

Integrating EAP-TLS Authentication With Microsoft NPS
As previously stated, EAP-TLS is a certificate-based mutual authentication method, which means that certificates are required by both the client and the server for effective authentication. Once those certificates have been found, EAP-TLS will generate session-based keys for each side to complete the login.
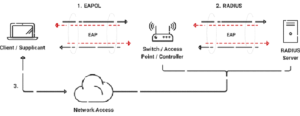
The steps are as follows:
- A user seeks network access control via a wireless access point (AP) or authenticator app.
- The AP inquires about the user’s identification.When the AP receives user information, it sends it to an authentication server.
- The RADIUS authentication server asks the AP for identification verification.
- The AP obtains validation and transmits it to the RADIUS authentication server.
- The user connects to the network directly.

To configure a secure network for 802.1x certificates, a solid basis for user authentication, authorization and accounting must be established. This process guarantees a secure and efficient network environment by capitalizing on the complexities of certificate authentication.
In this section, we’ll explain how you can start configuring EAP-TLS on your NPS Windows Server operating systems. We’ll also walk through how to ensure you no longer use insecure authentication methods on NPS to ensure greater network access protection.
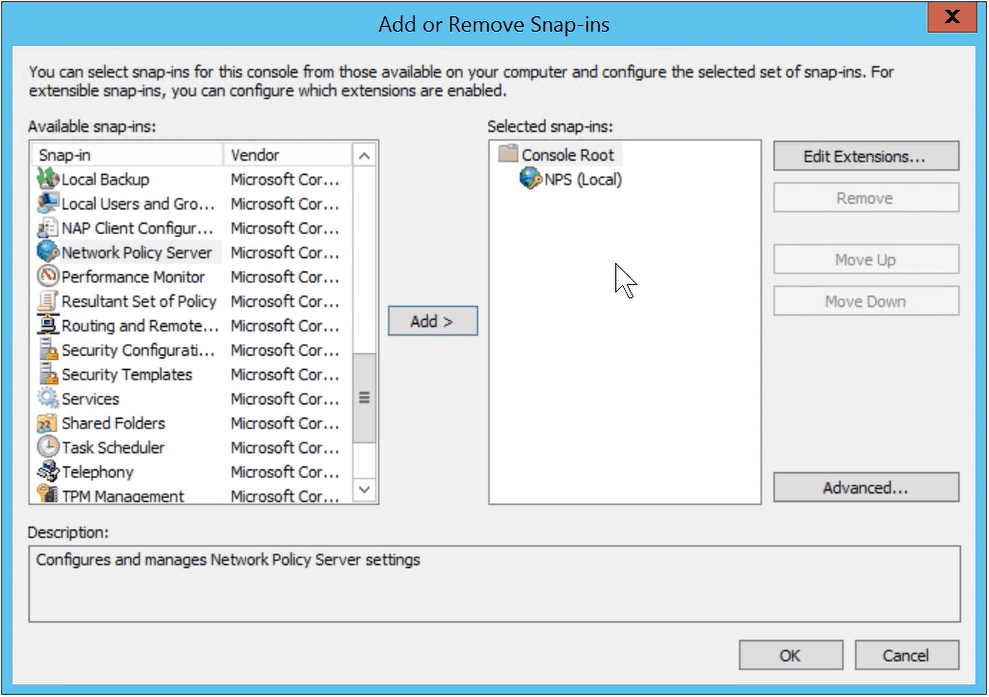
- Go to Windows > Run > MMC
- In the Console, navigate to File > Add/Remove Snap-in
- In the Add/Remove Snap-in window, select Network Policy Server from the Available snap-ins, and click Add
- In the Select Computer window, select Local Computer, and click OK
- In the Add/Remove Snap-in window, click OK
- In the Console, navigate to NPS (Local) > Policies > Network Policies
- In the Actions pane on the right, click New under Network Policies and the New Network Policy wizard will appear
- In the Specify Network Policy Name and Connection Type page, enter the Policy Name and click Next
- In the Specify Conditions page, click Add and the Select condition page appears
- Select NAS Port Type, and click Add, and the NAS Port Type window appears
- From the Common 802.1X connection tunnel types section, select Wireless – IEEE 802.1, and click OK
- The condition gets added to the Specify Conditions page
- Click Next and the Configure Authentication Methods window appears
- Under EAP Types, click Add and the Add EAP window appears
- Select Microsoft Smart Card or other certificate, and click OK
- De-select all the other check boxes under Less secure authentication methods and click Next
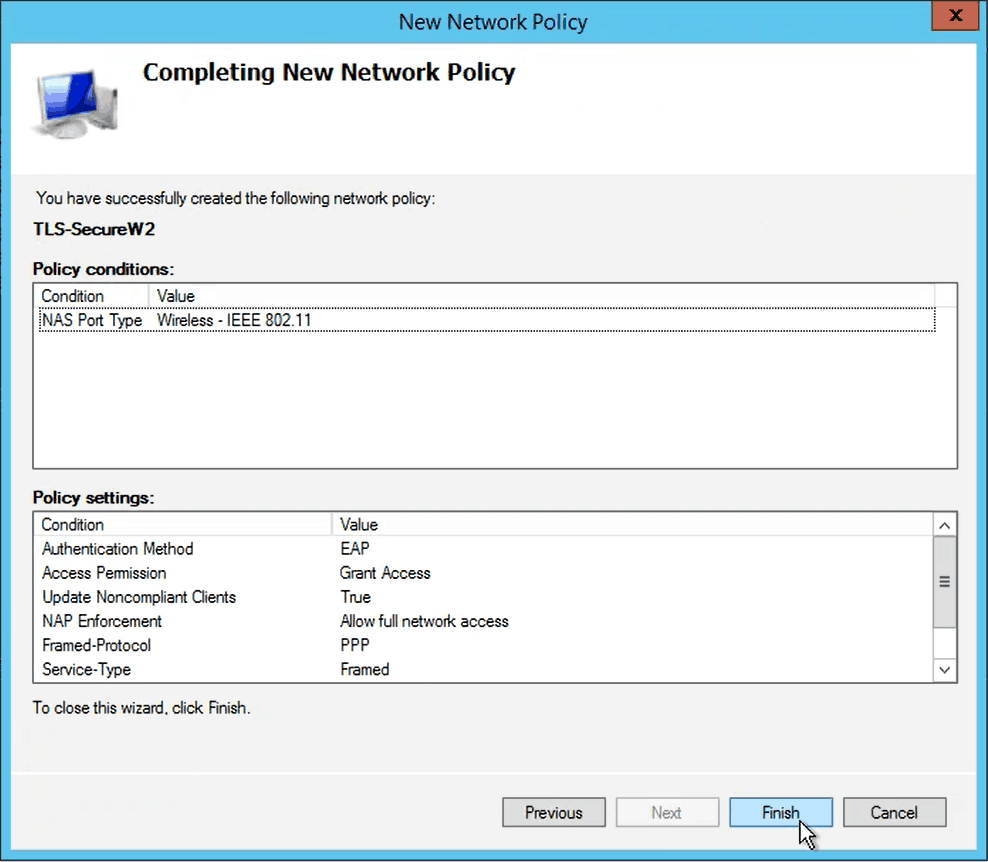
- In the Configure Constraints window, click Next
- In the Configure Settings window, click Next
- In the Completing New Network Policy window, click Finish
The link between the Microsoft Network Policy Server (NPS) RADIUS client and the larger network environment is crucial to maintaining strong authentication and network access control. In this section, we’ll walk you through connecting RADIUS clients to your NPS Windows Server operating systems.
- Go to Windows > Run > MMC
- In the Console, navigate to NPS (Local) > RADIUS Clients and Servers > RADIUS Clients
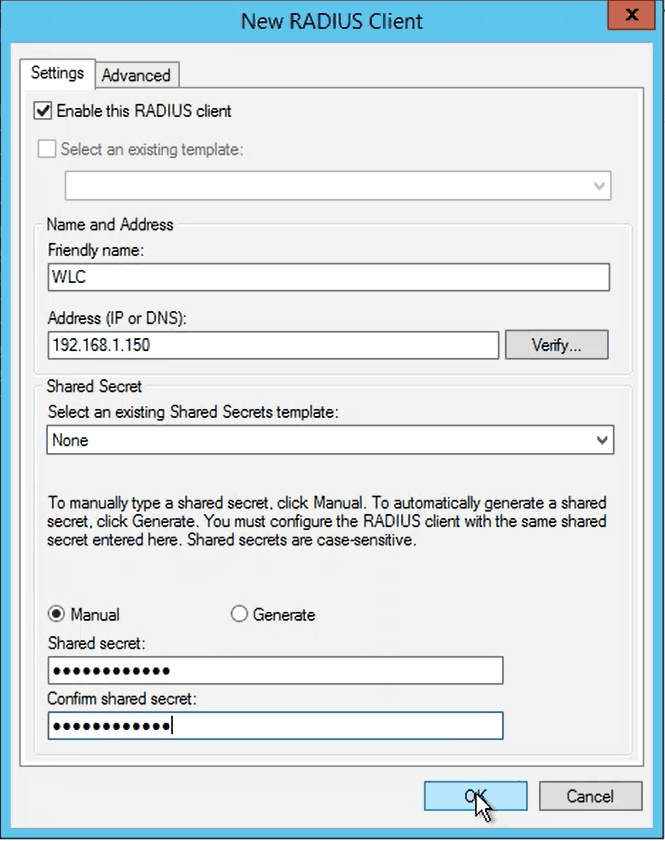
- In the Actions pane on the right, click New RADIUS Clients and the New RADIUS Client window appears
- Enter a Name and the IP address in the Friendly name and Address (IP or DNS) fields, respectively
- Enter the shared secret in the Shared secret and Confirm shared secret fields, and click OK
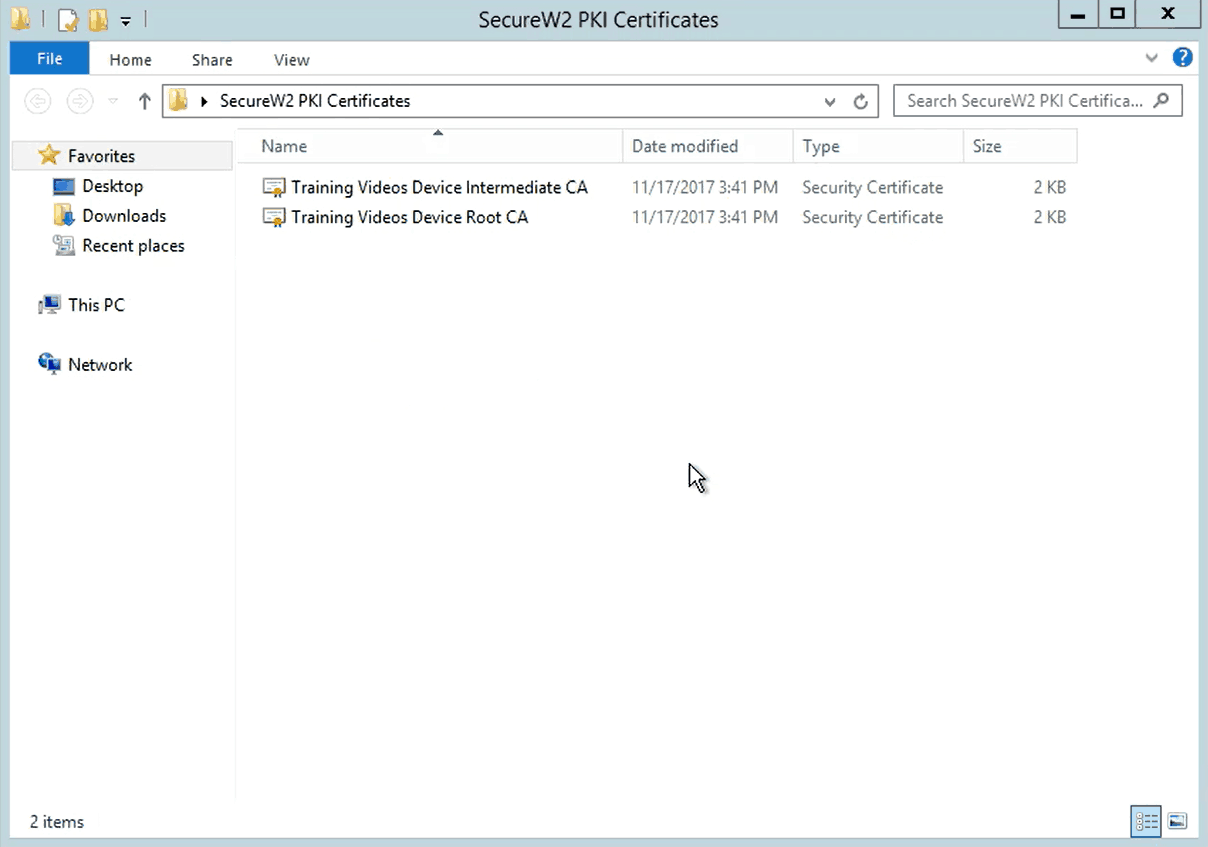
- Go to the SecureW2 JoinNow MultiOS and Connector Management Portal
- Navigate to PKI Management > Certificate Authorities
- Download both the Root and Intermediate CAs for the organization
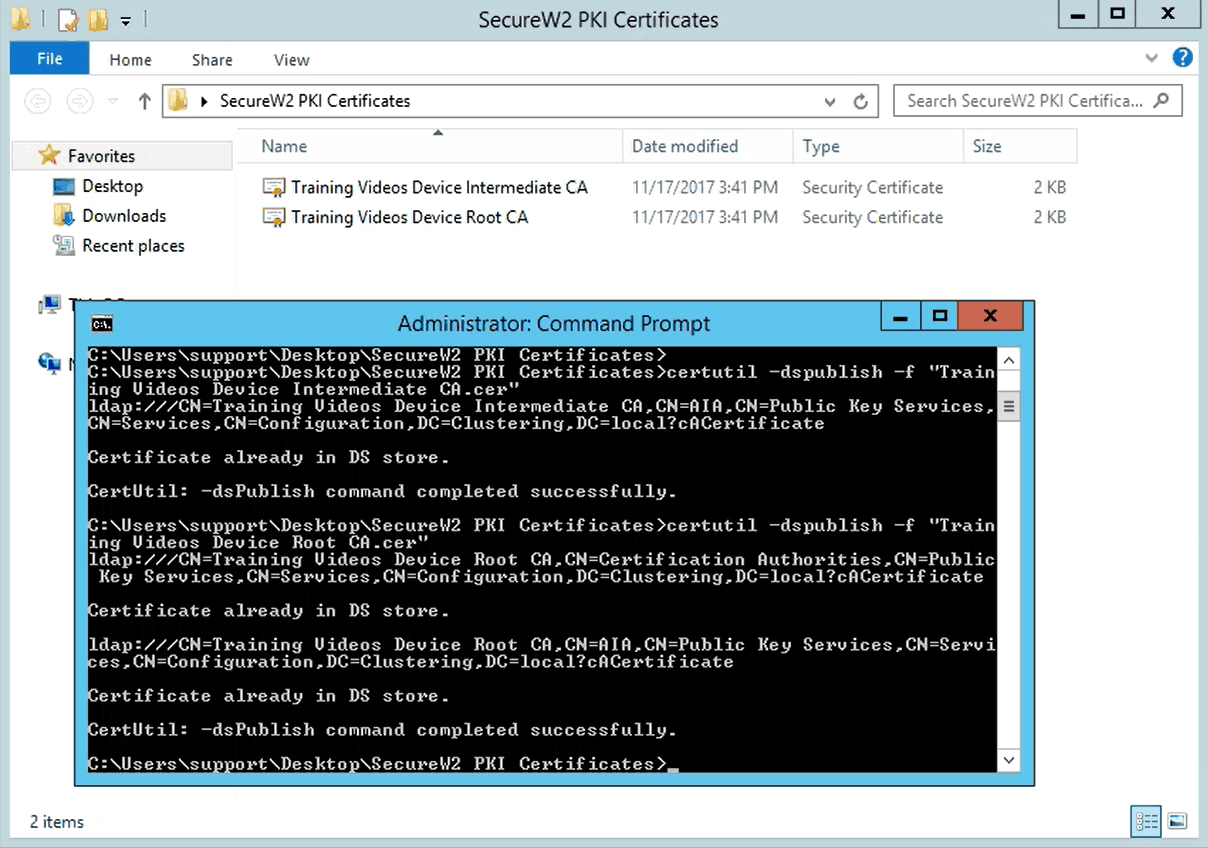
- Go to your server where you want to install your the certificates
- Go to Windows > Run > CMD and go to the folder where you have saved your certificates
- To install the certificates, run the following command consecutively for both the certificates:
NPS can be used to accomplish passwordless authentication, but its on-premise architecture requires duplication at each location, which adds to the expense of organization-wide adoption. Organizations striving for cost-effectiveness and scalability must overcome the bind to on-premise technology. This is where Cloud RADIUS from SecureW2 proves to be a strong solution.
In addition to enabling certificate-based RADIUS authentication, cloud RADIUS removes the requirement for duplication of on-premise network infrastructure. Organizations can get the required passwordless security by avoiding the high expenses linked to extensive on-premise duplication.

Moreover, Cloud RADIUS guarantees seamless integration with existing infrastructure, offering a simple transition for enterprises looking for improved authentication capabilities. However, we also provide an alternative with our vendor-neutral managed PKI for users not ready to go straight to Cloud RADIUS. It easily connects with NPS, giving businesses an adaptable option to improve existing authentication procedures and preparing them for a future move to a passwordless, cloud-based platform.
Contact us to learn how SecureW2 might help your organization’s security system improve the security of its network infrastructure with certificate-driven security.
Microsoft Network Policy Server is either registered trademarks or trademarks of Microsoft Corporation in the United States and other countries. Other trademarks, logos, and service marks used on this site are the property of SecureW2 or other third parties.
Microsoft NPS is either registered trademarks or trademarks of Microsoft Corporation in the United States and/or other countries. Other trademarks, logos and service marks used in this site are the property of SecureW2 or other third parties.