For Wi-Fi and VPN connections, Microsoft recommends moving from MS-CHAPv2 (password-based) to certificate-based authentication, such as EAP-TLS.
EAP-TLS (certificate-based authentication) requires a Public Key Infrastructure to enroll and manage Wi-Fi certificates. That’s why our cloud PKI and RADIUS are designed to integrate easily with Microsoft Entra ID, so organizations can use their Microsoft Entra ID for WPA2-Enterprise. Below, we break down the solution into three steps: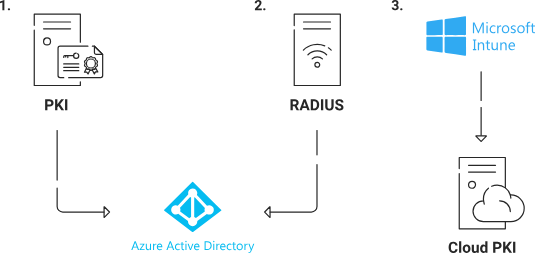
- Tie your PKI Infrastructure to Azure AD.
- Tie your RADIUS Infrastructure to Azure AD.
- Tie your Device Management platform to SecureW2 cloud PKI.
The SAML application is a crucial connection between the Core Provider and the JoinNow Management Portal. It allows a user to enter their credentials, which are then passed to the Core Provider for verification.
To create a SAML application in Microsoft Entra, perform the following steps:
- Log in to the Microsoft Entra admin center.
- From the left pane, navigate to Entra ID > Enterprise apps.
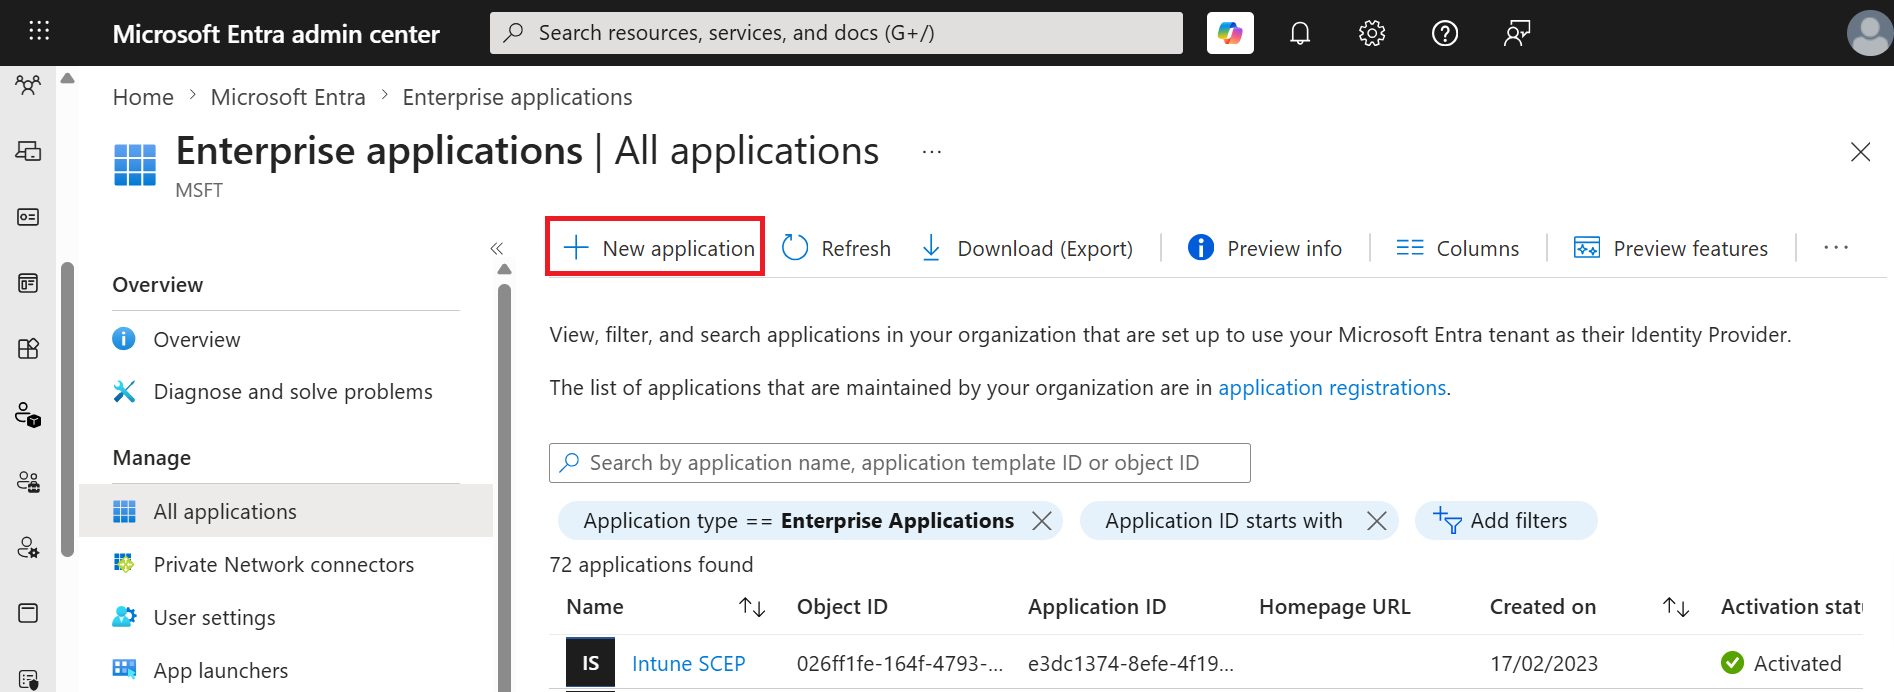
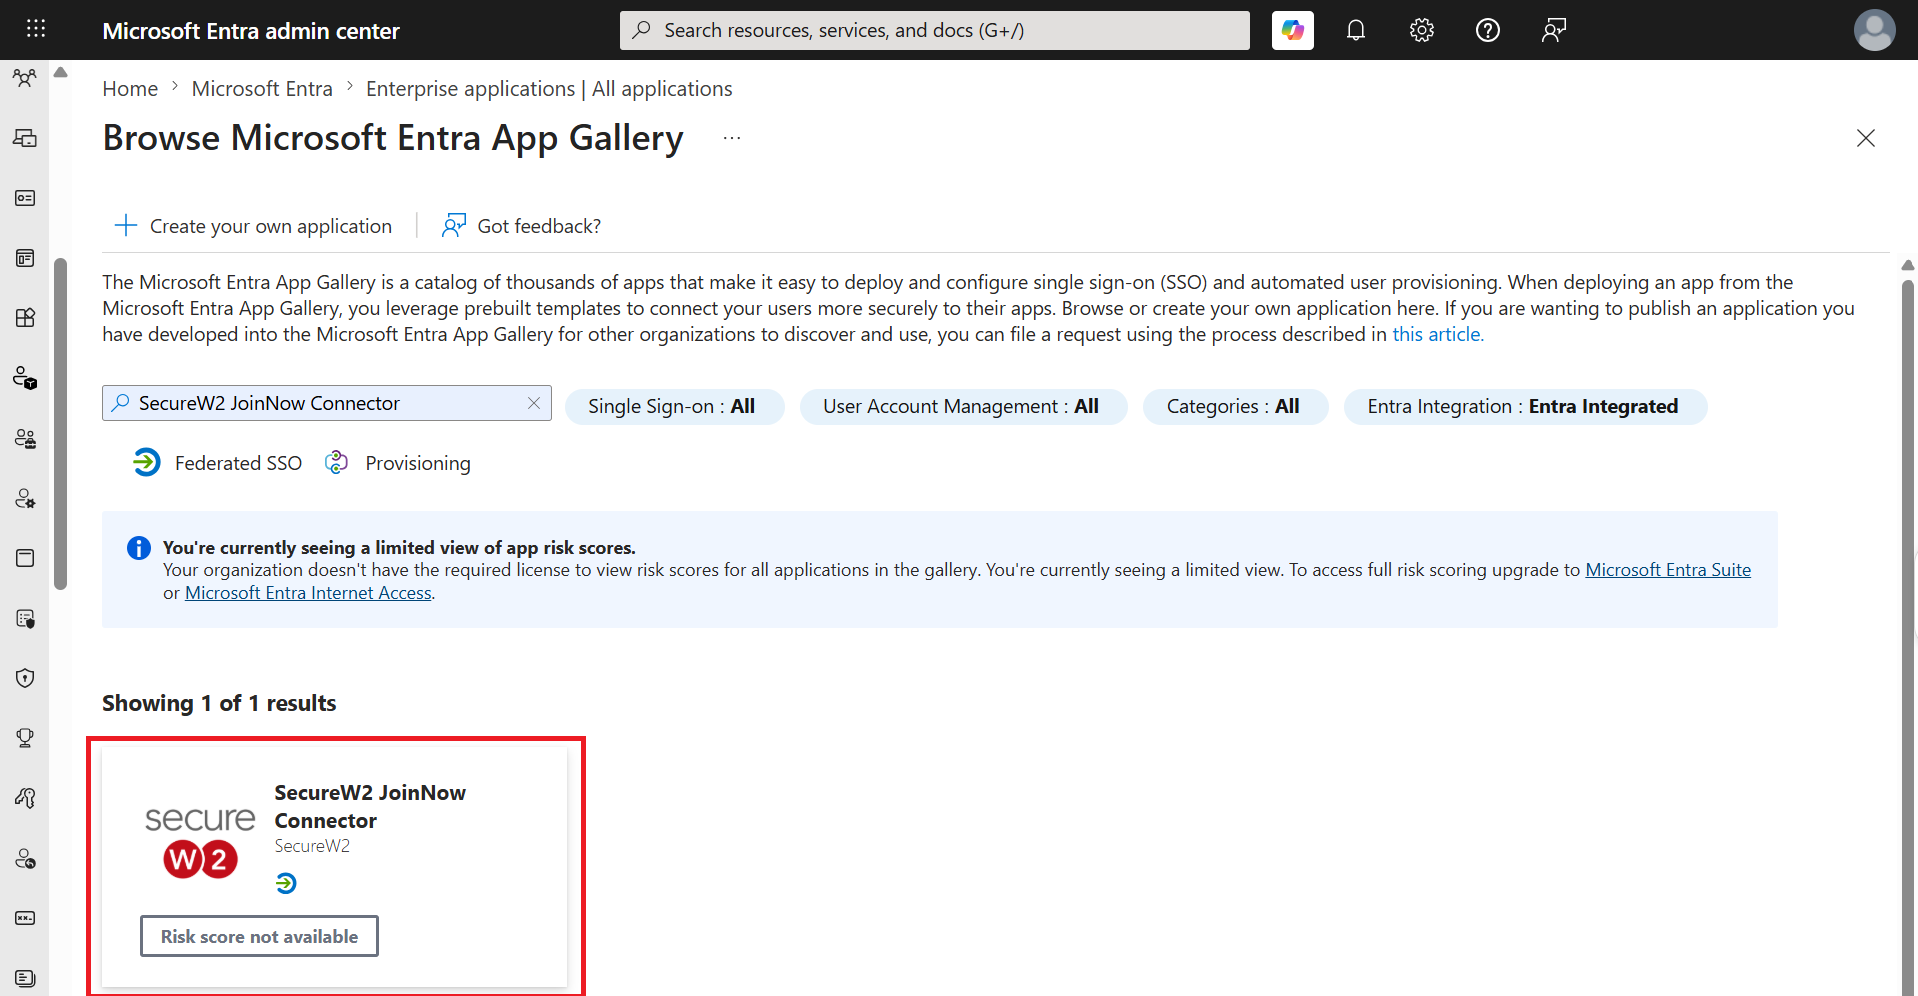
- Click New application.

- On the Browse Microsoft Entra Gallery page, type “SecureW2 JoinNow Connector” and select SecureW2 JoinNow Connector.

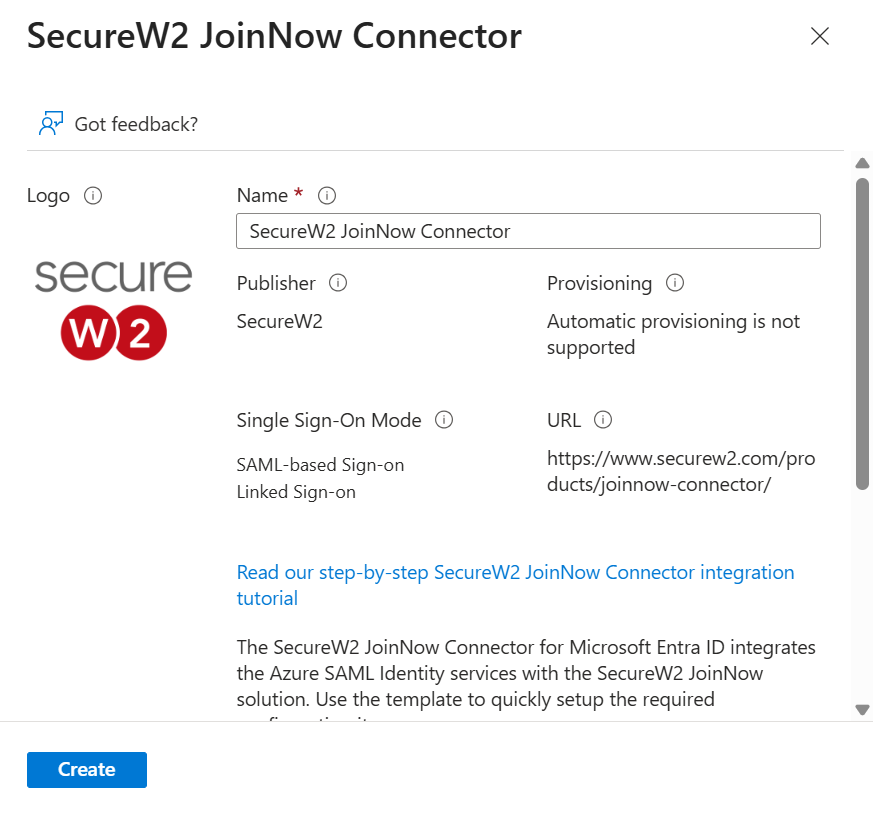
- On the SecureW2 JoinNow Connector pop-up window, enter the name of the application, and click Create.

To configure single sign-on in Microsoft Entra, perform the following steps:
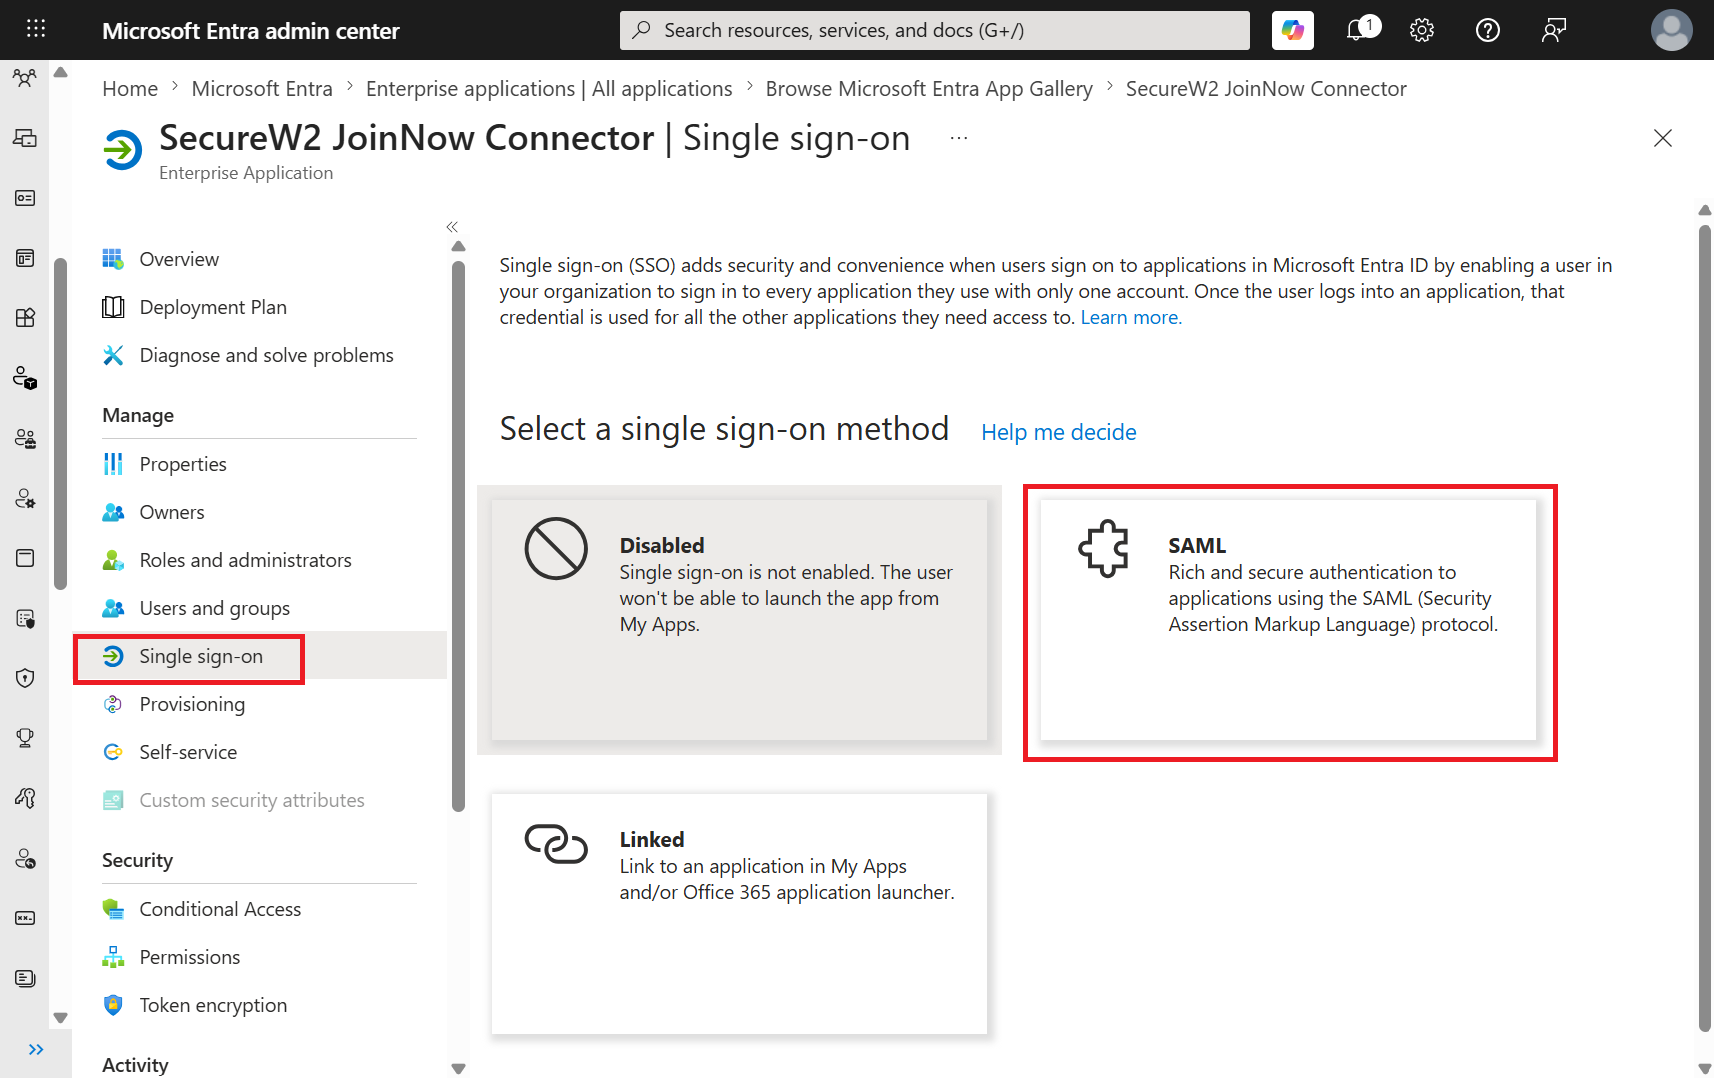
- In the left pane, navigate to Manage > Single sign-on.
- On the Single Sign-on page, select SAML.

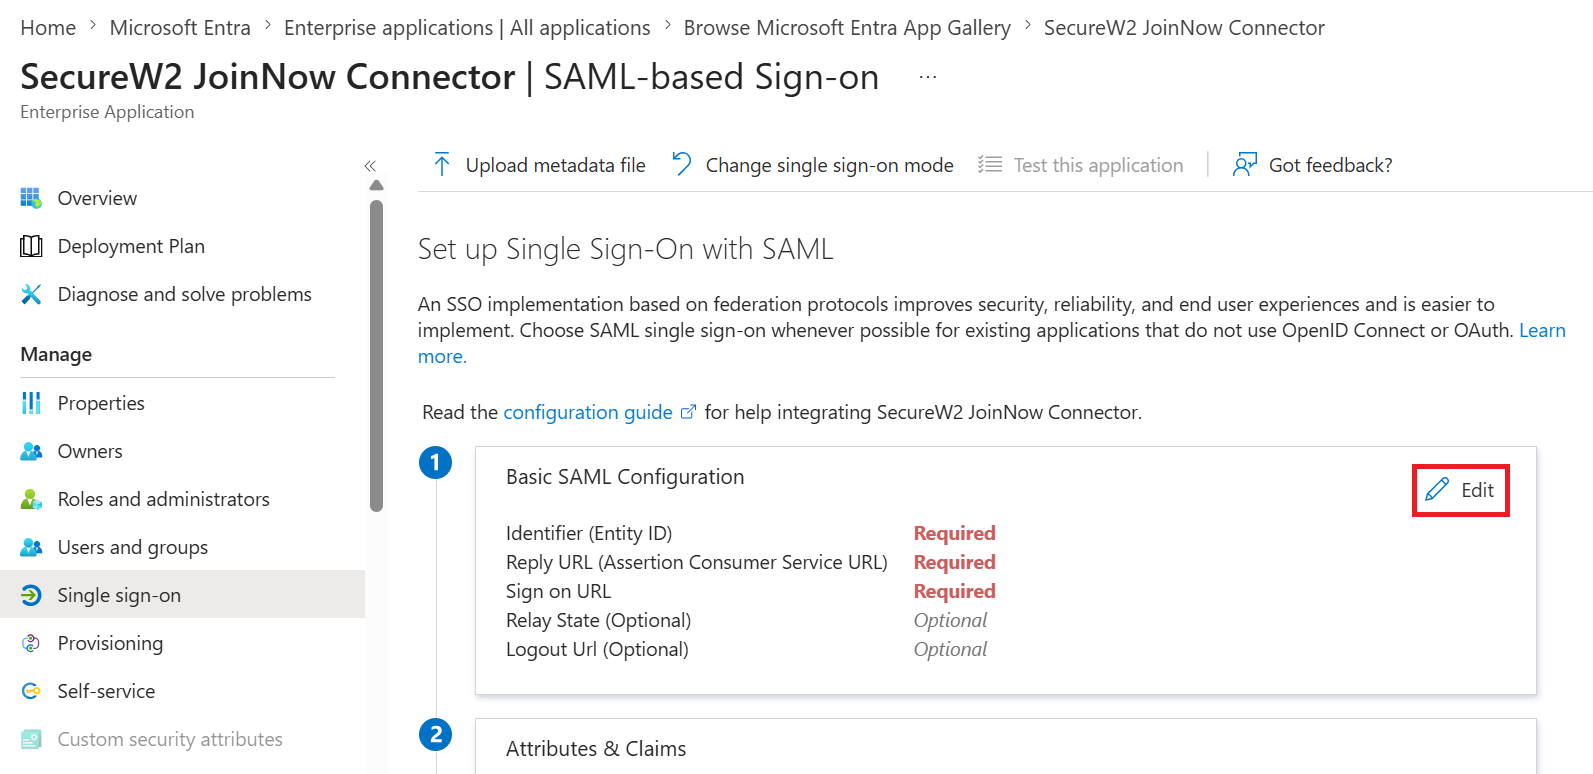
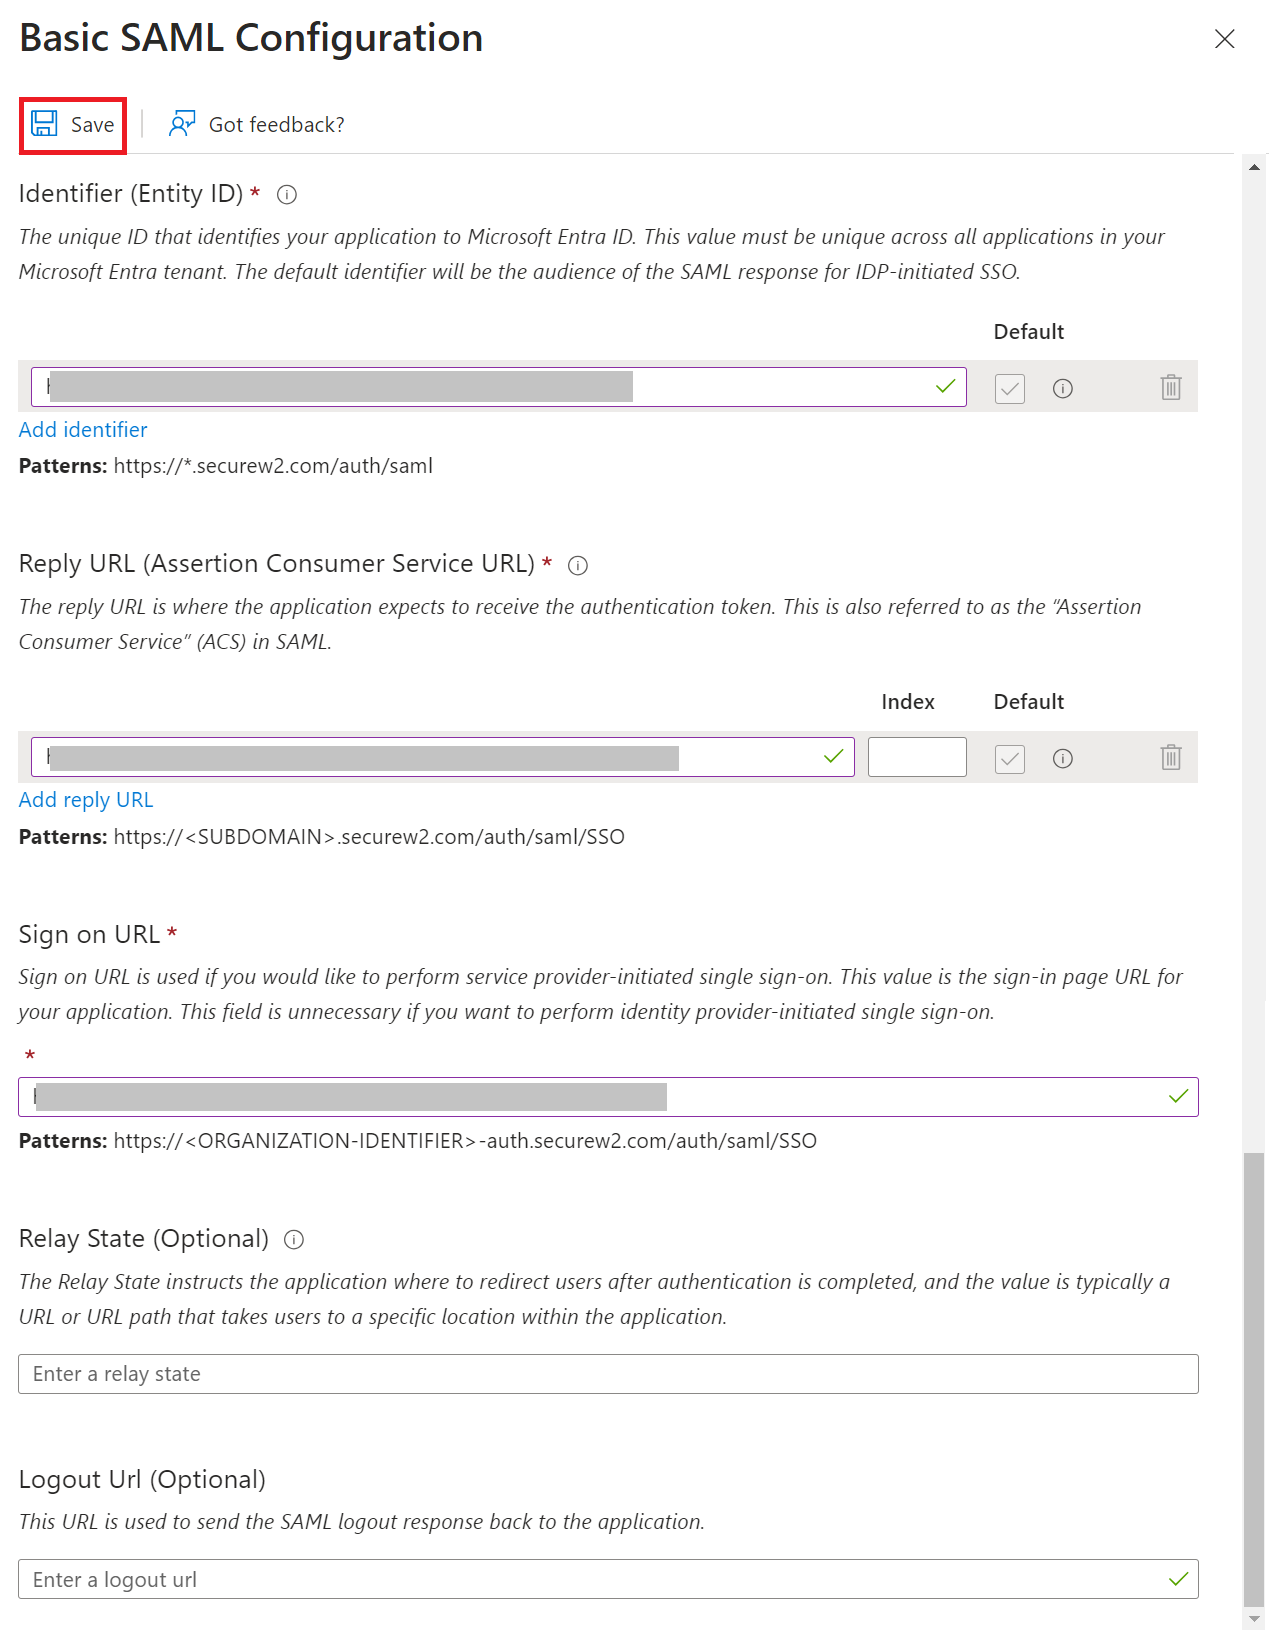
- In the Basic SAML Configuration section, click the Edit button.

- On the Basic SAML Configuration section, perform the following steps:
- In the Identifier (Entity ID) field, click Add identifier, then paste the Entity ID you copied earlier from the Creating a Core Provider section.
- In the Reply URL (Assertion Consumer Service URL) and Sign on URL fields, enter the ACS URL obtained in the Creating a Core Provider section.

- Click Save.
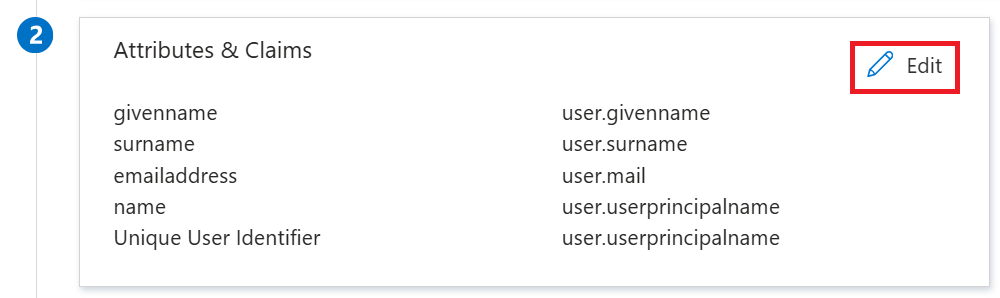
- Navigate to Attributes & Claims and click the Edit button.

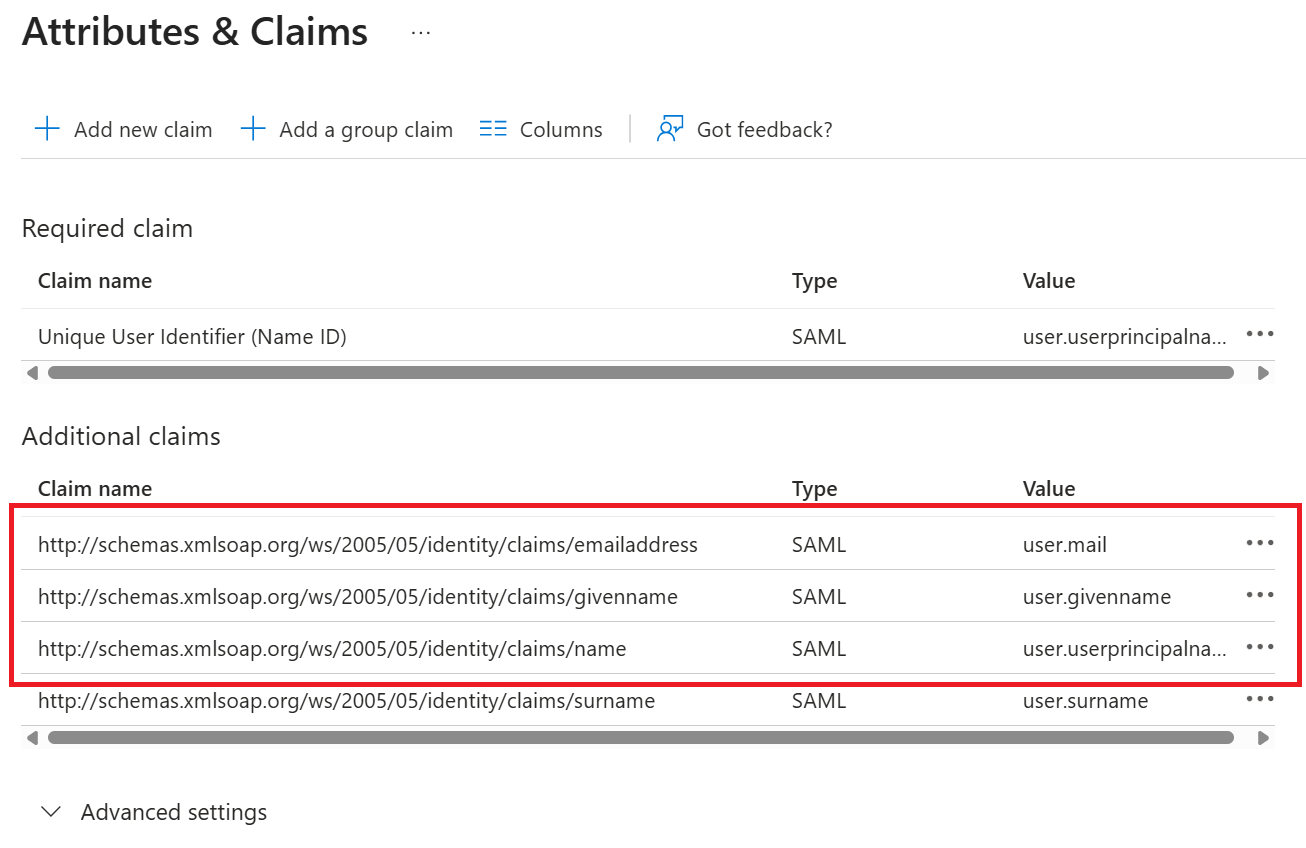
- On the Attributes & Claims section:
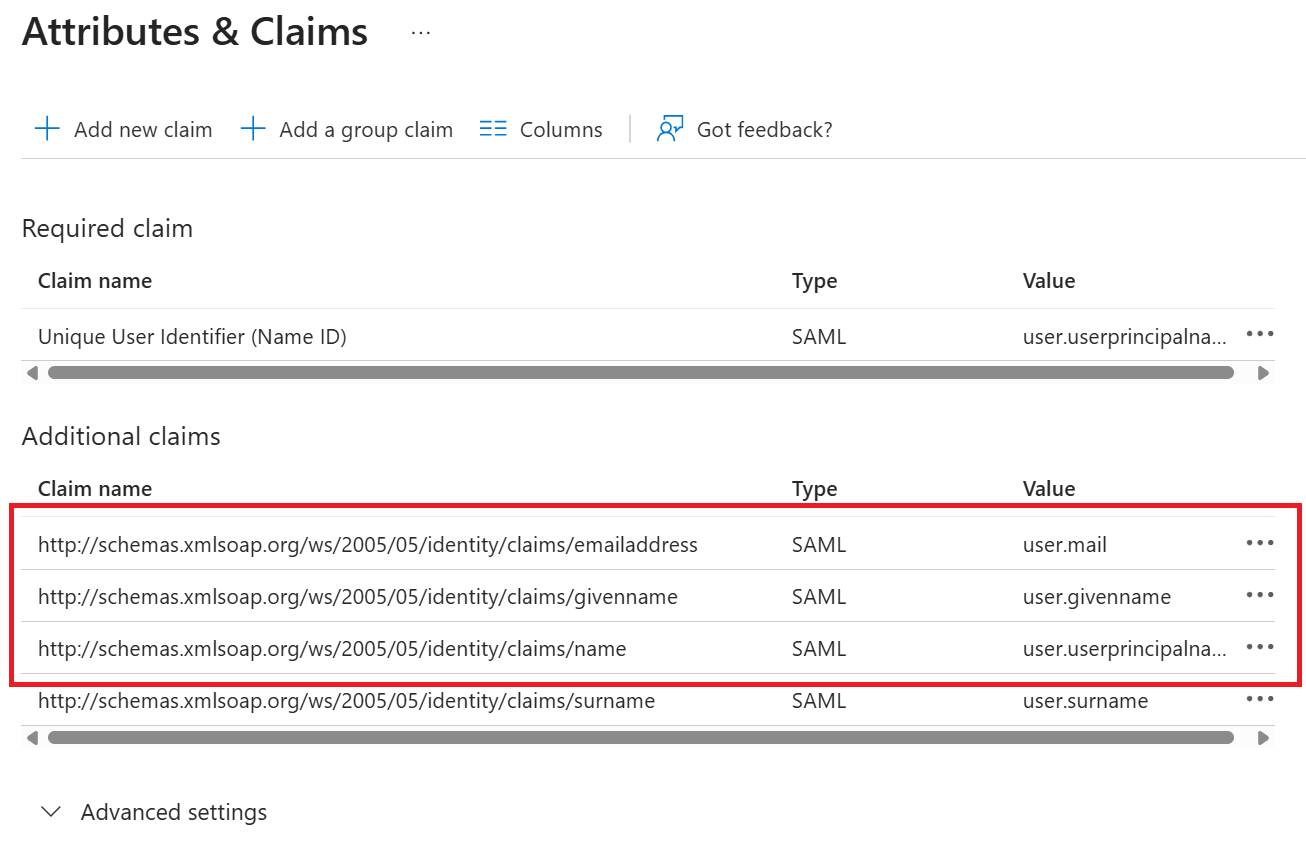
- The Attributes & Claims page defines the claims Entra ID includes in the SAML token. Copy the emailaddress, givenname, and name claims listed under Additional claims, and map them in the JoinNow Management Portal under Attribute Mapping (step 9), ensuring JoinNow correctly reads the user information Entra ID sends in the SAML token.

- The Attributes & Claims page defines the claims Entra ID includes in the SAML token. Copy the emailaddress, givenname, and name claims listed under Additional claims, and map them in the JoinNow Management Portal under Attribute Mapping (step 9), ensuring JoinNow correctly reads the user information Entra ID sends in the SAML token.
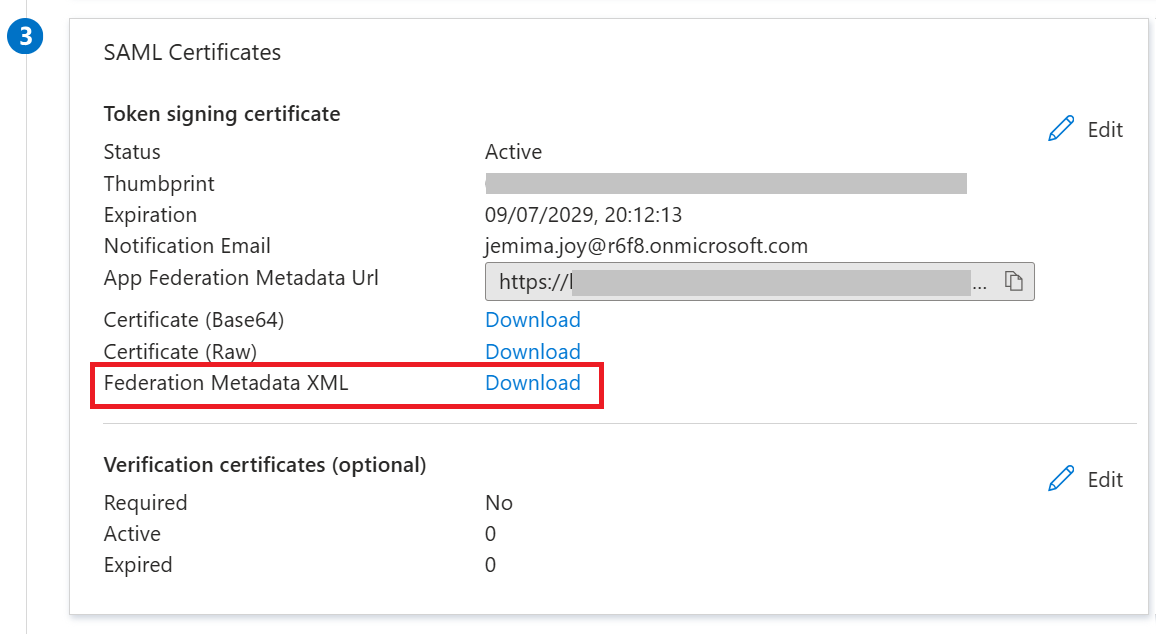
- Scroll down to the SAML Certificates section.
- Click Download to save the Federation Metadata XML file from Microsoft Entra.

- Click Download to save the Federation Metadata XML file from Microsoft Entra.
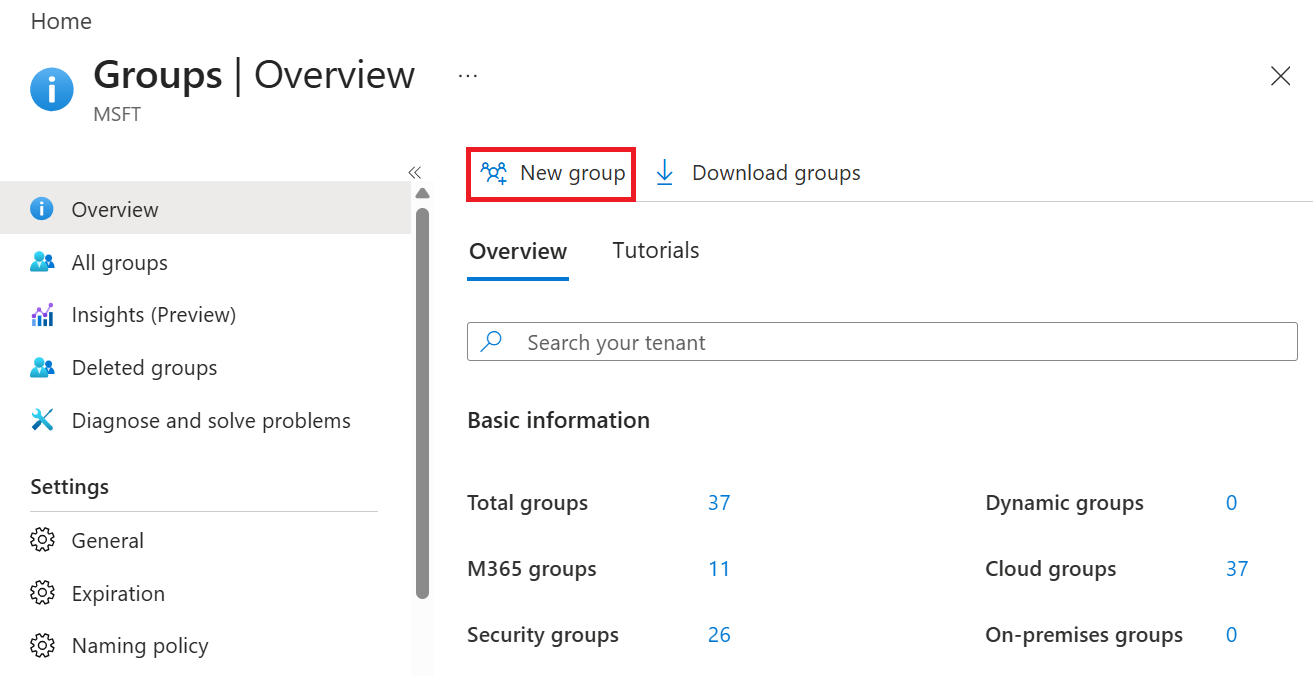
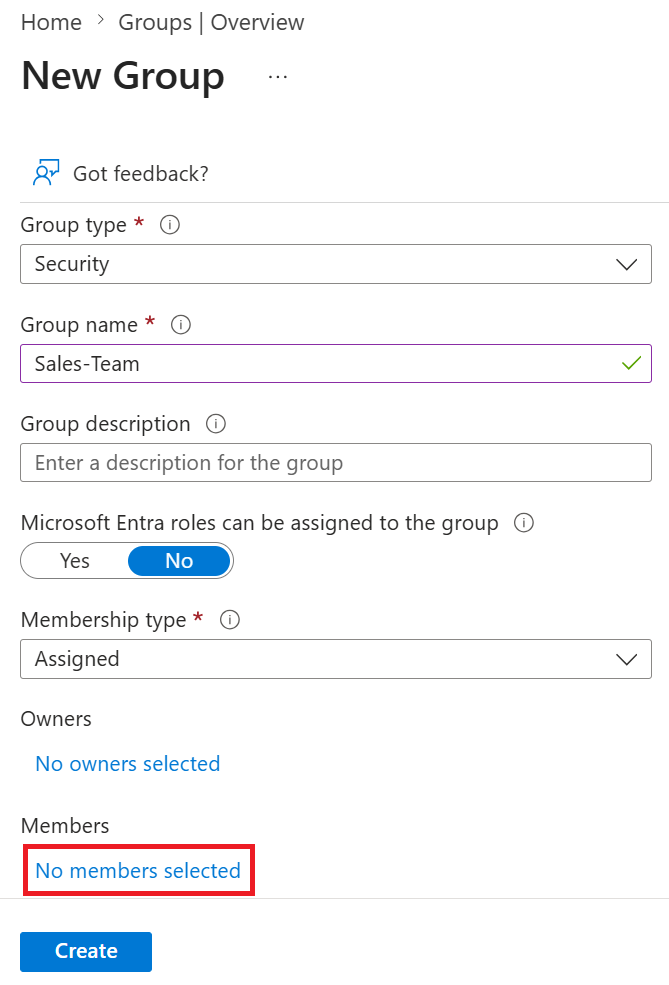
To create a group in Microsoft Entra, perform the following steps:
- Search for Groups, and then click New group.

- On the New Group page:
- From the Group type drop-down list, select Security.
- In the Group name field, type a suitable name for the group.
- In the Group description field, type a description for the group.
- From the Membership type drop-down list, select Assigned.
- In the Members field, click No members selected.

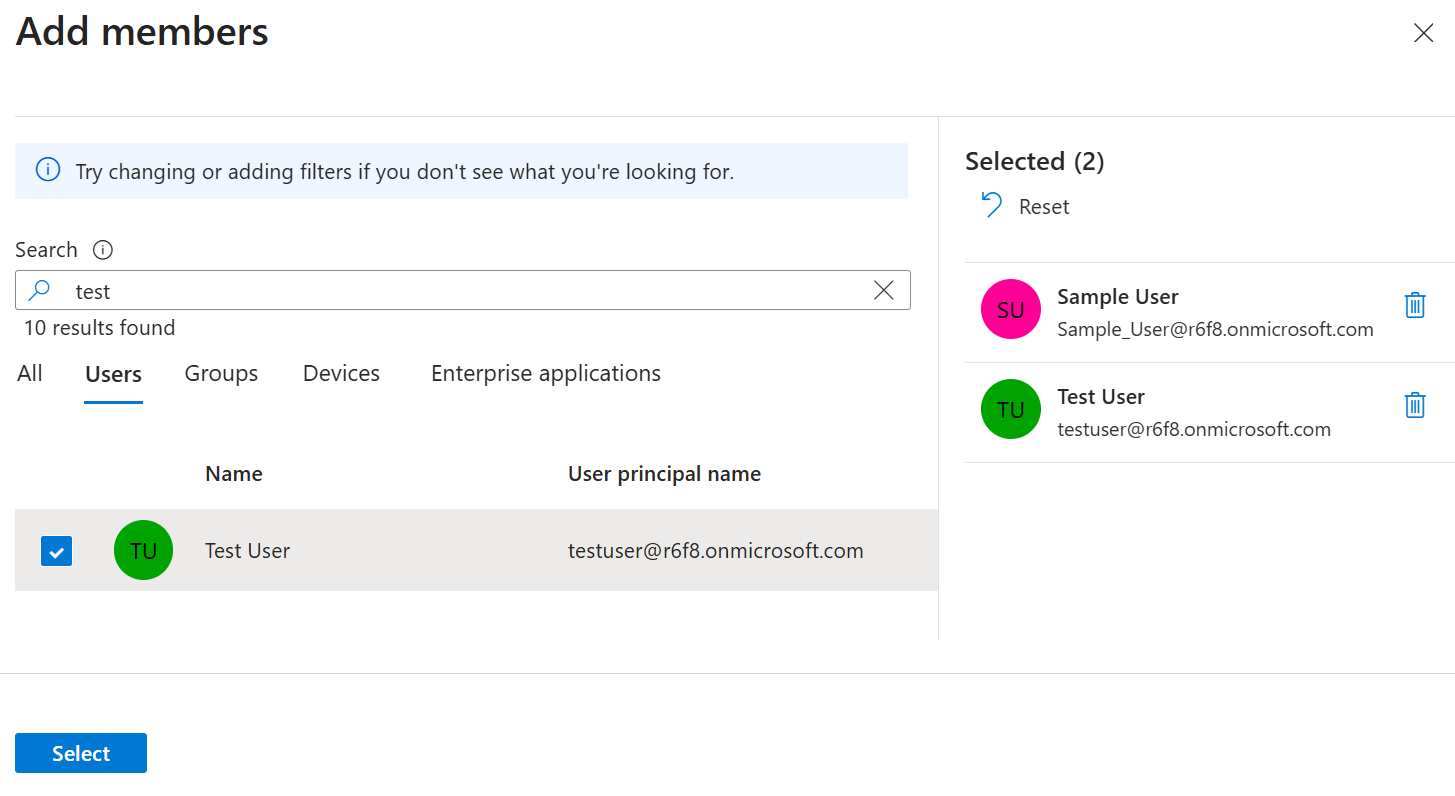
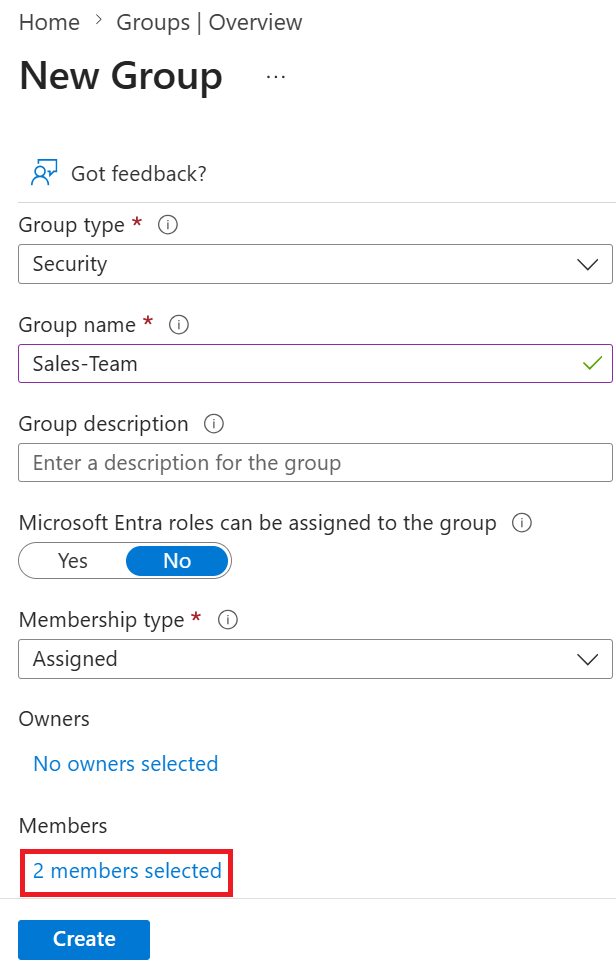
- On the Add members page, search for one or more members. Select the desired member(s) from the list, and then click Select to add them to the group.

- Click Create.
NOTE: Repeat steps a-c to create additional groups and add members, as required.

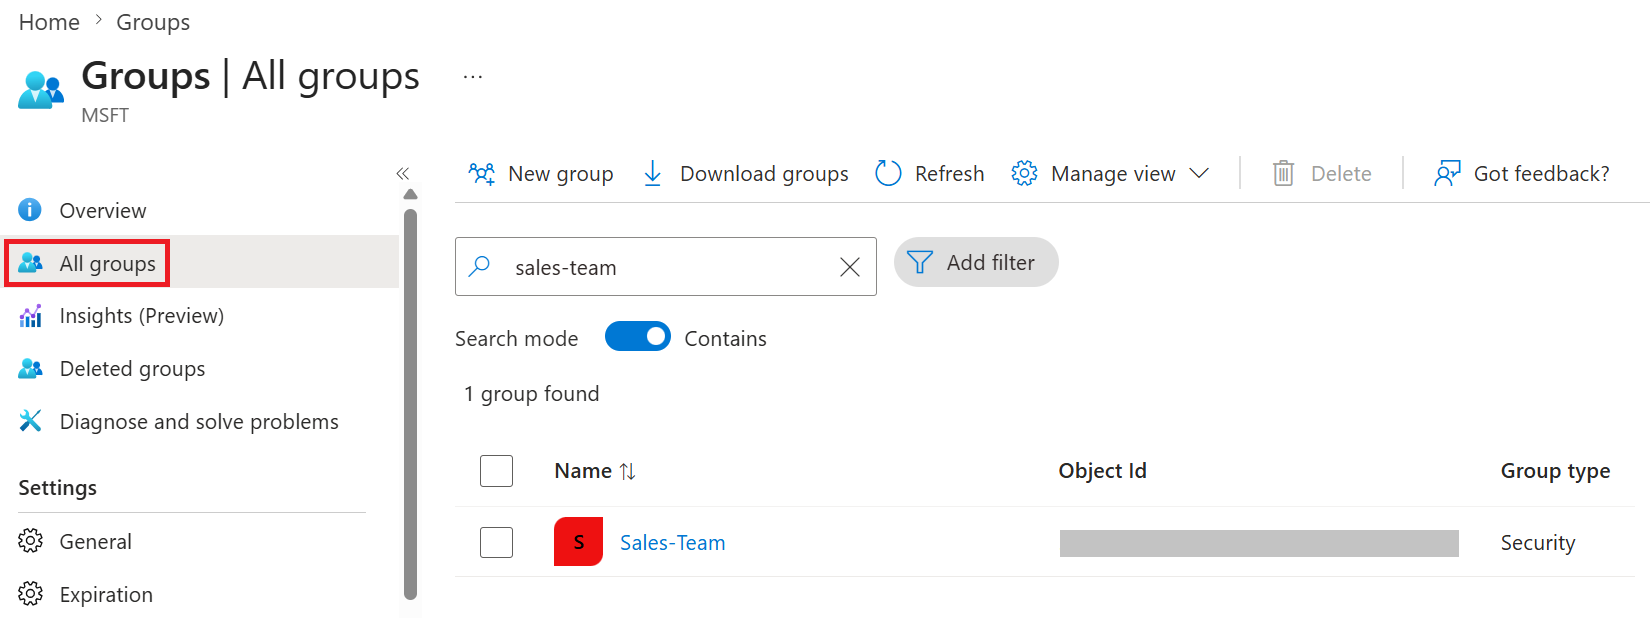
- In the left pane, navigate to All groups, and search for the group you created. Copy the Object Id to map it under Groups in the JoinNow Management Portal.

To add users to the SAML application in Microsoft Entra, perform the following steps:
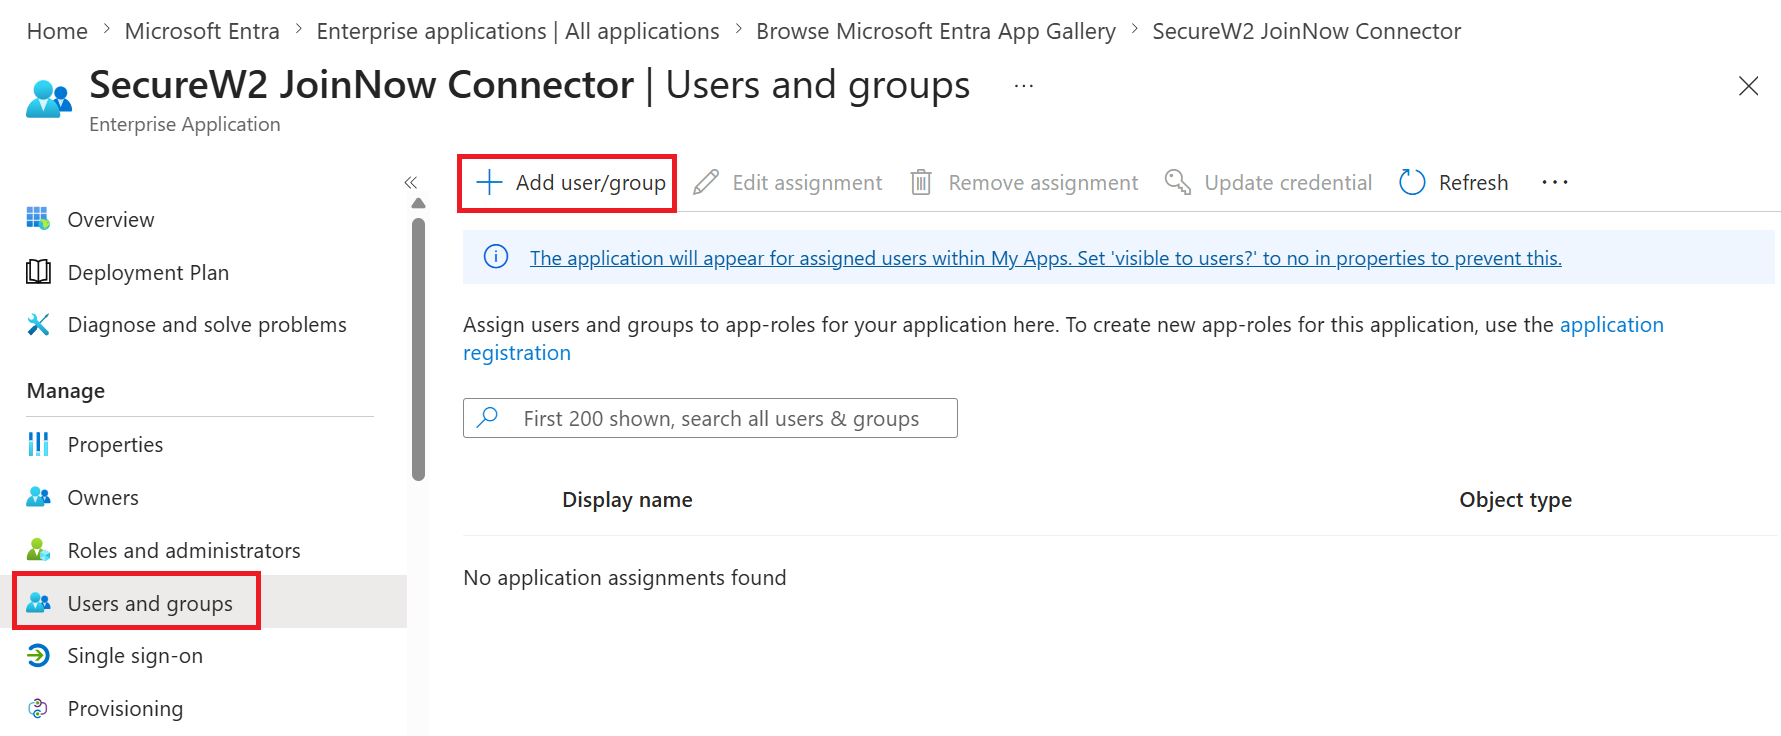
- In the left pane, navigate to Manage > Users and groups.
- Click Add user/group.

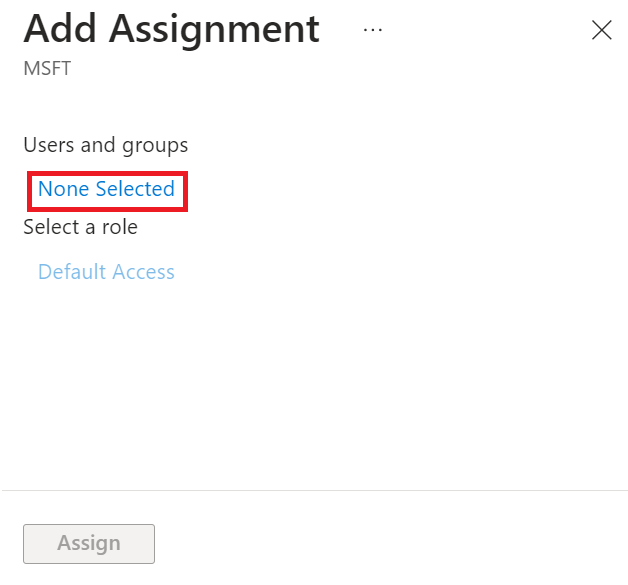
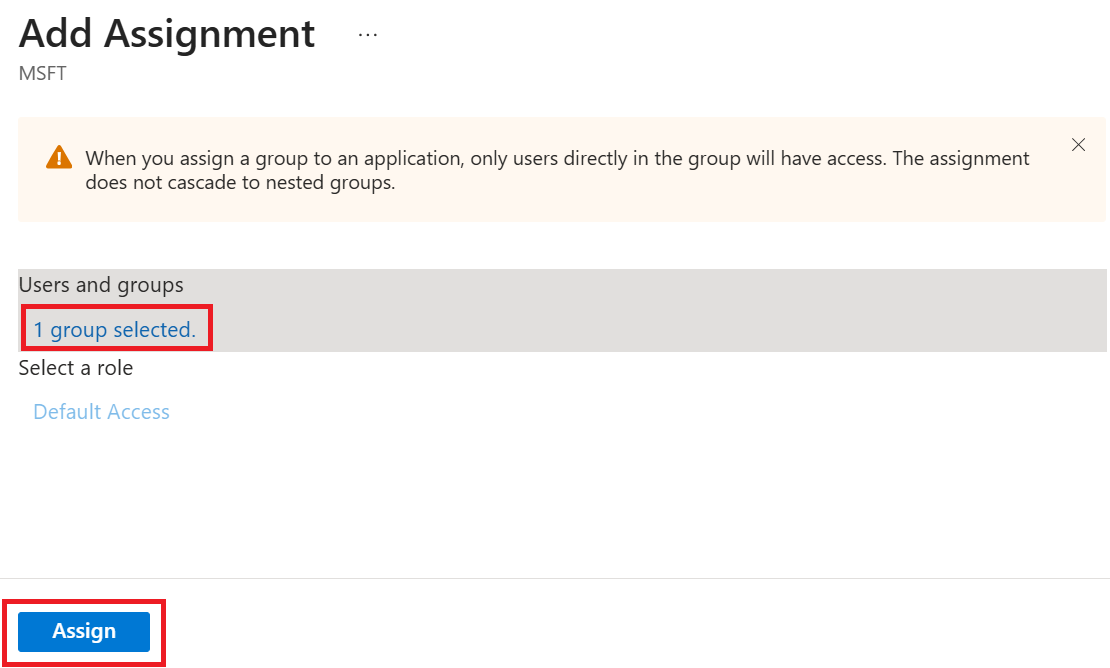
- On the Add Assignment page, click None Selected in the Users and groups section.

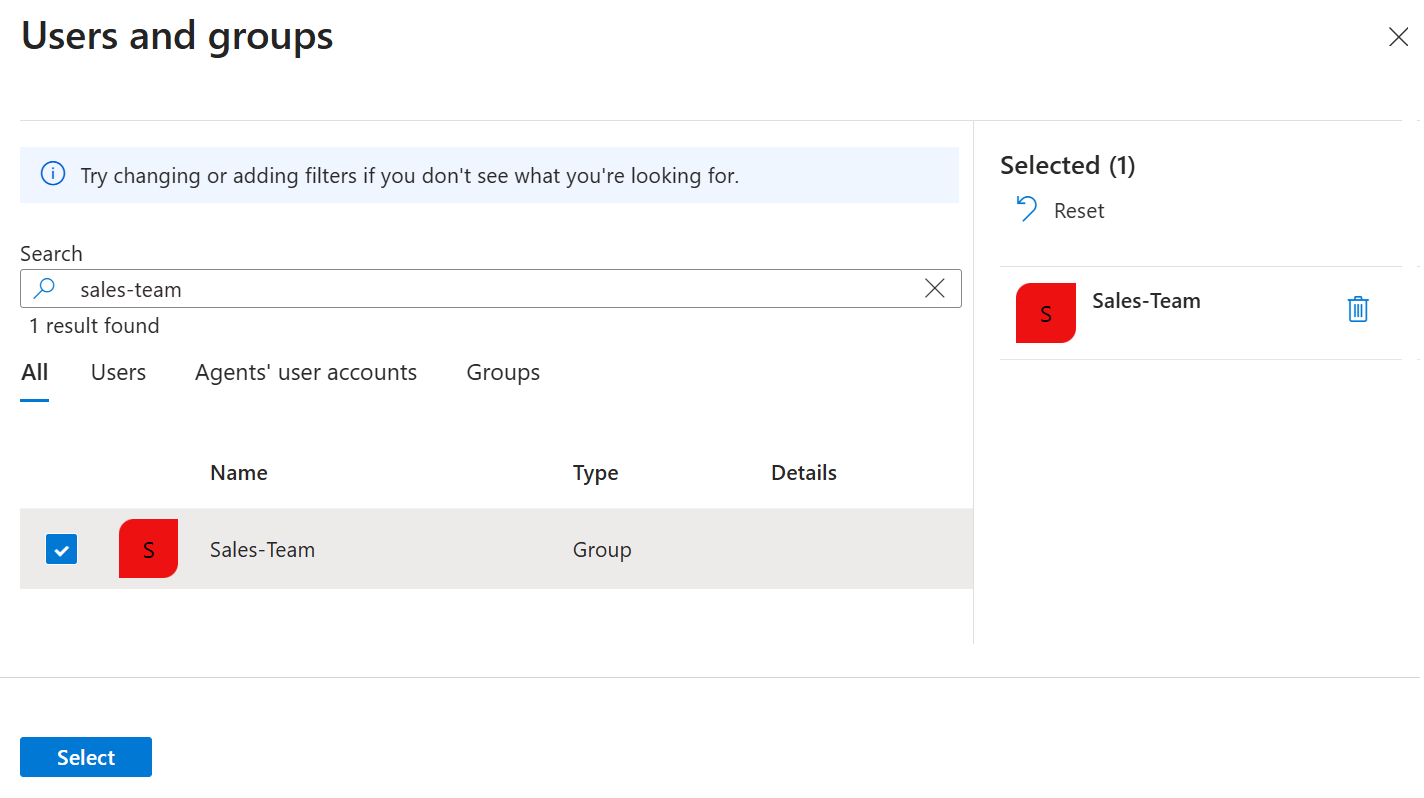
- On the Users and groups page, search for the user or group , and then click Select.

- On the Add Assignment page, click Assign.

To allow your SAML application to access Active Directory, perform the following steps:
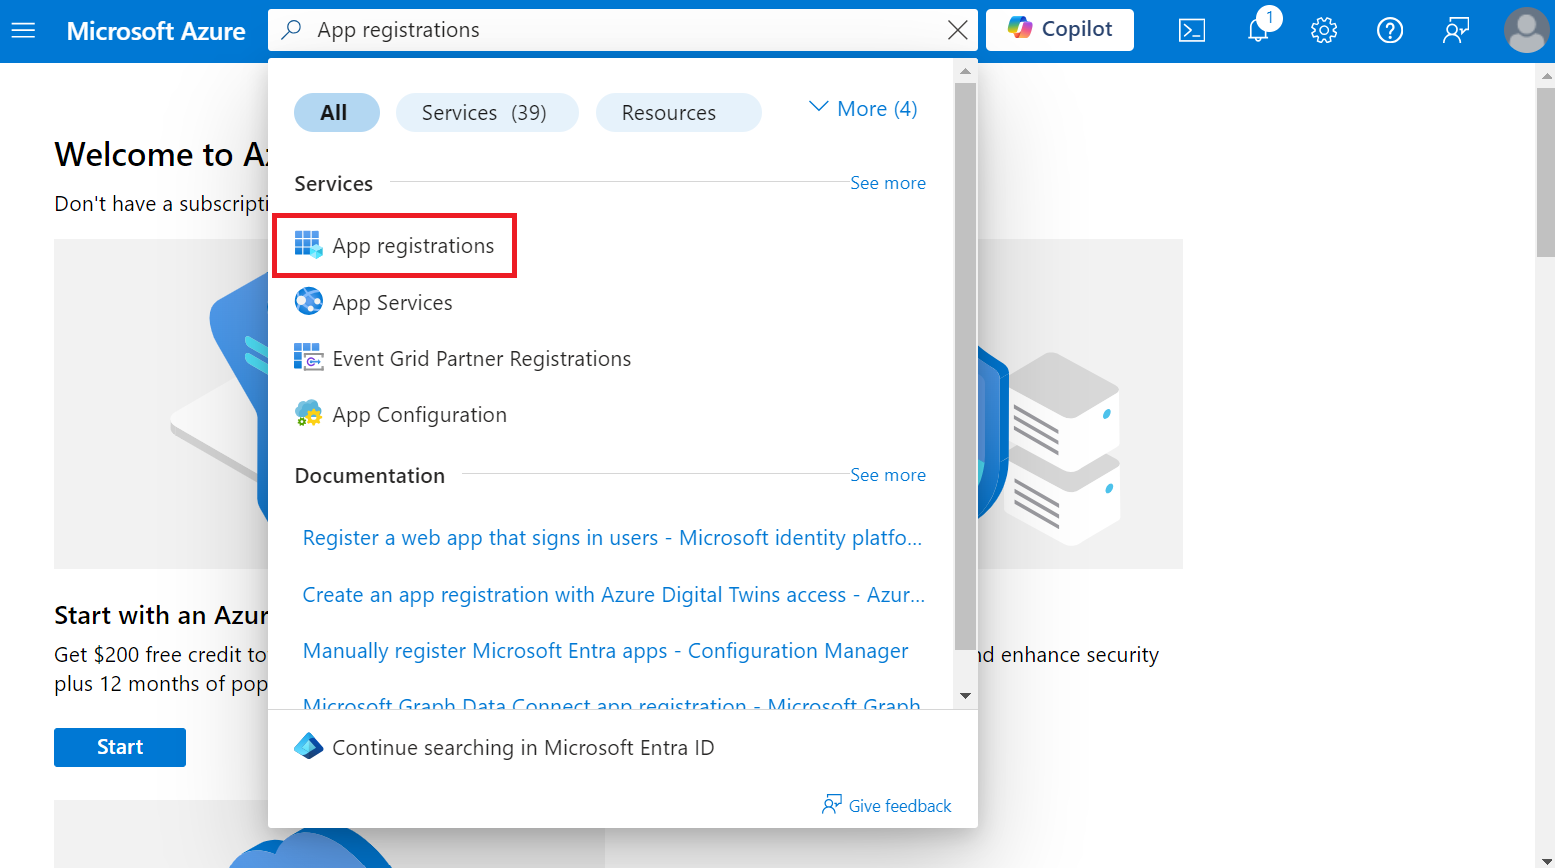
- In the Microsoft Entra portal, type “App registrations” in the search box and select App registrations.

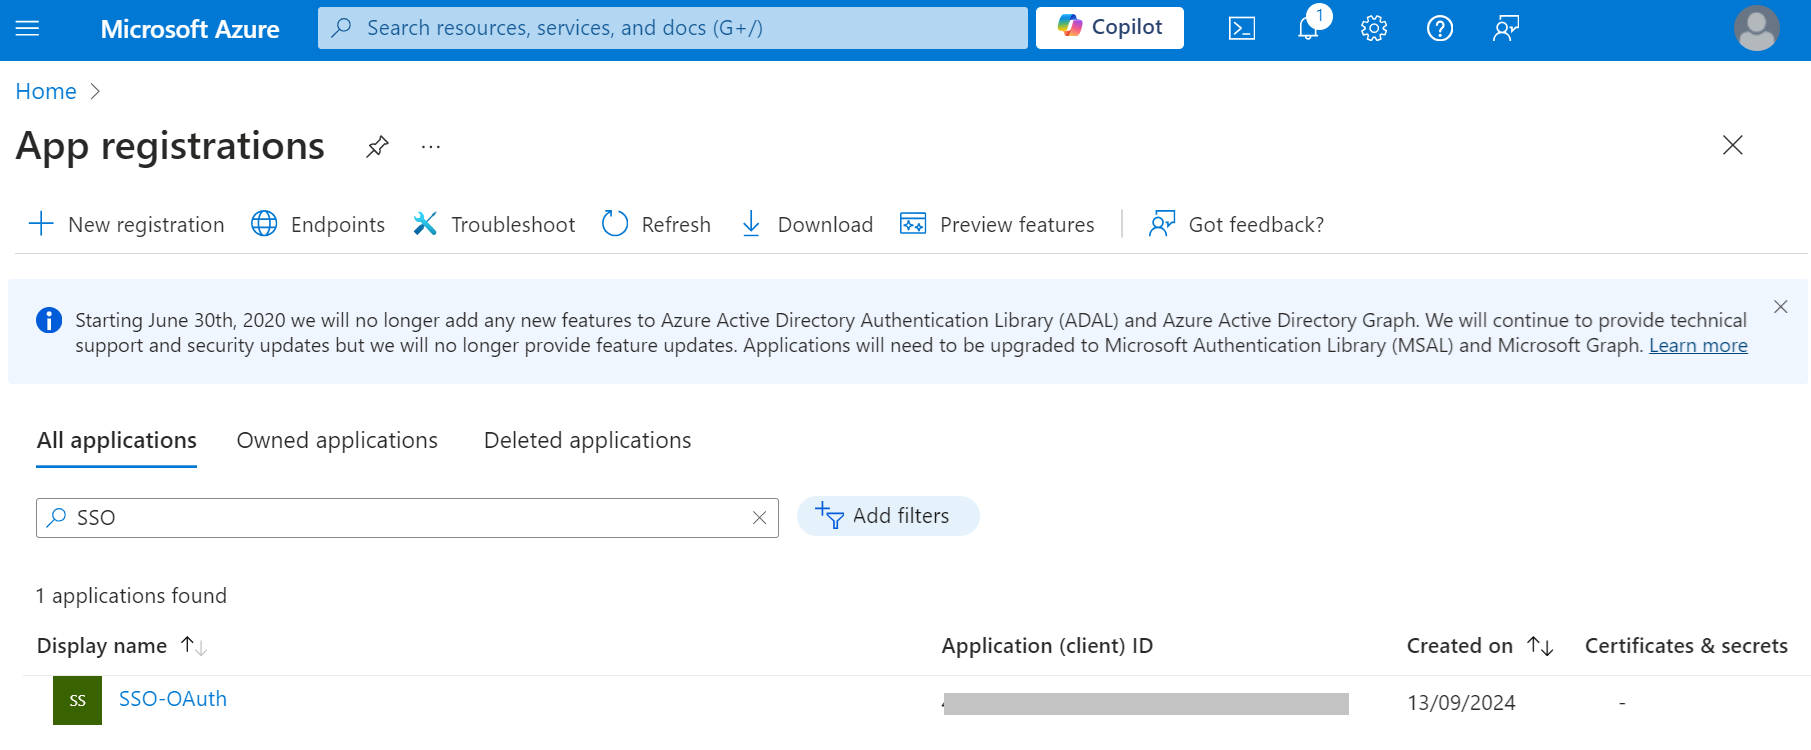
- Click the All applications tab, search for the application created in the Creating a SAML Application in Microsoft Entra section, and select the application.

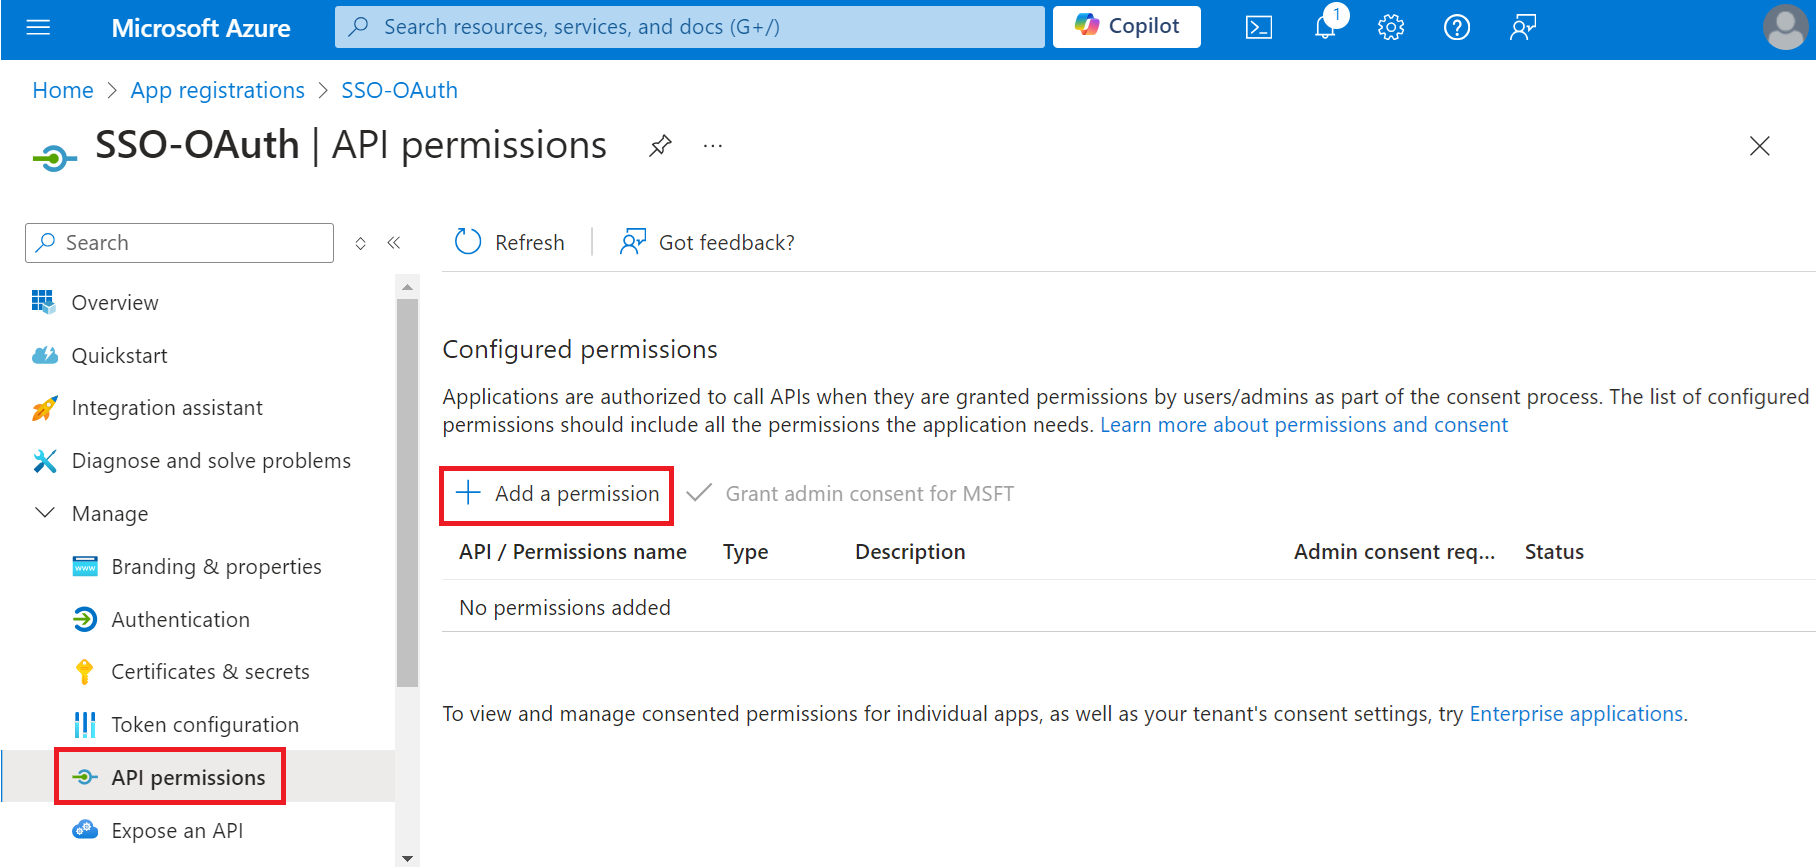
- On the displayed page, navigate to Manage > API permissions.
- On the API permissions screen, click Add a permission.

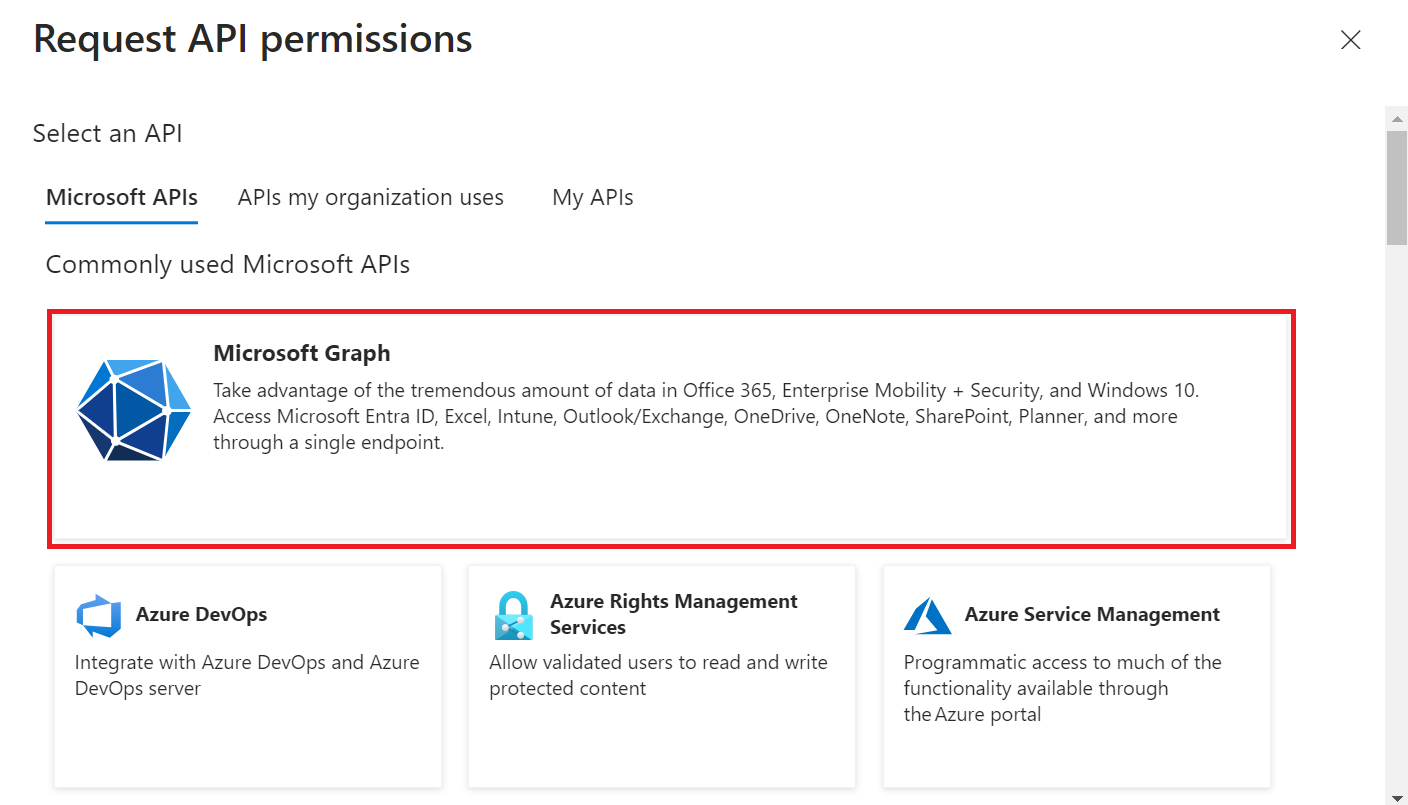
- Select Microsoft Graph.

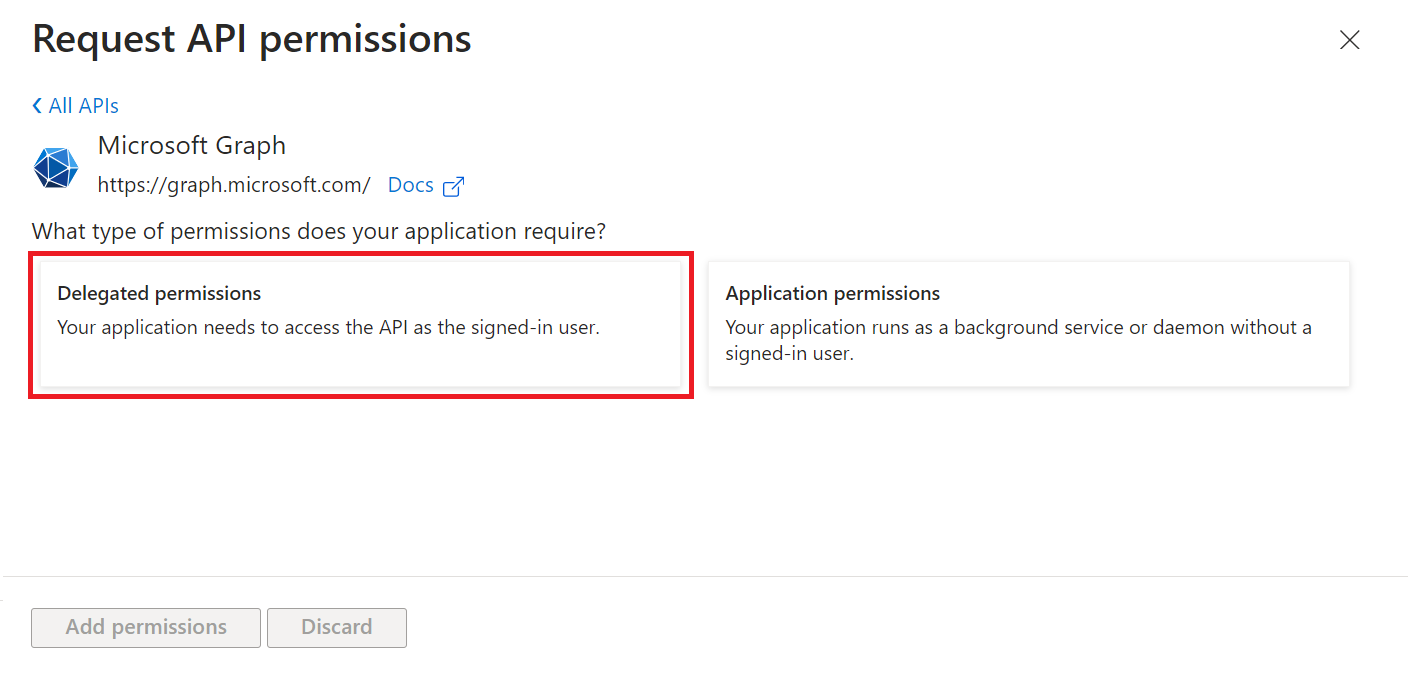
- Select Delegated permissions.

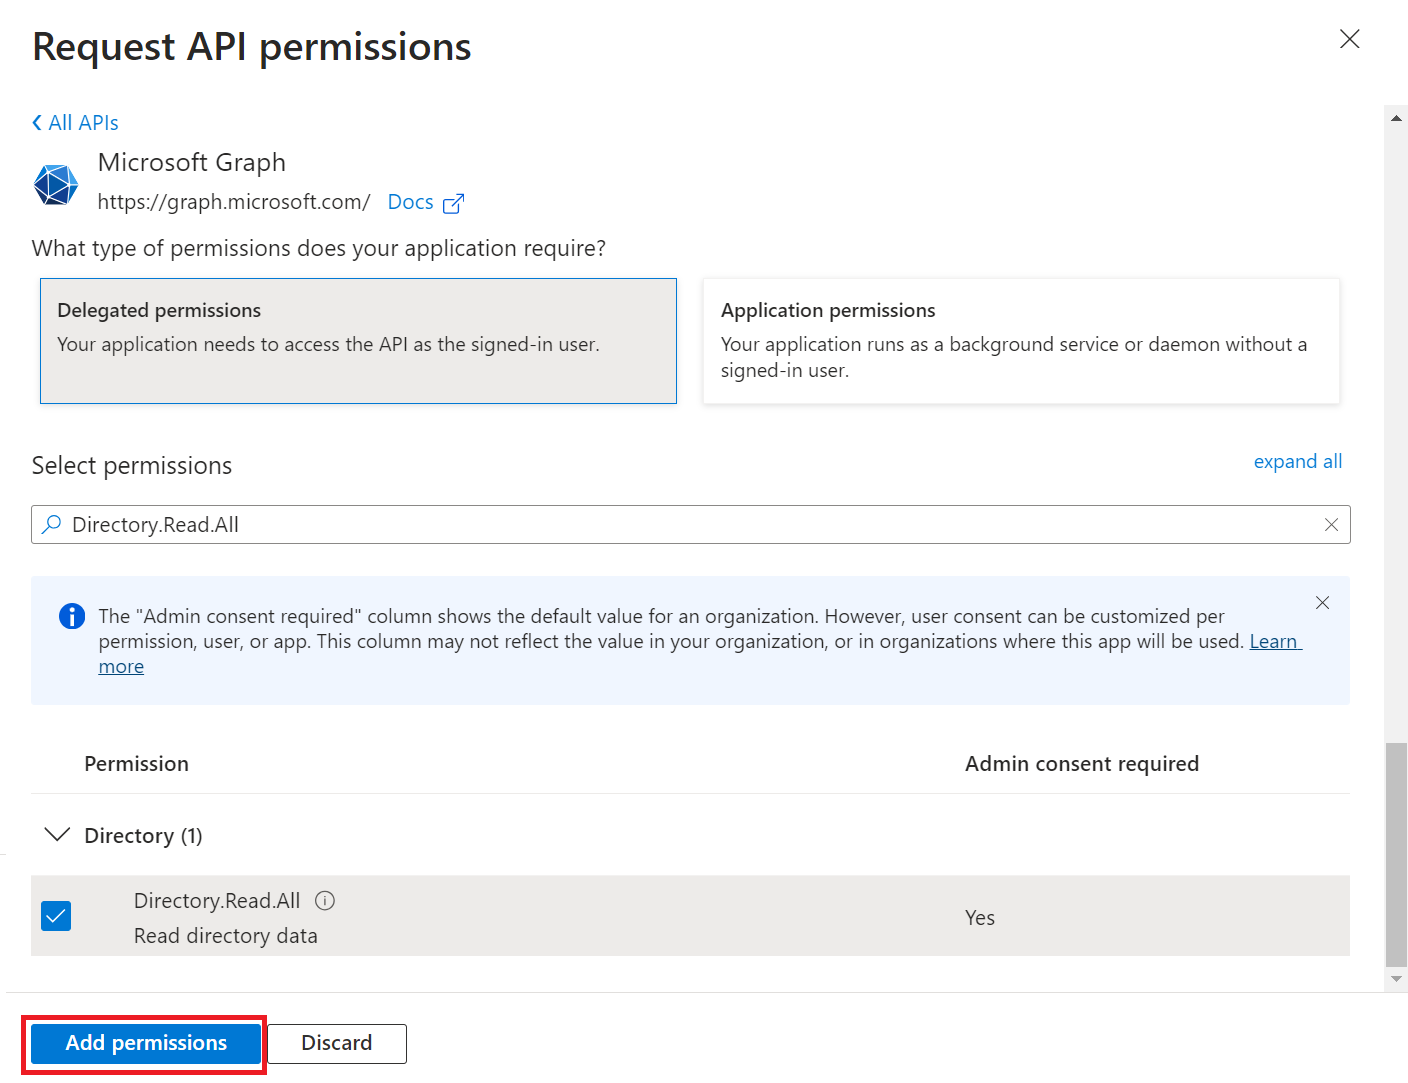
- In the Select permissions section, select the following permissions:
- Directory.Read.All
- Group.Read.All
- User.Read.All

- Click Add Permissions to add the permissions.

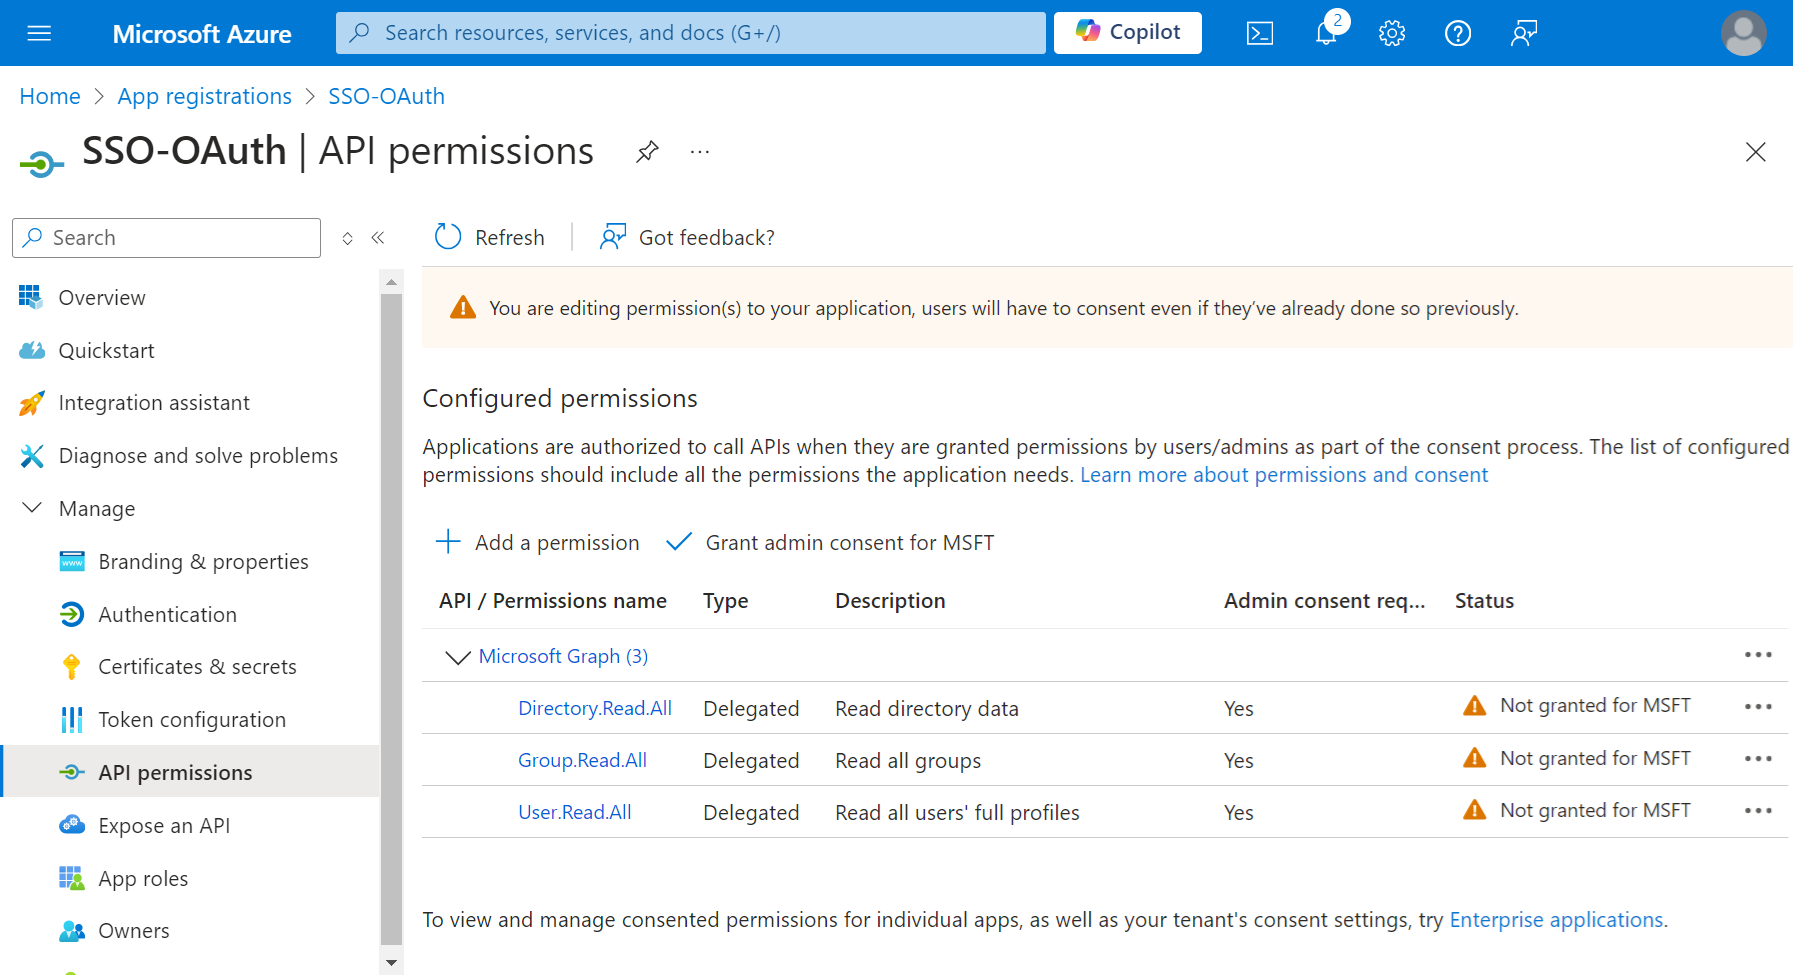
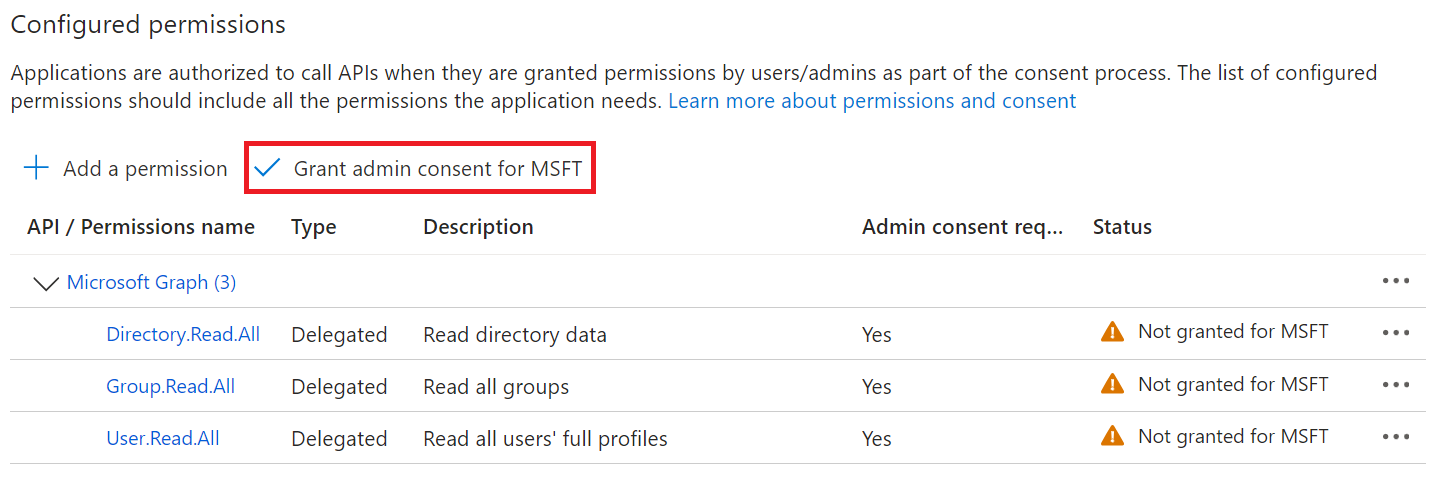
- After adding the permissions, click Grant admin consent for {your organization} to grant consent for the requested permissions.

- In the Grant admin consent confirmation pop-up window, click Yes.

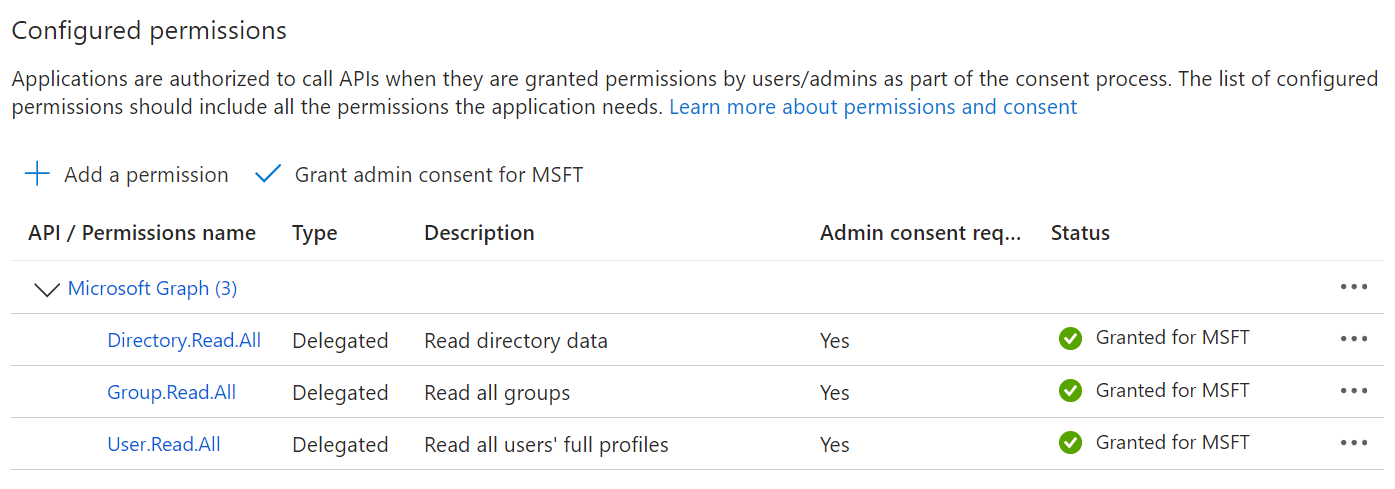
- The configured APIs are displayed on the Configured permissions page.

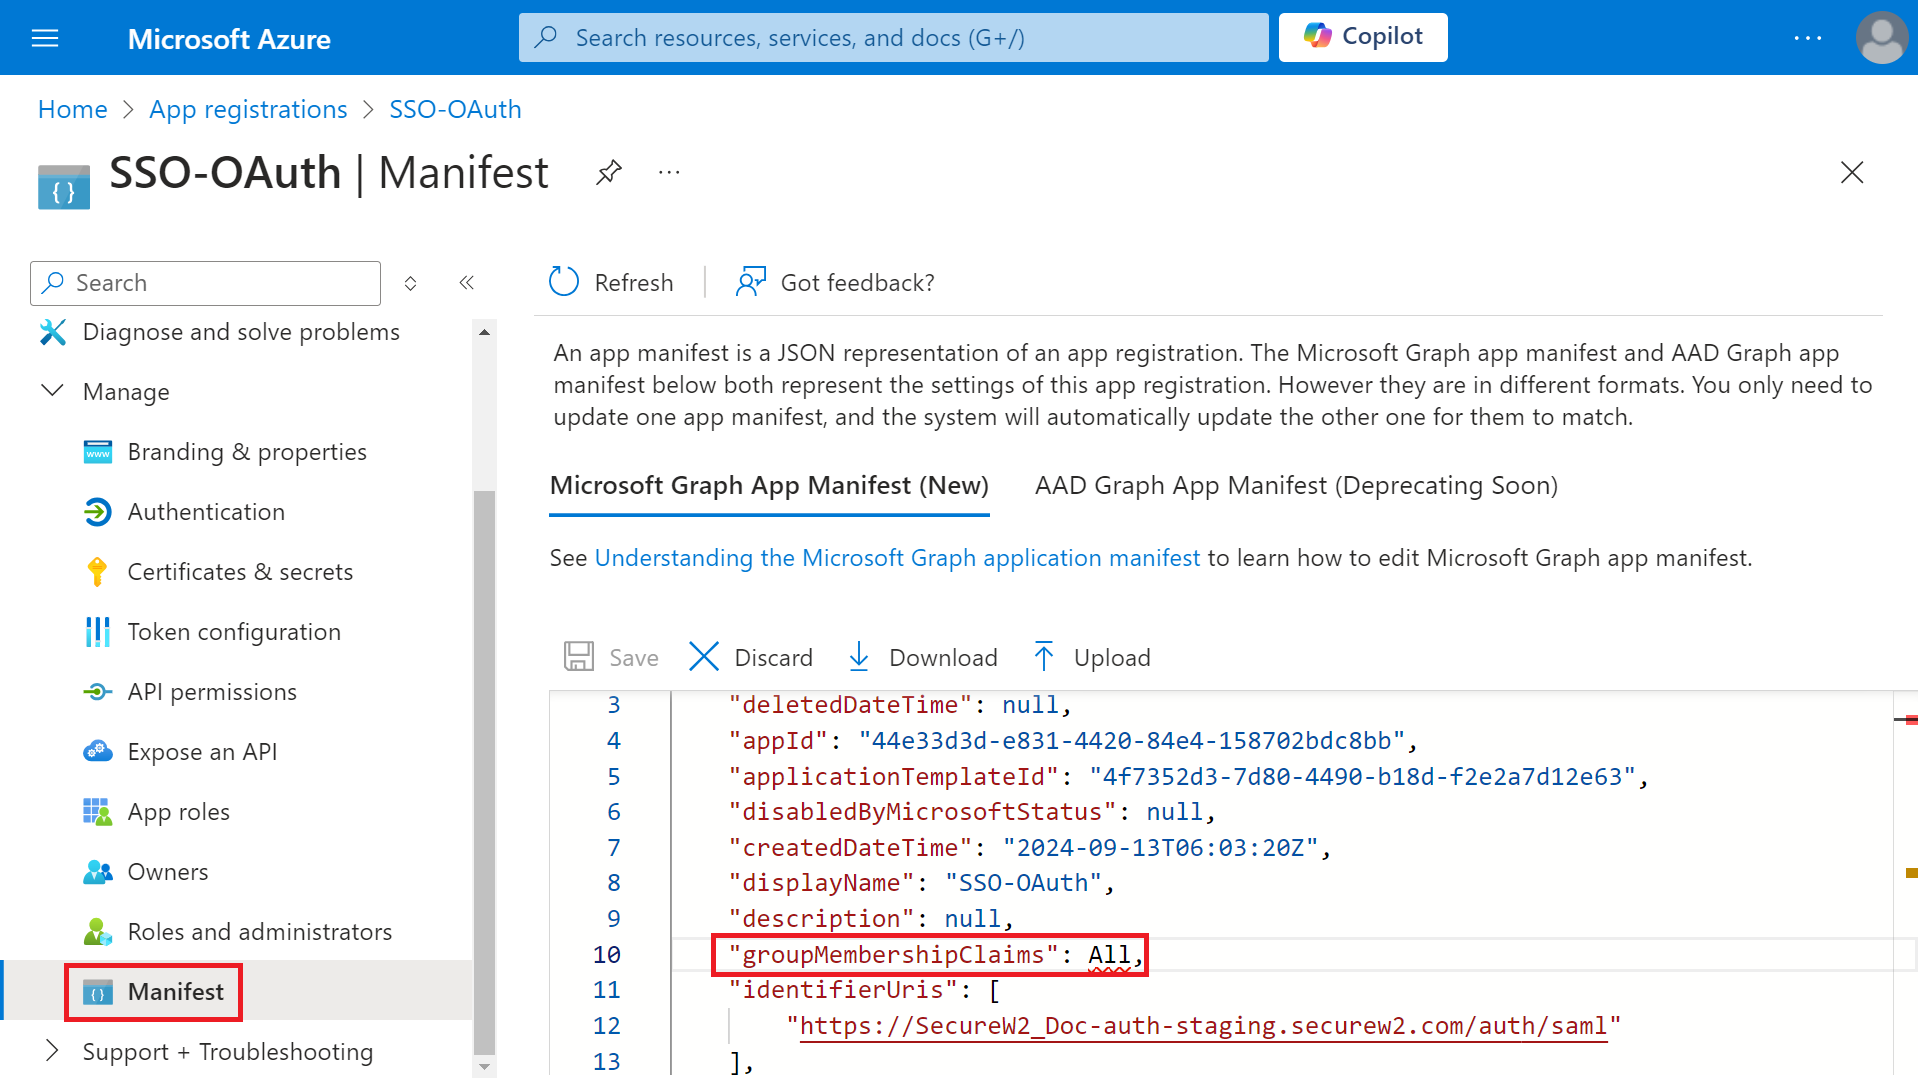
- Navigate to Manage > Manifest.
- Click the Microsoft Graph App Manifest (New) tab.
- Change the value of the groupMembershipClaims variable to “All” in the source code.

- Click Save.

To configure group mappings for SAML using Microsoft Entra ID, perform the following steps:
- In the left pane, navigate to Manage > Single sign-on.
- In the Attributes & Claims section, click the Edit button.

- On the Attributes & Claims page, click + Add a group claim.

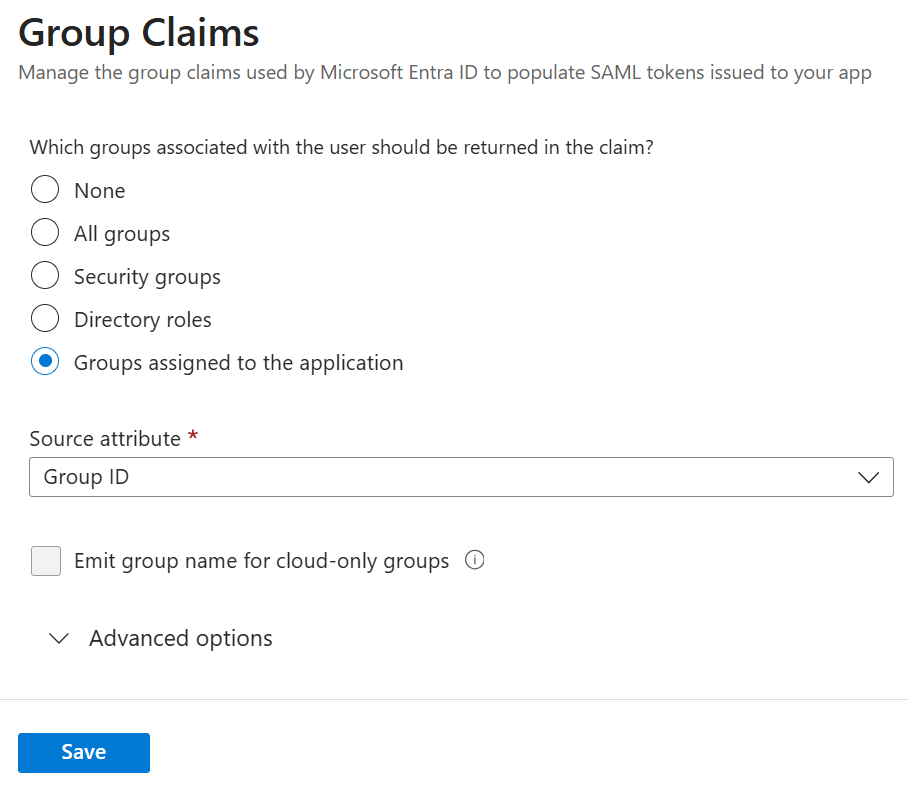
- On the Group Claims pop-up window:
- Select Groups assigned to the application.
- From the Source attribute drop-down list, retain Group ID.

- Click Save.
- Copy the newly added group claim under Additional claims.

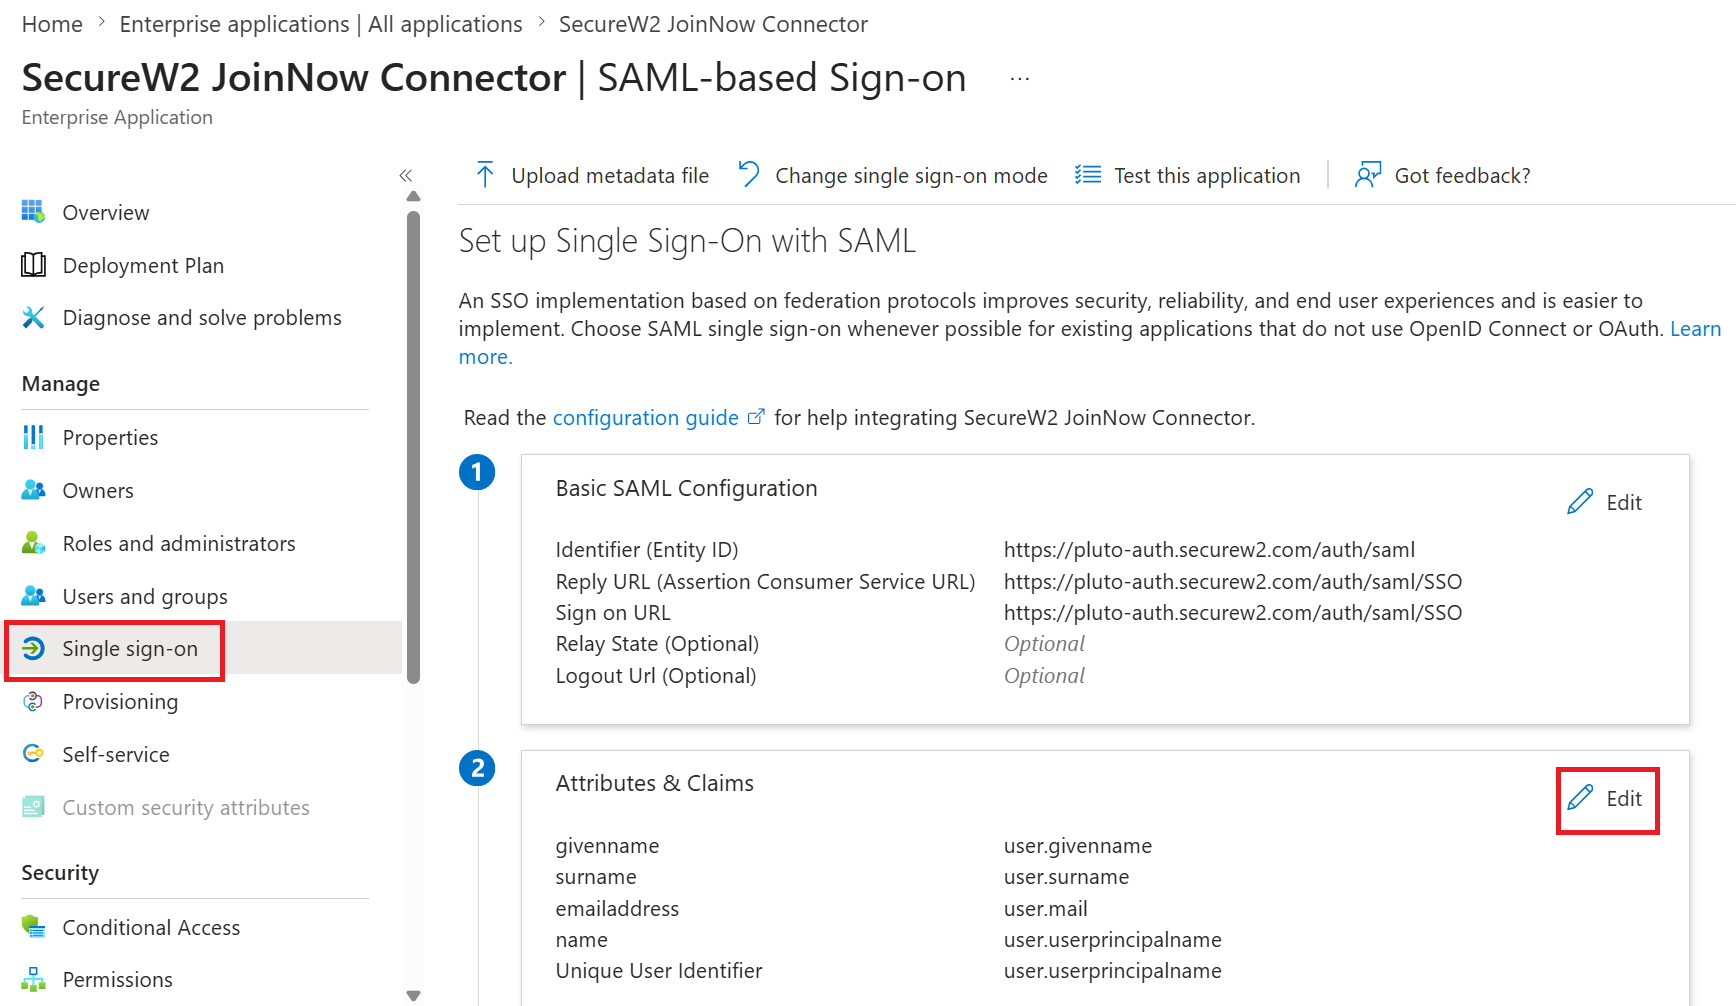
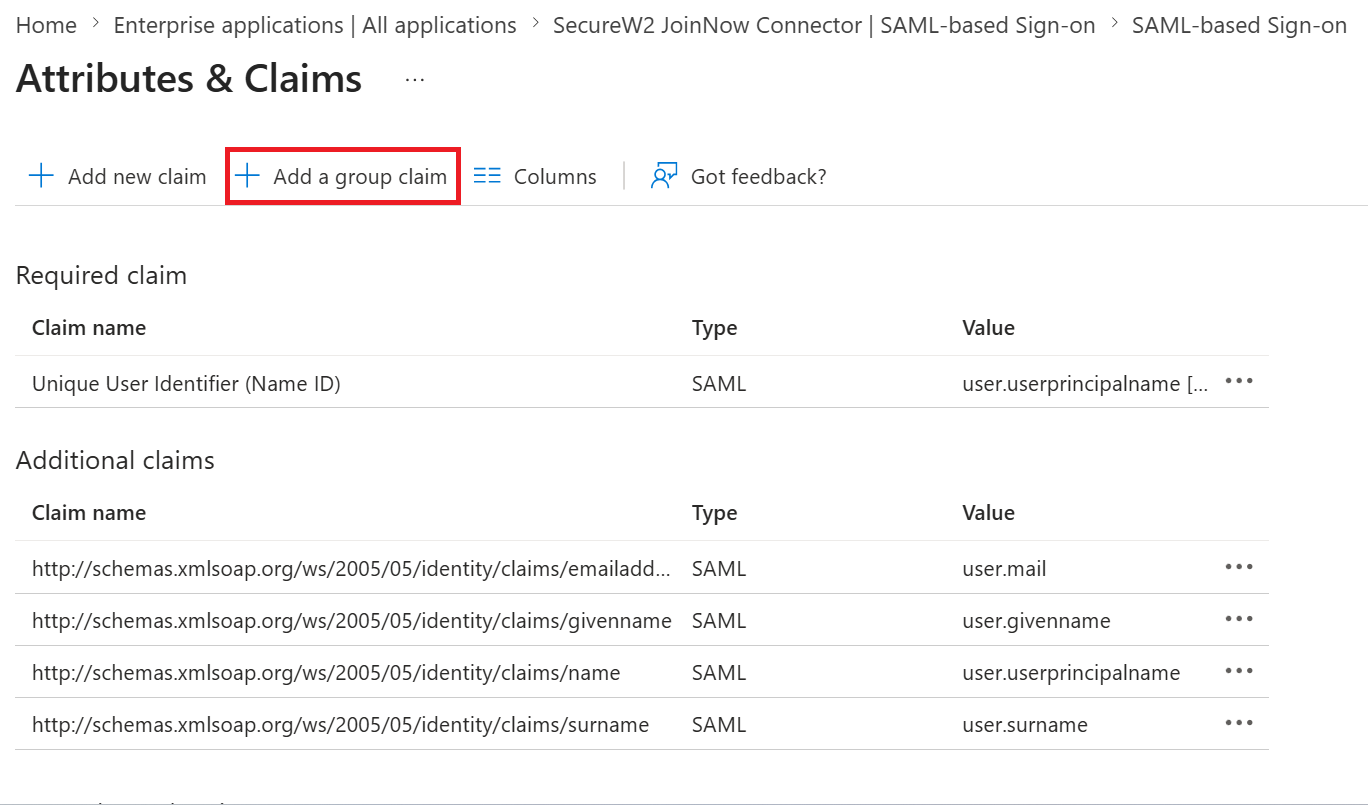
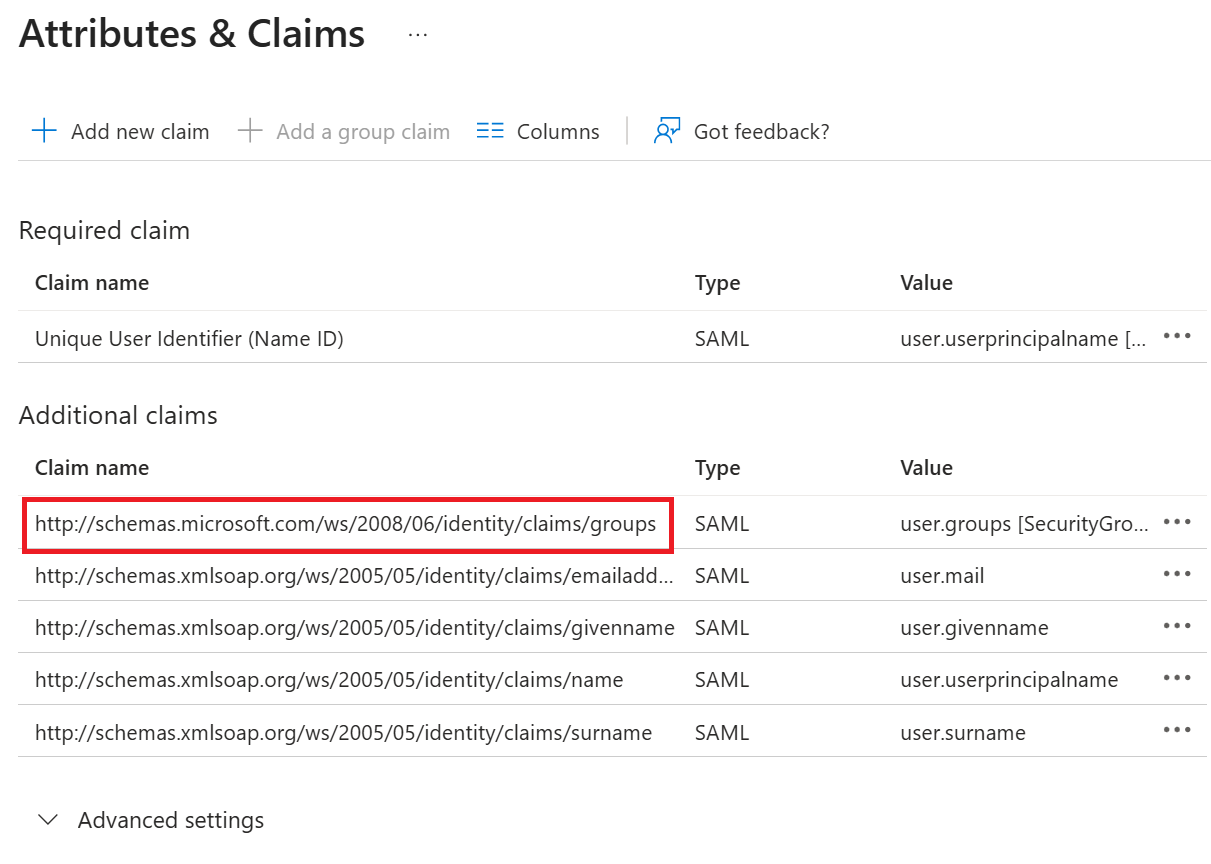
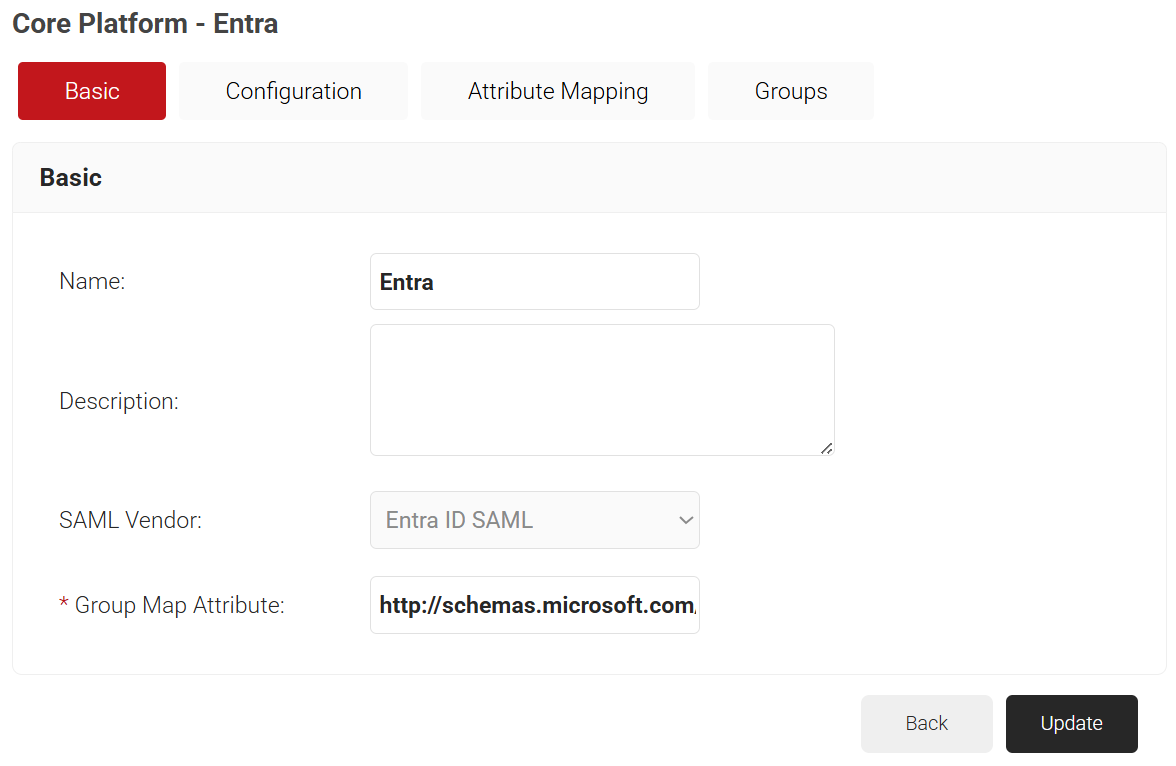
NOTE: If you don’t customize the Group Claim name, Microsoft Entra defaults to to http://schemas.microsoft.com/ws/2008/06/identity/claims/groups, and this value must be entered as the Group Map Attribute in the JoinNow Management Portal.
To create a core platform in SecureW2:
- Log in to the JoinNow Management Portal.
- Navigate to Integration Hub > Core Platforms.
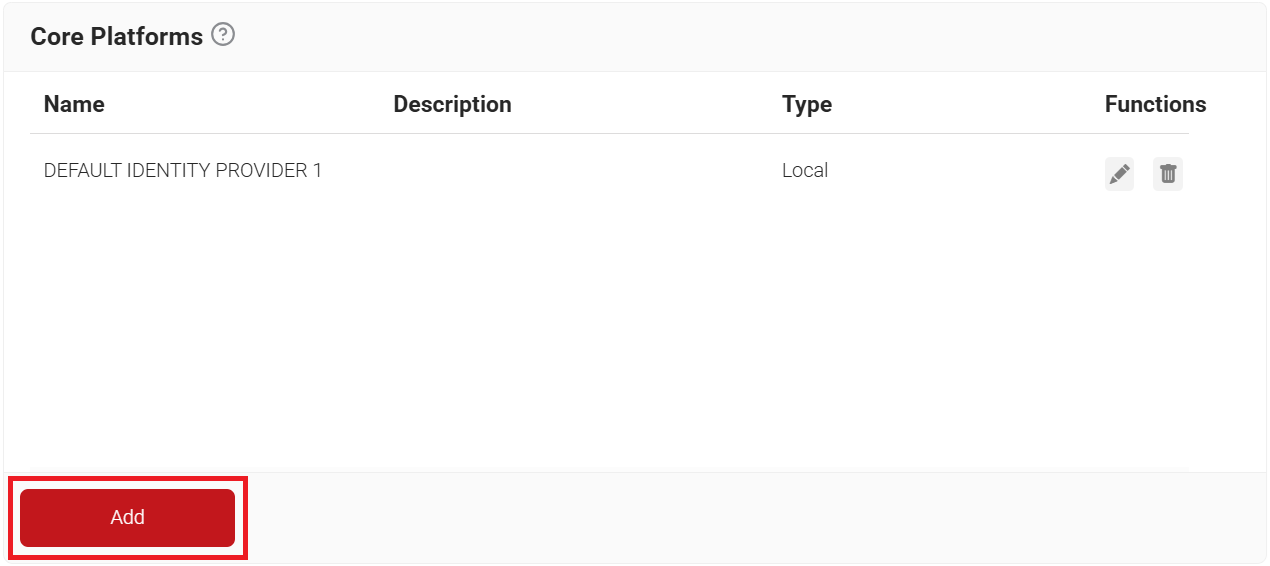
- Click Add.

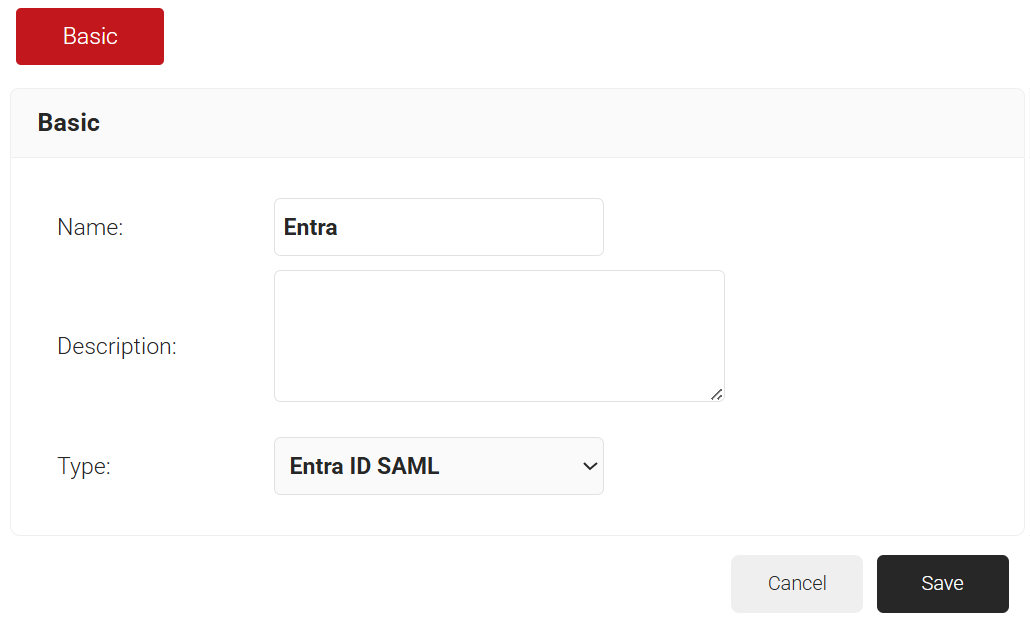
- In the Name and Description fields, enter a name and a suitable description for the core provider.
- From the Type drop-down list, select Entra ID SAML under the Core Provider category.

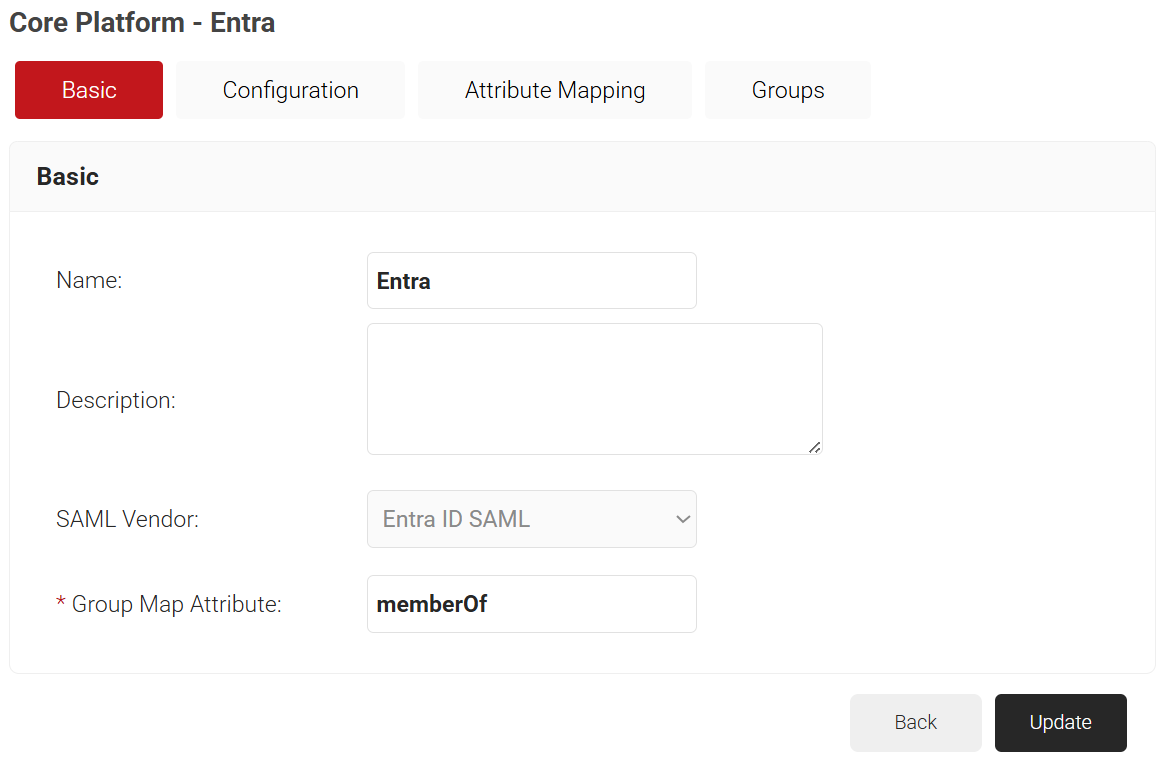
- Click Save. The page refreshes, and the Configuration, Attribute Mapping, and Groups tabs are displayed.

- To map a group attribute from Entra ID to the JoinNow Management Portal, enter the value http://schemas.microsoft.com/ws/2008/06/identity/claims/groups in the Group Map Attribute field. This value comes from the Configuring Group Mappings for SAML in Microsoft Entra ID section.

- Click the Configuration tab.
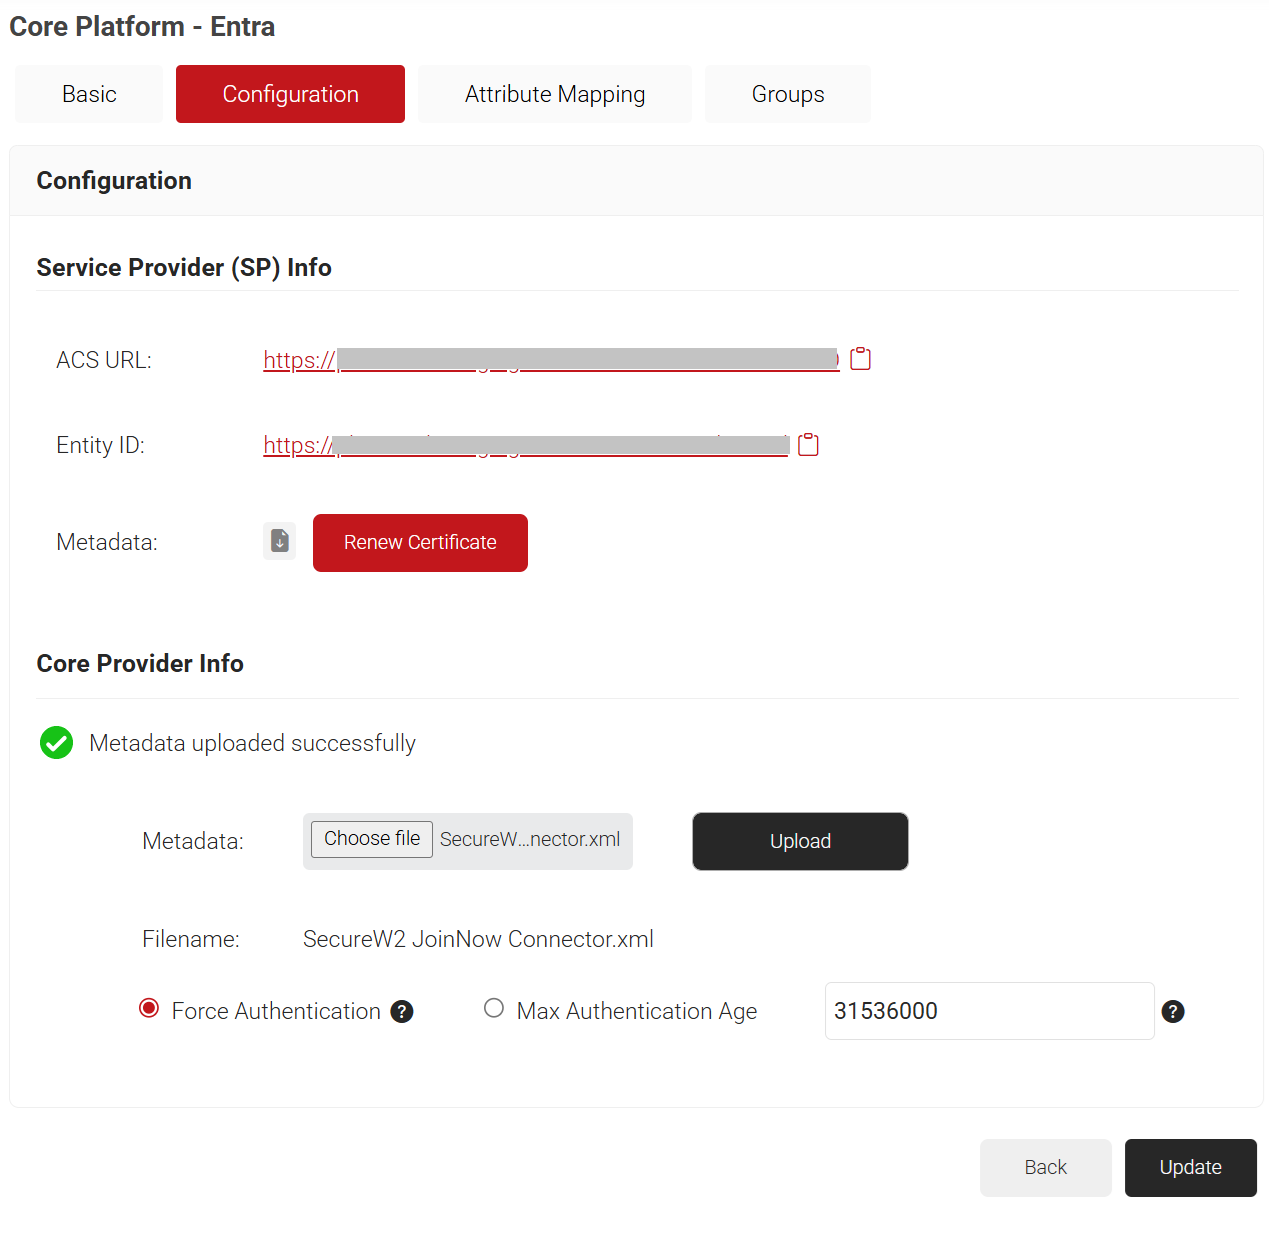
- Copy the Entity ID and ACS URL values to a text editor. You’ll use these later when configuring your SAML application in Microsoft Entra.
- In the Core Provider Info section, click Choose file, and select the Federation Metadata XML file you downloaded earlier from Microsoft Entra, and then click Upload.

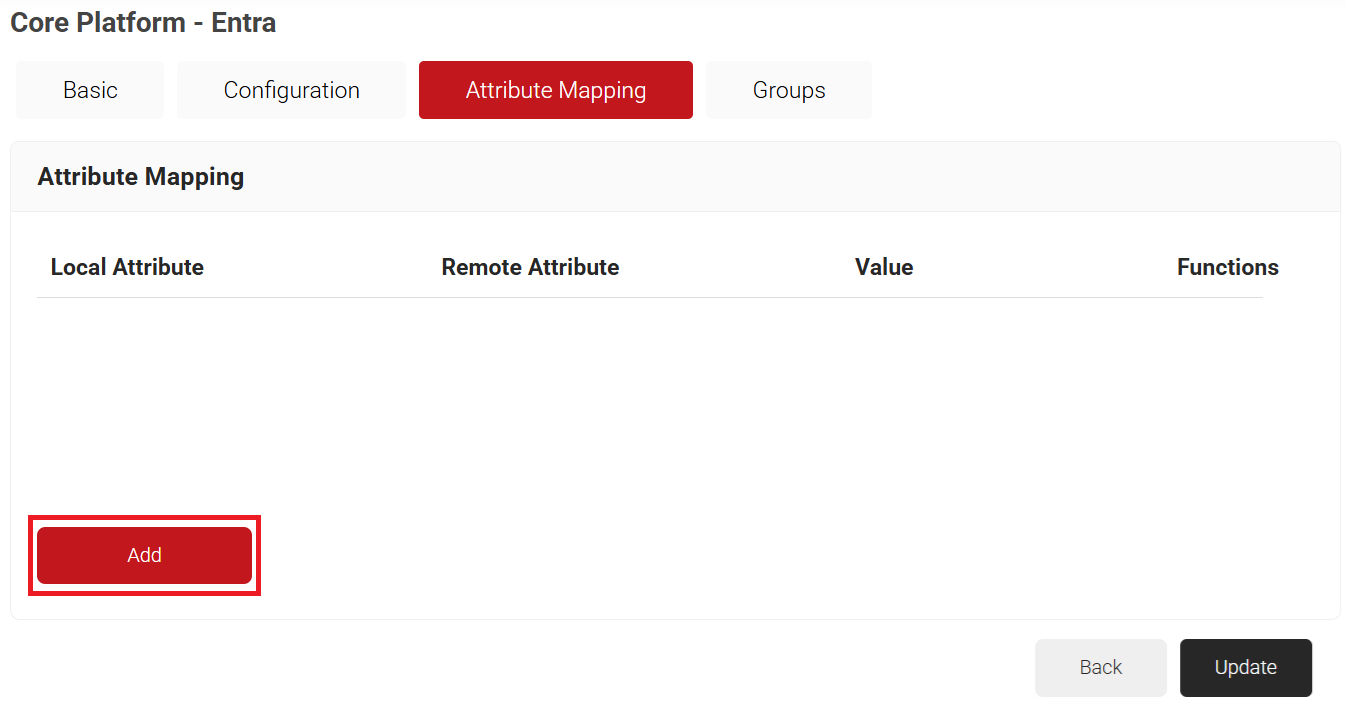
- Click the Attribute Mapping tab.
- Click Add.

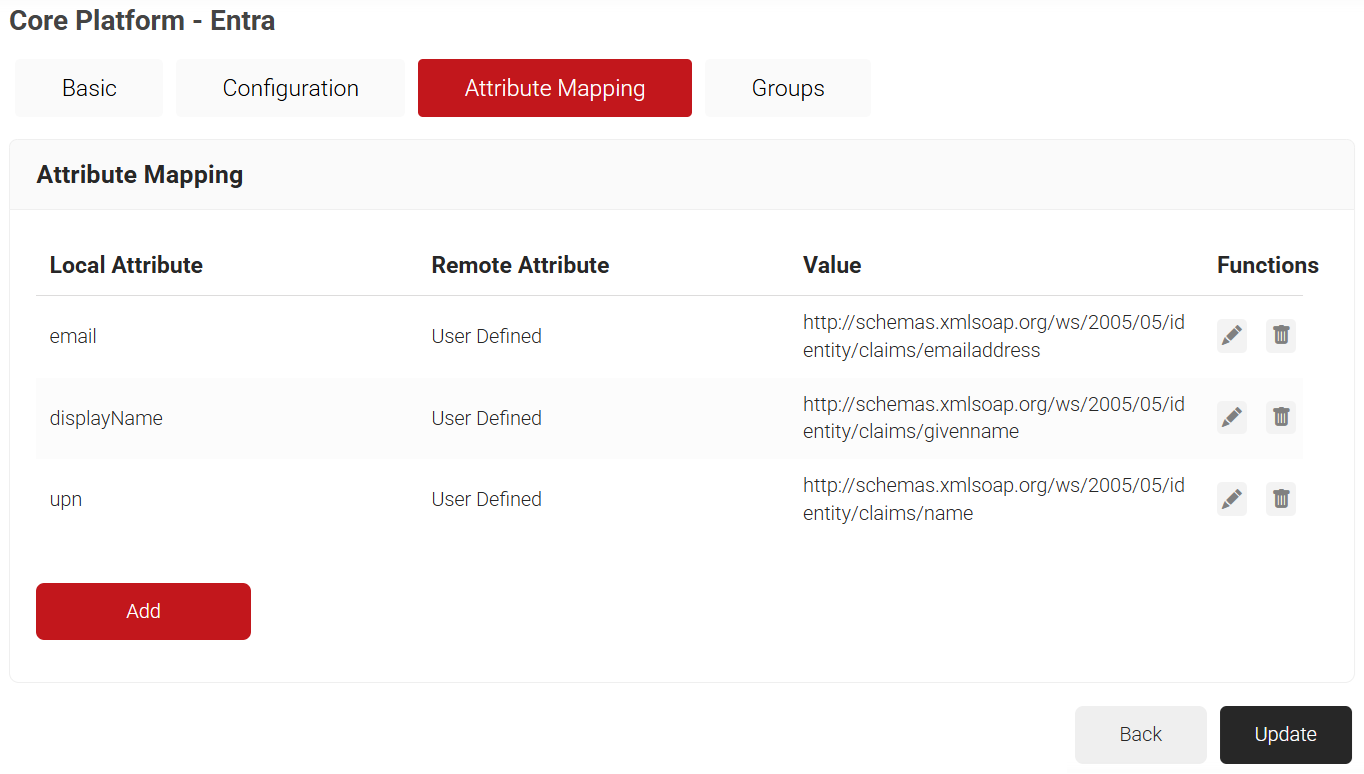
- In the Local Attribute field, enter a name for the attribute that corresponds to the Remote Attribute.
- From the Remote Attribute drop-down list, select User Defined and enter the exact claim name from Entra ID.

- Click Next to create the custom attribute with the appropriate mapping.

- Click Add.
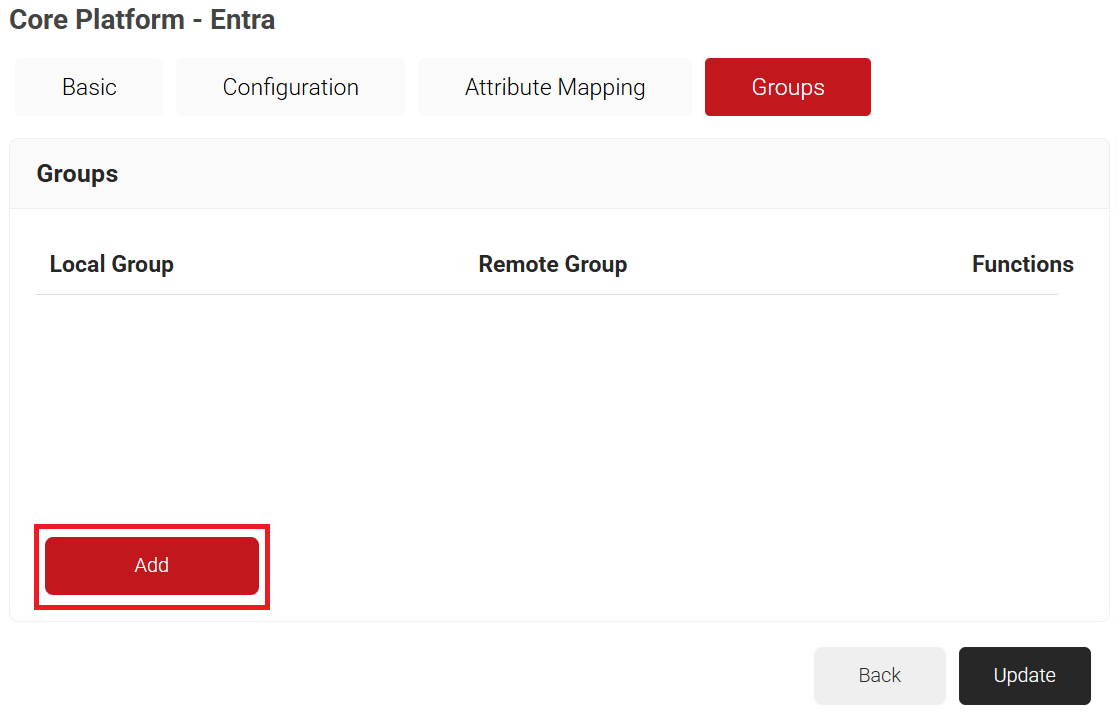
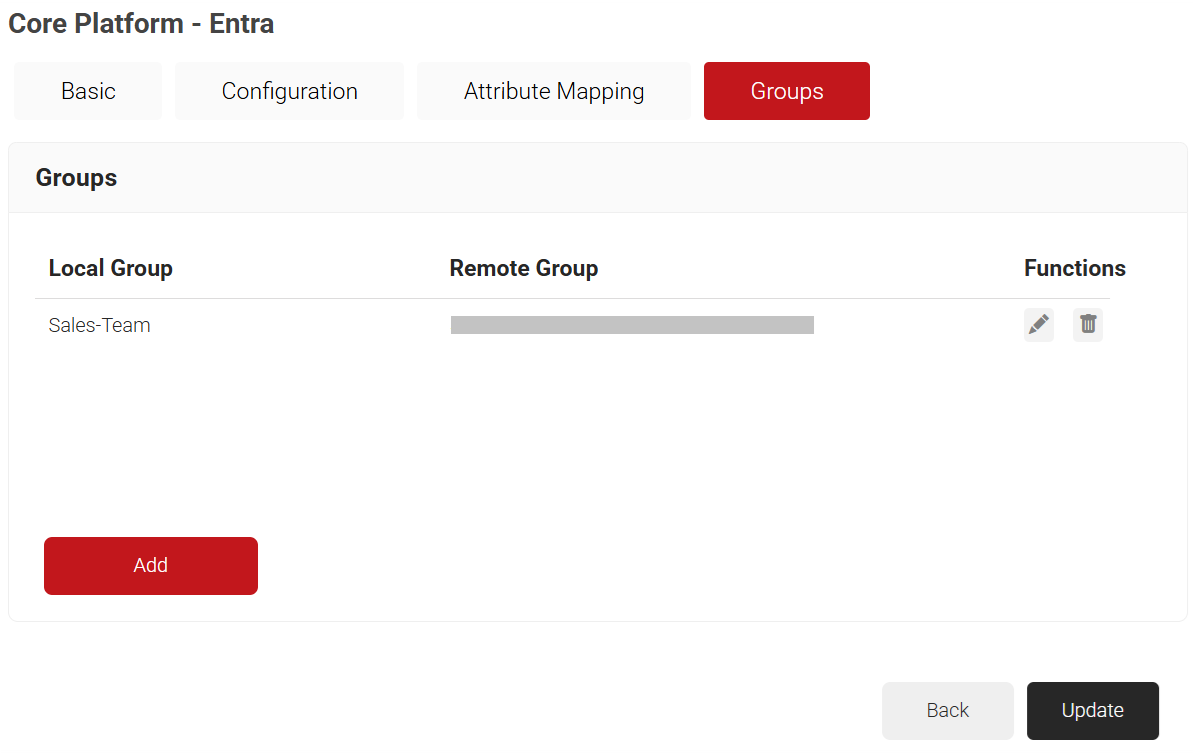
- Select the Groups tab.
- Click Add.

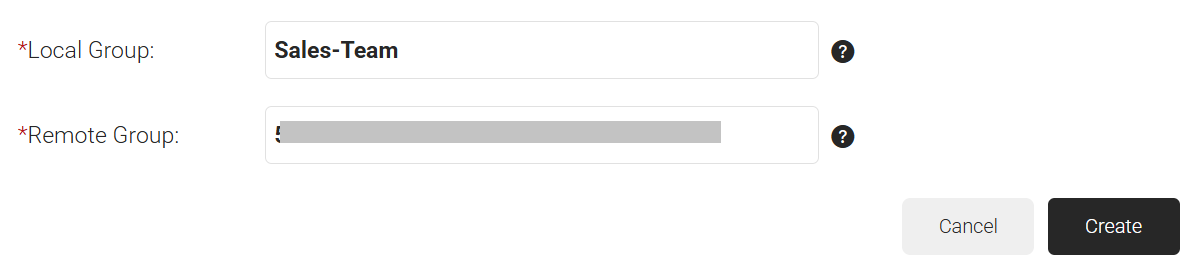
- In the Local Group field, enter a group name.
- In the Remote Group field, enter the Object ID of the group from Microsoft Entra.

- Click Create.

- Click Add.
- Click Update.

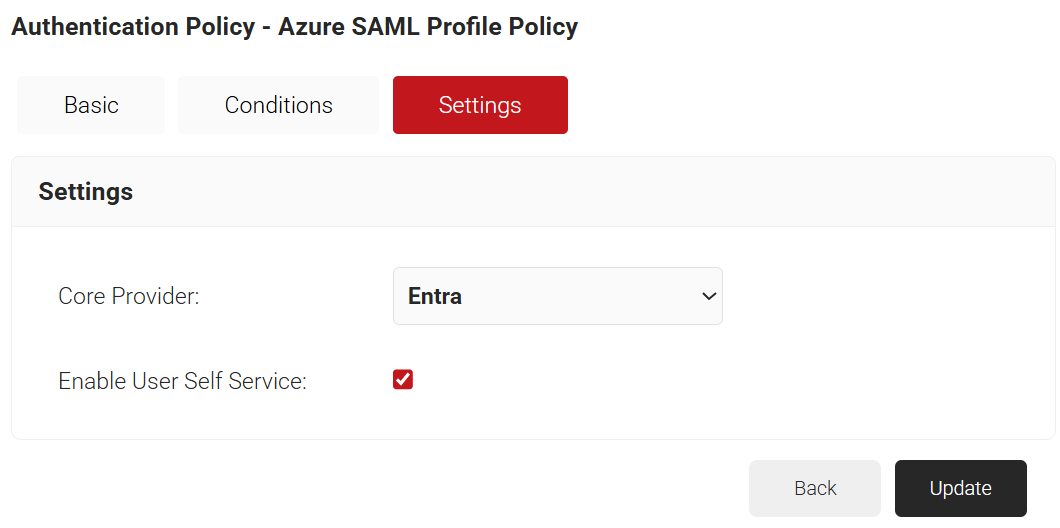
If you’ve already set up an authentication policy through Getting Started, you can either edit it with the required values or create a new one.
To create a new Authentication Policy, perform the following steps:
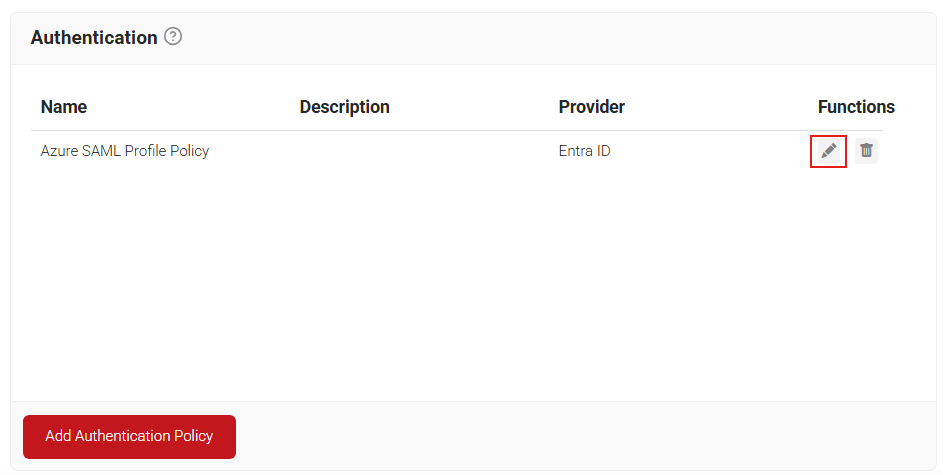
- Navigate to Policy Management > Authentication.
- On the Authentication page, click the Edit link for your network profile’s authentication policy.

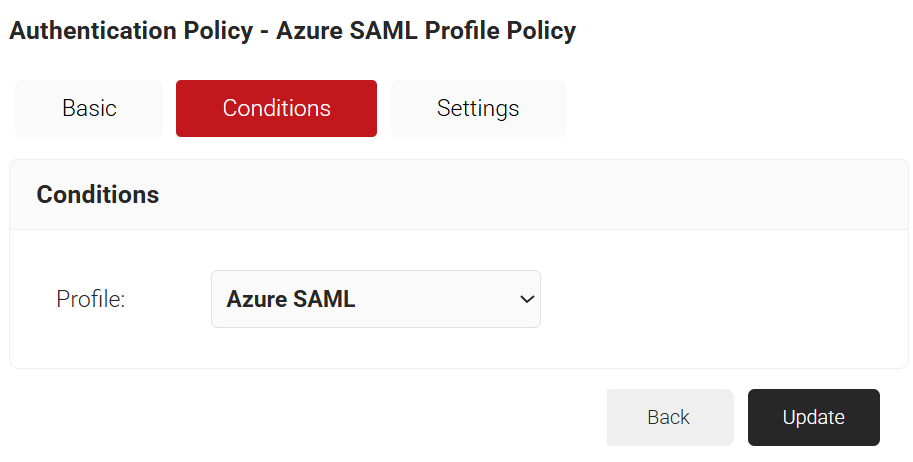
- Click the Conditions tab and verify that your network profile is displayed in the Profile field.

- Click the Settings tab.
- From the Core Provider drop-down list, select the core provider that you created earlier.
- Select the Enable User Self Service checkbox if required.

- Click Update.
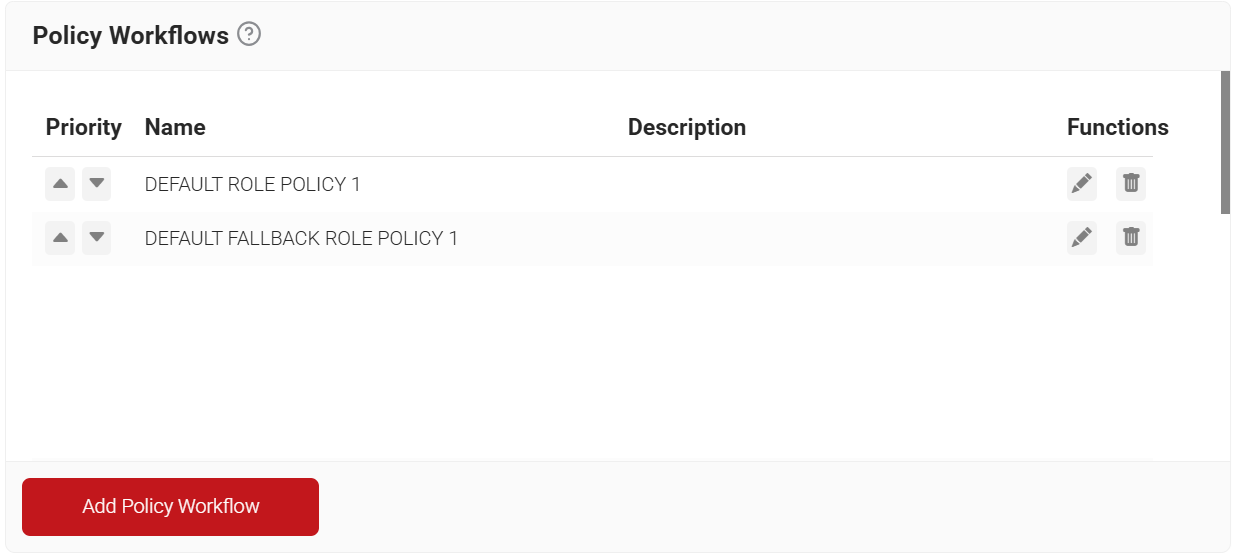
To add a policy workflow in SecureW2, follow these steps:
- Navigate to Policy Management > Policy Workflows.
- Click Add Policy Workflow.

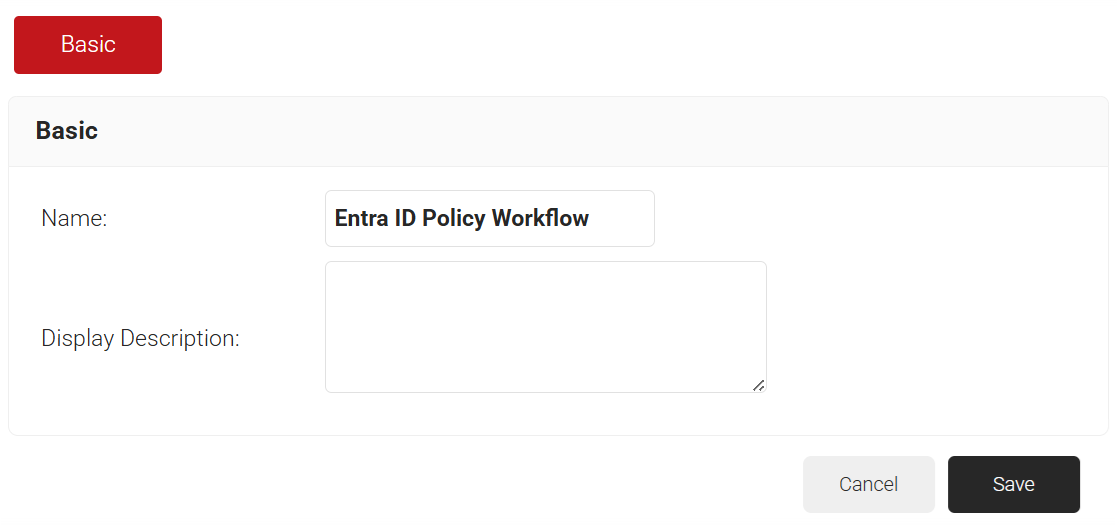
- In the Basic section, enter the name of the policy workflow in the Name field.
- In the Display Description field, enter a suitable description for the policy workflow.
- Click Save.

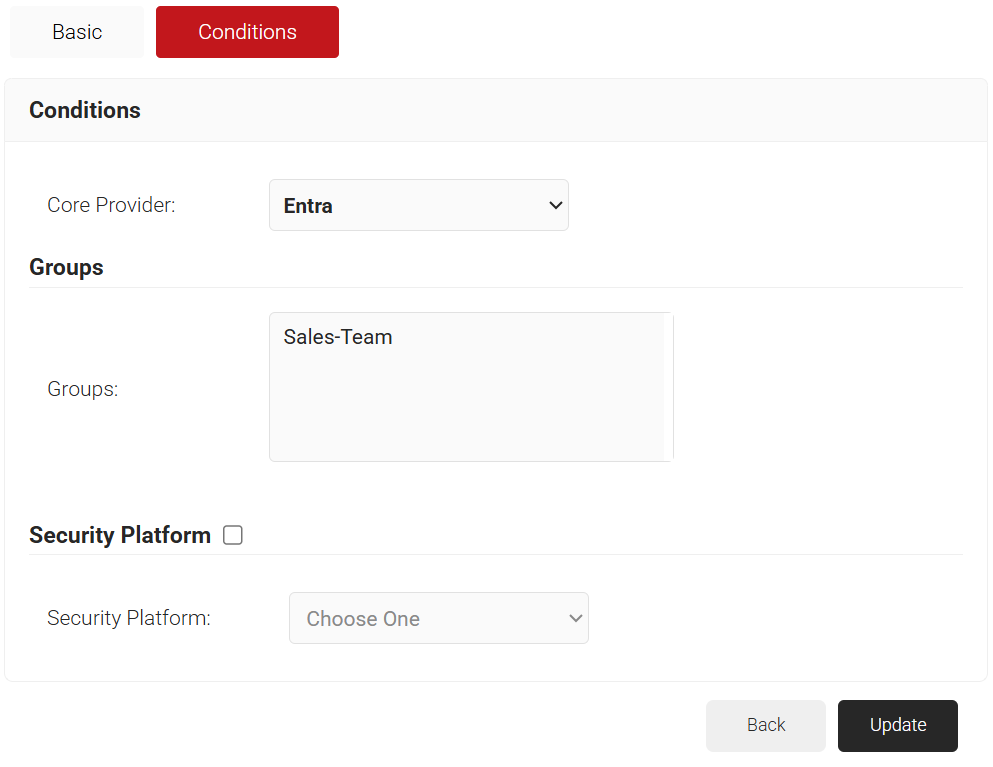
- The page refreshes, and the Conditions tab is displayed.
- From the Core Provider drop-down list, select the core provider you created earlier (refer to the Creating a Core Provider section).

- Click Update.
To create an enrollment policy, perform the following steps:
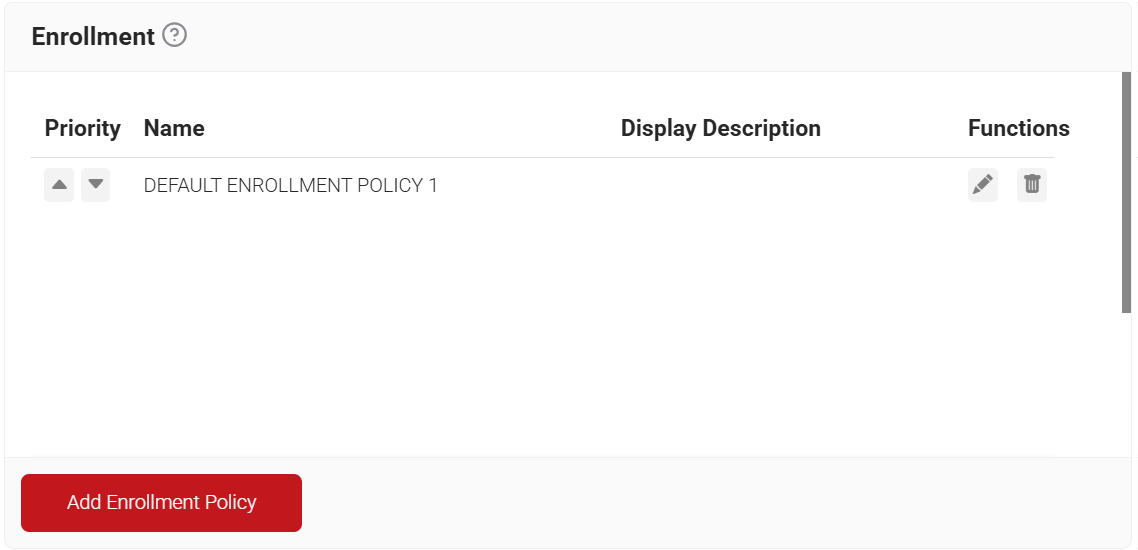
- Navigate to Policy Management > Enrollment.
- Click Add Enrollment Policy.

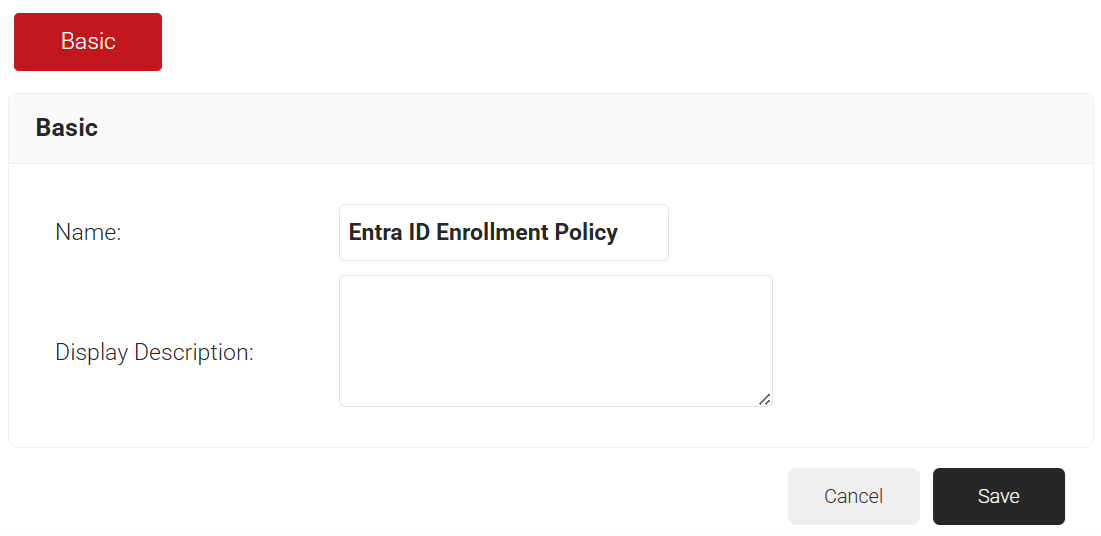
- In the Basic section, enter the name of the enrollment policy in the Name field.
- In the Display Description field, enter a suitable description for the enrollment policy.

- Click Save.
- The page refreshes, and the Conditions and Settings tabs are displayed.
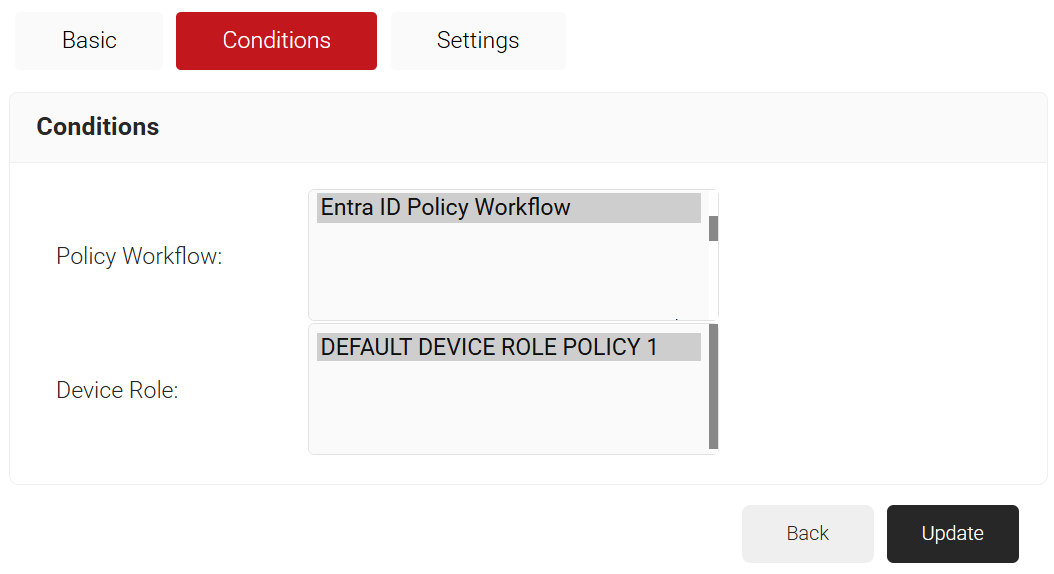
- Select the Conditions tab.
- In the Policy Workflow list, select the policy workflow you created earlier (see the Creating a Policy Workflow section).
- In the Device Role list, select DEFAULT DEVICE ROLE POLICY 1.

- Click Update.
To configure a Network Policy, perform the following steps:
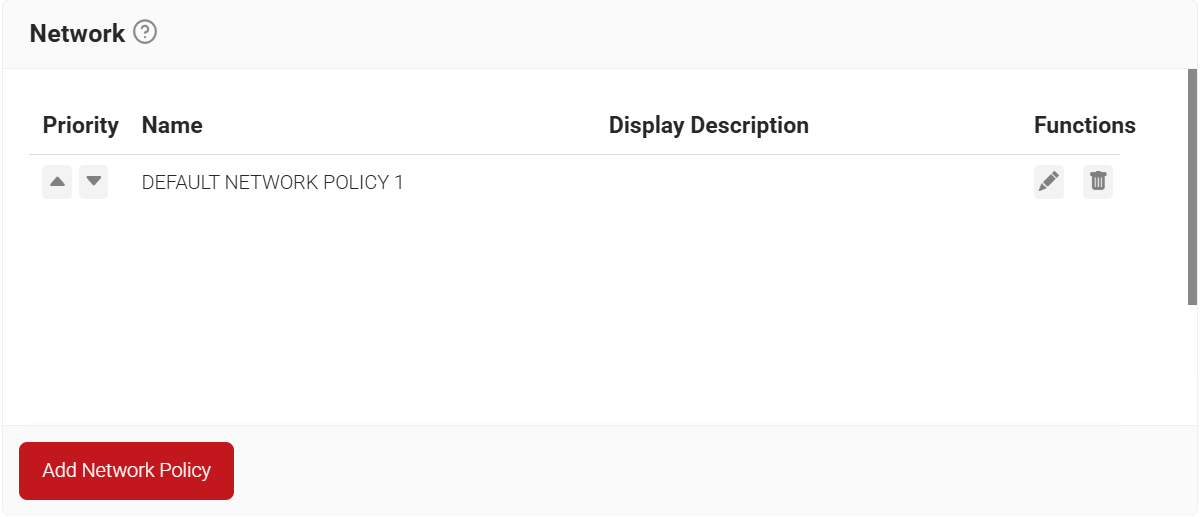
- Navigate to Policy Management > Network.

- On the Network page, click Add Network Policy.
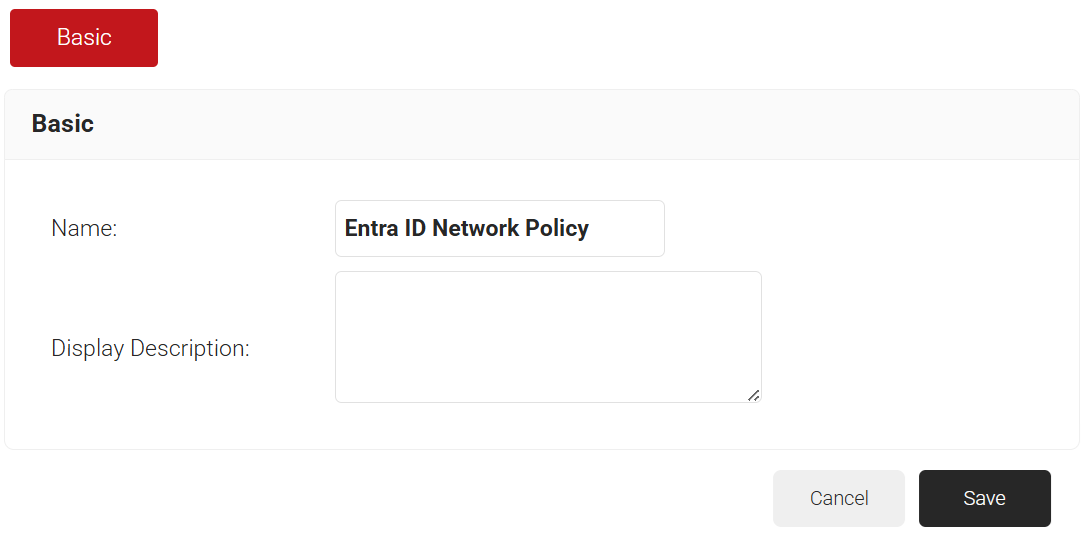
- Under the Basic section, in the Name field, enter the name of the network policy.
- In the Display Description field, enter a suitable description for the network policy.

- Click Save.
- The page refreshes, and the Conditions and Settings tabs are displayed.
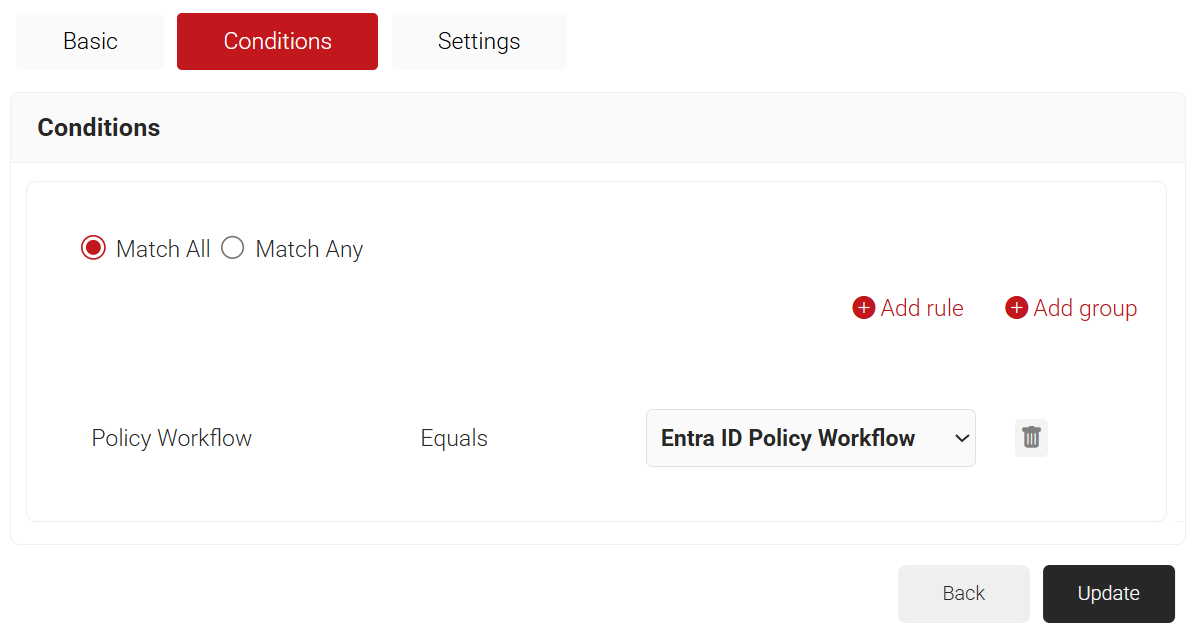
- Select the Conditions tab.
- In the Conditions section, select Match All or Match Any based on your requirement to set authentication criteria. In the case explained here, we are selecting Match All.

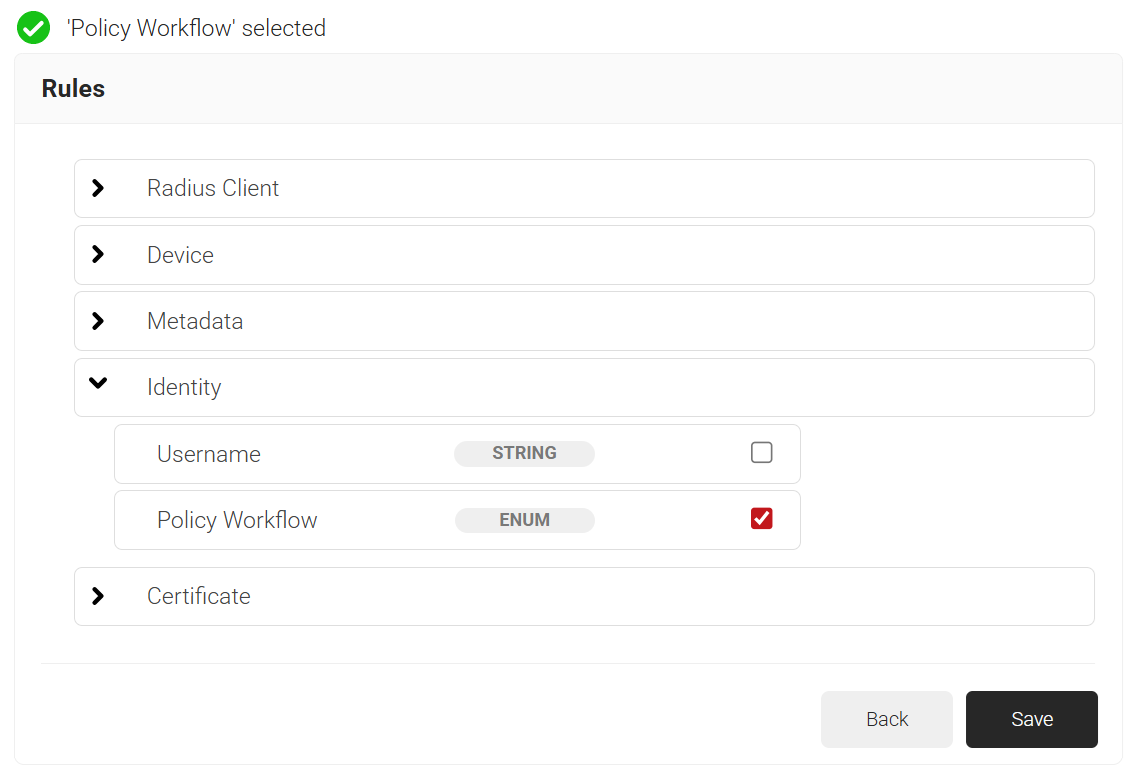
- Click Add rule and select the policy workflow you want to assign to this network policy. It is essential to select the appropriate policy workflow, as it triggers the network policy. This menu offers various rules that you can select based on your business requirements.

- Click Save.
- From the Policy Workflow Equals drop-down list, select the policy workflow you created earlier. You can select multiple policy workflows to assign to a Network Policy.

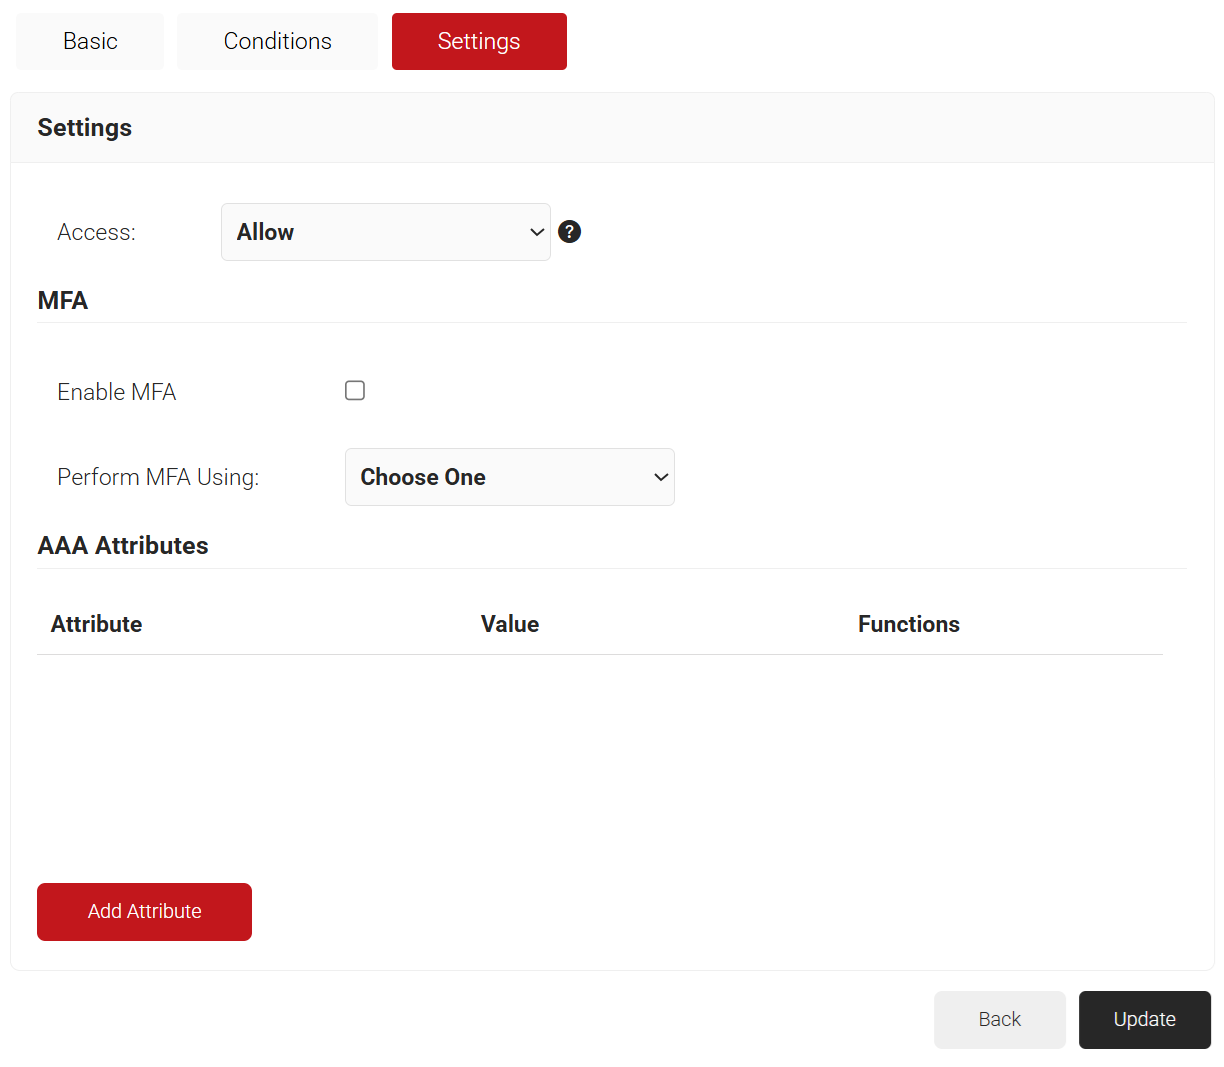
- Click the Settings tab.
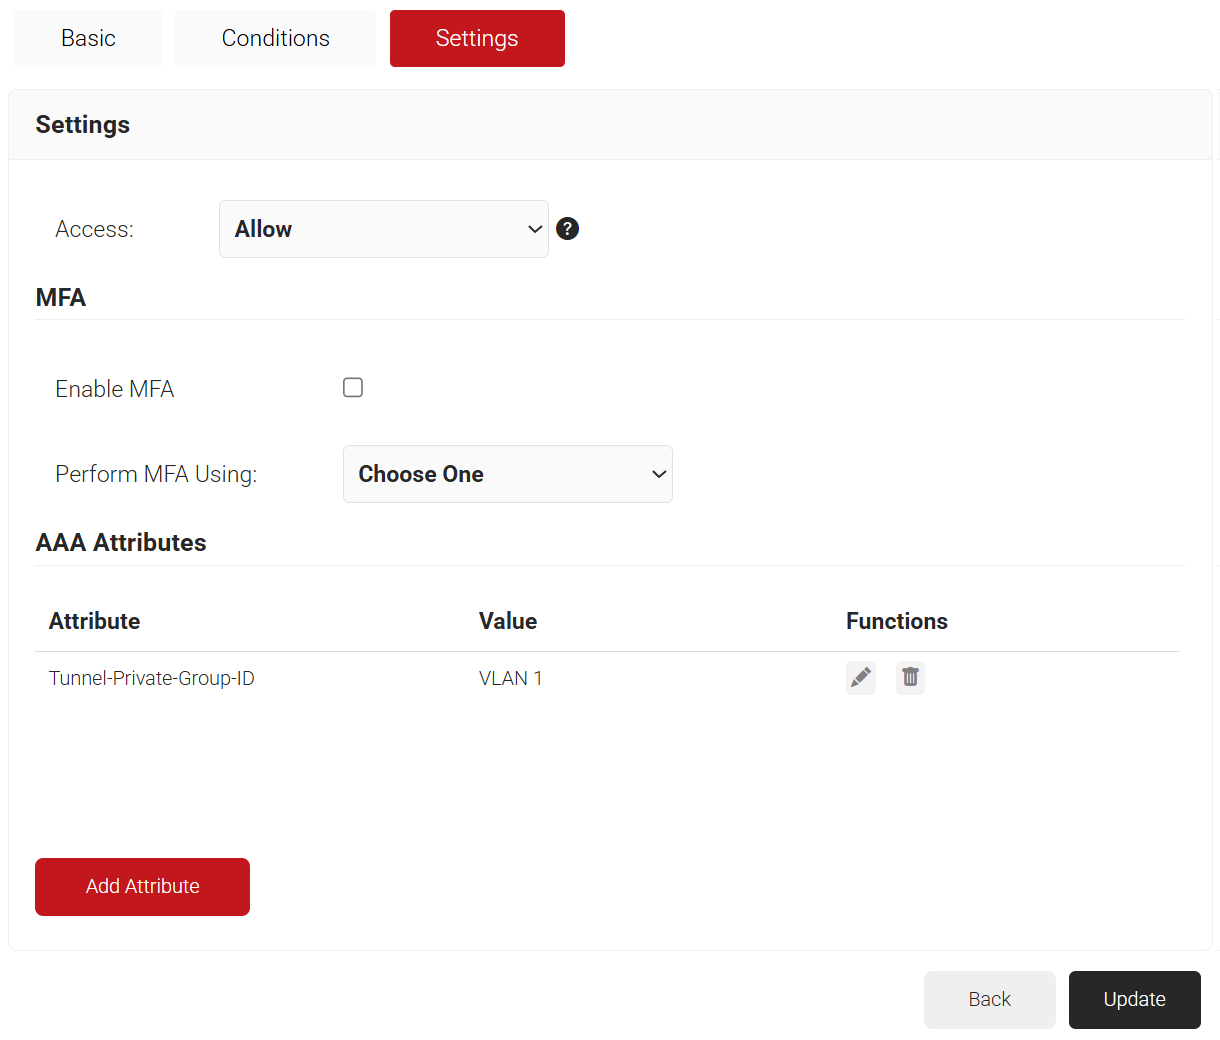
- From the Access drop-down list, select any one of the options to allow or deny authentication requests. The default value is “Allow”.
- To configure MFA, select the checkbox to enable MFA.
- From the Perform MFA Using drop-down list, select a Core Provider for MFA.

- Click Add Attribute.
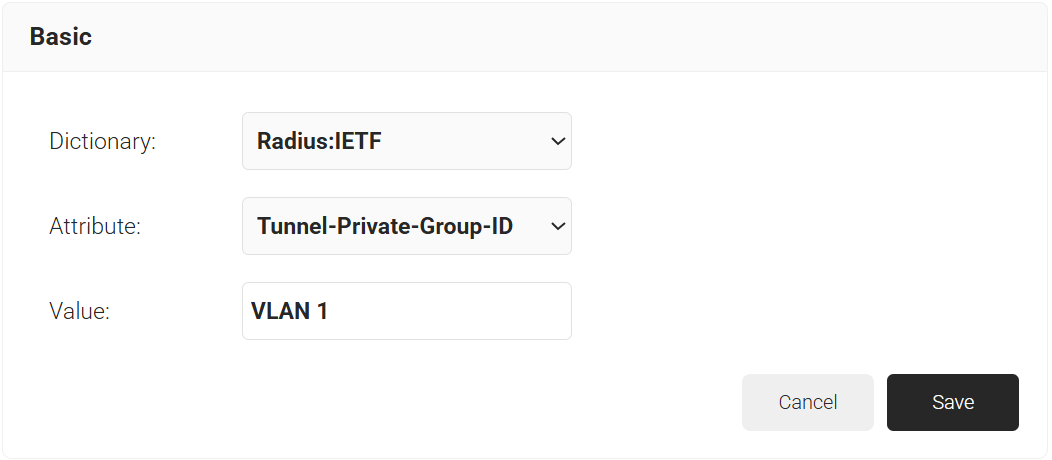
- From the Dictionary drop-down list, select an option:
- Radius: IETF – This is what we will use for the following attributes, as we are using standard RADIUS attributes for VLAN assignment.
- Custom: Used for any VSAs (Vendor-Specific Attributes)
- From the Attribute drop-down list, select one of the pre-configured RADIUS attributes.
- In the Value field, enter a value for the RADIUS attribute.

- From the Dictionary drop-down list, select an option:
- Click Save.

- Repeat for any other RADIUS attribute you would like to send. For reference, here is what is commonly required for VLAN Assignment:
- Tunnel-Medium-Type: IEE-802
- Tunnel-Private-Group-ID: {VLAN Name}
- Server Tunnel-Type: VLAN
- Click Update.

To republish your network profile:
- Navigate to Device Onboarding > Profiles, then select the network profile you want to publish or republish. Click Publish (or Republish if it has already been published). The process may take 60–90 seconds to complete.
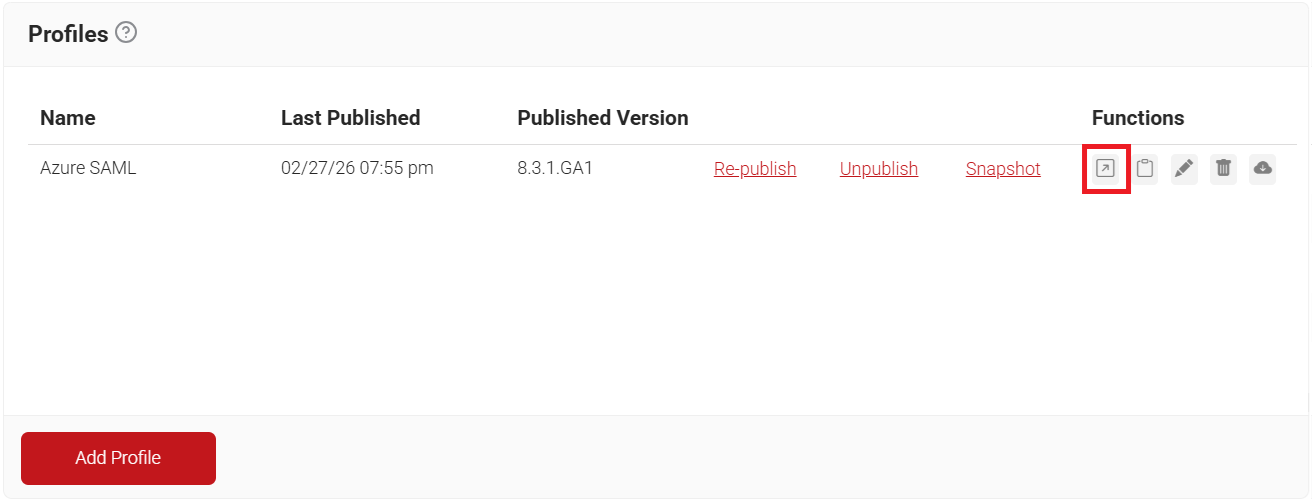
- After publishing successfully, click Open landing page under Functions.

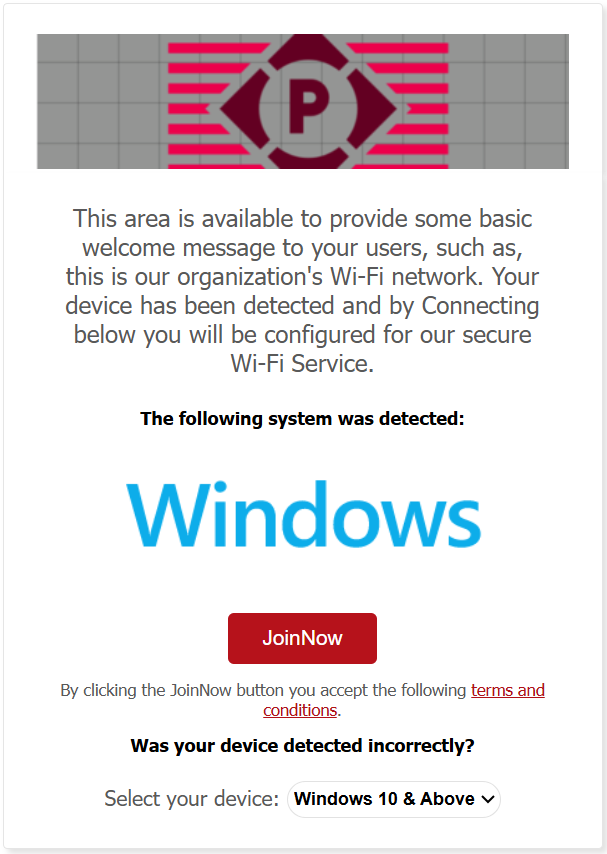
- Click the JoinNow button. It downloads a Wi-Fi wrapper package.

- Open the downloaded file and enter your Microsoft Entra credentials when prompted.
- The device attempts to enroll and connect. Verify that the enrollment is successful.
NOTE: If you notice any issues with your setup, please write to support@securew2.com