1. Introduction
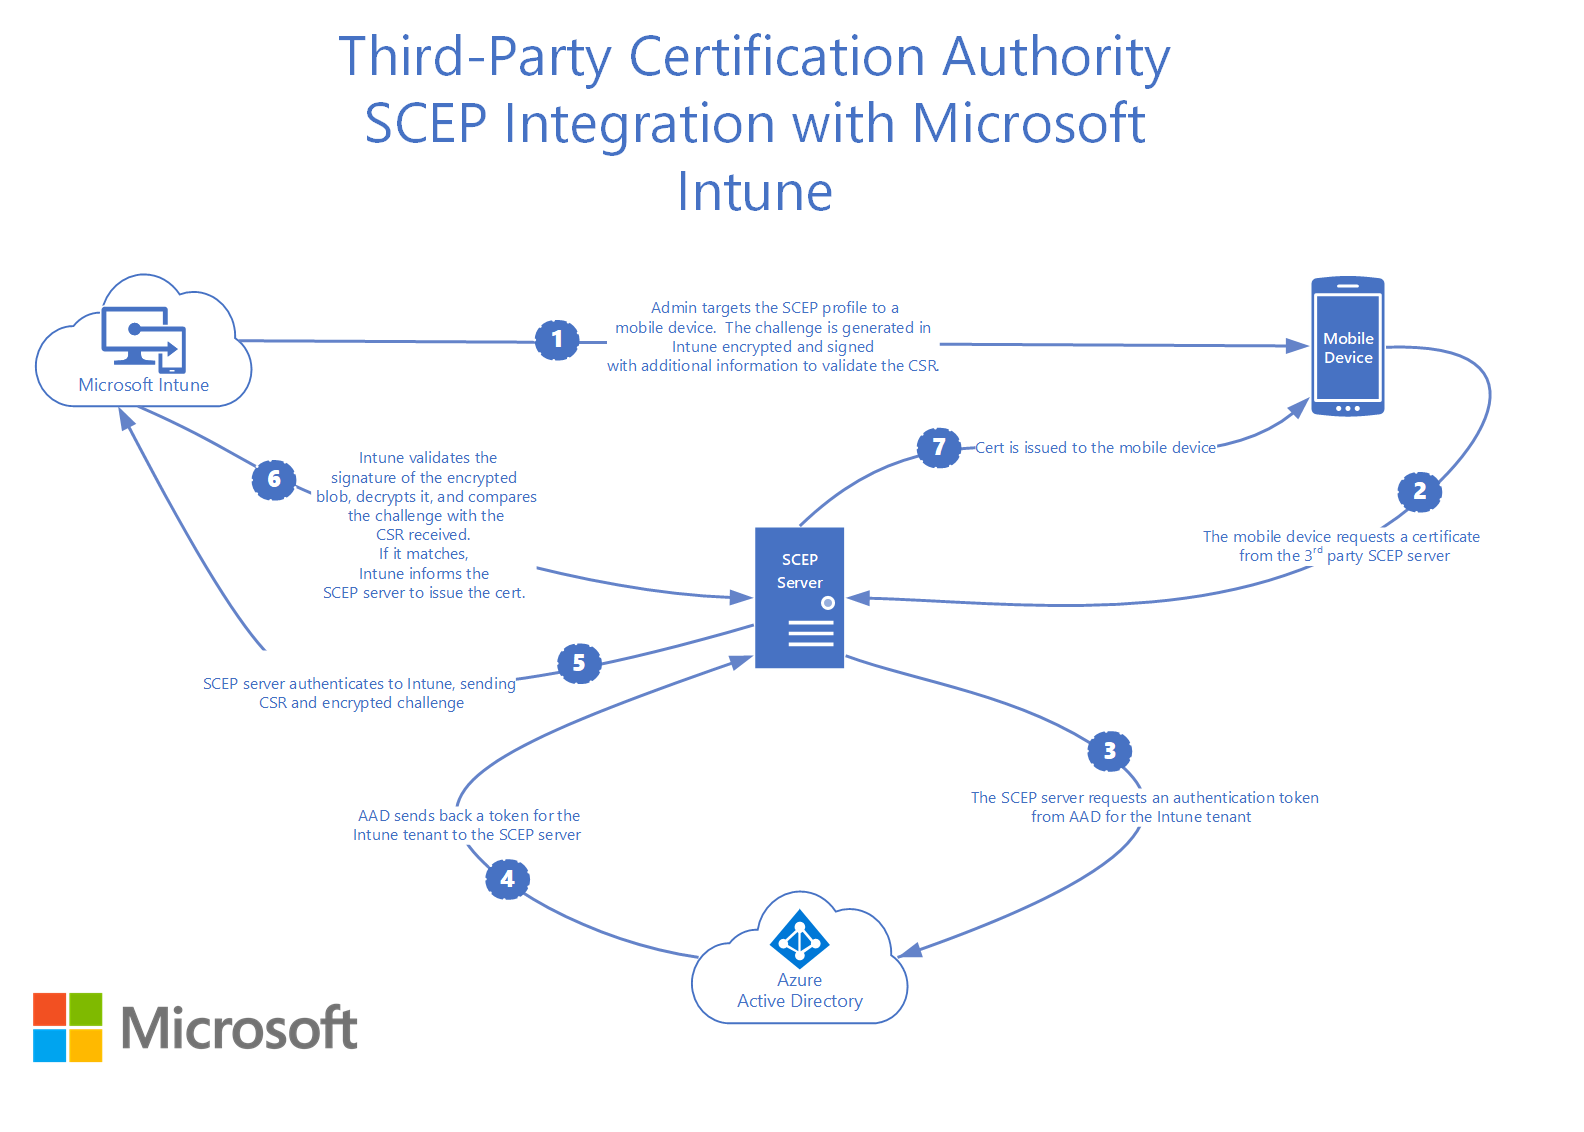
With the Intune CA Partner integration, organizations can automate their certificate lifecycle management based on the real-time status of their devices managed by Intune. This is achieved through the SCEP Protocol and an OAuth API. The API is invoked during the SCEP enrollment process to validate that the device requesting the certificate exists in your Intune organization. SecureW2 also periodically checks Intune to ensure that devices that are deleted, have changed permissions, or have fallen out of compliance have their authorization modified appropriately. The diagram created by Microsoft below illustrates the enrollment process.
This document describes the steps to integrate SecureW2 PKI as a third-party CA with Microsoft Intune to create and auto-enroll certificates for Microsoft Intune Managed Devices using the Simple Certificate Enrollment Protocol (SCEP).
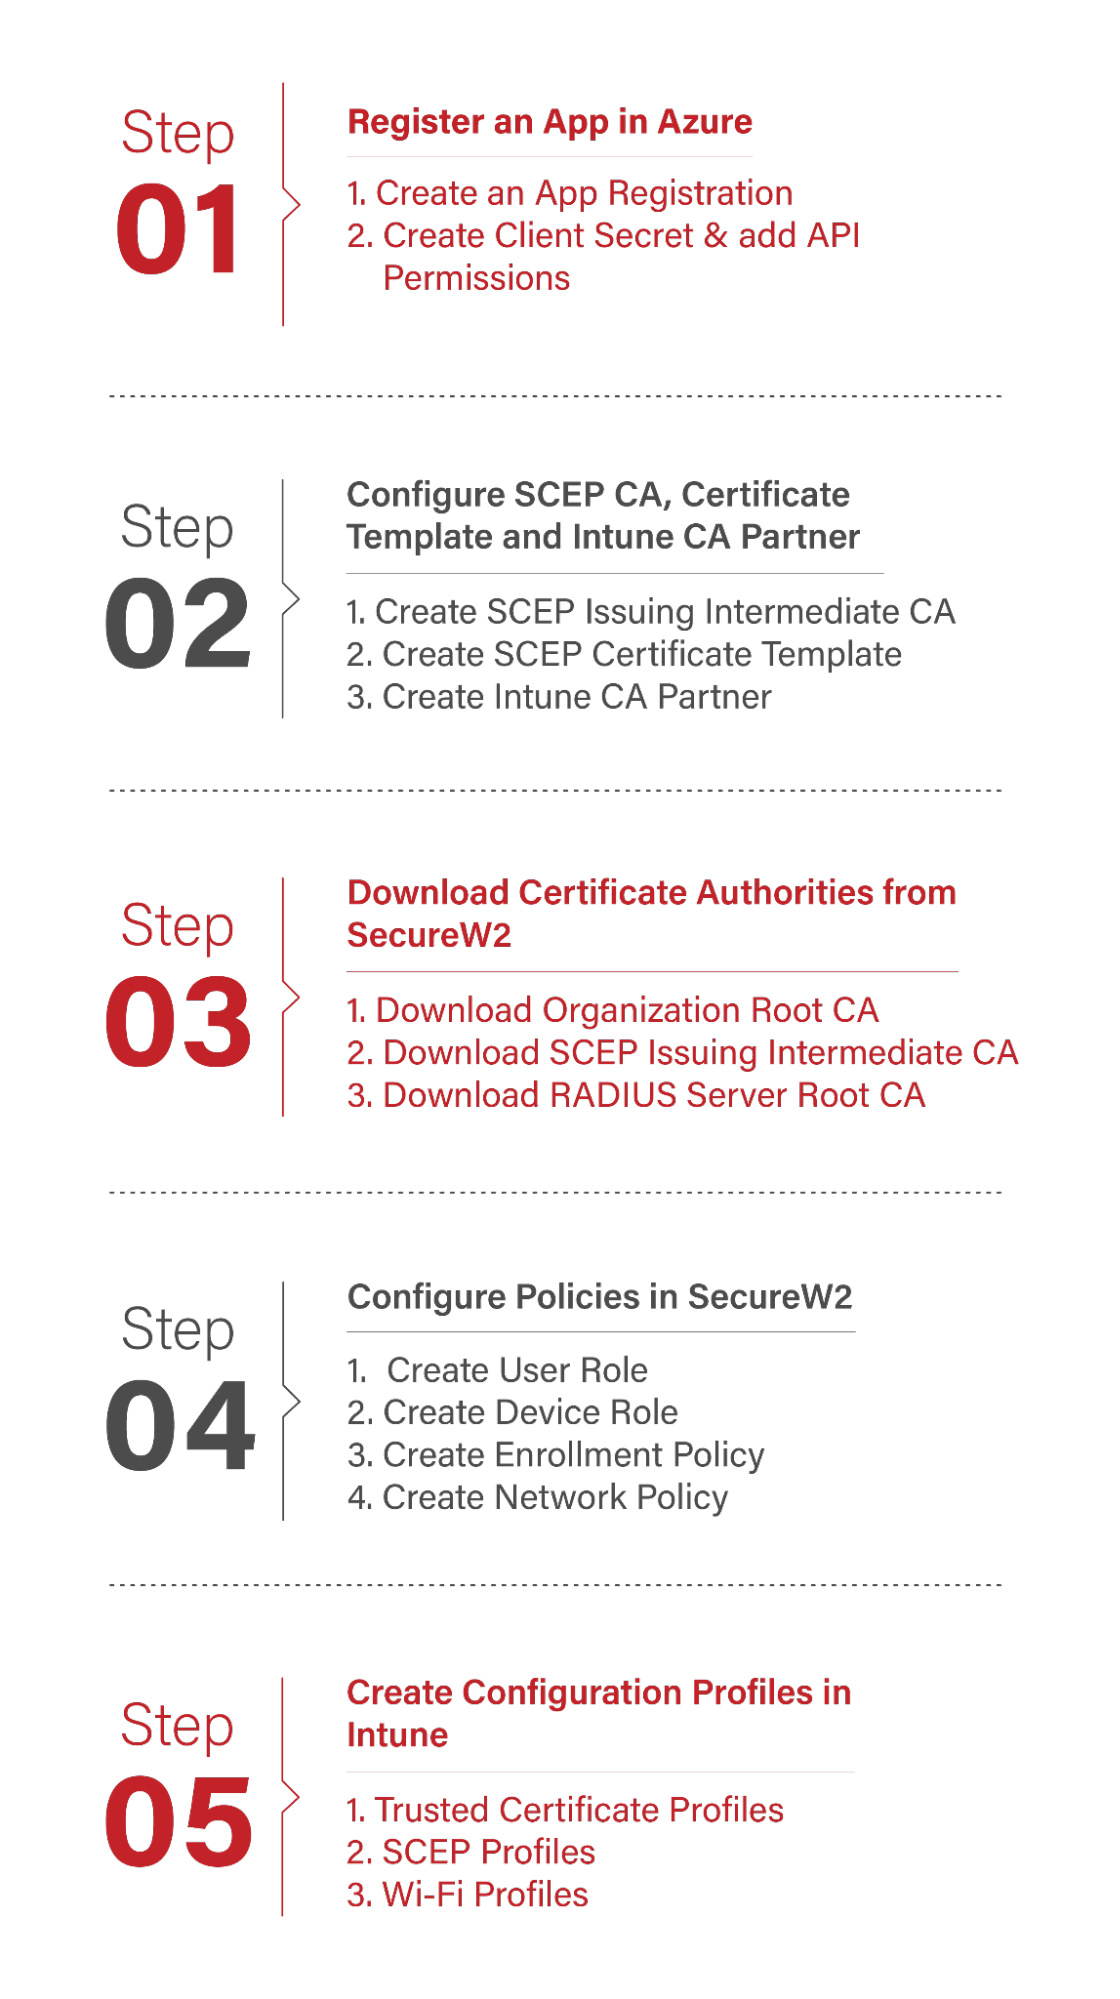
The below flowchart describes the high-level steps to set up Microsoft Intune to allow devices to enroll for digital certificates using the SCEP:
NOTE: When a device, that has been enrolled through the Intune third-party CA integration is removed from Intune, the corresponding certificates are automatically revoked in the JoinNow Management Portal.
4.1 Creating a New Application
To create an app in Azure to communicate with the CA Intune core provider, follow the given steps:
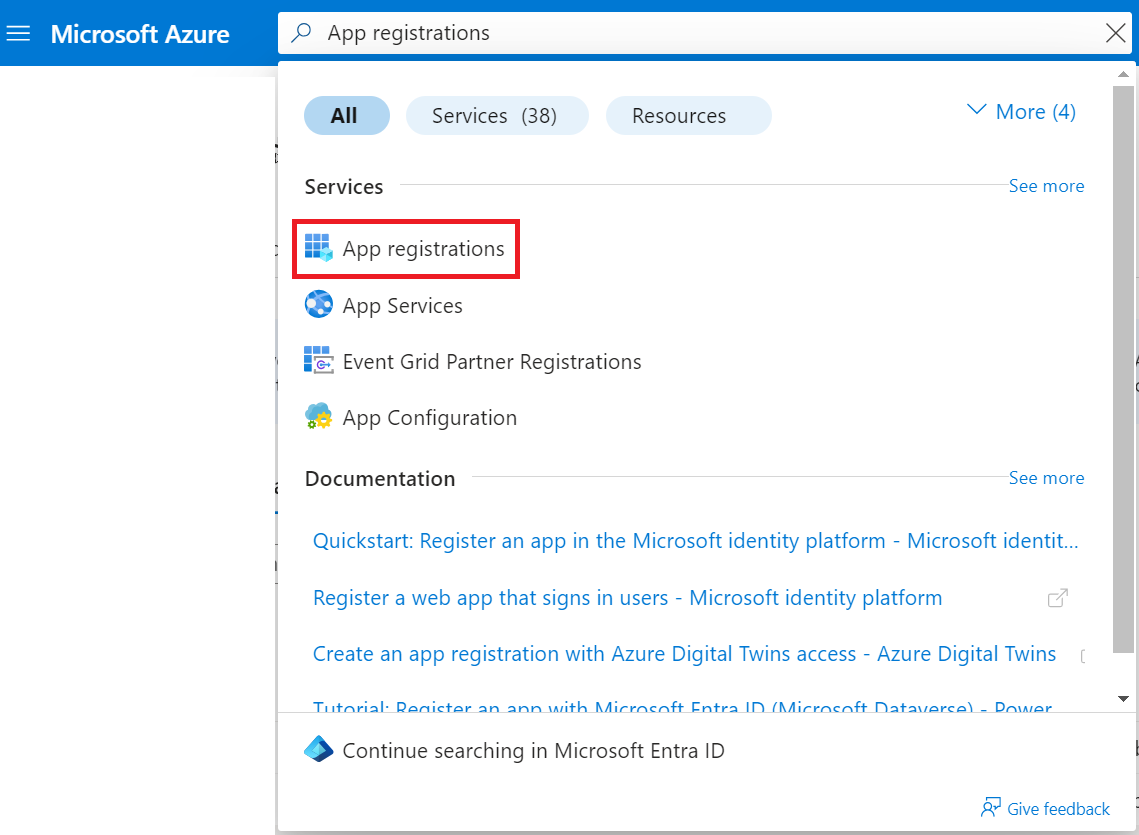
- Log in to the Azure portal.
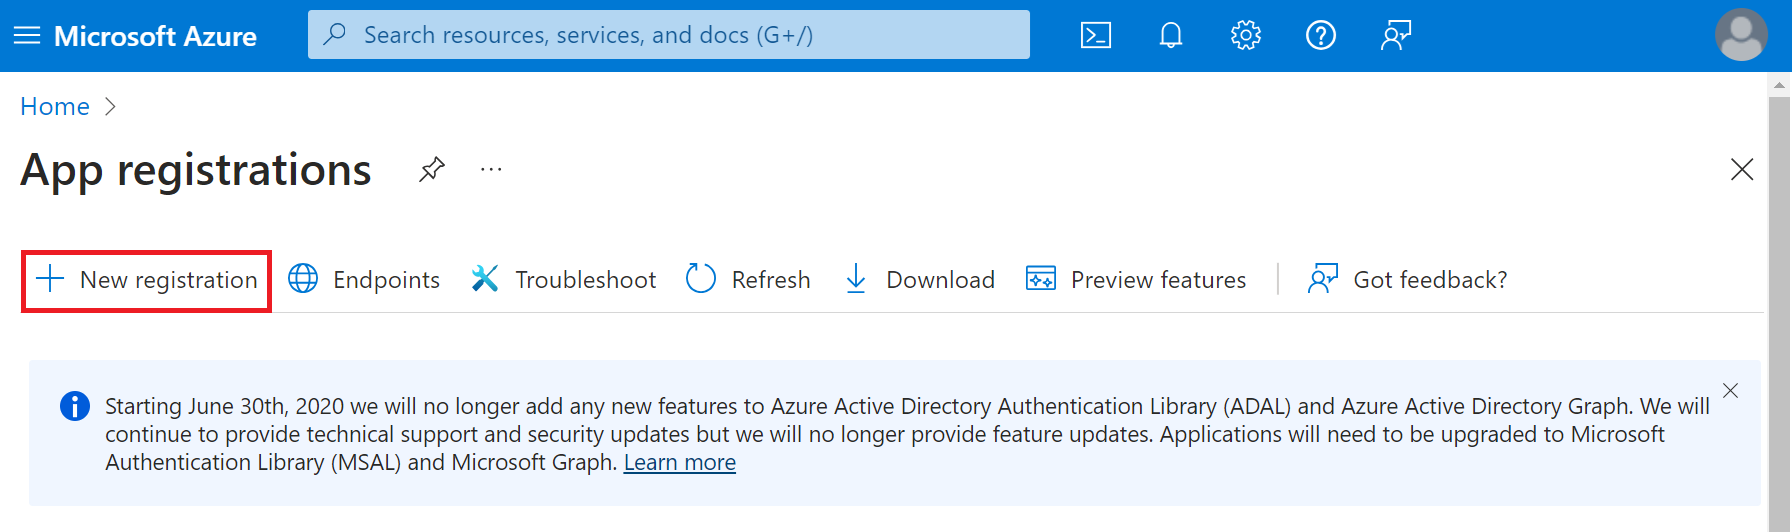
- Go to App registrations.

- Click New registration.

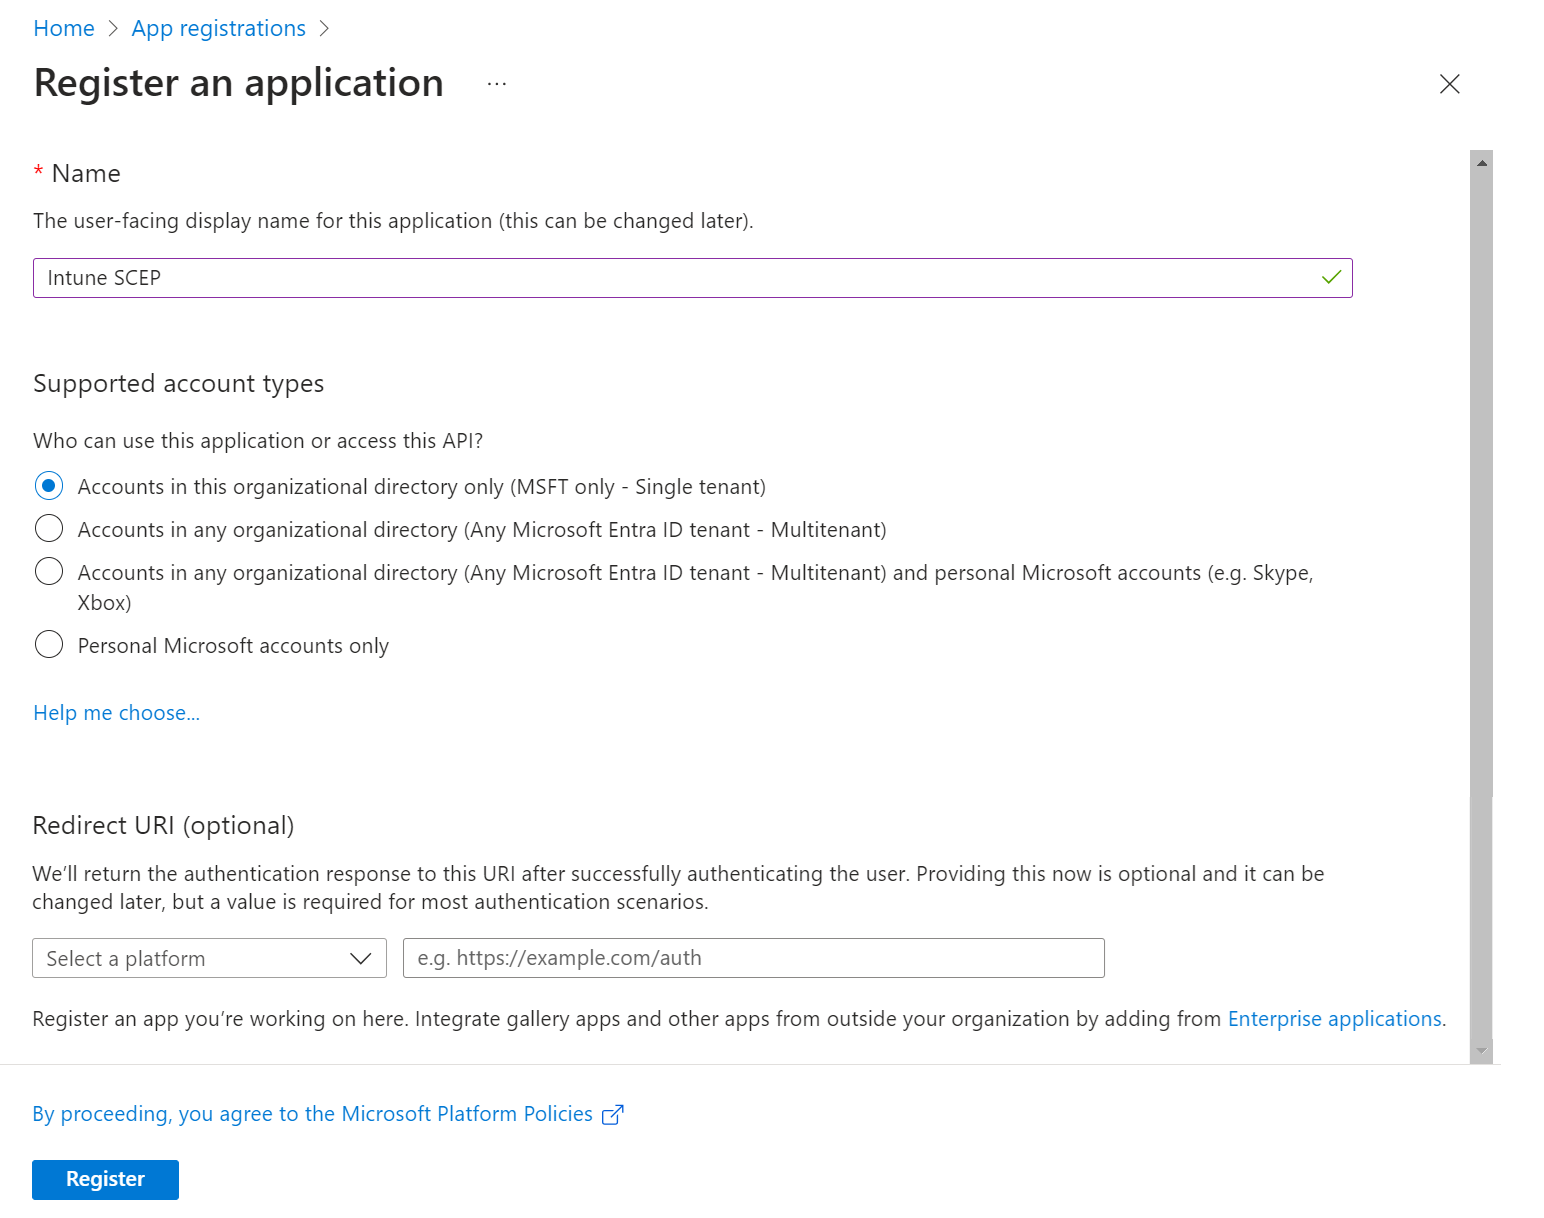
- On the Register an application page, enter the application’s name in the Name field.
- In the Supported account types section, specify who can use the application by selecting any one of the following options:
- Accounts in this organizational directory only (MSFT only – Single tenant)
- Accounts in any organizational directory (Any Microsoft Entra ID tenant– Multitenant)
- Accounts in any organizational directory (Any Microsoft Entra ID tenant– Multitenant) and personal Microsoft accounts (e.g., Skype, Xbox)
- Personal Microsoft accounts only

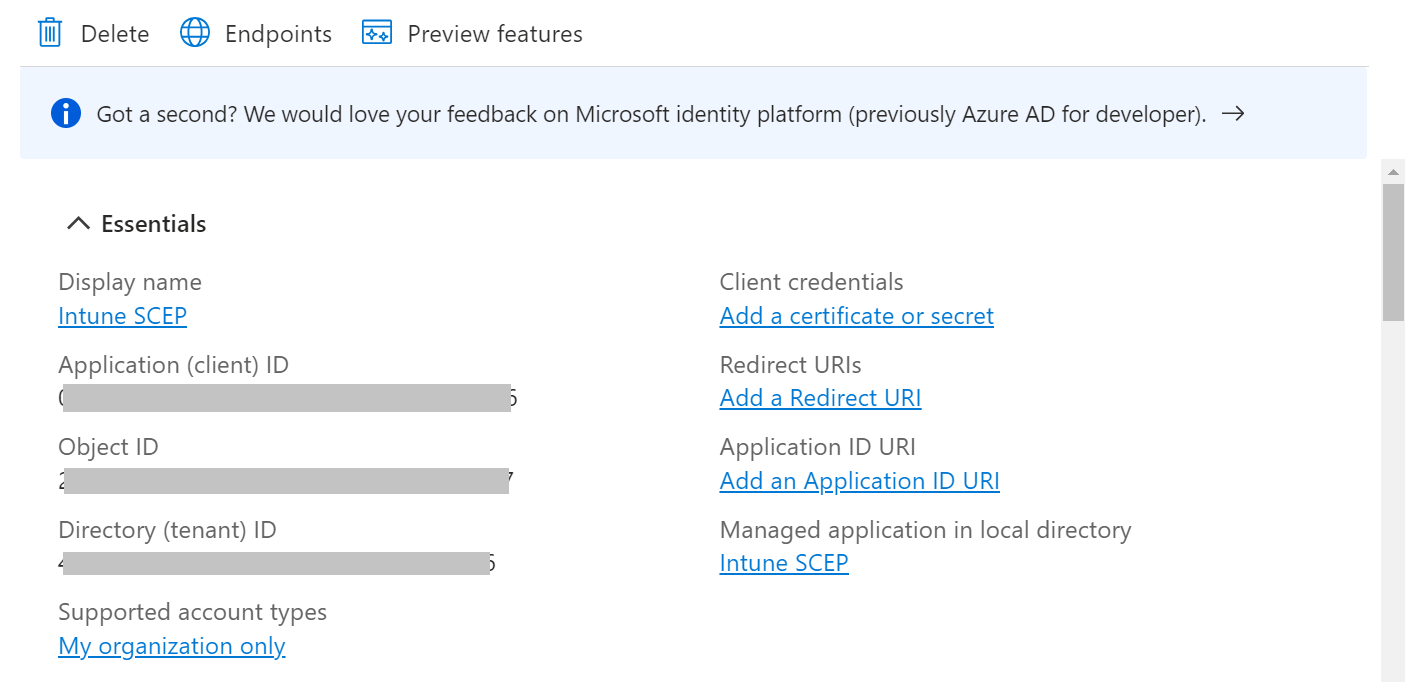
- Click Register. The following screen is displayed.

- Copy the Application (client) ID, Object ID, and Directory (tenant) ID values to your console. These values are required to create an Intune core provider in the JoinNow Management Portal (see the Creating an Intune CA Device Management Platform section).
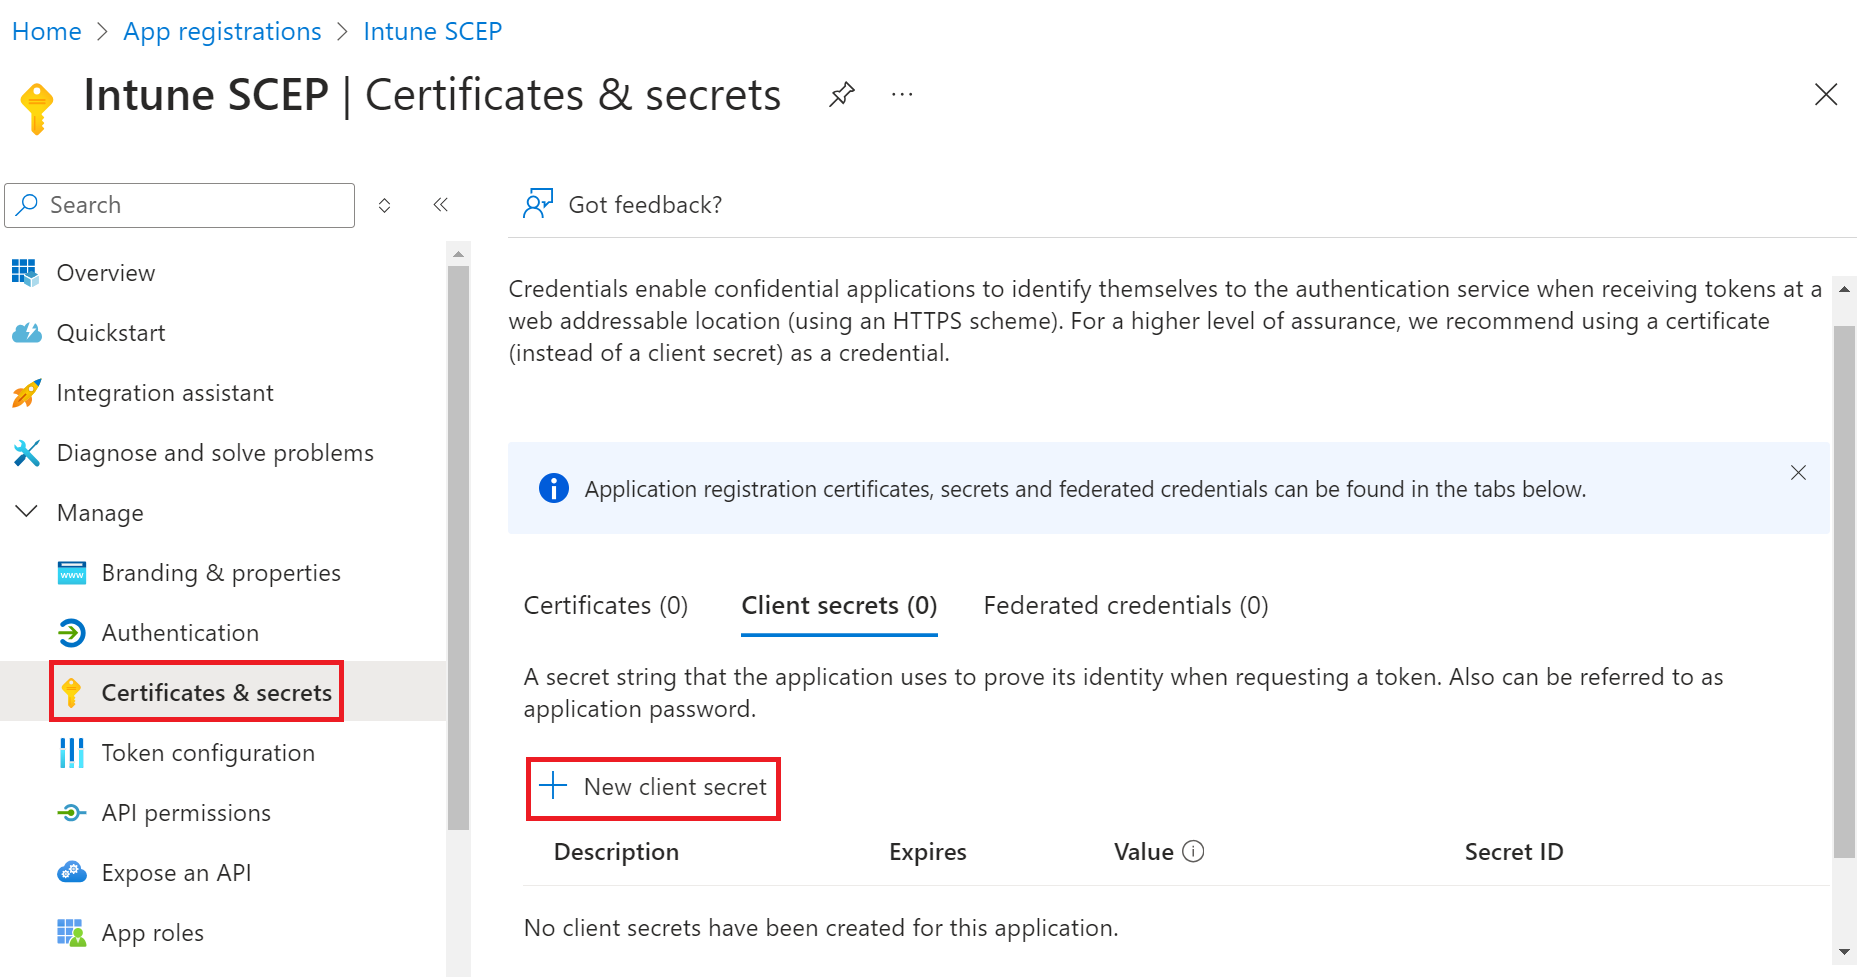
4.2 Creating a Client Secret
- On the left pane, go to Manage and click Certificates & secrets.
- Click New client secret.

- In the Add a client secret pop-up window, enter a description of the client secret in the Description field.
- From the Expires drop-down list, select the expiration date of the client secret.

- Click Add.
- The client’s secret is displayed under the Value column.

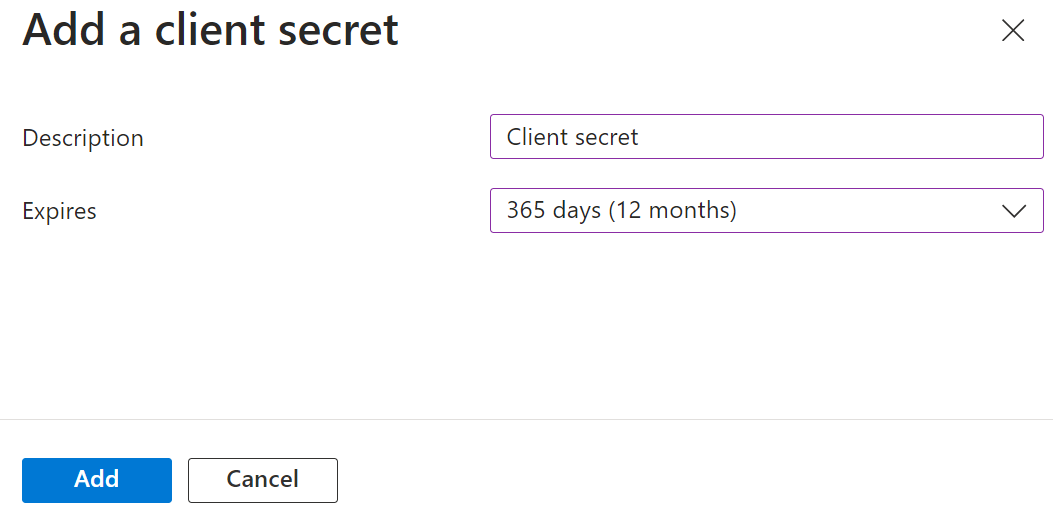
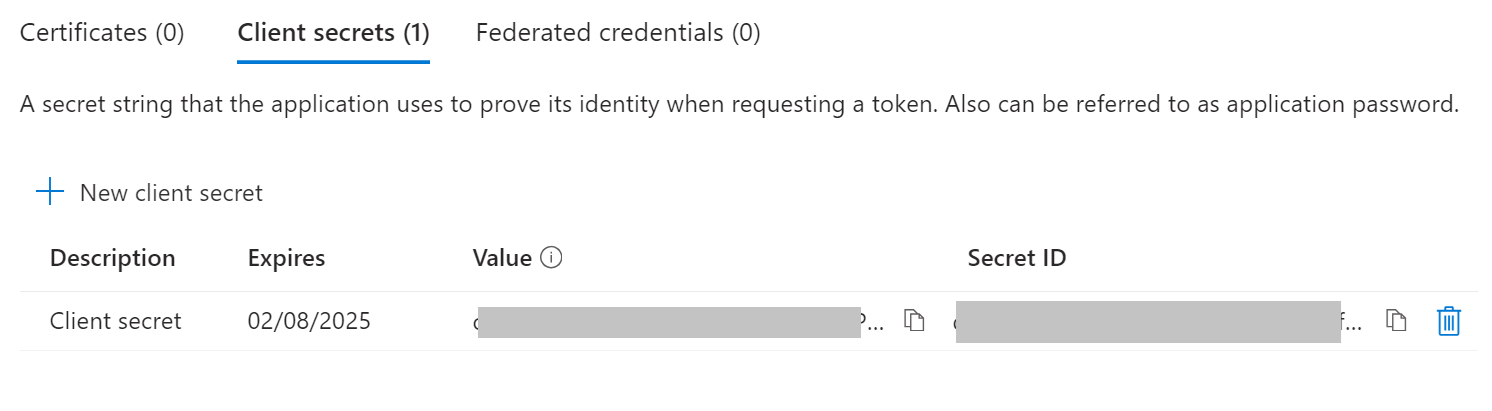
NOTE: Ensure you save the client secret on your console properly, as this secret is non-recoverable.
4.3 Adding API Permissions
To provide API permission for SecureW2 to access the Entra ID, follow the given steps:
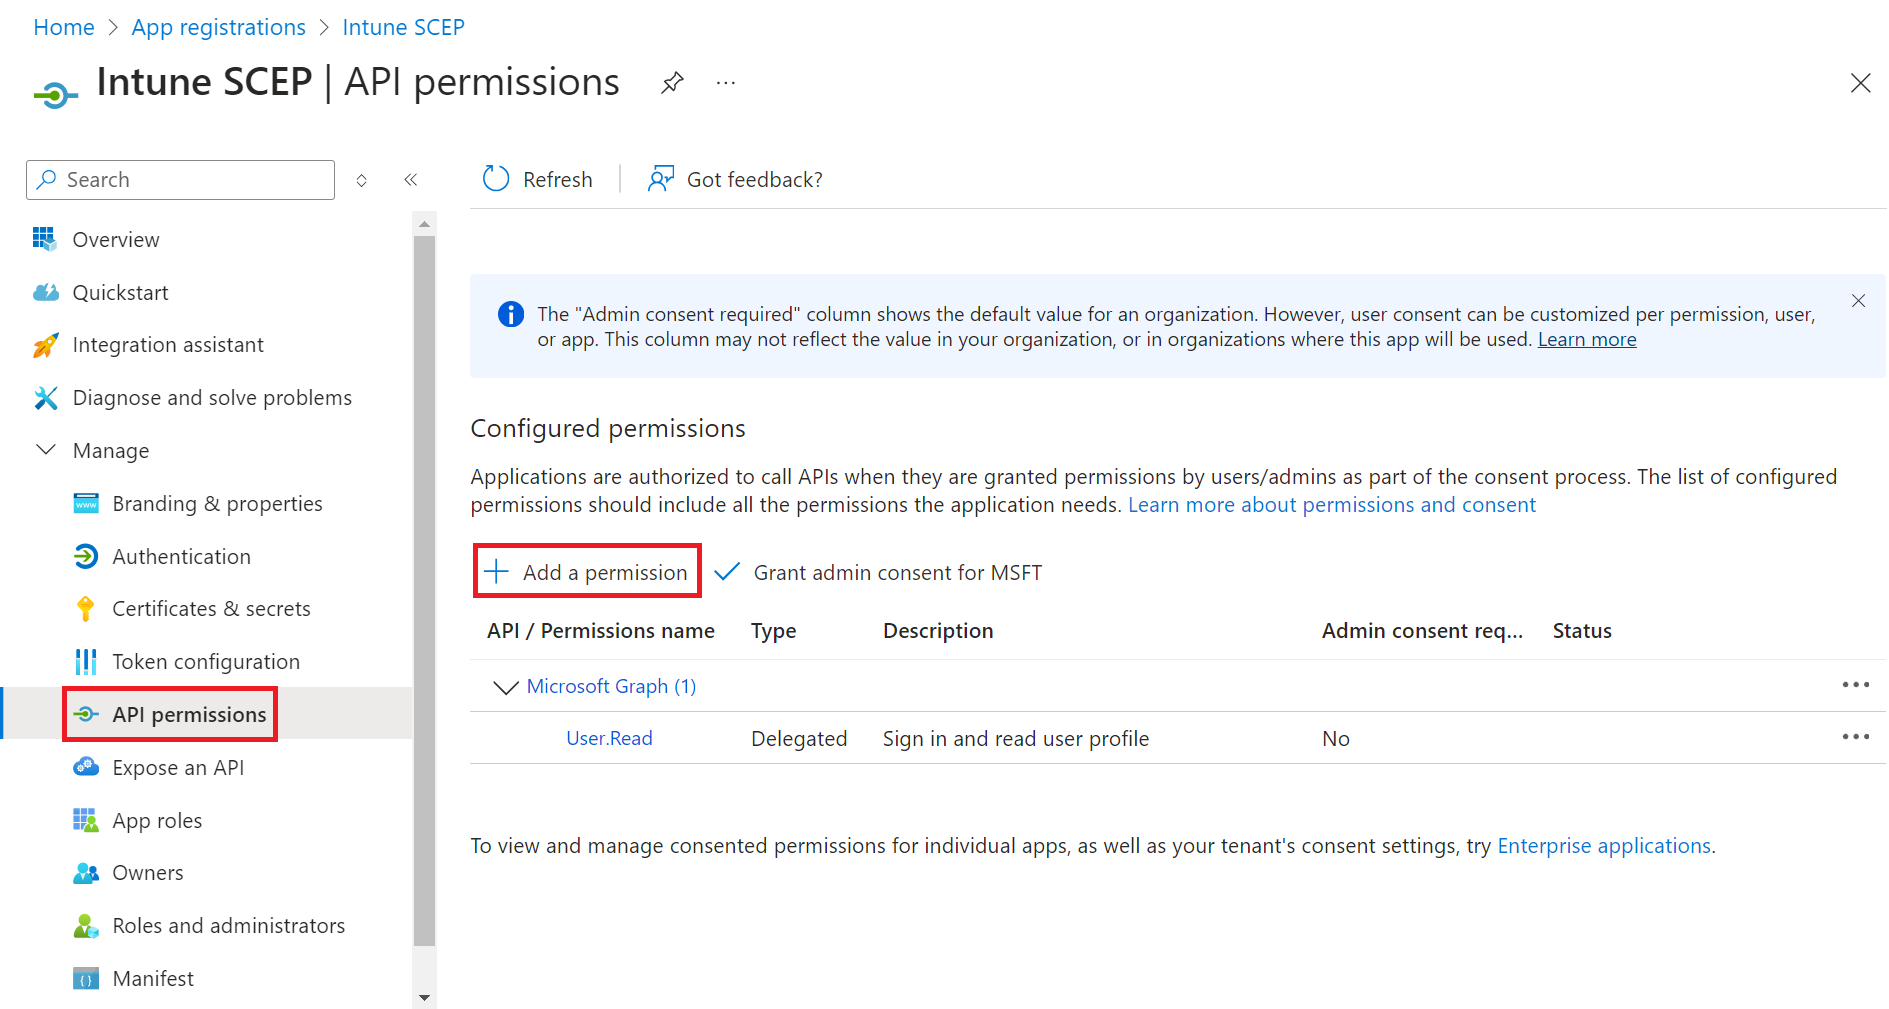
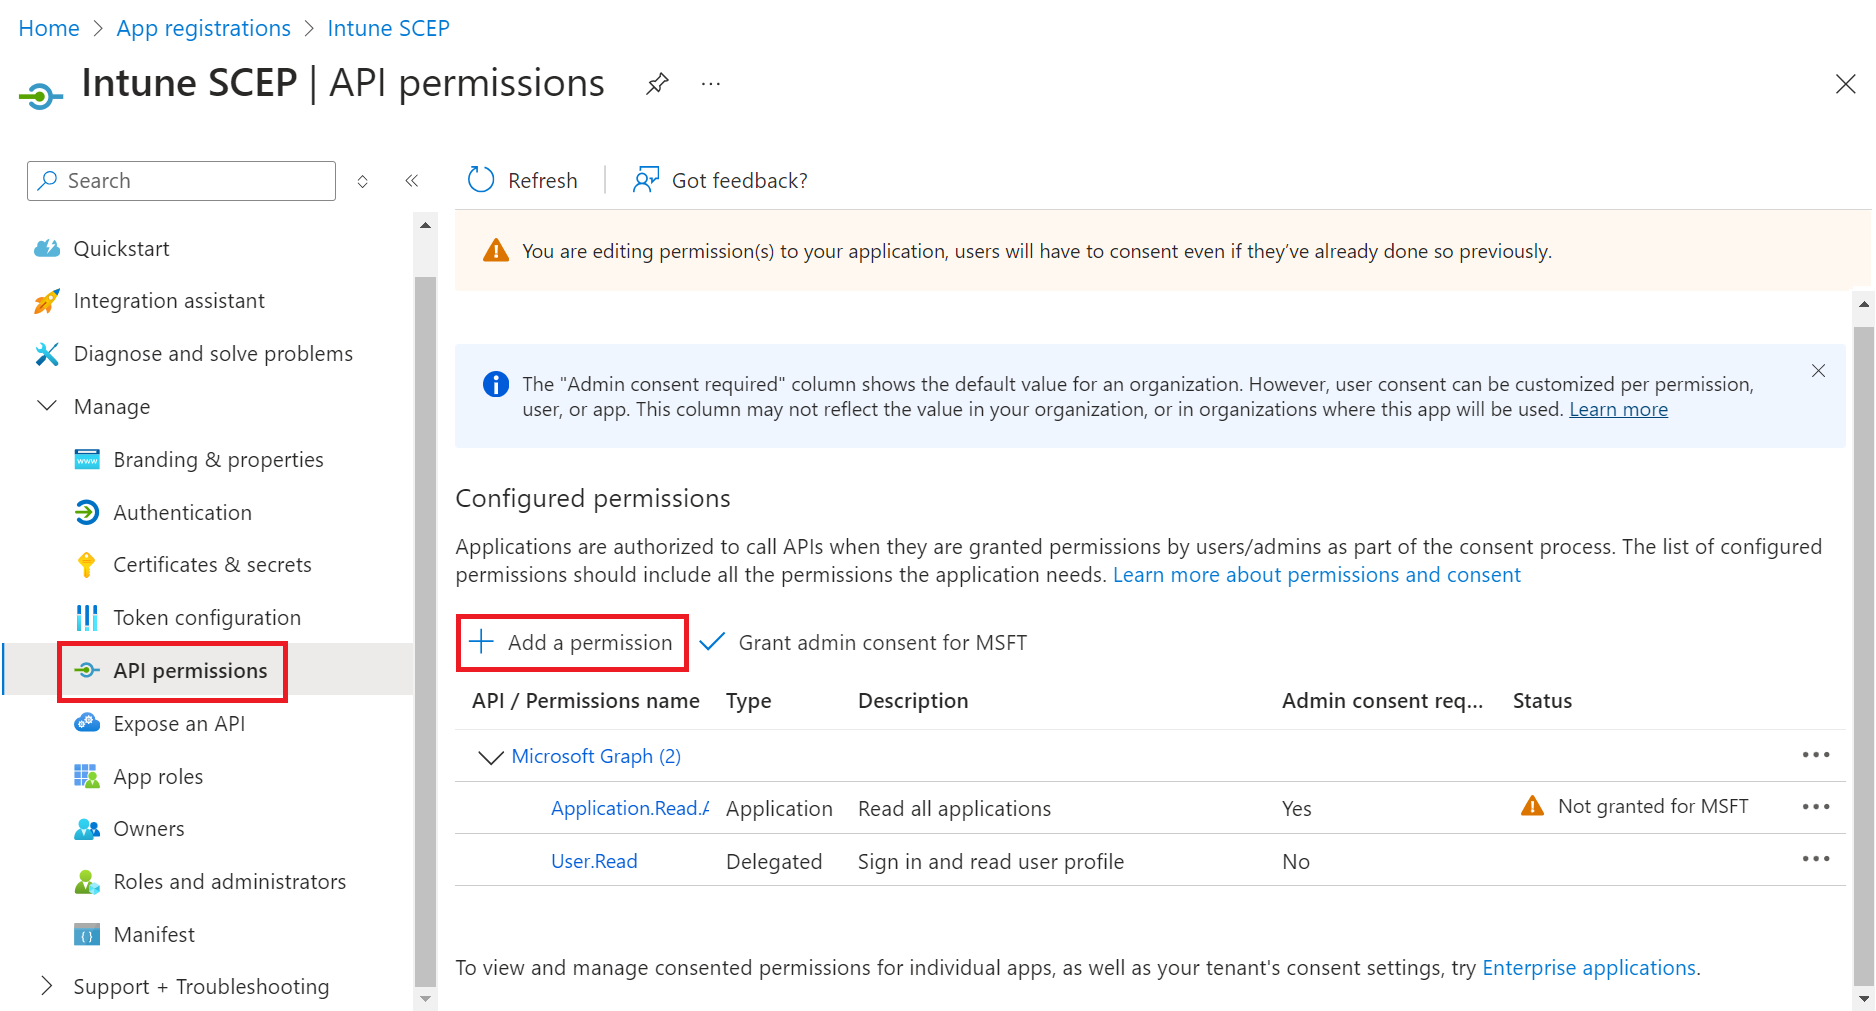
- On the left pane, go to Manage and select API Permissions.
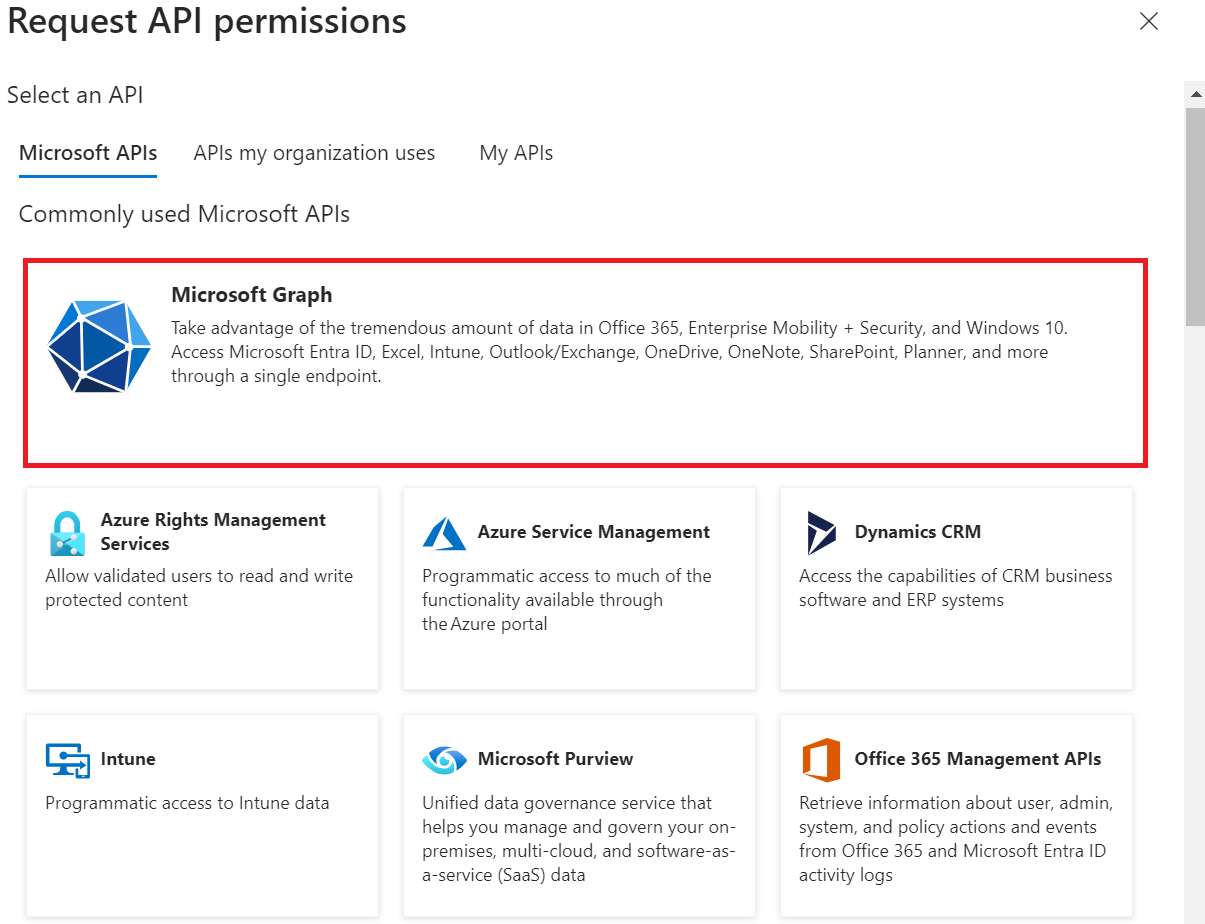
- On the API permissions screen, click Add a permission.

- Select Microsoft Graph.

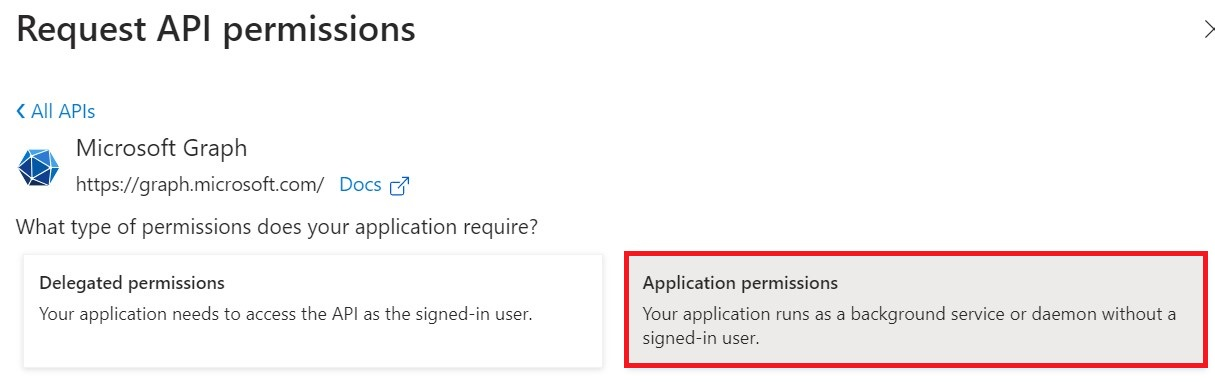
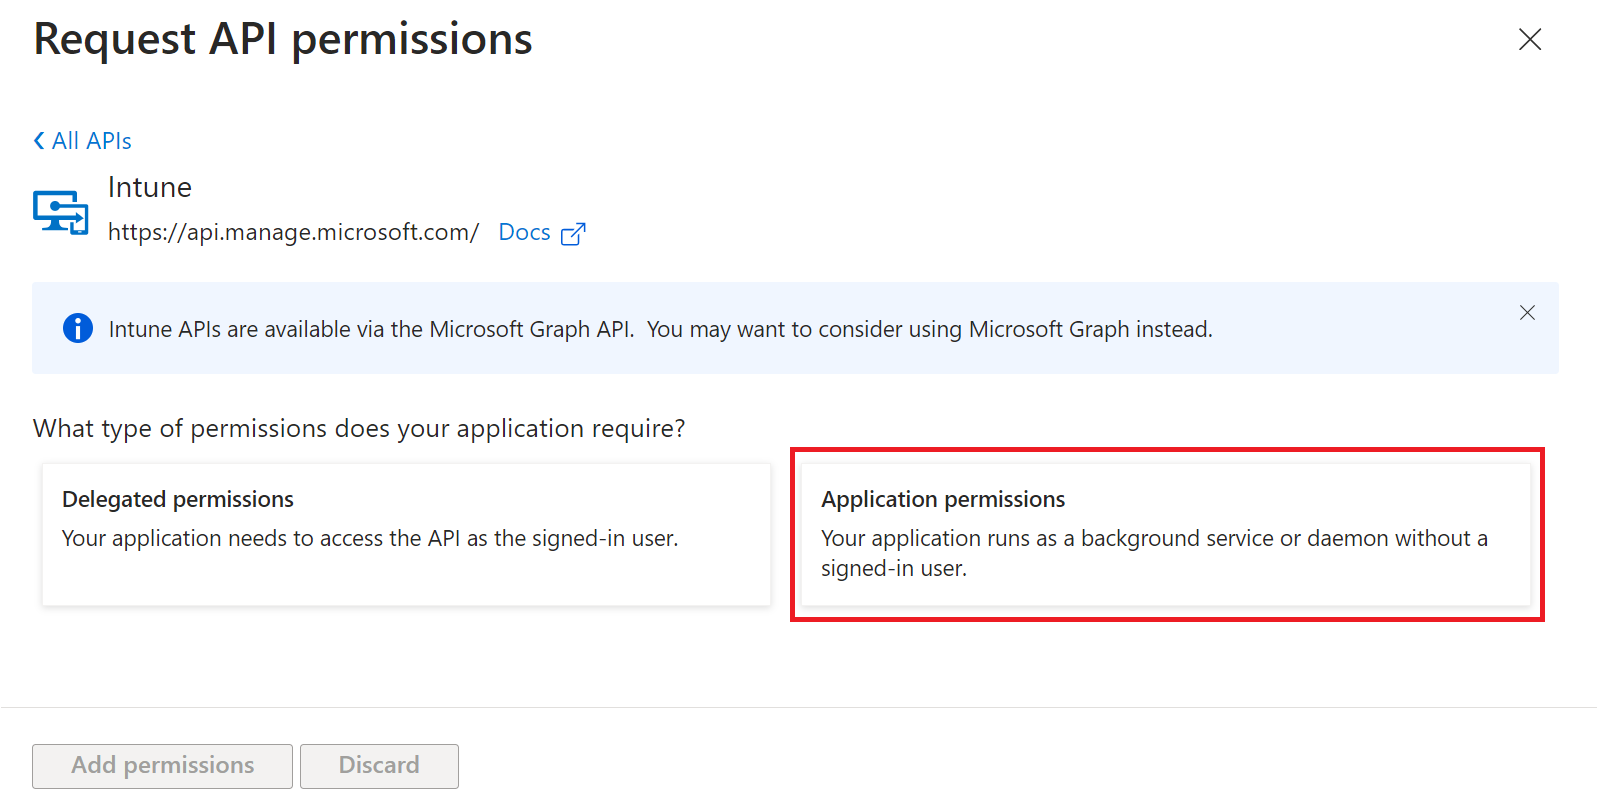
- Select Application permissions.

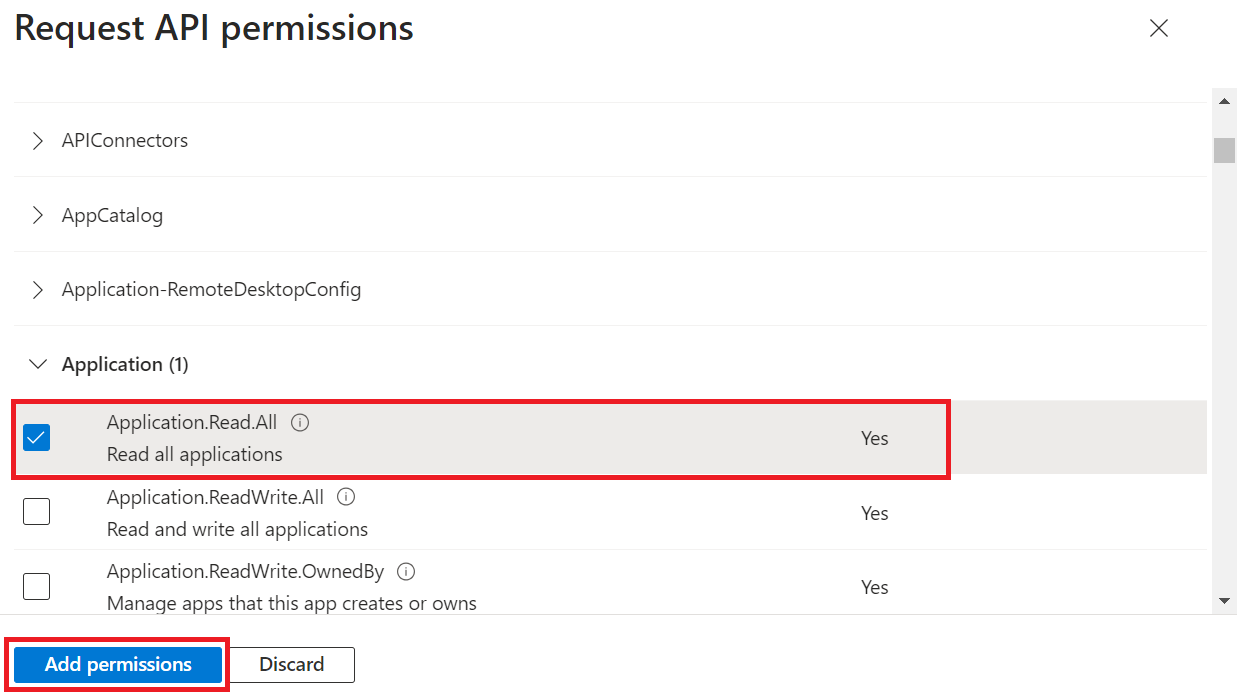
- In the Select permissions section, from the Application drop-down menu, select Application.Read.All.

- Click Add permissions.
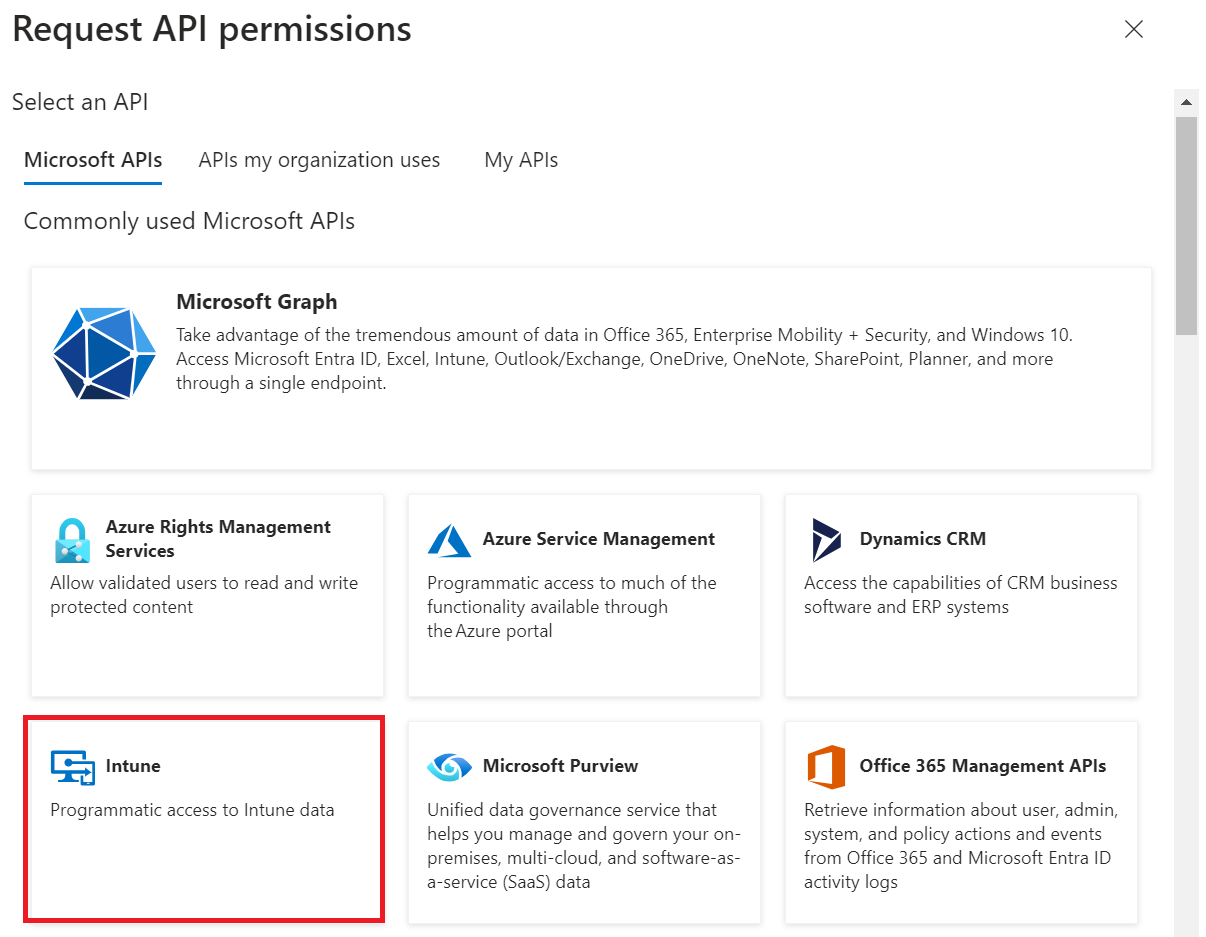
- Click Add a permission.

- Select Intune.

- Select Application permissions.

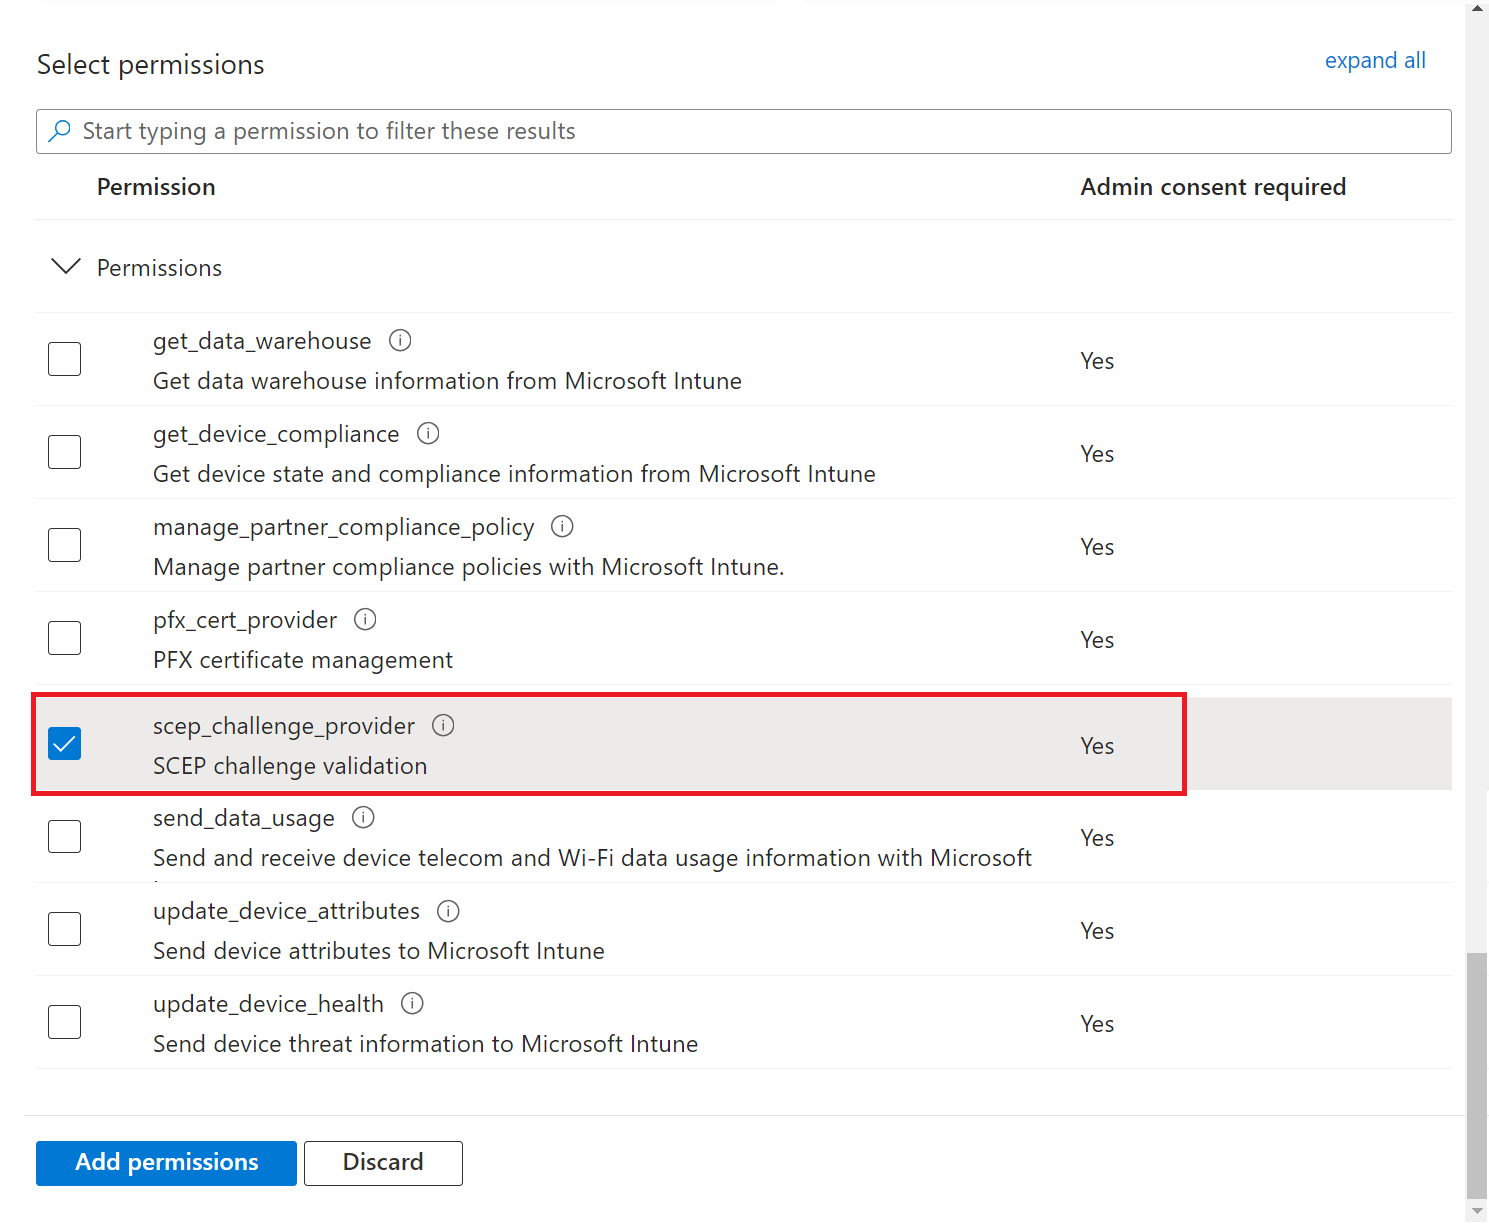
- In the Select permissions section, from the Permissions drop-down menu, select scep_challenge_provider for certificate request validation, and then click Add permissions.

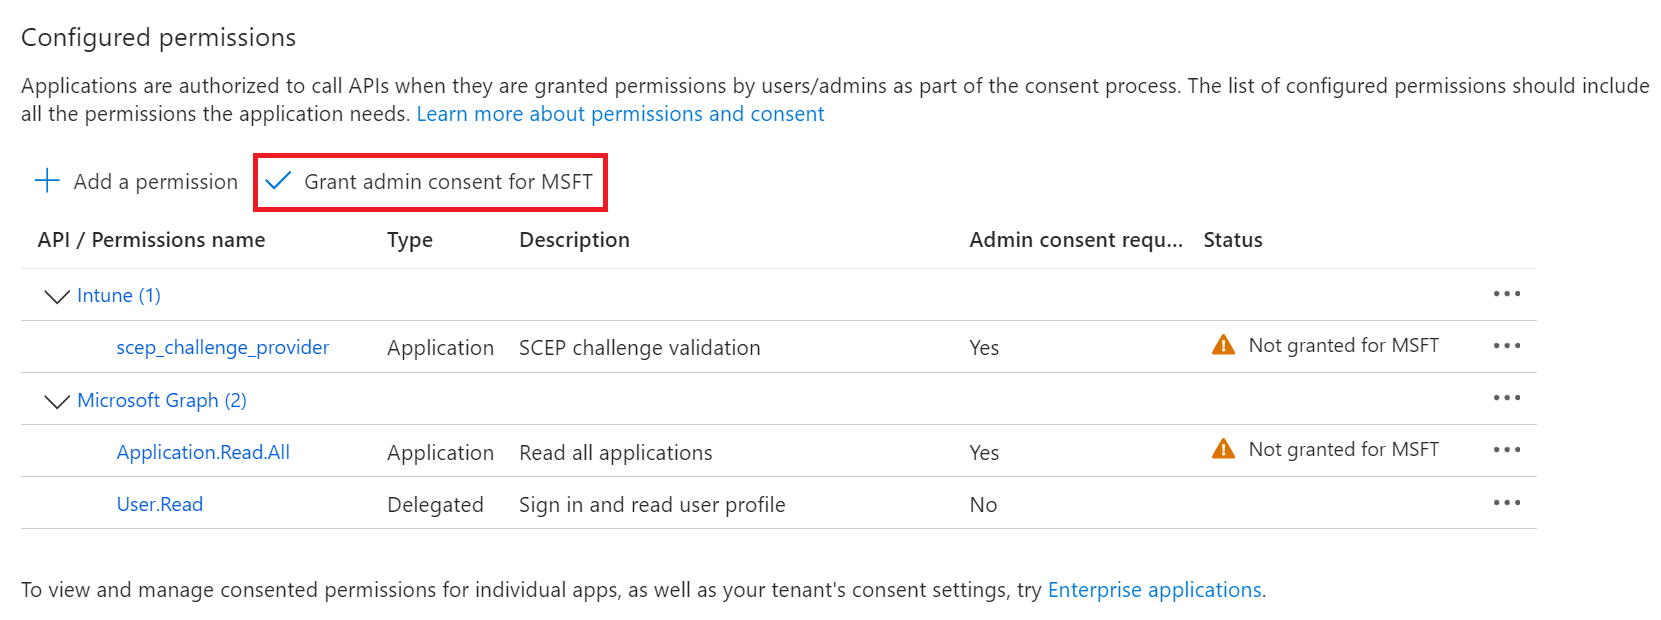
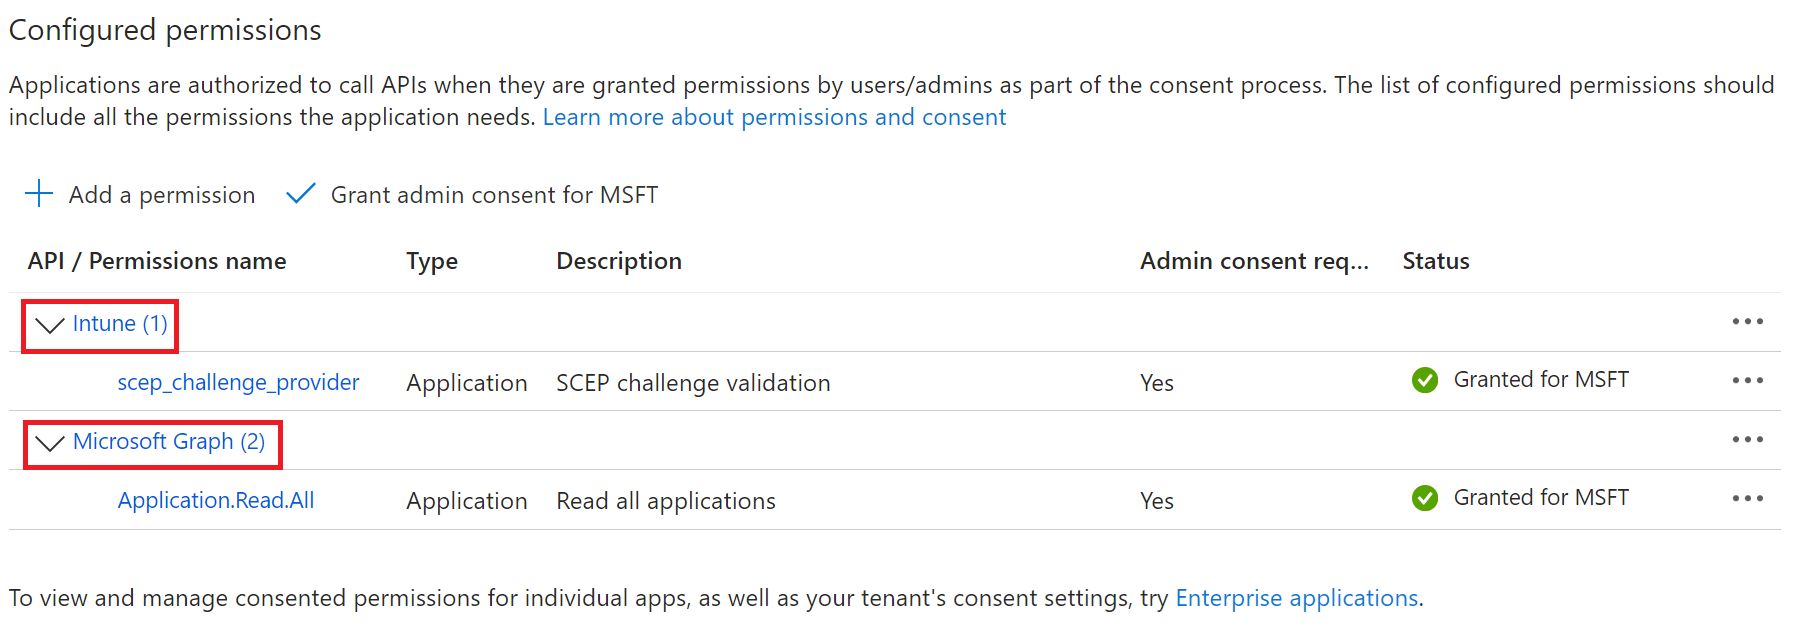
- After adding the permissions, click Grant admin consent for {your organization} to grant consent for the requested permissions.

- In the Grant admin consent confirmation pop-up window, click Yes.

- The configured APIs are displayed on the Configured permissions page.


5.1 Getting Started
The Getting Started Wizard creates everything you need for 802.1x, including a RADIUS server, CAs, network profiles, a Landing page for onboarding BYOD devices if desired, and all the default network settings required for 802.1x.
NOTE: If you have configured SecureW2 for your network, skip this section.
- Log in to the JoinNow Management Portal.
- Navigate to Device Onboarding > Getting Started.
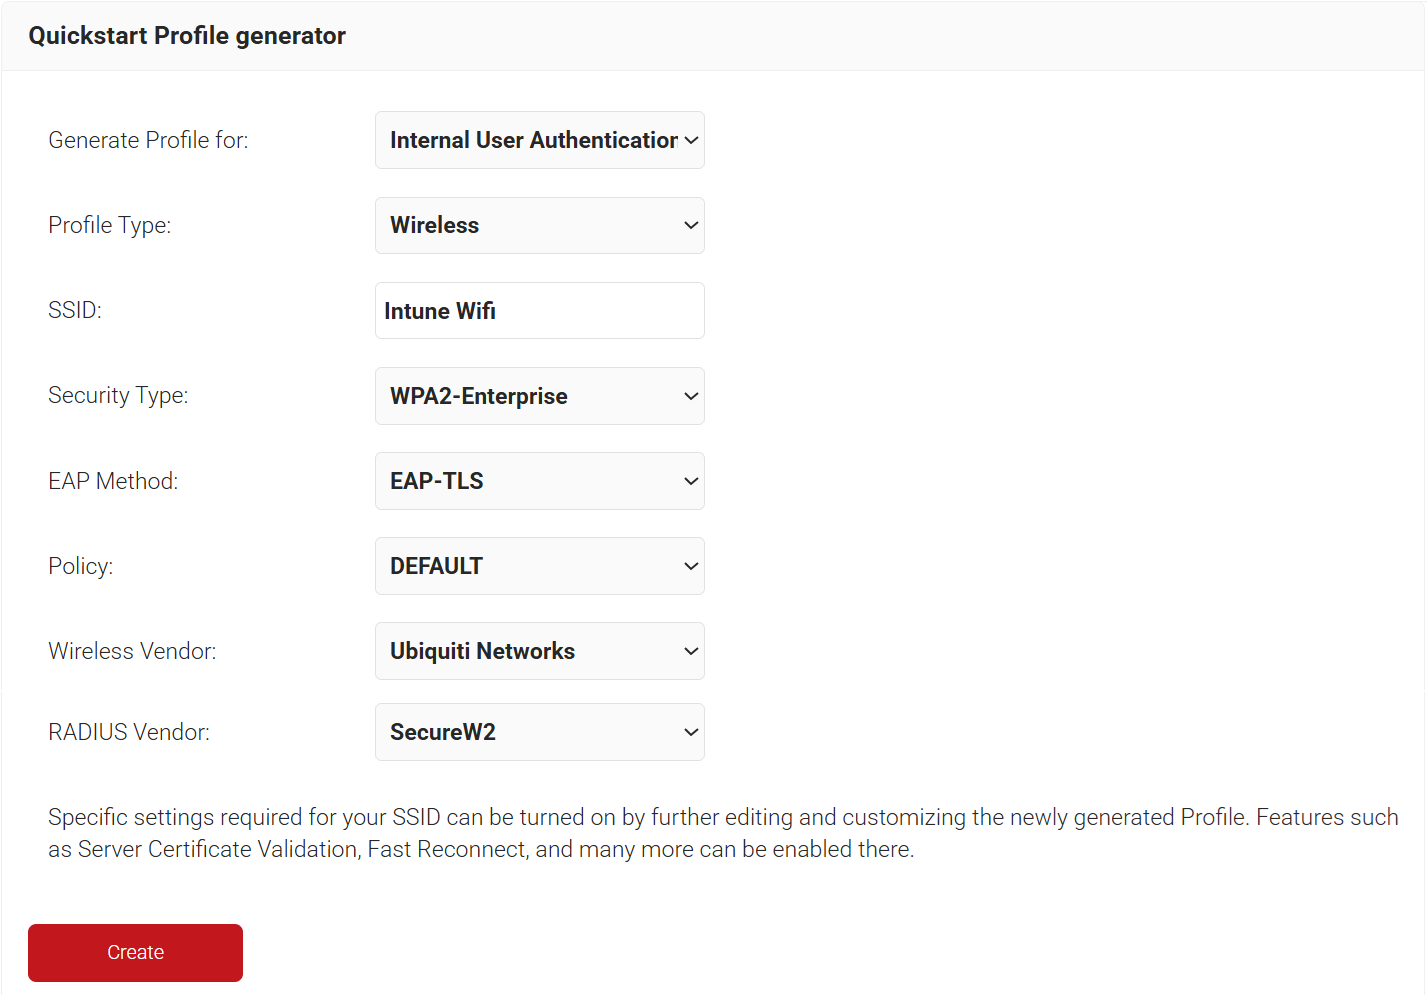
- On the Quickstart Network Profile generator page, from the Generate Profile for drop-down list, select Internal User Authentication.
- From the Profile Type drop-down list, select Wireless.
- In the SSID field, enter a suitable name for the SSID.
- From the Security Type drop-down list, select WPA2-Enterprise.
- From the EAP Method drop-down list, select EAP-TLS.
- From the Policy drop-down list, select DEFAULT.
- From the Wireless Vendor drop-down list, select a wireless infrastructure vendor.
- From the RADIUS Vendor drop-down list, select SecureW2.

- Click Create.
NOTE: The Getting Started wizard typically takes 60-90 seconds to create the profile.
5.2 Creating an Intermediate CA for Intune SCEP Gateway Integration
As a best practice, SecureW2 recommends having a new intermediate CA for JoinNow SCEP Gateway integration with Intune. The CA that issues certificates to BYOD devices should be separate from the CA that issues certificates to managed devices because managed devices do not require email notifications. You can disable email notifications for a dedicated CA that issues certificates to Intune-managed devices.
To create a new intermediate CA:
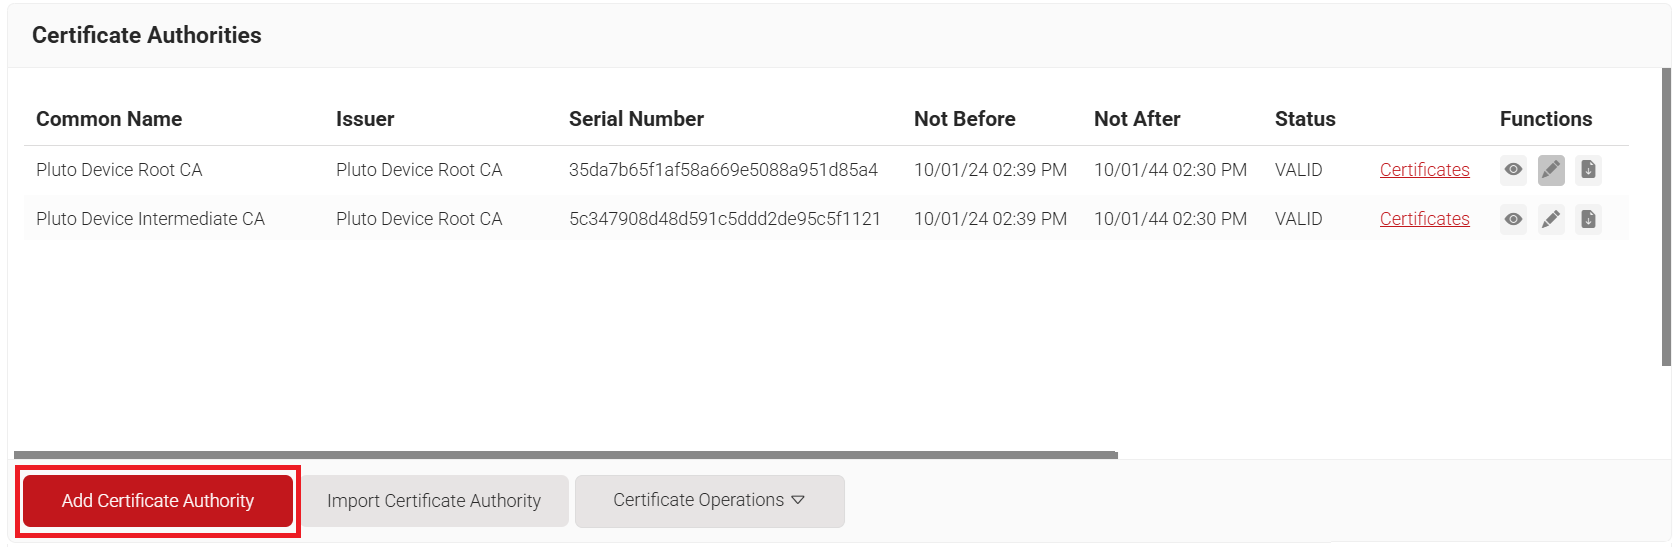
- Navigate to Dynamic PKI > Certificate Authorities.
- Click Add Certificate Authority.

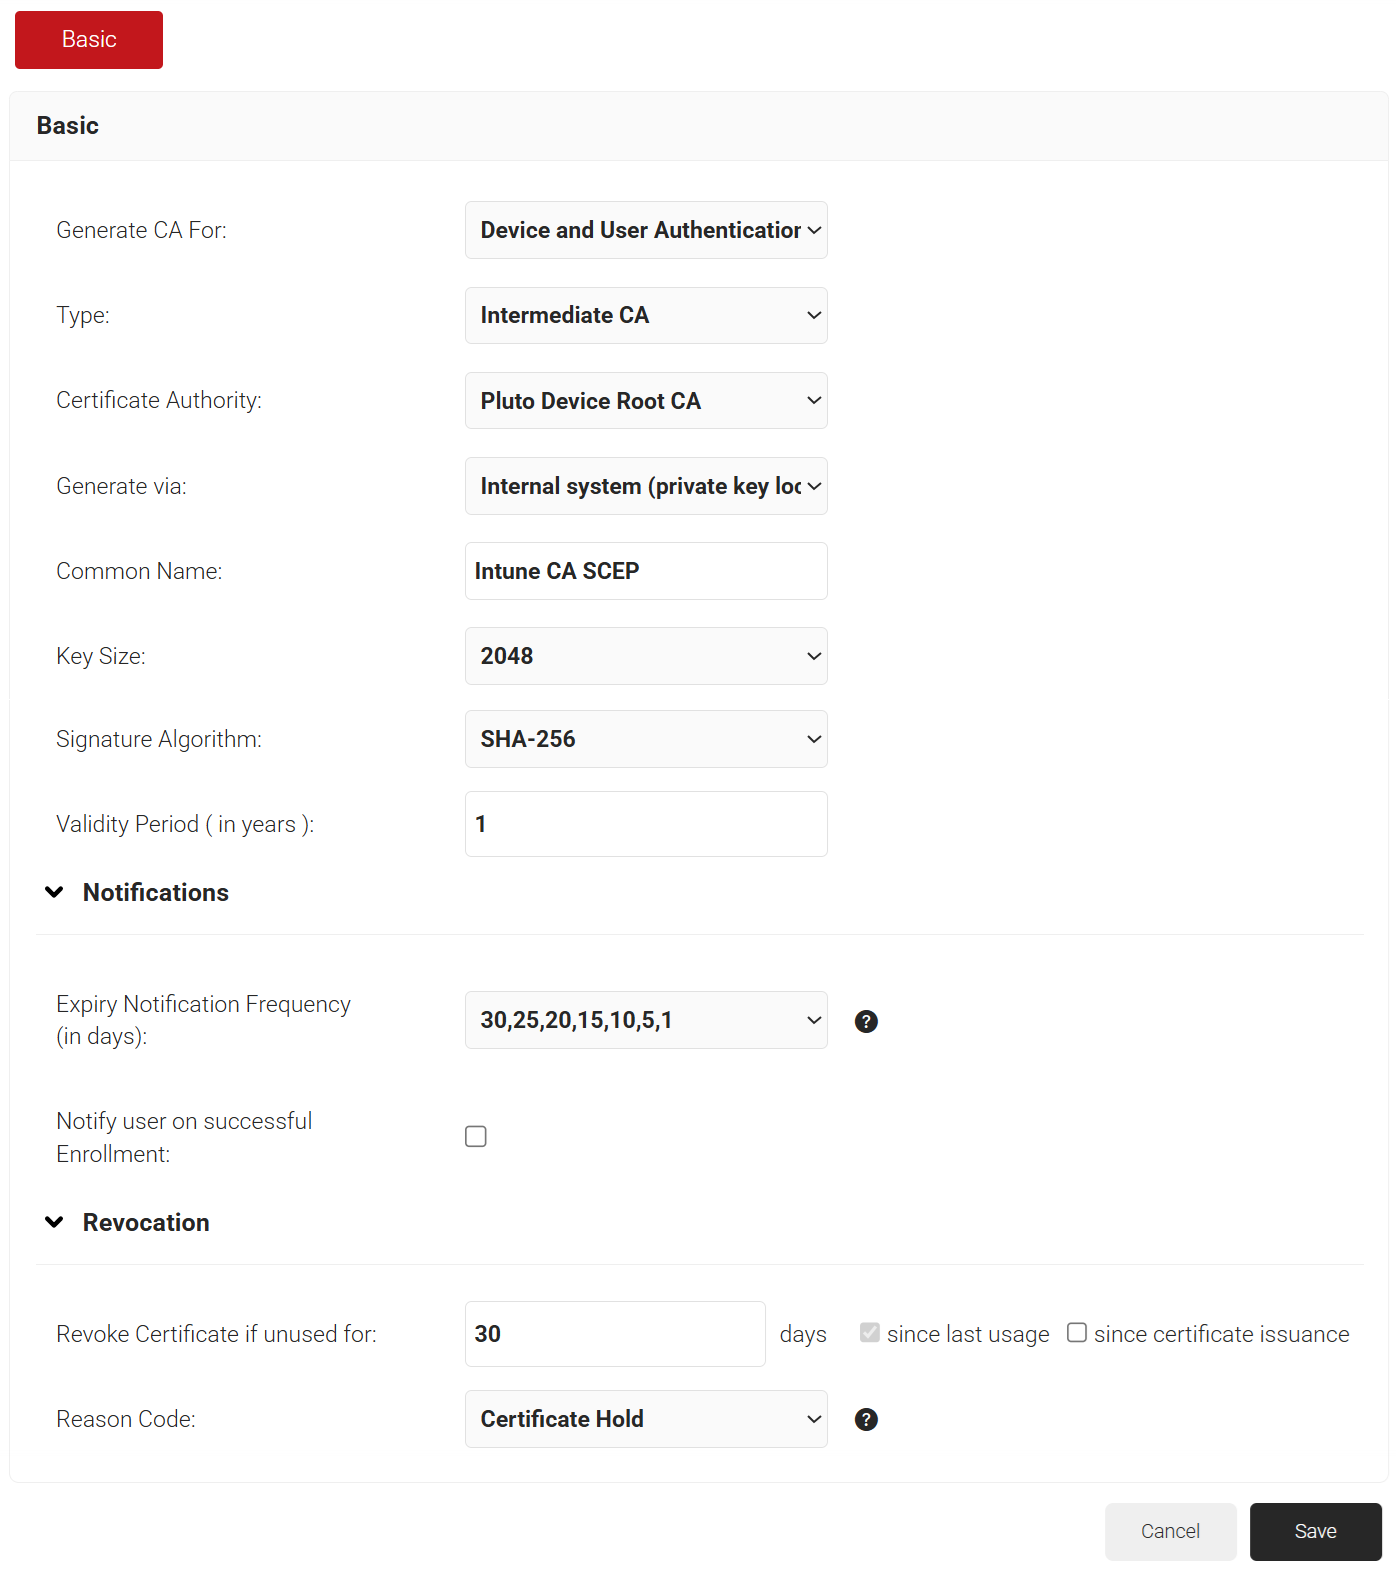
- In the Basic section, from the Generate CA For drop-down list, select the Device and User Authentication option to authenticate devices and users.
- From the Type drop-down list, select Intermediate CA.
- From the Certificate Authority drop-down list, select the default Root CA that comes with your organization.
- In the Common Name field, enter a common name for the CA certificate. SecureW2 recommends a name that includes “SCEP.”
- From the Key Size drop-down list, select 2048 for the CA certificate key pair.
- From the Signature Algorithm drop-down list, select SHA-256 as the signature algorithm for the certificate signing request.
- In the Validity Period field, enter the validity period for the Intermediate CA in terms of the number of years.
- In the Notifications section:
- From the Expiry Notification Frequency (in days) drop-down list, select the frequency interval for which a certificate expiration notification should be sent to users.
- Select the Notify user on successful Enrollment checkbox to notify users after a successful enrollment.
- If the RFC has a valid email address, the user will receive the certificate-issued or expired notification; otherwise, they will not receive the notification.
- In the Revocation section:
- In the Revoke Certificate if unused for field, select the number of days after which an unused certificate can be revoked.
- Since last usage – Select this checkbox to revoke the certificate after a specified number of days if it remains unused.
- Since certificate issuance – Select this checkbox to revoke the certificate after a specified number of days after it is issued.
- From the Reason Code drop-down list, select any one of the following reasons for which the certificate is revoked.
- Certificate Hold
- AA Compromise
- Privilege Withdrawn
- Unspecified

- In the Revoke Certificate if unused for field, select the number of days after which an unused certificate can be revoked.
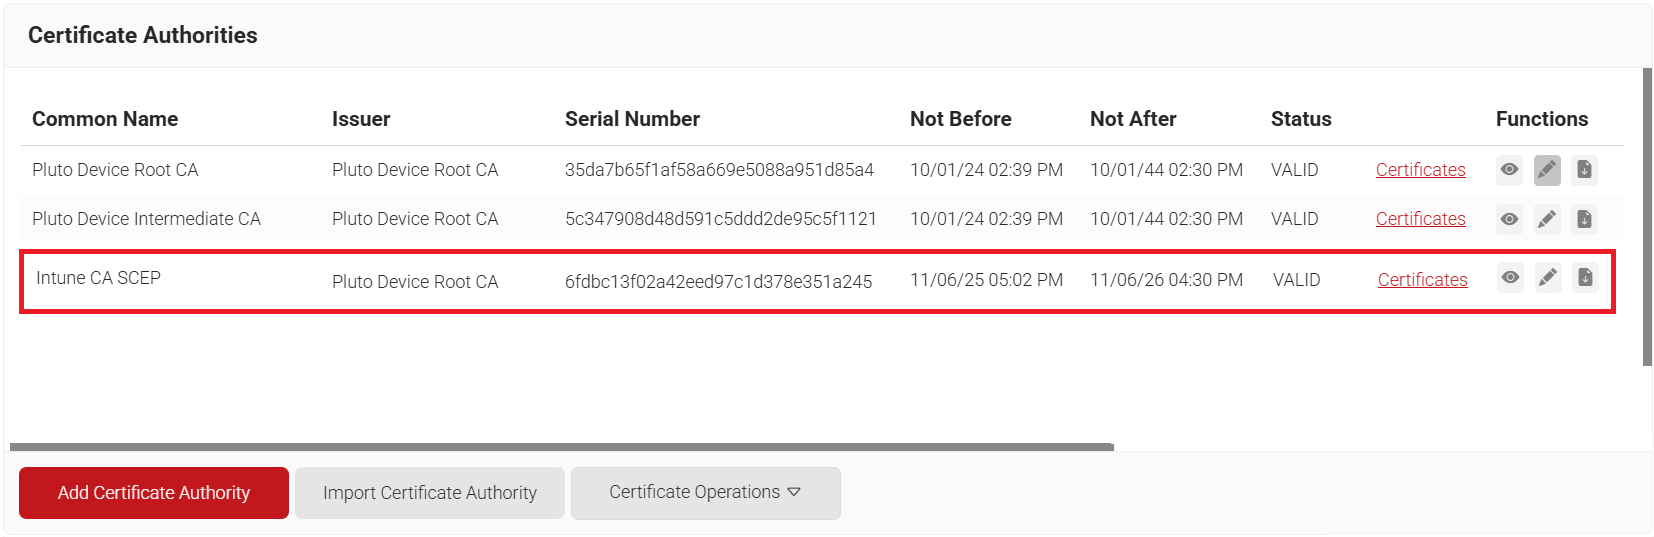
- Click Save. The new intermediate CA is generated.

5.3 Creating an Intune Certificate Template
To create an Intune Certificate Template:
- Navigate to Dynamic PKI > Certificate Authorities.
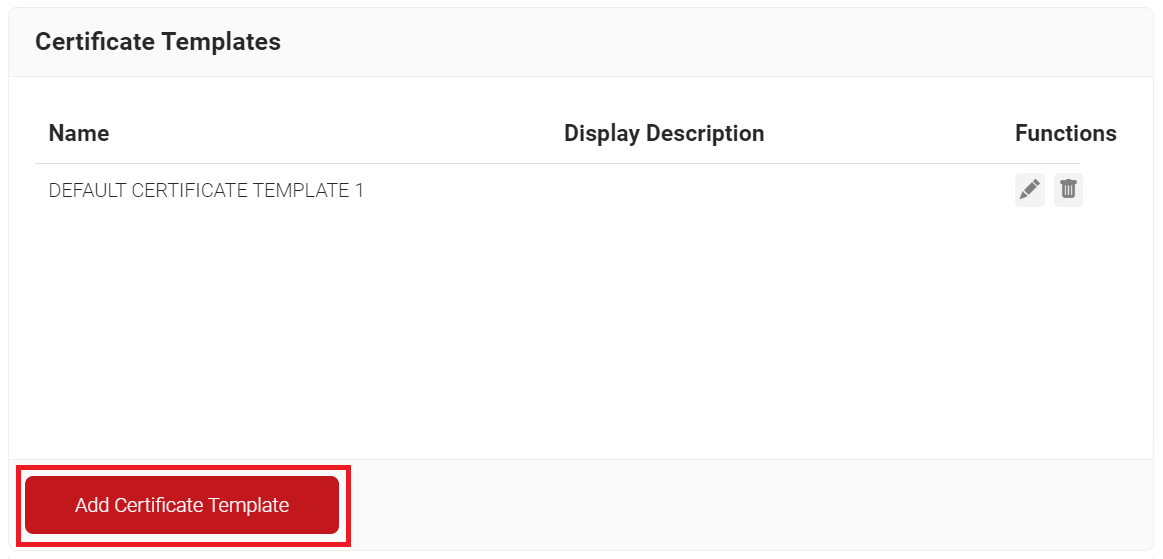
- Scroll to the Certificate Templates section and click Add Certificate Template.

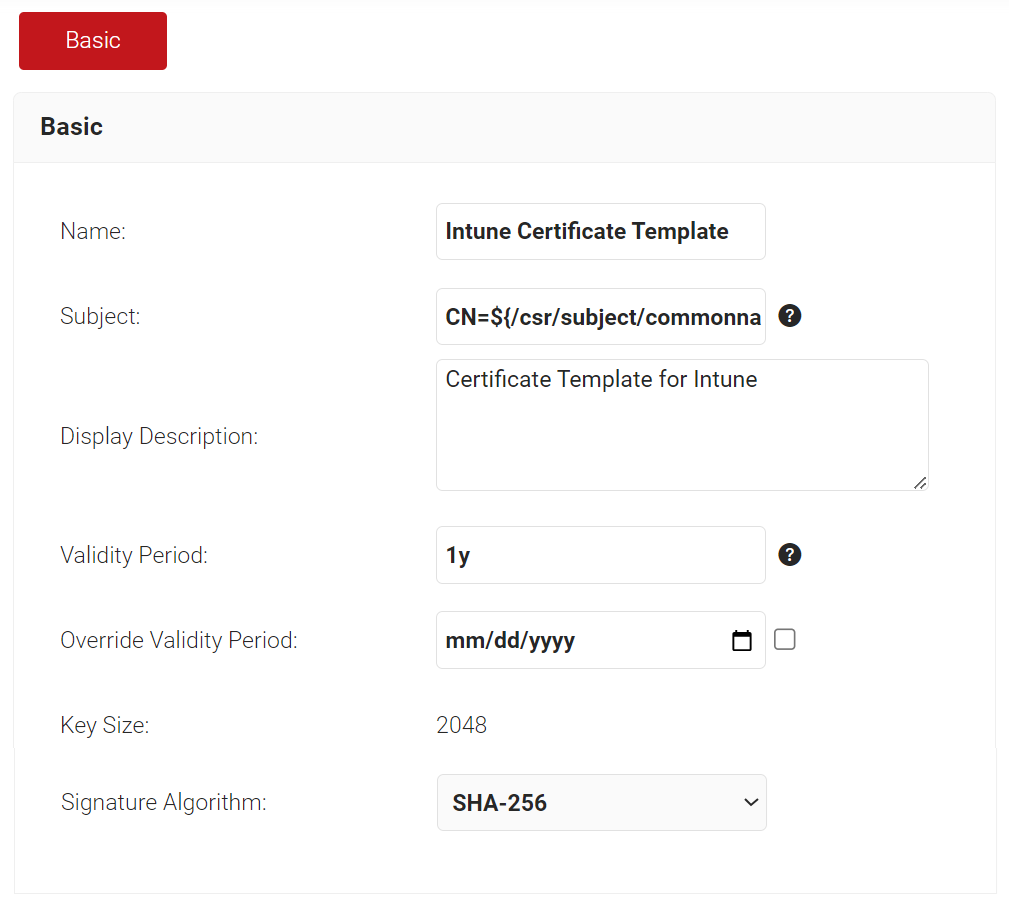
- In the Basic section, for the Name field, enter the name of the certificate template.
- In the Subject field, enter the following source value recommended for the Intune-specific certificate template: CN=${/csr/subject/commonname}
- In the Display Description field, enter a suitable description for the certificate template.
- In the Validity Period field, type the validity period of the certificate (based on the requirement).
- From the Signature Algorithm drop-down list, select SHA-256 as the signature algorithm for the certificate signing request.

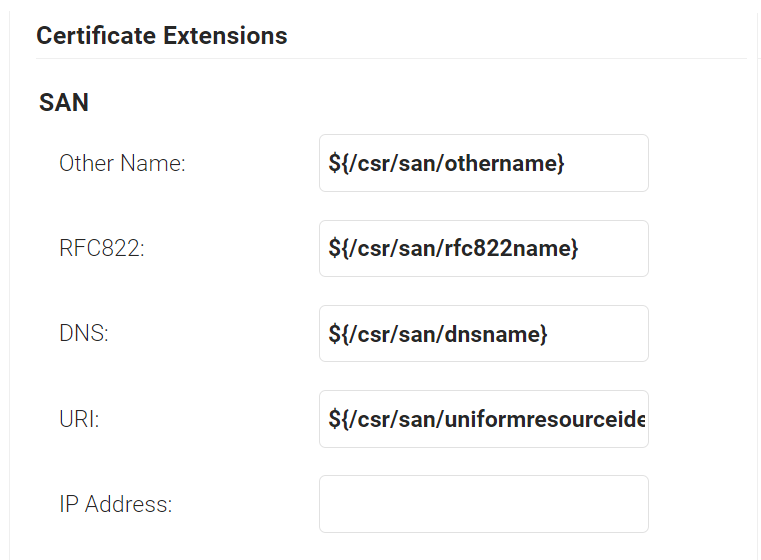
- In the SAN section, the following configurations are the recommended values. This can be changed as per the requirements of the infrastructure and setup.
- In the Other Name field, enter ${/csr/san/othername}. This will fetch the Othername value (UPN) configured in Intune.
- In the RFC822 field, enter ${/csr/san/rfc822name}. RFC822name normally refers to the email address. But this can be configured as per the business requirement in Intune.
- In the DNS field, enter ${/csr/san/dnsname}. This will fetch the DNS name from the client device as per the value configured in Intune.

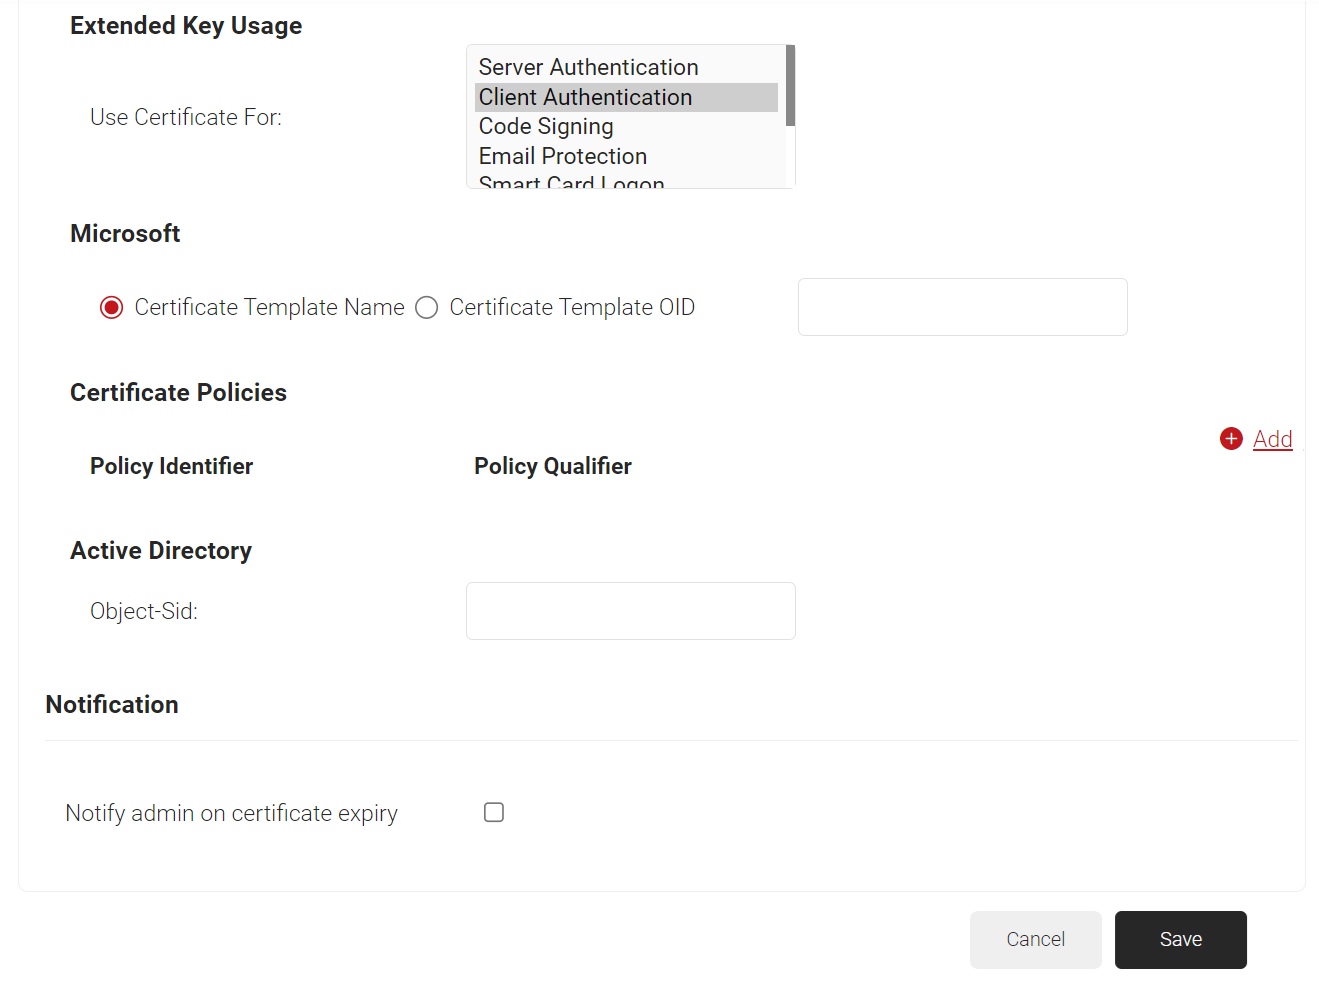
- In the Extended Key Usage section, from the Use Certificate For list, select Client Authentication.

- Click Save.
5.4 Creating an Intune CA Device Management Platform
In the JoinNow MultiOS Management Portal, create a device management platform for the Intune CA to accept requests from the Intune portal. The device management platform provides the Endpoint URI for the SCEP profiles in Intune.
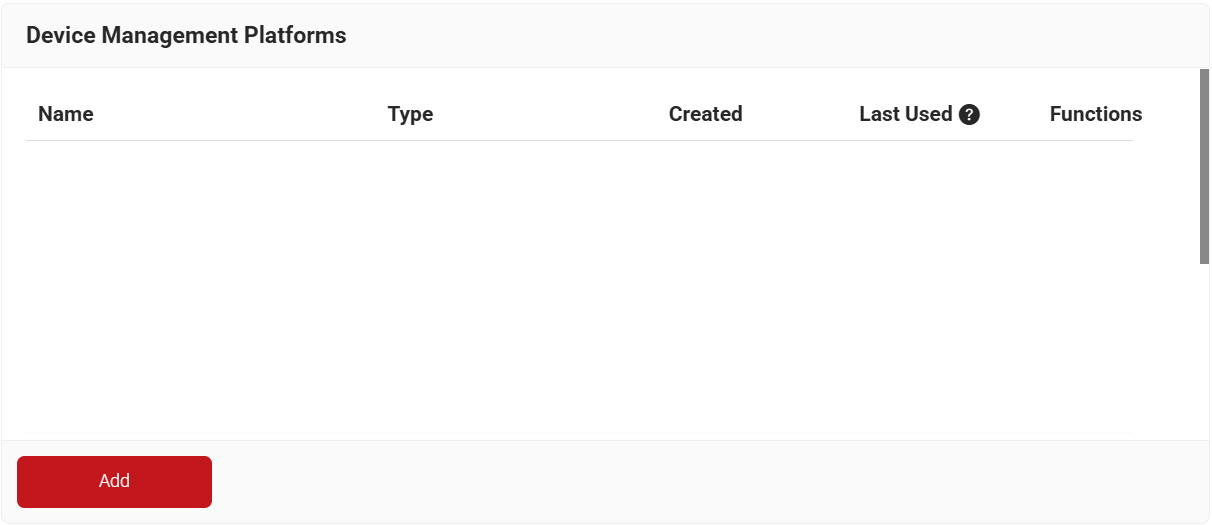
- Go to Integration Hub > Device Management Platforms.
- Click Add.

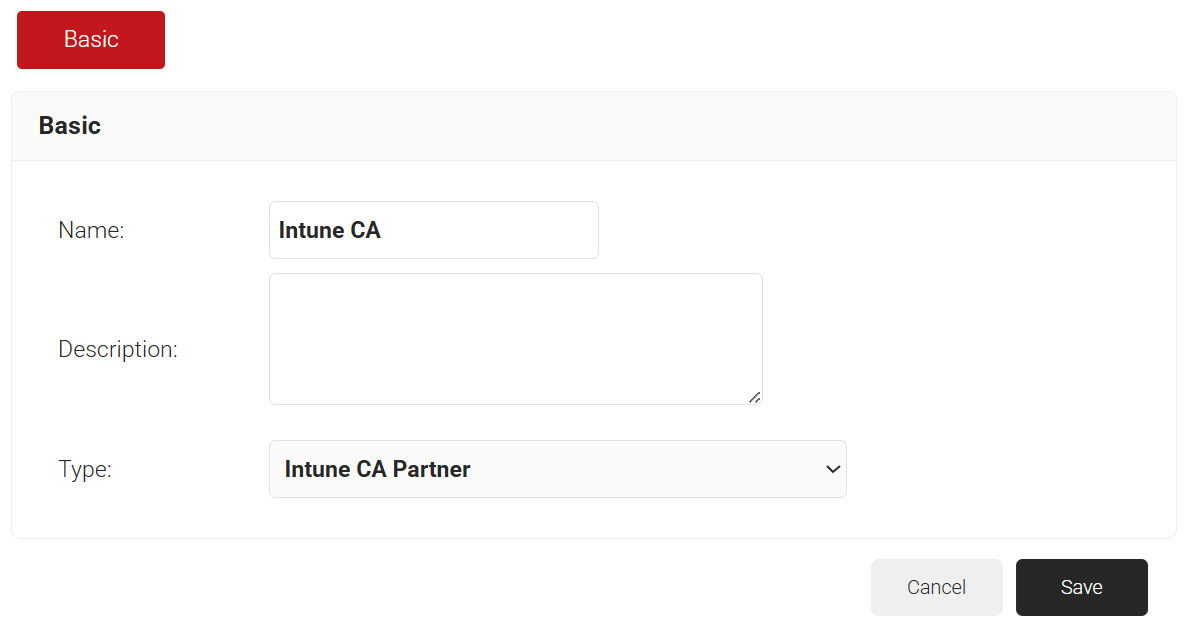
- In the Basic section, enter the name of the device management platform in the Name field.
- In the Description field, enter a suitable description for the device management platform.
- From the Type drop-down list, select Intune CA Partner.

- Click Save.
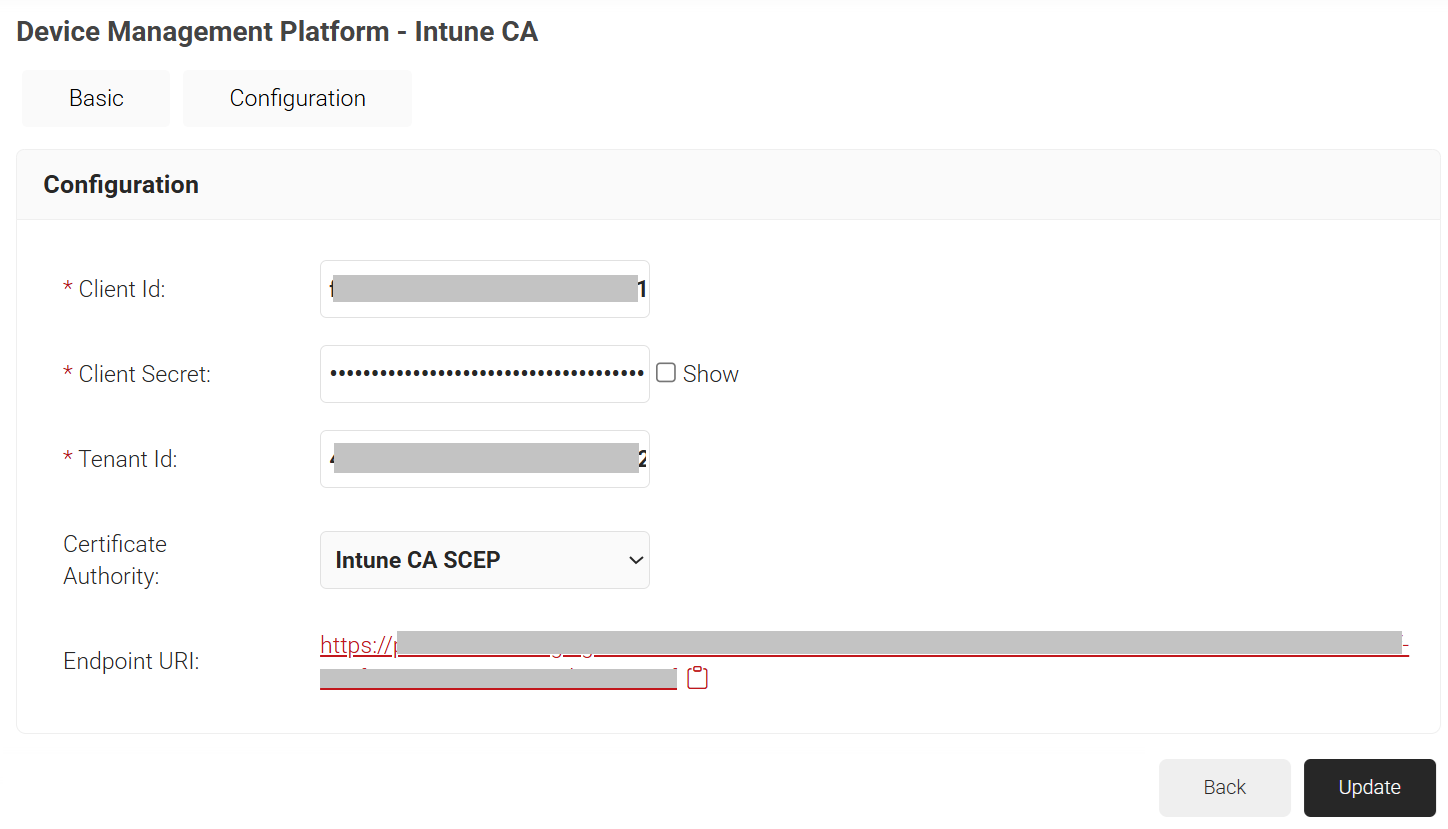
- The page refreshes, and the Configuration tab is displayed.
- Select the Configuration tab.
- In the Client Id and Tenant Id fields, enter the values you obtained after creating a new application in the Azure portal (for more information, see the Creating a New Application section).
- In the Client Secret field, enter the value you obtained after creating the client secret in the Azure portal (see the Creating a Client Secret section).
- From the Certificate Authority drop-down list, select the intermediate CA you created earlier (see the Creating an Intermediate CA for Intune SCEP Gateway Integration section).
- Copy the Endpoint URI to your console. You will use this endpoint URI to configure an SCEP Profile in Intune.

- Click Update.
5.5.1 Configuring a Policy Workflow
To configure a Policy Workflow:
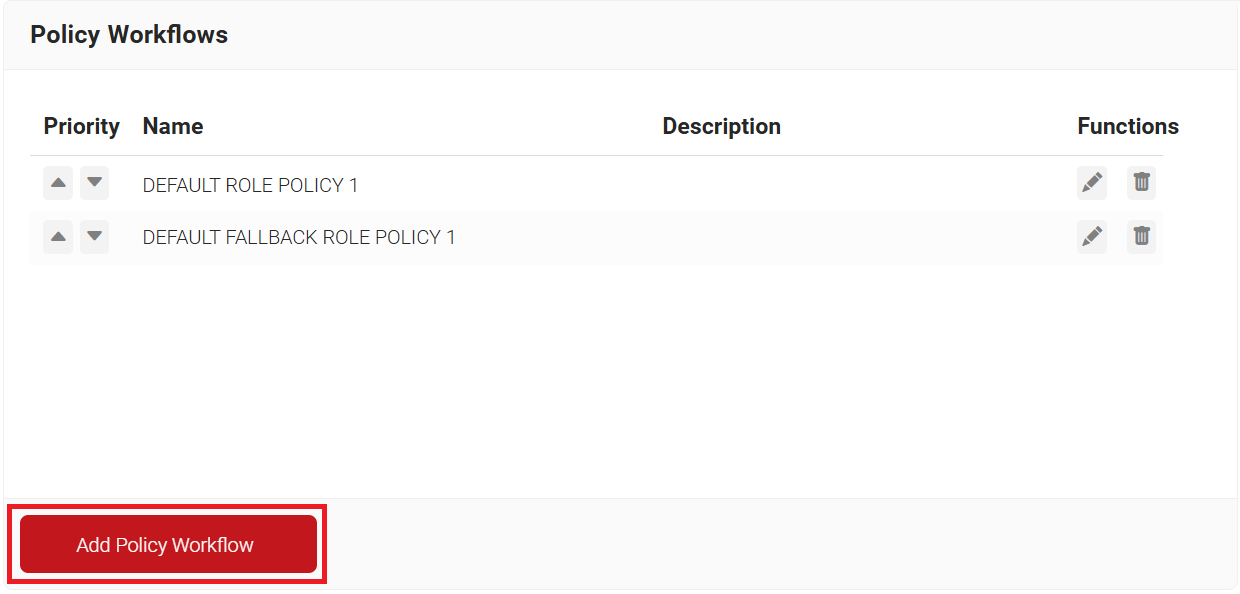
- Navigate to Policy Management > Policy Workflows.
- Click Add Policy Workflow.

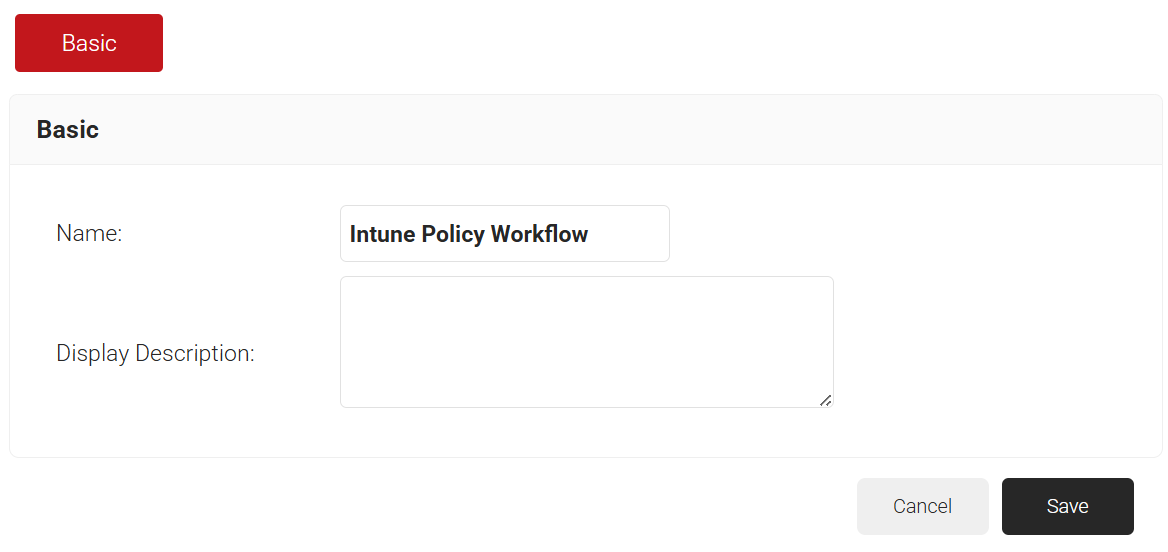
- In the Basic section, enter the name of the policy workflow in the Name field.
- In the Display Description field, enter a suitable description for the policy workflow.

- Click Save.
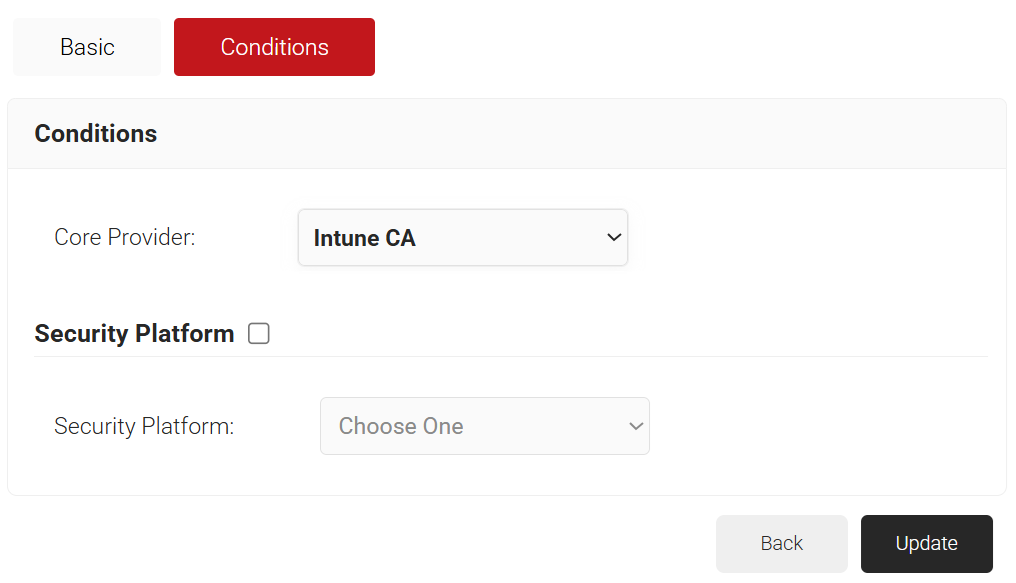
- The page refreshes, and the Conditions tab is displayed.
- Select the Conditions tab.
- From the Core Provider drop-down list, select the Intune CA device management platform you created earlier (see the Creating an Intune CA Device Management Platform section).

- Click Update.
5.5.2 Configuring an Enrollment Policy
To configure an enrollment policy:
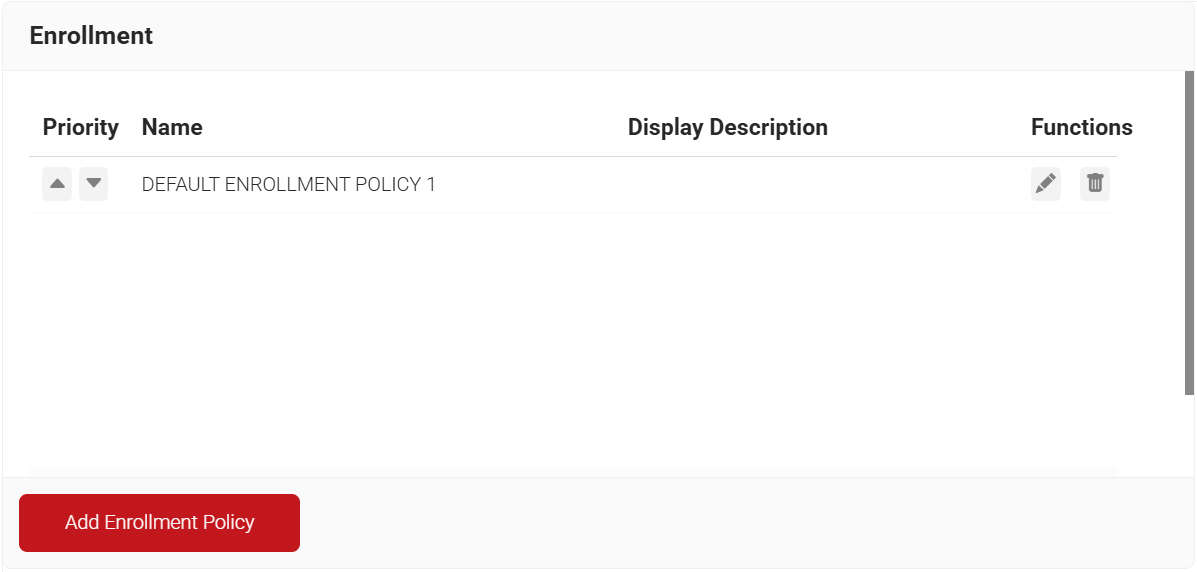
- Navigate to Policy Management > Enrollment.
- Click Add Enrollment Policy.

- In the Basic section, enter the name of the enrollment policy in the Name field.
- In the Display Description field, enter a suitable description for the enrollment policy.

NOTE: You must select a User Role and Device Role for enrollment. You can use a Fallback Device policy to allow enrollment based on the Policy Workflow. - Click Save.
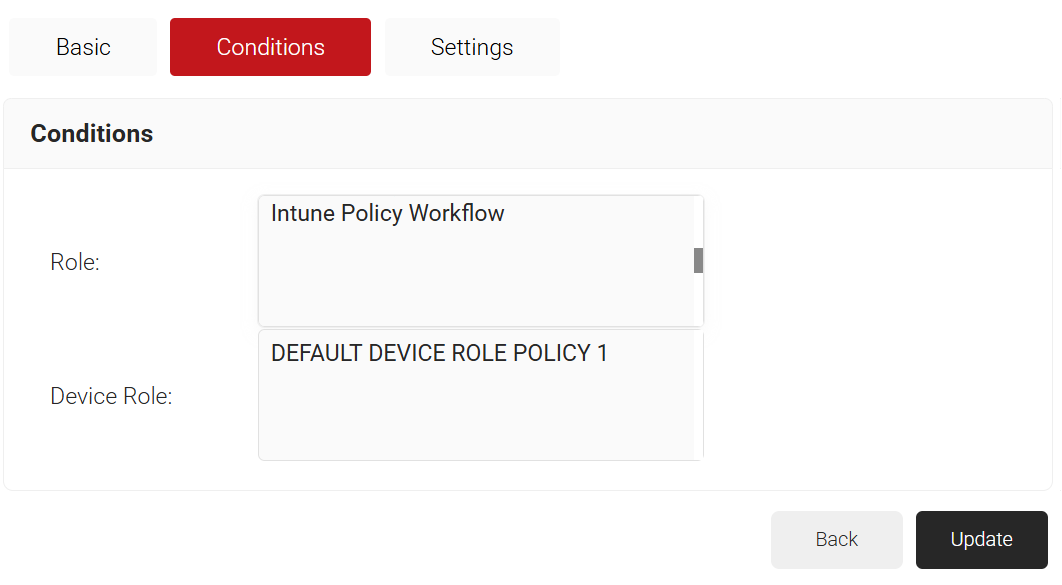
- The page refreshes, and the Conditions and Settings tabs are displayed.
- Select the Conditions tab.
- From the Role list, select the policy workflow you created earlier (see the Configuring a Policy Workflow section).
- From the Device Role list, select DEFAULT DEVICE ROLE POLICY 1.

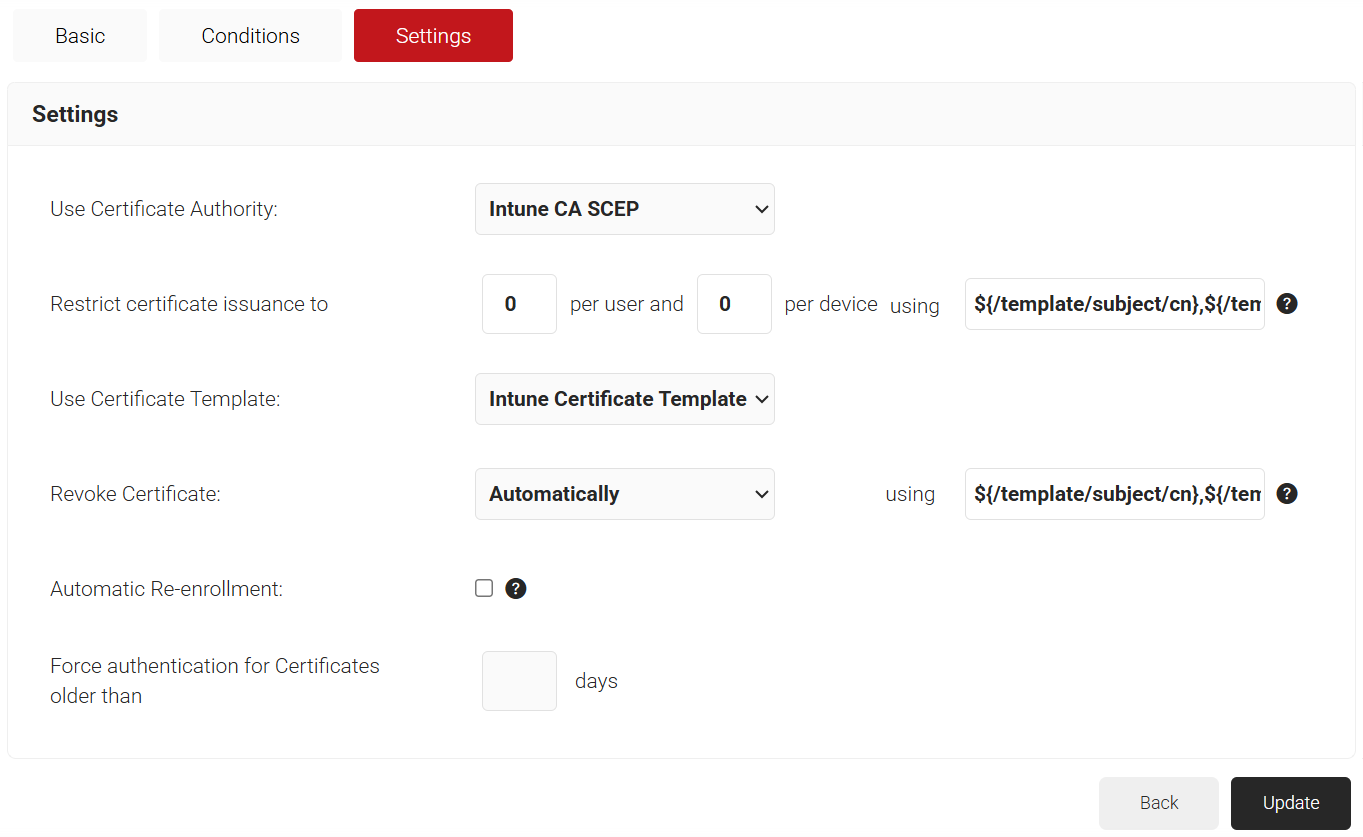
- Select the Settings tab.
- In the Settings section, from the Use Certificate Authority drop-down list, select the intermediate CA you created earlier (see the Creating an Intermediate CA for Intune SCEP Gateway Integration section).
- From the Use Certificate Template drop-down list, select the template you created earlier (see the Creating an Intune Certificate Template section).

- In the other settings, retain the default values.
- Click Update.

5.5.3 Configuring Network Policy
To configure network policy:
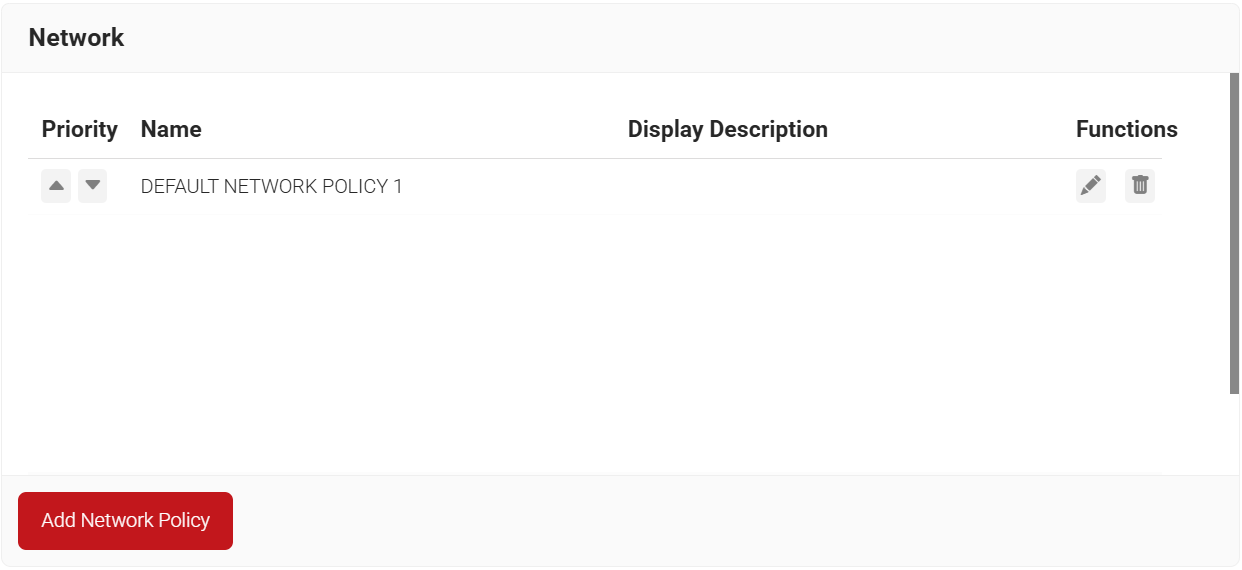
- Go to Policy Management > Network.
- Click Add Network Policy.

- In the Basic section, enter the name of the network policy in the Name field.
- In the Display Description field, enter a suitable description for the network policy.
- Click Save. The page refreshes, and the Conditions and Settings tabs are displayed.
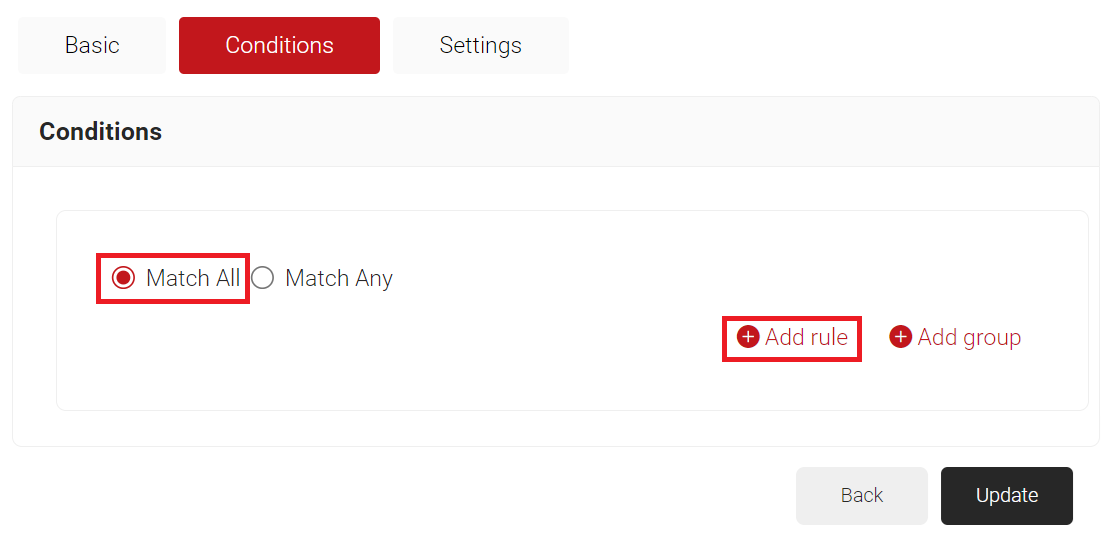
- Select the Conditions tab.
- Select Match All or Match Any based on your requirement to set authentication criteria. In the case explained here, we are selecting Match All.
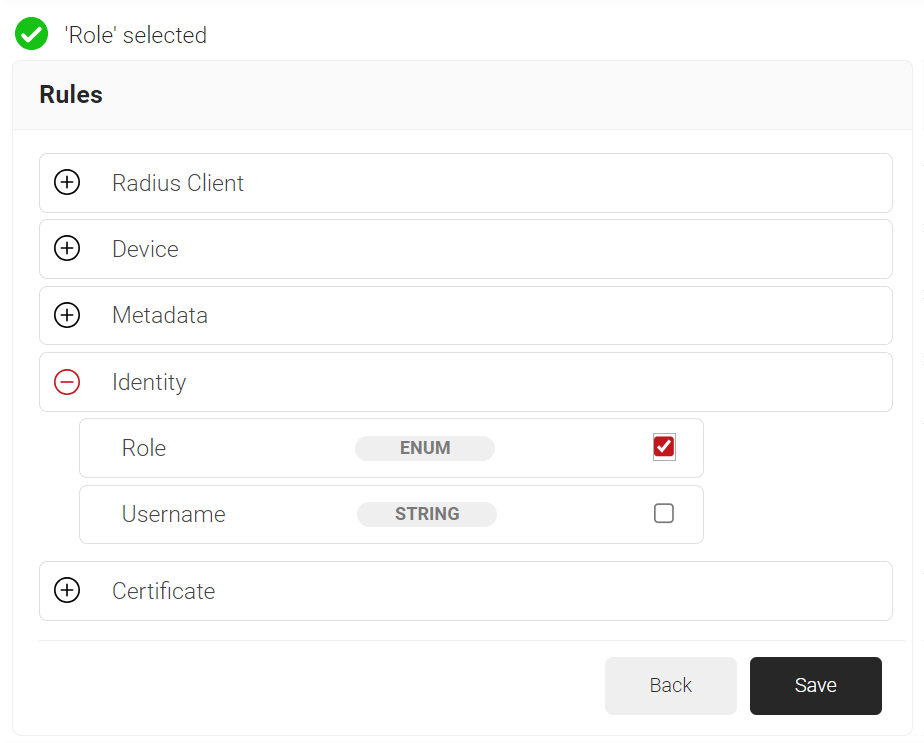
- Click the Add rule and select the role you want to assign to this network policy. It is essential to select the appropriate policy workflow, as it triggers the network policy. This menu offers various rules that you can select based on your business requirements.

NOTE: You can assign a network policy to multiple user roles.
- Click Save.
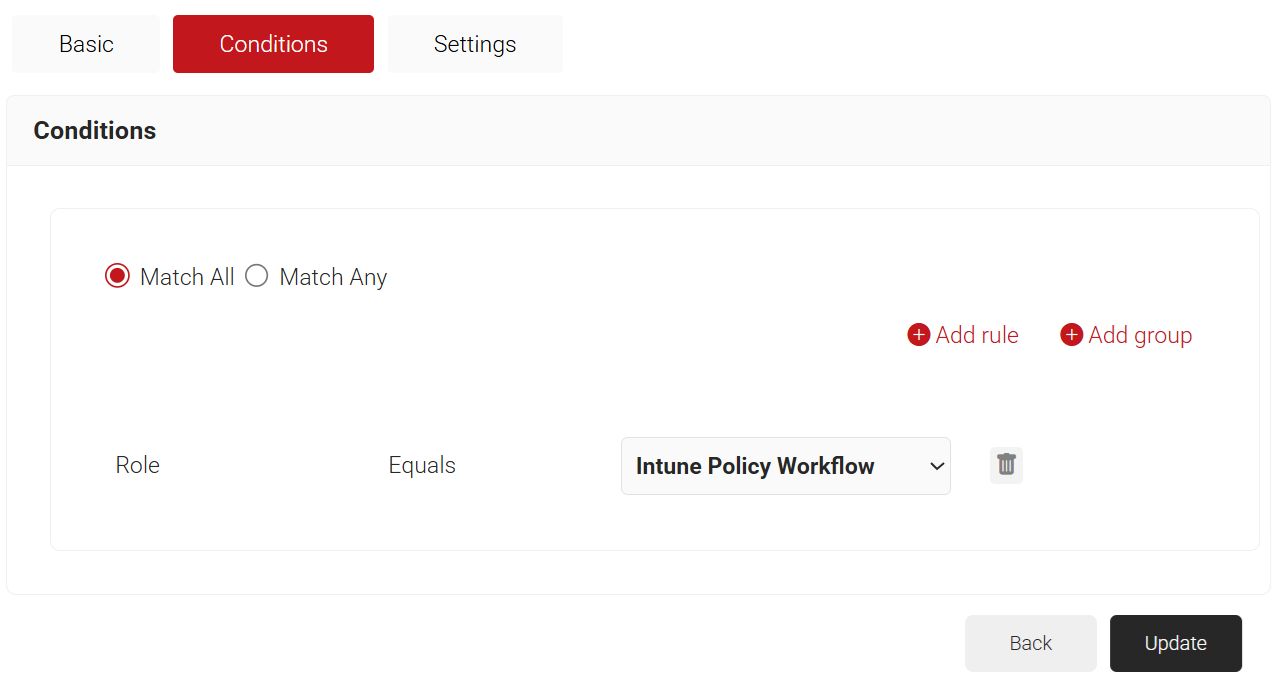
- The Role option appears under the Conditions tab.
- From the Role Equals drop-down list, select the policy workflow you created earlier (see the Configuring a Policy Workflow section).

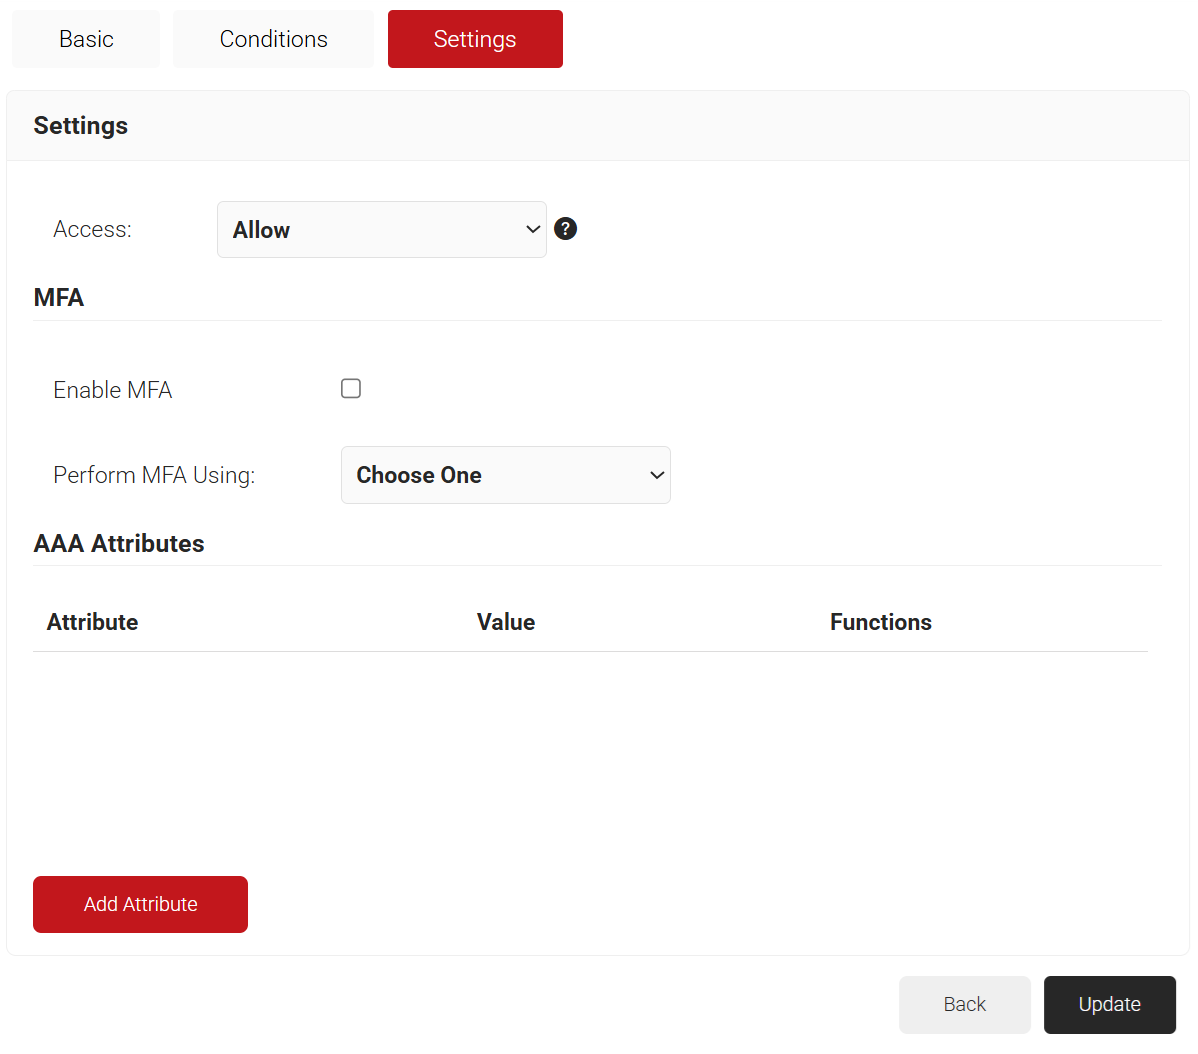
- Select the Settings tab.

- From the Access drop-down list, select any one of the options to allow or deny authentication requests. The default value is “Allow”.
- To configure MFA, select the checkbox to enable MFA.
- From the Perform MFA Using drop-down list, select a Core Provider for MFA.
- Click Add Attribute.
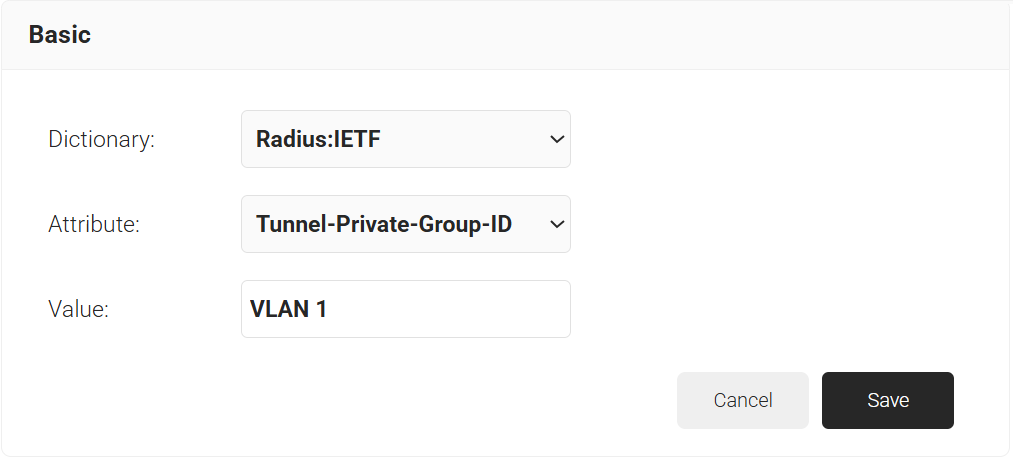
- From the Dictionary drop-down list, select an option:
- Radius: IETF – This is what we will use for the following attributes, as we are using standard RADIUS attributes for VLAN assignment.
- Custom: Used for any VSAs (Vendor-Specific Attributes).
- From the Attribute drop-down list, select an option.
- Framed-Protocol
- Framed-IP-Address
- Framed-IP-NetMask
- Framed-Routing
- Filter-Id
- Framed-MTU
- Framed-Compression
- Reply-Message
- Framed-Route
- Framed-IPX-Network
- State
- Class
- Session-Timeout
- Tunnel-Type
- Tunnel-Medium-Type
- Tunnel-Private-Group-ID
- Framed-Pool
- User-Name
- In the Value field, enter the appropriate value for the attribute.

- From the Dictionary drop-down list, select an option:
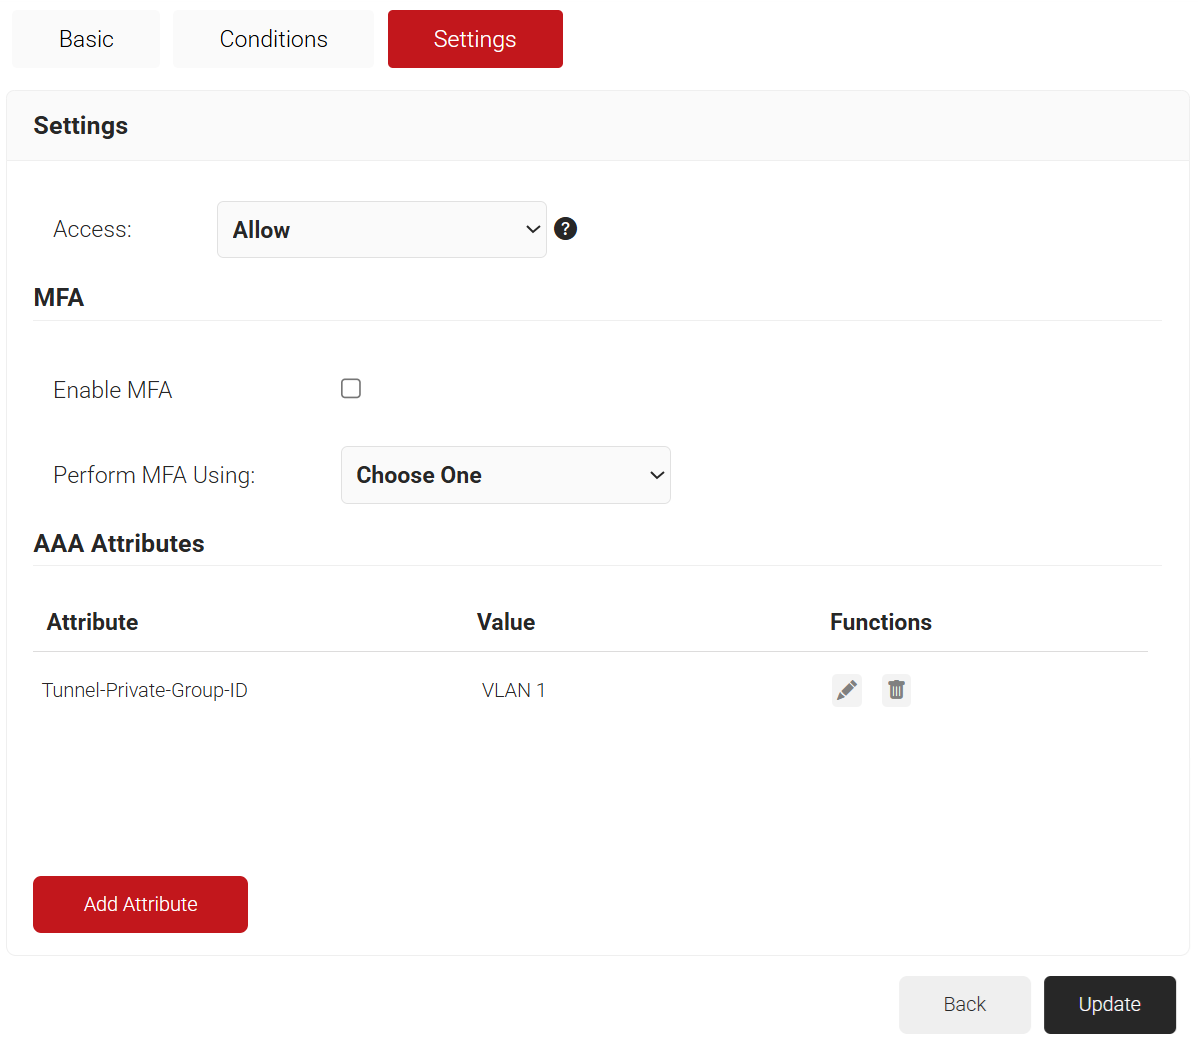
- Click Save.
- Repeat for any other RADIUS attribute you would like to send. For reference, here is what is commonly required for VLAN Assignment:
a. Tunnel-Medium-Type: IEE-802
b. Tunnel-Private-Group-ID: {VLAN Name}
c. Server Tunnel-Type: VLAN - Click Update.
6.1 Exporting the SecureW2 Root, Intermediate, and RADIUS CA
To create trusted profiles in Intune, the Root, Intermediate, and RADIUS Server CA must be uploaded in their respective profiles in the Intune Endpoint manager. To download these certificates from the JoinNow Management portal, follow the below steps:
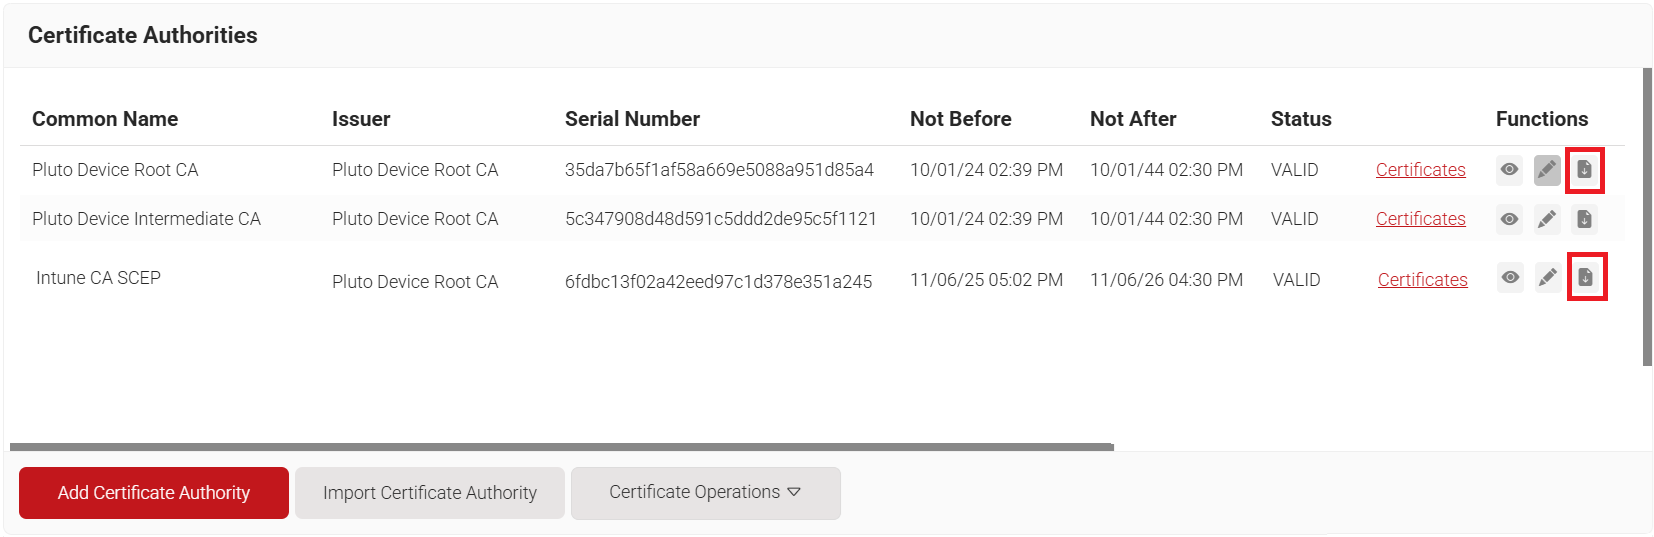
- Navigate to Dynamic PKI > Certificate Authorities.
- In the Certificate Authorities section, click the Download link for the Root CA, and intermediate CA issued to your organization (see the Creating an Intermediate CA for Intune SCEP Gateway Integration section). An example of this is explained in the below screenshot:
6.1.1 Exporting RADIUS Root CA
Similarly, for downloading the RADIUS Server Root CA:
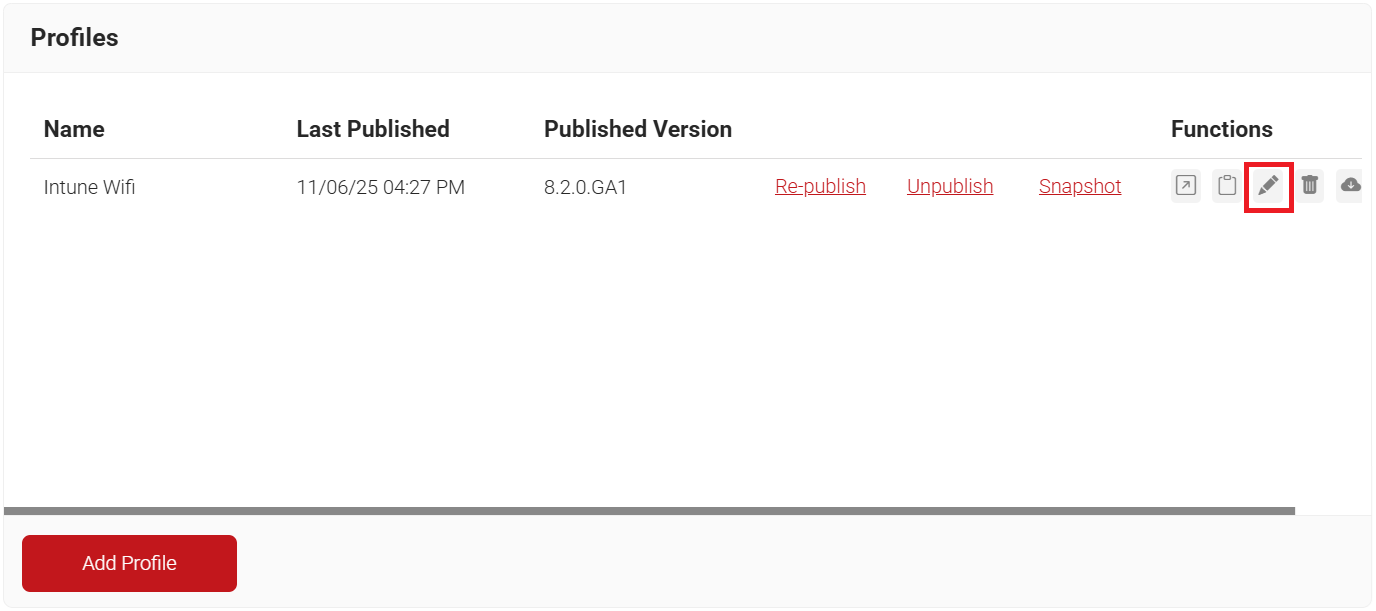
- Navigate to Device Onboarding > Profiles.
- On the Network Profiles page, click the Edit link of the network profile configured earlier (see the Getting Started section).

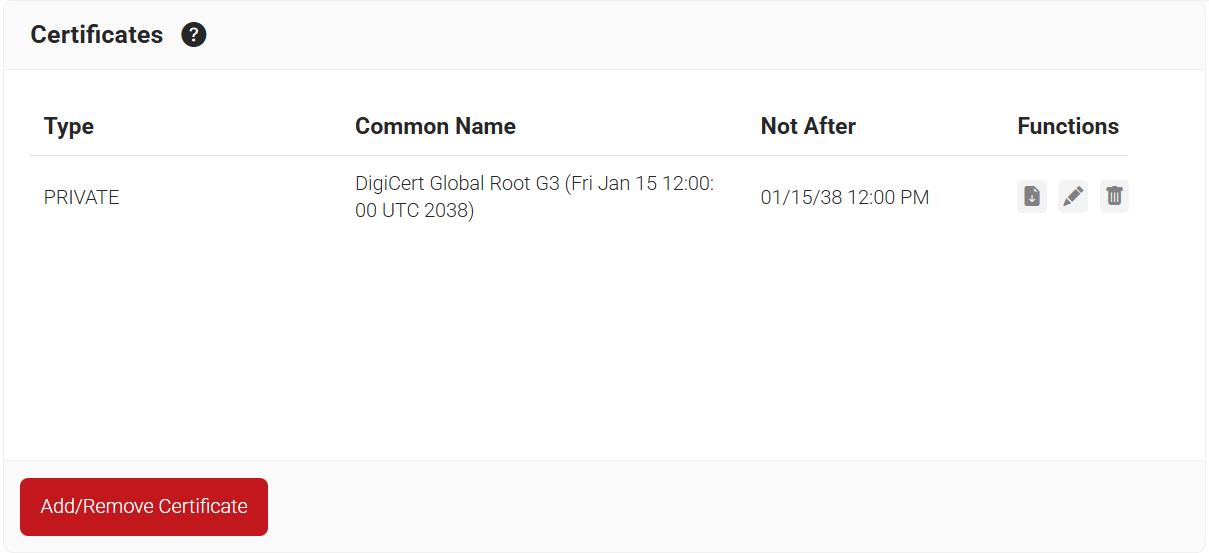
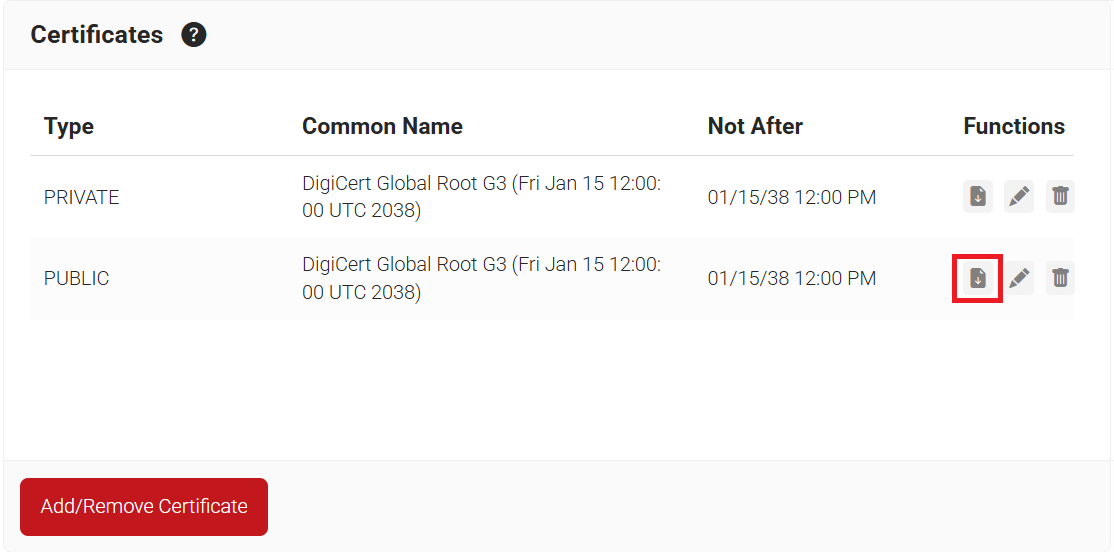
- Scroll down to the Certificates section and click Add/Remove Certificate.

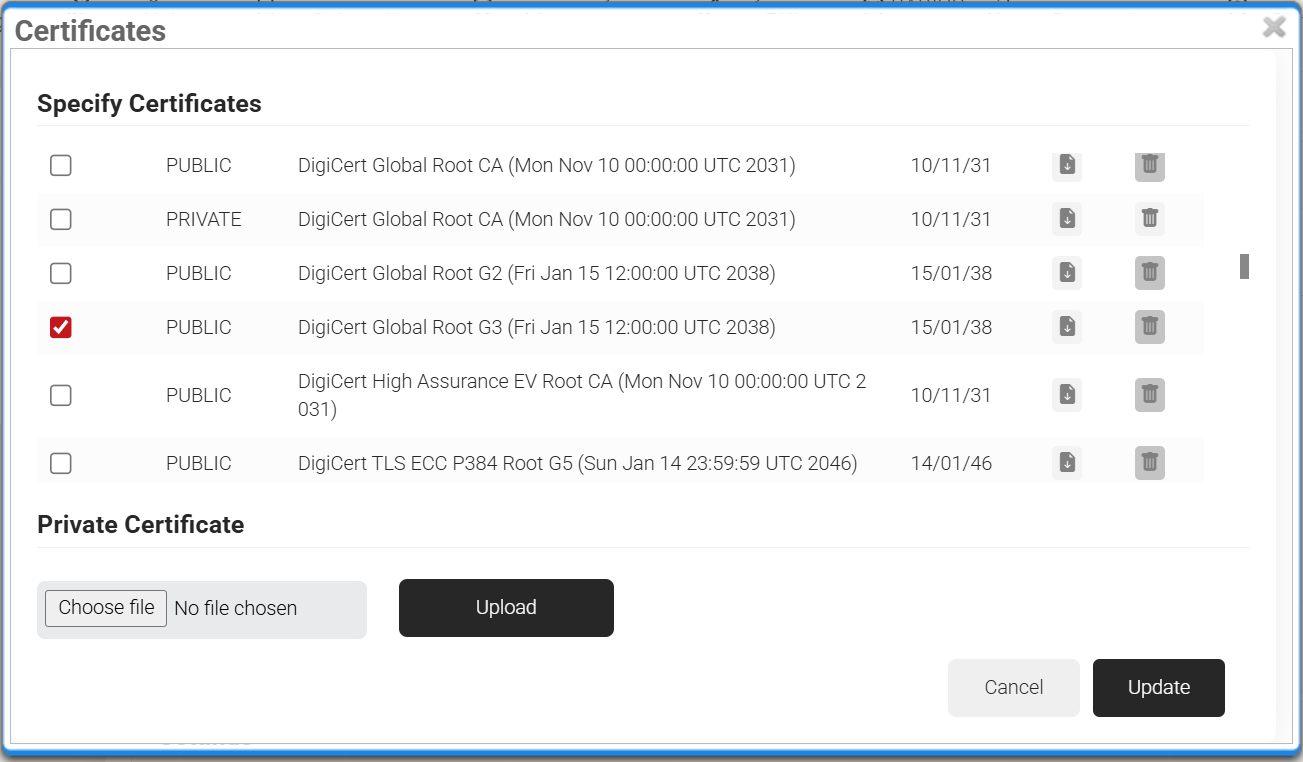
- Check the checkbox next to DigiCert Global Root G3 (Fri Jan 15 12:00:00 UTC 2038) as shown in the following screen.

- Click Update.
- The CA appears in the Certificates section.
- Click Download.

6.2 Creating Trusted Certificate Profile – Root, Intermediate, and RADIUS Root CA
The downloaded CA certificates must be uploaded to the respective trusted profiles to deploy them in the client devices. The deployment of these CA certificates is necessary to form a chain of trust during the enrollment and RADIUS authentication. Intune requires the creation of three trusted certificate profiles:
- Trusted Certificate Profile for Root CA
- Trusted Certificate Profile for Intermediate CA of the RADIUS Server certificate
- Trusted Certificate Profile for Root CA of the RADIUS Server certificate
To create trusted profiles in Intune:
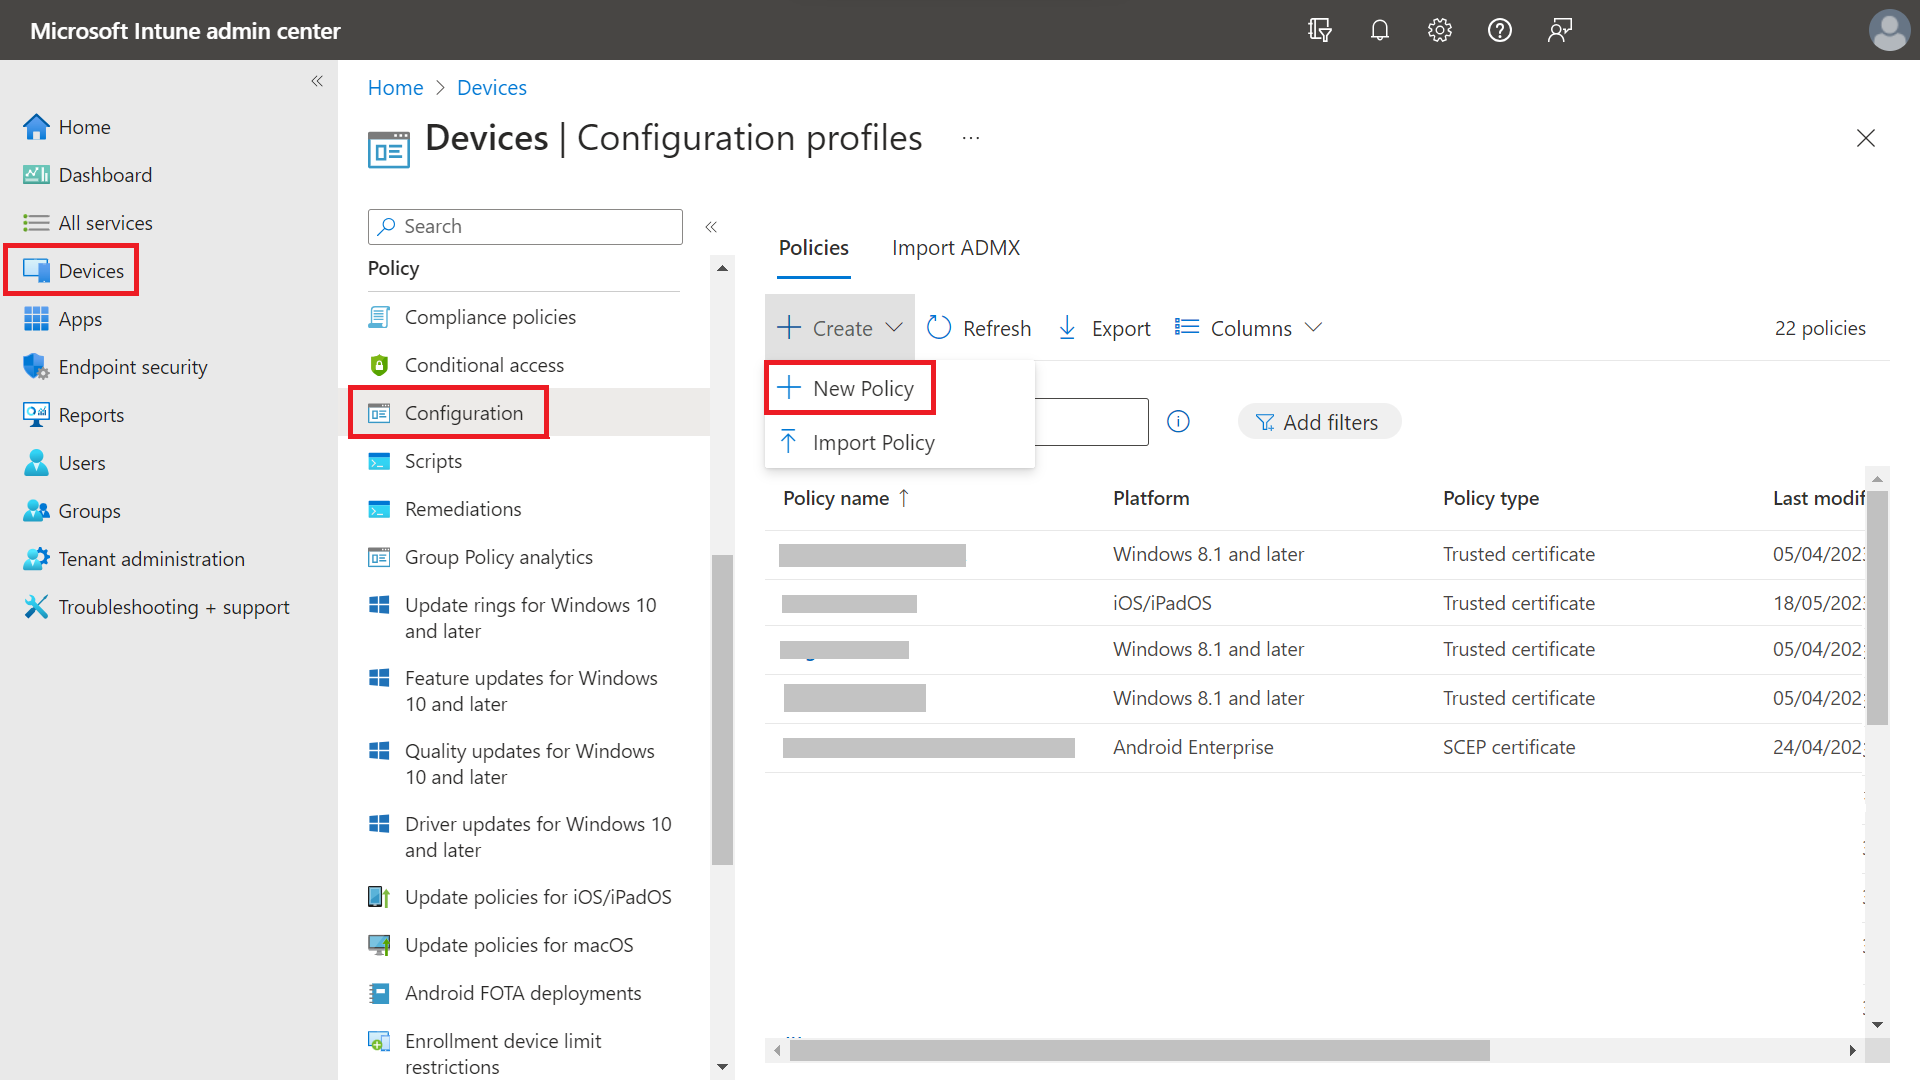
- Sign in to the Microsoft Endpoint Manager portal.
- Navigate to Devices > Configuration.
- Click Create and select New Policy.

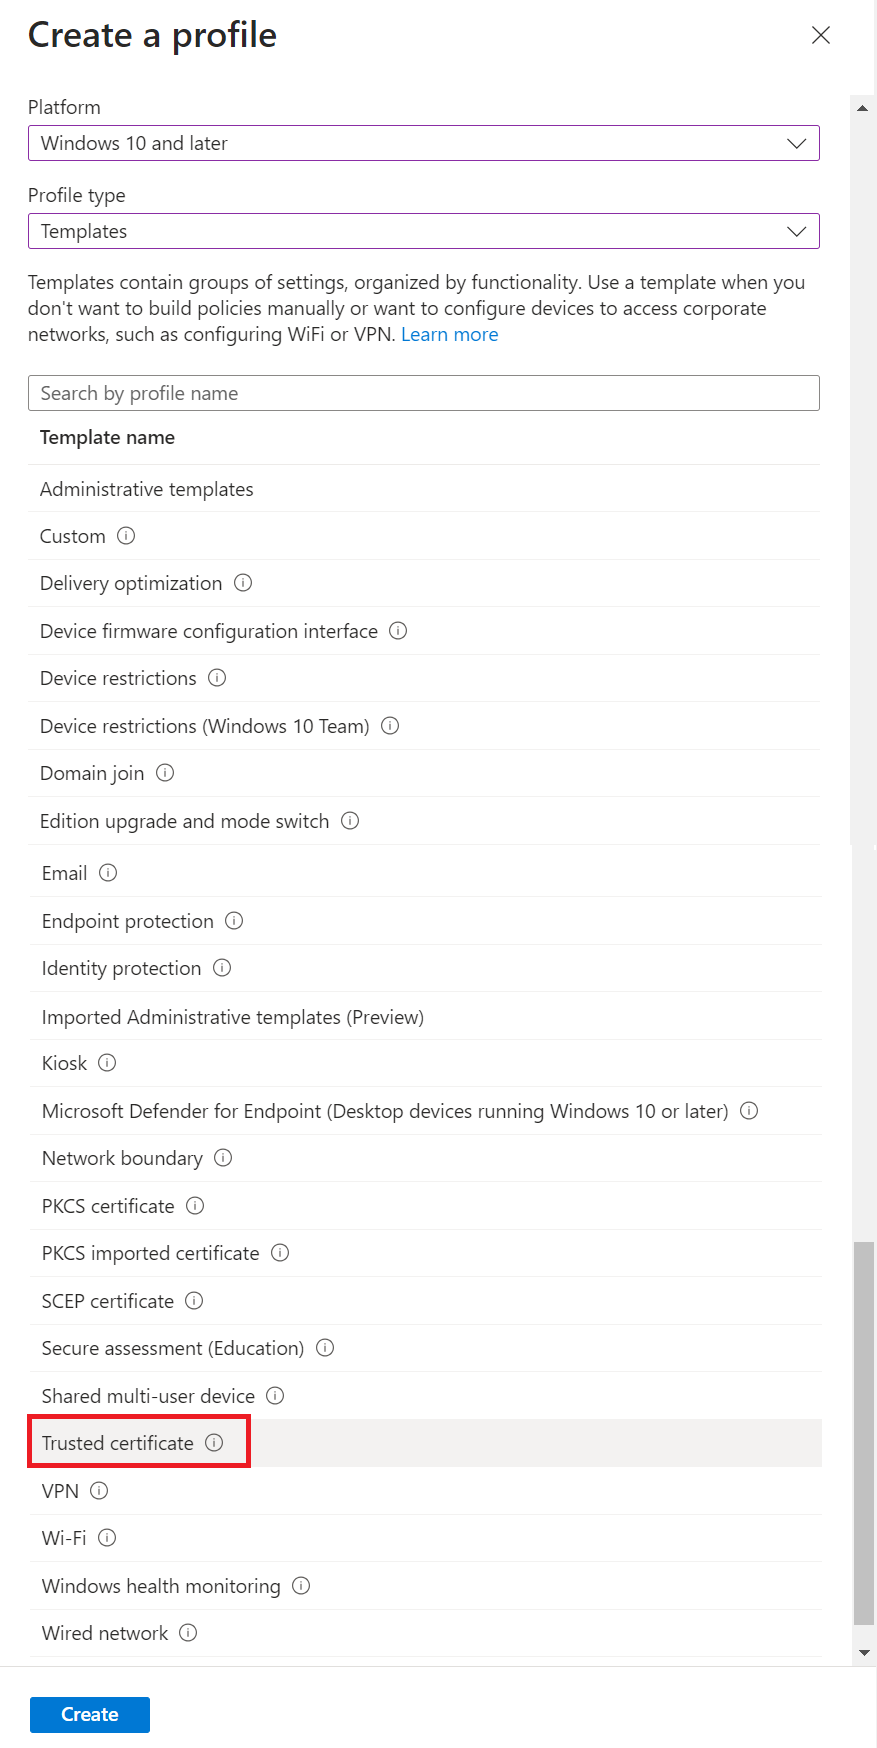
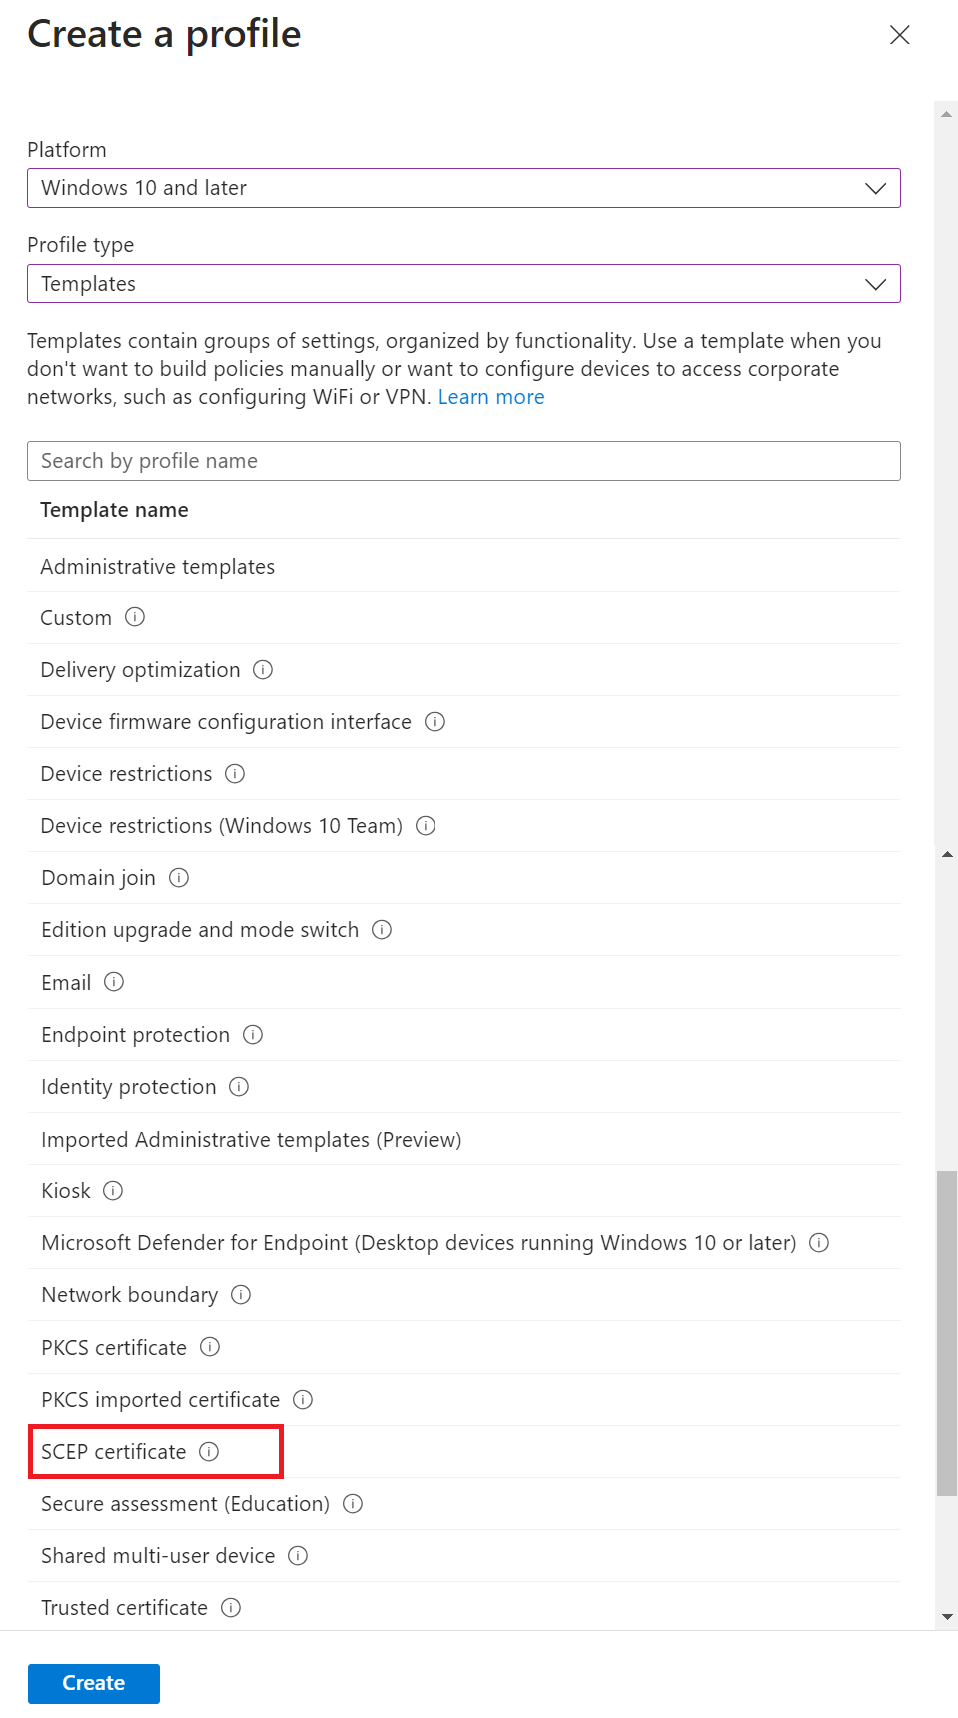
- On the Create a profile page, from the Platform drop-down list, select the device platform for this trusted certificate. The options are:
- Android device administrator
- Android (AOSP)
- Android Enterprise
- iOS/iPadOS
- macOS
- Windows 10 and later
- Windows 8.1 and later
NOTE: You must create a separate profile for each OS platform. The steps to create trusted certificates are similar for each device platform. - From the Profile type drop-down list, select Templates, and then select Trusted certificate.

- Click Create.
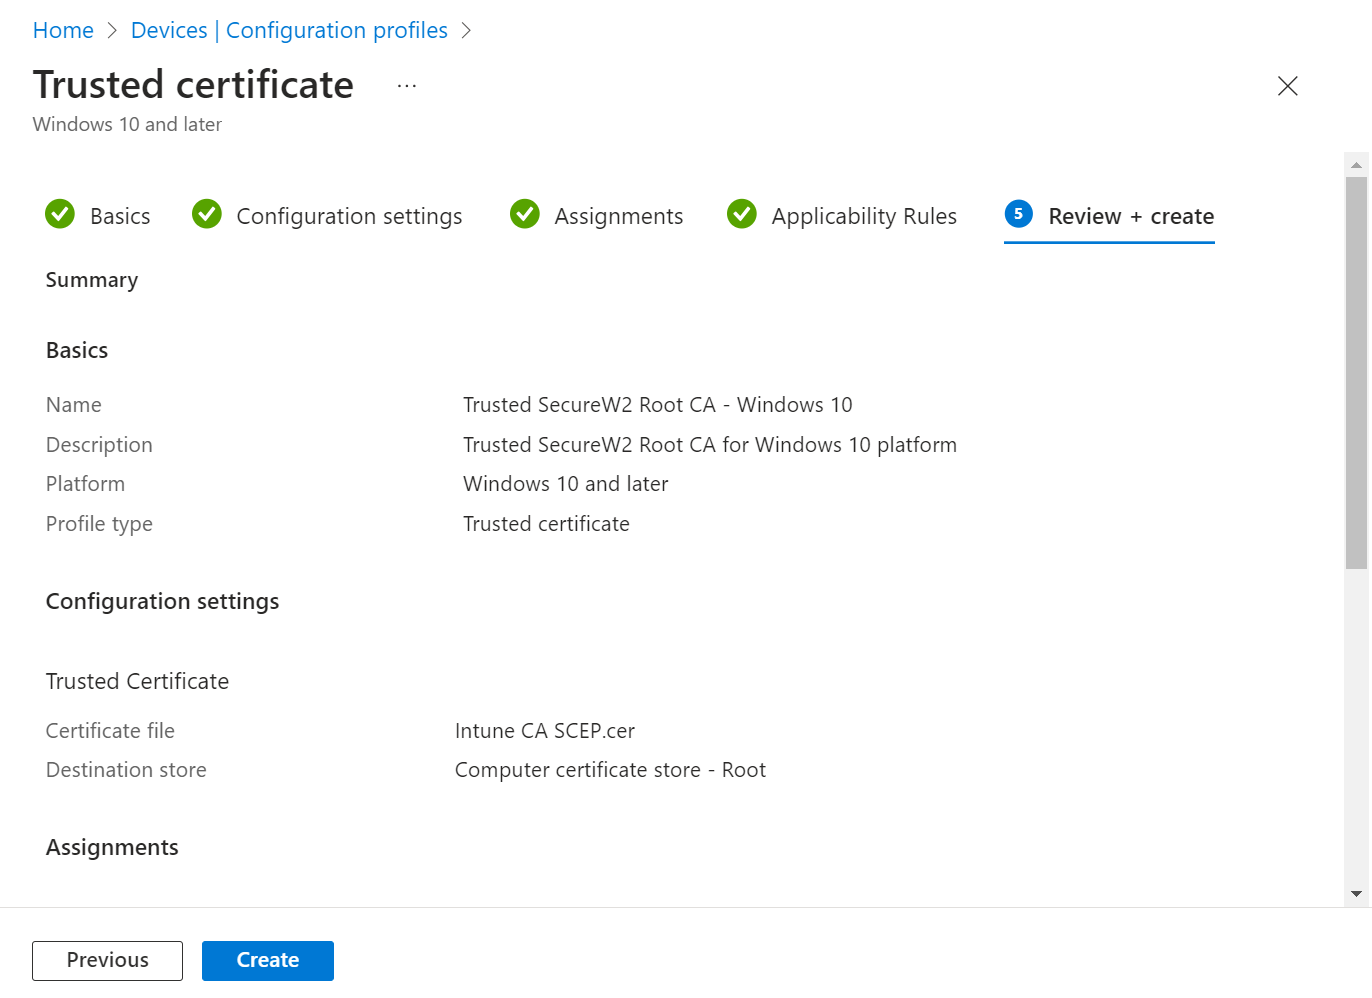
- On the Trusted certificate page, in the Basics section, enter the name of the Trusted Certificate in the Name field. For easy identification, suitable naming conventions with “Root, Intermediate, and RADIUS CA” can be used.
- In the Description field, enter a suitable description for the trusted certificate.

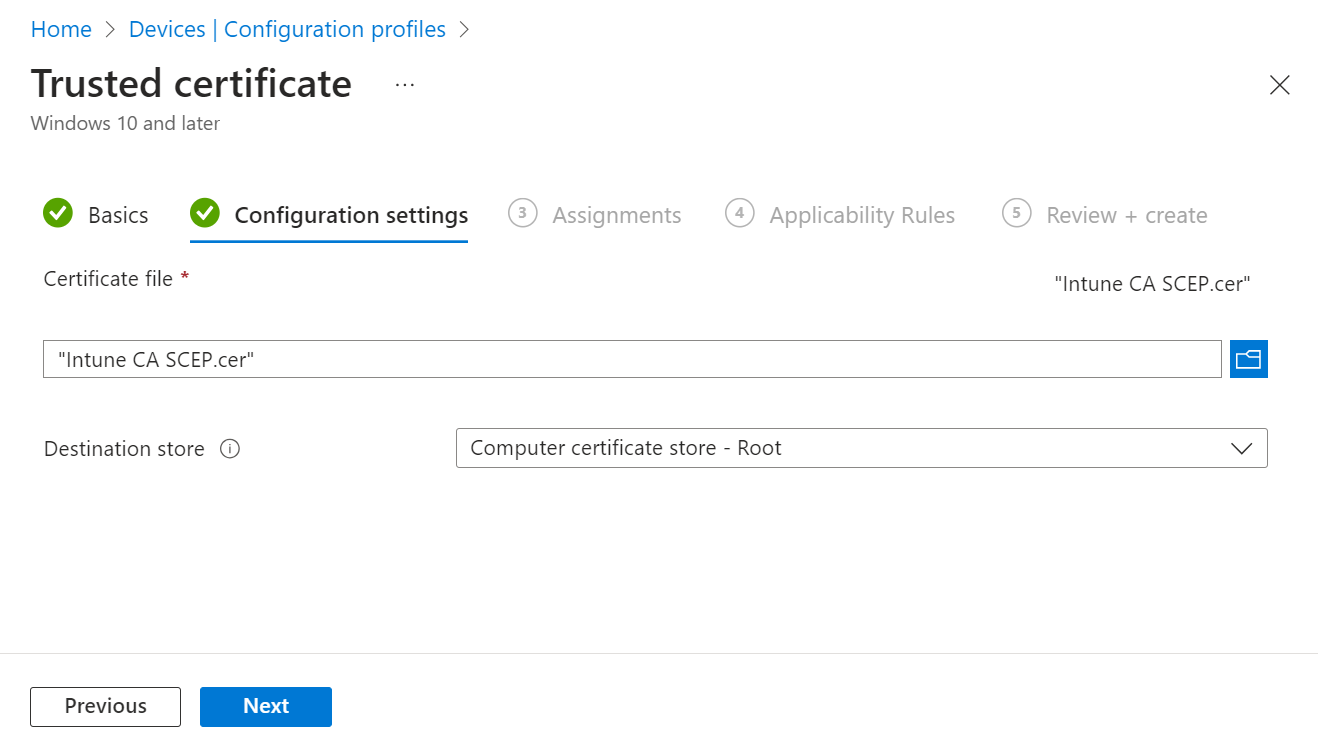
- Click Next.
- In the Configuration settings section, for the Certificate file field, click the Browse button. Select the certificate appropriate to the trusted profile being created as shown in the below table:
Trusted Profile mapped with Intermediate CA Trusted Profile mapped with Root CA Trusted Profile mapped with RADIUS Server Root CA Upload the Intermediate CA downloaded from the JoinNow portal in 6.1 Exporting the SecureW2 Root, Intermediate, and RADIUS CA
From the Destination store drop-down list, select “Computer certificate store – Intermediate”
Upload the Root CA of the organization downloaded from the JoinNow portal in 6.1 Exporting the SecureW2 Root, Intermediate, and RADIUS CA
From the Destination store drop-down, select “Computer certificate store – Root”
Upload the Root CA of the organization downloaded from the JoinNow portal in 6.1.1 Exporting RADIUS Root CA
From the Destination store drop-down, select “Computer certificate store – Root”
- Click Next.

- Assign the profile to the appropriate Groups and Rules, review it, and click Create.

7. 1 Creating a SCEP Certificate Profile
To create a SCEP certificate profile, perform the following steps:
- Log in to the Microsoft Endpoint Manager portal.
- Navigate to Devices > Configuration.
- Click Create and select New Policy.
- On the Create a profile page, from the Platform drop-down list, select the device platform for this SCEP certificate. You can select one of the following platforms for device restriction settings:
- Android device administrator
- Android (AOSP)
- Android Enterprise
- iOS/iPadOS|
- macOS
- Windows 10 and later
- Windows 8.1 and later
NOTE: You must create a separate profile for each OS platform. The steps to create trusted certificates are similar for each device platform. - From the Profile type drop-down list, select Templates and then select SCEP certificate.

NOTE: You must create a separate profile for each OS platform. The steps to create trusted certificates are similar for each device platform. - Click Create
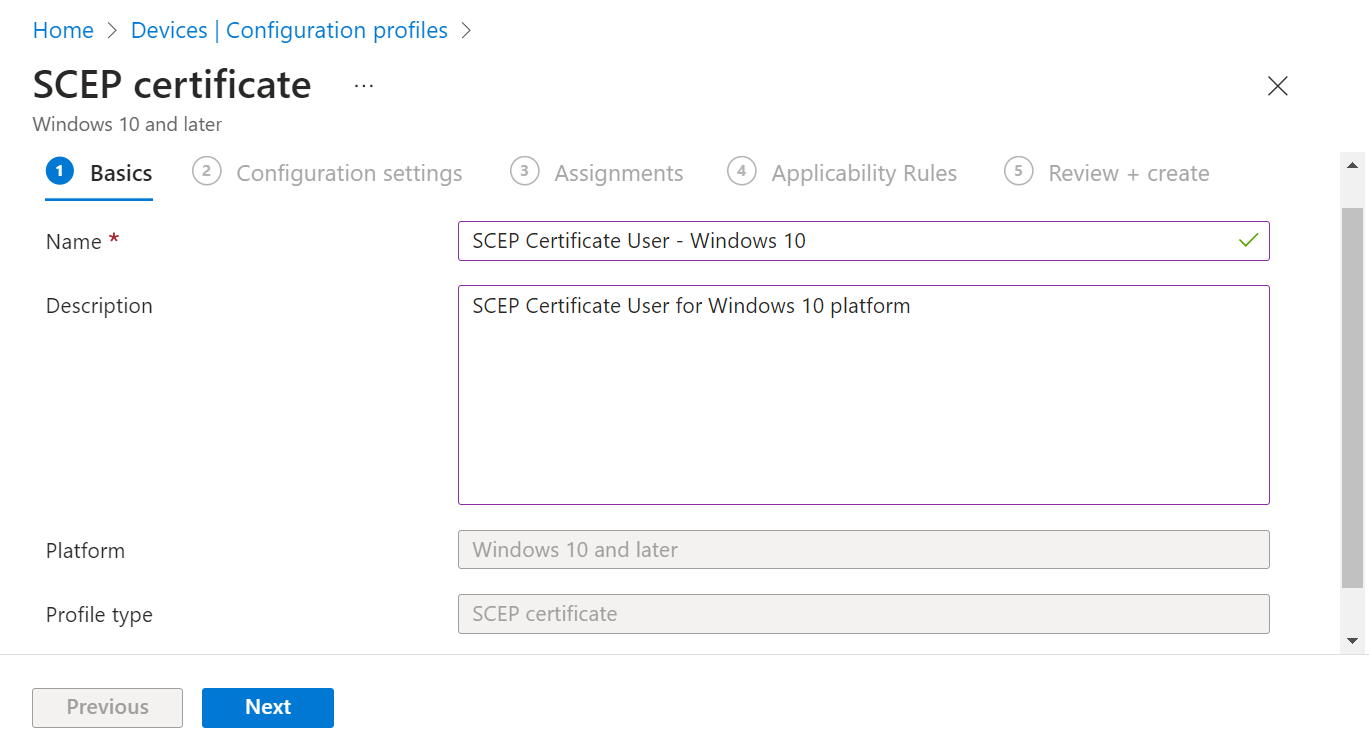
- On the SCEP certificate page, in the Basics section, enter the name of the SCEP certificate in the Name field.
- In the Description field, enter a suitable description for the SCEP certificate.
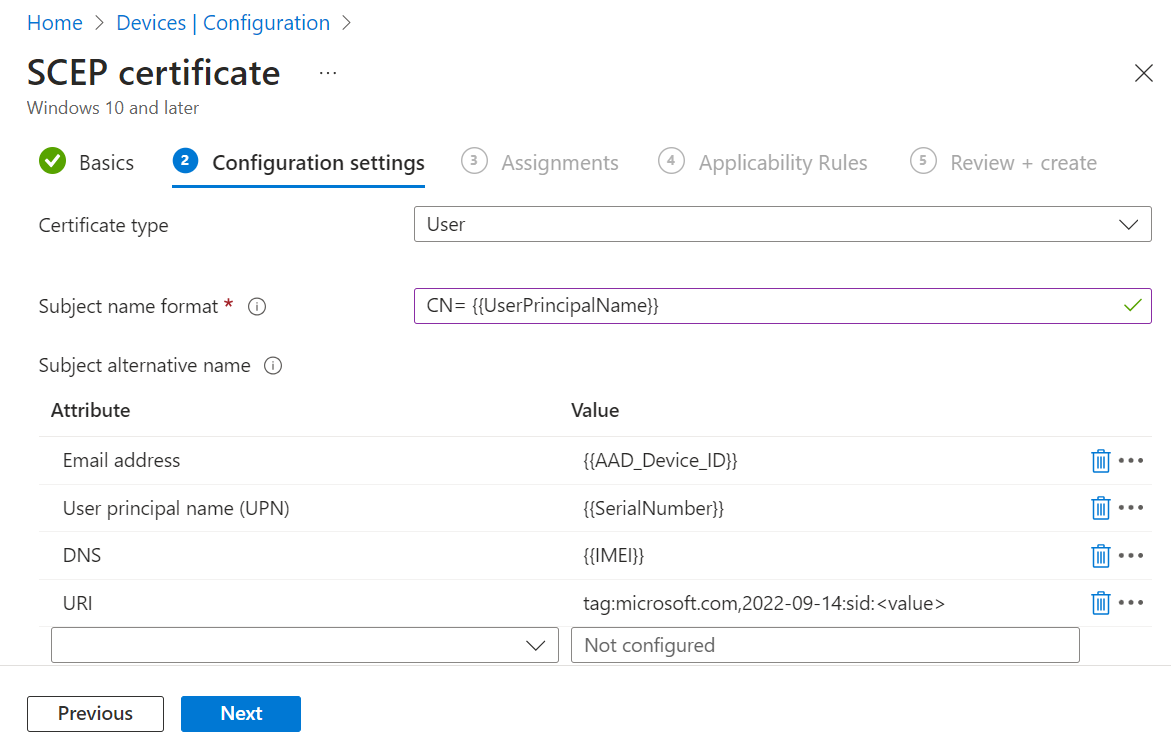
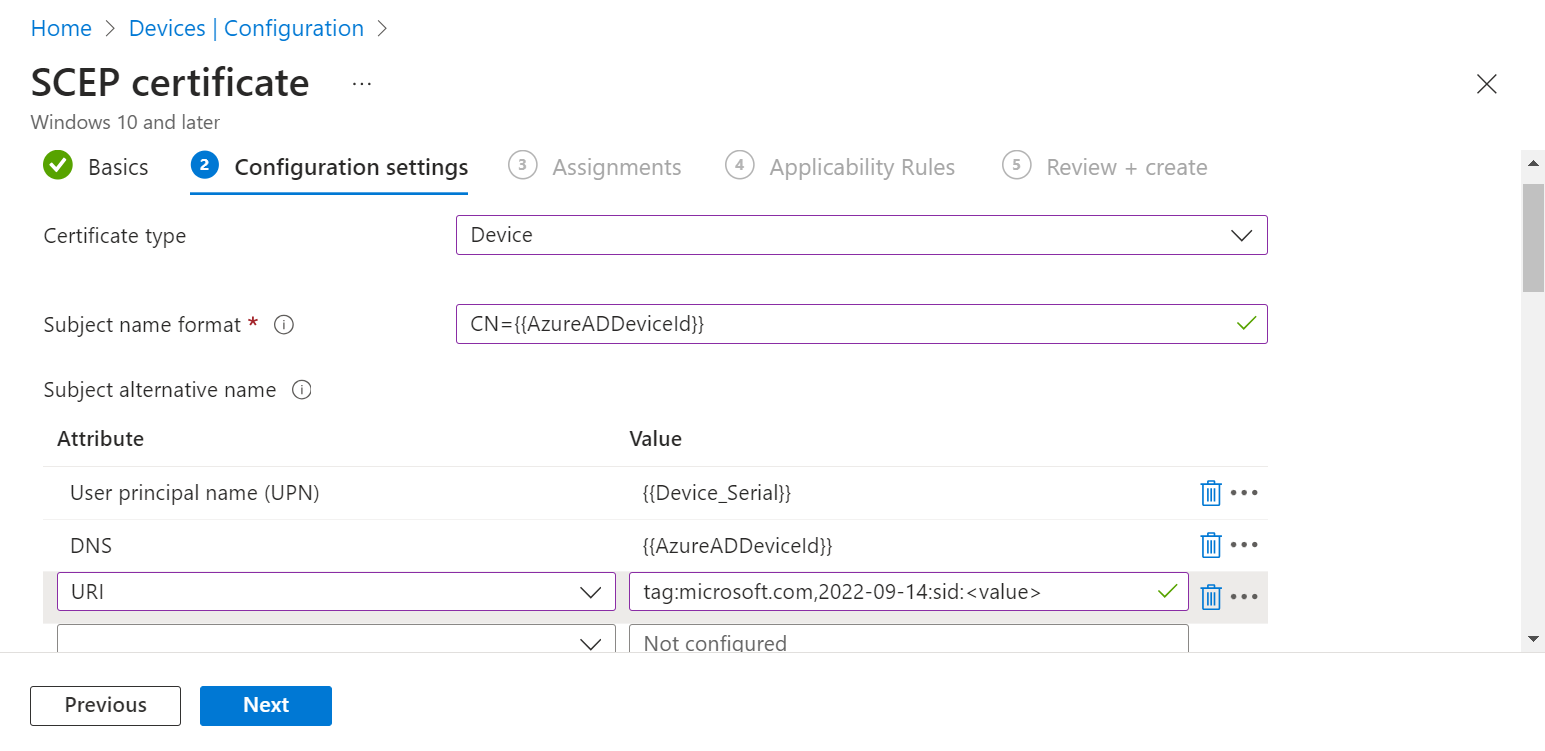
- Click Next. The Configurations settings tab opens. Two types of certificates can be issued to a client device.
- For Certificate Type – User

- For Certificate Type – Device

The following tabular column shows the configuration values for the two SCEP profiles:Field User Certificate Device Certificate Certificate type Select User Select Device Subject name format CN= {{UserPrincipalName}} CN={{AzureADDeviceId}} Subject alternative name Configure attributes with respective value:
- For Email ID, enter {{EmailAddress}}
- For User principal name, enter {{UserPrincipalName}}
- For DNS, enter {{AzureADDeviceId}}
- For URI, enter tag:microsoft.com,2022-09-14:sid:<value>
Configure attributes with respective value:
- For User principal name, enter {{Device_Serial}}
- For DNS, enter {{AzureADDeviceId}}
- For URI, enter tag:microsoft.com,2022-09-14:sid: <value>
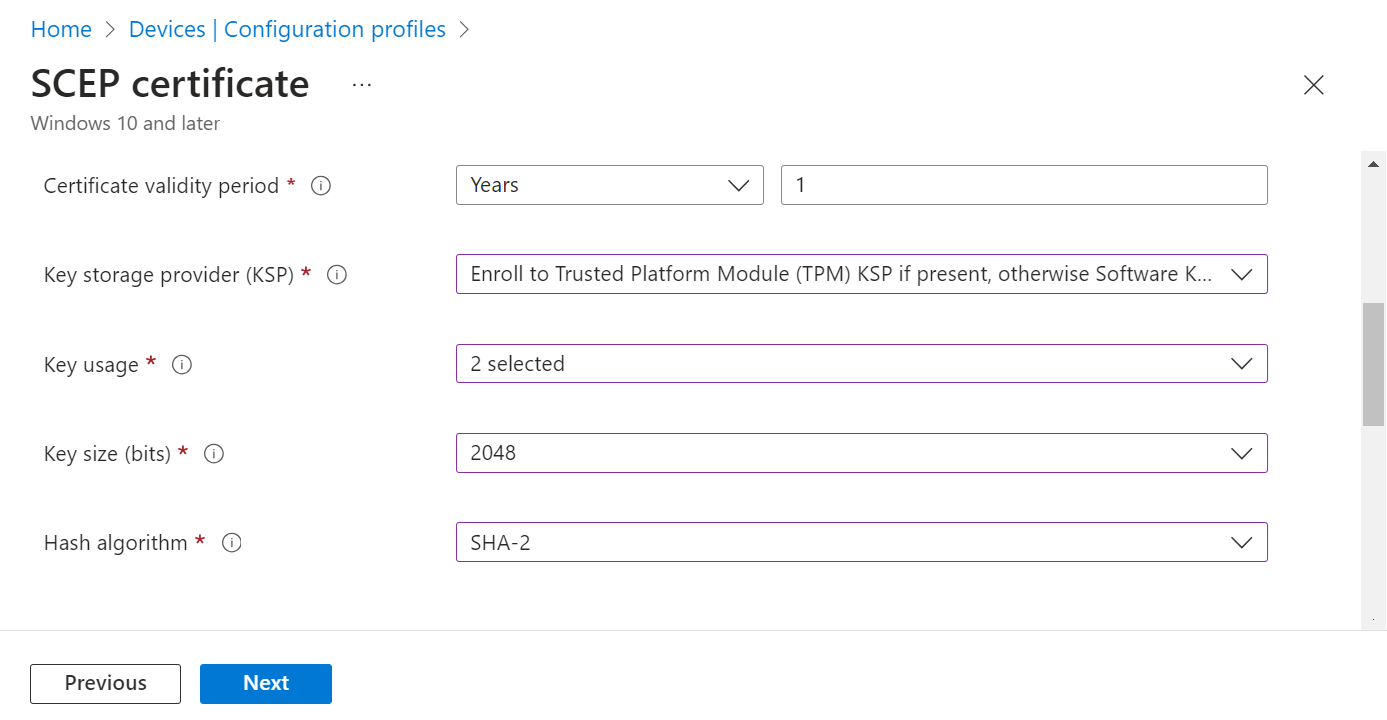
Certificate validity period Validity in number of Years Validity in number of Years Key storage provider (KSP) select Enroll to Trusted Platform Module (TPM) KSP if present, otherwise Software KSP to store the certificate’s key. Key usage Select both the Key encipherment and Digital signature checkboxes to exchange the certificate’s public key.
- Key encipherment: Allows key exchange only when the key is encrypted.
- Digital signature: Allows key exchange only when a digital signature protects the key.
Key size (bits) Select 2048 or 4096 as necessary. Hash algorithm Select SHA-2, the highest level of security that the connecting devices support. 
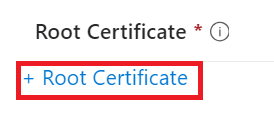
- Click + Root Certificate under the Root Certificate section.

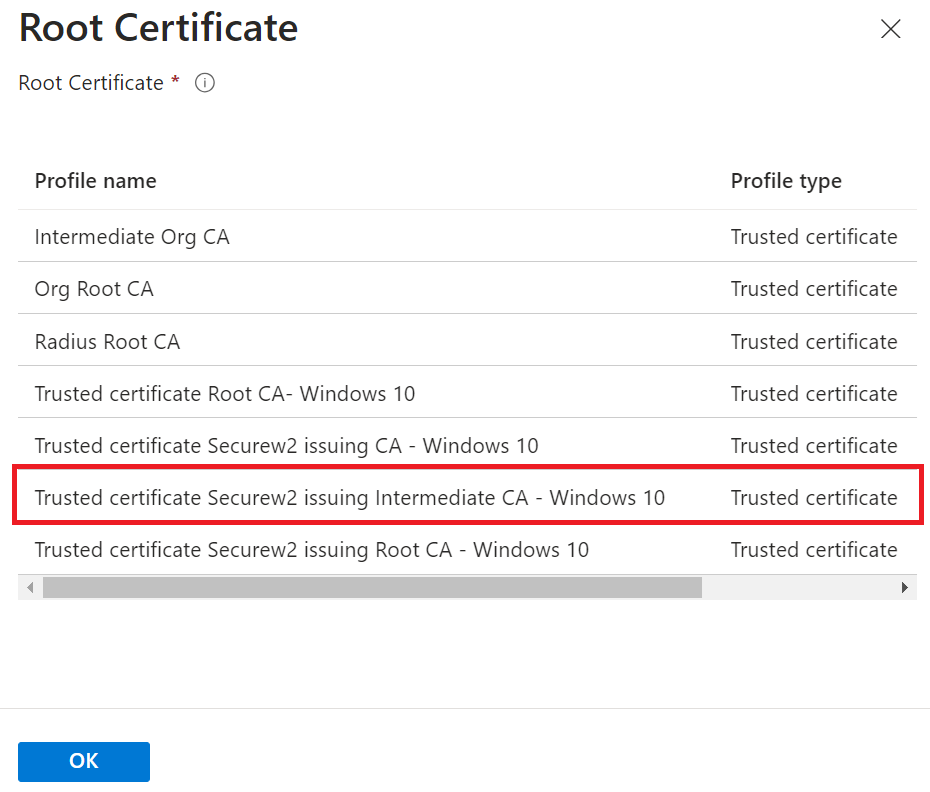
- In the Root Certificate pop-up window, select the profile created earlier (see the Creating a Trusted Certificate Profile – SecureW2 Intermediate CA section).

- Click OK.
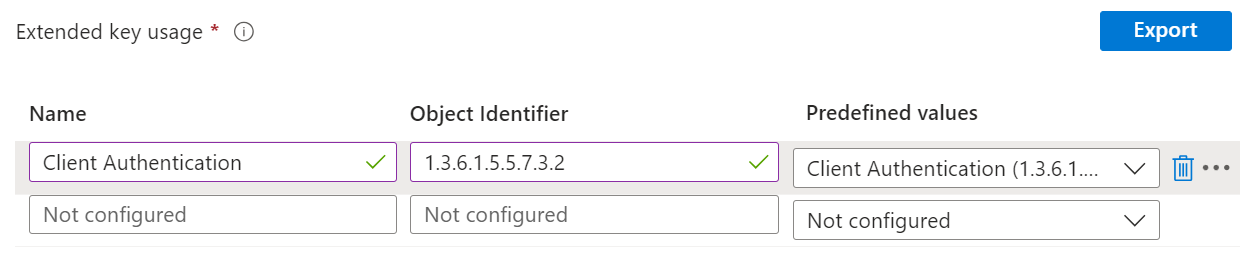
- Under the Extended key usage section, add values for the certificate’s intended purpose. In most cases, the certificate requires client authentication for the user to be able to authenticate to a server.
- In the Name field, enter the name of the extended key usage.
- In the Object Identifier field, enter a unique string of decimal numbers to identify an object.
- From the Predefined values drop-down list, select Client Authentication.

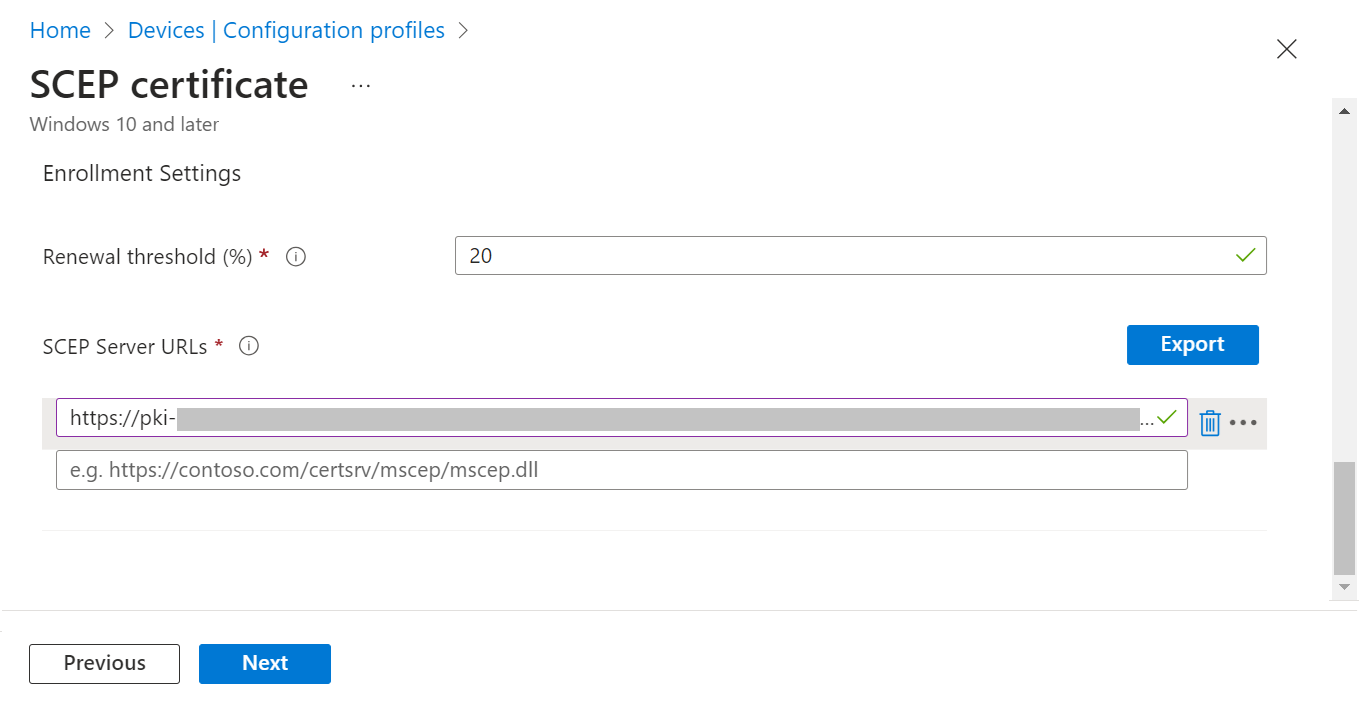
- Under the Enrollment Settings section, in the Renewal threshold (%) field, enter the percentage of the certificate lifetime that remains before the device requests renewal of the certificate. The recommended value in Microsoft Intune is 20%.
- In the SCEP Server URLs field, enter the Endpoint URI generated from the JoinNow Management Portal (see the Creating an Intune CA Device Management Platform section).

- Click Next.
- Assign the profile to the appropriate Groups and Rules, review it, and click Create.
- For Certificate Type – User
8.1 Creating a Wi-Fi Profile
To create a Wi-Fi Profile, perform the following steps:
- Sign in to the Microsoft Endpoint Manager portal.
- Navigate to Devices > Configuration.
- Click Create and select New Policy.
- On the Create a profile page, from the Platform drop-down list, select the device platform for this trusted certificate. The options are:
- Android device administrator
- Android (AOSP)
- Android Enterprise
- iOS/iPadOS
- macOS
- Windows 10 and later
- Windows 8.1 and later
NOTE: You must create a separate profile for each OS platform. The steps to create trusted certificates are similar for each device platform.
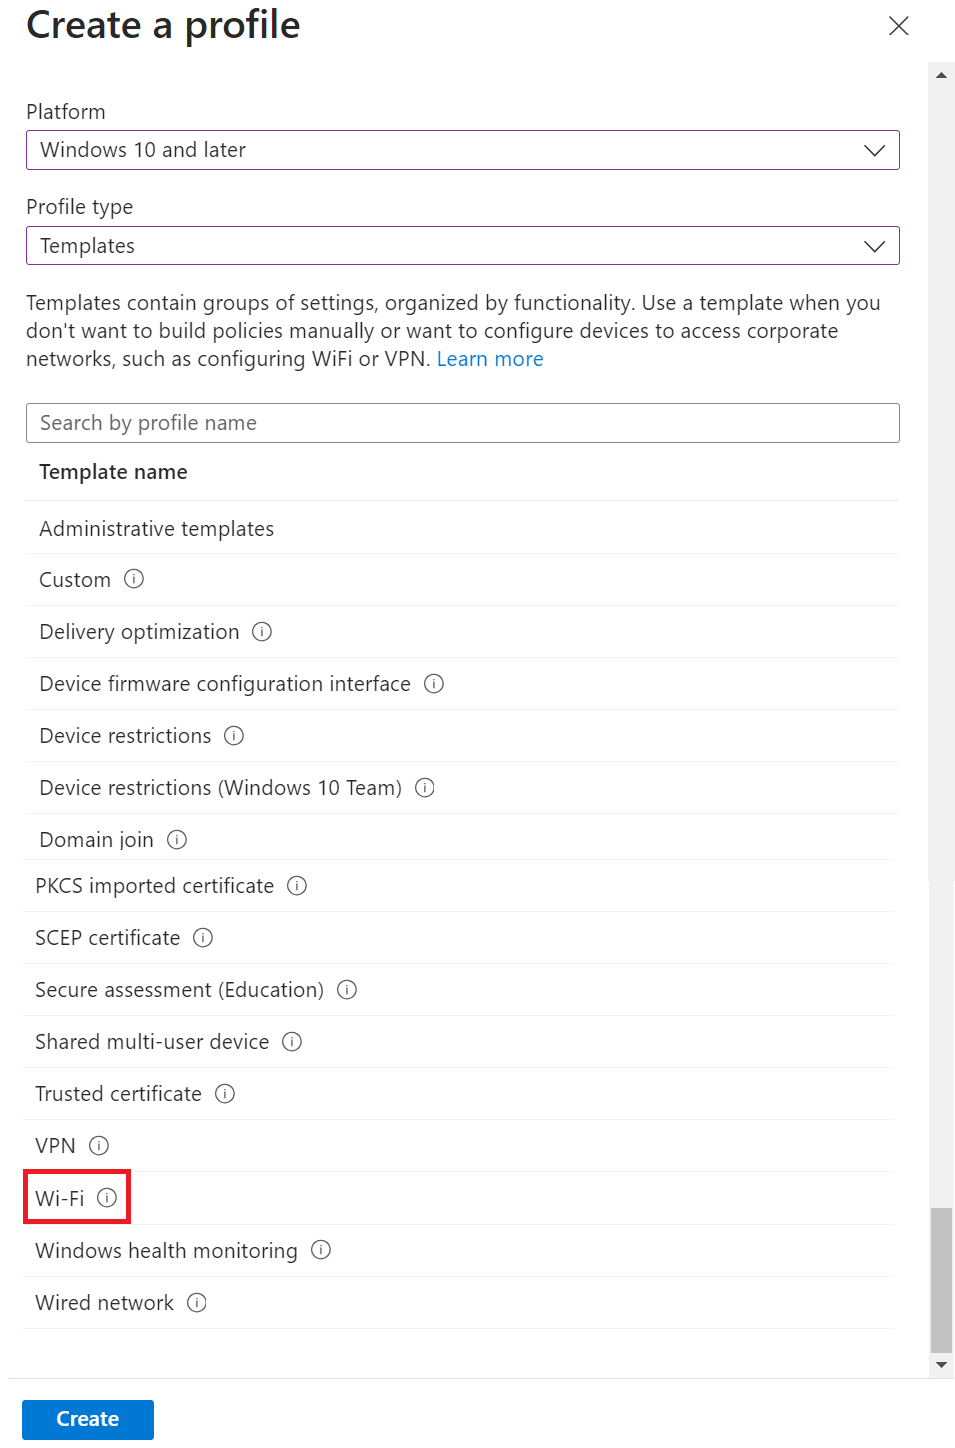
- From the Profile type drop-down list, select Templates and then select Wi-Fi.

- Click Create.
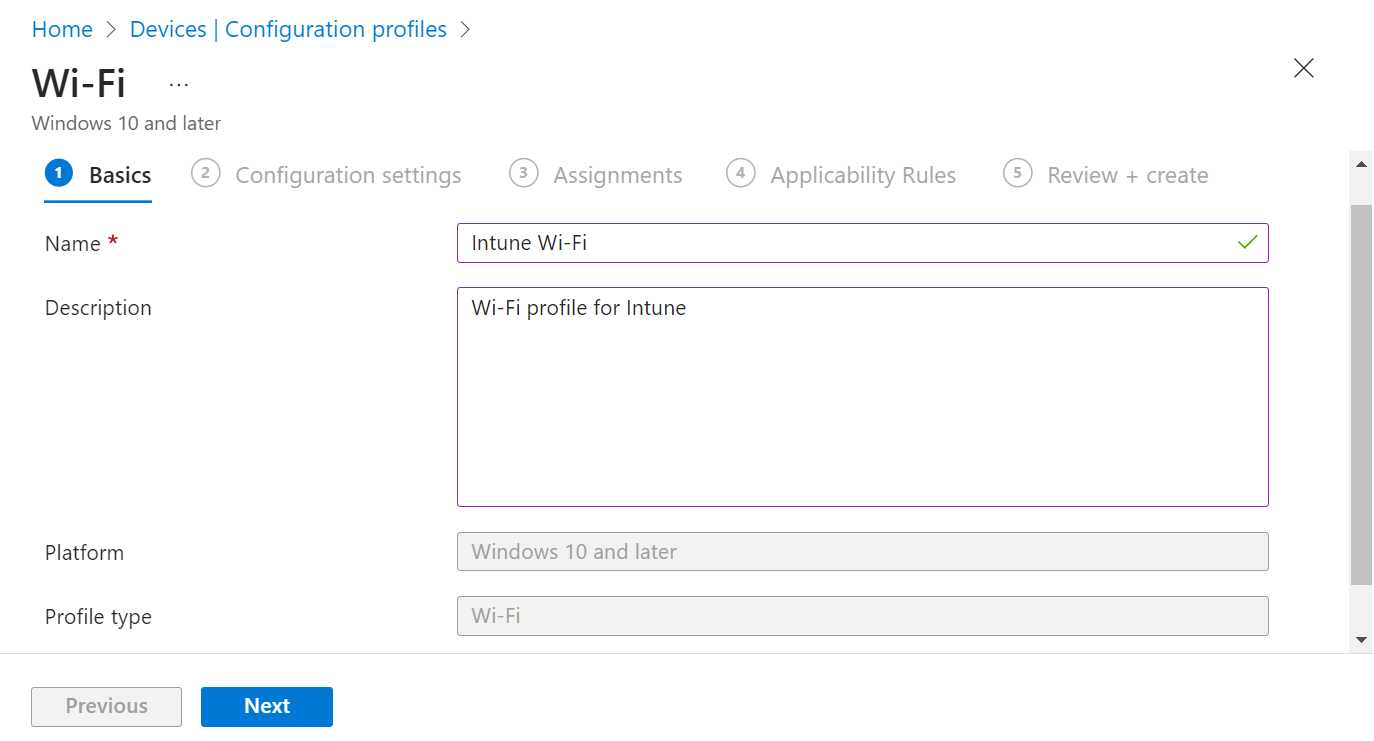
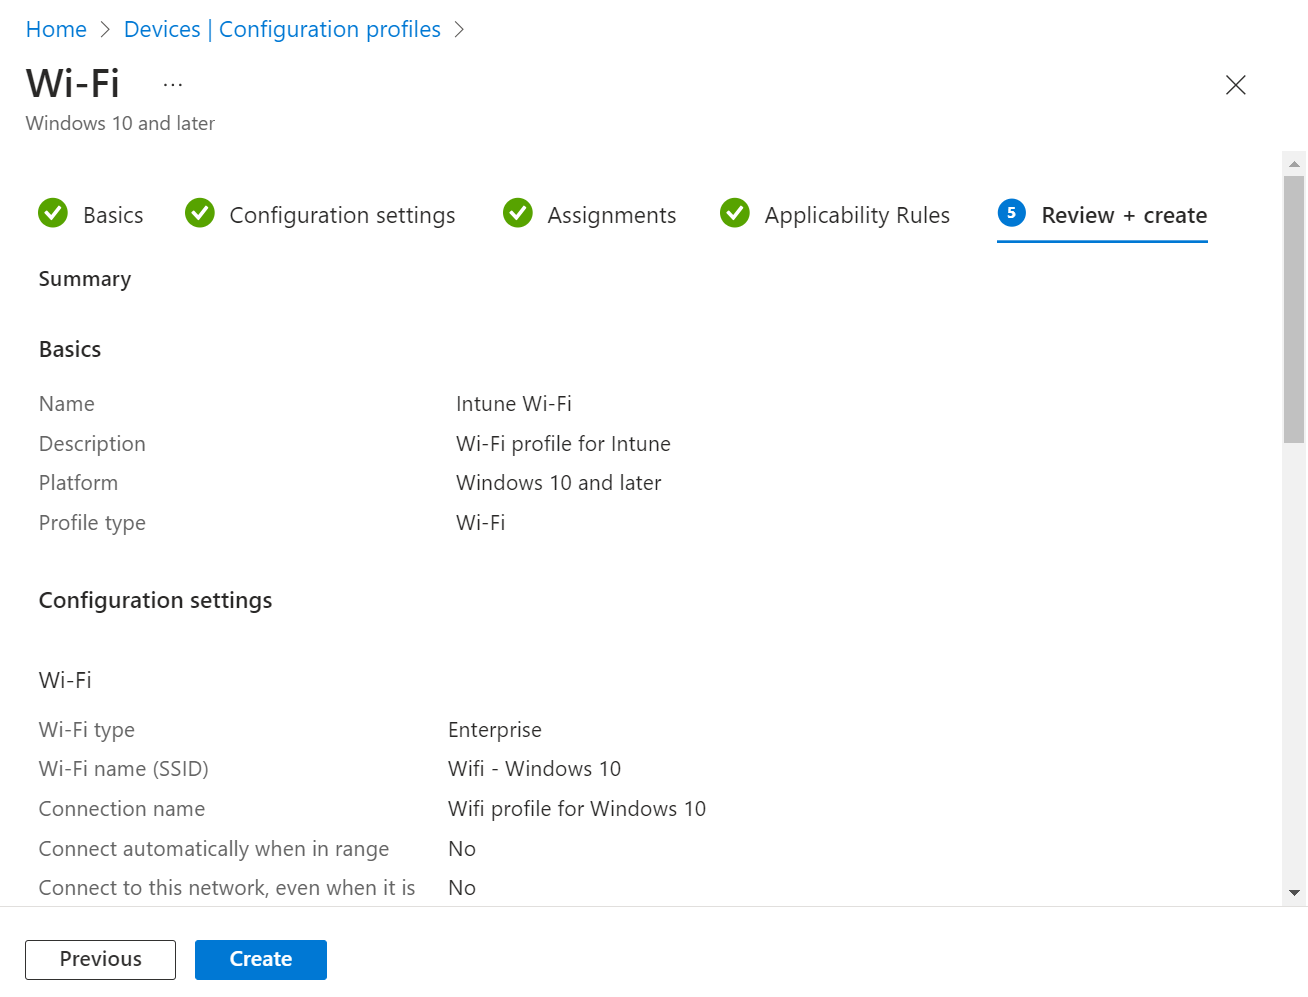
- On the Wi-Fi page, in the Basics section, enter the Wi-Fi’s name in the Name field.
- In the Description field, enter a suitable description for the Wi-Fi.

- Click Next.
- In the Configuration settings section, from the Wi-Fi type drop-down list, select any one of the following options:
- Basic
- Enterprise
- Configure your Wi-Fi settings and click Next.

- Assign the profile to the appropriate Groups and Rules, review it, and click Create.


8.2 Assign a Device Profile
After creating a profile, you must specify the devices to which the profiles are to be pushed. To assign the devices, perform the following steps:
- Sign in to the Microsoft Endpoint Manager portal.
- Navigate to Devices > Configuration.
- Select the profile you want to assign a policy to users or groups.
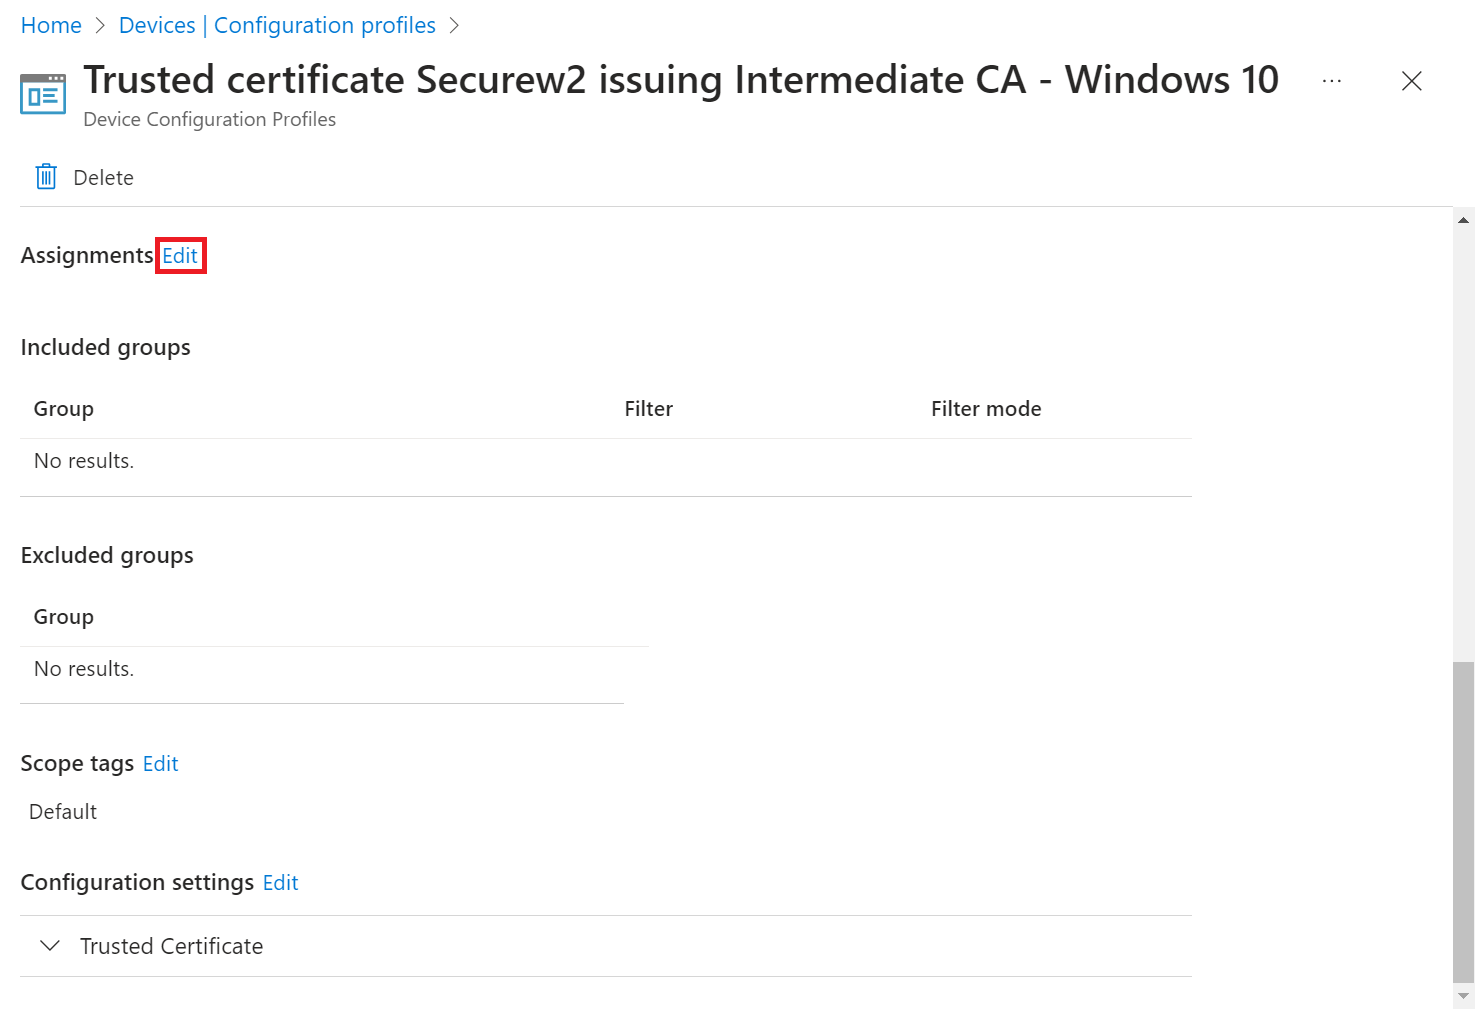
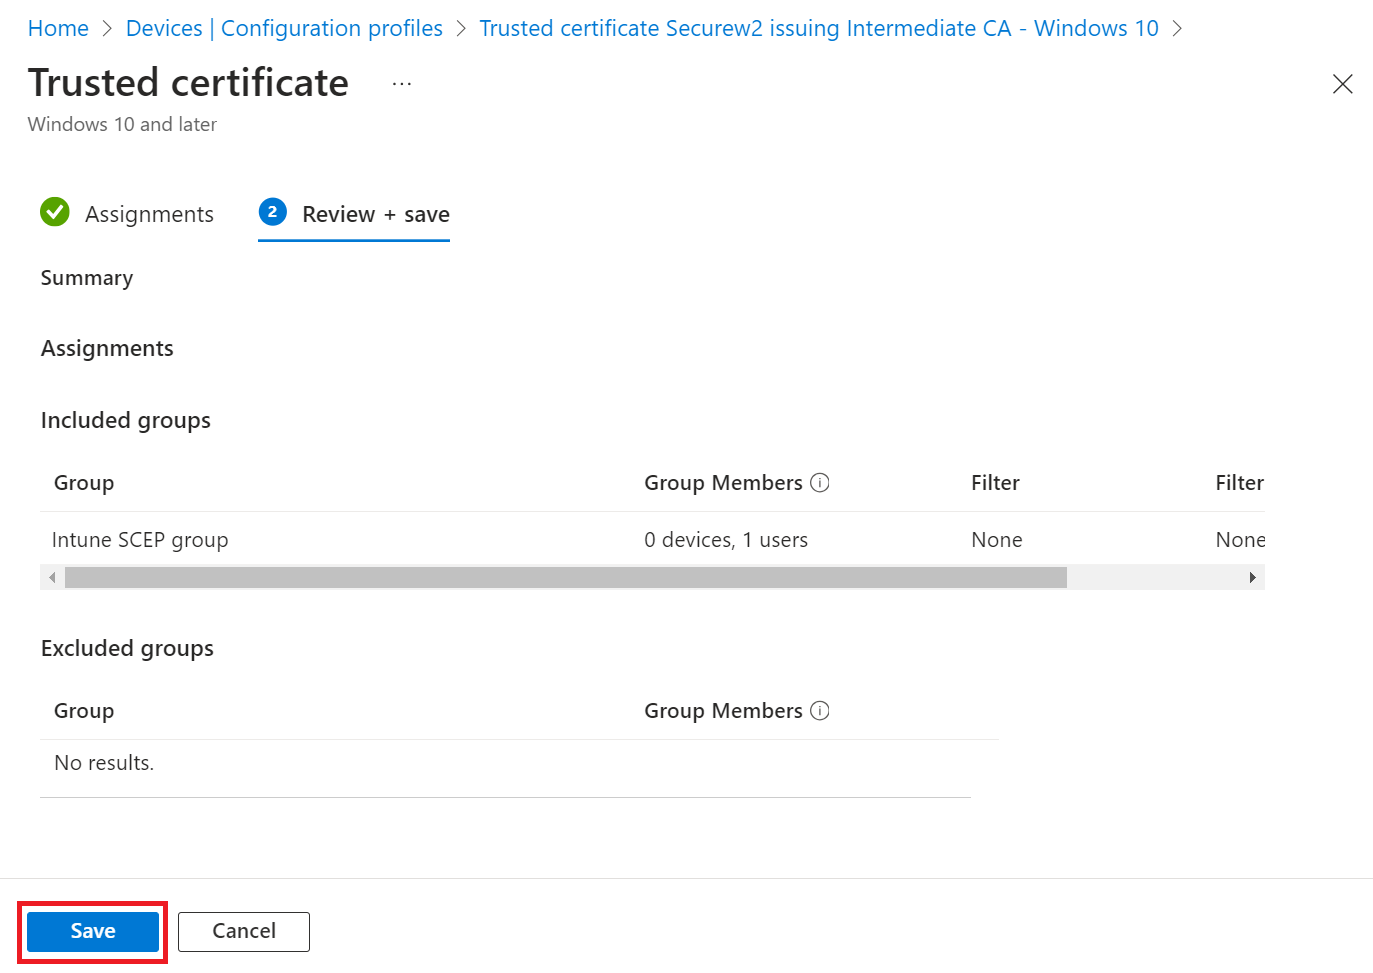
- Scroll to the Assignments section and click the Edit link.

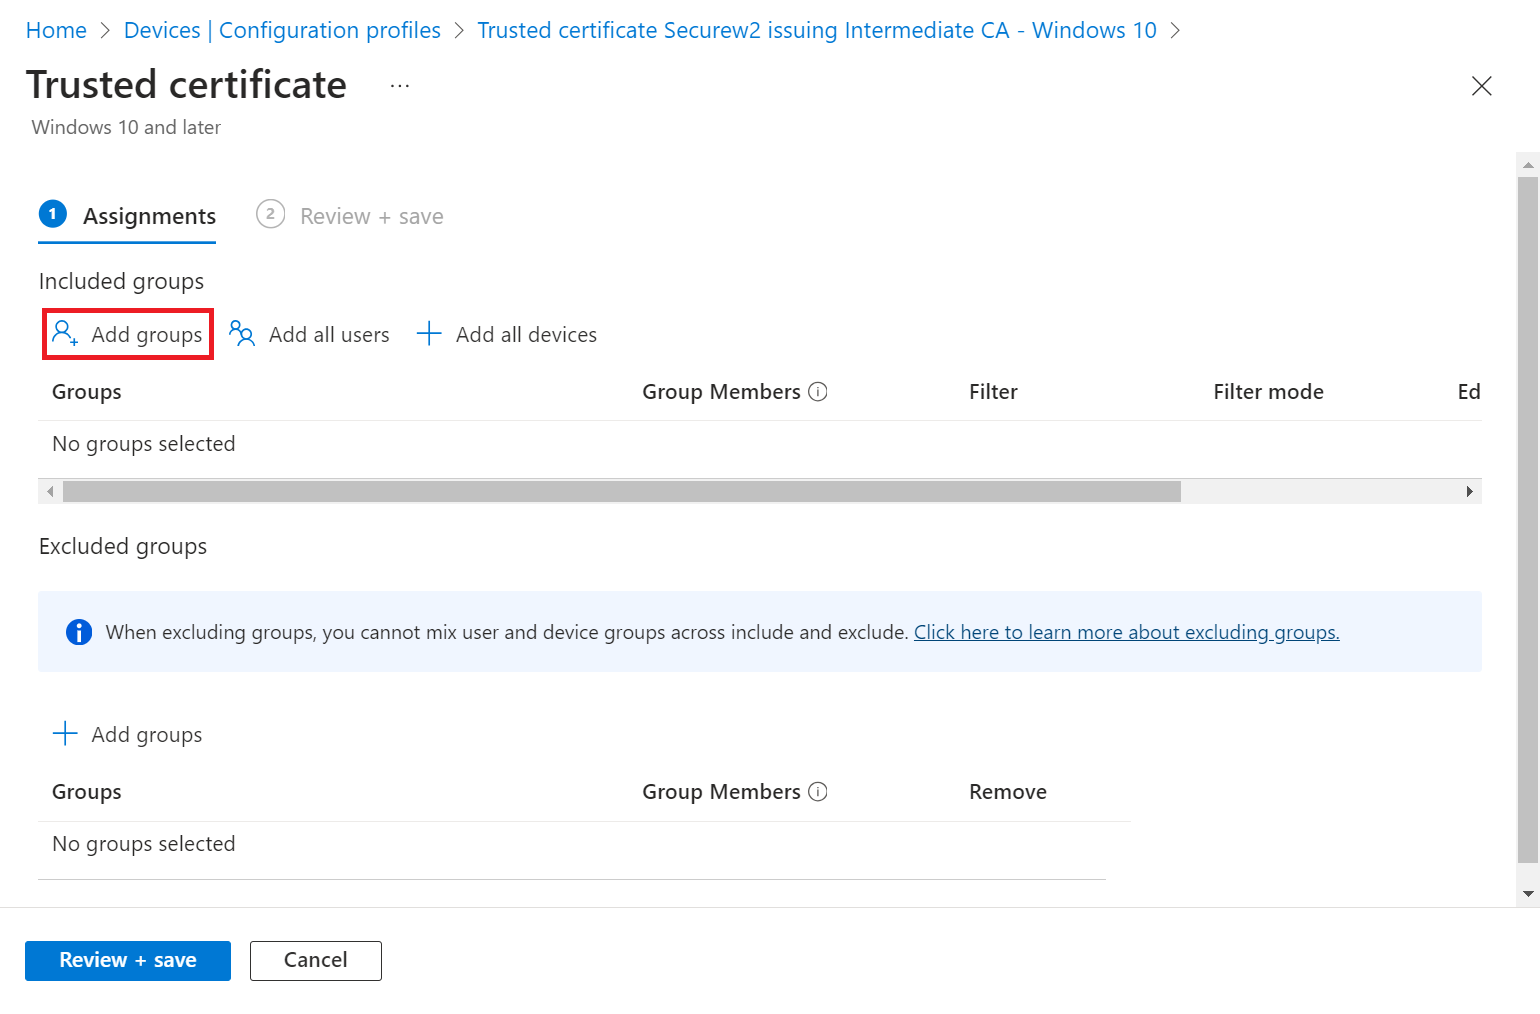
- Under the Included groups or Excluded groups section, click Add groups to add one or more Entra ID Groups. To apply the policy to all relevant devices, select Add all users or Add all devices.

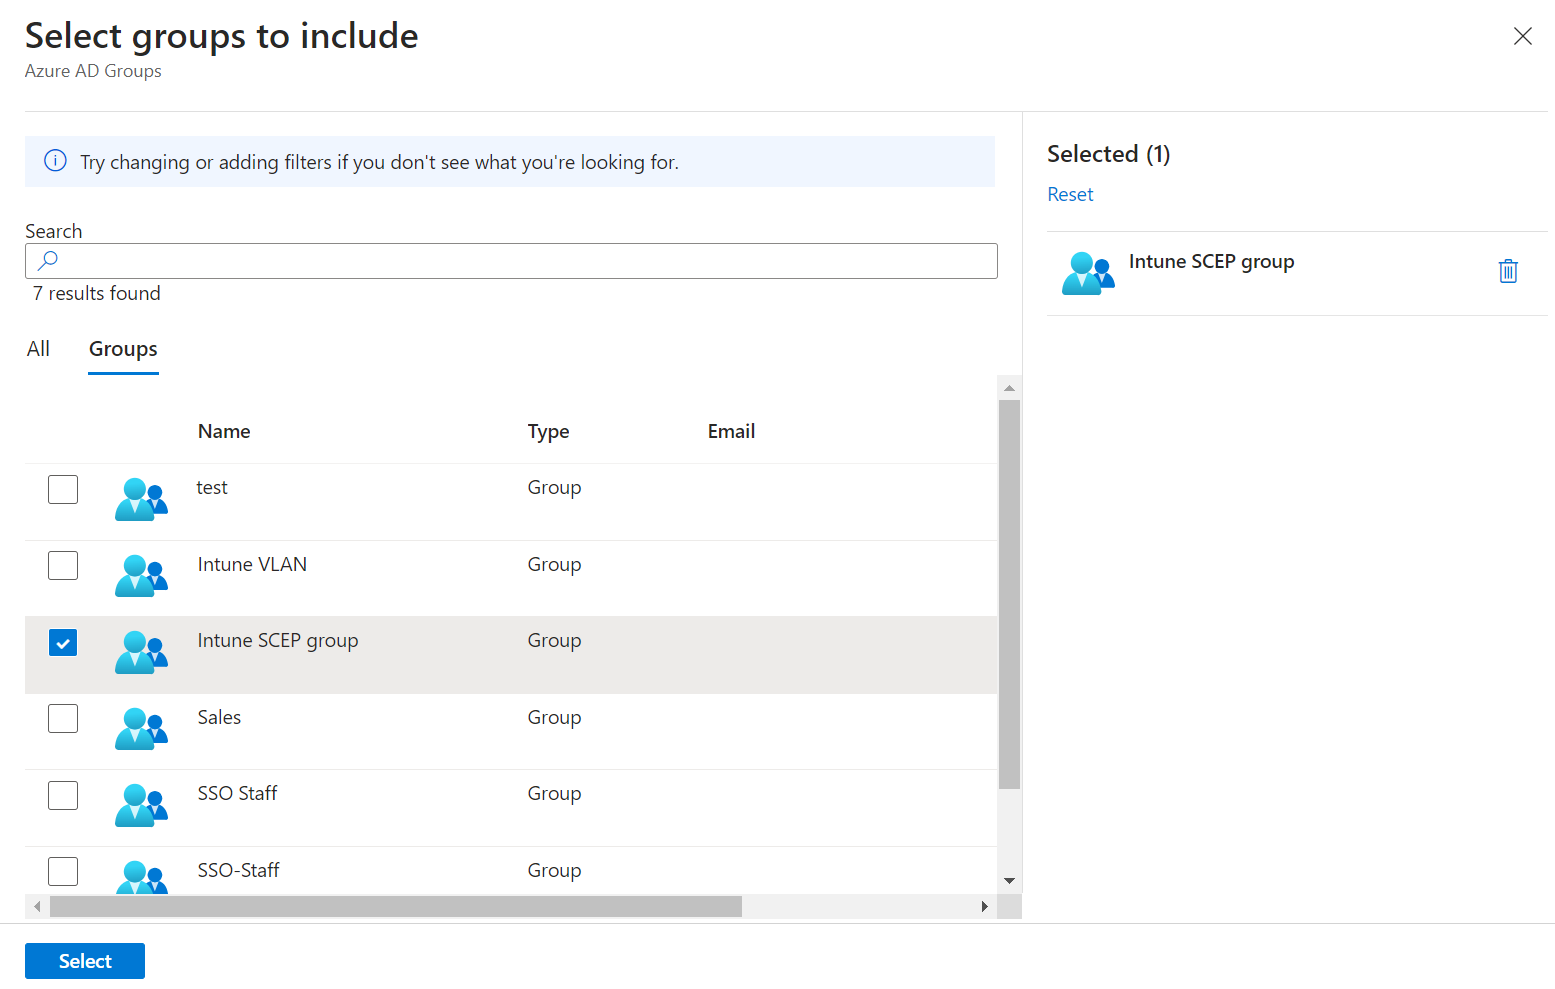
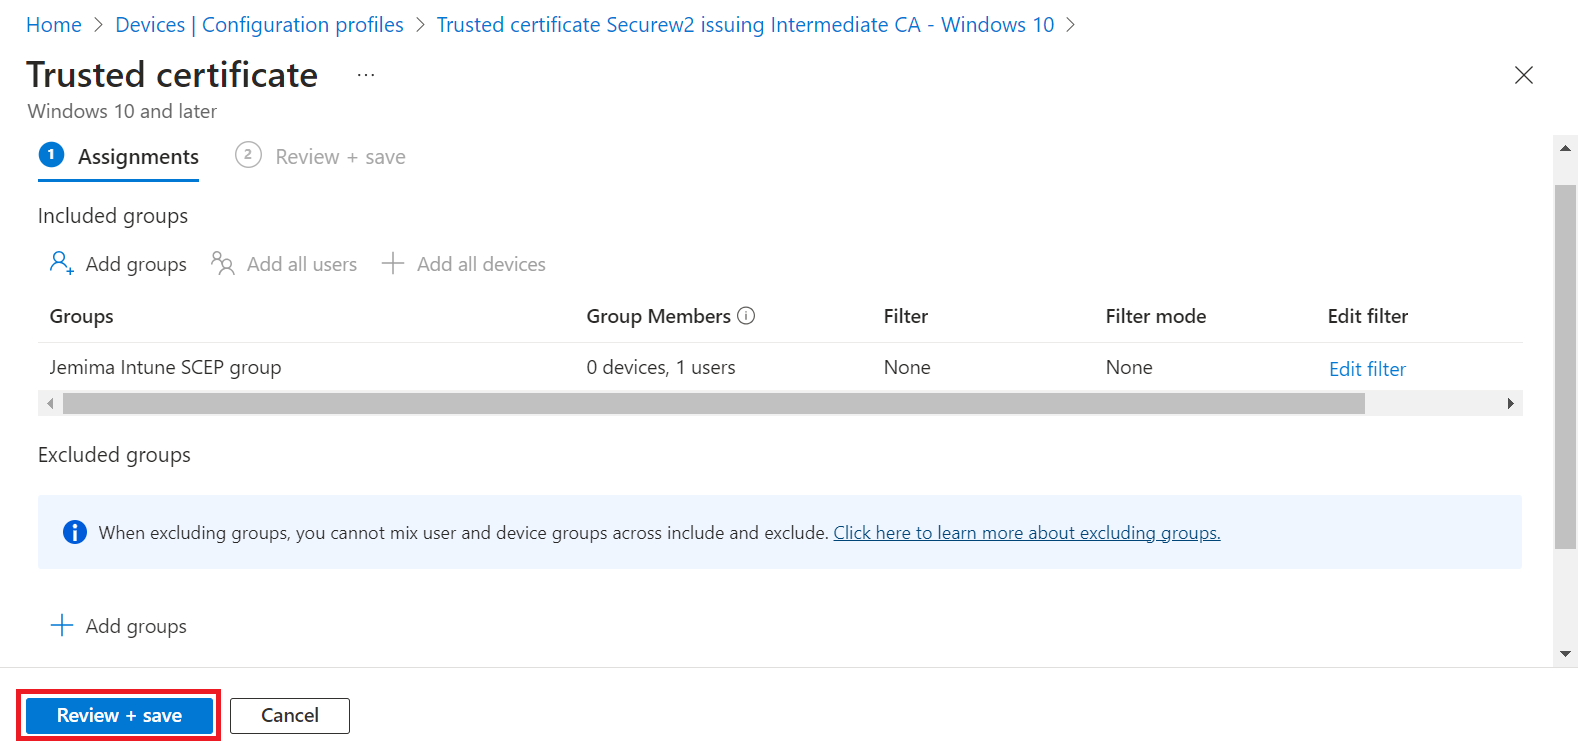
NOTE: If you click Add all users or Add all devices, the Add groups option is disabled. - On the Select groups to include page, select the Entra ID group to which the policy must be assigned and click Select to add the group.

- Click the Review + save button.

- Click Save.