

Setting Up EAP-TLS WPA2-Enterprise with Cisco Wireless LAN Controller
An onboarding SSID is an open SSID users connect to initially to configure their devices for wireless access. The onboarding SSID redirects the user to the SecureW2 landing page where they can enroll for a certificate. From here, the OS of the user’s device is detected and a client is deployed that is specific to that device’s OS. The client then configures the device by installing the Wi-Fi certificate, RADIUS server certificate for server certificate validation, and appropriate network settings required to authenticate via EAP-TLS.
- Login to the Cisco Dashboard
- In the WLAN tab, click Go next to the Create New dropdown menu
- Enter a Profile Name and SSID, and then click Apply
- Click the Security tab, and in the Layer 2 Security dropdown menu, select None
- Click the Layer 3 tab, and in the Layer 3 Security dropdown menu, select Web Policy

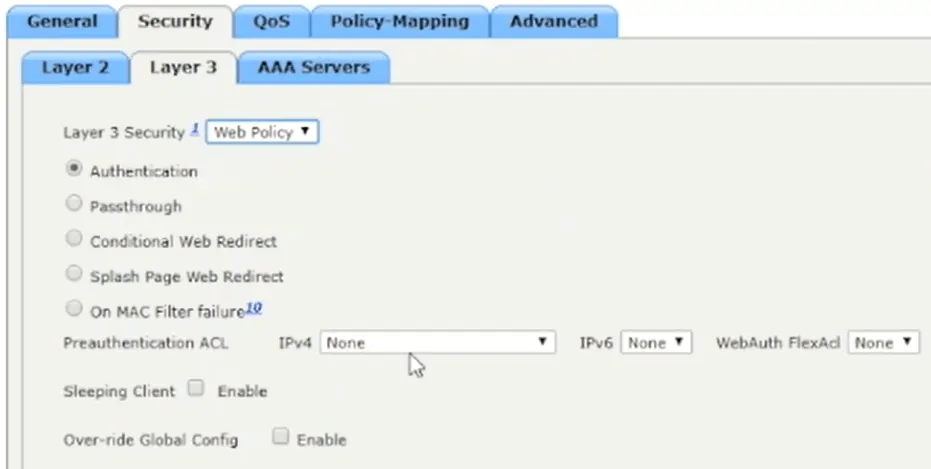
Here you would select your Walled Garden configuration or Access Control List (ACL) from the IPv4 dropdown menu. We are going to go through a quick setup for those who do not have one configured before starting this guide.
- Click the Security tab on the top menu, and click Access Control Lists
- Click New, enter a name in the Access Control List Name text box, and click Apply
- In the list that appears, click the ACL you just created and click Add New Rule
- Here you will see the information that can be populated into a new rule

- Here you will see the information that can be populated into a new rule
- Navigate to the SecureW2 Management Portal, click Documentation, and click SecureW2 JoinNow Deployment Guide
- Scroll to the section in the guide called Chapter 2: Firewall Rules
- Here you will find an array of resources you need to allow through the Open SSID
- For more details, check out our Onboarding SSID video in the Management Portal
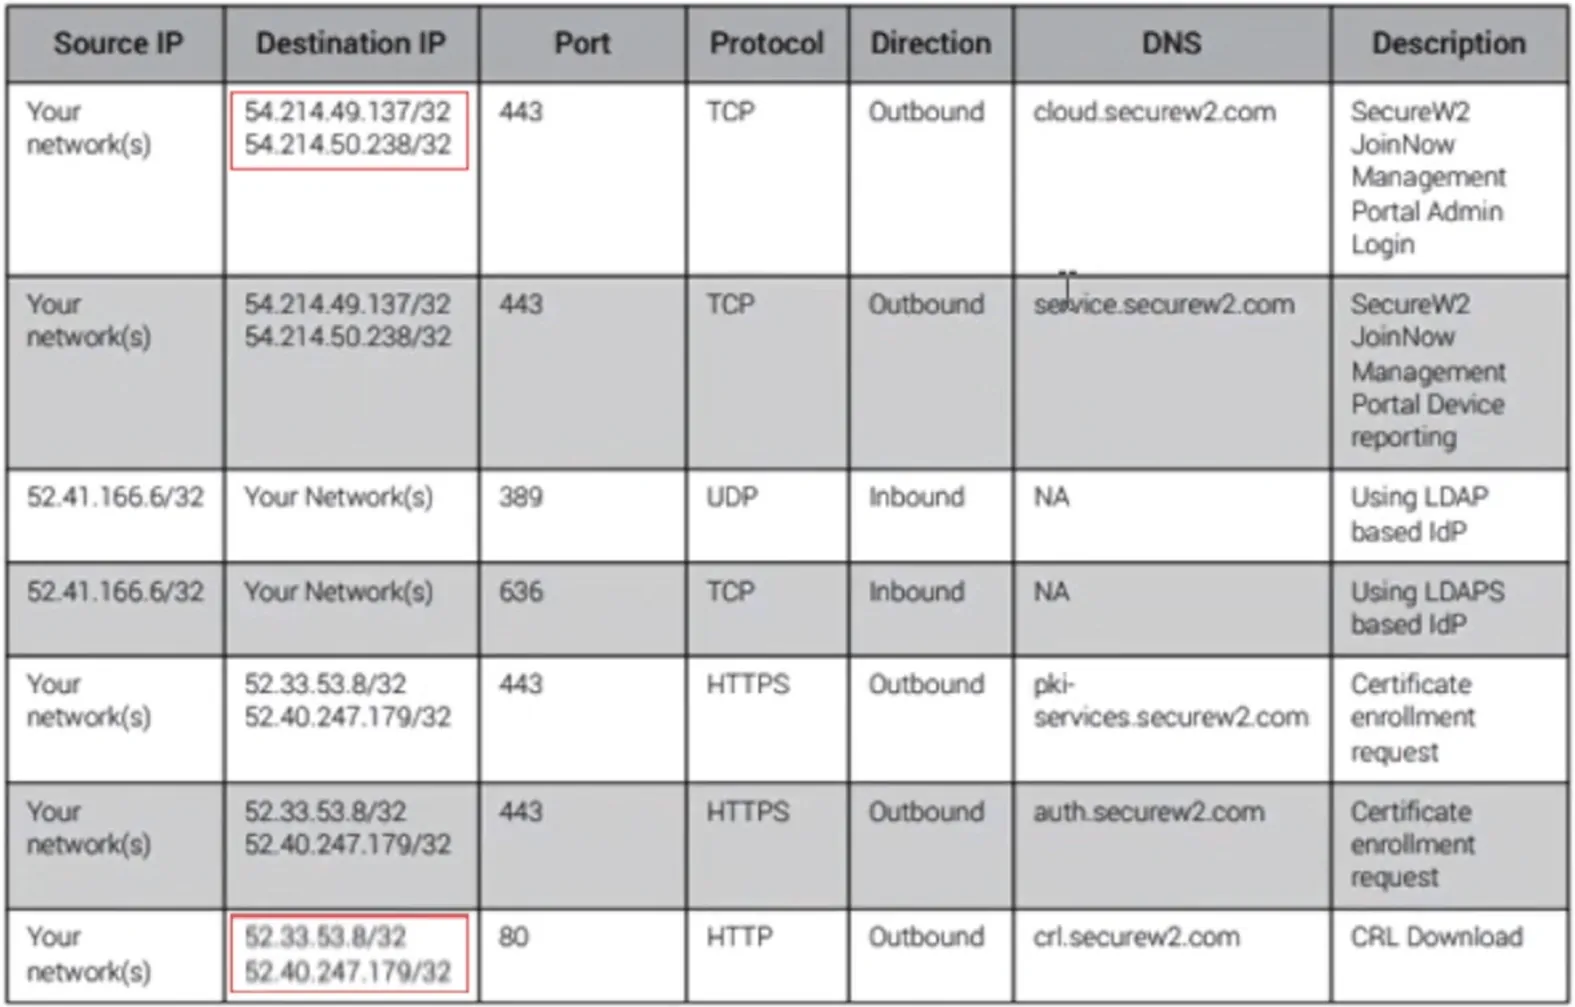
- For testing purposes, the following are the IP Addresses that need to be allowed:

- Copy the first IP Address on the list and navigate to the Cisco dashboard
- In the new rules list for the ACL, type 1 in the Sequence textbox
- Select IP Address in the dropdown box for Source and paste the IP Address we copied from the guide into the IP Address textbox
- In the Netmask textbox, enter 255.255.255
- In the Action dropdown box, select Permit and click Apply
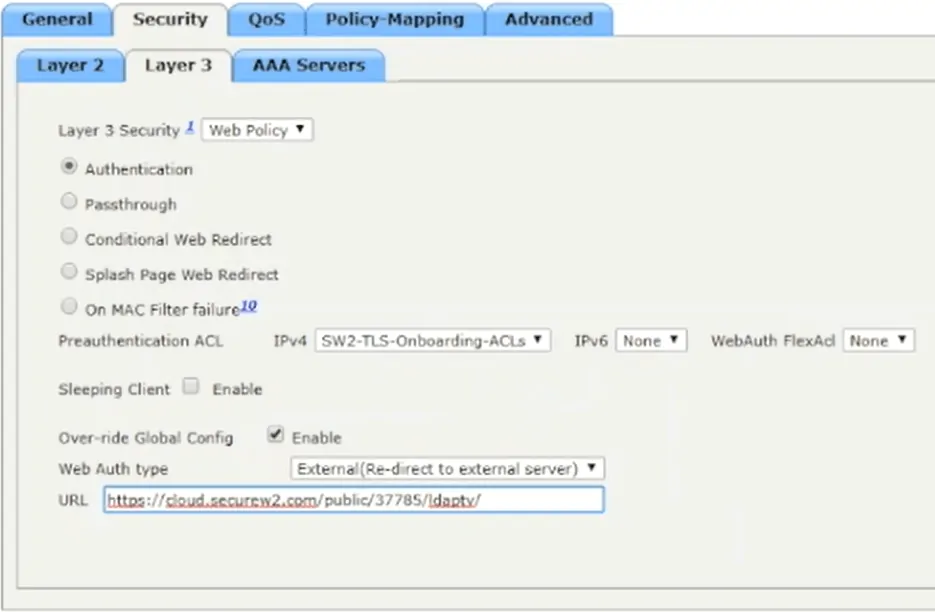
- Resuming our WLAN configuration, select the ACL List we created from the IPv4 dropdown box
- Click the checkbox next to Over-ride Global Config to enable it
- In the Web Auth Type dropdown box, select External (Re-direct to external server)
- Navigate to the SecureW2 Management Portal, click Network Profiles, and click View for the network profile you’ve configured for this guide
- Copy the URL of the landing page that opens and paste it in the URL textbox in the ACL List Configuration
- Click Apply
- In the General tab, check the box next to Status labelled Enable, and click Apply


First, we need to add the SecureW2 Cloud RADIUS Server into Cisco, so starting in the SecureW2 Management Portal:
- Under the heading AAA Management, click AAA Configuration
- Navigate to the Cisco dashboard and click Security
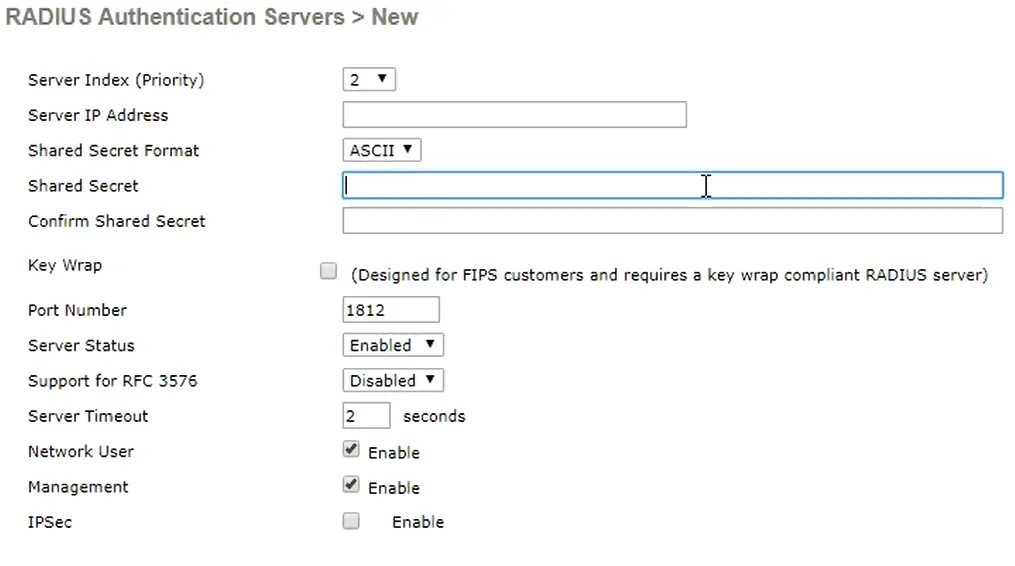
- Click Authentication beneath the heading RADIUS, and click New
- The following is the information from SecureW2 that you will enter in the Cisco RADIUS
- Shared Secret
- Primary IP Address (enter in the textbox called Server IP Address in Cisco)
- Port
- After you have entered this information, click Apply

Now that we’ve configured the onboarding SSID that will enroll users for a certificate, we need to setup the secure SSID. This SSID needs to be configured for EAP-TLS WPA2-Enterprise Authentication. It also needs to be integrated with a RADIUS server (in this case the SecureW2 RADIUS) that will authenticate the users’ certificates and authorize them for network access.
- Click Network Profiles under the heading Device Onboarding
- Click Edit that applies to the network profile you created for this WPA2-Enterprise Authentication and copy the name of the network
- Navigate to the Cisco dashboard and click the WLANs tab
- Next to the dialog box called Create New, click Go
- Paste the name of the network into the Profile Name and SSID textboxes, and click Apply
- Click the Security tab and click AAA Servers
- In the Server 1 dialog box, select the server we created earlier, and click Apply

- Under the General Tab, click the check box for Enabled and click Apply
