SOTI MobiControl is the Enterprise Mobility Management (EMM) solution that provides control and visibility to the users on overall connected end devices including their performance, security or compliance risks.
Below is a detailed guide on how to integrate SecureW2 with SOTI MobiControl to create and auto-enroll certificates using the Simple Certificate Enrollment Protocol (SCEP).
The following are the high-level steps to set up certificate enrollment through SCEP:
- Create an Intermediate CA for SCEP Gateway Integration
- Generate SCEP URL and Secret
- Configure Soti Mobicontrol
- Set up Soti Mobicontrol Configuration Profiles
Prerequisites
The following are the prerequisites to set up SCEP on SOTI Mobicontrol:
- End users should enroll their devices with SOTI MobiControl.
- Contact SOTI support for Cloud deployment
Configure SecureW2
Create an Intermediate CA for SCEP Gateway Integration
To create a new intermediate CA, perform the following steps:
- Log in to the JoinNow Management Portal.
- Navigate to PKI > Certificate Authorities.
- Click Add Certificate Authority.
- In the Basic section, from the Generate CA For drop-down list, select Device and User
Authentication to authenticate devices and users. - From the Type drop-down list, select Intermediate CA.
- From the Certificate Authority drop-down list, select the default Root CA that comes with your organization.
- In the Common Name field, enter a common name for the CA certificate.
- From the Key Size drop-down list, select 2048 for the CA certificate key pair.
- From the Signature Algorithm drop-down list, select the signature algorithm for the certificate signing request. The option available is SHA-256.
- In the Validity Period (in years) field, enter the validity period of the CA certificate.

- Click Save. The new intermediate CA is generated.
Generate SCEP URL and Secret
To generate the SCEP URL and secret:
- Navigate to Identity Management > API Tokens.
- Click Add API Token.
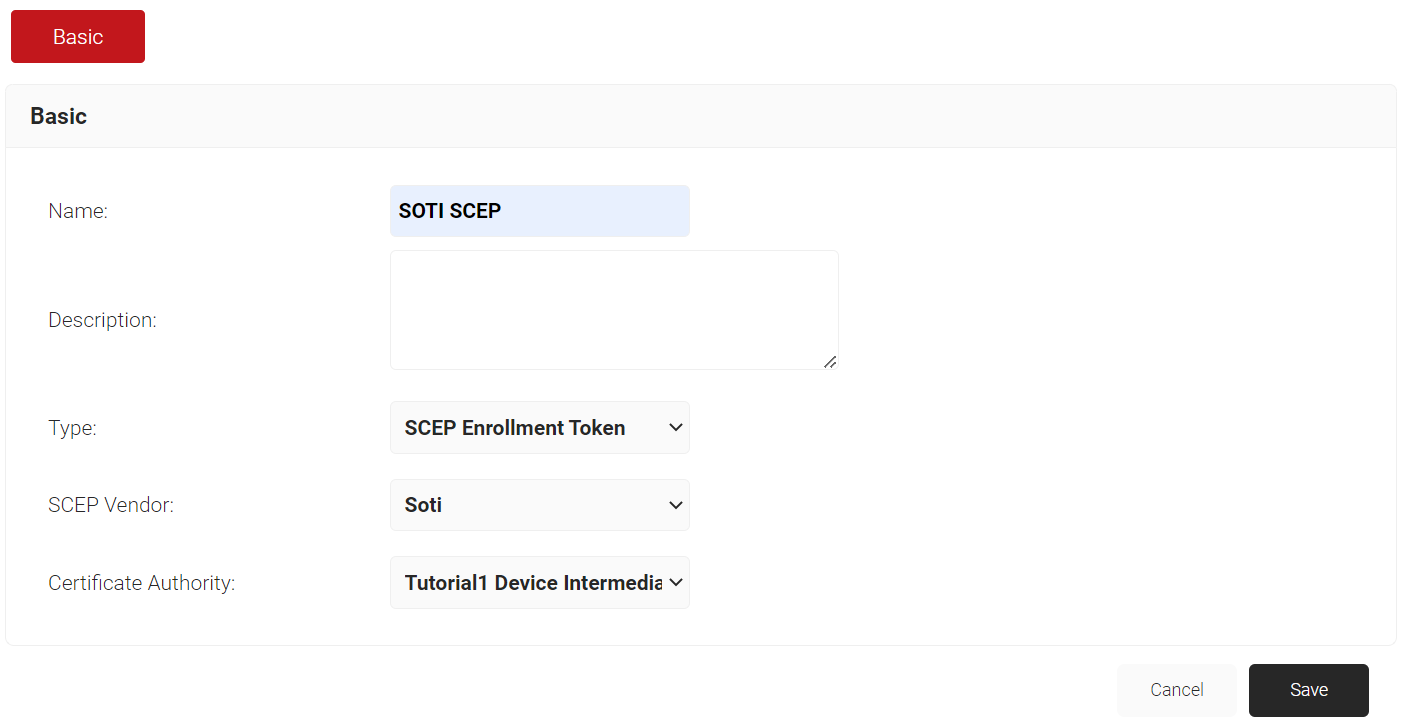
- In the Basic section, enter the name of the API Token in the Name field.
- In the Description field, enter a suitable description for the API Token.
- From the Type drop-down list, select SCEP Enrollment Token.
- From the SCEP Vendor drop-down list, select Soti.
- From the Certificate Authority drop-down list, select a CA. If you do not select a CA, by default, the organization CA is chosen.

- Click Save.
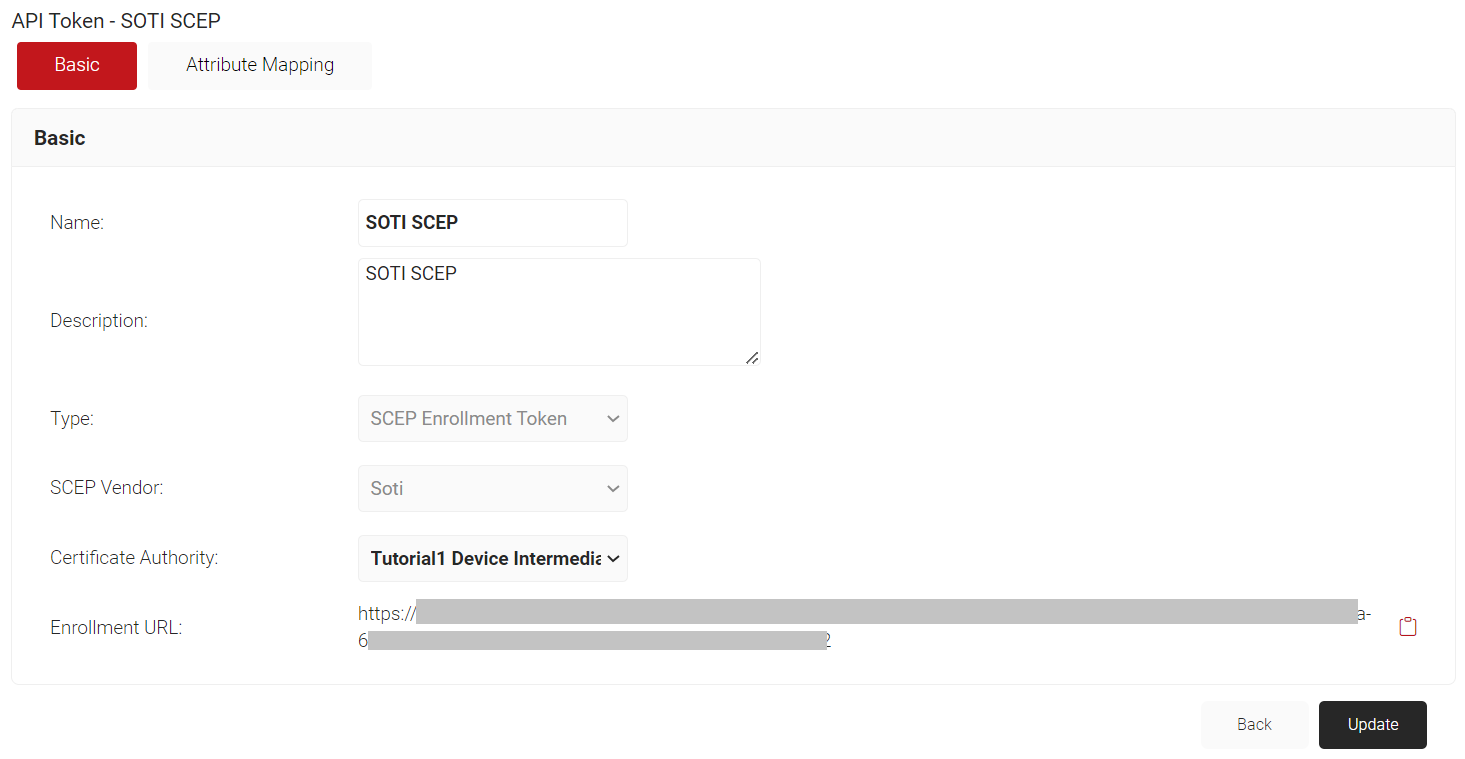
- Click Update.A .csv file that contains the API Secret and URL is downloaded. In addition, the Enrollment URL is displayed on the screen.

- Click Update.
NOTE: Save the .csv file securely. This file is downloaded only once when the token is created. If you lose this file, you cannot retrieve the secret.
Configure Soti Mobicontrol
Set up Certificate Authority Enrollment via SCEP
To set up certificate authority enrollment via SCEP on Soti Mobicontrol:
- Log in to the SOTI Mobicontrol portal.
- Click the Menu button on the top left corner.
- Navigate to SYSTEM SETTINGS > Global Settings.

- In the Global Settings page, navigate to Services > Certificate Authority.

- Click the + button in the Certificate Authorities section.

- In the General Details section, enter the name of the CA in the Name field.
- From the Certificate Type drop-down list, select ADCS.
- Select the SCEP radio button in the Configuration Type section.
- Enable the Use SCEP Client option.
- In the Service URL field, enter the SCEP URL generated from the .csv file (see the Generate SCEP URL and Secret section).
- Enable the Use Static Challenge option.
- In the Static Challenge field, enter the API Secret from the .csv file.

- To enter the value in the Thumbprint field, navigate to PKI > Certificate Authorities in the JoinNow Management Portal.
- Click the Download link on the recently created Intermediate CA (see the Create an Intermediate CA for SCEP Gateway Integration section).

- From your Mac device, click the Finder menu from the dock and navigate to Applications > Utilities > Keychain Access.
- In the keychain Access dialog box, under the Certificates tab, open the Intermediate CA certificate created earlier.

- On the displayed screen, copy the thumbprint from SHA-256 under the Fingerprints section and paste the value in the Thumbprint field present in the Certificate Authority dialog box (in the SOTI Mobicontrol portal).


- Click the Download link on the recently created Intermediate CA (see the Create an Intermediate CA for SCEP Gateway Integration section).
- To create a Soti Mobicontrol certificate template, scroll down to the Certificate Templates section and click the + button.

- In the Template Details section, enter the template name in the MobiControl Template Name field.
- From the Subject Name drop-down list, select a common name of the certificate.
NOTE: Once the Subject Name is selected, enter “CN=” before the attribute. For example, select %ENROLLEDUSER_EMAIL% from the Subject Name drop-down list and add “CN=%ENROLLEDUSER_EMAIL%”.
- Click the + button in the Subject Alternative Names section.

- From the ALTERNATIVE NAME TYPE drop-down list, select RFC822 Name.
- From the ALTERNATIVE NAME VALUE drop-down list, select the corresponding payload variables for RFC822 Name.

- Select the 2048 radio button in the Key Size section.
- Enable the Use Automatic Renewal option.
- In the Days Before Automatic Renewal field, enter the number of days to specify the interval before the certificate is renewed.

- Click ADD. The certificate template is created and enabled in the Certificate Templates section.

- Click SAVE.
Set up Soti Mobicontrol Configuration Profiles
Configure a Soti Mobicontrol profile for macOS
To create and configure a Soti Mobicontrol profile, perform the following steps:
- Log in to the SOTI Mobicontrol portal.
- Click the Menu icon on the top left corner.
- Navigate to CONFIGURATIONS > Profiles.

- Click the + NEW PROFILE button.

- In the CREATE PROFILE dialog box, select macOS Device.

- In the CREATE PROFILE dialog box, under the GENERAL tab, enter the name of the profile in the Profile Name field.
- In the Description field, enter a suitable description for the profile.

- Under the CONFIGURATIONS tab, click the + button.

- In the Add a Configuration pop-up, select the Certificates option under the Security & Restrictions section.

- In the CERTIFICATES dialog box, enable the DigiCert Global Root CA option under the Add Certificates section.
- Under the Certificate Templates section, enable the recently created certificate template (see the Set up Certificate Authority Enrollment via SCEP section).

NOTE: Once you enable the certificate template, it’s corresponding certificate authority will be used. - Click SAVE.
Create a Soti Mobicontrol WiFi Payload
To set up a Soti Mobicontrol WiFi profile:
- Log in to the SOTI Mobicontrol portal.
- Click the Menu icon on the top left corner.
- Navigate to CONFIGURATIONS > Profiles.
- Click the + NEW PROFILE button.
- In the CREATE PROFILE dialog box, select macOS Device.
- Under the GENERAL tab, enter the Profile Name and Description for profile creation.
- Under the CONFIGURATIONS tab, click the + button.
- In the Add a Configuration dialog box, select WiFi under the Connectivity section.

- In the WIFI dialog box, enter the Name of the SSID.
- In the Security section, select WPA2 Enterprise from the Type drop-down list.
- In the Protocols section, select the TLS checkbox.

- In the Authentication section, select the certificate template that you created earlier from the User Identity Certificate drop-down list.

- In the Trust section, select the DigiCert Global Root CA checkbox from the Trusted Certificates drop-down list, and then click APPLY.

- Click the + button in the Add Trusted Server Names section.
- In the TRUSTED SERVER NAME field, enter *.securew2.com (if you are using RADIUS server).

- Click SAVE.

- Click SAVE.
- Click SAVE AND ASSIGN.
- In the ASSIGN dialog box, select a Device Group and choose your configured device under the Devices section.

- Click ASSIGN.