How to Configure WPA2-Enterprise with PingIdentity
Many organizations nowadays do not prefer password-based W-Fi Authentication solutions due to security threats. So, due to technological
advancement, they have started to choose 802.1x certificate-based W-Fi Authentication (EAP-TLS), which offers more security than credential-based (Password) authentication and a better user experience.
EAP-TLS requires a public key infrastructure (PKI) to enroll and authenticate the certificates for PingId W-Fi authentication. PingId is an Identity Provider like Azure, Octa, and Google. SecureW2 PKI can configure WPA2-enterprise with Ping Identity by using SAML-Application to enroll the certificates for Wi-Fi authentication.
Setting up PingIdentity Wi-Fi Authentication
The Ping Identity Wi-Fi Authentication can be set up with the help of SAML Authentication, where the end-user can enter the credentials. The credentials will be sent to and verified by PingId. After verification, The PingId sends the attributes to the SAML App and shares them with SecureW2 PKI To issue PingIdentity 802.1x certificates.
Configuring an Identity Provider for PingID
An Identity Provider is the type of system that verifies the User/Device profiles.The following steps to create an IDP for Ping Identity:
- Log in to the SecureW2 Management Portal.
- Go to Identity Management > Identity Providers.

- On the Identity Providers page, click Add Identity Provider.
- In the Basic section:
- Enter the Name and Description of the IDP in the corresponding fields.
- From the Type drop-down list, select SAML.
- From the SAML Vendor drop-down list, select Ping Identity.
- Click Save.
- On the displayed page, click the Configuration tab.
- In the Service Provider (SP) info, copy the ACS URL and Entity ID values and save them on a word or text file.

Configuring a SAML App in the PingIdentity Portal
The SAML App will allow users to enter their credentials in Pingid, which later passes to the user IDP for verification.
Steps to create a SAML App for the PingIdentity Portal.
- Log in to the PingIdentity portal with your credentials.
- On the left pane, click on
 icon.
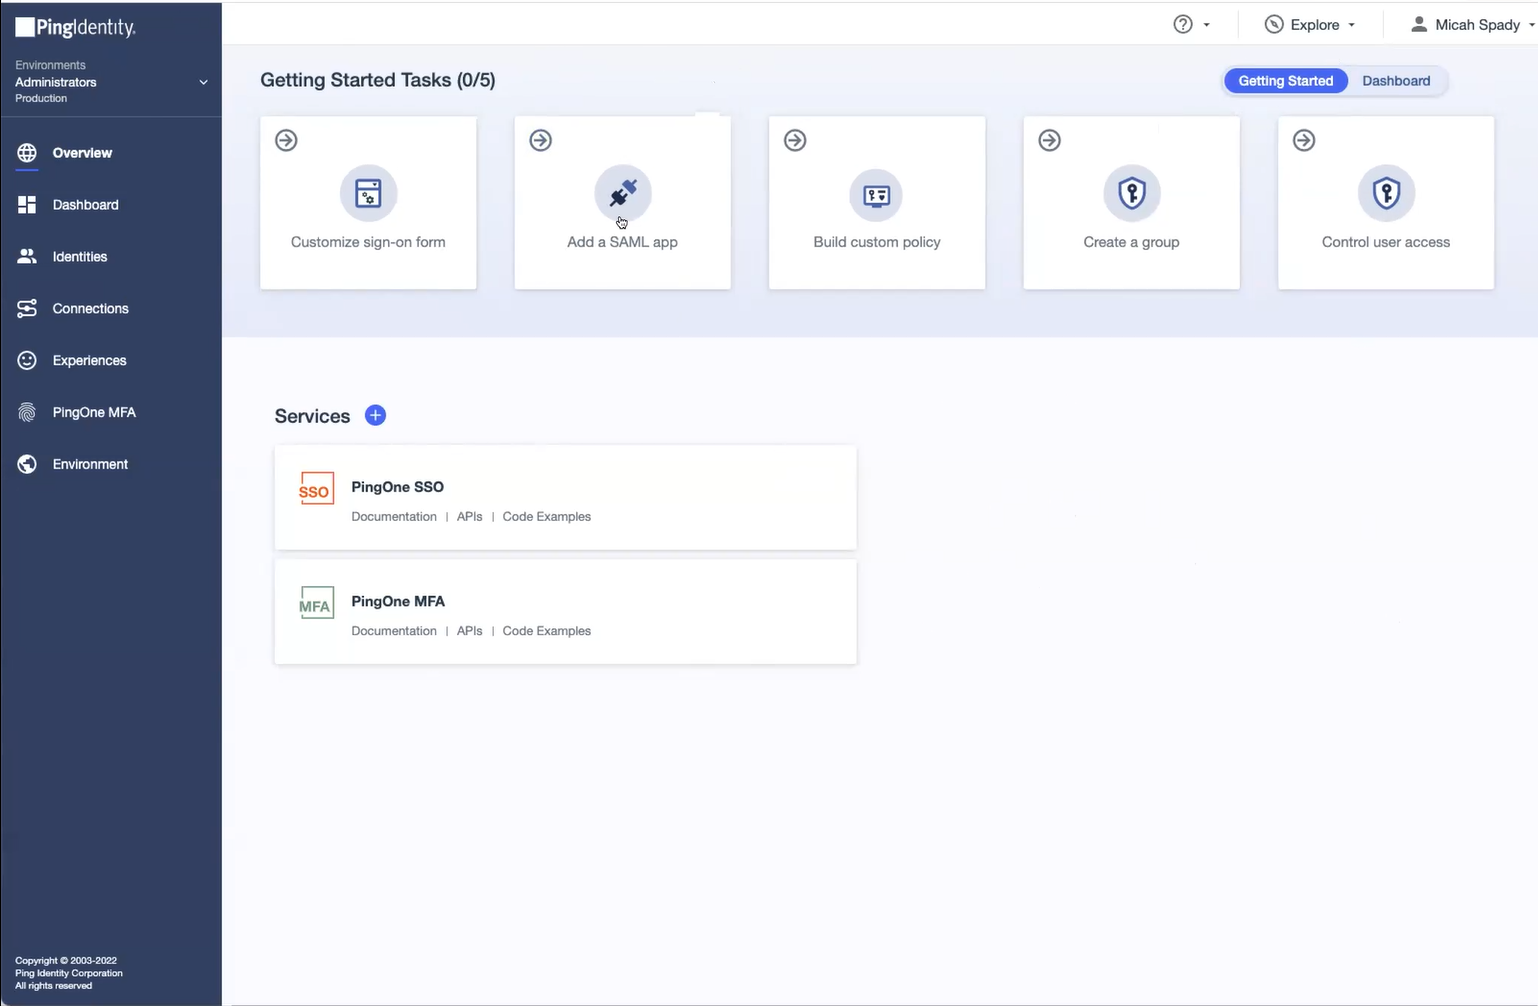
icon. - On the displayed page, click Add a SAML app and then click the Connections icon on the left pane.
- On the Applications page, click the
 icon. The Add Application dialog box appears.
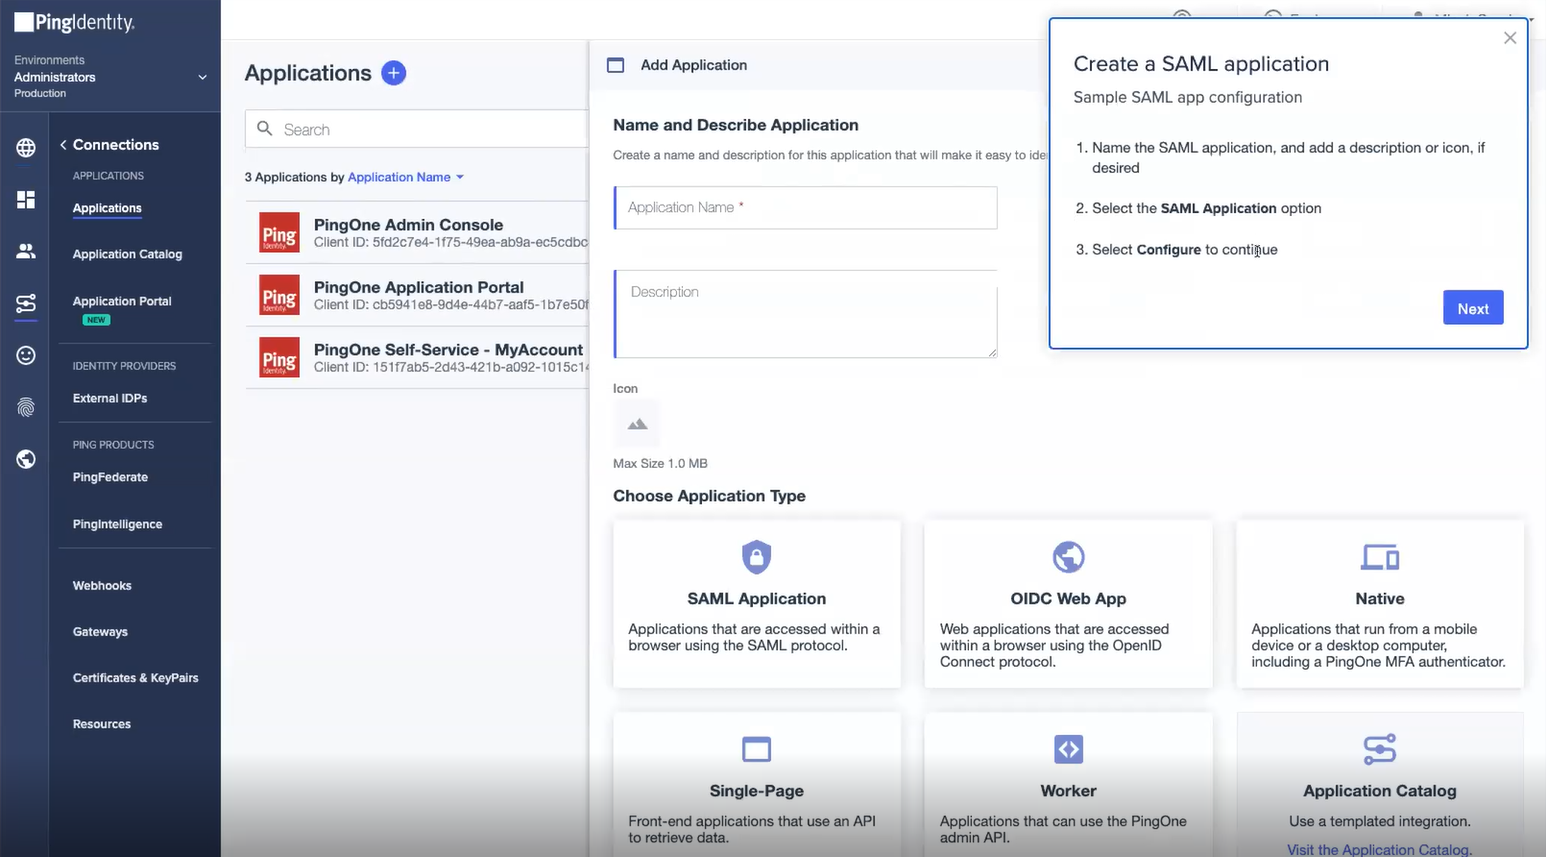
- Enter the Name and Description for the application in the corresponding fields.
- In the Choose Application Type section, select SAML Application.
- Click Configure.

- In the SAML Configuration dialog box:
- Select the Manually Enter option.
- In the ACS URLs field, enter the ACS URL value obtained from the SecureW2 Management Portal.
- In the Entity ID field, enter the Entity ID value obtained from the SecureW2 Portal.
- Click Save.

- From the left pane, select Identities. The Users page is displayed.

- Click the +Add User button on the right side.
- In the Add User window, under PERSONAL section enter a suitable name in the GIVEN NAME field.
- In the COMPANY INFORMATION section:
- From the Population drop-down list, select Technical Administrators .
- In the USERNAME field, enter the username.
- Click Save.
- In the left pane, click Connections.
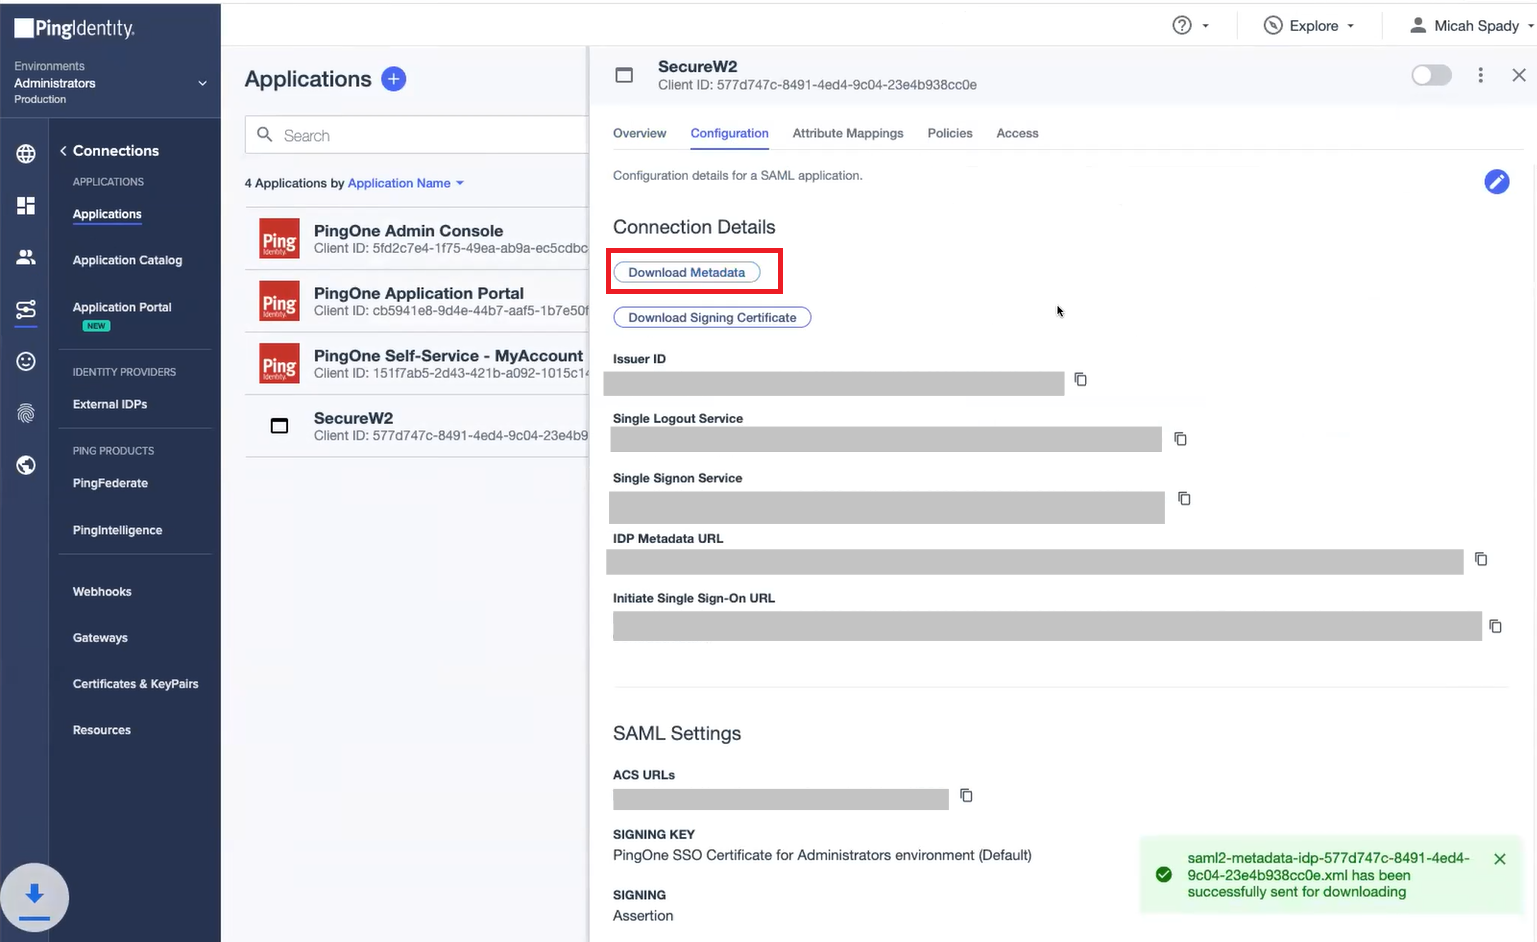
- On the Applications page, select the SAML app you created earlier (see the Configuring a SAML App section).
- Click the Configuration tab and then click the Download Metadata button.
Uploading Metadata to SecureW2
- Log in to the SecureW2 Management Portal.
- Go to Identity Management > Identity Providers.
- On the Identity Providers page, select the IDP created for PingID (see the Configuring an Identity Provider for PingID section) and click the Edit link.
- Click the Configuration tab and in the Identity Provider (IDP) Info section:
- For the Metadata field, click Choose File and select the Metadata file downloaded from the PingID portal.
- Click Upload.
- Click Update

Configuring Attribute Mapping In the PingId
Steps to configure the Attribute Mapping PingId portal.
- In the PingIdentity portal, click the SAML app created earlier.
- The Overview window is displayed. Go to Attribute Mapping, click the Attributes button to edit the attribute mappings.
- In the Edit Attribute Mappings window, click the + Add button to add the required application attributes under the Attributes column and select relevant PingOne Mappings from the drop-down list.
- For Email Attributes, under the Applications column, enter email and select Email Address from the drop-down list.
- For User Principal Name (UPN), enter upn and select Email Address from the drop-down list.
- For displayName, enter a display name and select Username from the drop-down list.

- Click Save.
Configuring the Attributes in the SecureW2 Management Portal
- In the SecureW2 Management Portal, go to Identity Management > Identity Providers and click the Edit link of the PingID IDP you created.
- On the displayed screen, click the Attribute Mapping tab.

- On the displayed screen, click the Add button.
- In the Local Attribute field, type email to identify the attribute locally. From the Remote Attribute drop-down list, select User Defined. In the adjacent text box, type email, and then click Next.

- In the Local Attribute field, type upn to identify the attribute locally. From the Remote Attribute drop-down list, select User Defined. In the adjacent text box, type upn, and then click Next.

- In the Local Attribute field, type displayName to identify the attribute locally. From the Remote Attribute drop-down list, select User Defined. In the adjacent text box, type DisplayName, and then click Next.

Creating a Group in the Ping Identity Portal
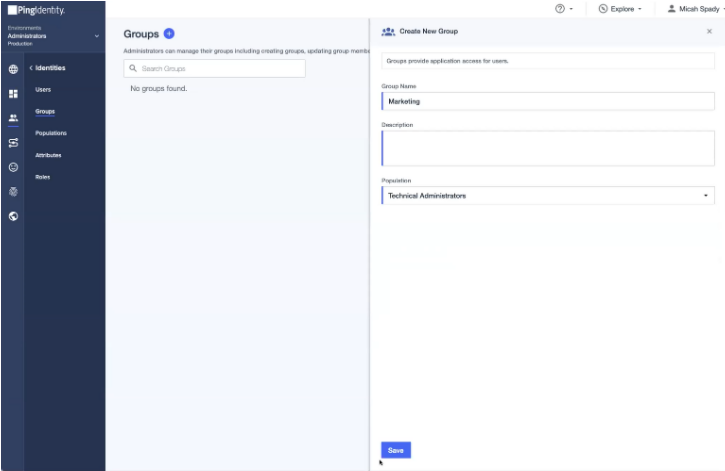
- In the PingIdentity portal, in the left pane, click Identities > Groups and then click the icon on the Groups page to add a new group.
- In the Group Name field, enter the name of the group.
- From the Population drop-down list, select Technical Administrators.
- Click Save. The group is successfully created.
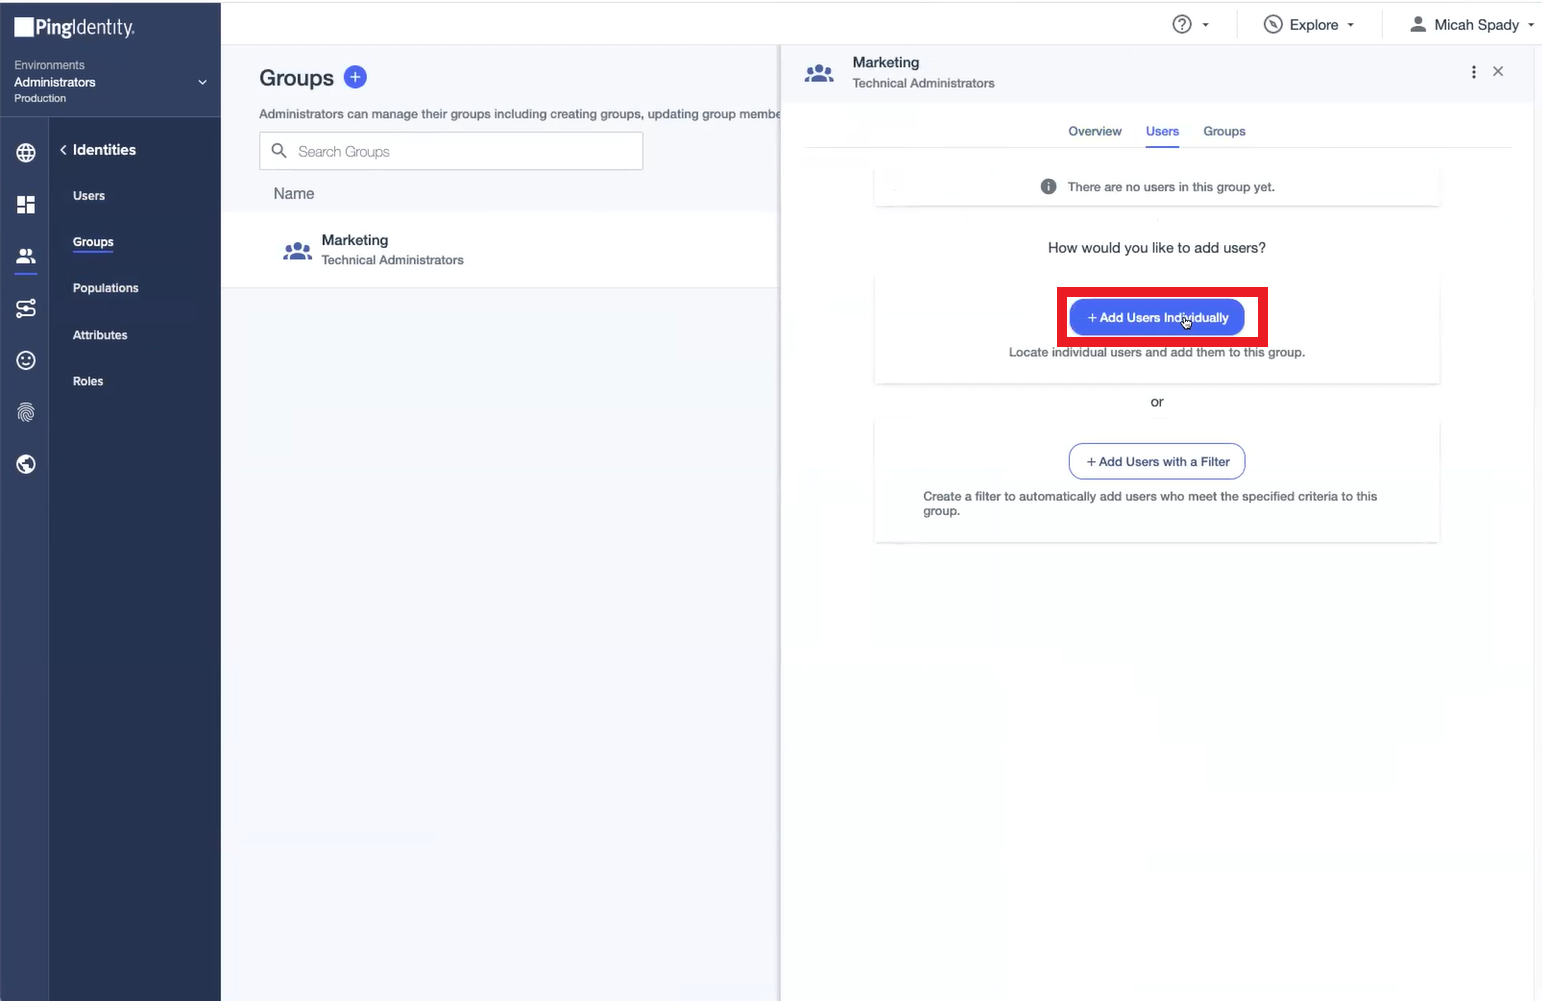
- On the displayed window, click the Users tab and then click the + Add Users Individually button.
- The list of users is displayed. Select the users by clicking the + icon.
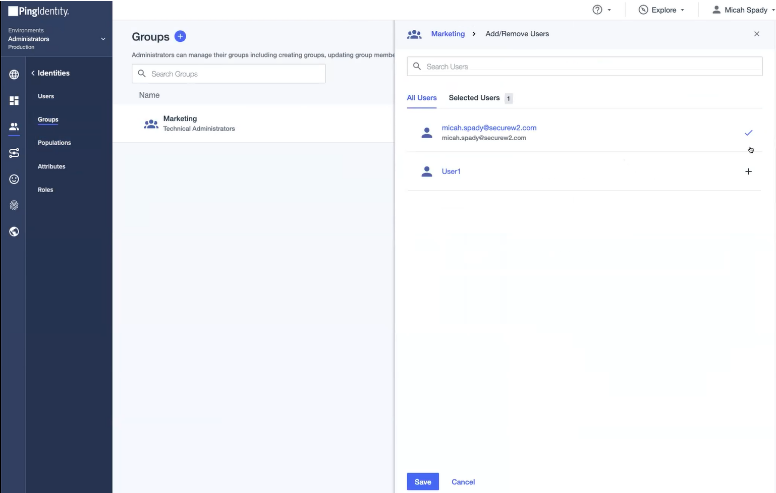
- Click Save.
Configuring Policies in SecureW2
Now that we’ve set up the connection between SecureW2 and PingIdentity, we need to configure a few policies so we can enroll our users for certificates.
Creating an Authentication Policy
- In the Management Portal, go to Policy Management > Authentication and click Add Authentication Policy.
- In the Basic section, enter the Name and Display Description of the policy in the corresponding fields.
- Click Save.

- Click the Conditions tab. From the Profile drop-down list select the profile.
- Click Update.

- Click the Settings tab. From the Identity Provider drop-down list, select the Ping IDP created earlier.
- Click Update.

Creating a Role Policy
- Navigate to Policy Management > Roles and click Add Role.
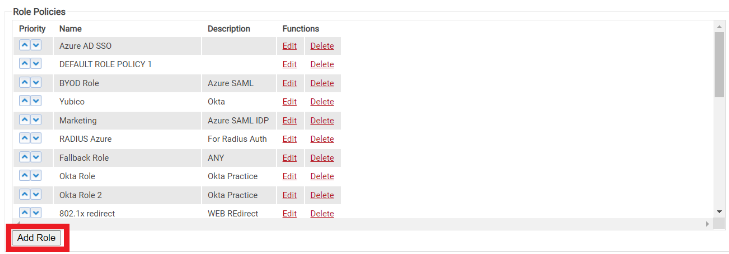
- On the displayed page, In the Basic section, enter the Name and Description of the Role policy in the corresponding fields.
- Click Save.
- On the displayed page click the Conditions tab.

- From the Identity Provider drop-down list, select the Ping IDP created earlier.
- Click Update.
Creating an Enrollment Policy
- Go to Policy Management > Enrollment and click Add Enrollment Policy.
- On the displayed page, enter the Name and Description of the policy in the corresponding fields.
- Click Save.

- On the displayed page, click the Conditions tab.
- From the Role list, select the role created earlier.

- From the Device Role list, select DEFAULT DEVICE ROLE POLICY.
- Click Update.
After creating the Role and Enrollment policies, we have to republish the Secure SSID profile in the Network Profiles page.
Testing Certificate Enrollment
- Go to Device Onboarding > Network Profiles.
- In the Network Profiles table, select the profile we created earlier and click Republish.
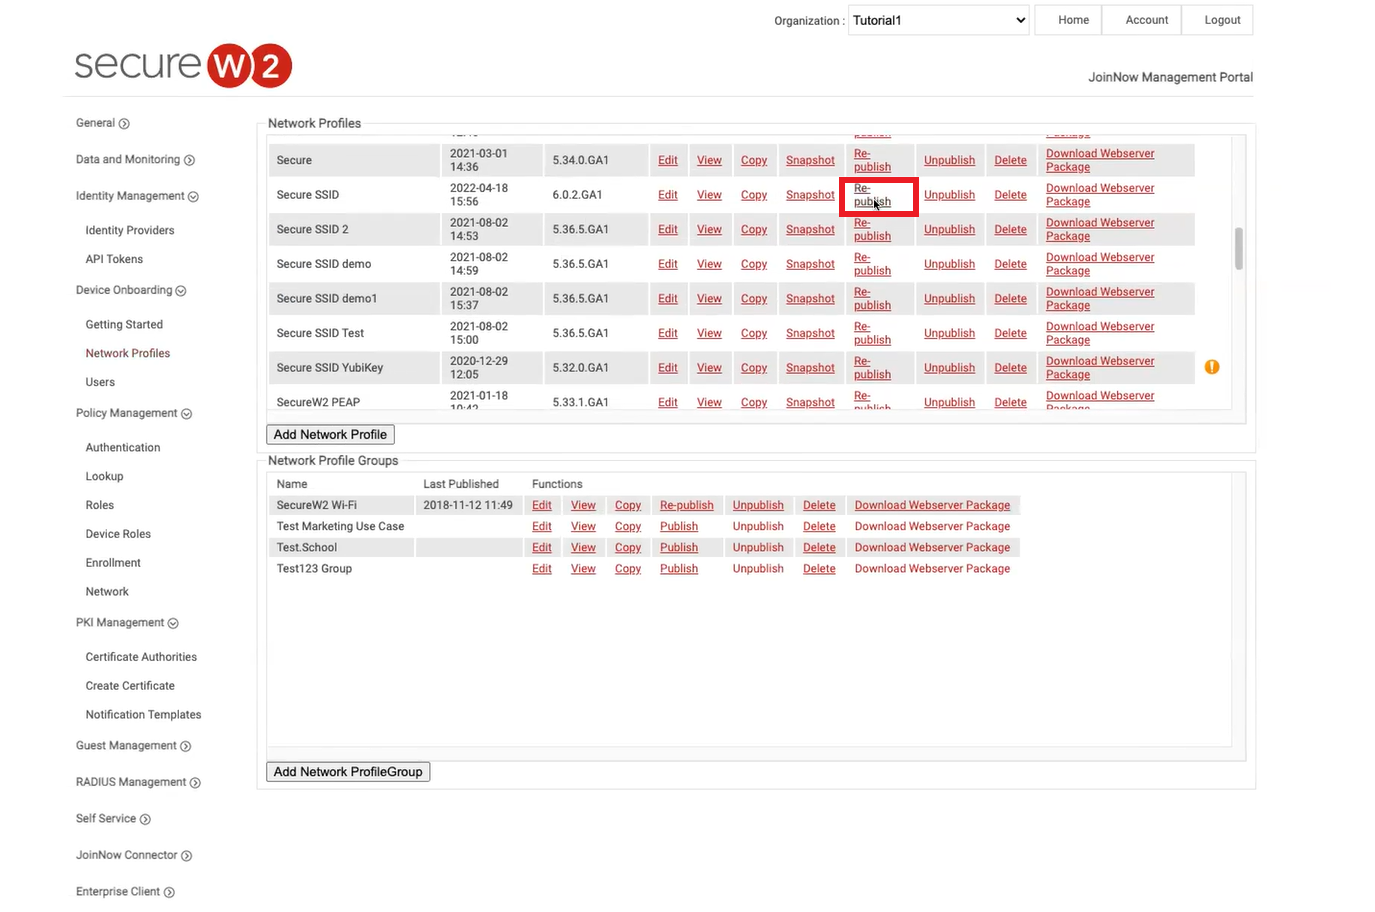
Note: After you modify a profile, republish the profile anytime for the changes to be effective. - In the Republish Network Profile window, in the Name field, enter a name for the profile and click OK.
- After republishing the profile, click View. The Landing Page is displayed.
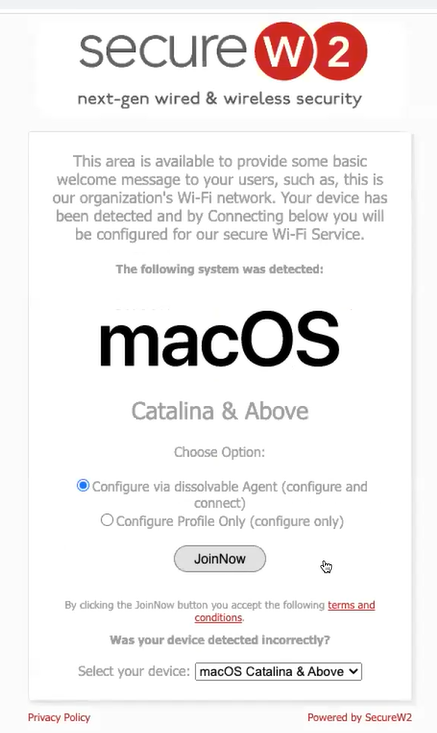
- Click the JoinNow button. A dissolvable client will run depending on the operating system of the device.
- Once the client runs, users will be redirected to the PingIdentity SAML app and prompted for their credentials.
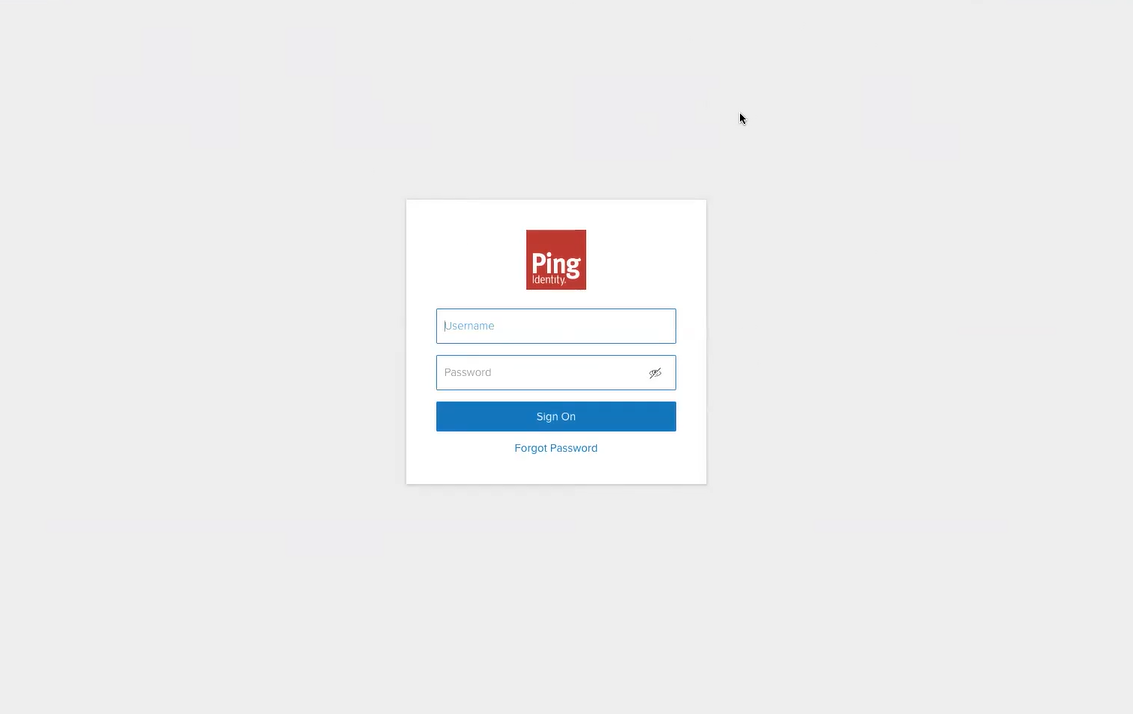
- Once the credentials are verified, the SecureW2 client will proceed to enroll the device for a certificate.
SecureW2 can quickly integrate with PingId and easily get secure Wi-fi access. And our Turnkey Managed PKI, 802.1x onboarding, and Cloud RADIUS server offer a better user experience and outstanding network facility.
SecureW2 can serve as the most cost-effective solution to the organization’s needs. Click here to see our pricing details.
Schedule a Demo
Sign up for a quick demonstration and see how SecureW2 can make your organization simpler, faster, and more secure.
Schedule NowPricing Information
Our solutions scale to fit you. We have affordable options for organizations of any size. Click here to see our pricing.
Check Pricing