

The best way to ensure roaming internet access for employees is by deploying Passpoint. Whether you just need to be covered across campus or want to extend your network to nearby partners, Passpoint allows you to stay seamlessly switch between nearby access points so connection is never lost.
Passpoint can be a little difficult to deploy, but SecureW2 can integrate into your existing network infrastructure to enable Passpoint for Azure.
Below is an overview of the process.
Requirements for Passpoint with Azure
- A Microsoft Azure account
- A Microsoft Azure Active Directory for use as an Identity Provider
- SAML app configured through Microsoft Azure
- An active SecureW2 Cloud Connector subscription
- Passpoint-supported Access Points and Devices
Configure an Azure AD IdP
This guide assumes you’ve already been using Azure AD (Microsoft Entra ID) as your identity provider. We will connect it to the SecureW2 platform through SAML to enable Passpoint.
If you have not yet configured a user directory through Azure, refer to this guide. If you’d like to use it for your WPA2-Enterprise network with EAP-TLS, SecureW2 has the industry’s most secure option for certificate deployment. Learn about it here.
“Create” an Identity Provider in SecureW2
We will pre-register an IdP in SecureW2 that will later be connected to your existing Azure AD IdP.
- In the Identity Management section, click on the Identity Provider
- Click Add Identity Provider and fill the Name and Description sections
- In the Type section, enter SAML and click Save
- Click the Saml Vendor dropdown and select Azure
- Click Save.
Create a SAML Application in Azure
To create a SAML application in Microsoft Azure:
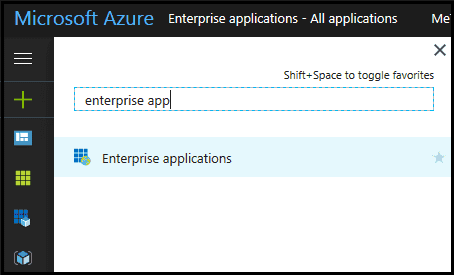
- From your Microsoft Azure Portal, use the search feature to go to Enterprise applications.
- In the main pane, click New application.
- In the Add an application pane, under Add from the gallery, enter ‘SecureW2‘ in the search field.
- If the SecureW2 JoinNow Connector application appears:
- Select it.
- In the Add your own application pane, click Add.
- If the SecureW2 JoinNow Connector application does not appear:
- Click Non-gallery application.
- In the Add your own application pane, for Name, enter a name.
- Click Add.
Configure Single-Sign-On in Azure
To configure single sign on in Microsoft Azure:

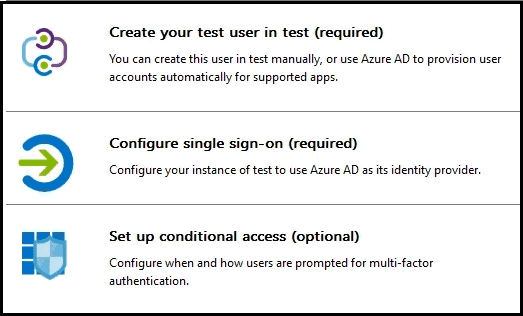
- From your Microsoft Azure Portal, click Configure single sign-on (required).

- Click the Single Sign-on Mode dropdown and select SAML-based Sign-on.
- In a new browser tab/window, log into your SecureW2 Management Portal and go to Identity Management > Identity Providers.
- Click Edit for the IDP you created in the previous section.
- Select the Configuration
- Copy and paste as follows:
- From SecureW2, copy the information for EntityId and ACS URL, and paste respectively into Azure for Identifier and Reply URL.

- From SecureW2, copy the information for EntityId and ACS URL, and paste respectively into Azure for Identifier and Reply URL.
- In the SAML Signing Certificate section, in the DOWNLOAD column, click Metadata XML. Save the metadata file (.xml) to your computer.

Configure the IdP with Azure Metadata
To upload the Azure metadata to SecureW2:
- From your SecureW2 Management Portal, go to Identity Management > Identity Providers.
- Click Edit for the IDP you created in the section “Create” an Identity Provider in SecureW2.
- Select the Configuration tab.
- Under Identity Provider (IDP) Info, for Metadata, click Choose File.
- In the window that appears, select the metadata file (.xml) you saved to your computer in the previous section.
- Click Upload.
- Click Update.
Enable Passpoint with Azure
Now that you’ve integrated your Azure account with SecureW2, you’ve got all the tools you need to deploy Passpoint.
There’s just three things left to configure:
- Onboarding Client
- OSU Server
- Remediation Server
Onboarding Users for Passpoint with Azure
The real challenge of Passpoint deployment is getting all of your users enrolled to use it. Manually enrolling hundreds or thousands of users is too large of a burden for IT, but asking them to do it themselves is a recipe for disaster.
Luckily for you, your SecureW2 account comes with our renowned JoinNow Onboarding software. It allows you to create and push a config package to MDM/AD-Domain managed devices or BYODs which prompts the end user to begin the automatic enrollment and subsequent self-configuration for their device. It’s simple enough and foolproof enough to shift the burden of enrolling to the end user without the danger of misconfiguration.
Once you’ve handled onboarding, you need to set up an OSU Server. OSU, or online signup, is the Passpoint-specific onboarding software that works in a fashion similar to ours. OSU needs to be supported by a Remediation Server, which is a fallback server for users that fail to enroll correctly – usually because their device is out of date.
SecureW2 Enables Passpoint for Azure

Our support engineers can help you set up all of the above in a matter of hours. Our industry-leading solution integrates into your existing network to enable Passpoint without requiring a major overhaul.
We have affordable solutions for organizations of all sizes. See our pricing here.
 Vivek Raj