Key Points
- Configure Kandji SCEP profiles using SecureW2 to automate certificate enrolment and improve device security with minimal administrative work.
- SecureW2's solutions simplify certificate management by integrating SCEP and Kandji MDM, resulting in safe and efficient certificate-based network access.
- Switch to SecureW2 for smooth certificate deployment and comprehensive network security solutions designed specifically for managed devices.
Digital certificates have, time and again, proven to be more secure than credential or password-based authentication as they are phishing-resistant. However, manually distributing digital certificates is a considerable challenge for network administrators in larger organizations. Simple Certificate Enrollment Protocol (SCEP) automates certificate distribution and management through a URL and shared secret that allows devices to communicate with a Public Key Infrastructure (PKI).
This method of certificate enrollment is often used with MDMs such as Kandji. SecureW2, an official partner with Kandji, gives administrators the tools to rapidly deploy certificates through a SCEP gateway API to auto-enroll to all their managed endpoints. In this guide, we’ll discuss how SecureW2 works with Kandji and how to configure a Kandji SCEP profile to enroll Kandji-managed devices for certificates automatically.
What is SCEP?
One of the most significant hurdles to certificate deployment is that it can be challenging to distribute certificates to all your organization’s devices. Simple Certificate Enrollment Protocol (SCEP) addresses this issue by automating the certificate enrollment process.
SCEP uses a unique URL and a securely distributed secret to issue certificates. Managed devices receive the URL and secret, automatically navigate to the URL, and enroll for a certificate. All of this occurs behind the scenes with no end-user input. An MDM like Kandji can push a payload that contains the SCEP URL and a password to the managed devices instead of individually enrolling them for certificates.
How Does SCEP Work with Kandji?
Kandji uses a custom mobile config to configure SCEP on its UI. On Kandji’s UI, you can also use auto-renewal of certificates, so you don’t have to push the SCEP profile again to renew certificates.
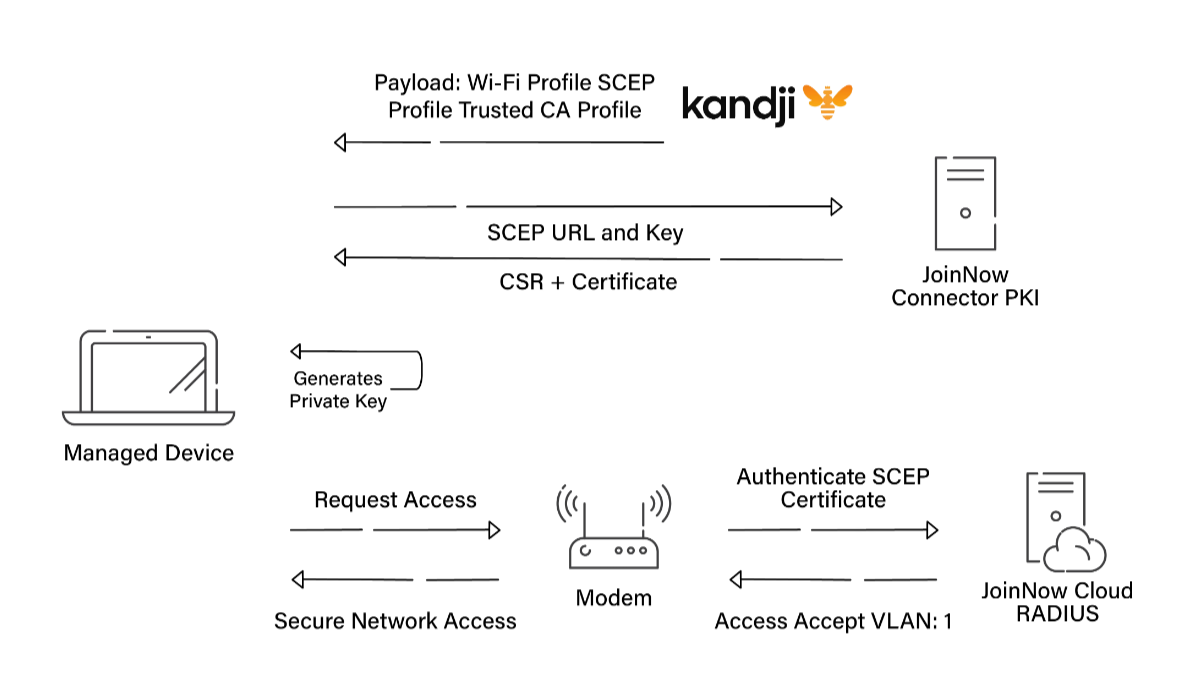
When a Kandji-managed device enrolls for certificates, it follows these steps:
- Kandji pushes a payload to the device, including the SCEP profile and the trusted Certificate Authority.
- The device navigates to the SCEP URL and provides the key from the payload.
- The PKI responds with the signed certificate.
View the diagram below for a visualization of what this process looks like. With SecureW2’s solution, the private key for the device’s certificate is generated on the certificate for enhanced security.
Kandji admins will have two options to deploy SCEP for Mac devices. They are:
- SecureW2 custom .mobileconfig for SCEP and Wifi Configuration: SecureW2 will create a custom .mobileconfig to push to your devices to configure them for SCEP certificates and certificate-based Wi-Fi using the provided SCEP certificate.
- Native Kandji SCEP Configuration and Custom Wi-Fi .mobileconfig: Create a SCEP configuration using the Kandji Library and push out a .mobileconfig to configure devices for certificate-based Wi-Fi using that SCEP certificate.
Prerequisites to Deploy SCEP Profile For Apple Devices on Kandji
To start with, you should have the following subscriptions active
- SecureW2 Cloud Connector License
- SecureW2 Managed Device Gateway Licence
- Kandji Licence
- Access Points that support WPA2 Enterprise
- iOS and macOS devices managed by Kandji
SecureW2 Custom .mobileconfig for SCEP and Wi-Fi configuration
Send the following details to the support team at SecureW2 to configure a custom .mobileconfig file that you can upload on Kandji.
- SSID device names that need to be authenticated
- RADIUS server Root CA
- Require cert attributes like Subject field, Alternative name type, RFC 822 name, Key size, and key usage.
Once you receive the .mobileconfig file, you can use the SCEP URL and the challenge key from the JoinNow portal.
Generate SCEP URL and Challenge Key From the JoinNOW Management Portal
SCEP prompts for a challenge key in a CSR from the server and pushes a payload containing the SCEP URL and the challenge key to managed devices. This helps to generate a digital certificate for a Kandji-managed device quickly and can be done for any number of devices, thus reducing time.
- Go to Identity Management> API tokens
- Enter an API token name.
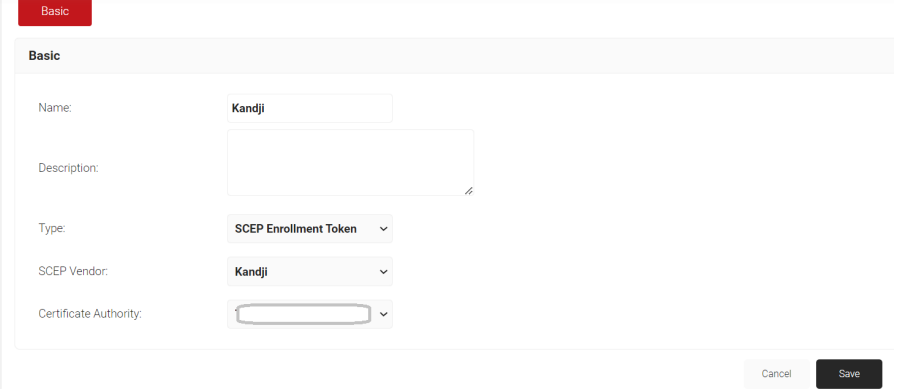
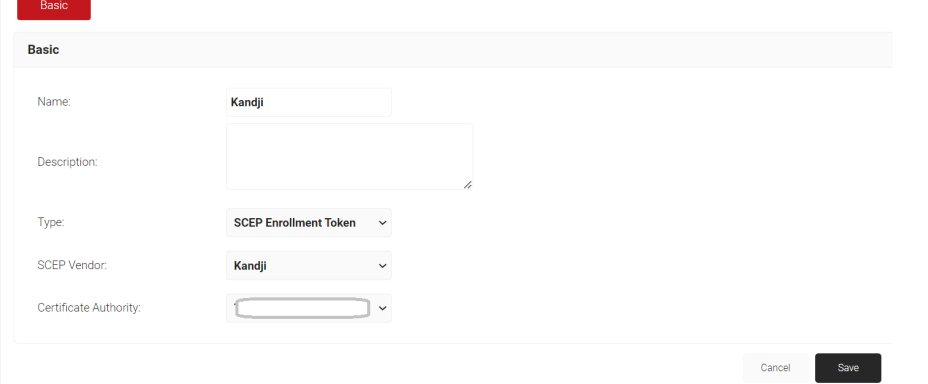
- Select the SCEP Enrollment Token from the Type Drop-down menu.
- Select Kandji as the SCEP vendor.
- Select a Certificate Authority in JoinNow.
- Click Save.
- A .csv file with your SCEP URL and secret key will be downloaded to your device.
- Paste the URL to the URL field in Kandji.
- Paste the secret key into the challenge field in Kandji.
Create a new BluePrint by navigating to Library > Add Custom profile and upload the shared profile. This should configure the device to get a certificate from the JoinNow Management portal and connect it to the secured SSID.
How to use Native Kandji SCEP Configuration + Custom WiFi .mobileconfig
You can also create a SCEP configuration in Kandji with a custom .mobileconfig. But this must be uploaded for Wi-Fi configuration. 1. Create a new blueprint or use the existing one.
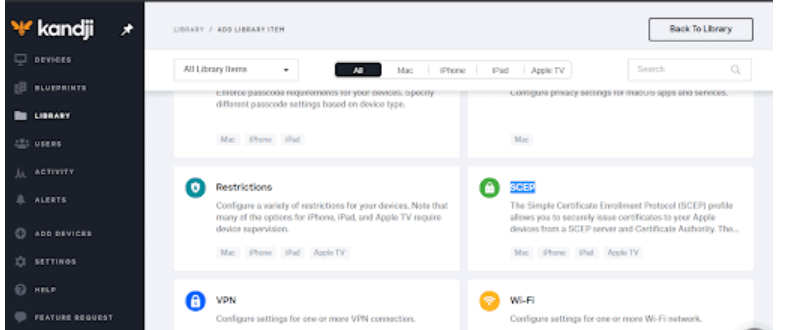
- Click Library> Add a new library
- Click on SCEP> Add & Configure
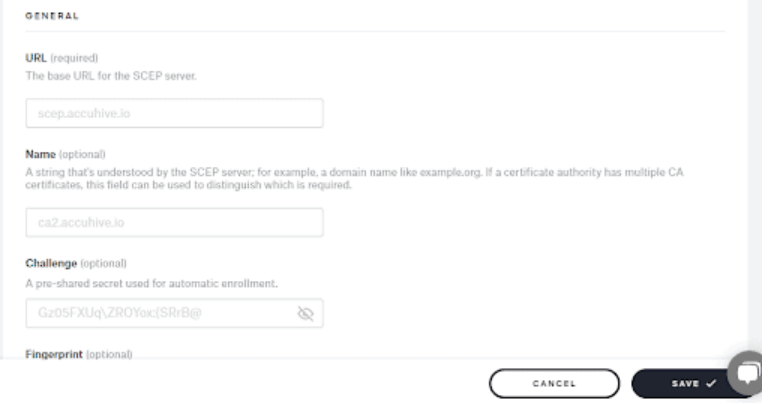
- Add the SCEP URL and the shared key and assign it to the existing blueprint.
To generate a SCEP URL and Challenge from the JoinNow Portal, you should:
- Go to Identity Management> API tokens
- Enter a name in the API token field.
- Select SCEP Enrollment Type from the drop-down.
- Select Kandji as the SCEP vendor.
- Select the CA in JoinNow.
- Click Save.
- A .csv file with your SCEP URL and Secret key is downloaded.
- Paste the URL into Kandji
- Paste the secret key in the Challenge field in Kandji.
Now, revisit the Kandji portal and populate the remaining settings for a SCEP profile.
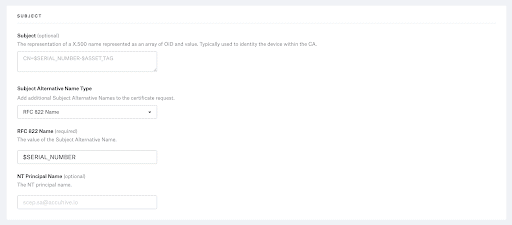
- Subject Field: Typically, we enter an email id in this field.
- Subject Alternative Name Type: enter RFC 822 Name. This field is mandatory.
- RFC 822 Name: enter $SERIAL_NUMBER.
Note: The $SERIAL_NUMBER will be used to encode the certificate and will create an entry in the JoinNow Management Portal for a device. You can enter multiple values sent using RFC 822. A semicolon separates the name. NT Principal Name: Optional field and can be left blank.
RFC 822 Name is a mandatory field that needs to be sent from Kandji to encode the SAN values in a certificate.
Key Size: 2048(Mandatory field).
Key Usage: Both Signing & Encryption
NOTE: We set Key Usage as Both Signing & Encryption, but in our test lab, we found that it works without selecting any option
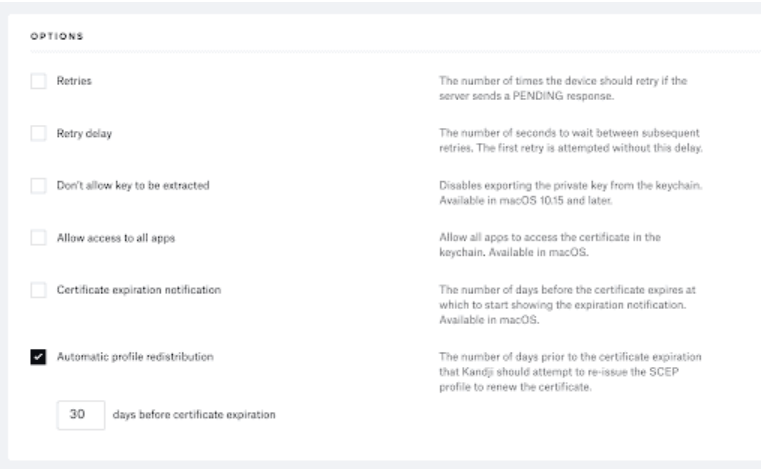
3. Scroll down to the Options section. Enable Automatic profile redistribution. This field is mandatory. Set the redistribution 30 days before the certificate expiration.
Leverage SecureW2 as a Kandji Admin for Certificate Management on Managed iOS Devices
SecureW2’s Managed PKI and RADIUS server integrates with your identity and device management infrastructure, saving you money by avoiding forklift upgrades. Now, you can seamlessly switch to Cloud-based RADIUS and PKI, which can efficiently onboard all your managed devices for a secure certificate-based authentication that makes your network more secure.
SecureW2 is Kandji’s official technology partner, as we have the proper SCEP support and are industry leaders in providing SCEP certificate distribution for managed devices. Our team of highly experienced engineers supports SCEP deployment through our JoinNow Connector PKI for easy certificate management.
Click here for top-notch network security solutions for your organization.