
The Notification Gateway enables the network admin to send OTP notifications to guest users after authentication. Currently, we use the SMS service from Twilio to send OTPs.
To create a Notification Gateway, perform the following steps:
- Log in to the JoinNow Management Portal.
- Navigate to General > Organization.
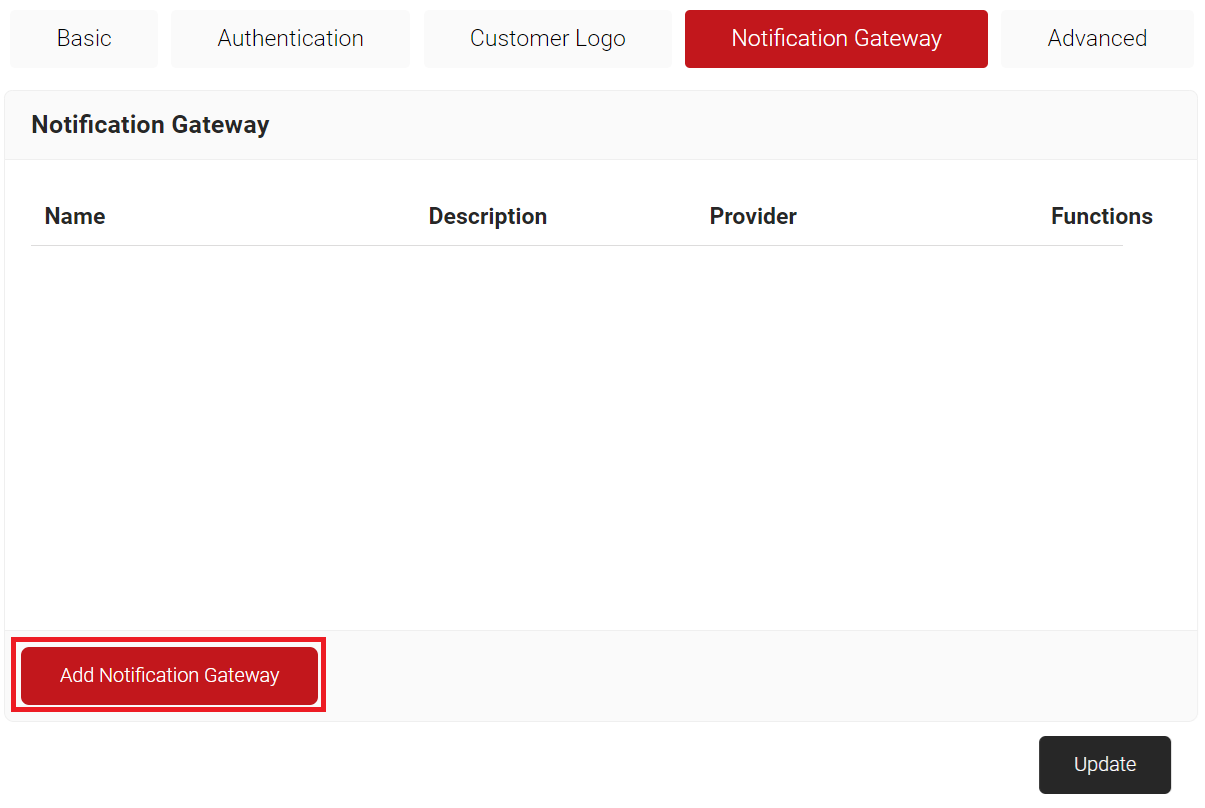
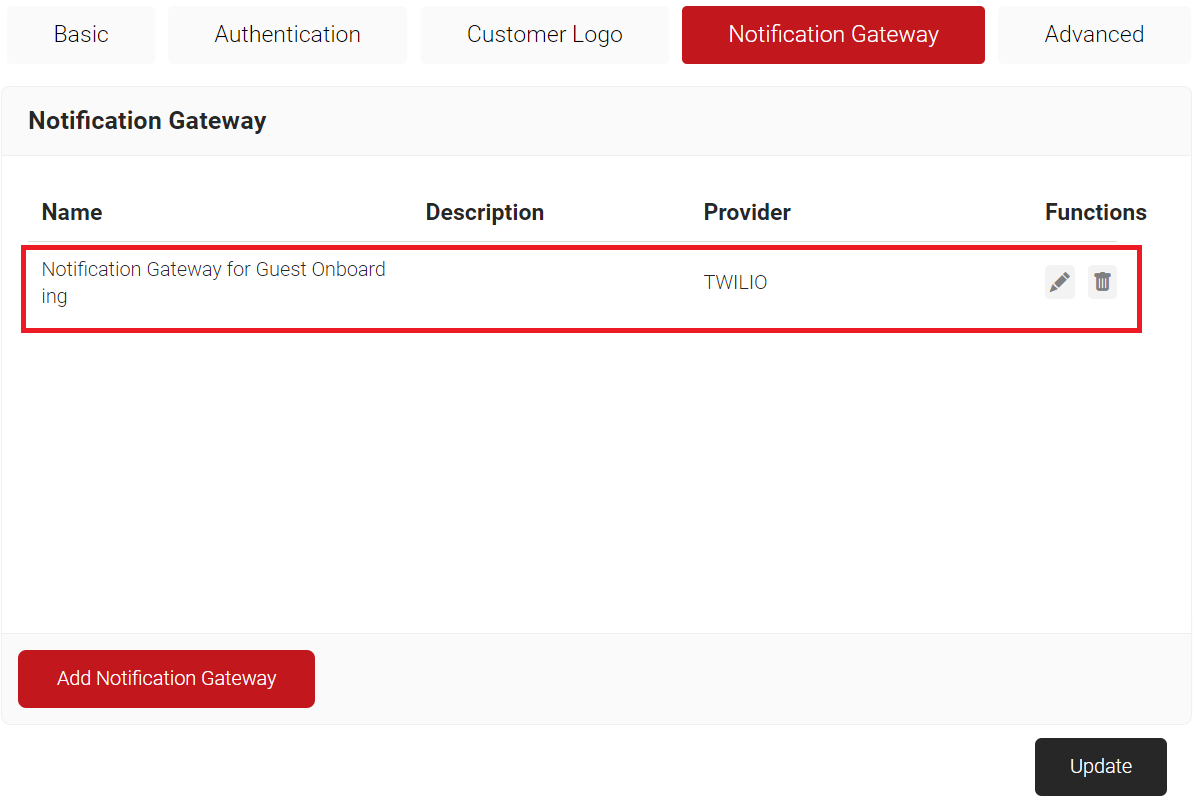
- Select the Notification Gateway tab.
- Click Add Notification Gateway.
- In the Basic section, enter the name of the notification gateway in the Name field.
- In the Description field, enter a suitable description for the notification gateway.
- From the Provider drop-down list, select Twilio.
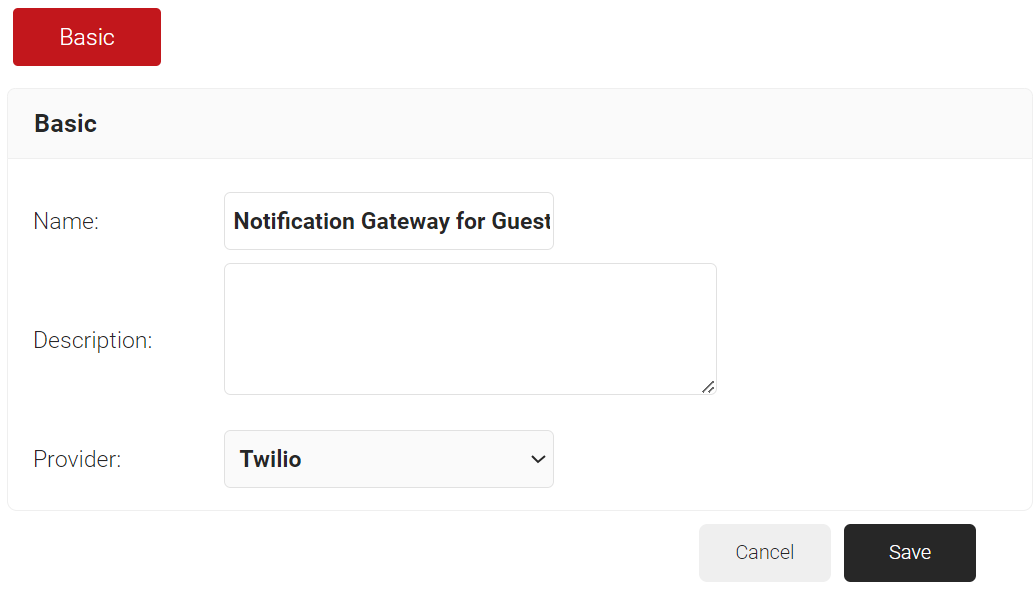
- Click Save.
- Click the Configuration tab.
- In the Account ID field, enter the Account SID obtained from the Twilio Console.
- In the Auth Token field, enter the Auth Token obtained from the Twilio Console.
- In the Messaging Service ID field, enter the Messaging Service SID obtained from the Twilio Console.
- In the Phone Number field, enter the guest user’s contact number to receive the OTP for authentication from the Twilio Console.
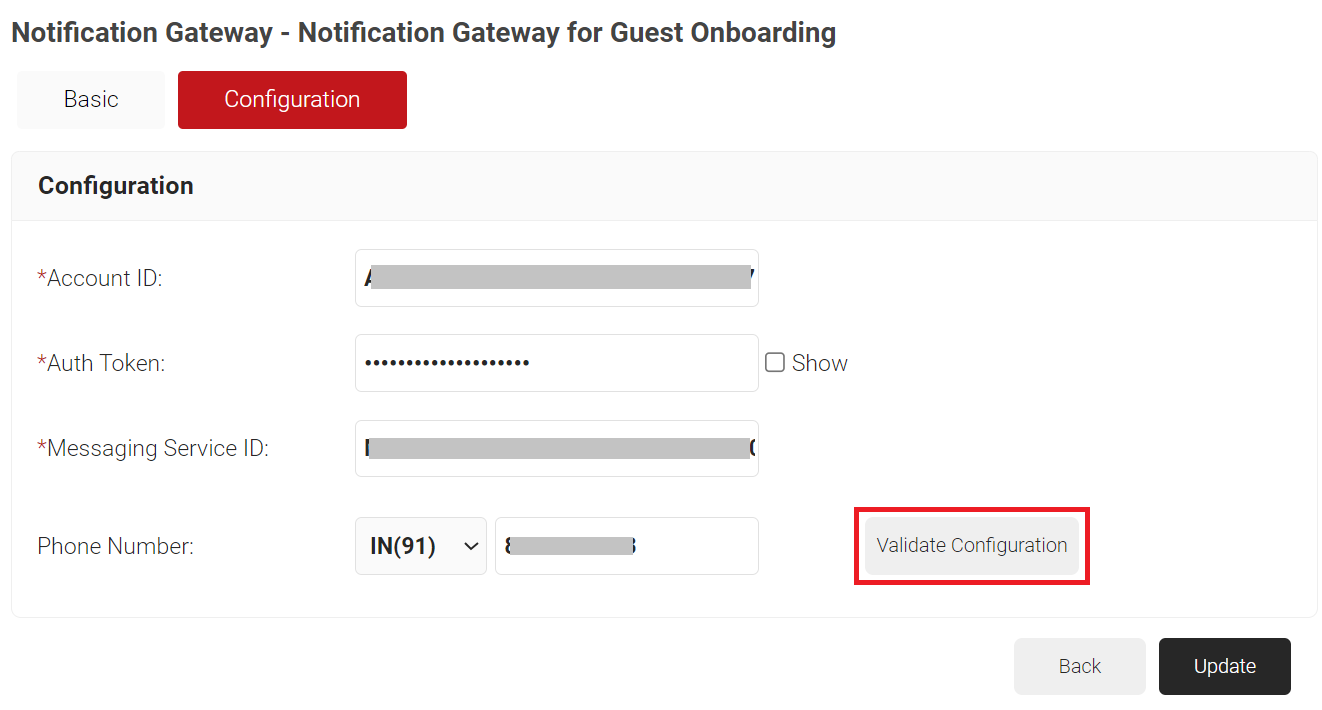
- Click the Validate Configuration button to check the validity of the phone number entered.
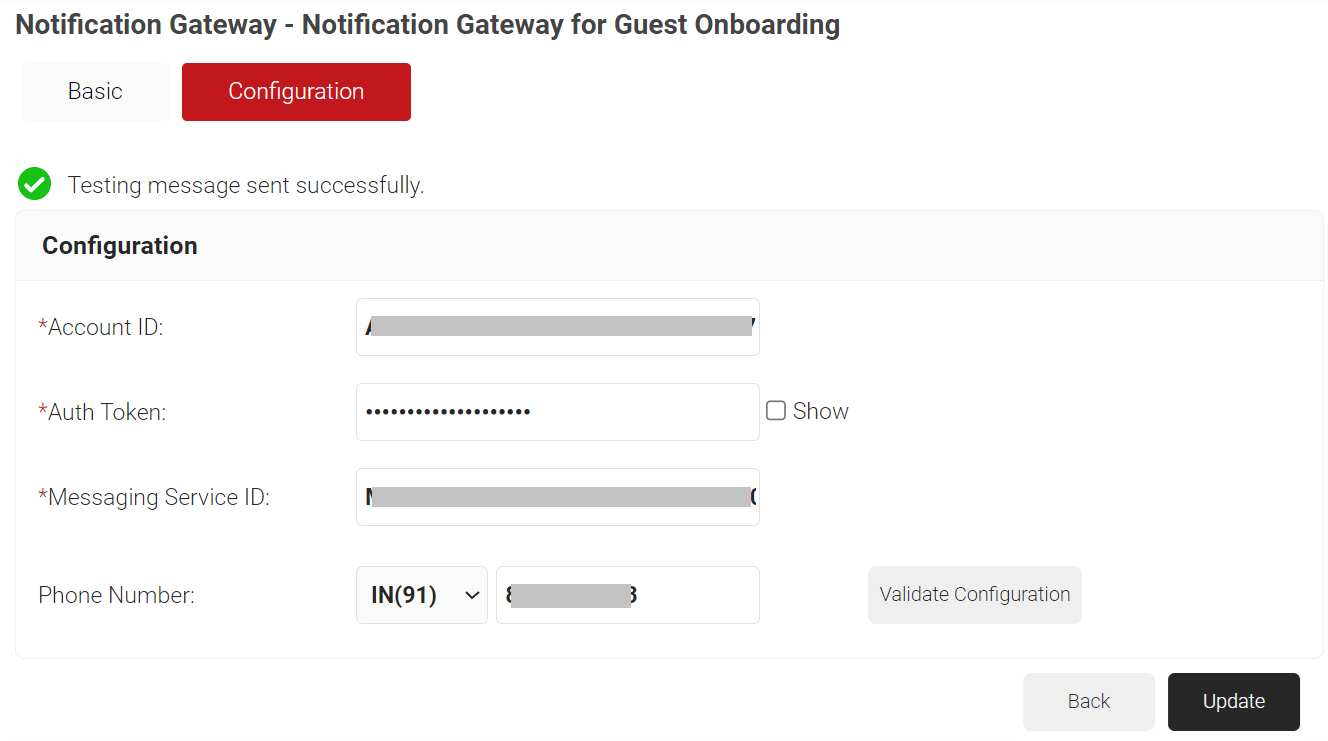
- Click Update.
The Self Registration Core Provider allows network admins to issue certificates to the end user devices using their mobile number, Gmail account, or both methods.
To create a guest core provider, perform the following steps:
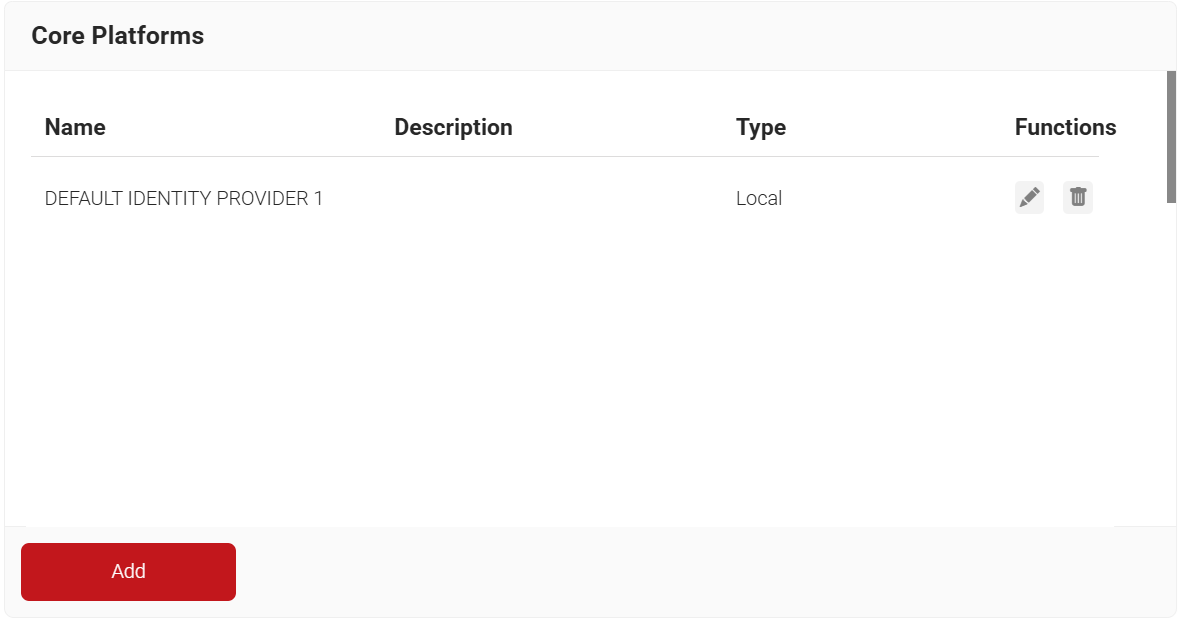
- Navigate to Integration Hub > Core Platforms.
- Click Add.
- In the Basic section, enter the name of the core provider in the Name field.
- In the Description field, enter a suitable description for the core provider.
- From the Type drop-down list, select Self Registration.
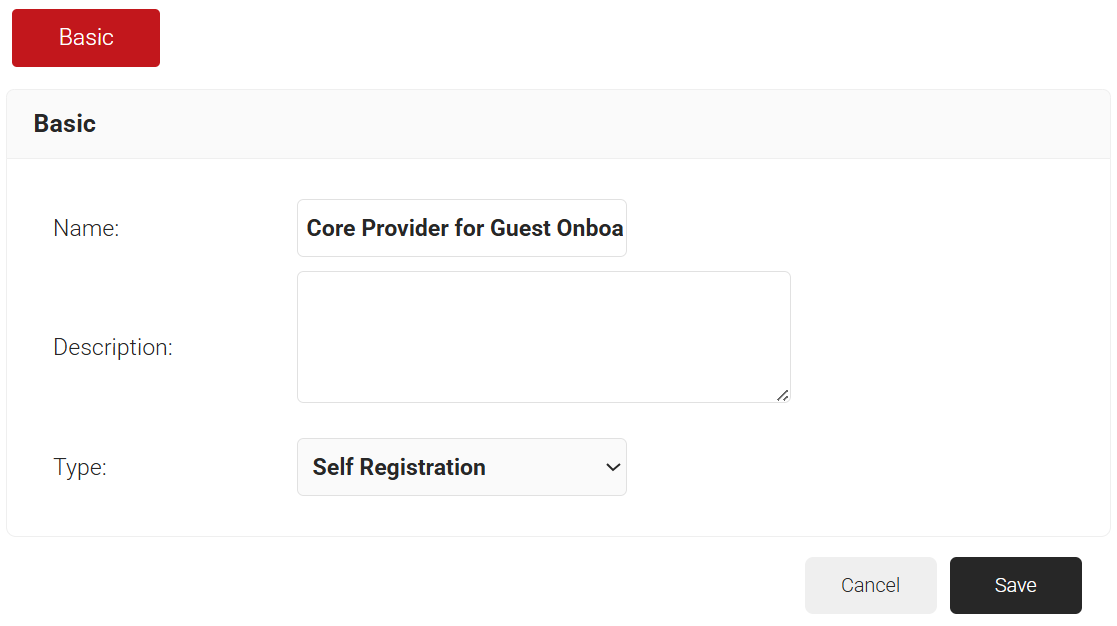
- Click Save. The page refreshes, and Configuration, and Notification Template tabs are displayed.
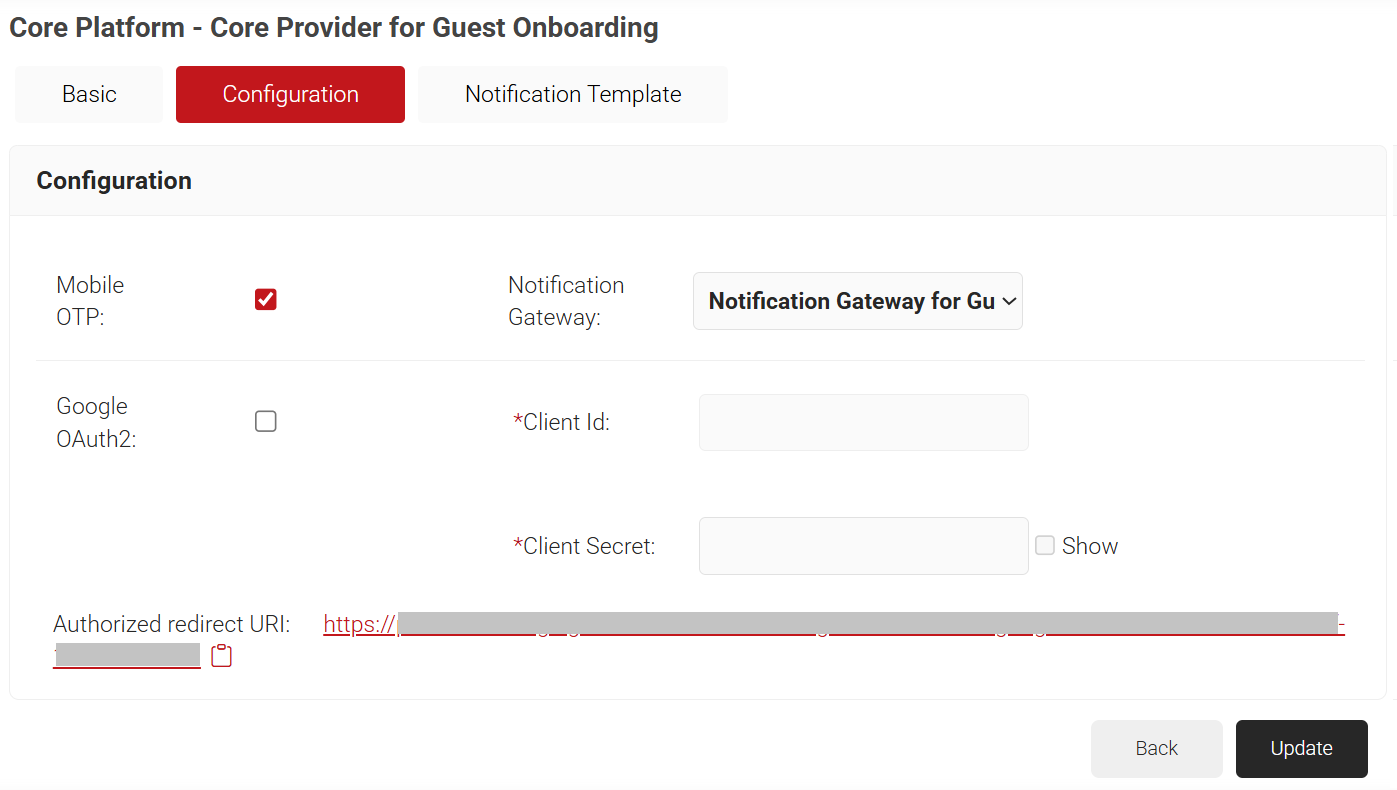
- Click the Configuration tab and select the required authentication methods.
- Mobile OTP: This method uses the configured SMS Notification Gateway to send OTP for identification during the enrollment process.
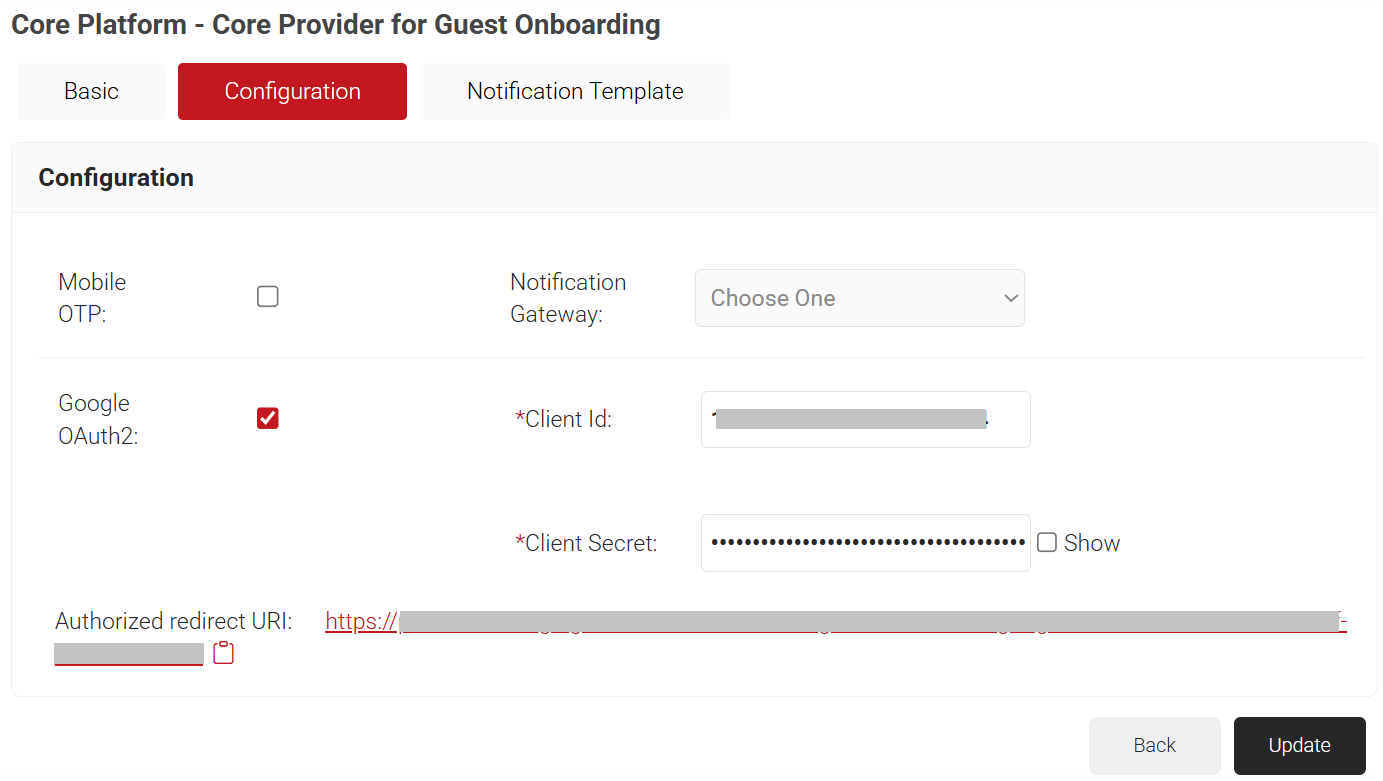
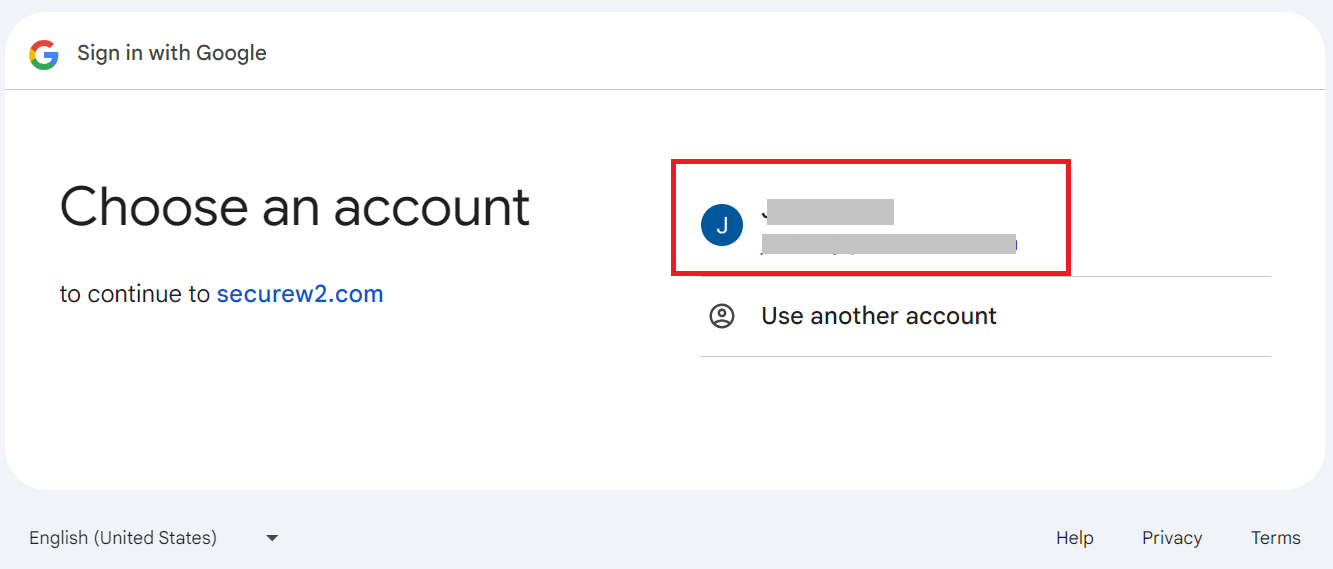
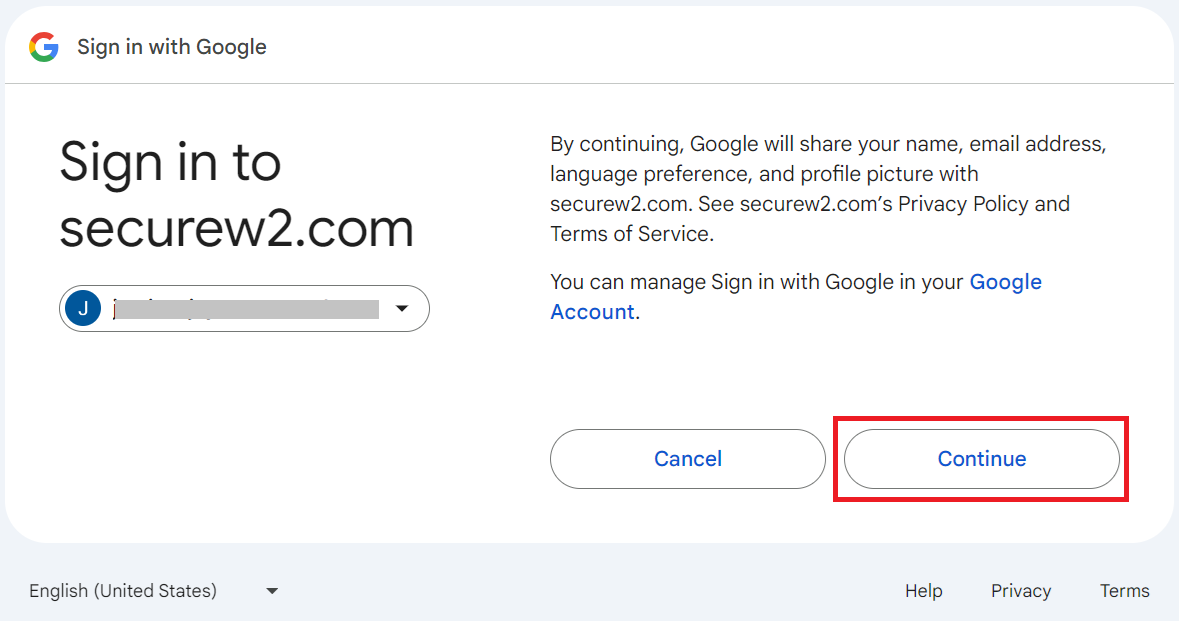
- Google OAuth2: This method uses the Google OAuth2 protocol to identify the user during the enrollment process. To configure Google OAuth2, create an OAuth2 app in the Google Account and add the corresponding Client ID and Client Secret to the JoinNow Management portal, which is obtained from the OAuth2 app. During the creation of the OAuth2 app in the Google Account, you need to add the “Authorized redirect URI” value obtained from the JoinNow Management portal.
- For Mobile OTP:
- Select the Mobile OTP checkbox to enable the Notification Gateway drop-down list.
- From the Notification Gateway drop-down list, select the notification gateway created earlier in the Creating a Notification Gateway section.
- For Google OAuth2:
- Select the Google OAuth2 checkbox to enable the Client Id and Client Secret fields.
- In the Client Id field, enter the Client ID obtained from the Google Console (refer to the Creating Authorization Credentials section, step 10).
- In the Client Secret field, enter the Client secret obtained from the Google Console (refer to the Creating Authorization Credentials section, step 10).
- Copy the Authorized redirect URI value on your computer.
- Click the Notification Template tab.
- Click Add Notification Template.
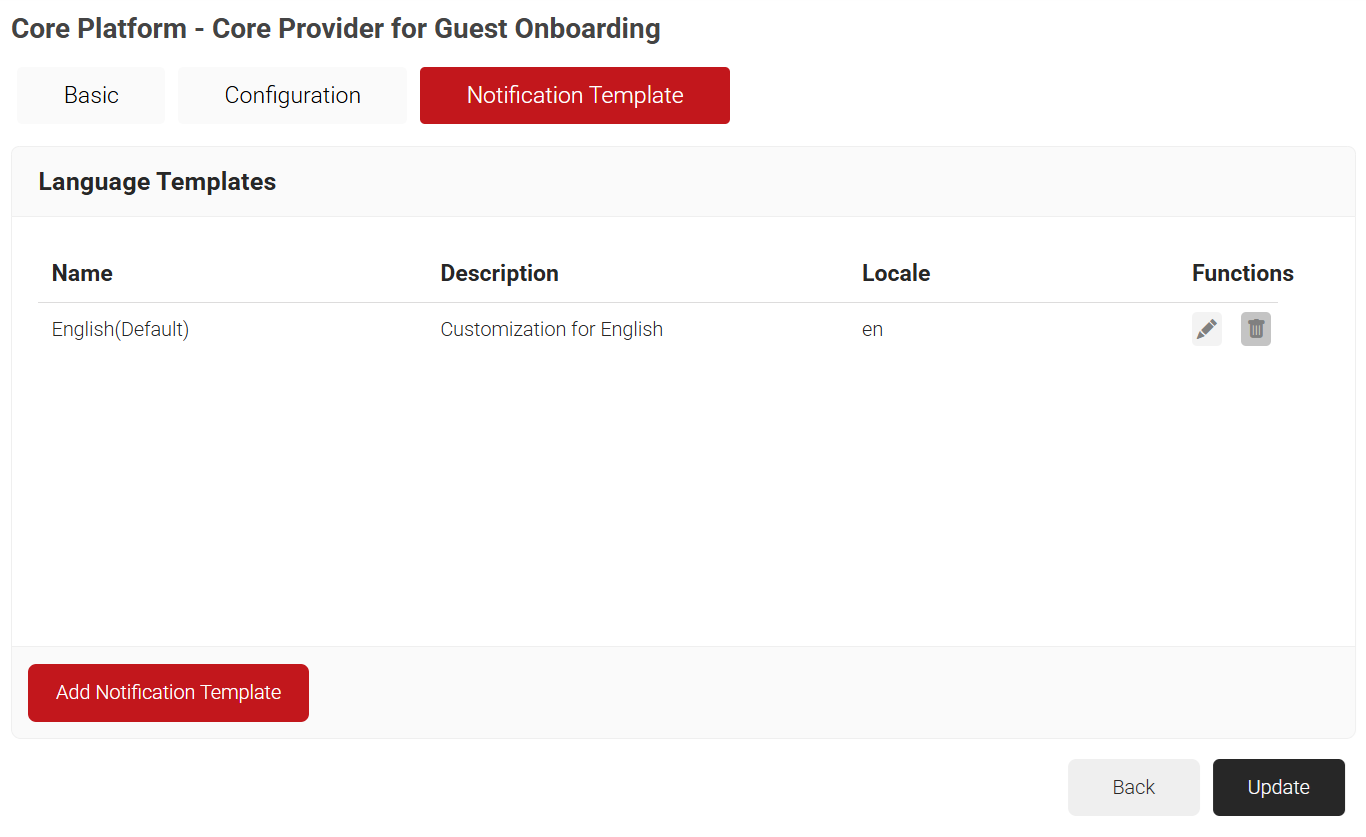
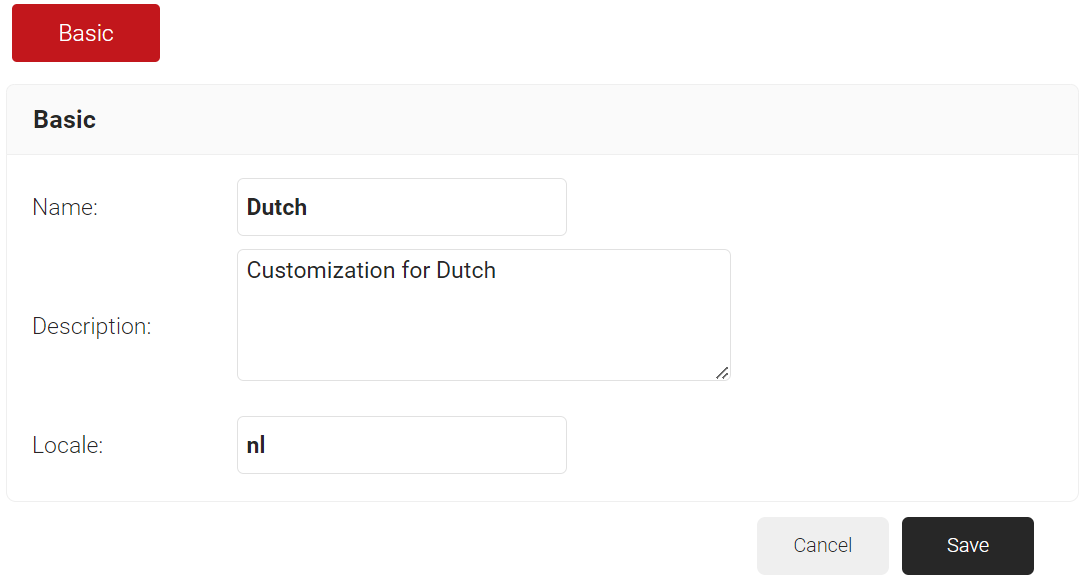
- In the Basic tab, enter a name for the Language Template in the Name field.
- In the Display Description field, enter a description for the Language Template.
- In the Locale field, enter a language code. e.g., nl for Dutch.
- Click Save. The page refreshes and opens the Notification Template tab.
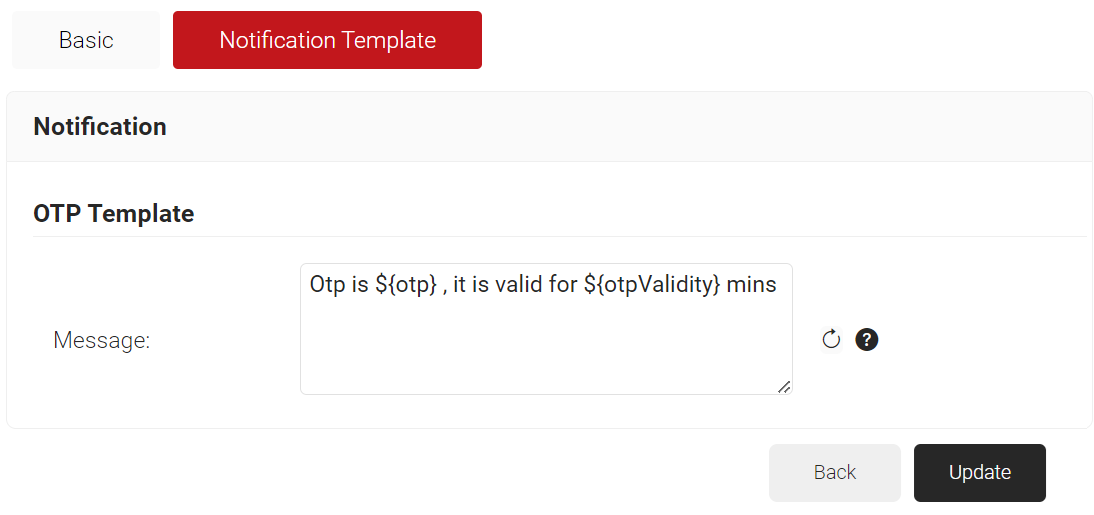
- Click the Notification Template tab.
- In the Message field, enter the customized message format with the OTP value that can be sent to users during the enrollment process. Ensure to retain “${otp}” and “${otpValidity}” variables in the message, as they convey the OTP value and its validity, respectively.
- In the Message field, enter the customized message format with the OTP value that can be sent to users during the enrollment process. Ensure to retain “${otp}” and “${otpValidity}” variables in the message, as they convey the OTP value and its validity, respectively.
- Click Add Notification Template.
- Click Update.
The Google Service Account must be created in the IAM & Admin console. Log in to the Google IAM & Admin console using the link here.
To create a new project in the Google service account, perform the following steps:
- Log in to the Google Service Account.
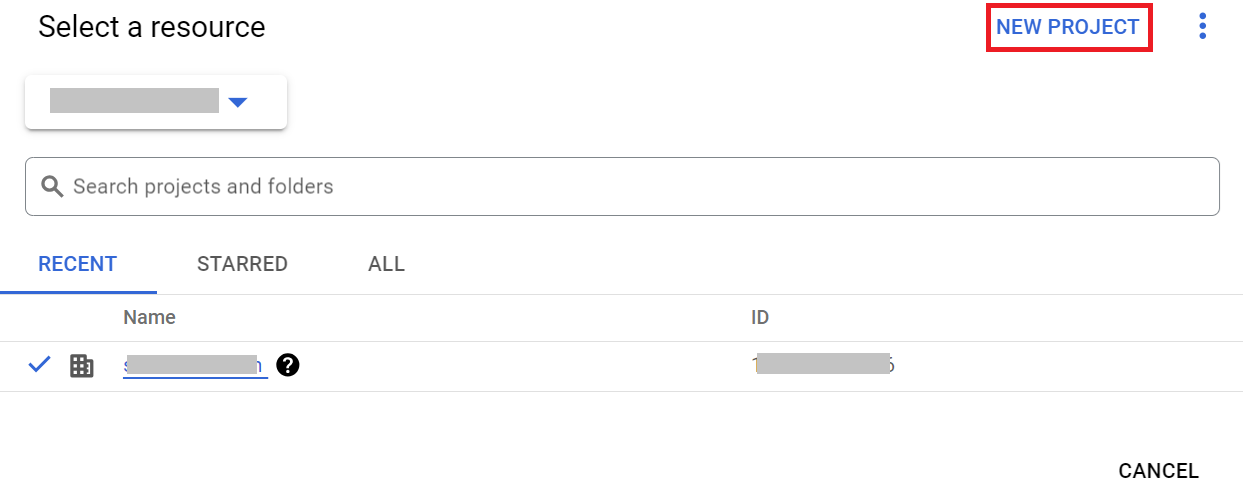
- Click the Select a Project drop-down list at the top of the page.
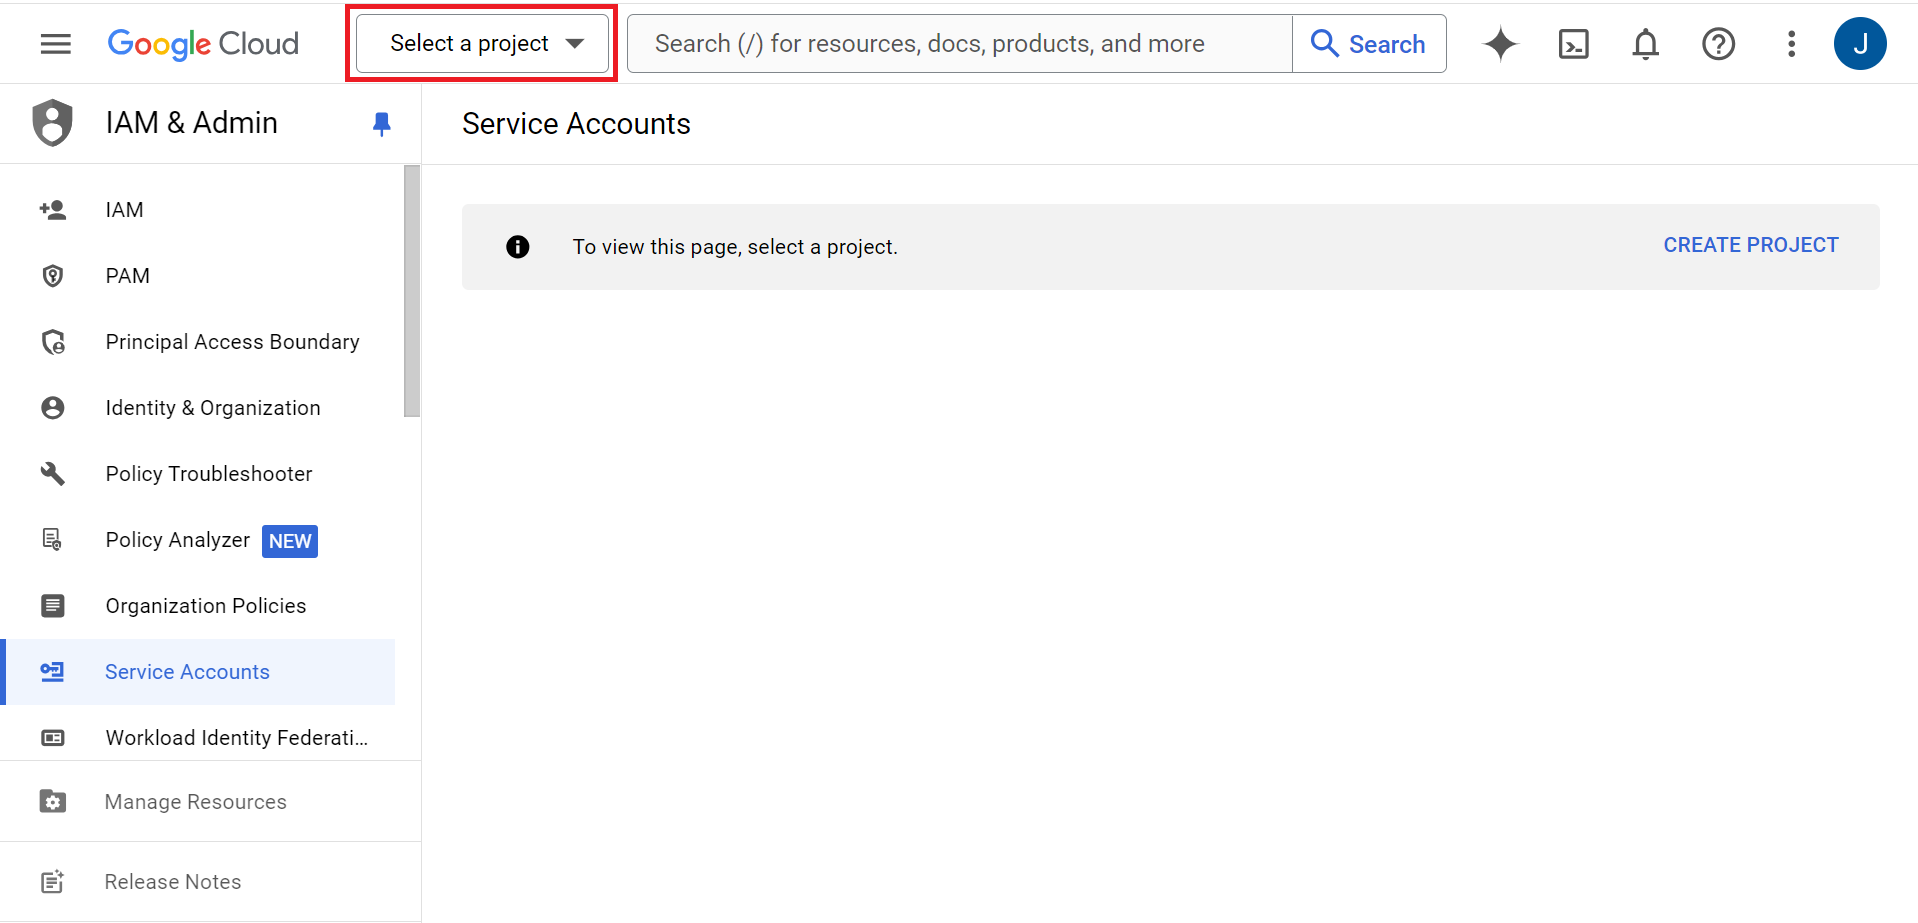
- Click NEW PROJECT.
- On the New Project page, enter a name for the project in the Project name field.
- From the Organization drop-down list, select the required organization for the project.
- From the Location drop-down list, select the parent organization.
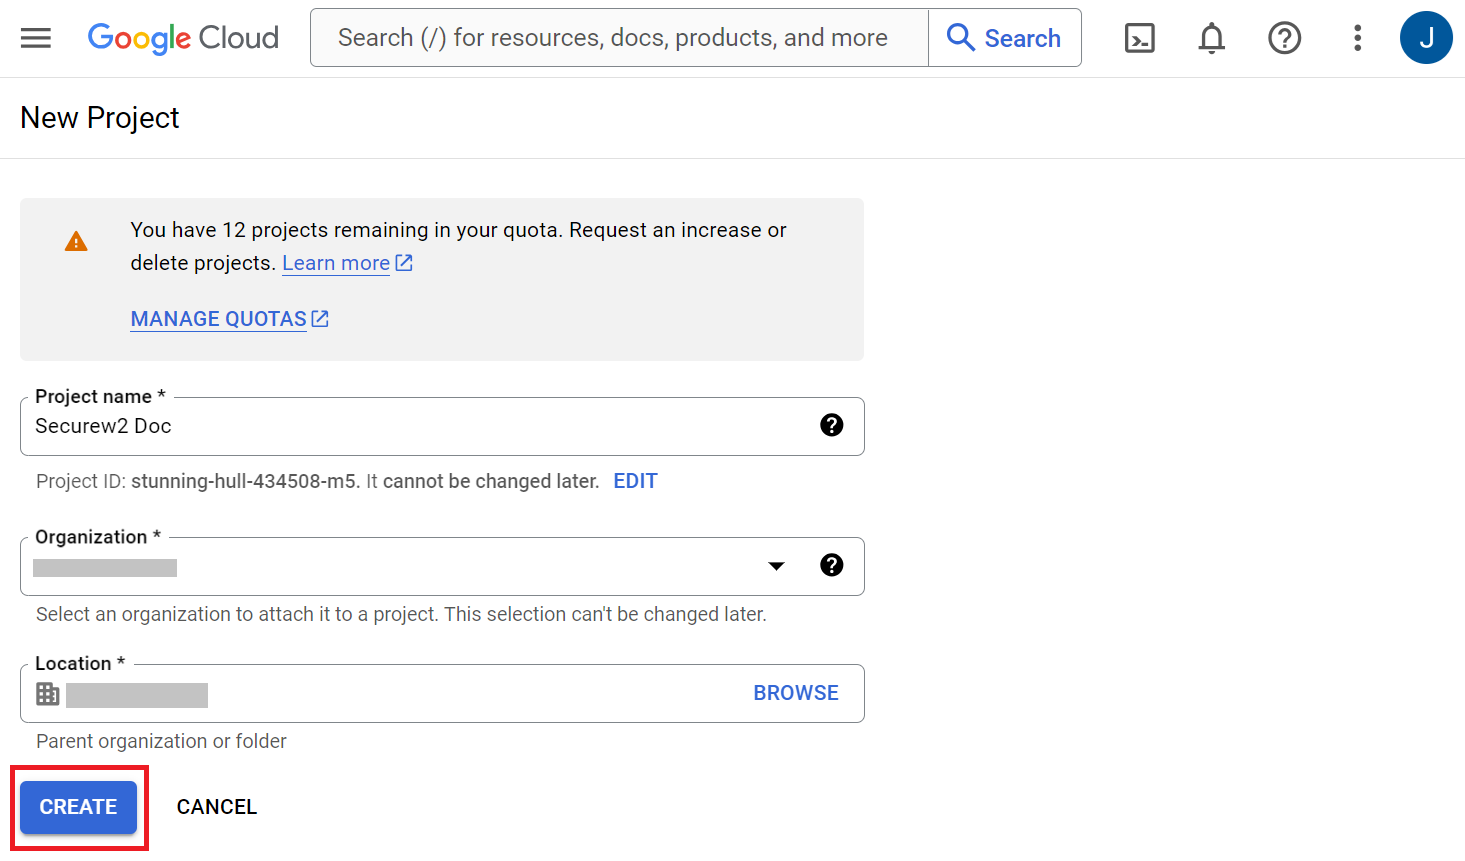
- Click CREATE.
To create an OAuth Consent screen, follow these steps:
- Log into the APIs & Services console using the link here.
- On the left pane, click the OAuth consent screen.
- On the OAuth consent screen, select External to make the app available to all users outside the organization.
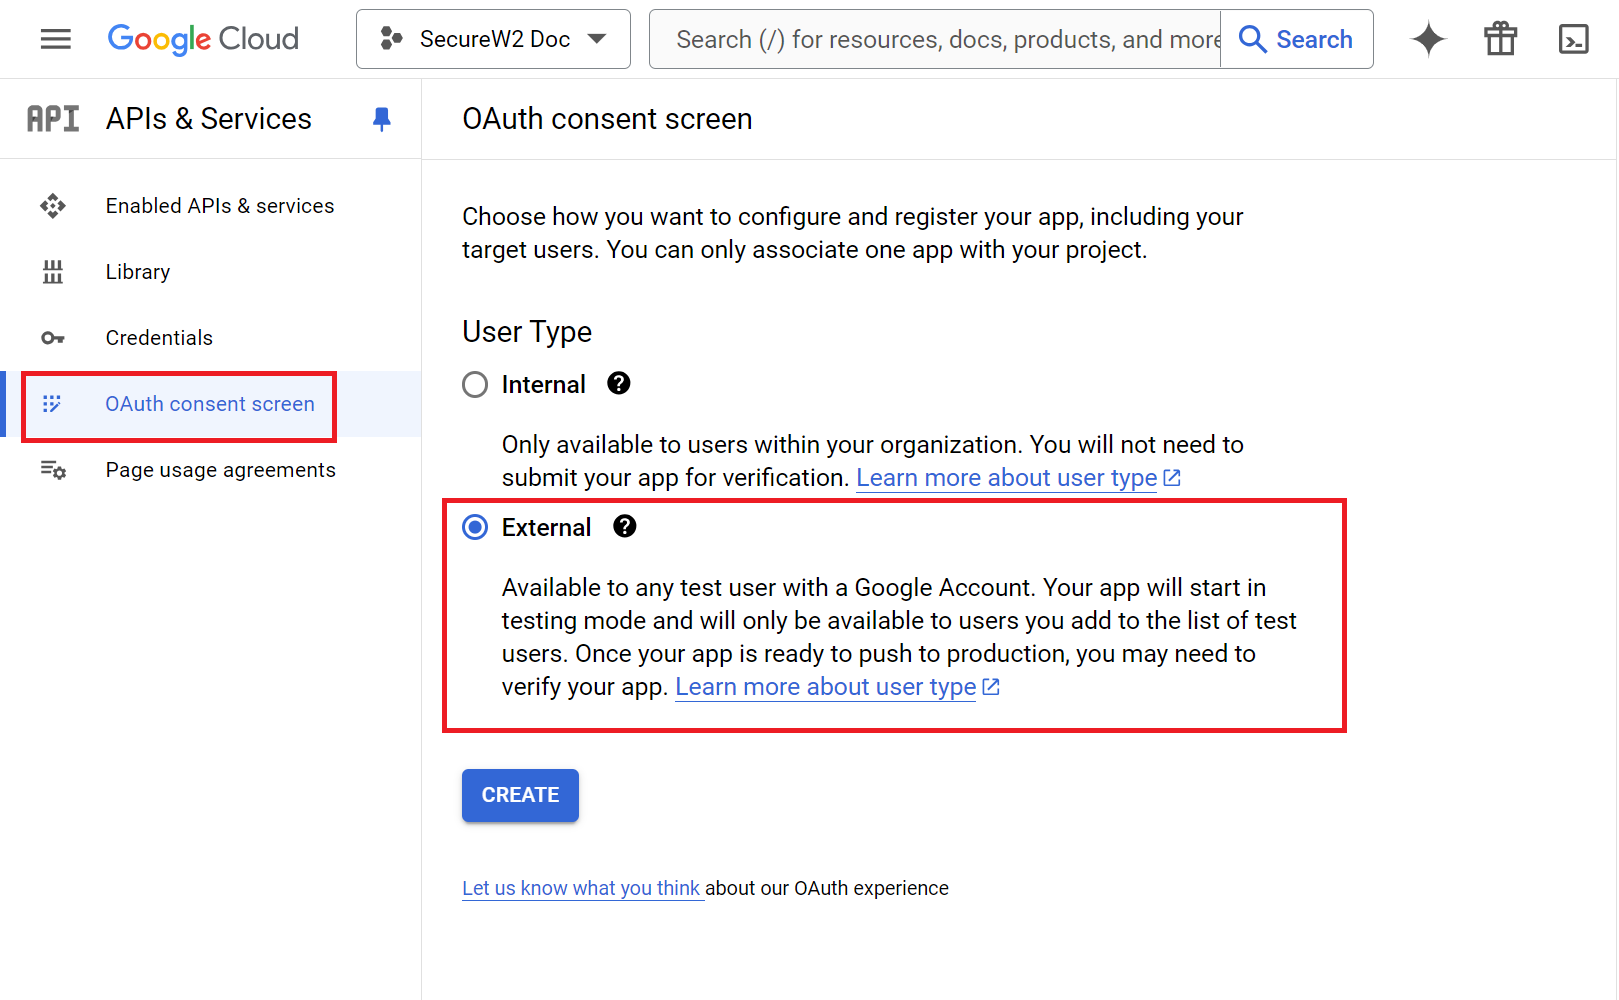
- Click CREATE.
- On the OAuth consent screen tab:
- In the App information section, for the App name field, enter the name of the application.
- From the User support email drop-down list, select the email address where users can contact you with questions about their consent. The App information is displayed on the consent screen to help end users identify and contact you.
- In the Developer contact information section, for the Email addresses field, enter the list of email addresses for Google to notify you about any changes to your project.
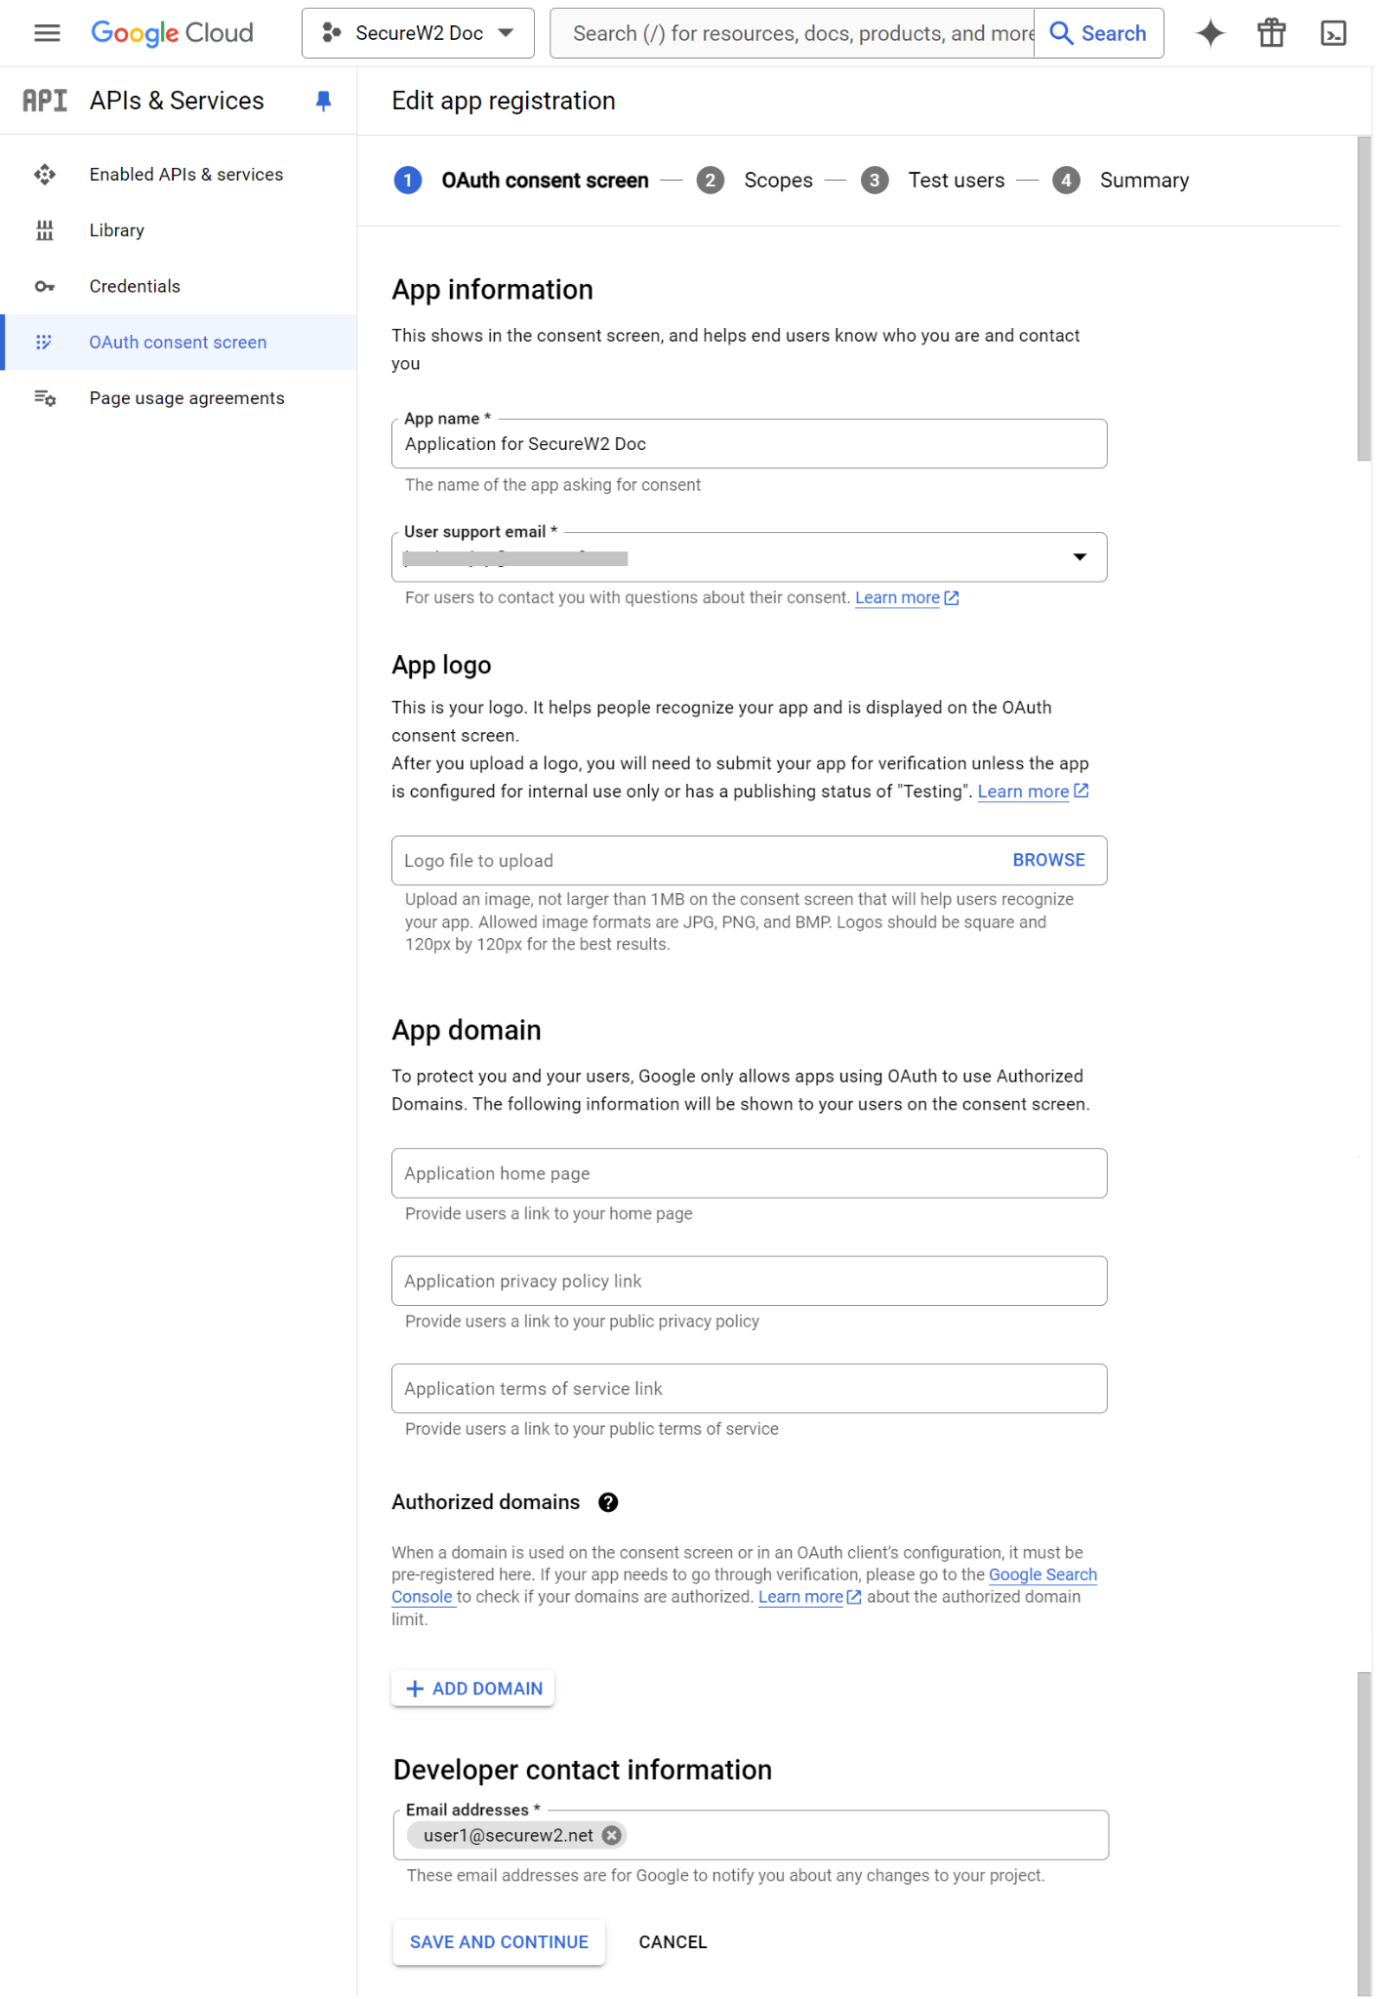
- Click SAVE AND CONTINUE.
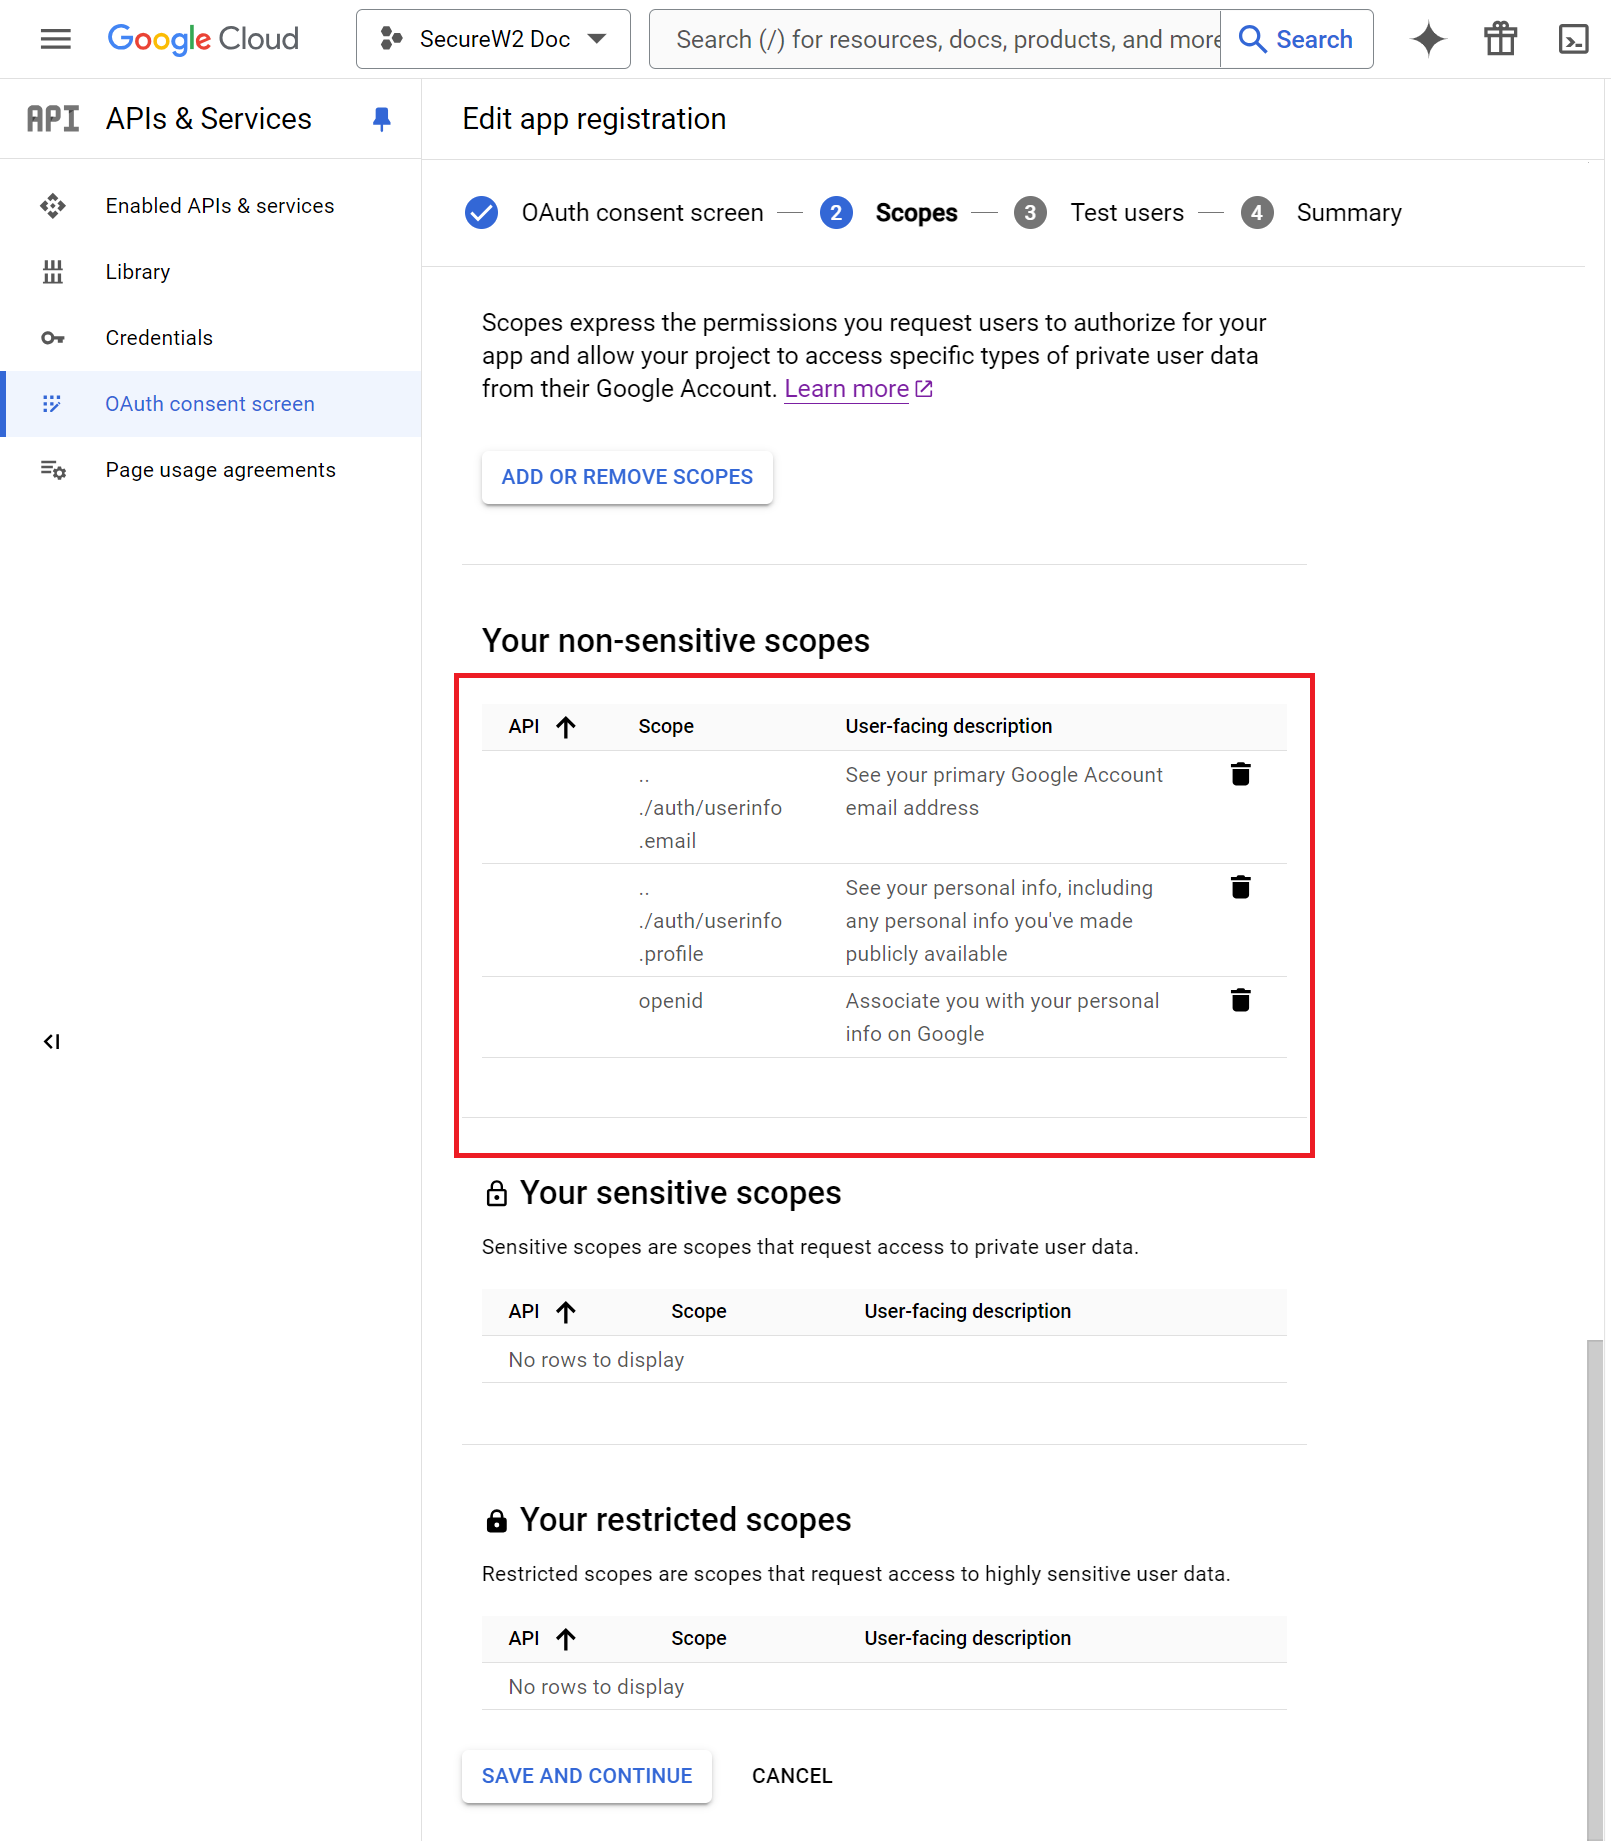
- On the Scopes tab:
- Click the ADD OR REMOVE SCOPES button.
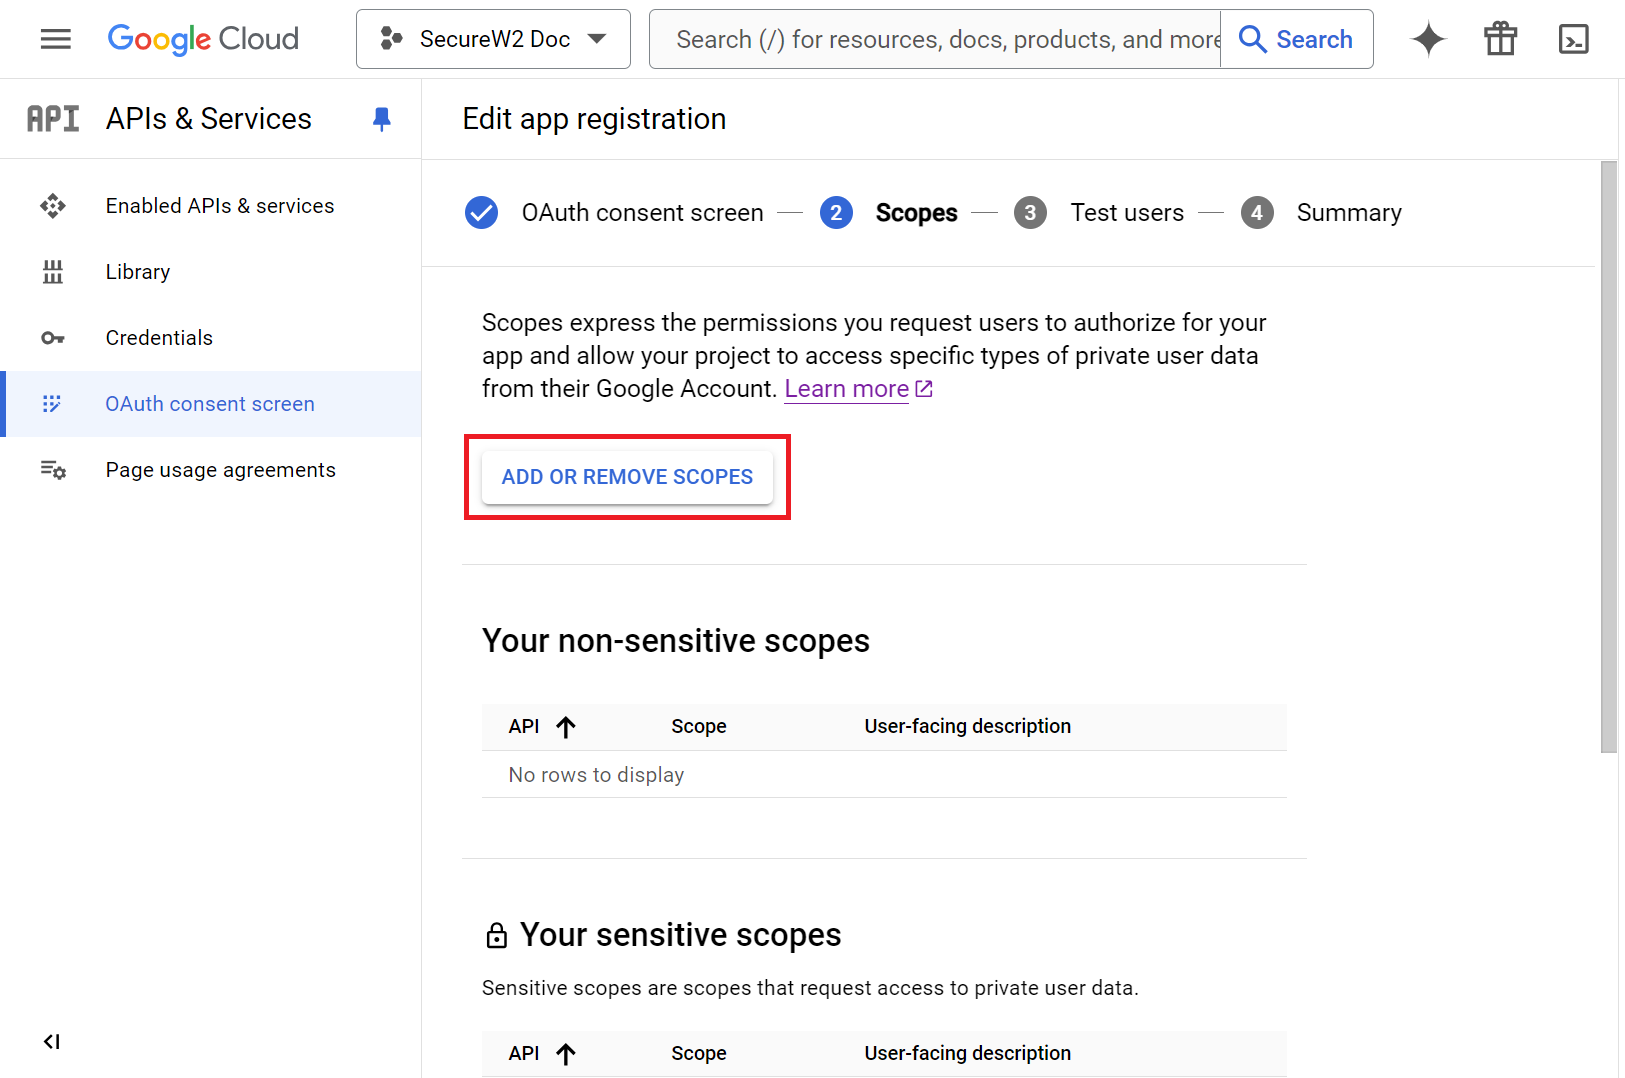
- On the Update selected scopes pop-up window, select the following values:
- https://www.googleapis.com/auth/userinfo.email
- https://www.googleapis.com/auth/userinfo.profile
- Openid
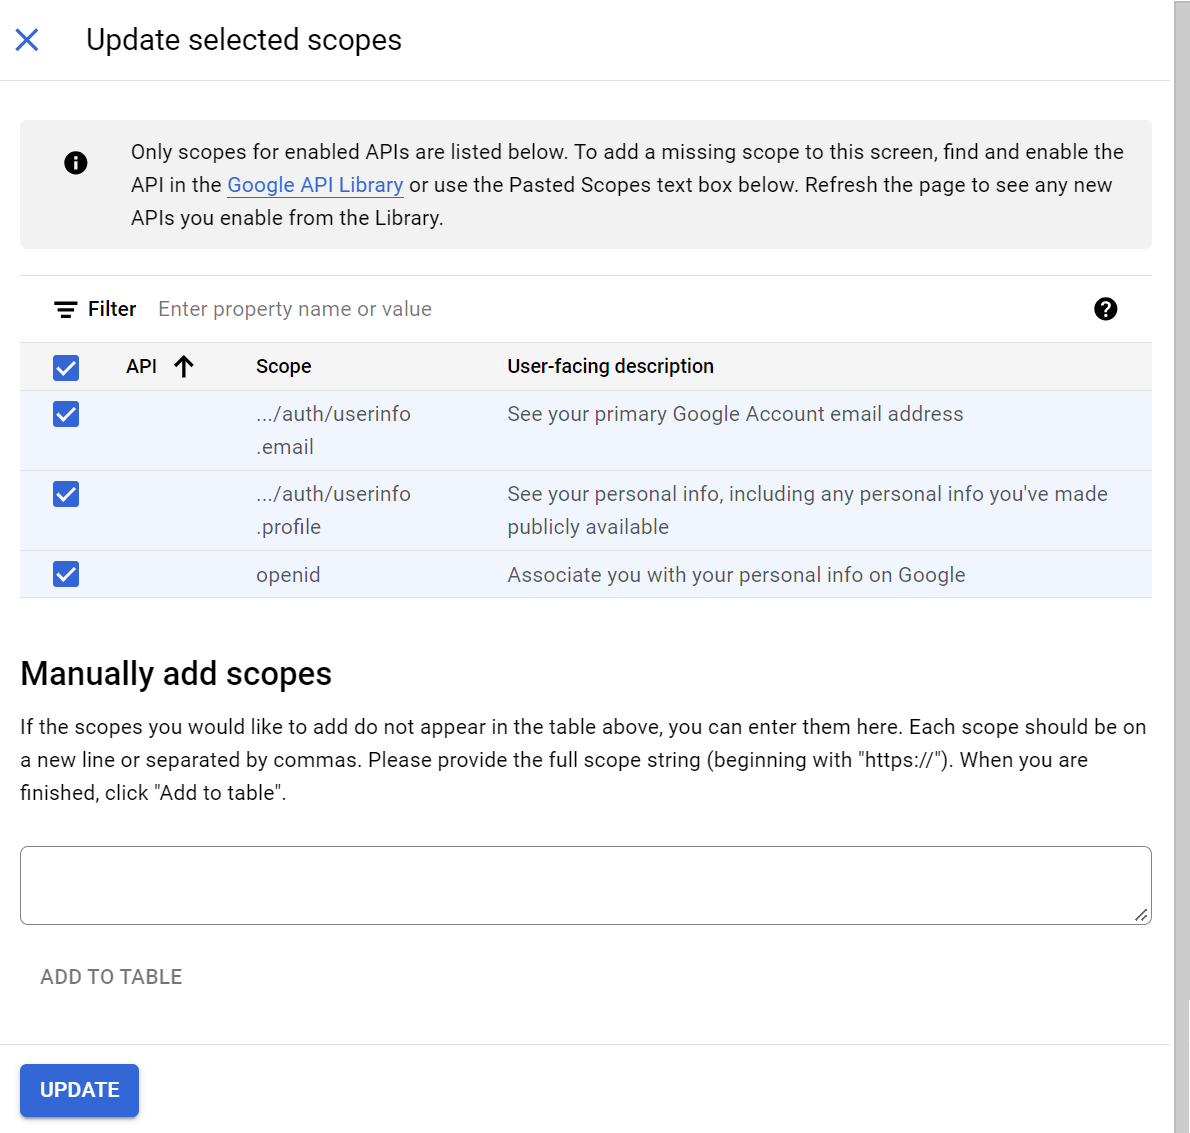
- Click UPDATE.
- Click SAVE AND CONTINUE.
- Click the ADD OR REMOVE SCOPES button.
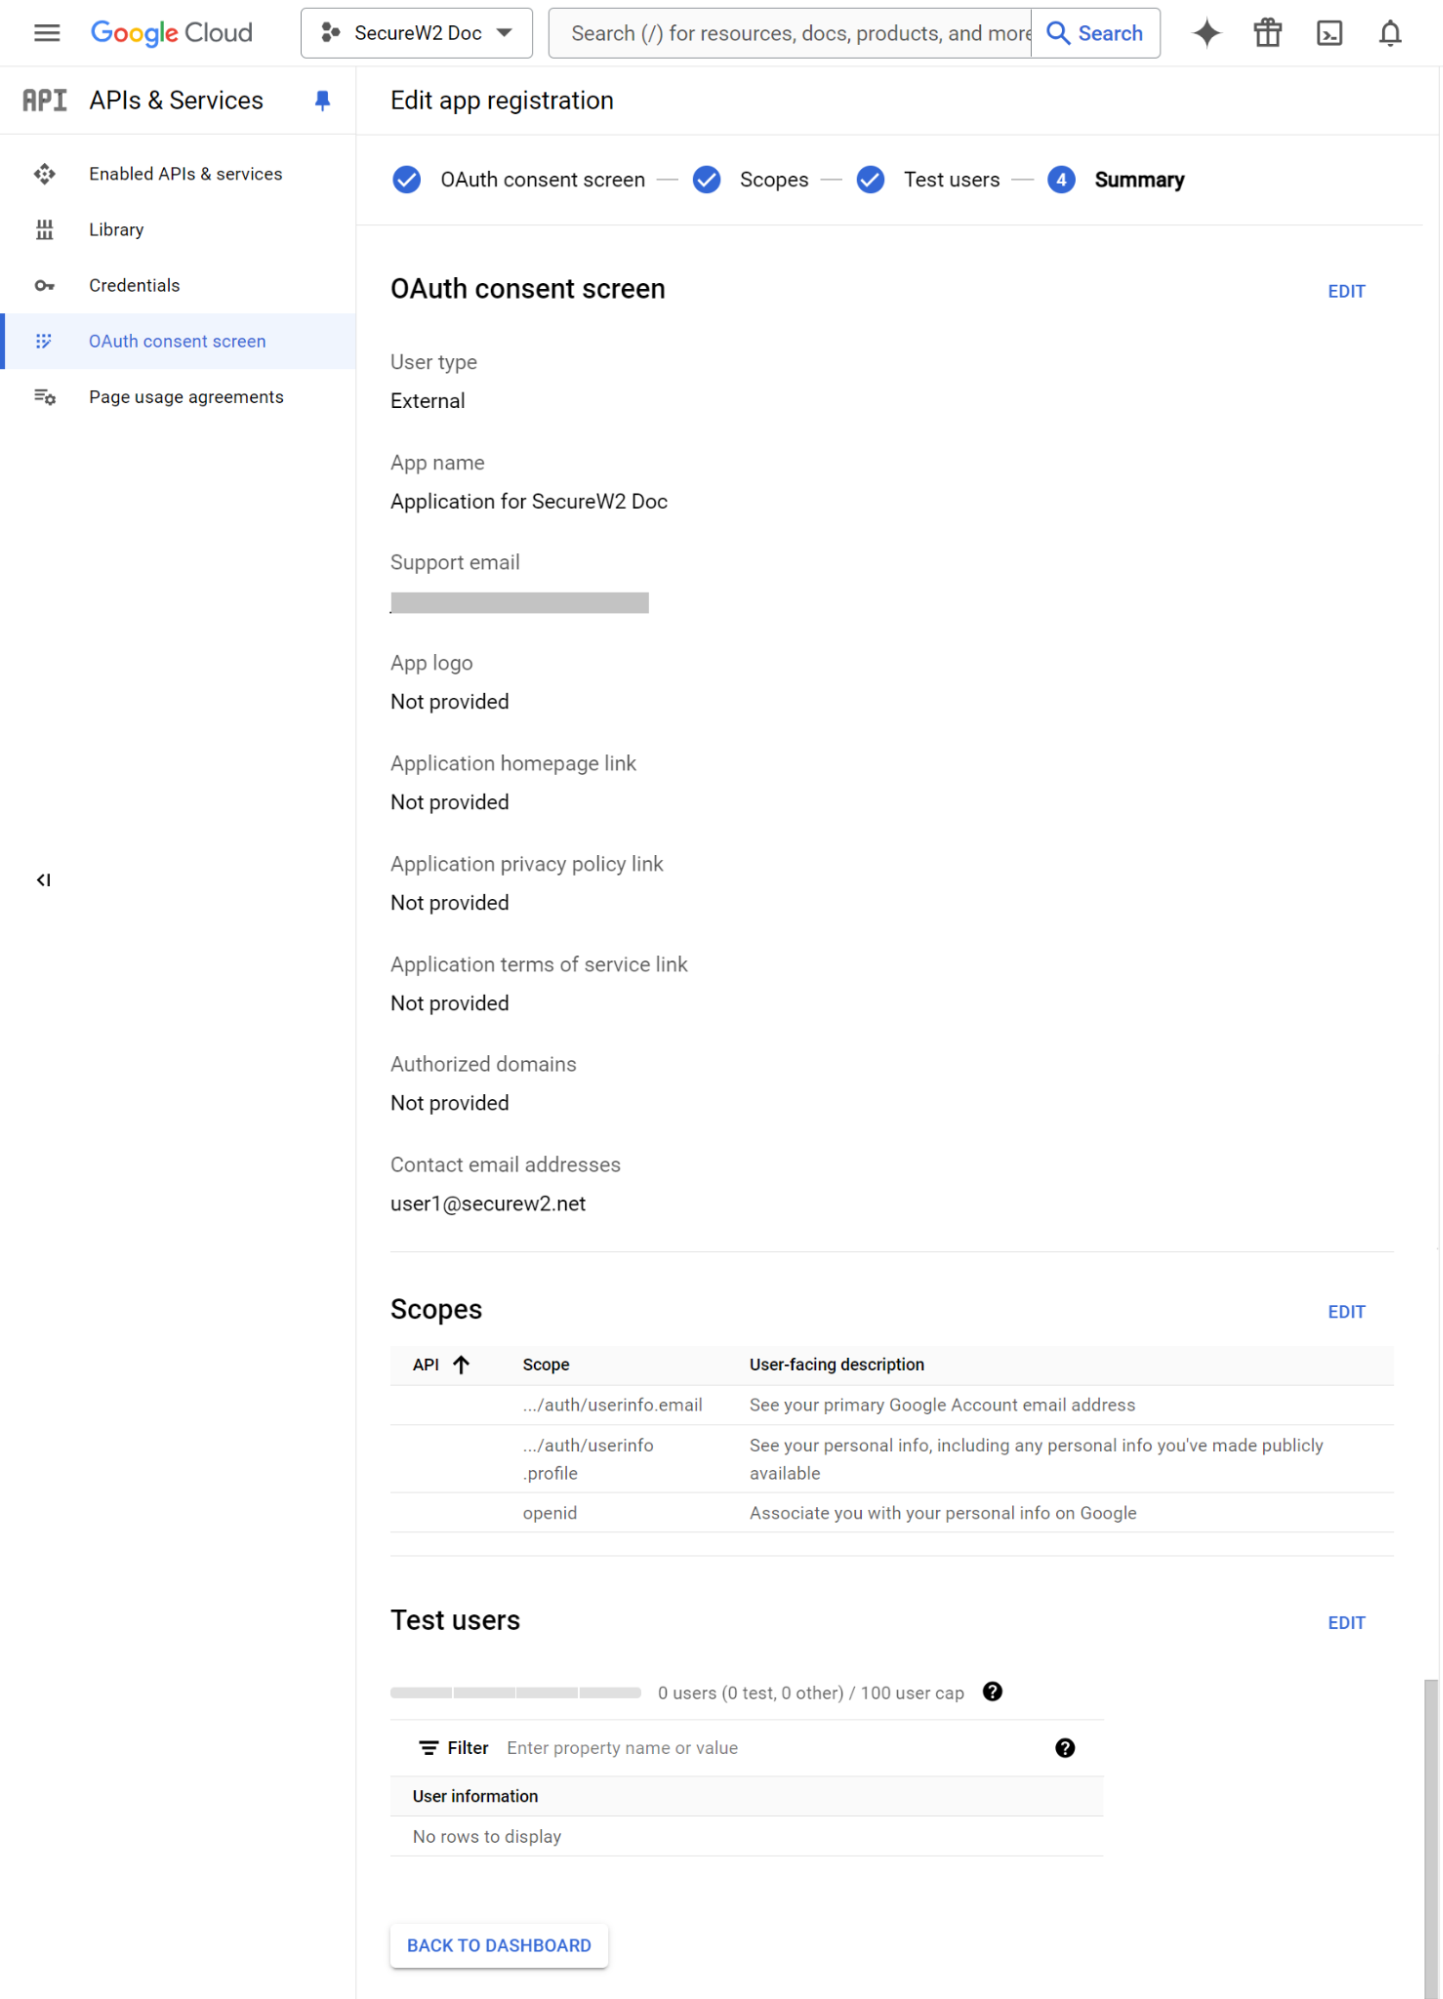
- On the Summary tab, review the app registration summary. To make changes, click EDIT. If the app registration details are correct, click the BACK TO DASHBOARD button.
To create credentials for your project, execute the following steps:
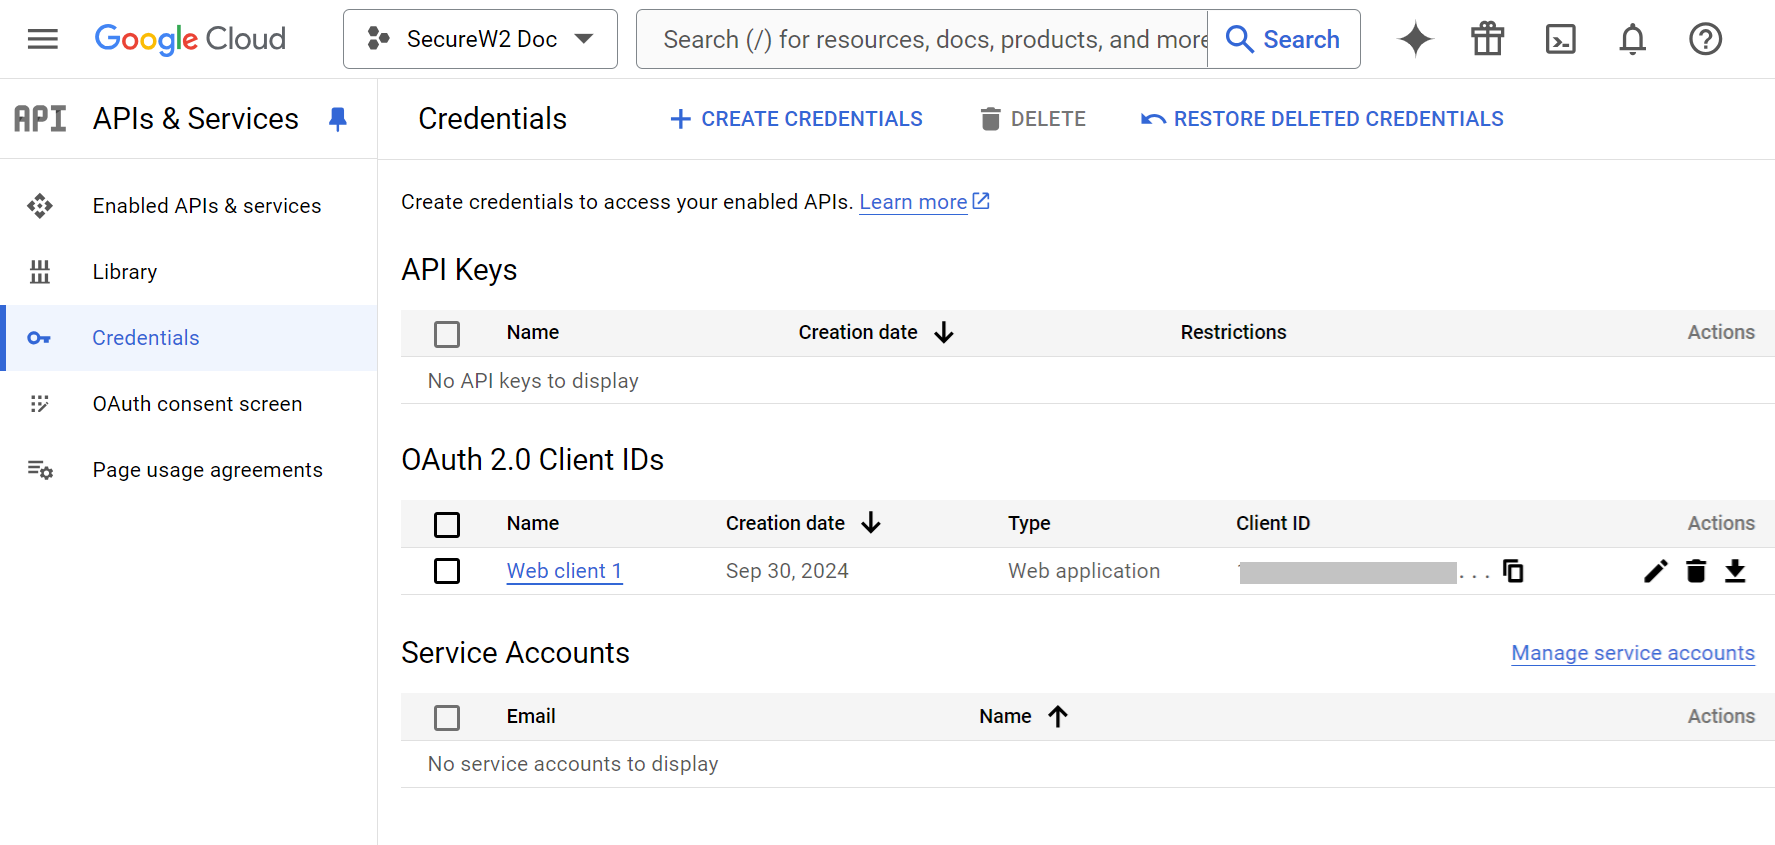
- Log into the APIs & Services console using the link here.
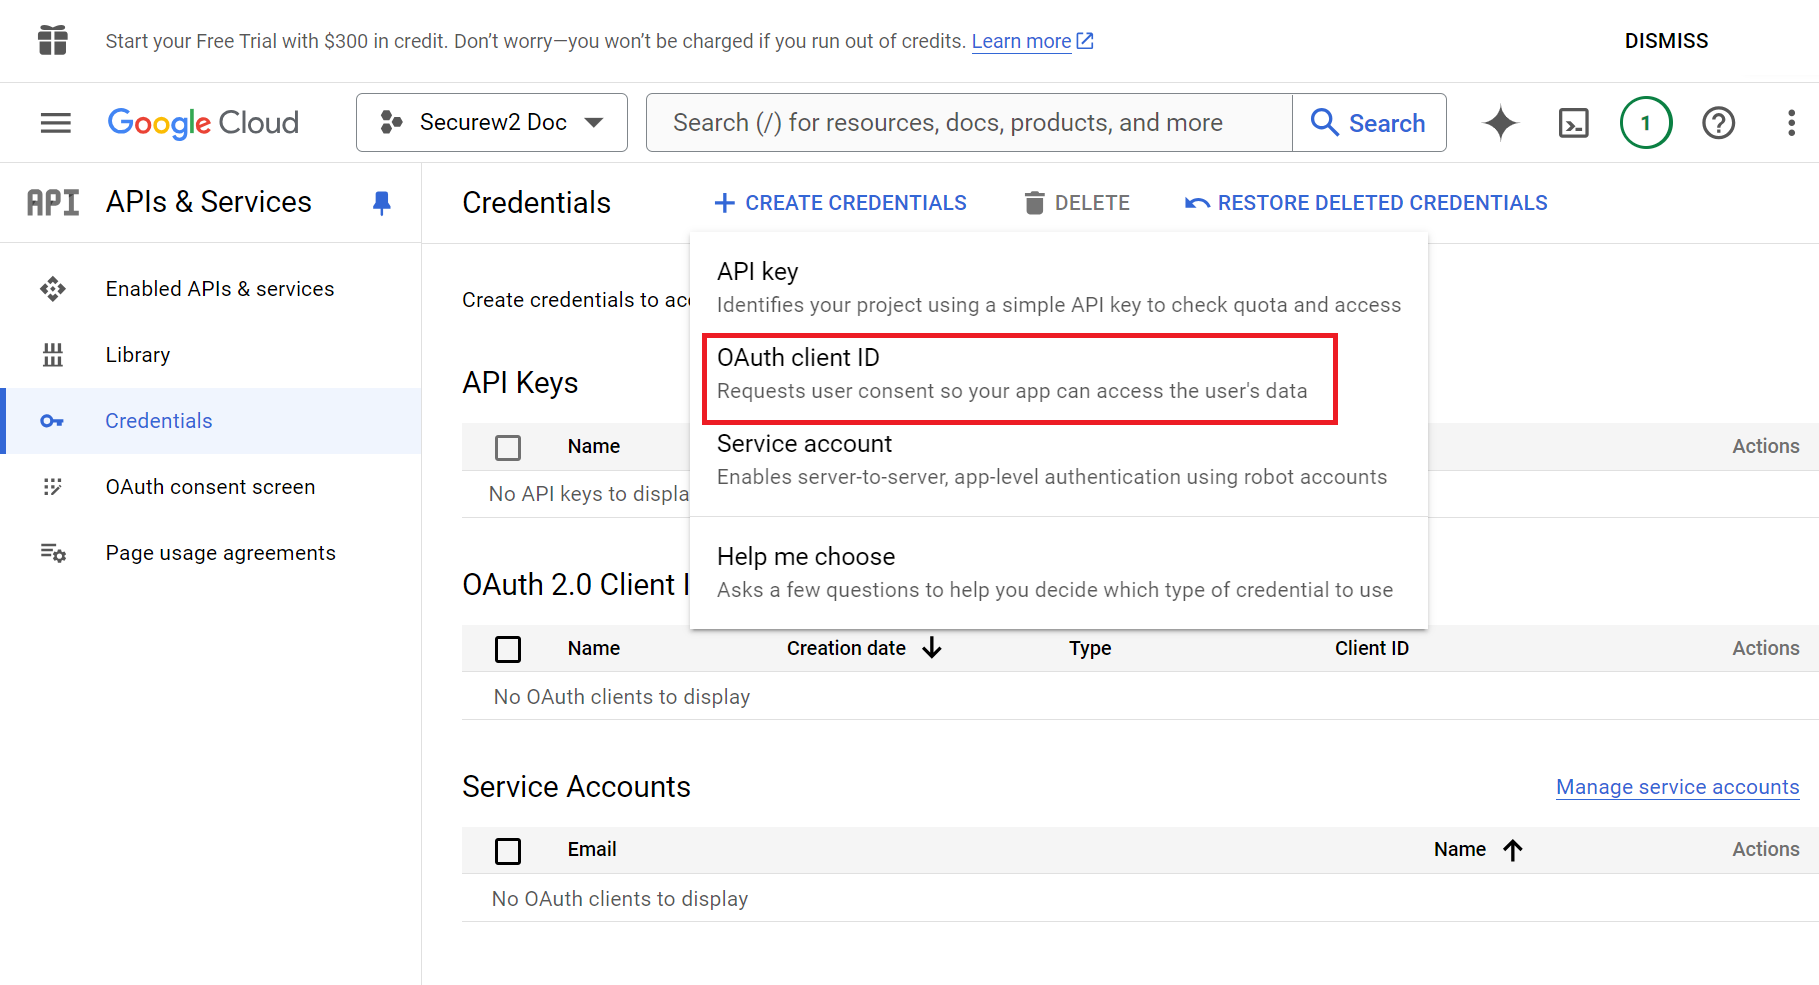
- On the left pane, click Credentials.
- Click the + CREATE CREDENTIALS menu and select OAuth client ID.
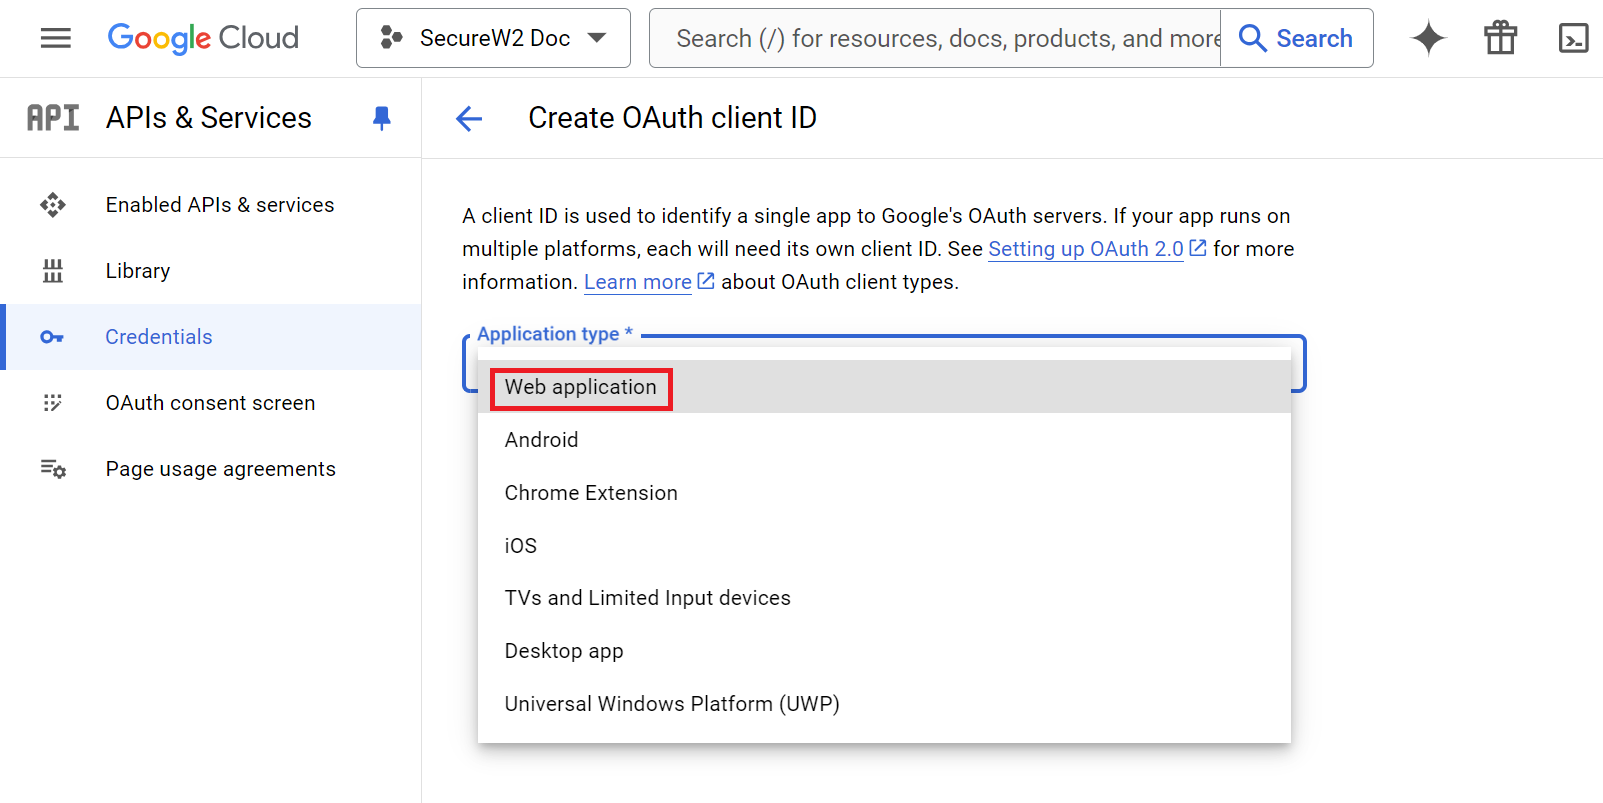
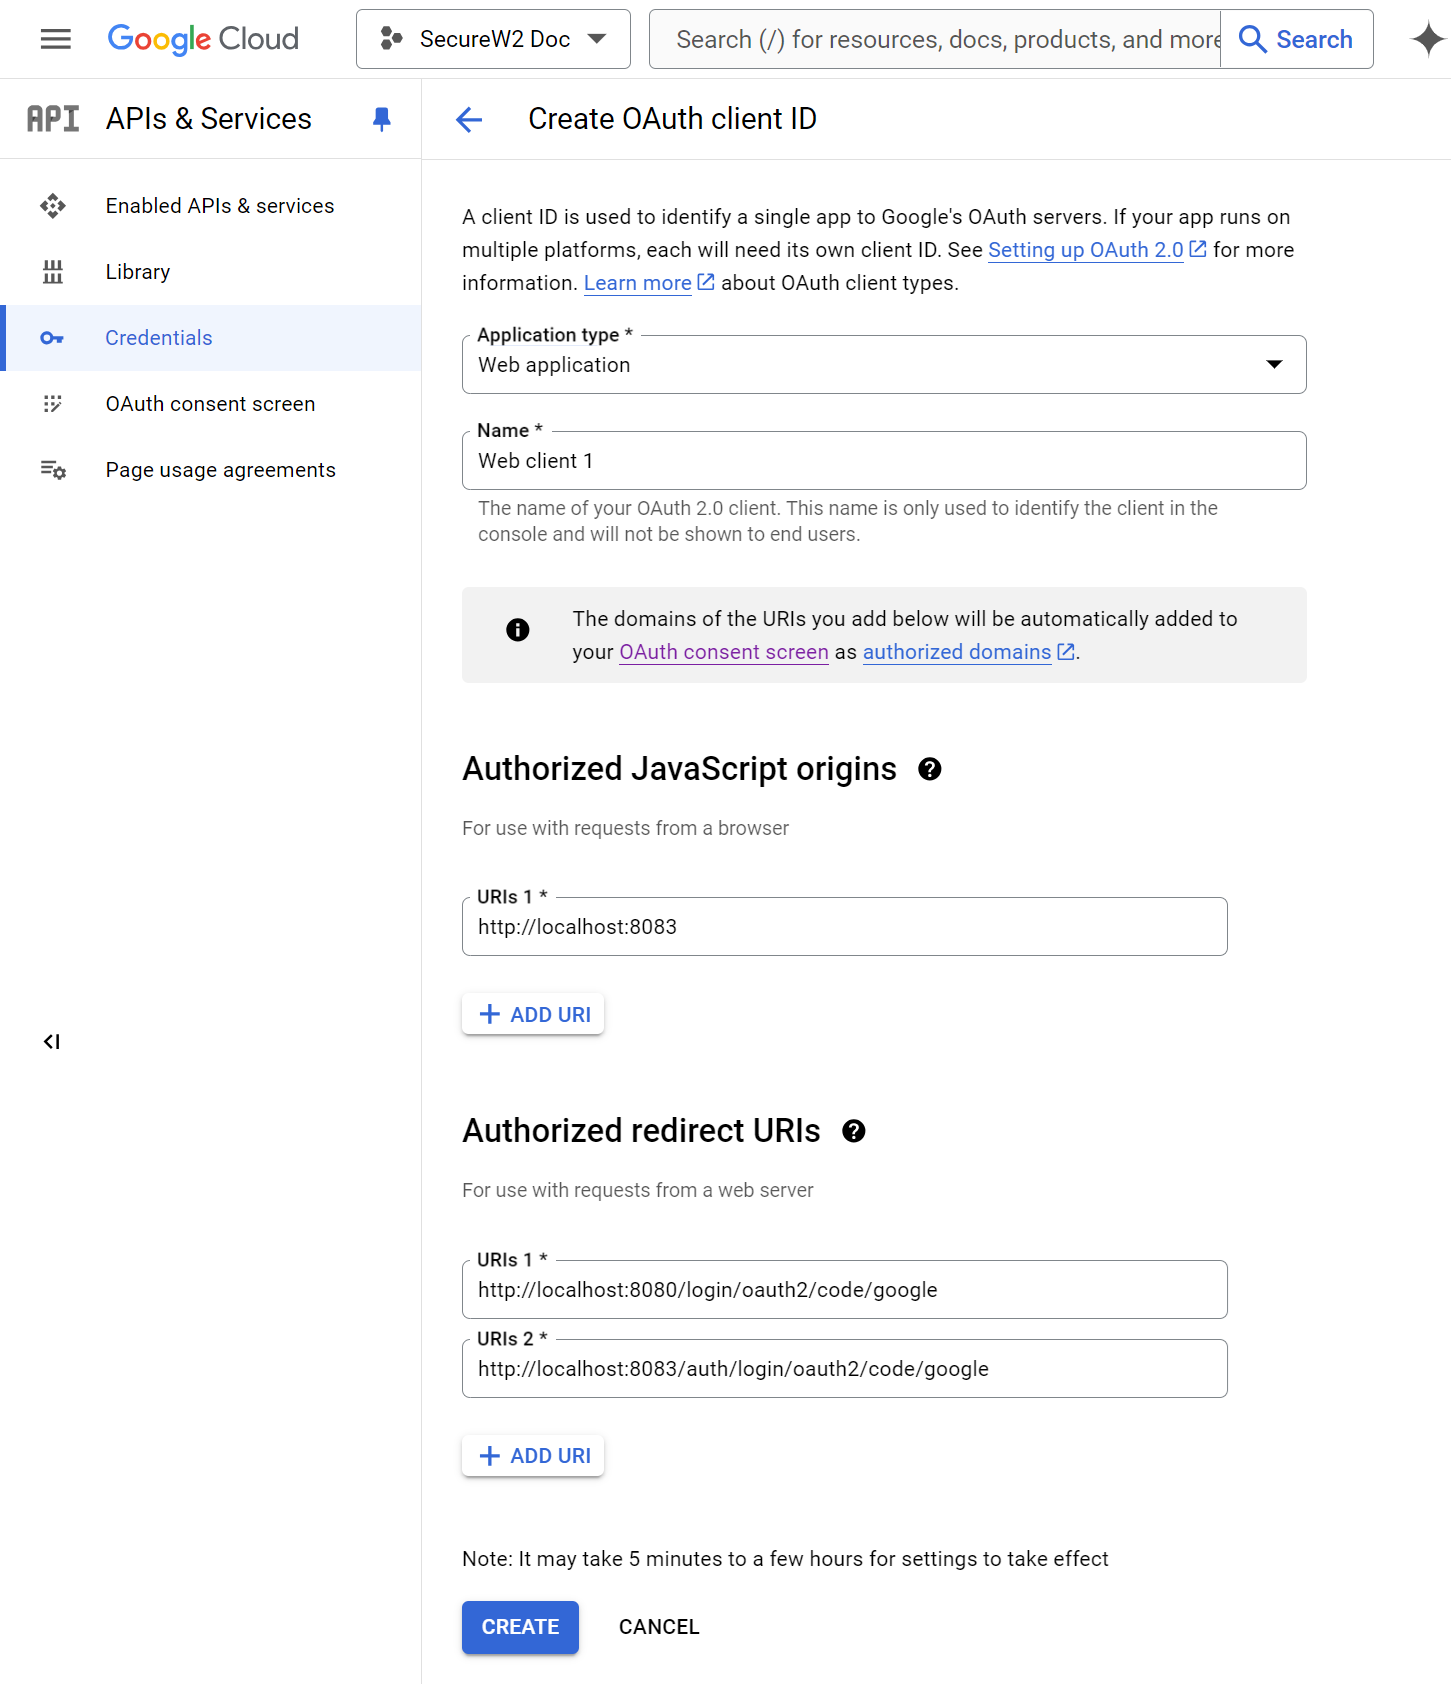
- On the Create OAuth client ID page, from the Application type drop-down list, select Web application.
- In the Name field, enter the OAuth2 client’s name. This name is only used for identifying the client in the console and will not be visible to end users.

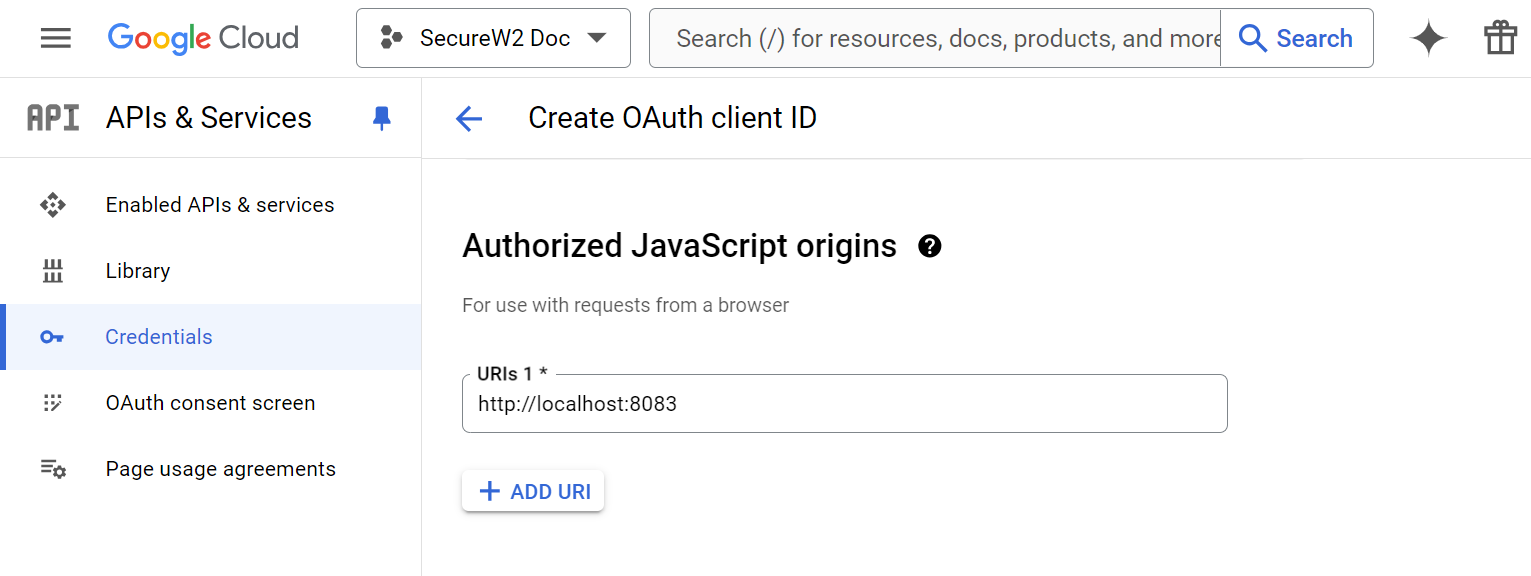
- In the Authorized JavaScript origins section, click the ADD URI button.

- In the URIs 1 field, enter the base URL of the authentication portal.
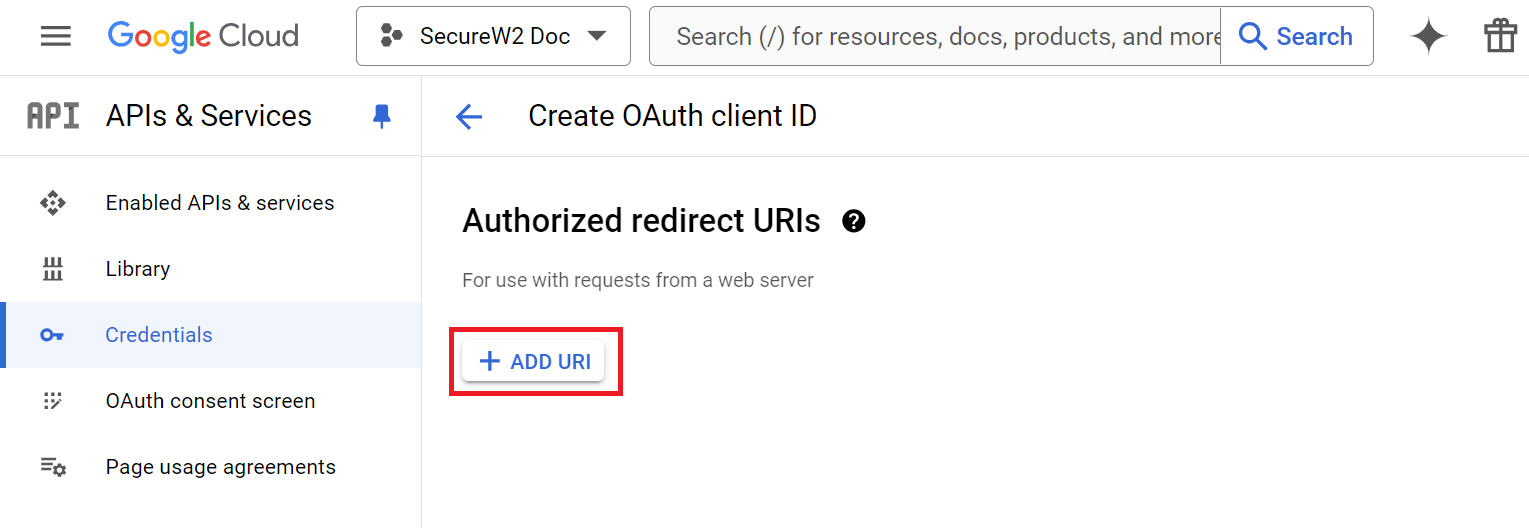
- In the Authorized redirect URIs section, click the ADD URI button.
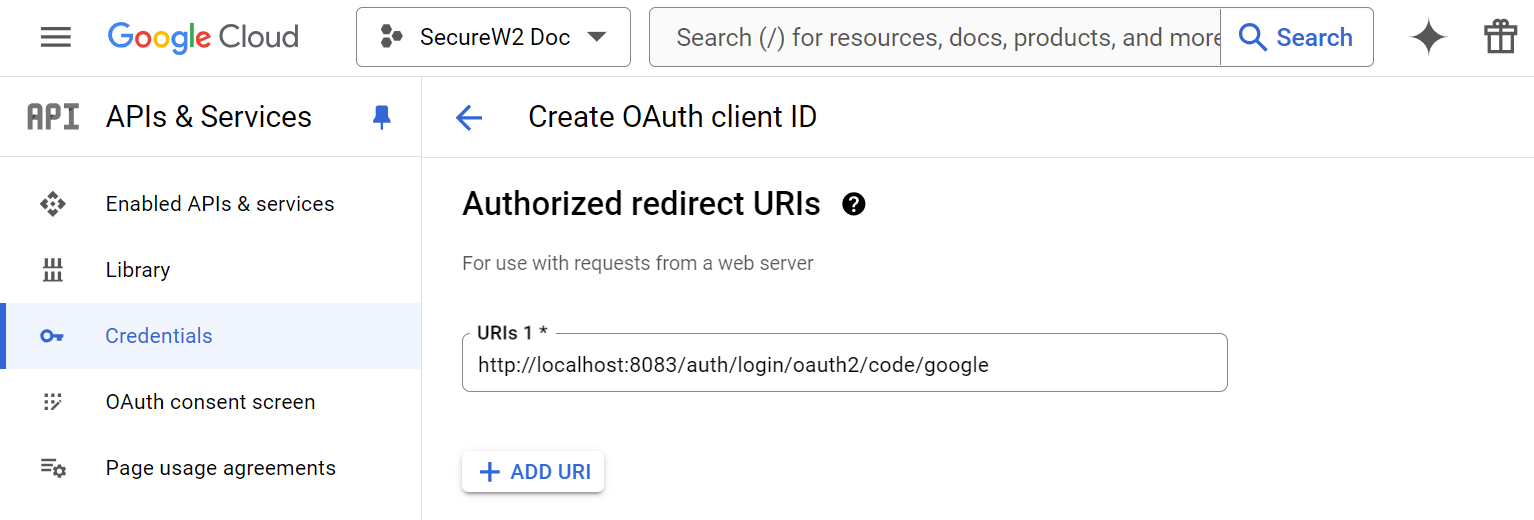
- In the URIs 1 field, enter the redirect URI obtained from the JoinNow Management Portal (refer to the Creating a Guest Identity Provider section, step 10).
- In the URIs 1 field, enter the redirect URI obtained from the JoinNow Management Portal (refer to the Creating a Guest Identity Provider section, step 10).
- Click CREATE.
- The Client ID and Client secret values are generated in the OAuth client created pop-up window. Copy the Client ID and Client secret values to your computer.
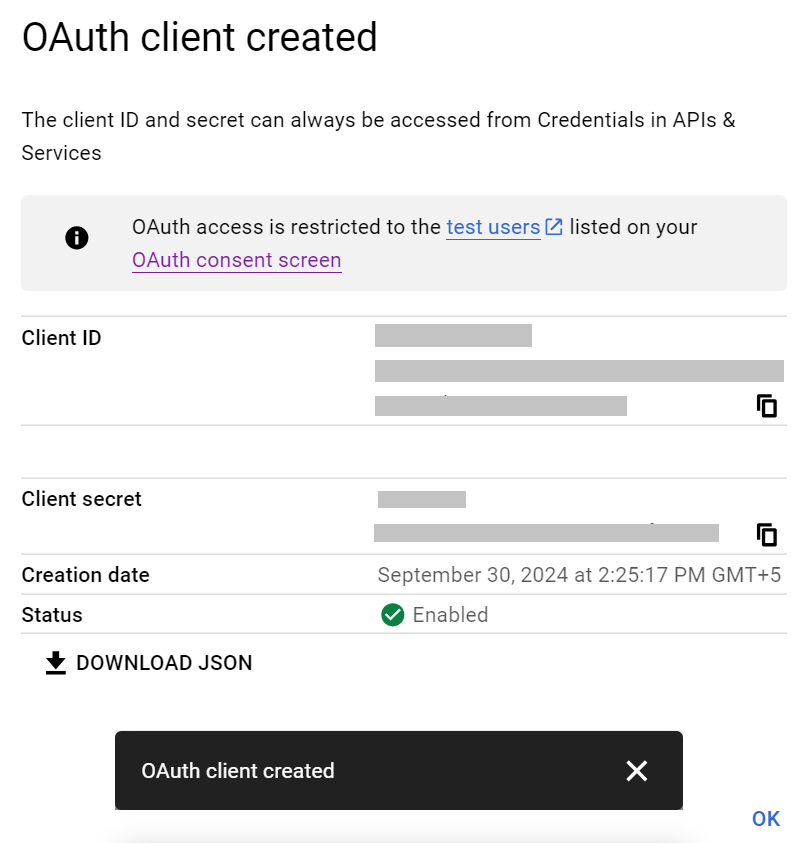
- Click OK.
To configure the Network Profile for guest user authentication, perform the following steps:
- Log in to the JoinNow Management Portal.
- Navigate to Device Onboarding > Getting Started.
- On the Quickstart Network Profile generator page:
- From the Generate Profile for drop-down list, select Guest User Authentication to create a wireless TLS profile. When Guest User Authentication is selected, the Profile Type and EAP Method fields are unavailable to the network admin because the guest user will perform only certificate-based authentication.
- In the SSID field, enter the name of the profile.
- From the Security Type drop-down list, select WPA2-Enterprise.
- From the Policy drop-down list, retain the DEFAULT.
- From the Wireless Vendor drop-down list, select your preferred Wireless vendor.
- From the RADIUS Vendor drop-down list, select your preferred RADIUS vendor.
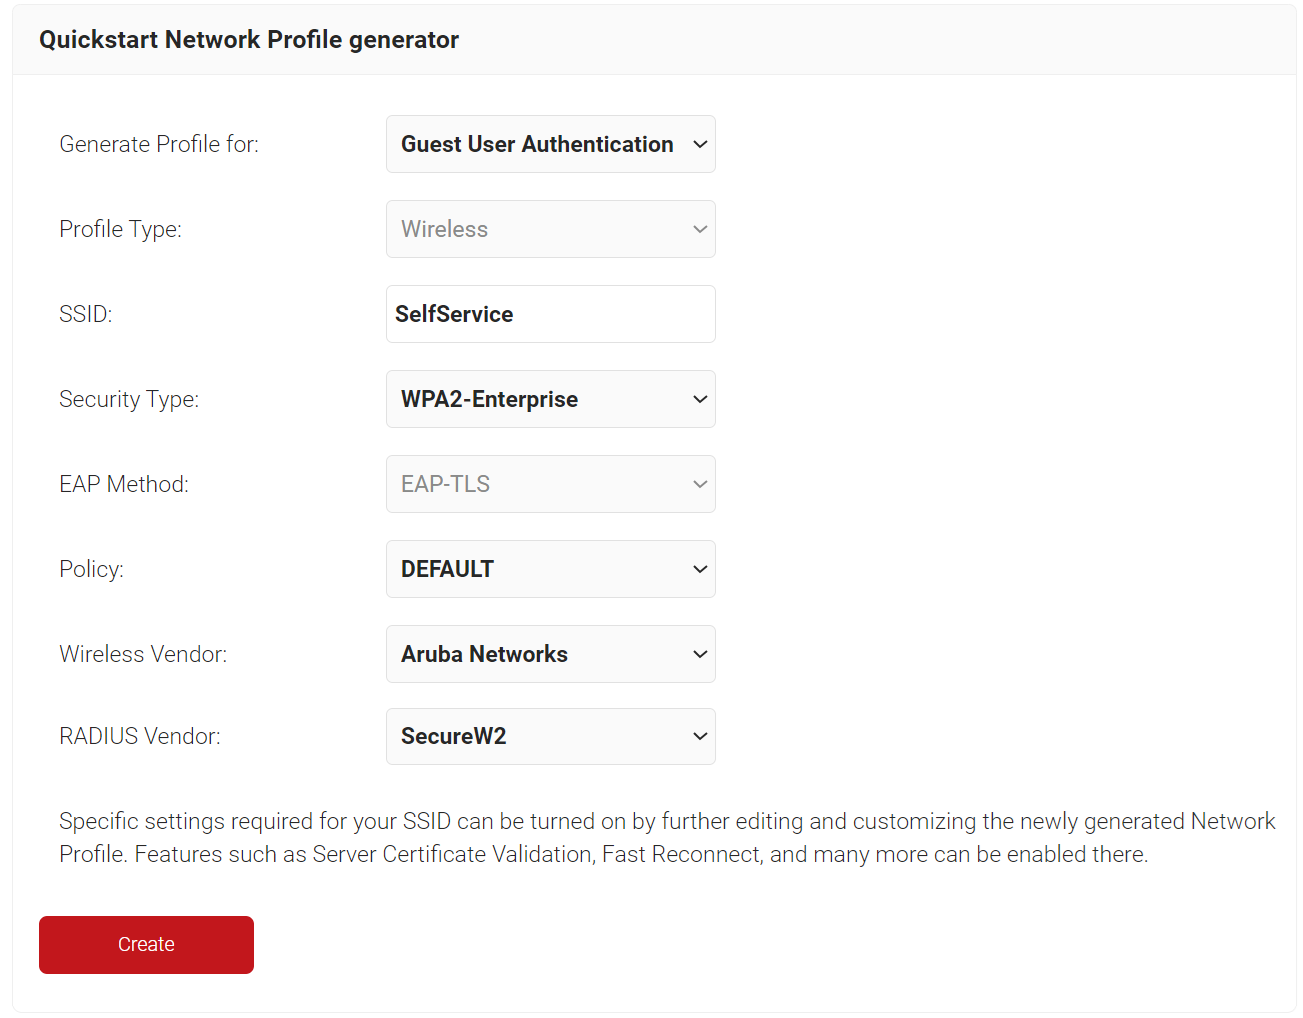
- Click Create.
The Network Profile is created along with the following sections:
- CA (Root and Intermediate) is created if it is not already available under the organization name.
- A specific Certificate Template for Guests certificates
- Policies (Authentication Policy, Policy Engine Workflow, Enrollment Policy, and Network Policy)
The Certificate Authority (both Root and Intermediate) is created as a part of the Getting Started process.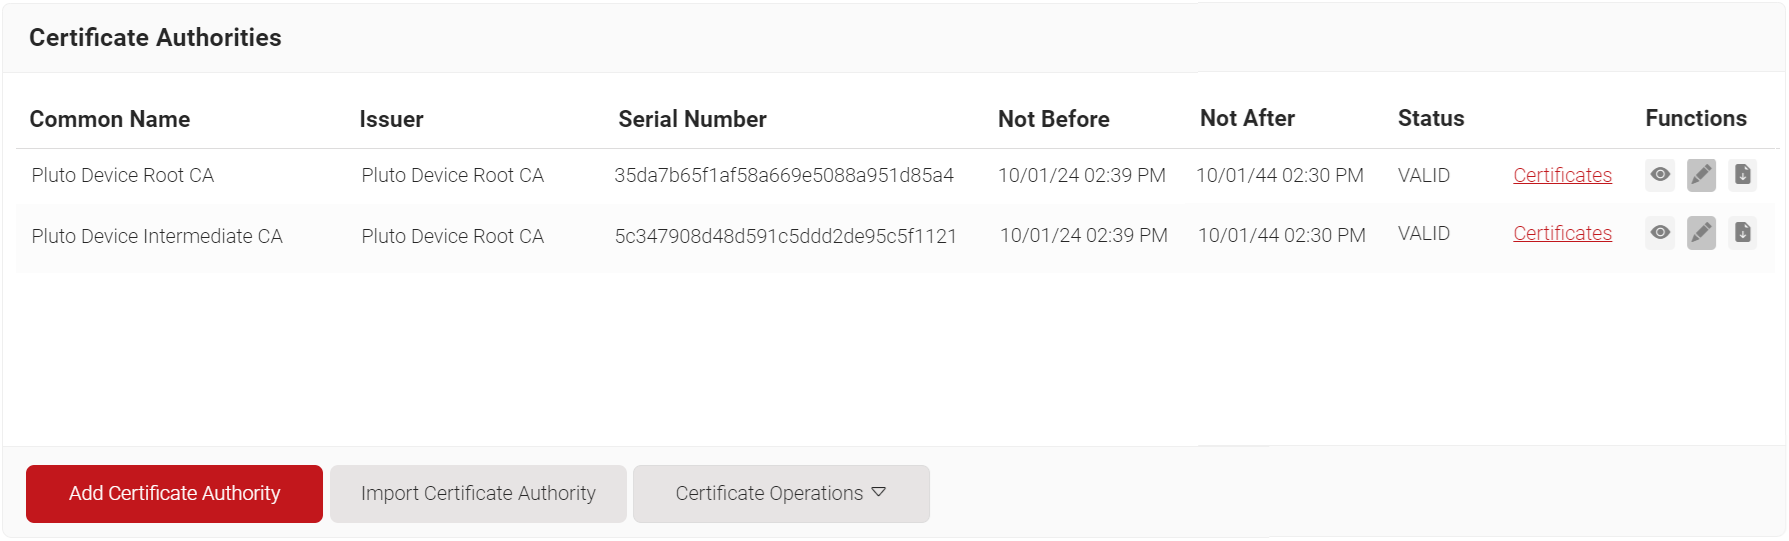
If your organization already has both the Root and Intermediate CAs, they are not created during the Getting Started process. If you prefer to use a separate intermediate CA for guest TLS, you can create one and map it to issuing certificates.
To create a new intermediate CA, perform the following steps:
- Navigate to Dynamic PKI > Certificate Authorities.
- Click Add Certificate Authority.
- In the Basic section, from the Generate CA For drop-down list, select the Device and User Authentication option to authenticate devices and users.
- From the Type drop-down list, select Intermediate CA.
- From the Certificate Authority drop-down list, select the default Root CA that comes with your organization.
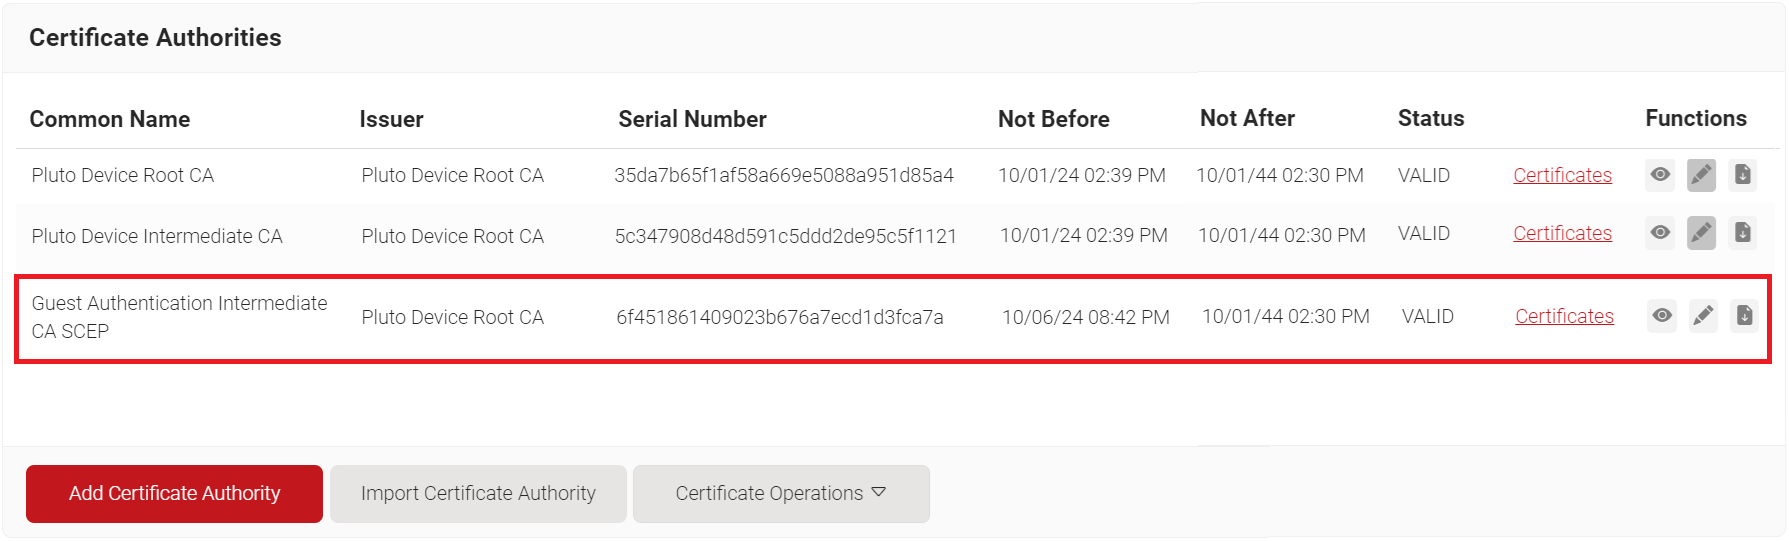
- In the Common Name field, enter a common name for the CA certificate. SecureW2 recommends a name that includes “SCEP.”
- From the Key Size drop-down list, select 2048 for the CA certificate key pair.
- From the Signature Algorithm drop-down list, select the signature algorithm for the certificate signing request. The option available is SHA-256.
- In the Validity Period (in years) field, enter the validity period of the CA certificate.
- In the Notifications section:
- From the Expiry Notification Frequency (in days) drop-down list, select the frequency interval for which a certificate expiration notification should be sent to users.
- Select the Notify user on successful Enrollment check box to notify users after a successful enrollment.
- If the RFC has a valid email address, the guest user will receive the certificate issued or expired notification; otherwise, they will not receive the notification.
- In the Revocation section:
- In the Revoke Certificate if unused for field, select the number of days after which an unused certificate can be revoked.
- From the Reason Code drop-down list, select any one of the following reasons for which the certificate is revoked.
- Certificate Hold
- AA Compromise
- Privilege Withdrawn
- Unspecified
- If the guest user uses SecureW2 RADIUS, auto revocation will take place.
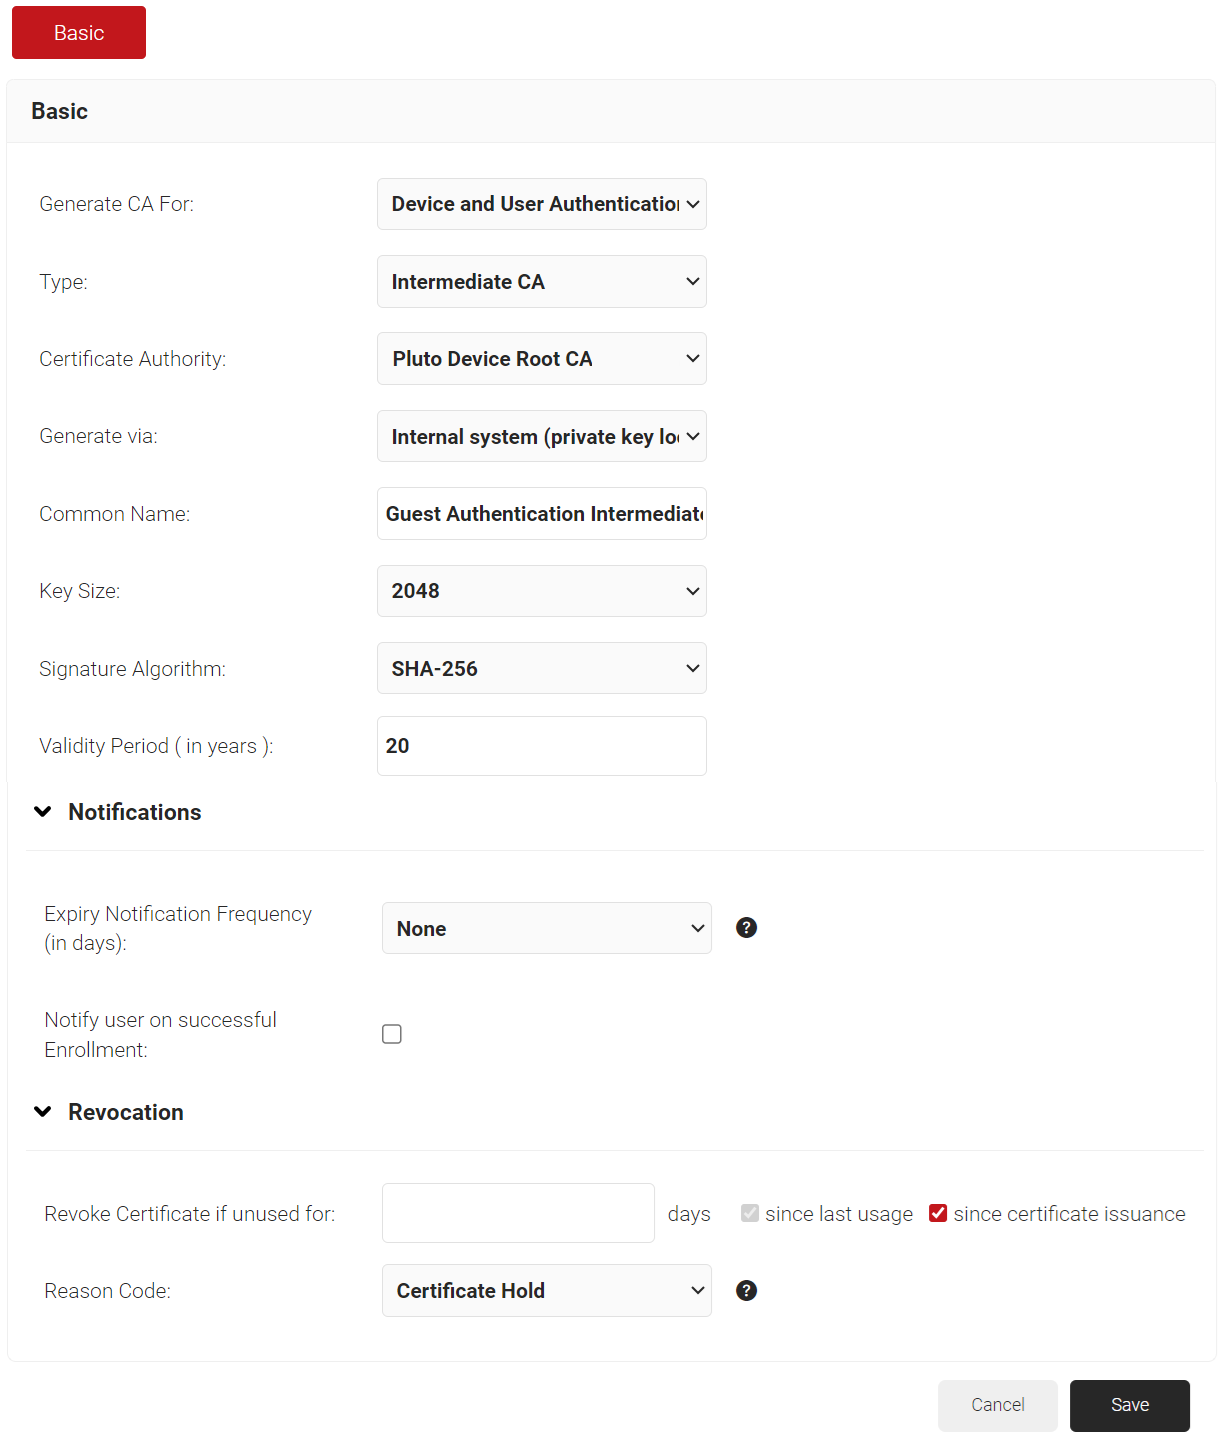
- Click Save.
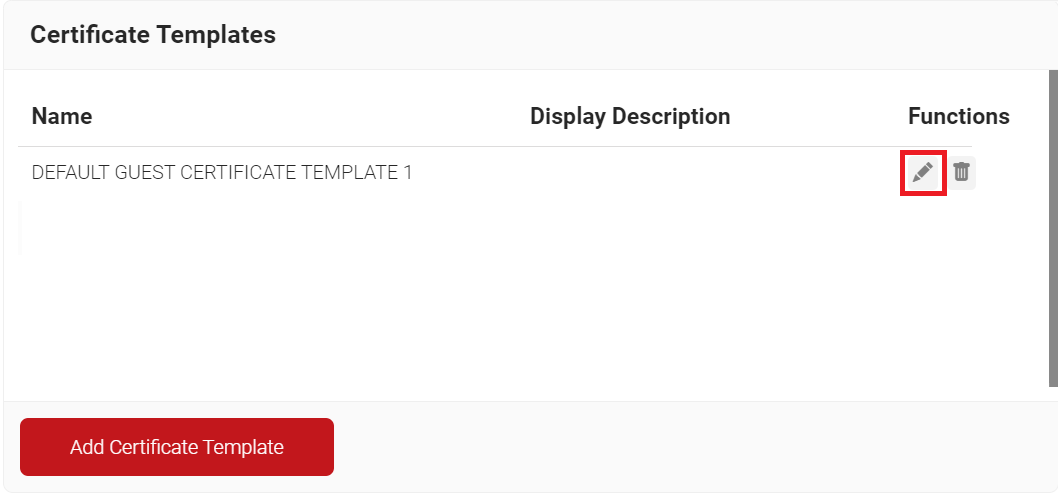
The Certificate Template is created as a part of the Getting Started process. To edit the Guest TLS certificate template, perform the following steps:
- Navigate to Dynamic PKI > Certificate Authorities.
- Scroll to the Certificate Templates section, and then click Edit on the DEFAULT GUEST CERTIFICATE TEMPLATE 1.
- In the Basic section, for the Name field, enter the name of the certificate template.
- In the Subject field, retain the default value CN=${/auth/upn:/device/identity} hardcoded in the certificate template.
- /auth/upn – The guest user’s mobile number or email address is encoded in the CN of the Certificate template.
- /device/identity – The device identity is encoded in the CN of the Certificate template.
- If the /auth/upn and /device/identity attributes are used together, as specified in the default template, the value of the /auth/upn attribute is prioritized and encoded in the CN of the Certificate template. If the /auth/upn attribute is not available, then the value of /device/identity is used.
- You can also choose to use either one, based on your requirements.
- CN=${/auth/upn} or
- CN=${/device/identity}
- In the Display Description field, enter a suitable description for the certificate template.
- In the Validity Period field, type the validity period of the certificate (based on the requirement).
- From the Signature Algorithm drop-down list, select the signature algorithm for the certificate signing request. The option available is SHA-256.
- In the SAN section, for Other Name, RFC822, DNS, and URI fields, retain the default values provided in the certificate.
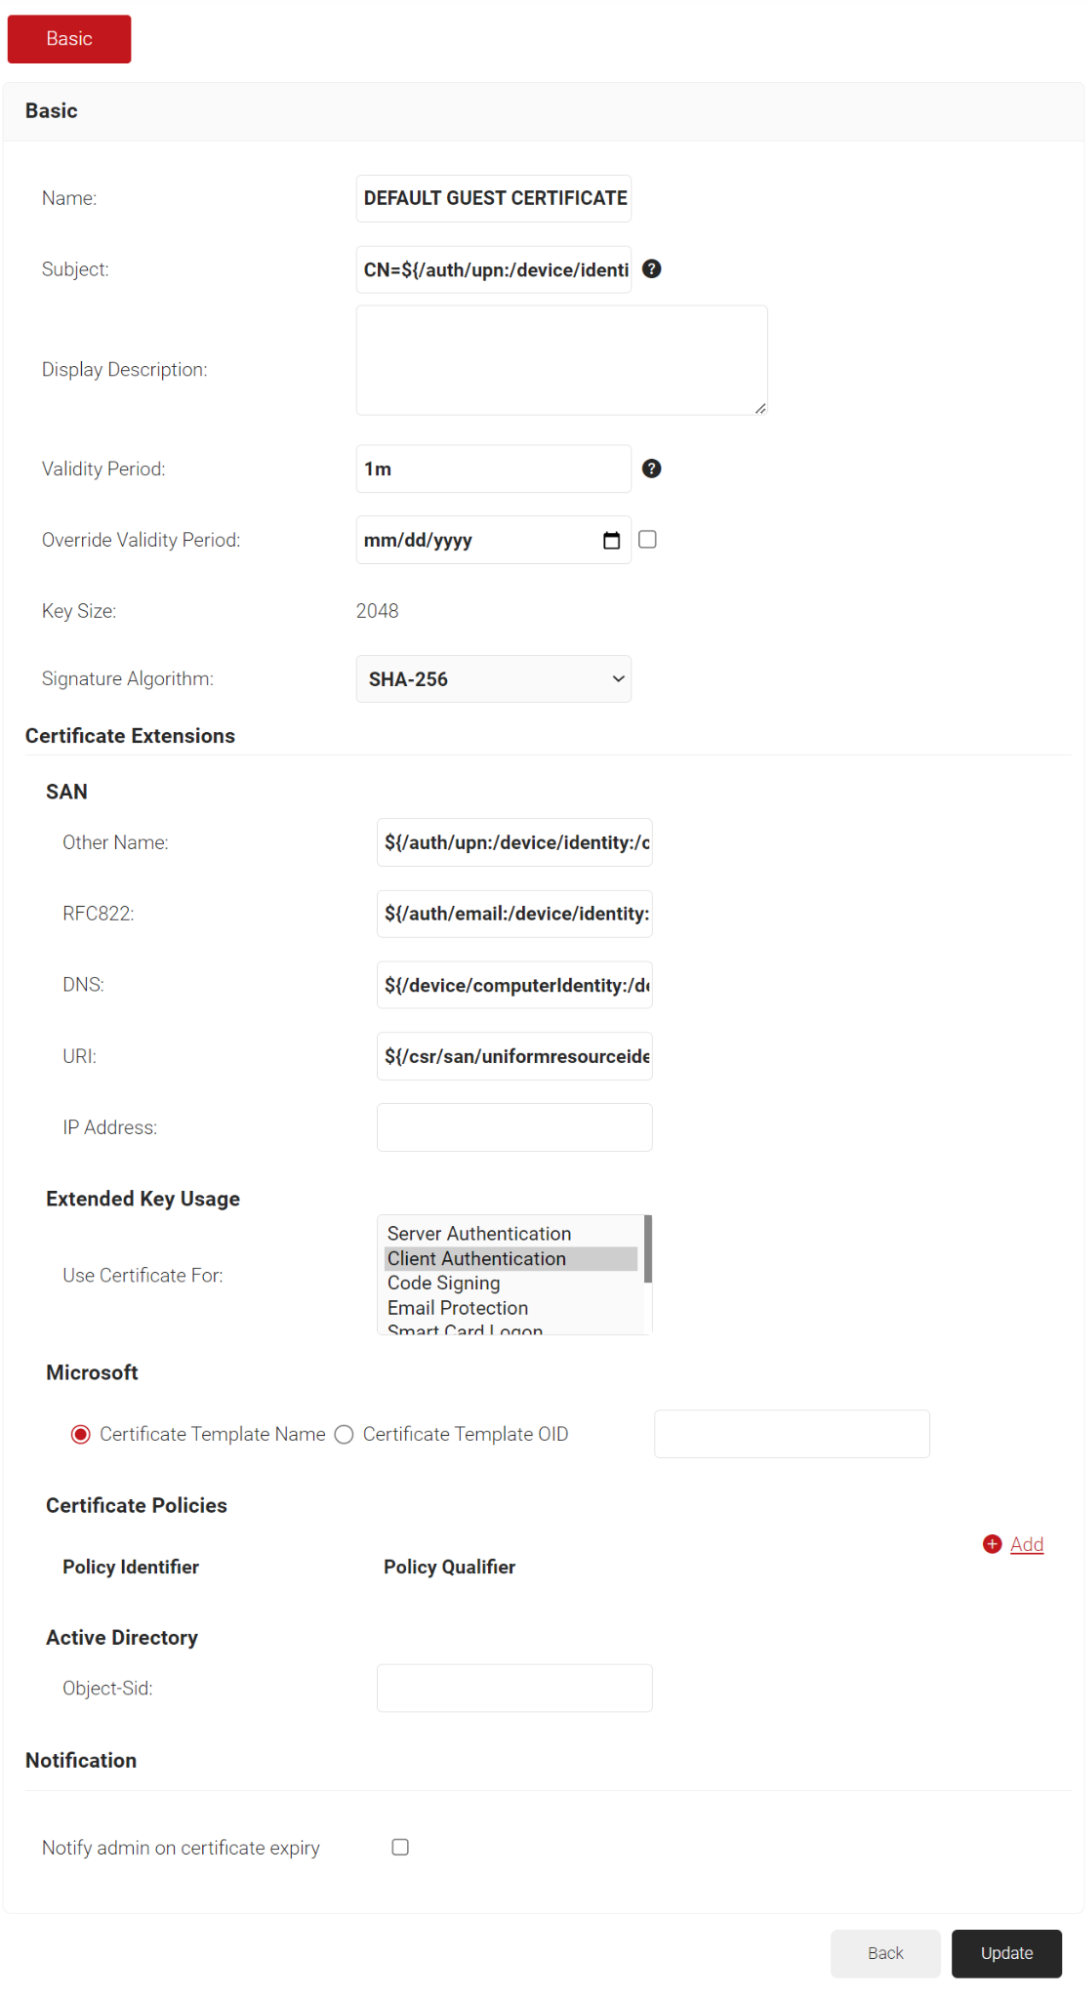
- Click Update.
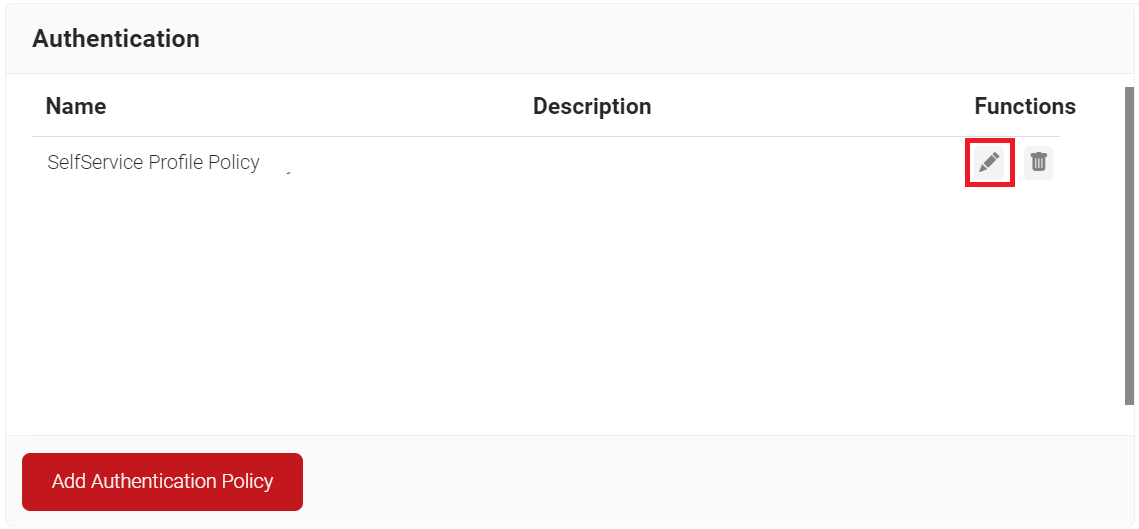
If you have already set up an authentication policy using Getting Started, you can edit it with the required values.
- Navigate to Policy Management > Authentication.
- On the Authentication page, click Edit on the Guest TLS authentication policy.
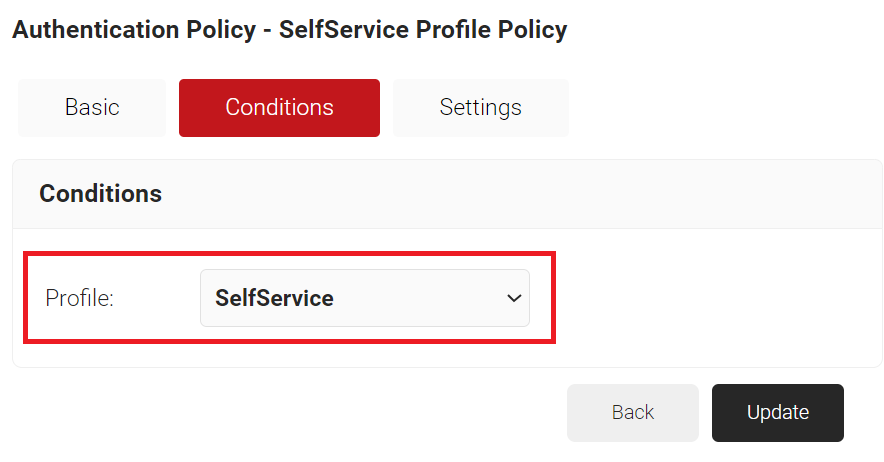
- Click the Conditions tab.
- In the Profile drop-down list, ensure that the network profile you created in the Creating a Network Profile section is selected.
- Click the Settings tab.
- From the Core Provider drop-down list, ensure that the core provider you created in the Creating a Guest Core Provider section is selected.
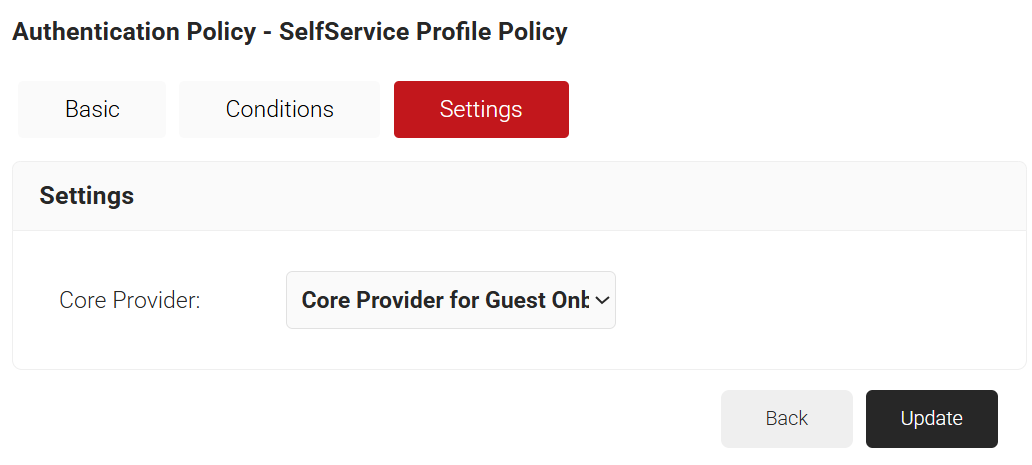
- Click Update.
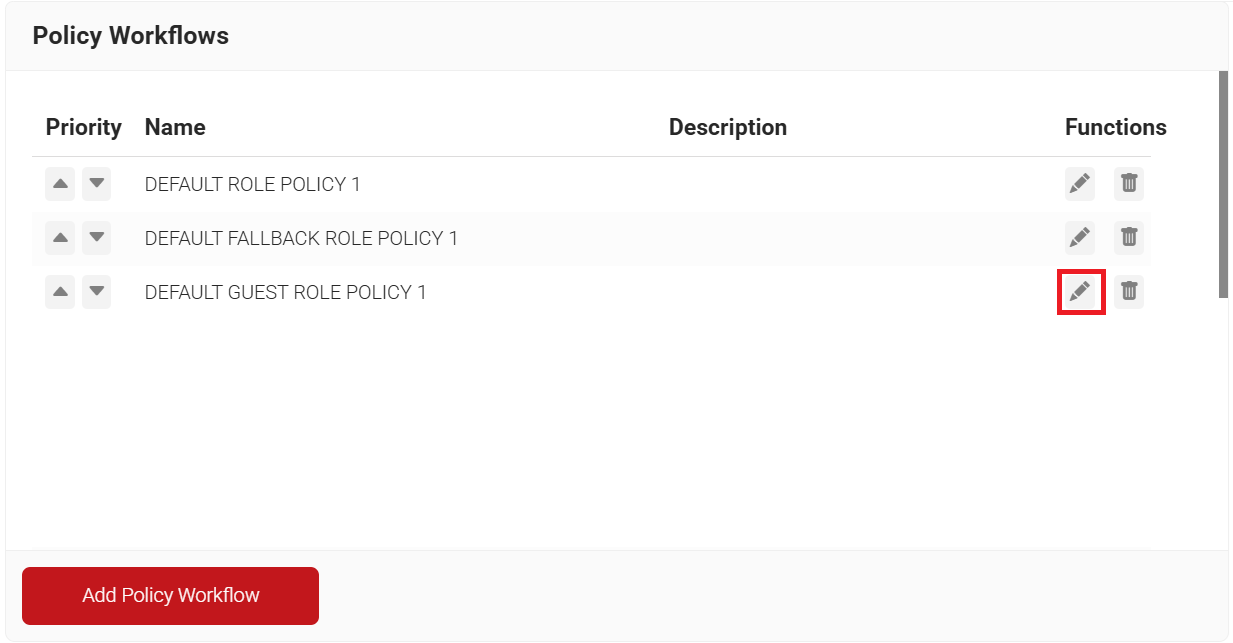
To edit the Guest TLS Policy Engine Workflow, perform the following steps:
- Navigate to Policy Management > Policy Workflows.
- Click Edit on the DEFAULT GUEST ROLE POLICY 1.
- Click the Conditions tab.
- In the Core Provider drop-down list, ensure that the core provider you created in the Creating a Guest Core Provider section is selected.
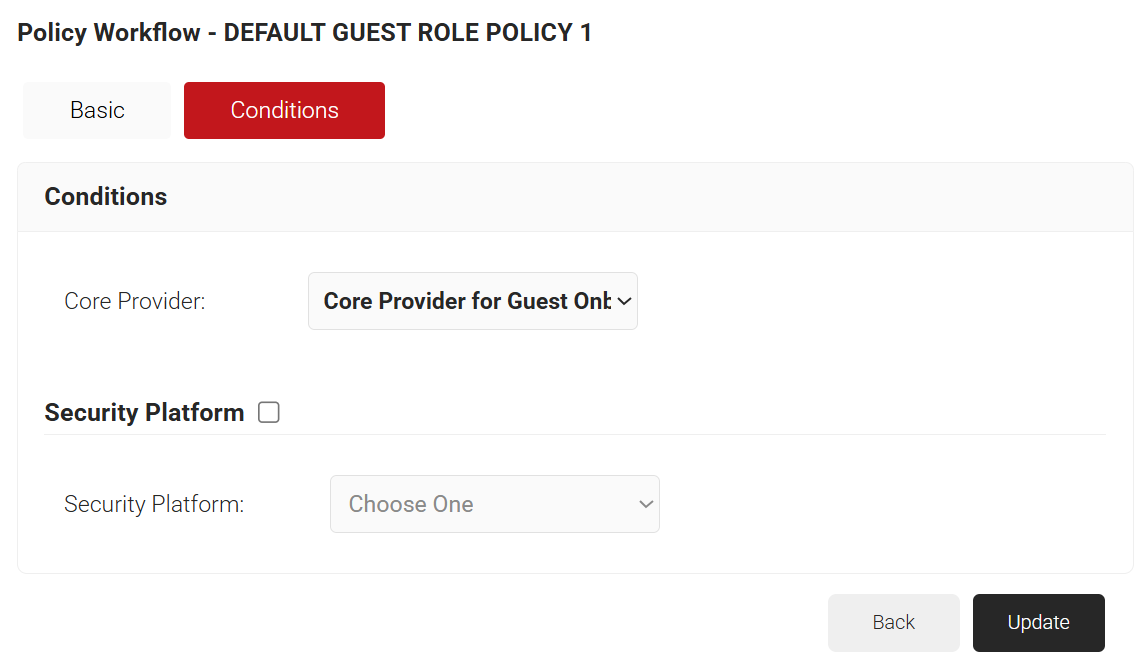
- Click Update.
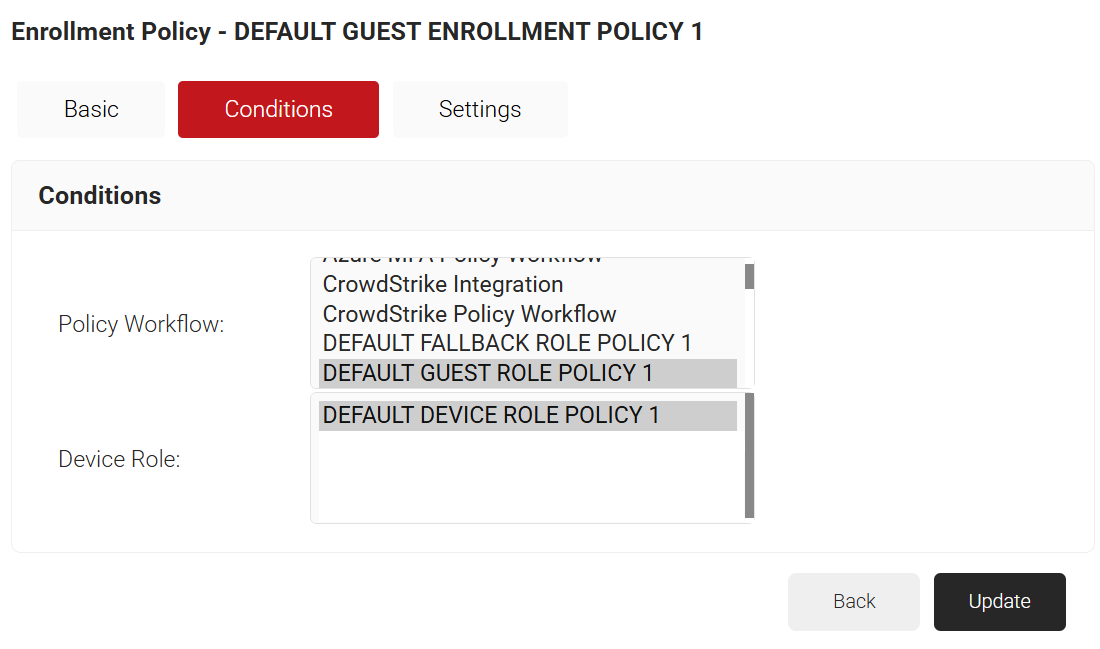
To edit the Guest TLS Enrollment Policy, perform the following steps:
- Navigate to Policy Management > Enrollment.
- Click Edit on the DEFAULT GUEST ENROLLMENT POLICY 1.
- Click the Conditions tab.
- In the Conditions section, from the Policy Workflow list, ensure that the policy workflow you created in the Policy Workflow section is selected.
- From the Device Role list, ensure that the DEFAULT DEVICE ROLE POLICY 1 is selected.
- Click the Settings tab.
- From the Use Certificate Authority drop-down list, ensure that the Intermediate CA you created in the Certificate Authority section is selected.
- From the Use Certificate Template drop-down list, ensure that the Certificate Template you created in the Certificate Template Configuration section is selected.
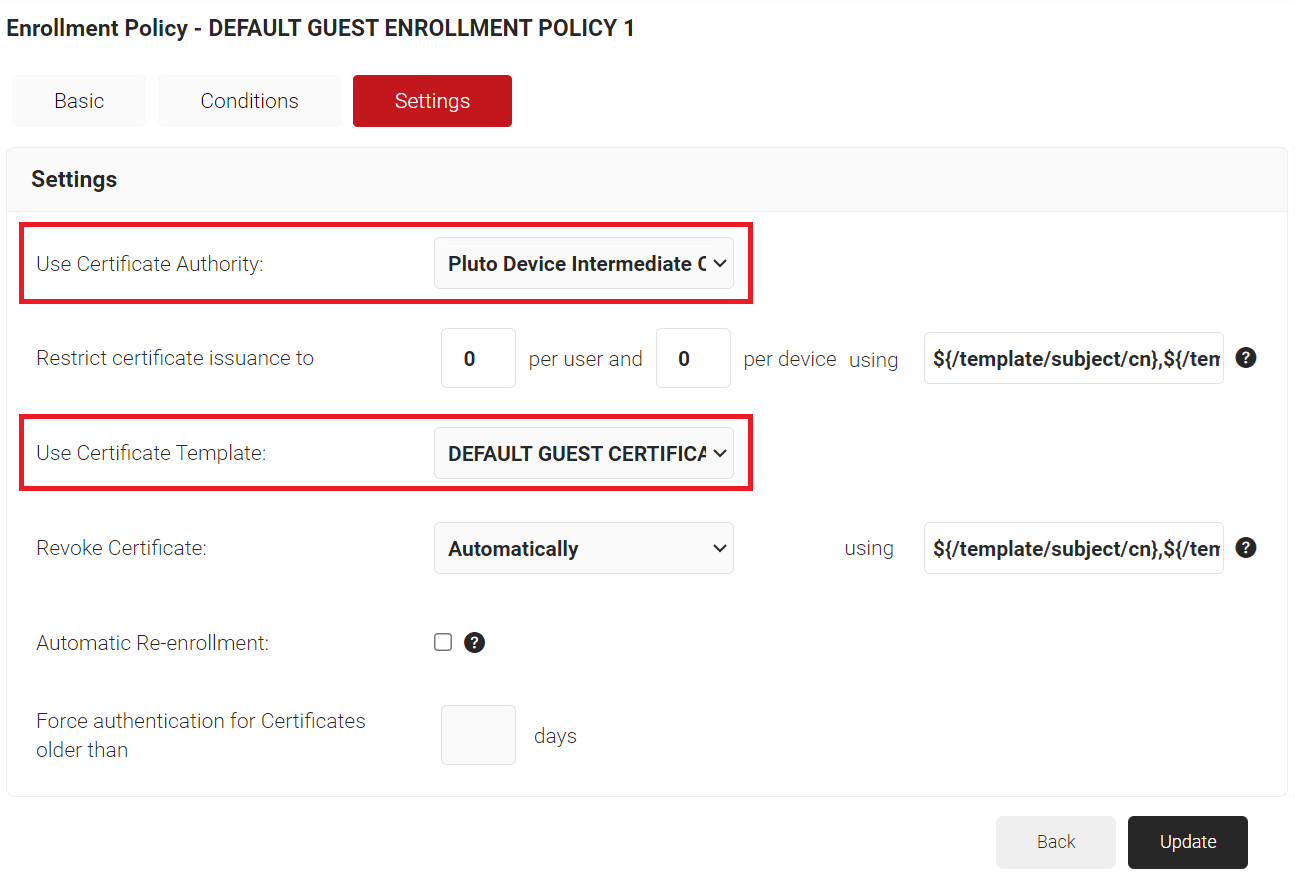
- Click Update.
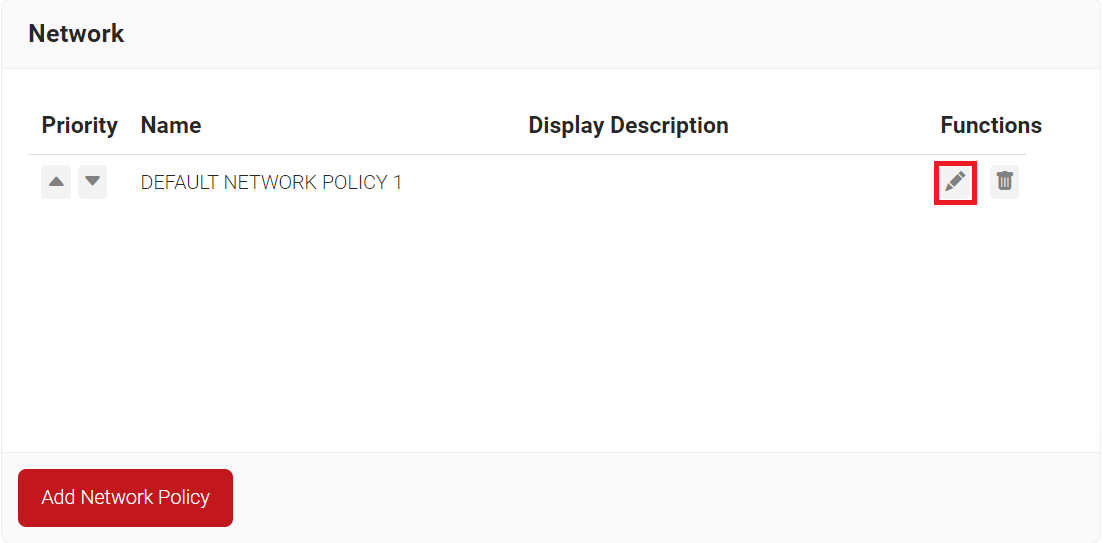
To edit the Guest TLS Network Policy, perform the following steps:
- Navigate to Policy Management > Network.
- Click Edit on the DEFAULT NETWORK POLICY 1.
- Click the Conditions tab.
- From the Policy Workflow Equals drop-down list, ensure that the policy workflow you created in the Policy Workflow section is selected.
- From the Device Role Equals drop-down list, ensure that the DEFAULT DEVICE ROLE POLICY 1 is selected.
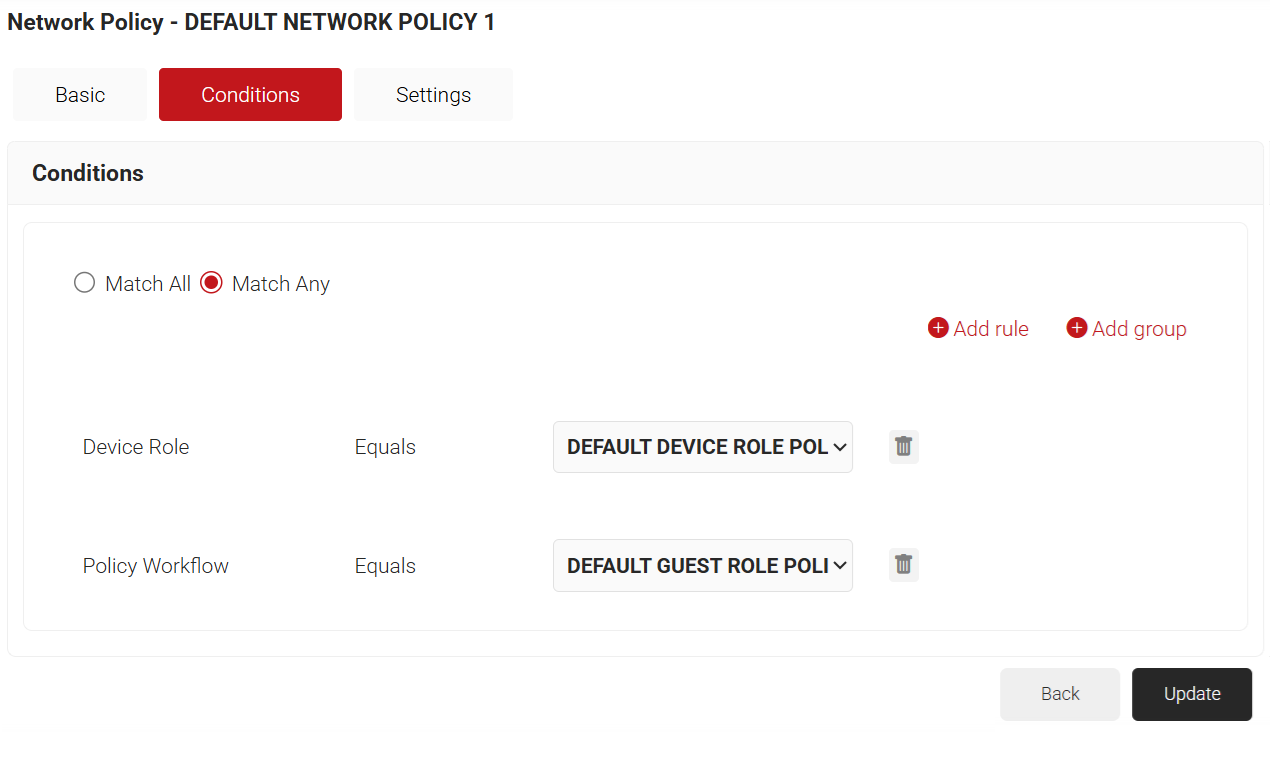
- Click Update.
The Language Template allows the admin to customize the text on the guest authentication landing page. The landing page of the default language template can be modified, or new foreign language templates, such as Dutch, French, Italian, etc., can be created.
To create a language template, perform the following steps:
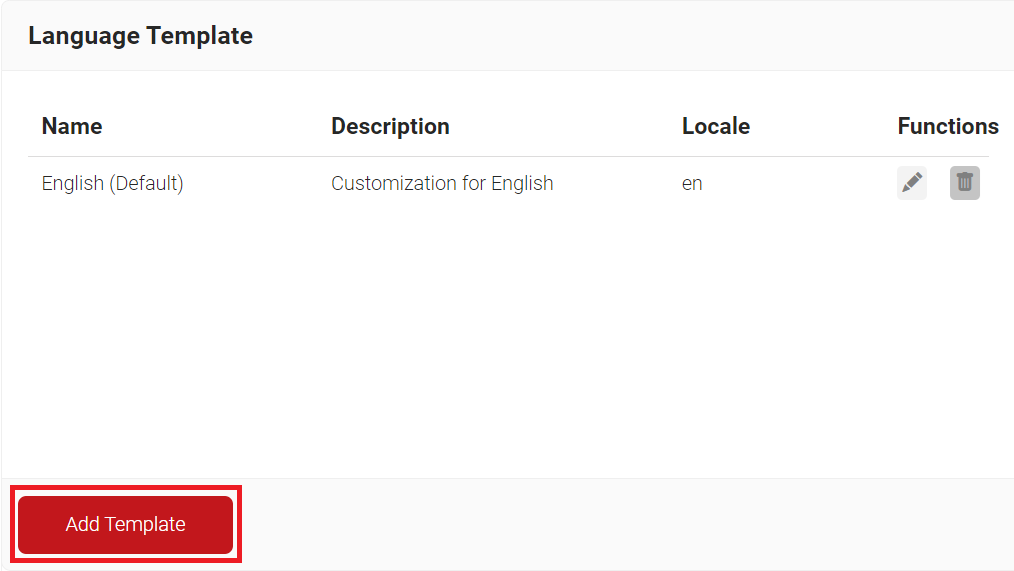
- Navigate to Guest Authentication > Language Template.
- On the Language Template page, click Add Template.
- In the Basic tab, enter a name for the Language Template in the Name field.
- In the Display Description field, enter a description for the Language Template.
- In the Locale field, enter a language code. e.g., nl for Dutch.
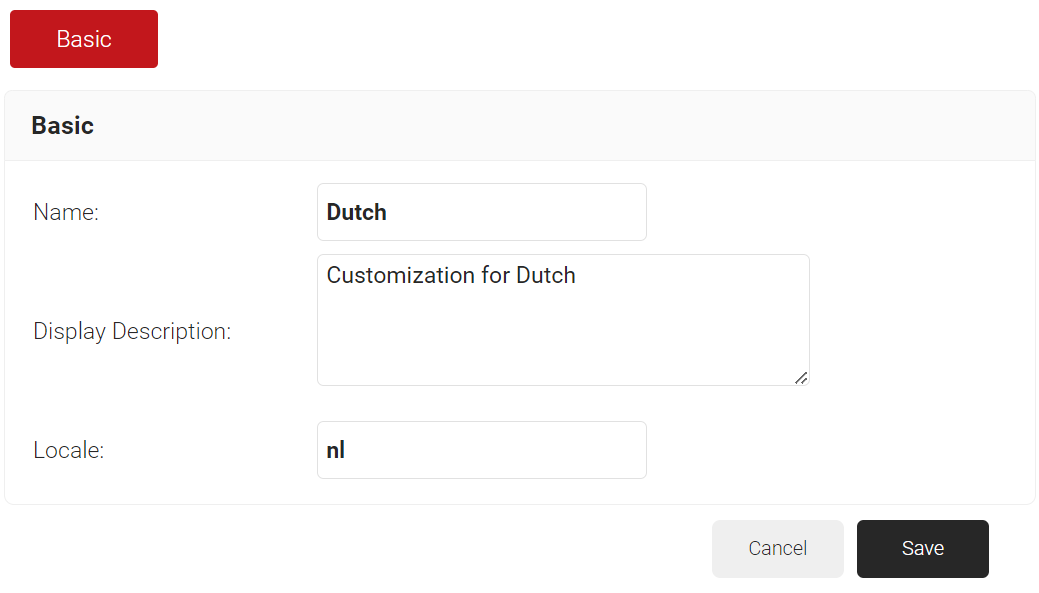
- Click Save. The page refreshes and opens the Landing Page tab.
- Click the Landing Page tab.
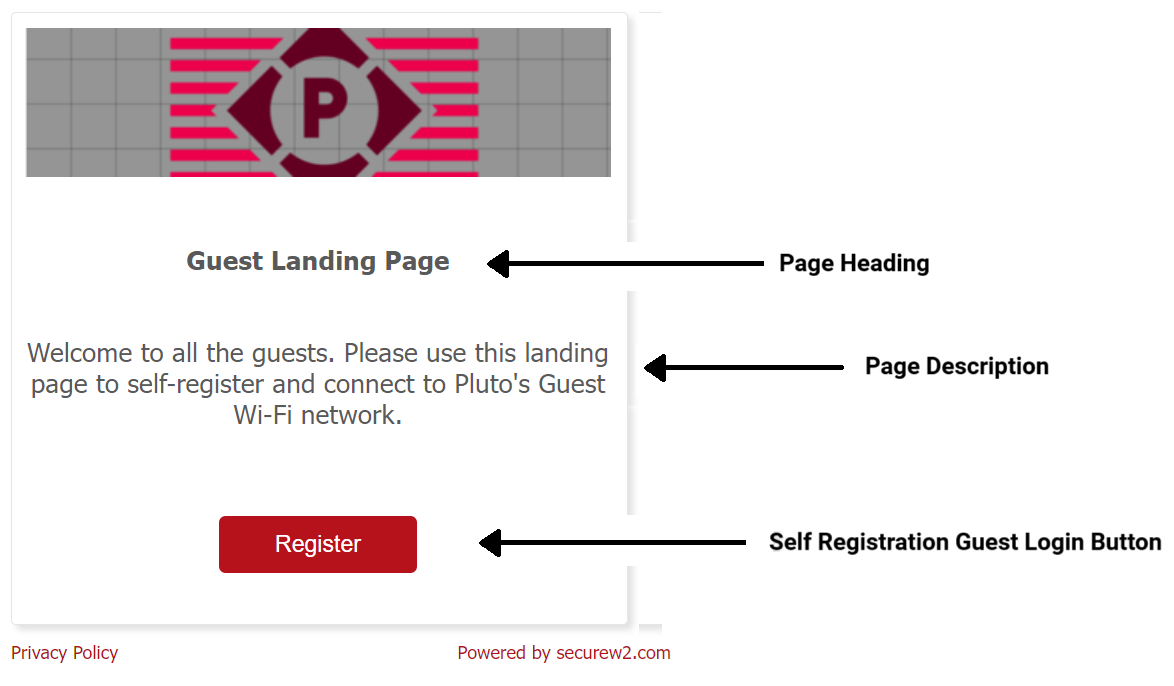
- In the Page Heading field, enter a name for the heading of the landing page.
- In the Page Description field, enter a short description for the landing page.
- In the Self Registration Login Button field, enter the name to display on the button on the Guest Landing page.
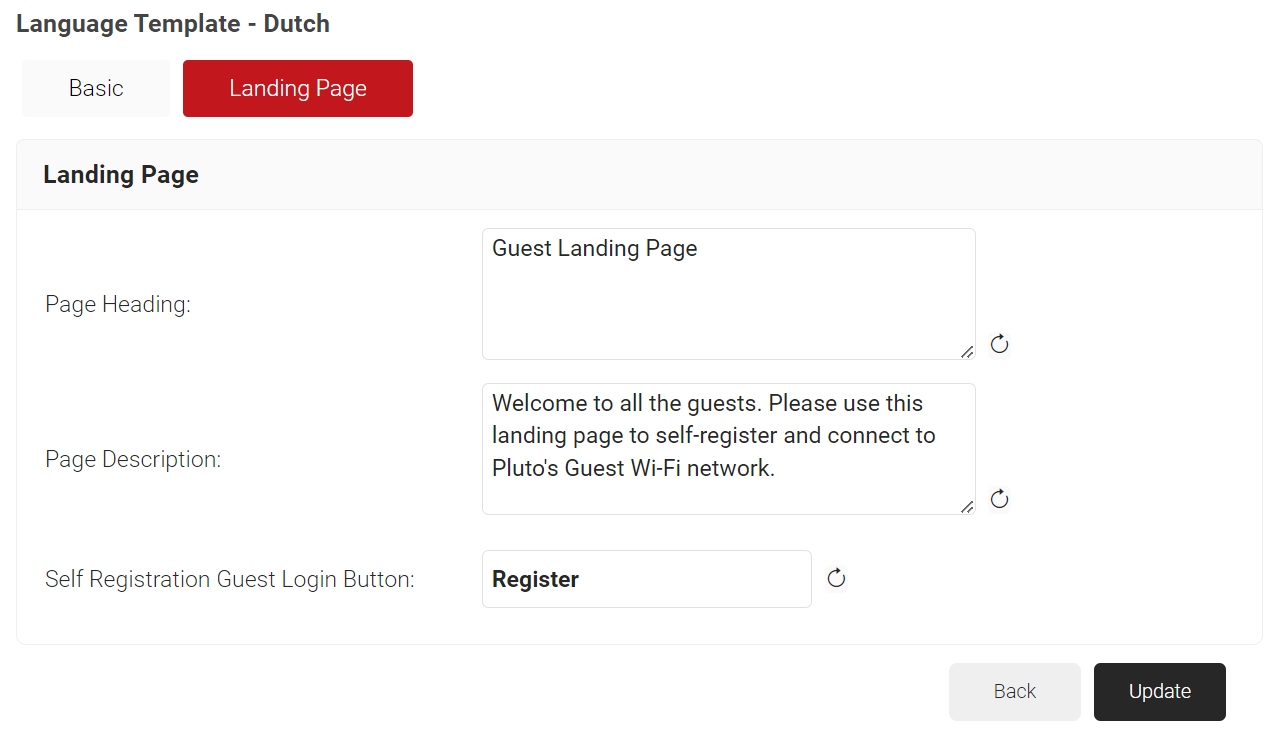
- Click Update.
Guest Registration allows only the Organization Admin role to map the Network Profile of the guest users, enabling them for certificate enrollment and onboarding to the network.
NOTE: Once the Network profile is mapped on the Guest Registration page, you cannot modify the Identity Provider and Network Profile on the Authentication Policies page, nor can you delete the Authentication policy.
- Navigate to Guest Authentication > Guest Registration.
- To provide TLS authentication for guests, select the Enable checkbox.
- To block TLS authentication for guests, clear the Enable checkbox.
- From the Network Profile drop-down list, select the guest network profile created in the Creating a Network Profile section.
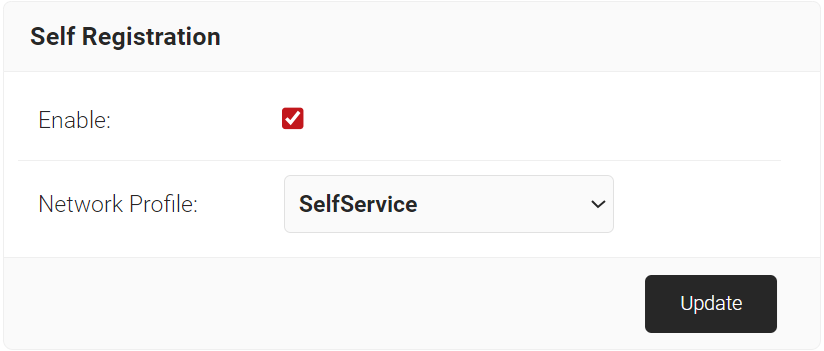
- Click Update.
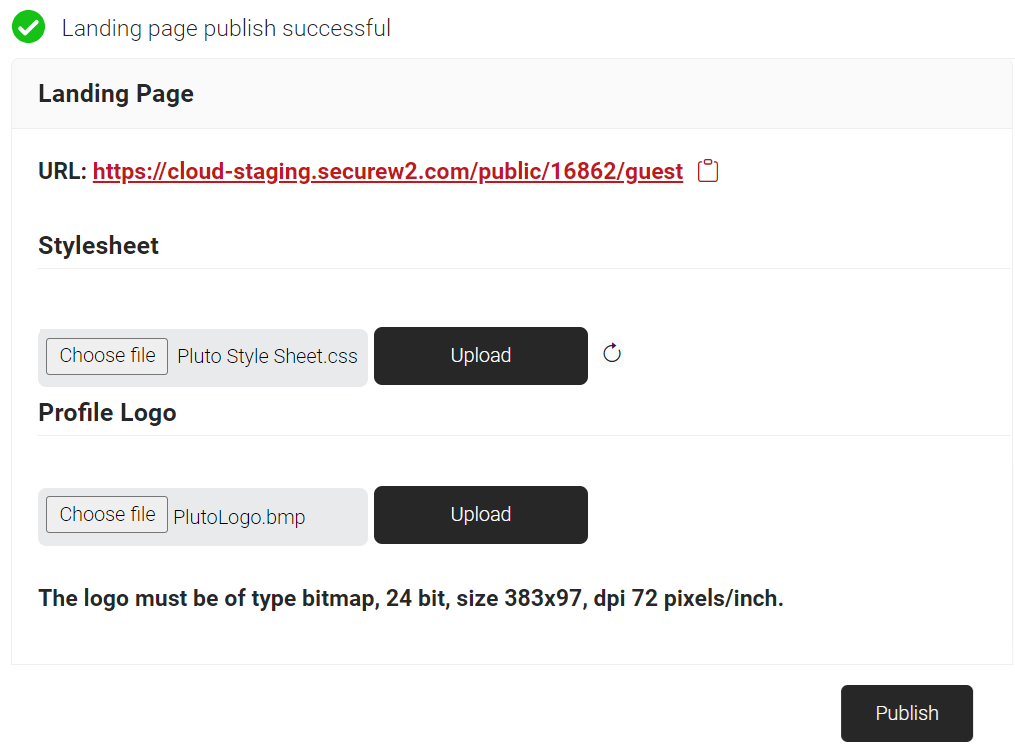
Admins can customize the guest landing page, which is the first page viewed when the guest users attempt to onboard to the network. The configurations made on the Language Template and Self Registration pages are also published on the Landing Page.
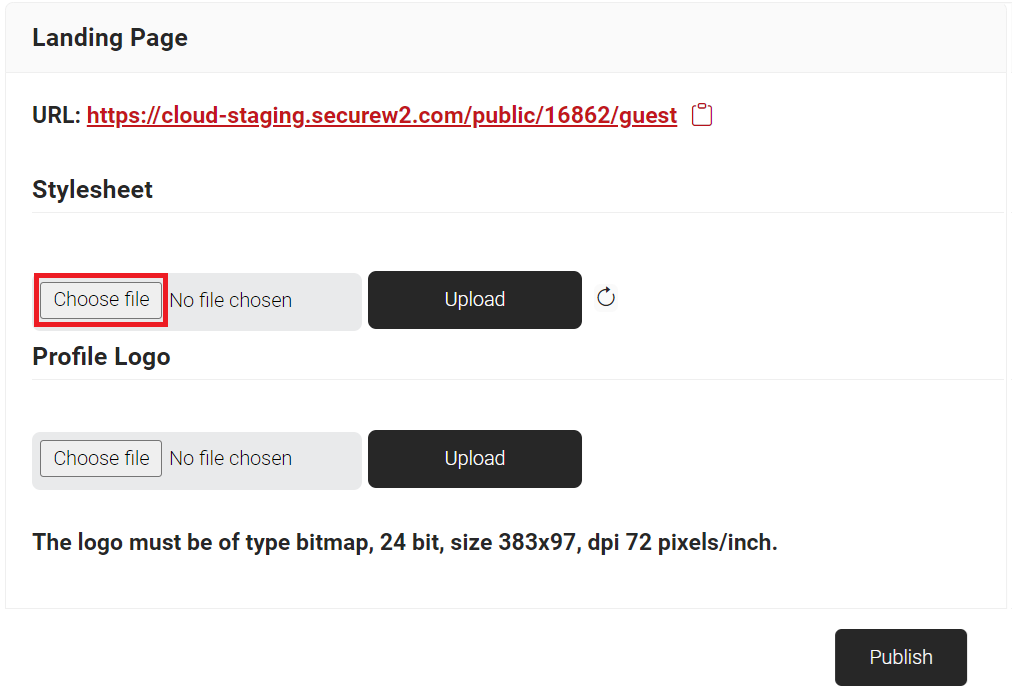
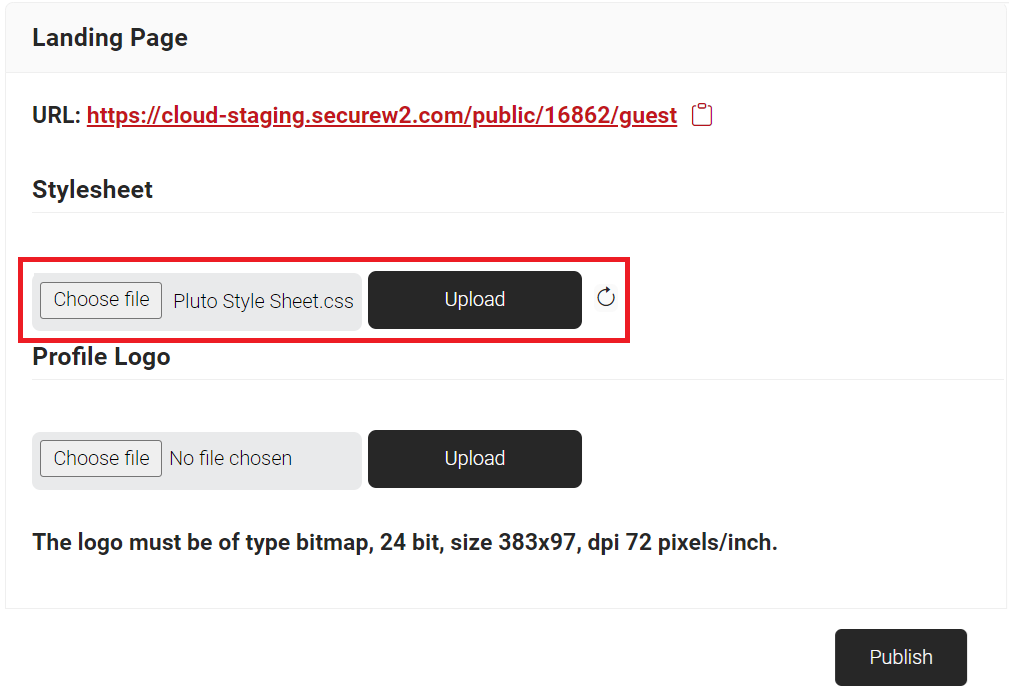
- Navigate to Guest Authentication > Landing Page.
- In the Stylesheet section:
- To customize the Guest Landing page design, download the .css file from https://cloud.securew2.com/public/<Organization Code>/guest/css/main.css, edit the file, and then upload it by clicking the Choose file button. The maximum size for a .css file that can be uploaded in the stylesheet section is 100 KB. This URL is also available on the Landing Page.
- Click Upload.
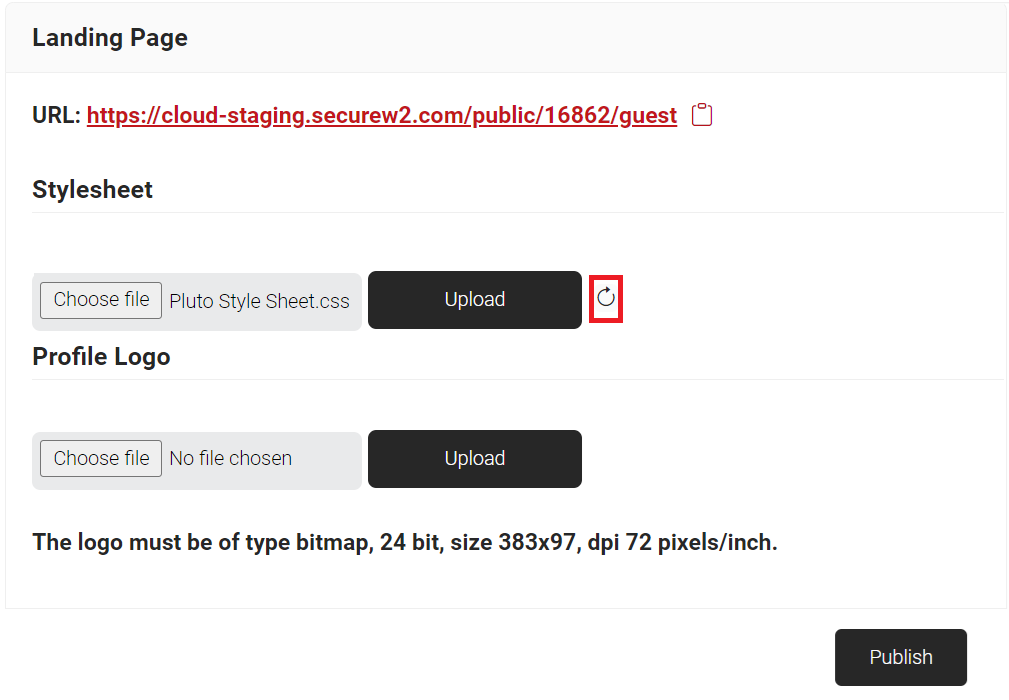
- When the Reset button is clicked, the uploaded .css stylesheet is removed from the Stylesheet section, and the customized Guest Landing Page is restored to its default state.
- To customize the Guest Landing page design, download the .css file from https://cloud.securew2.com/public/<Organization Code>/guest/css/main.css, edit the file, and then upload it by clicking the Choose file button. The maximum size for a .css file that can be uploaded in the stylesheet section is 100 KB. This URL is also available on the Landing Page.
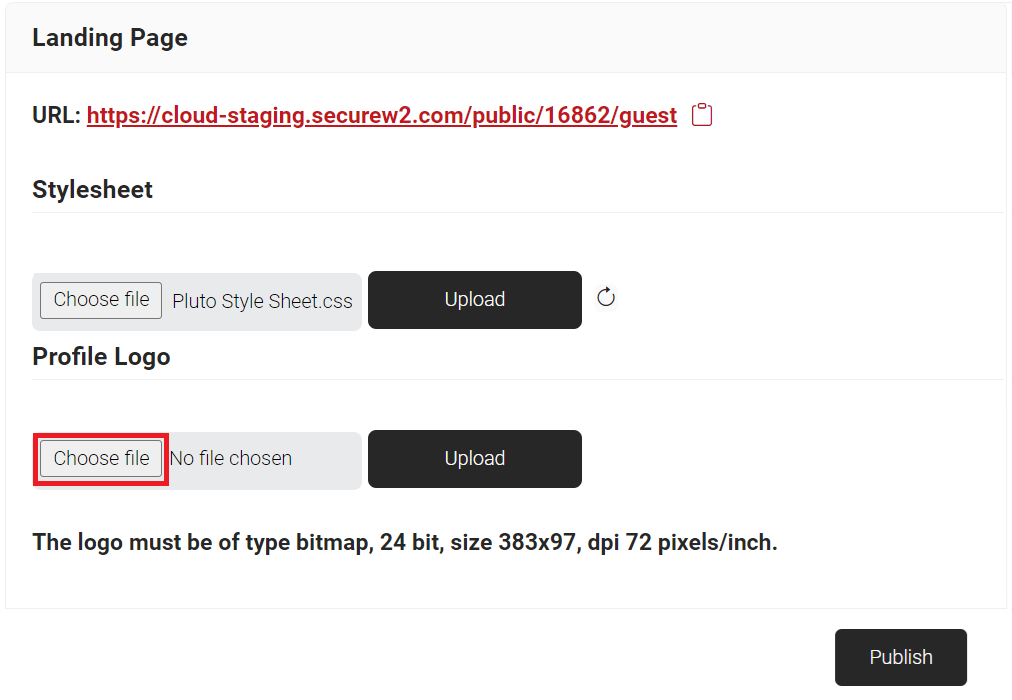
- In the Profile Logo section:
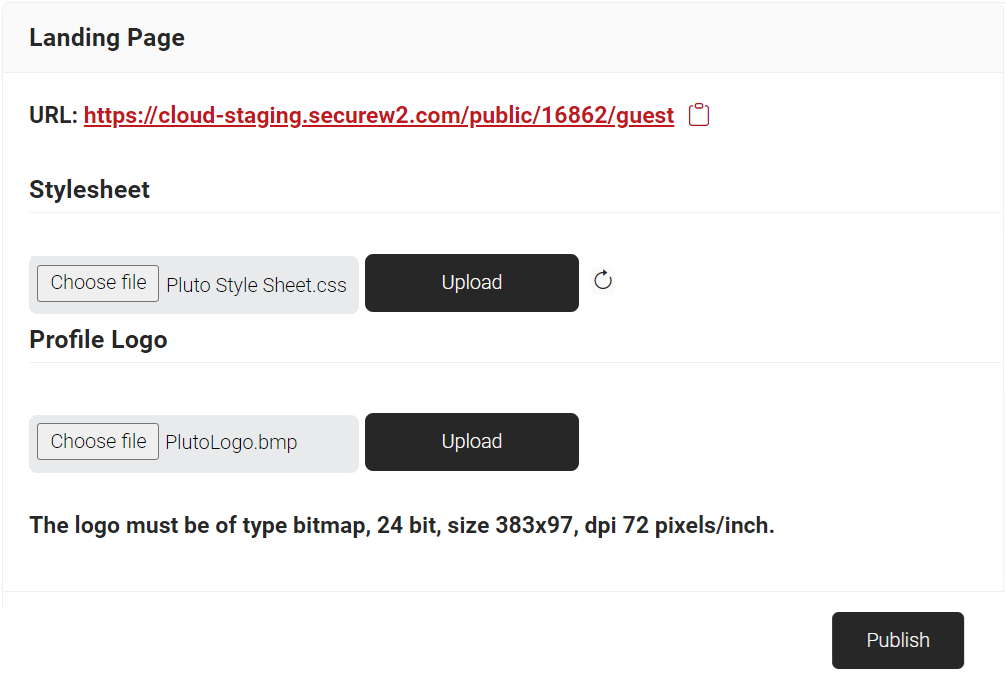
- Click the Choose file button and select the logo for the landing page. The logo must be a bitmap image, 24-bit, with dimensions 383×97 and a resolution of 72 pixels per inch.
- Click Upload, and the uploaded image will be displayed as the Organization logo on the Guest Landing Page.
- Click the Choose file button and select the logo for the landing page. The logo must be a bitmap image, 24-bit, with dimensions 383×97 and a resolution of 72 pixels per inch.
- Click Publish.

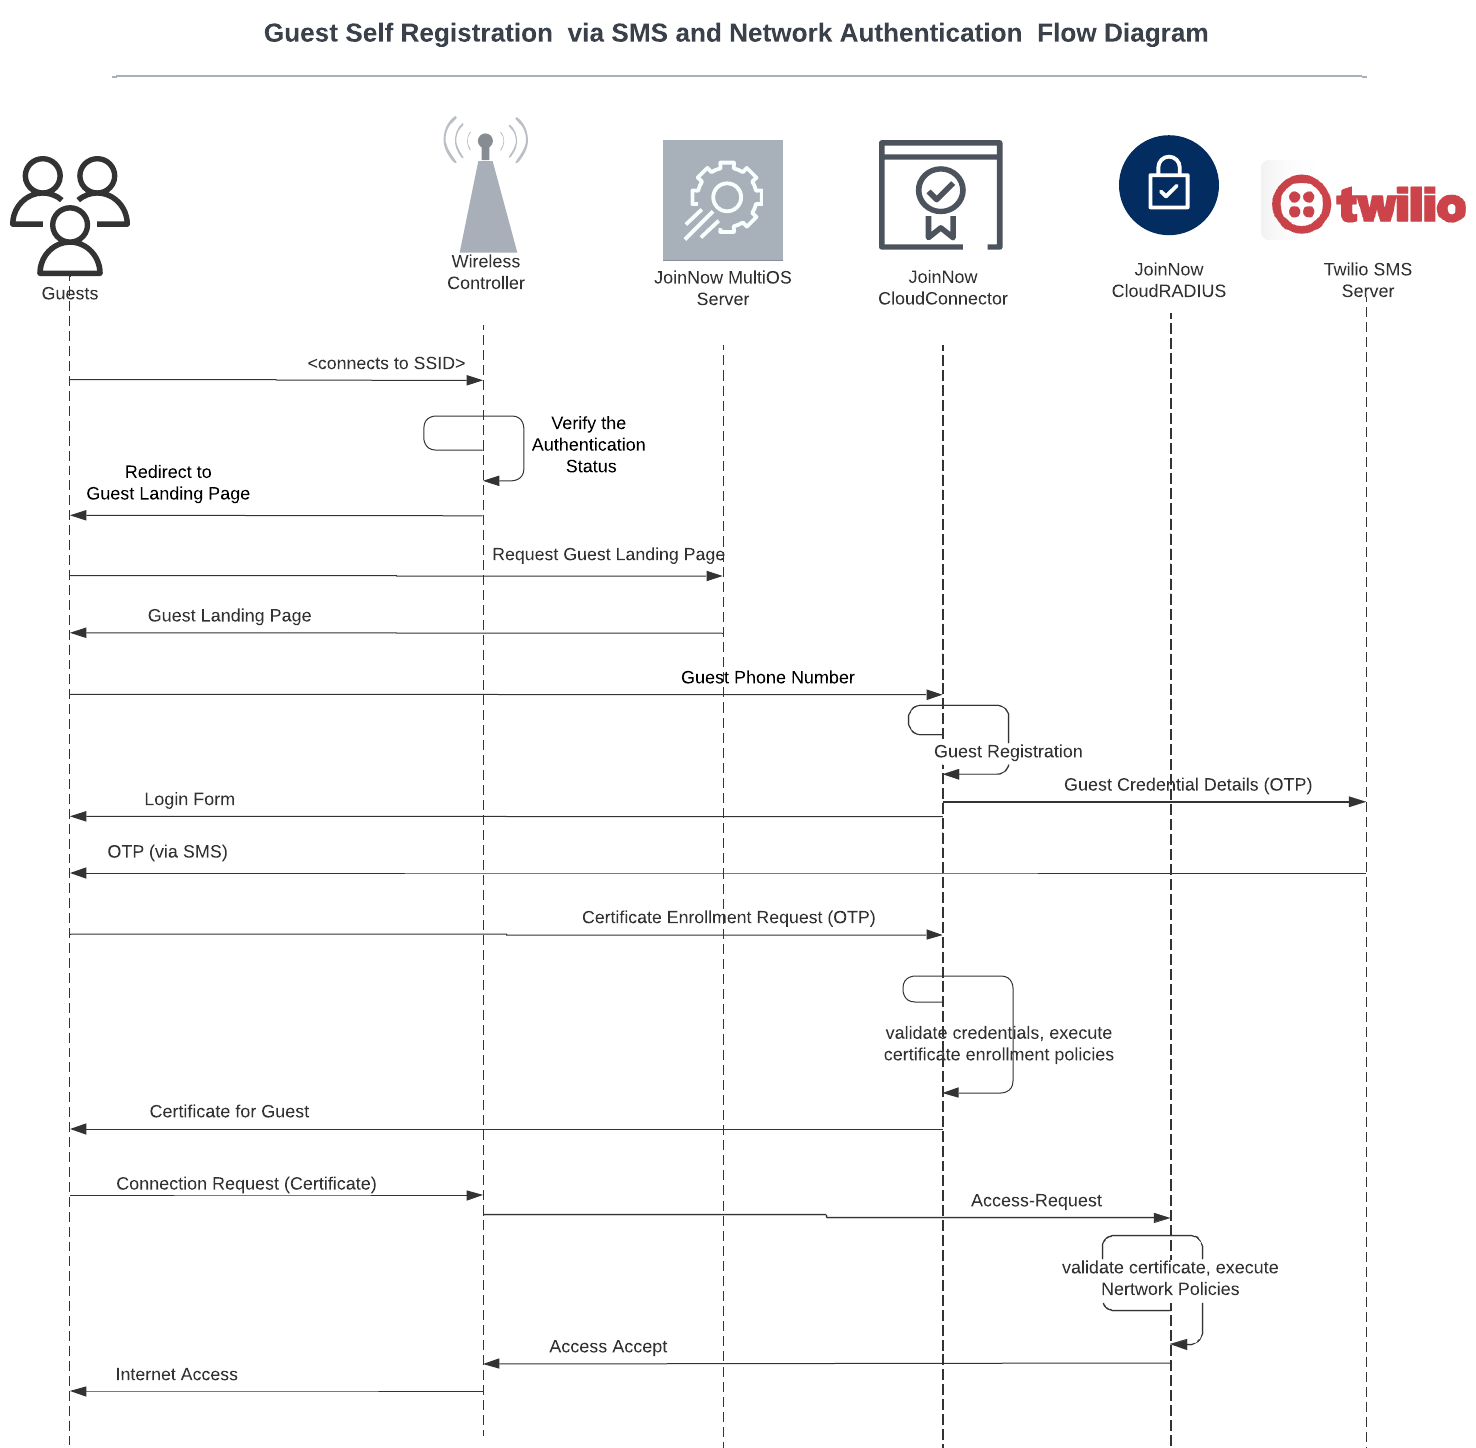
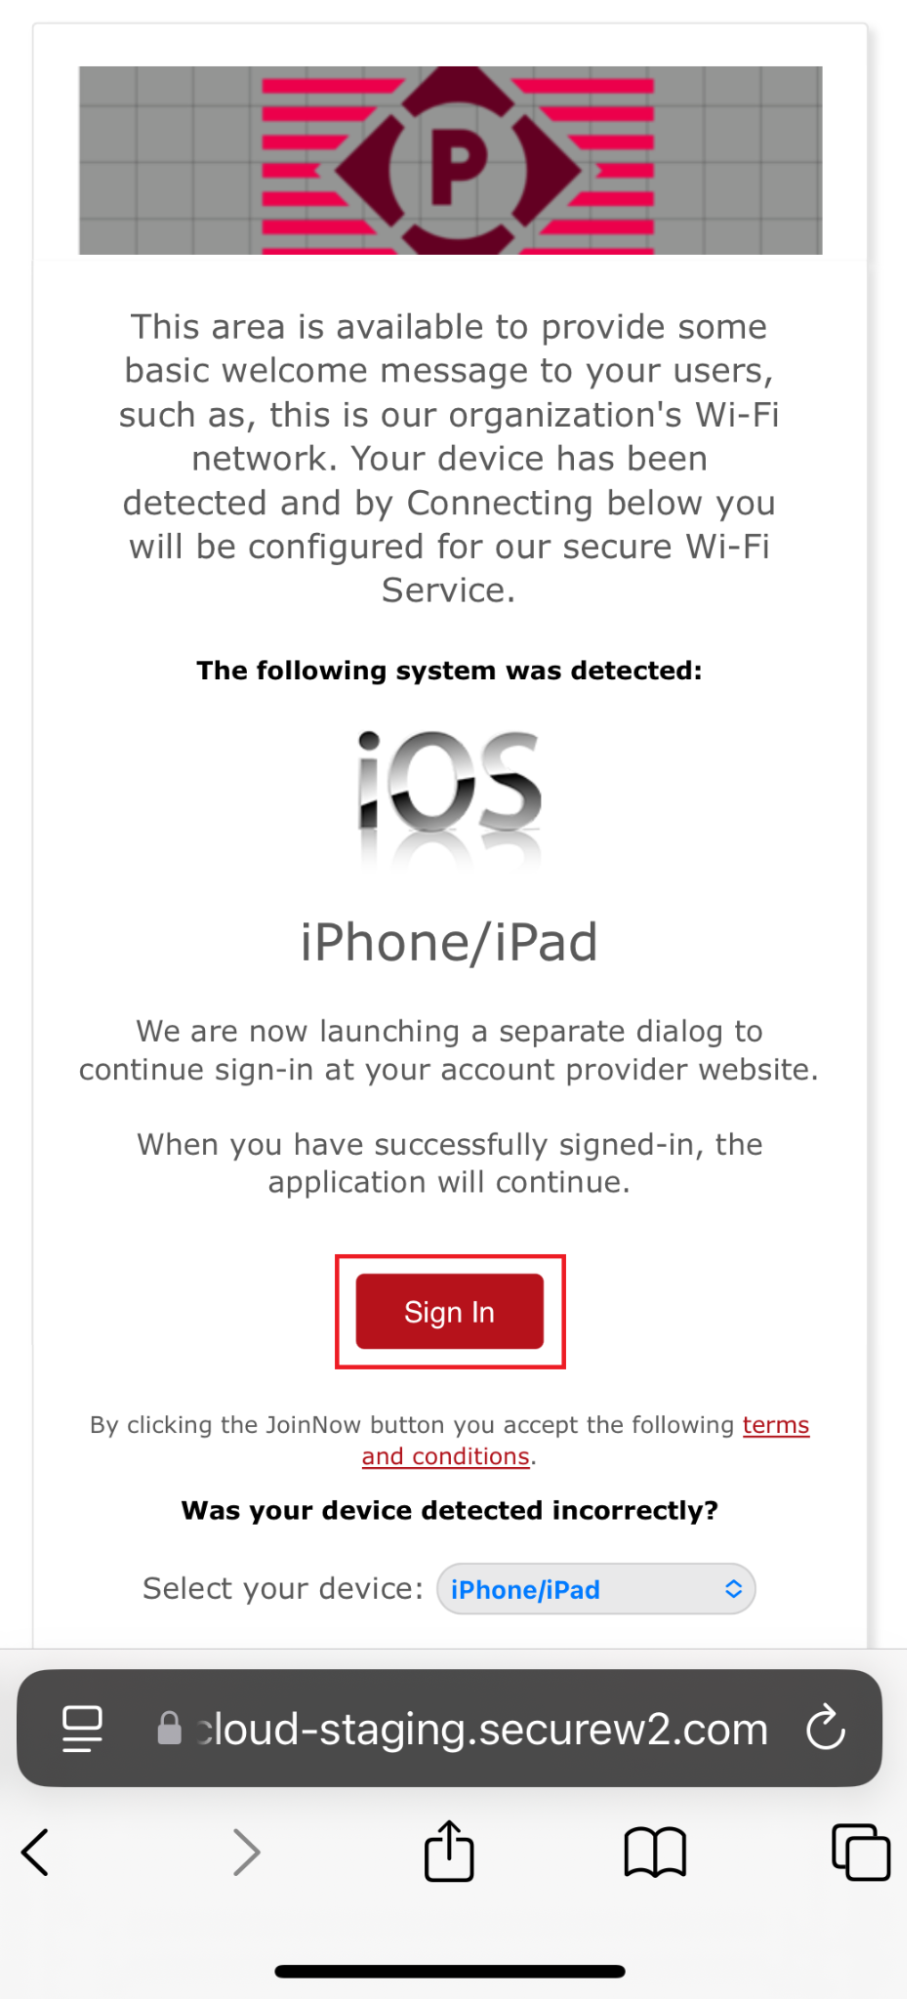
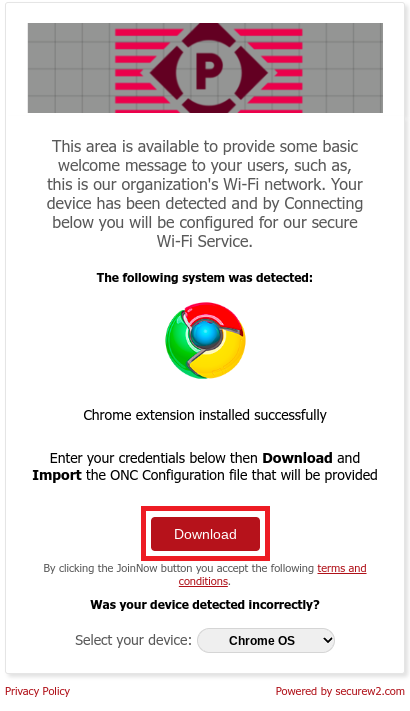
During device onboarding, the user is redirected to the Guest Landing Page. When the Register button is clicked, the user is directed to the User Onboarding page.
The following is a sample of the customized Guest Landing Page.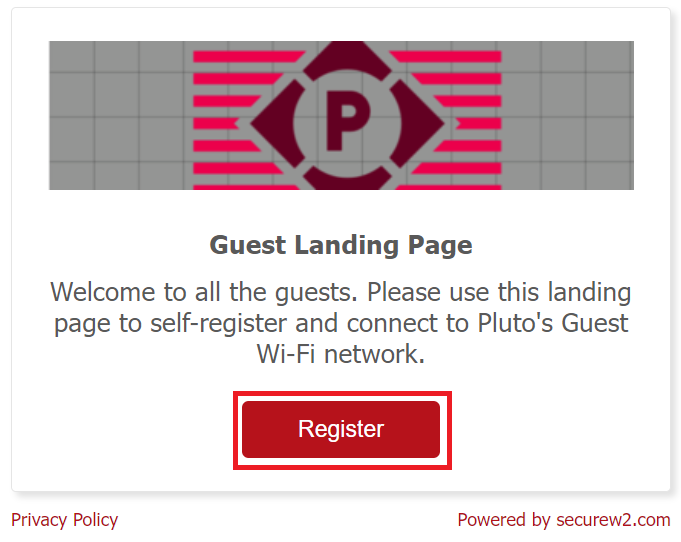
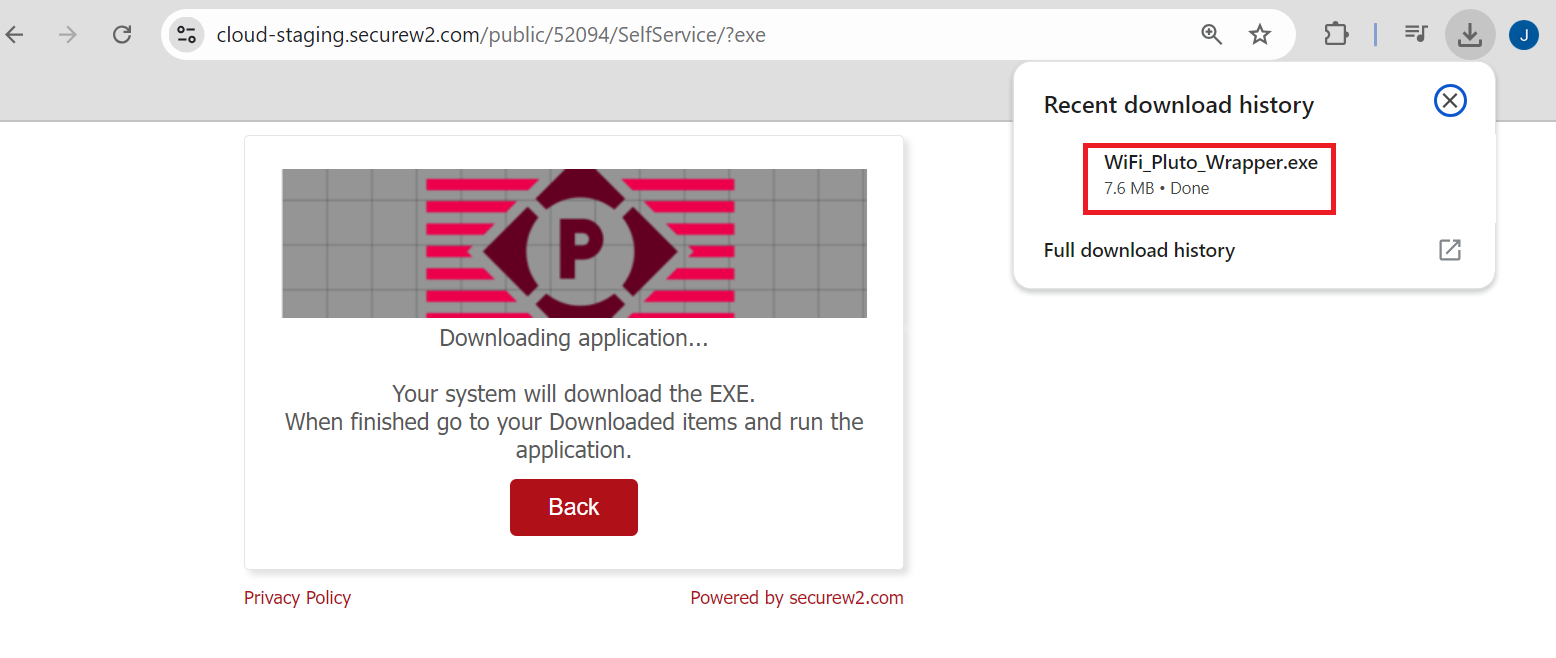
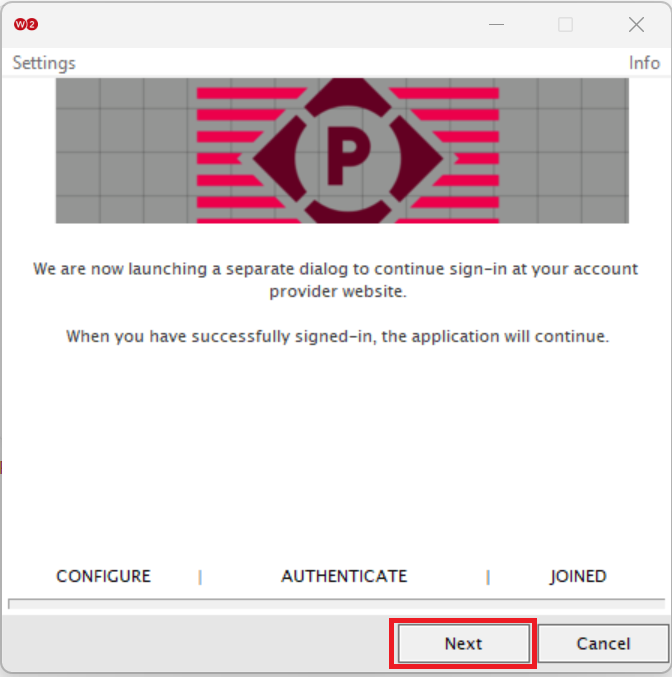
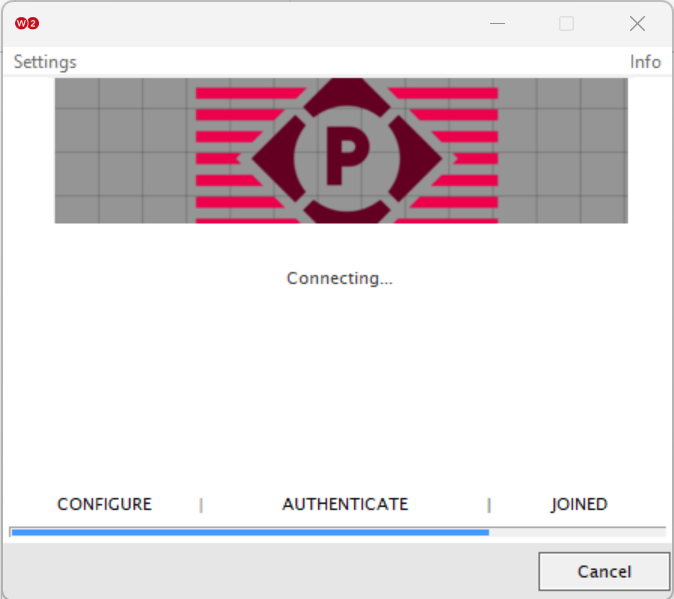
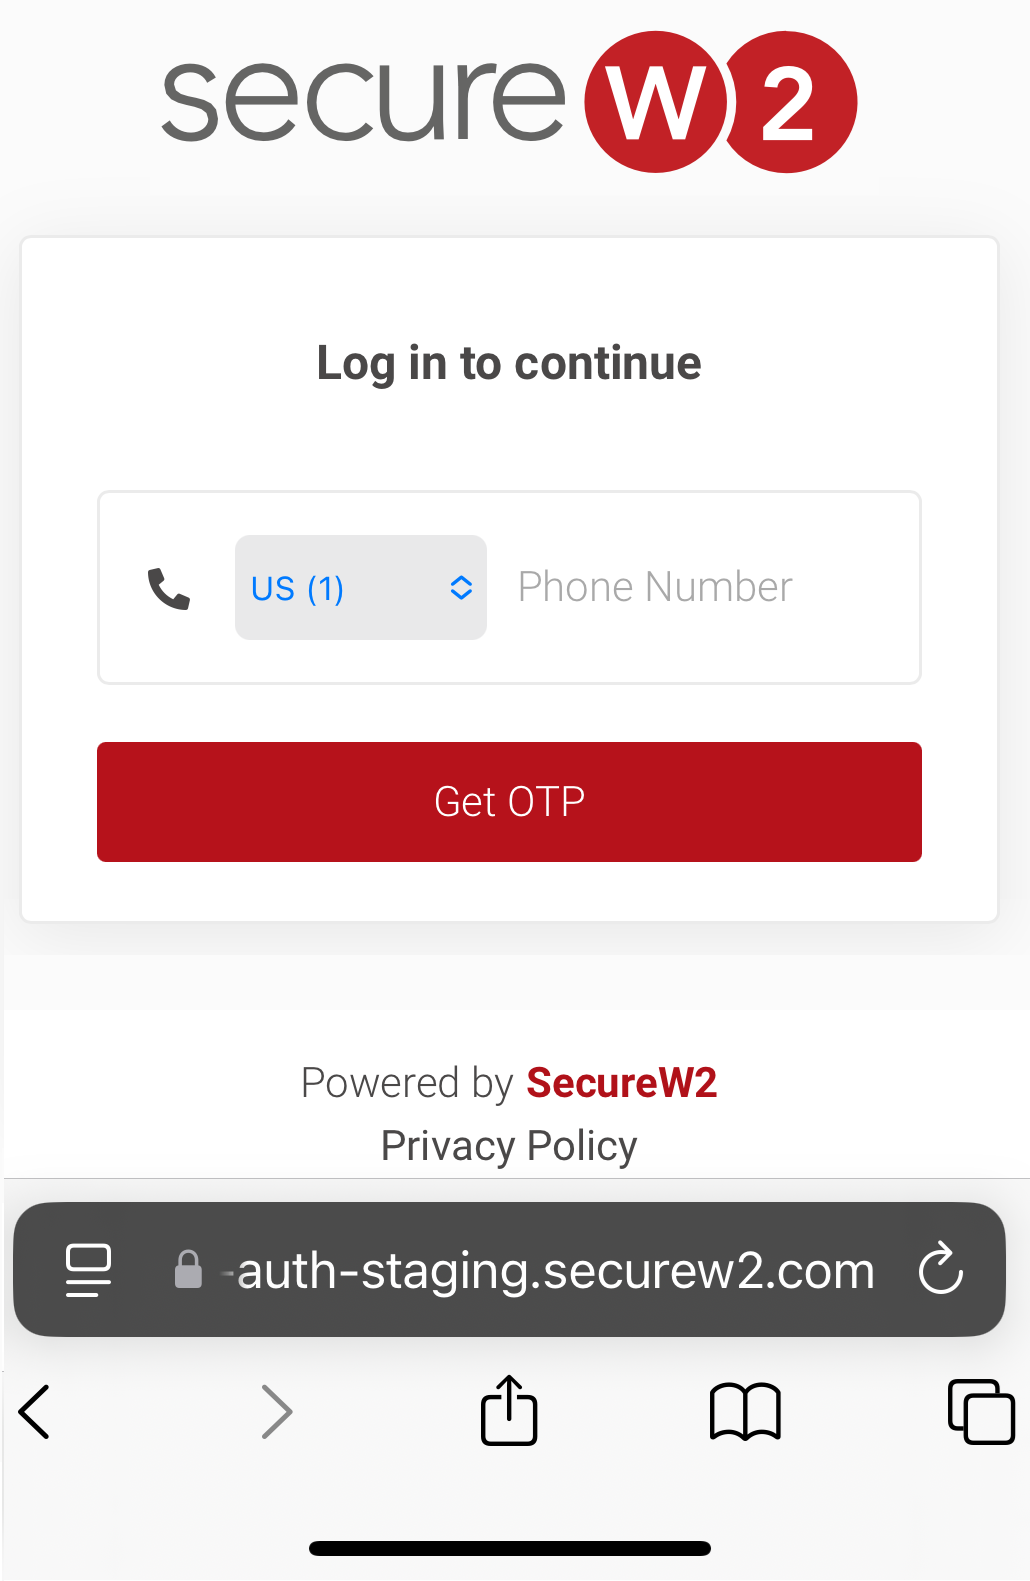
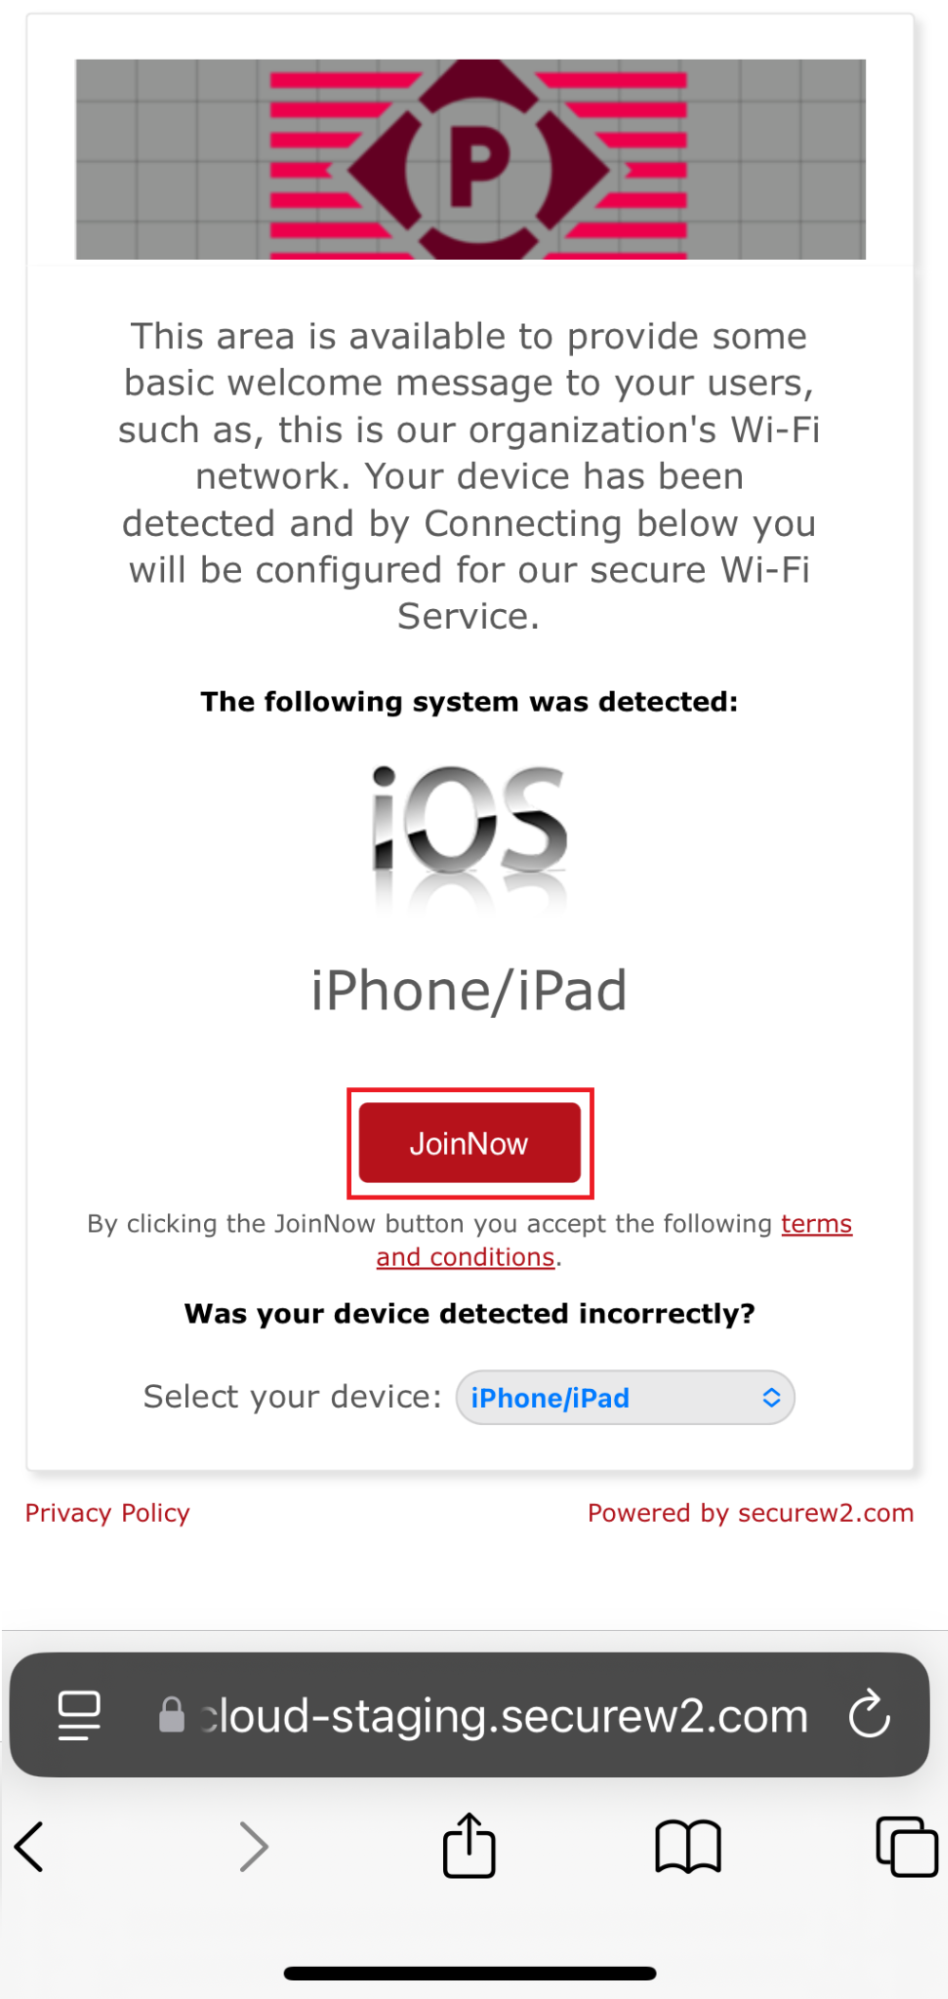
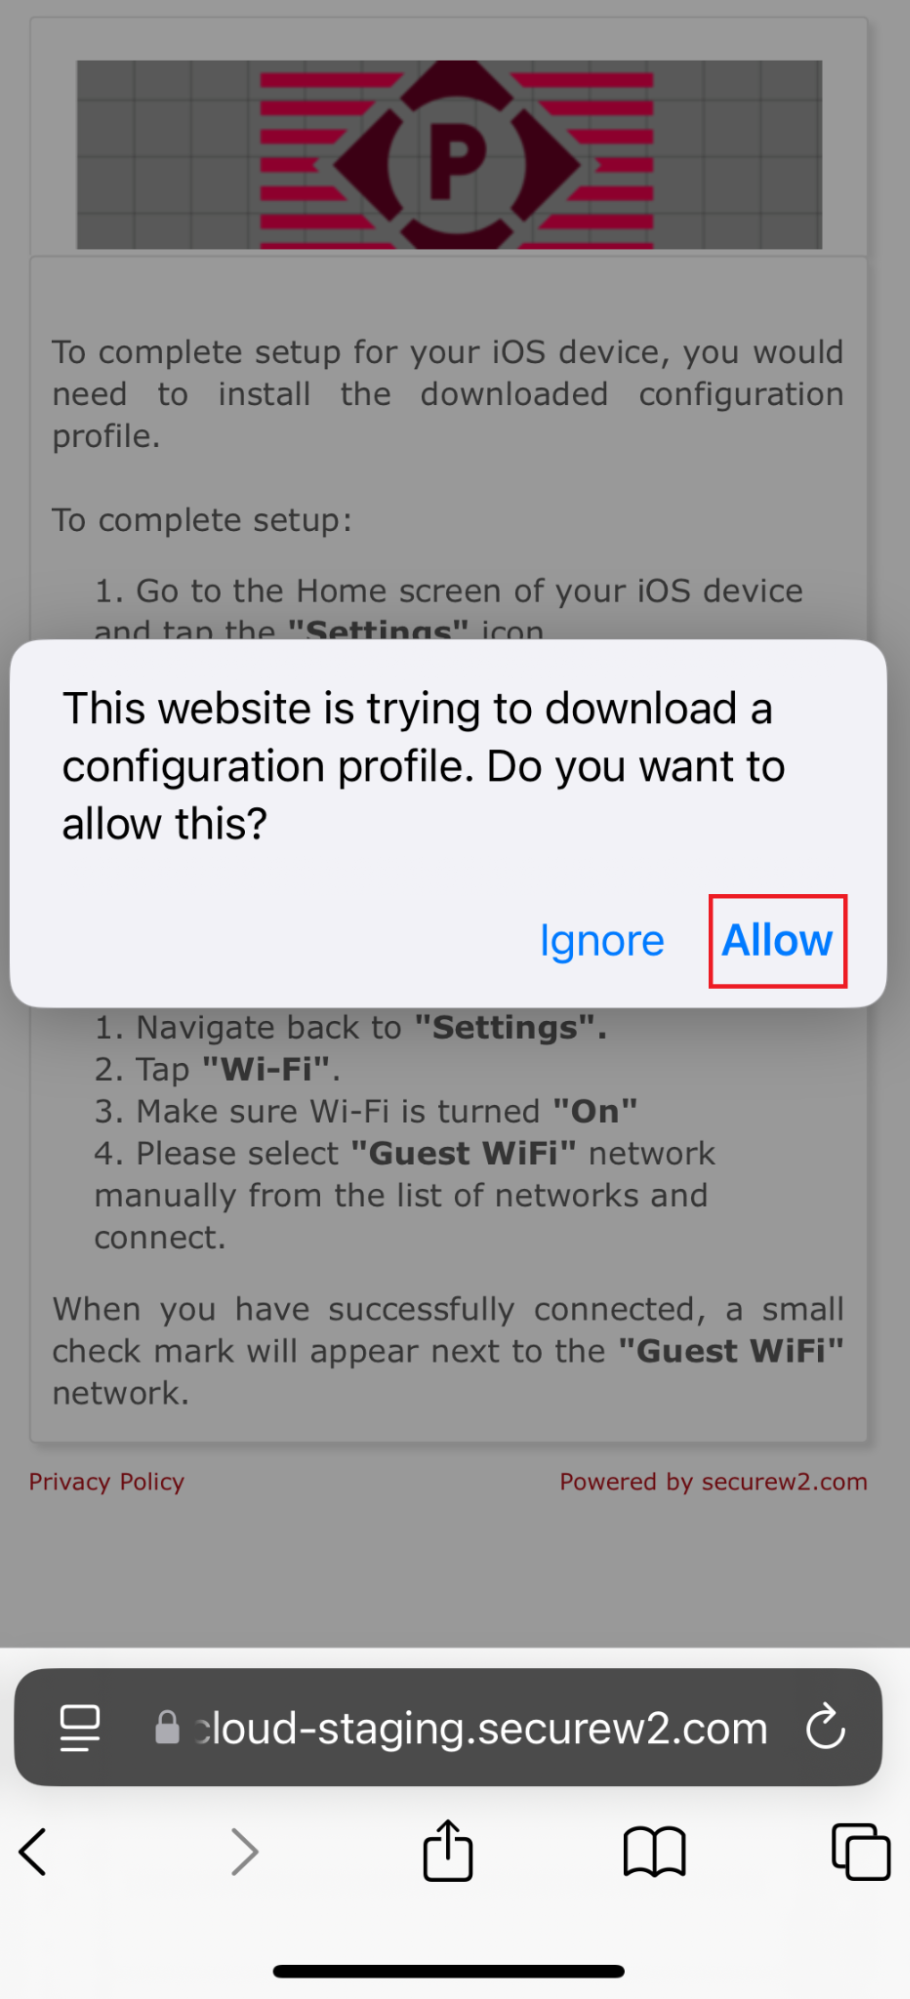
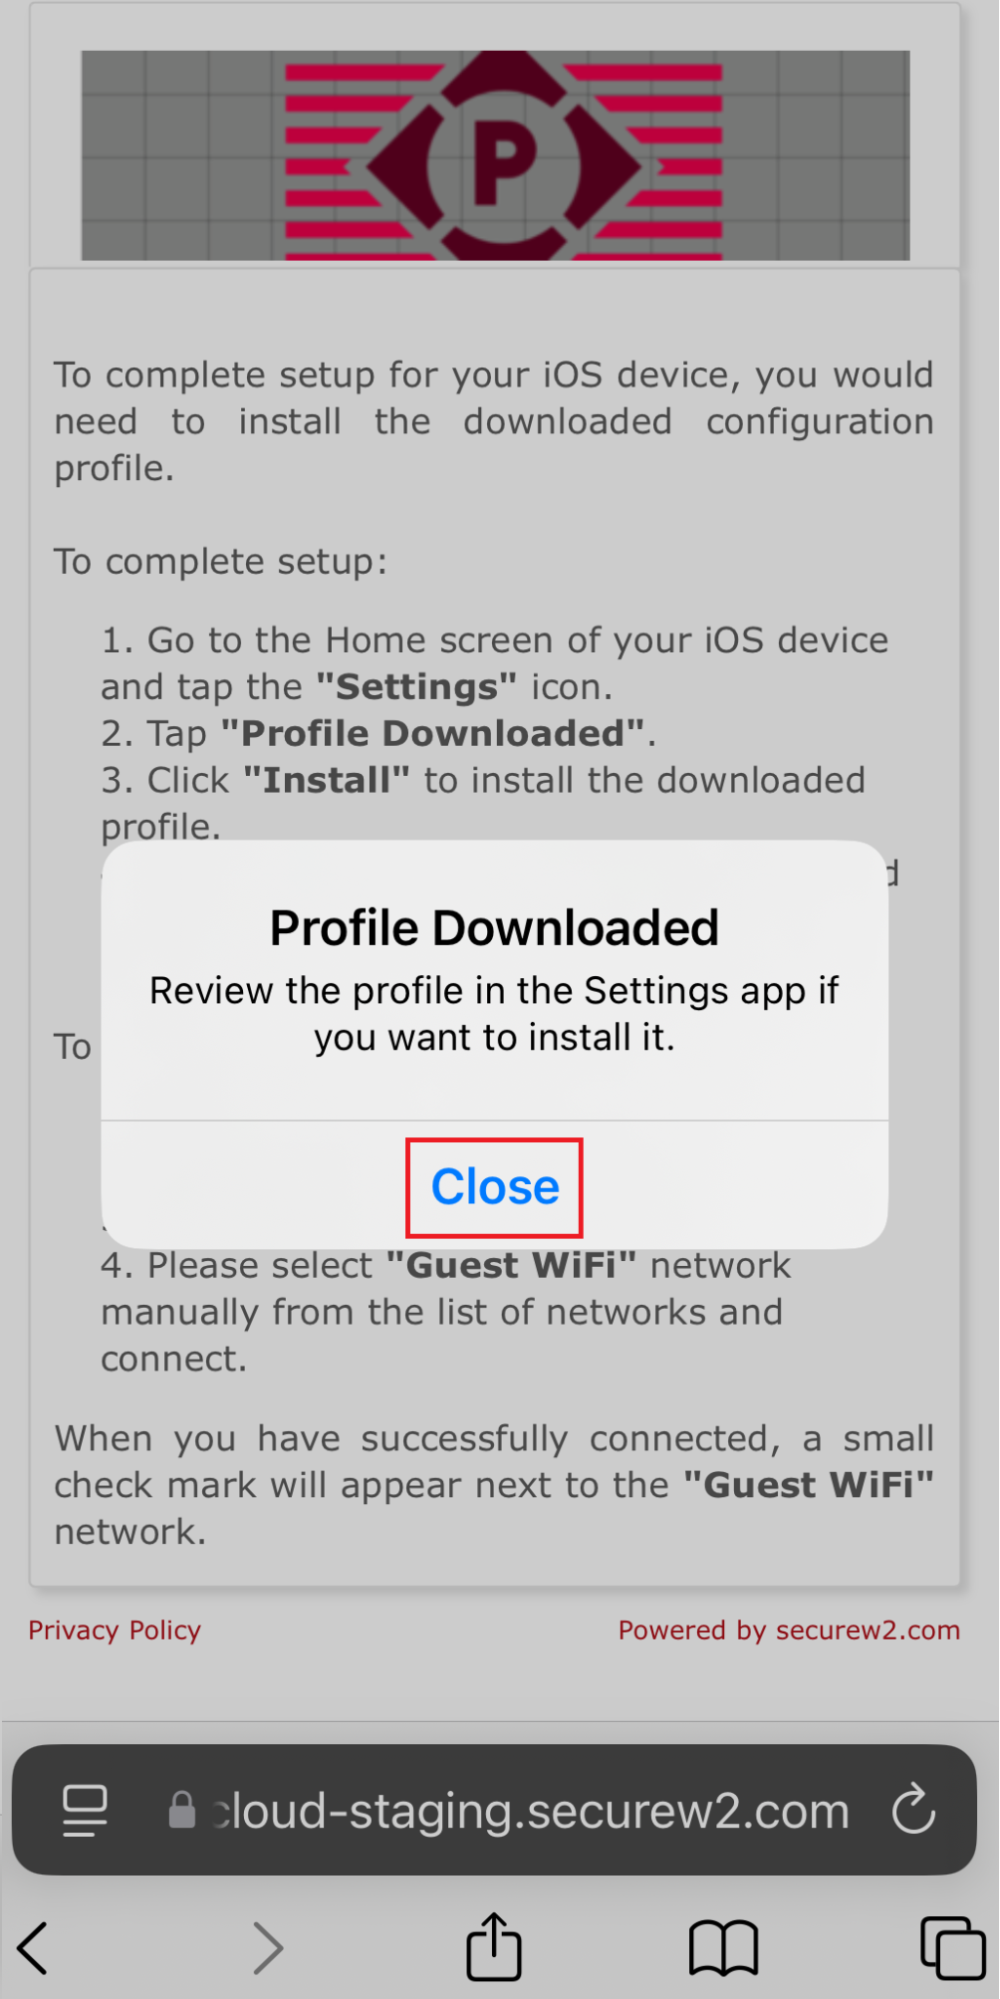
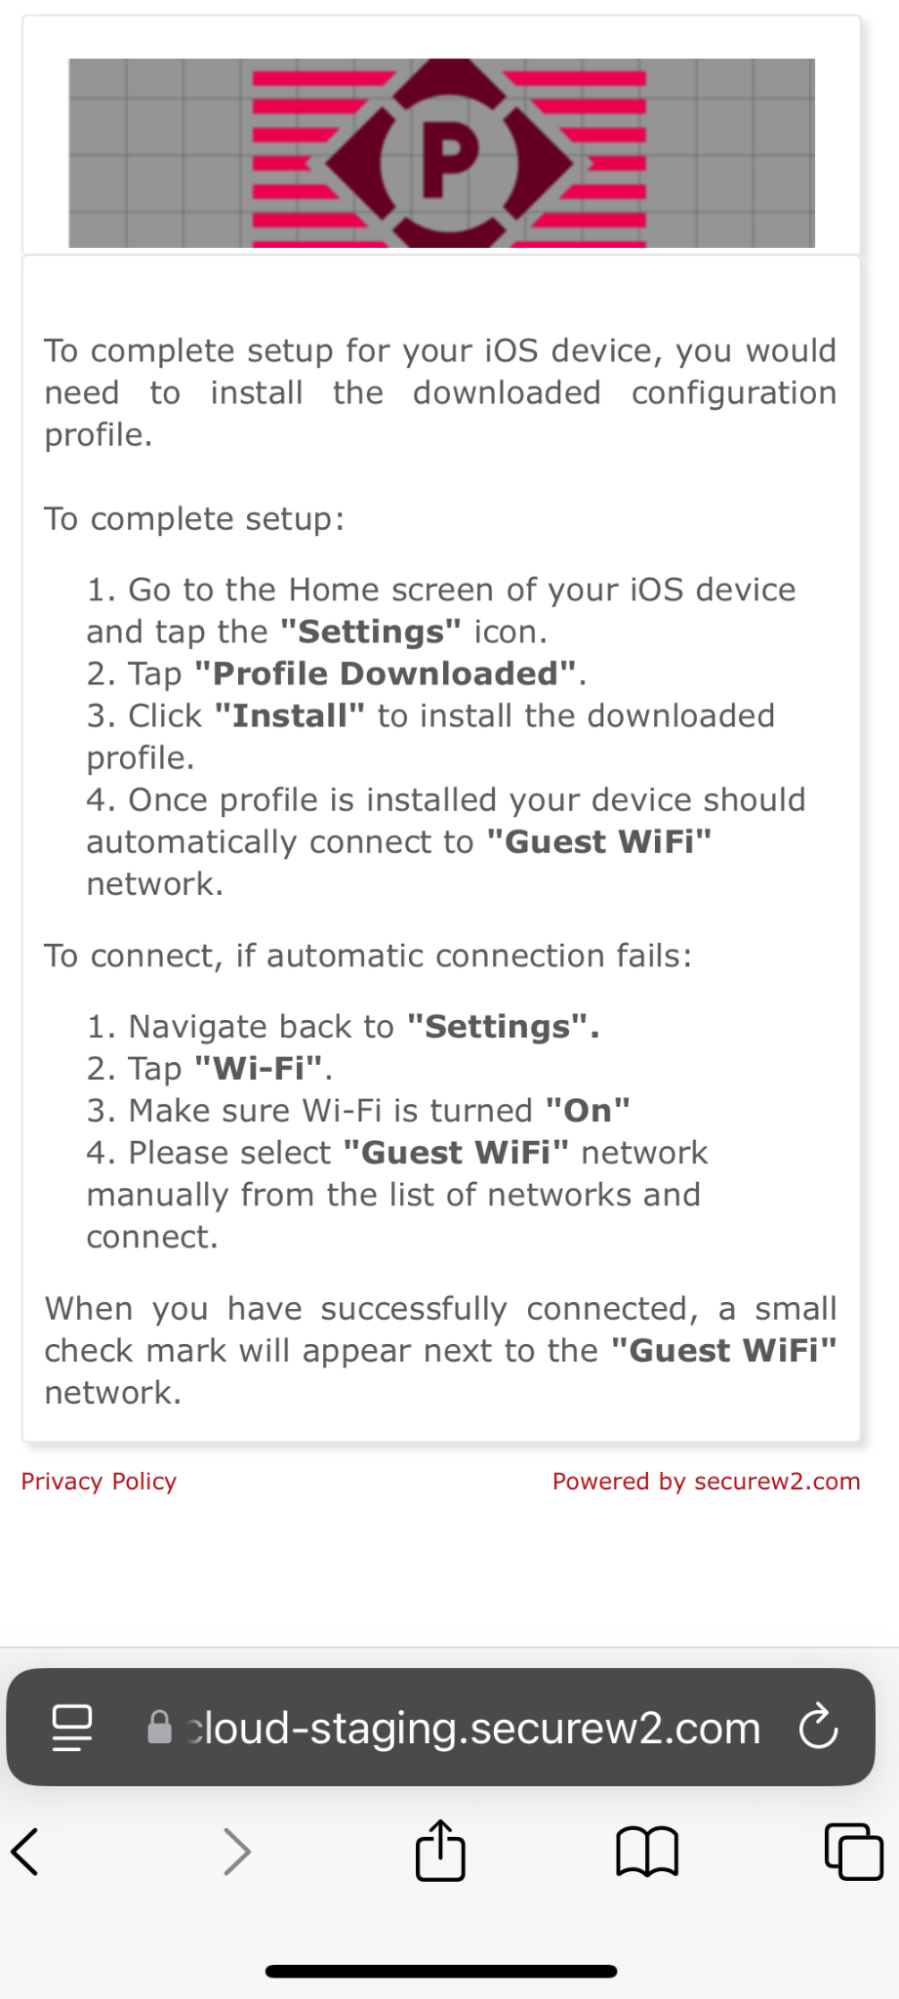
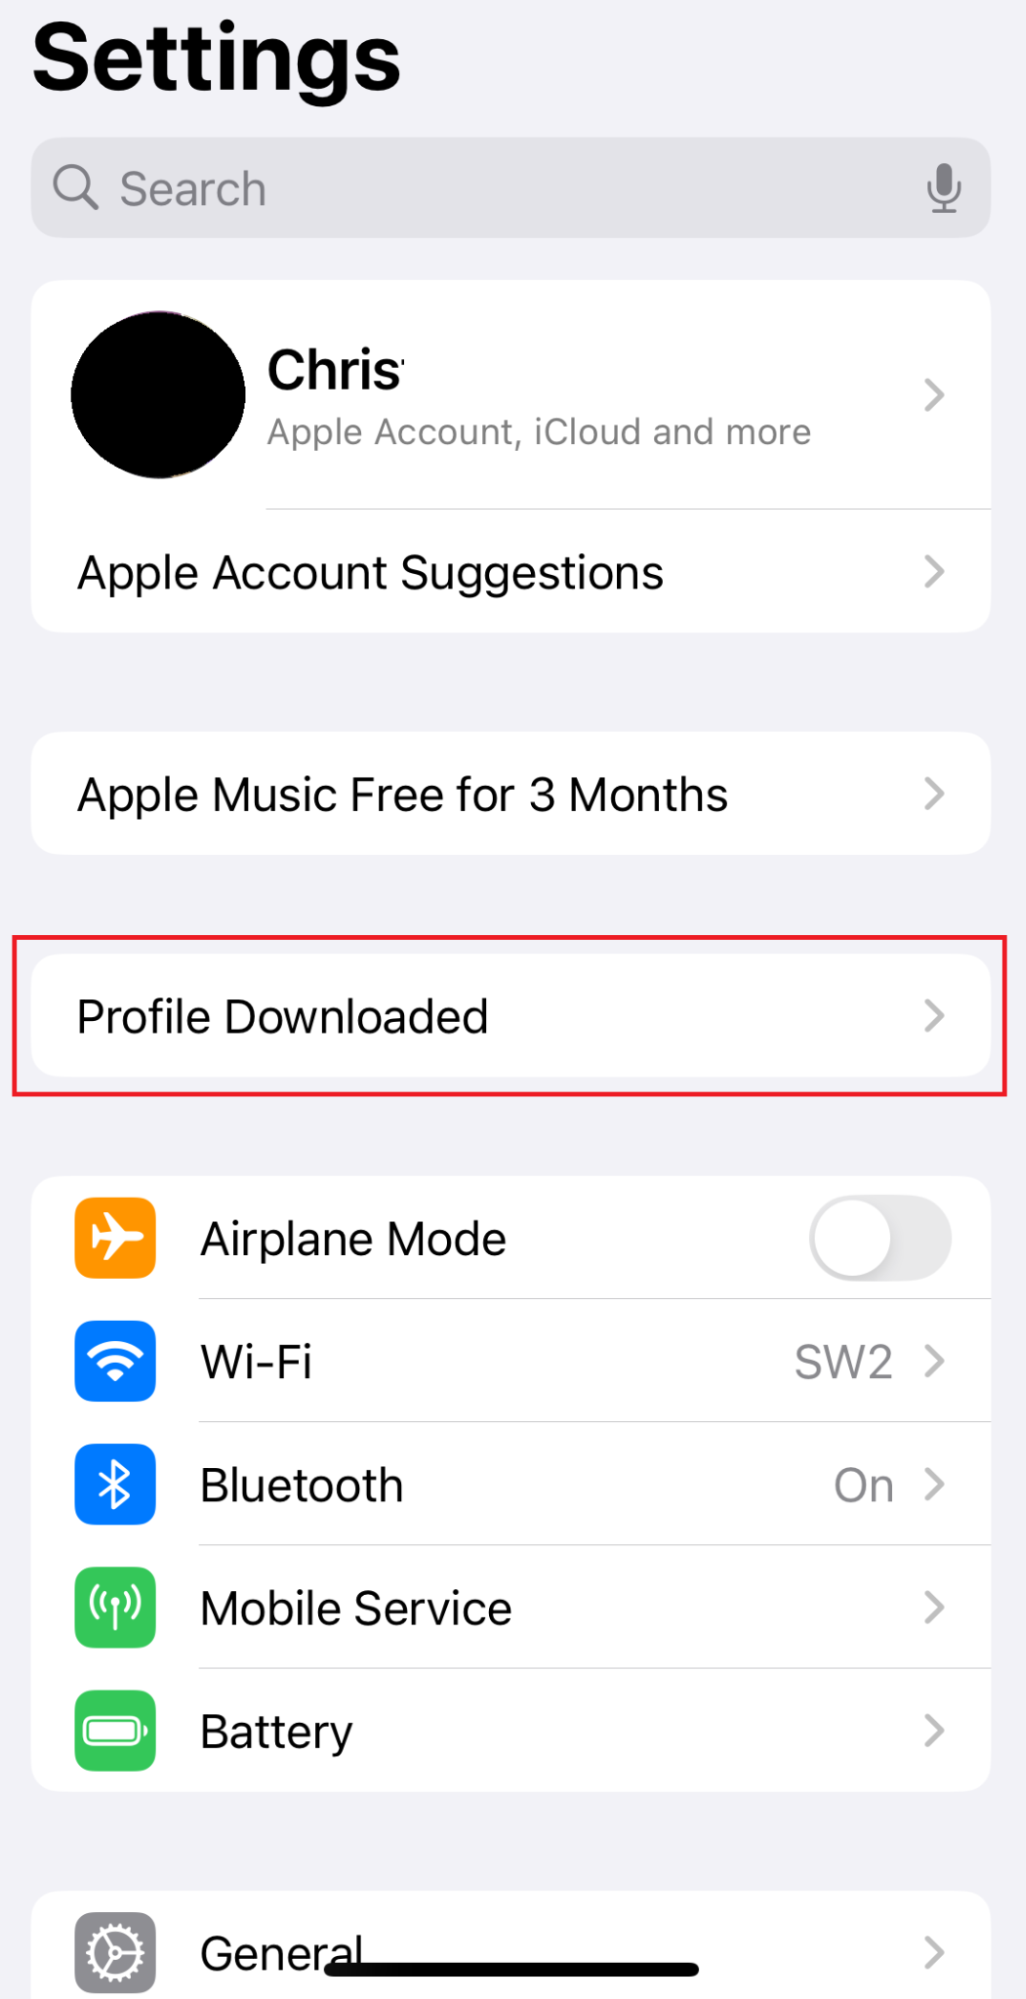
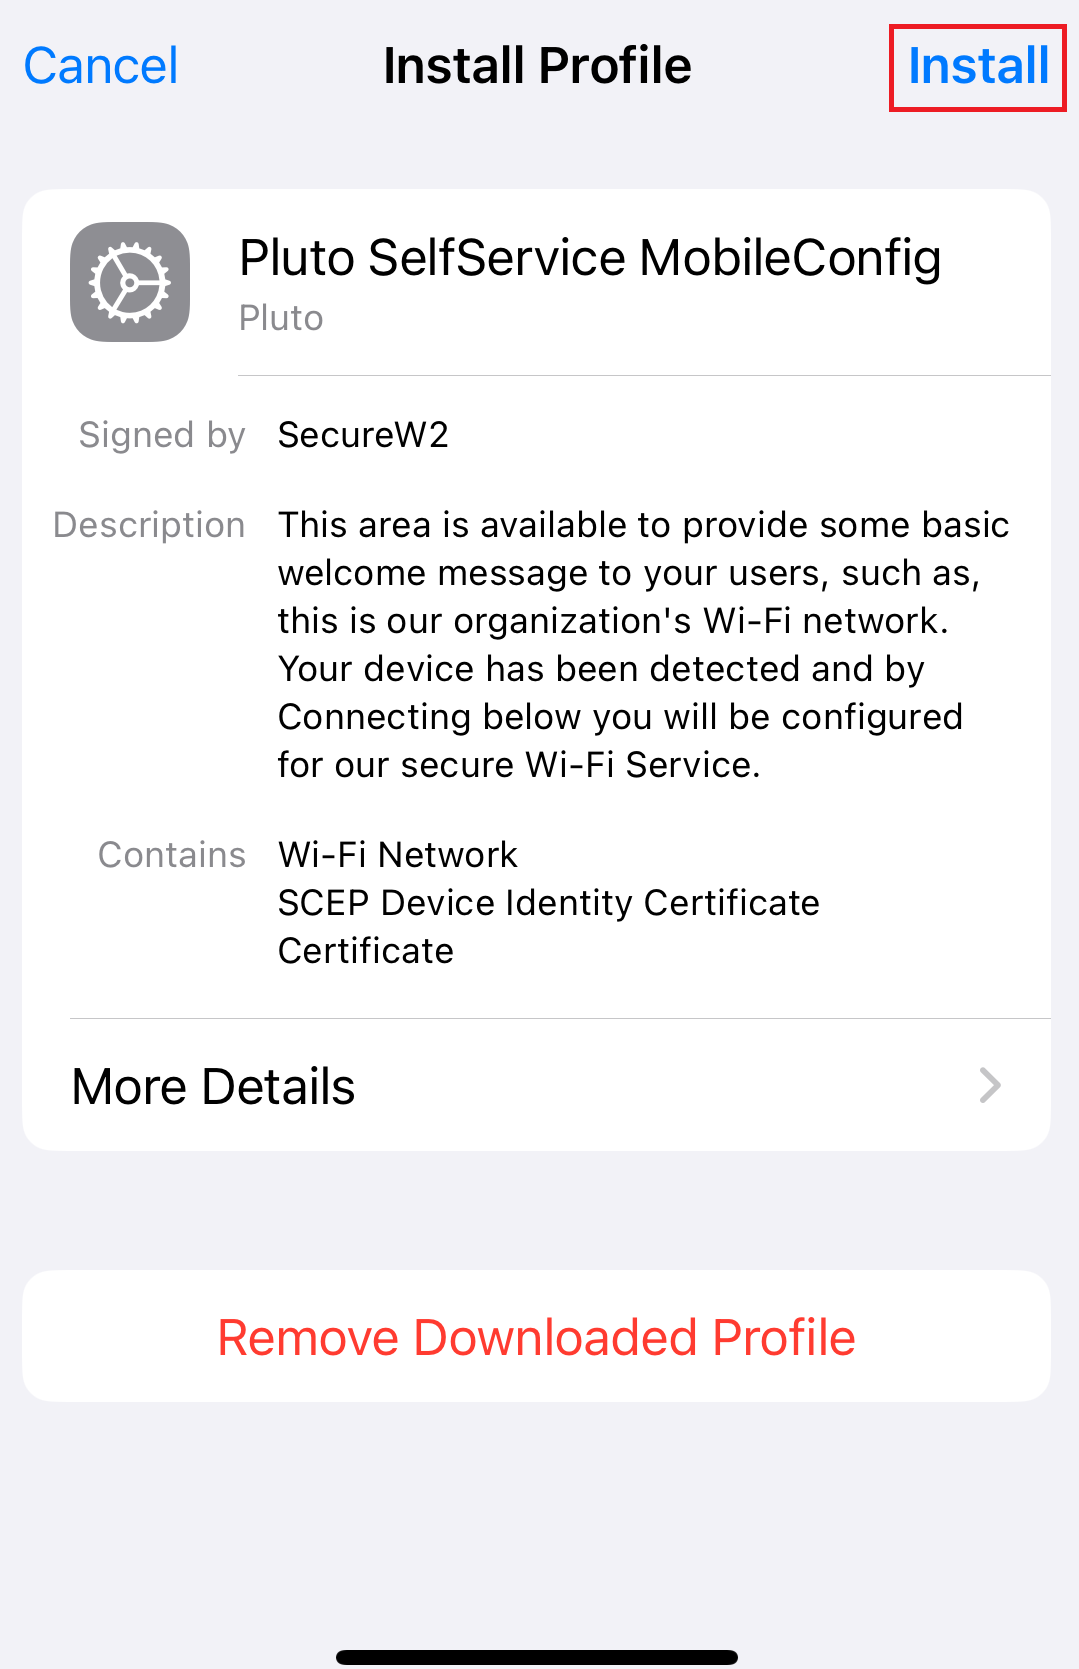
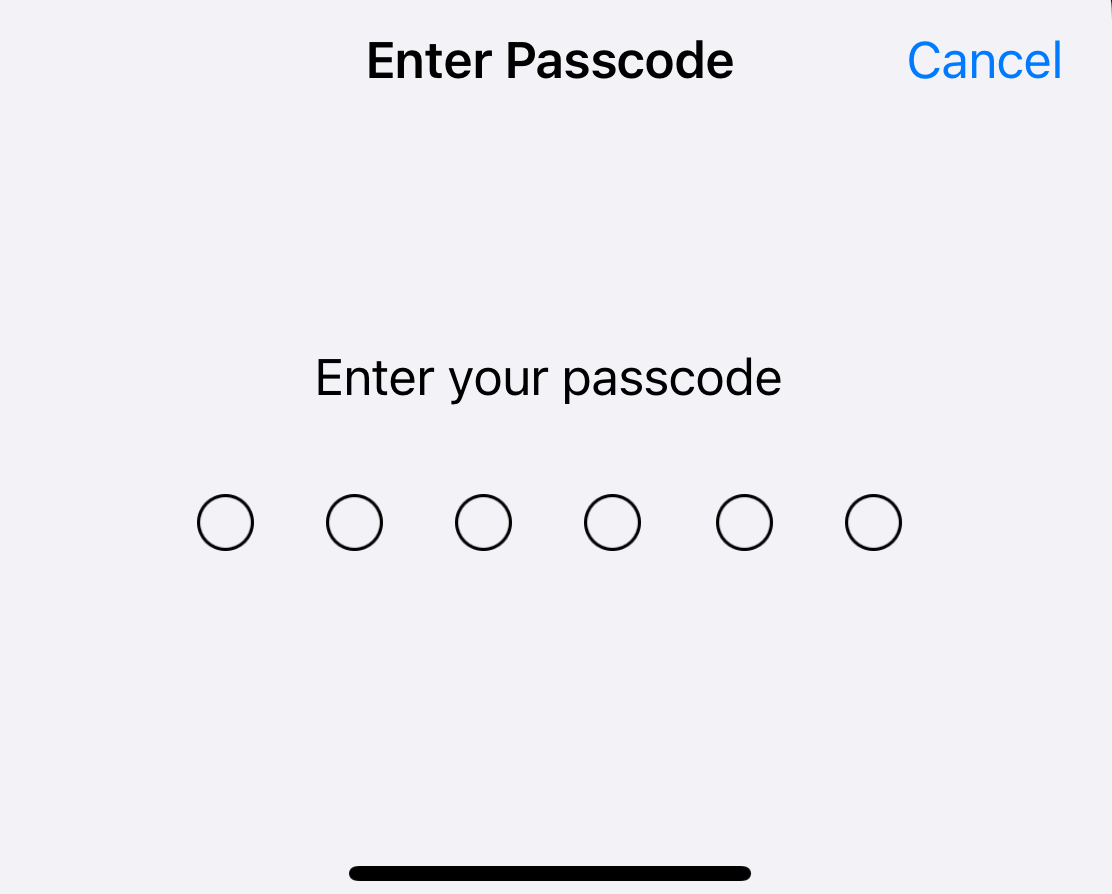
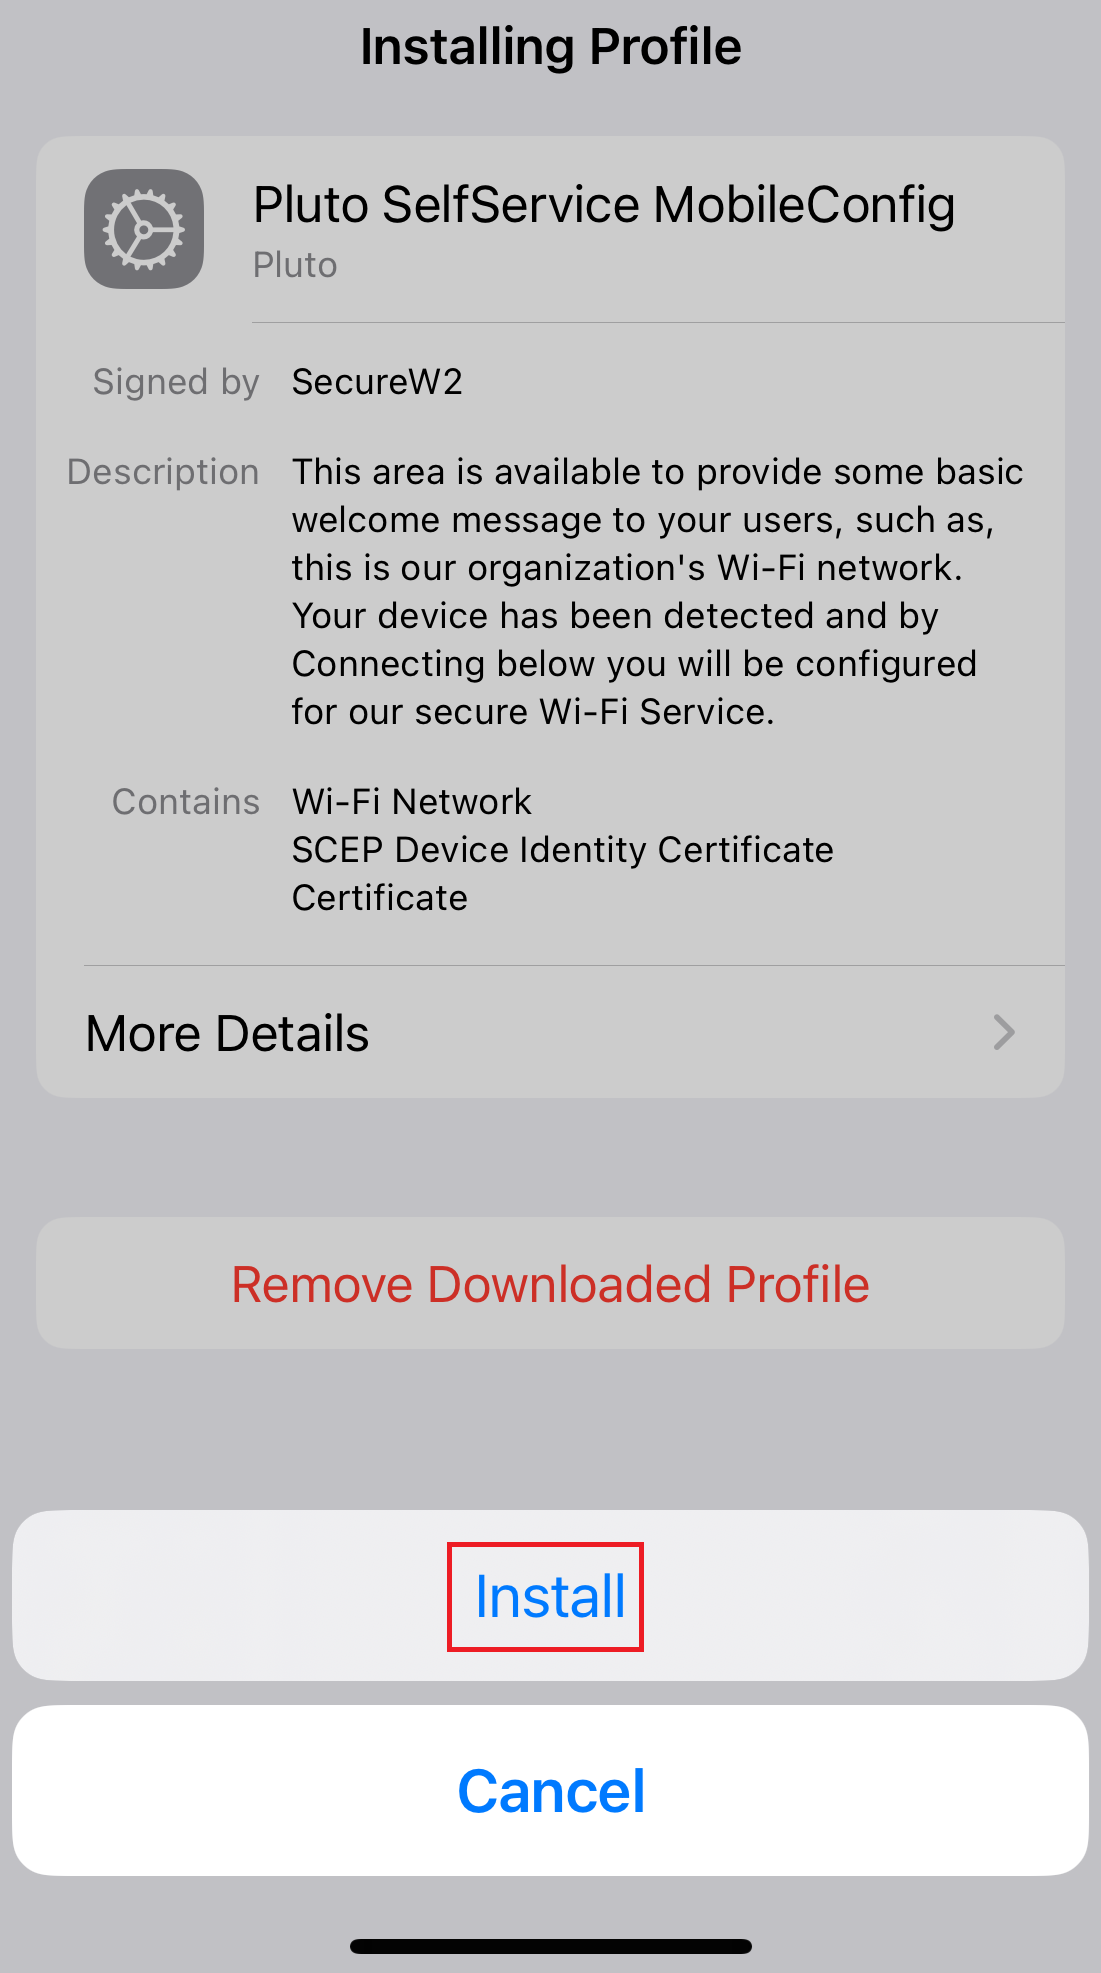
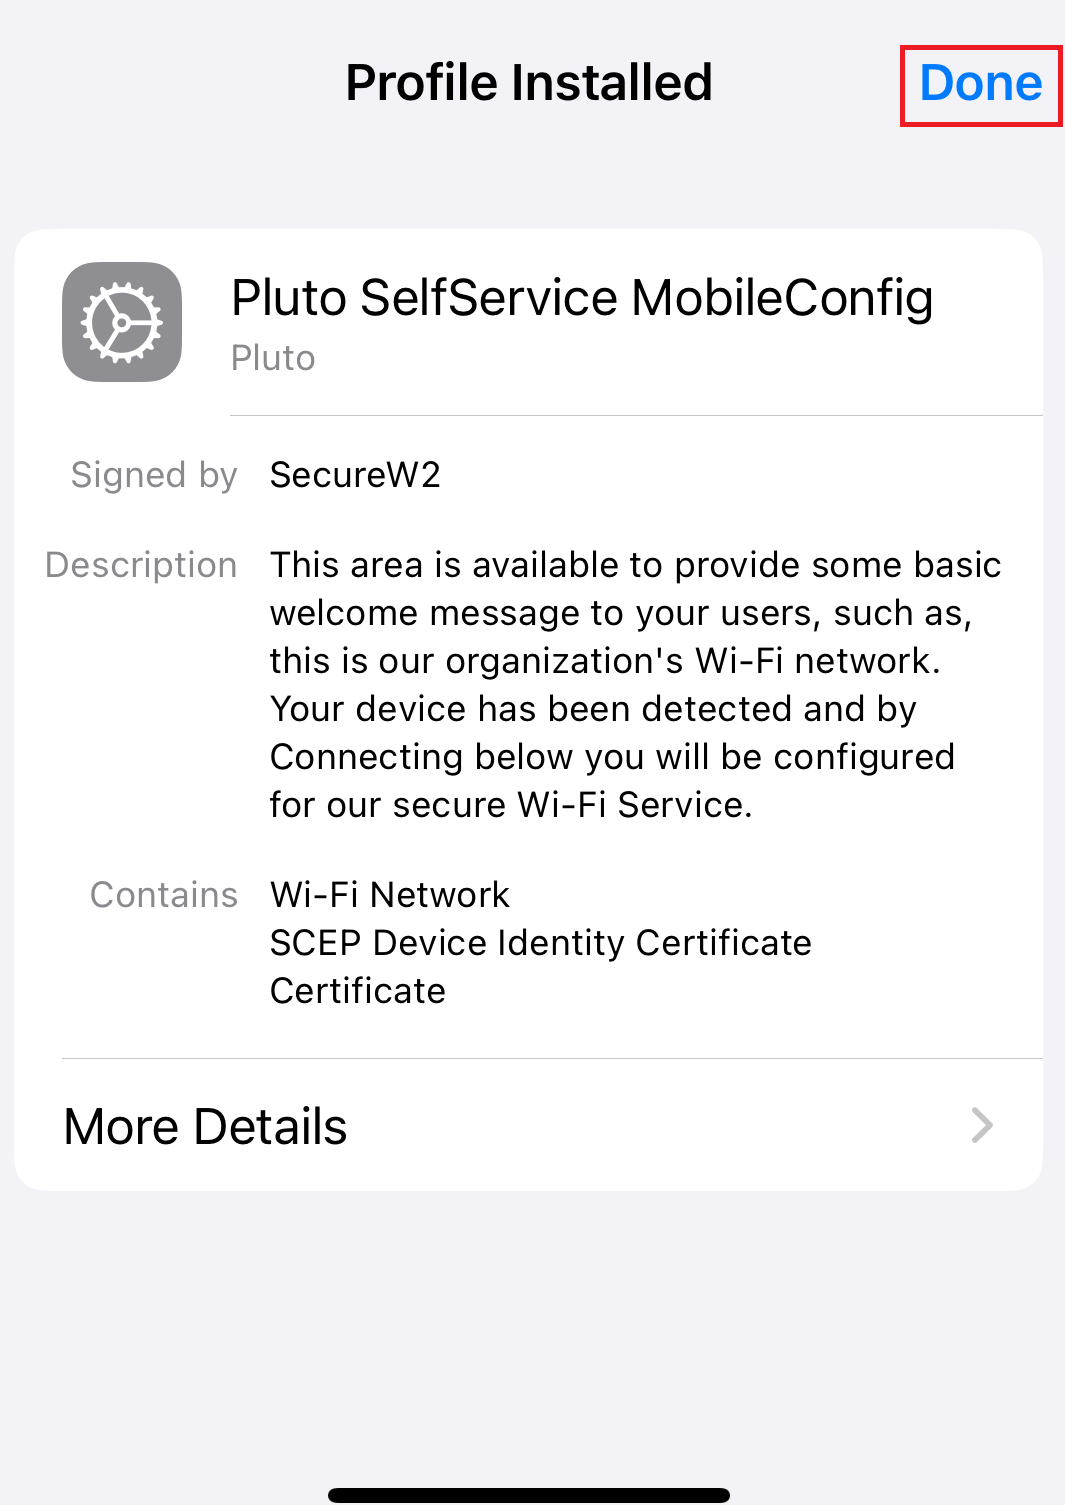
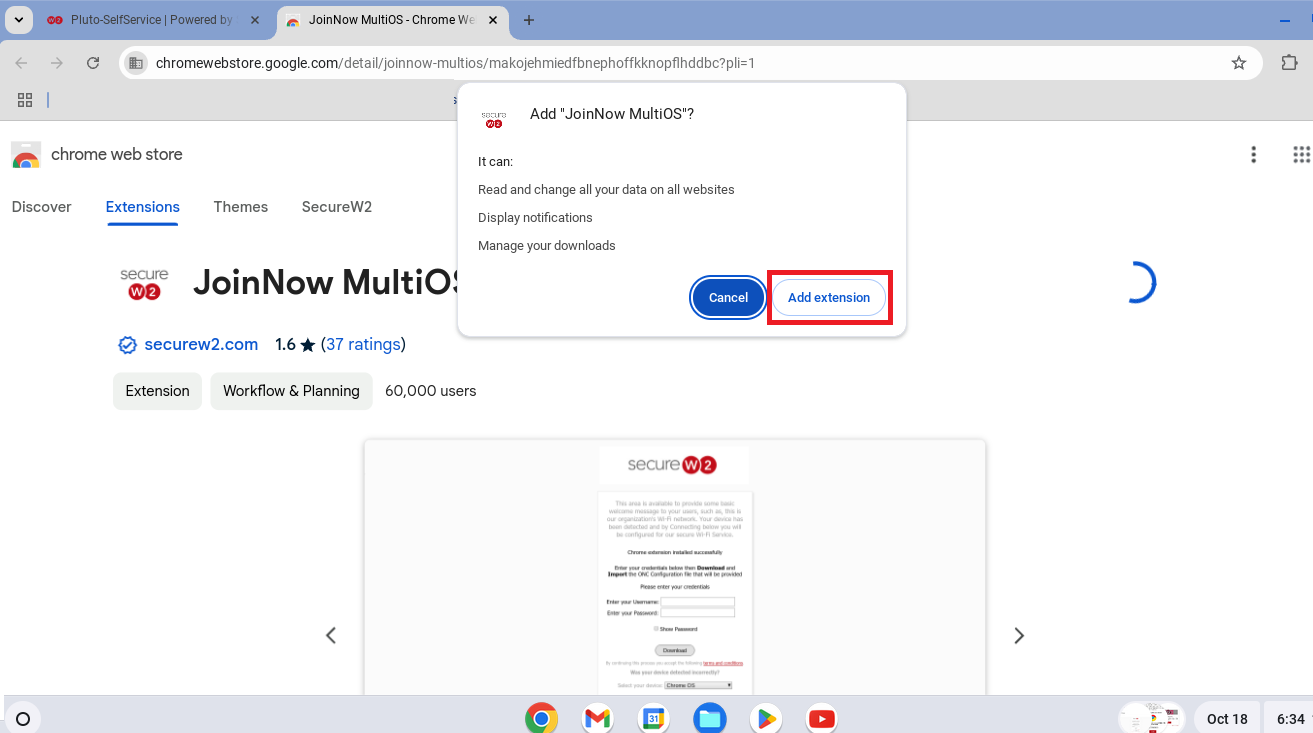
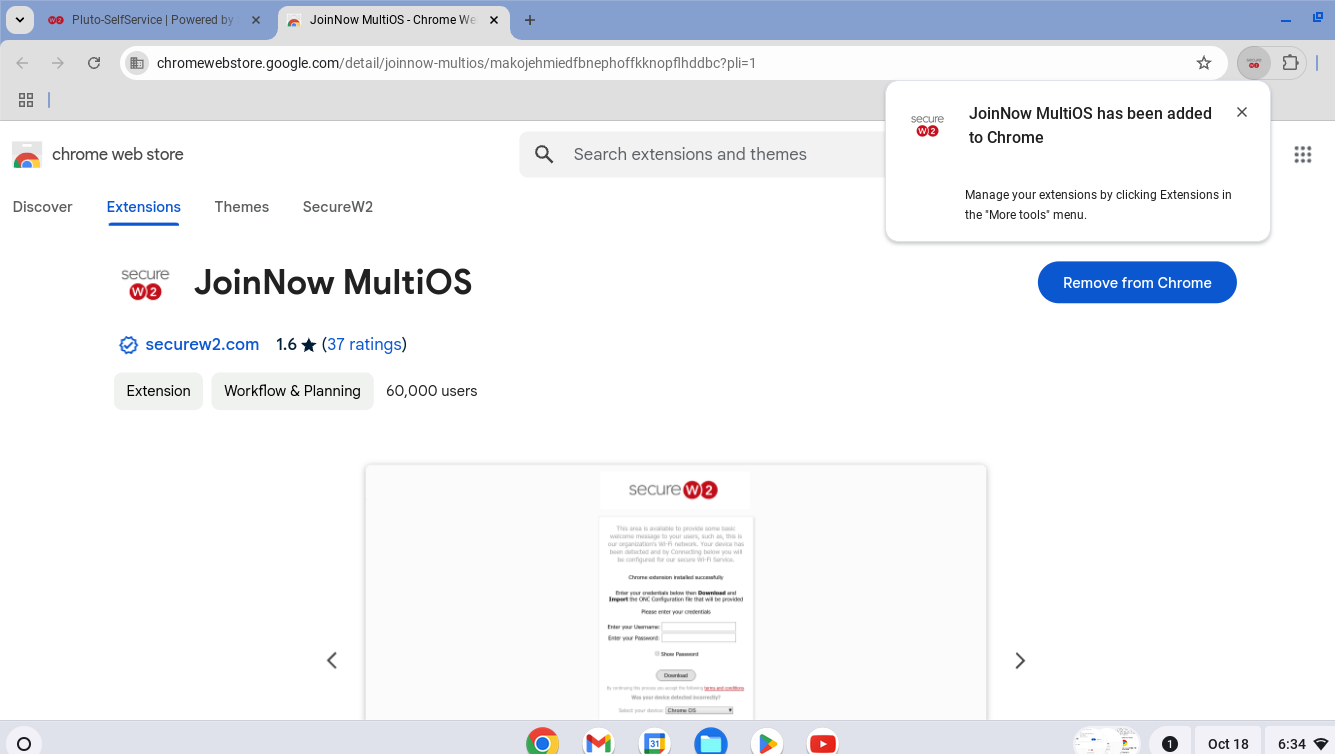
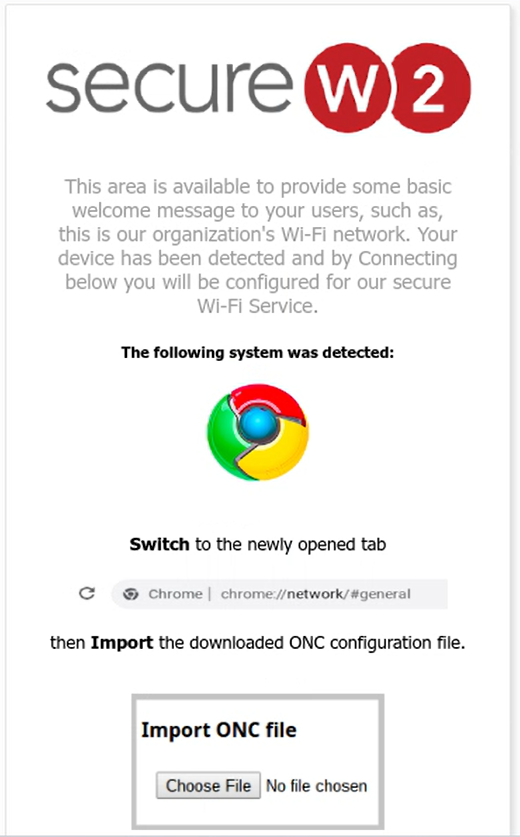
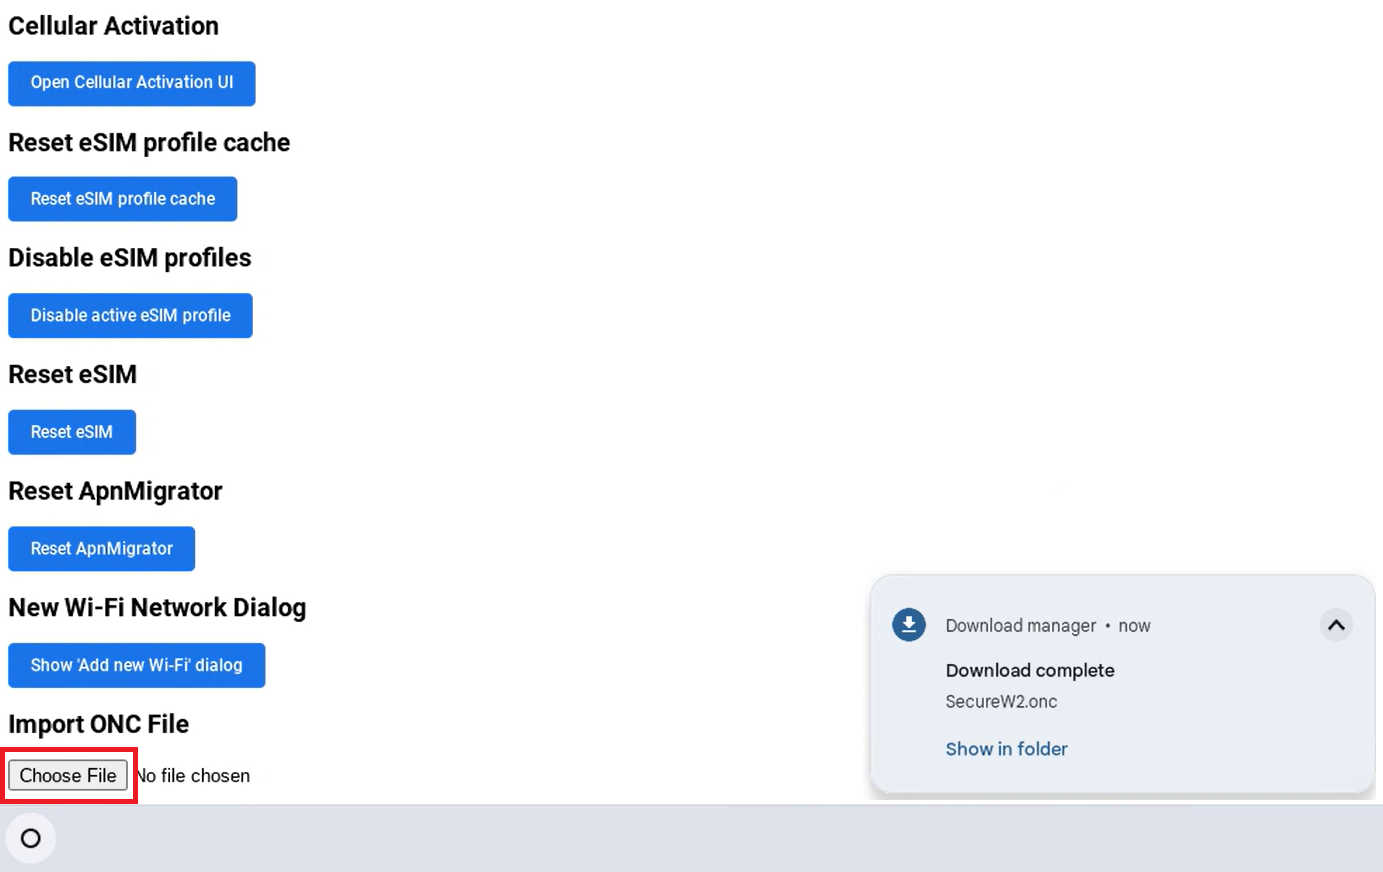
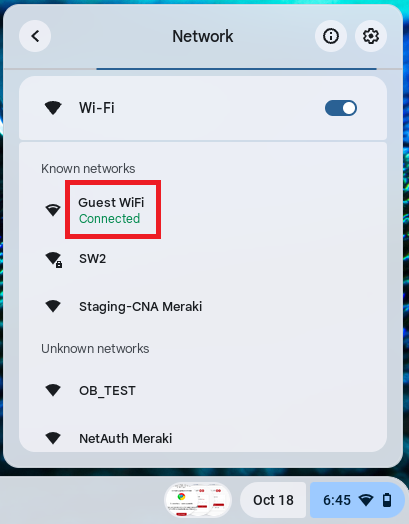
On the User Onboarding page, the corresponding OS is displayed based on the device’s OS. Below is the sample onboarding flow for the Windows OS platform.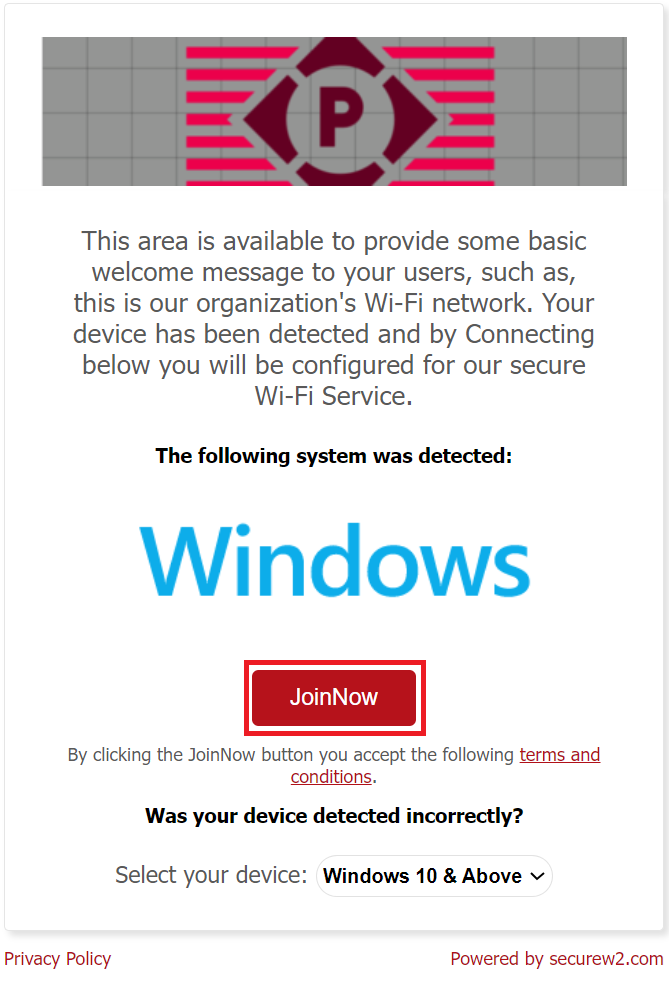
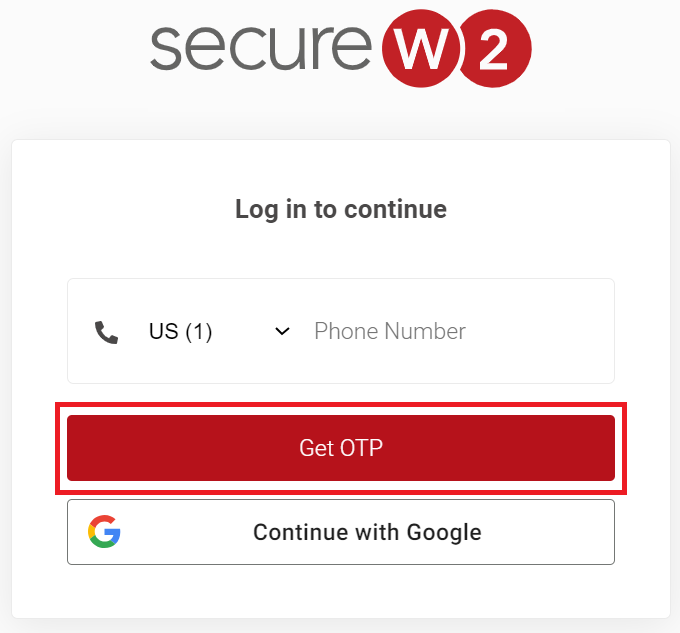
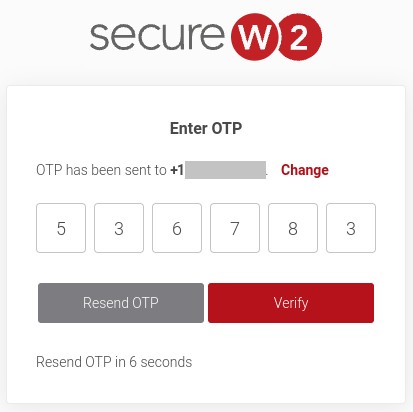
Registration via Mobile OTP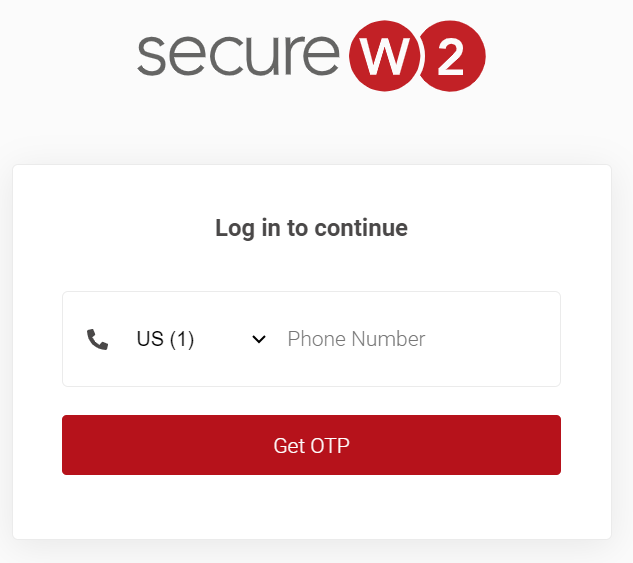

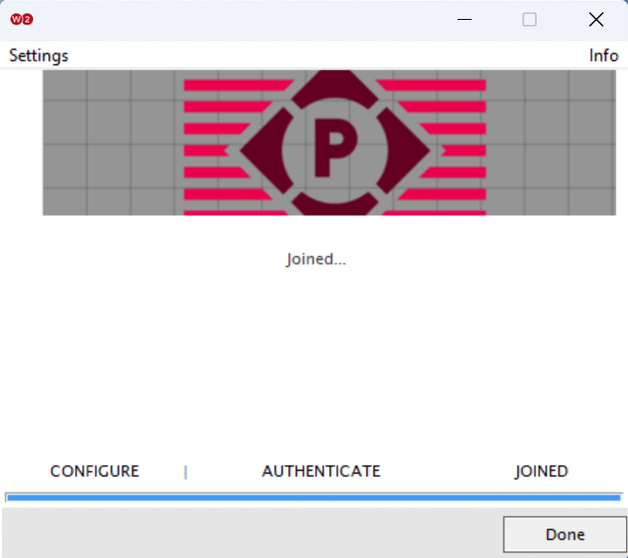
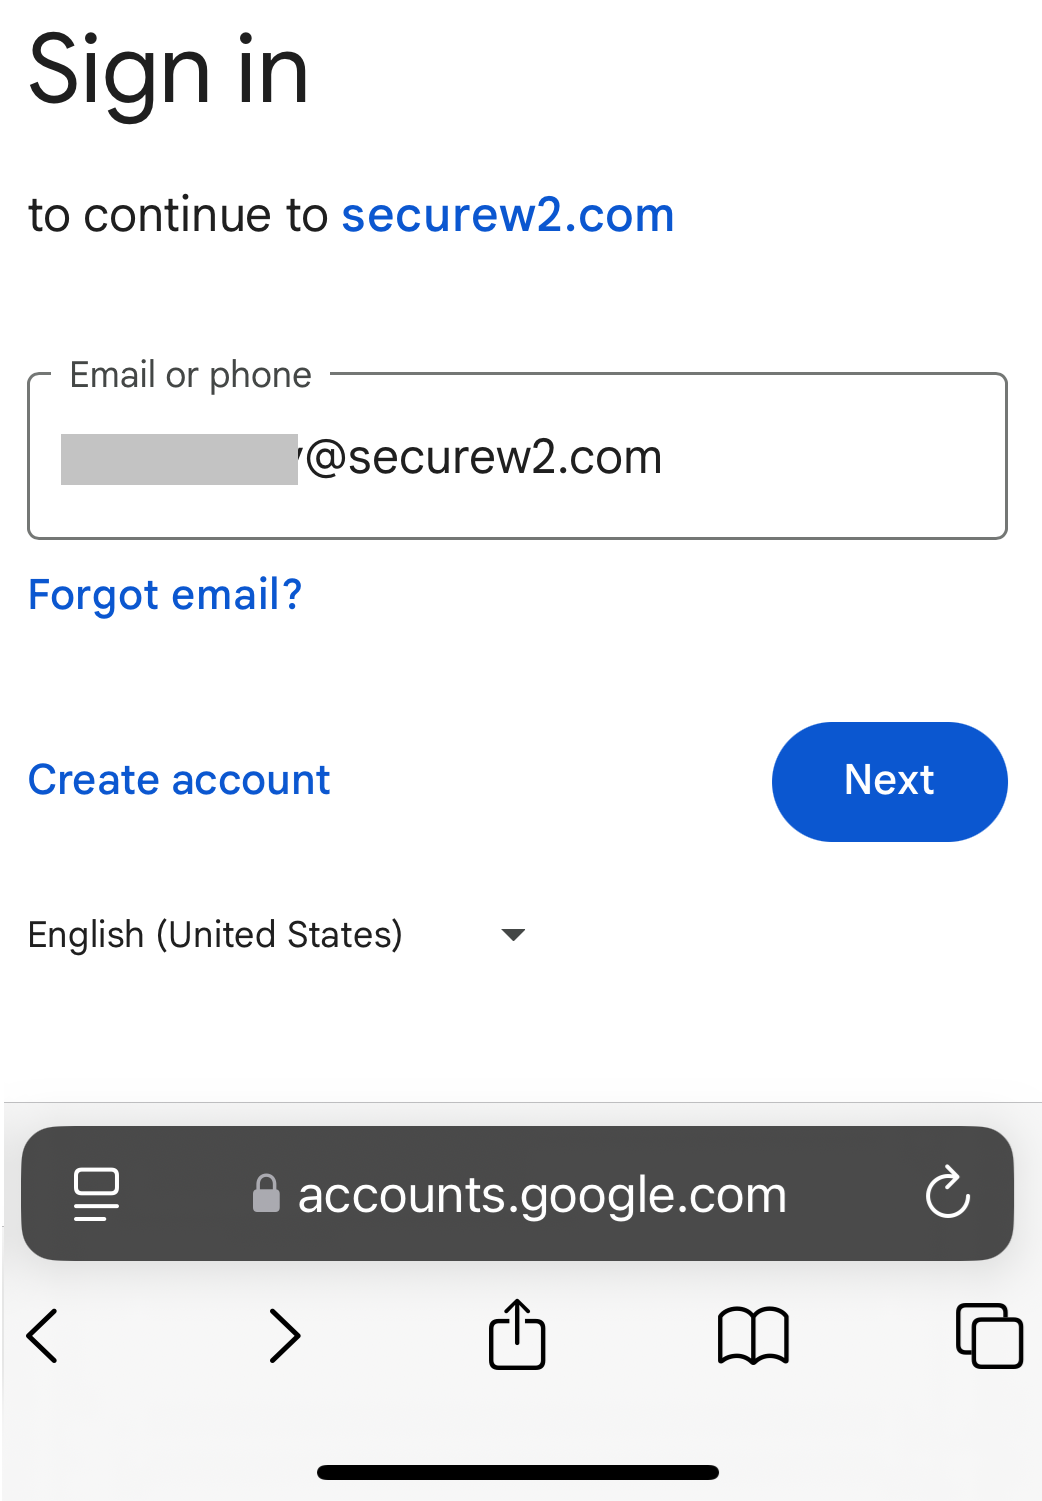
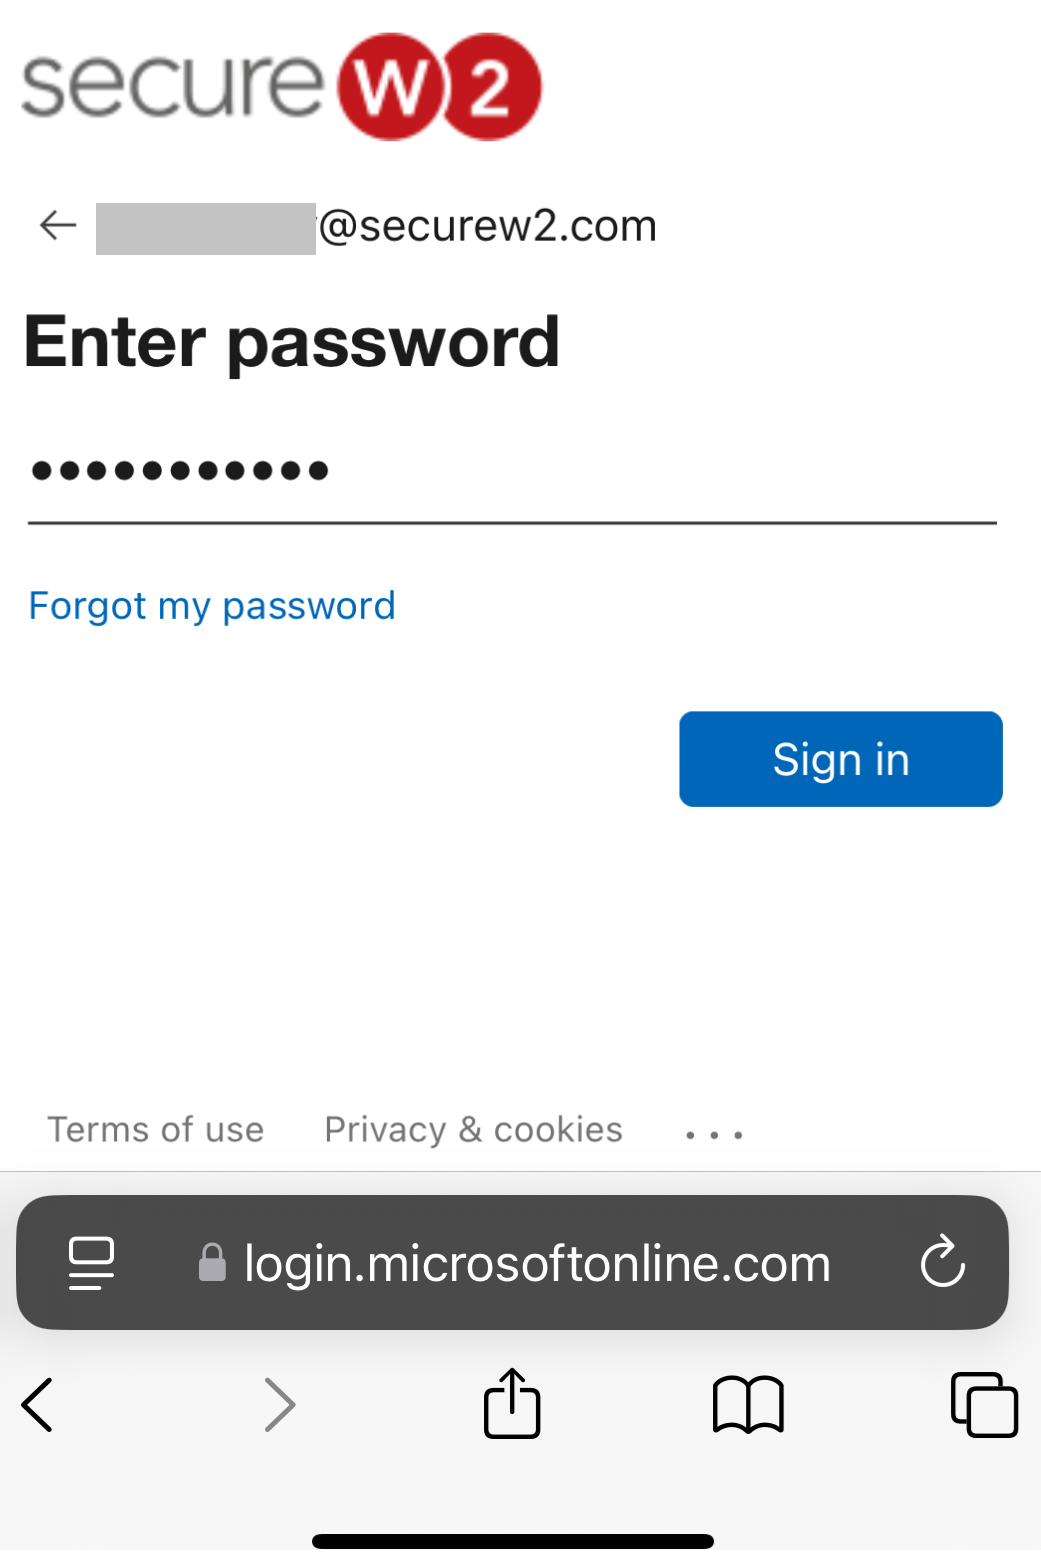
Registration via Google Identity
The onboarding flow for Android and macOS is similar to that of the Windows platform.
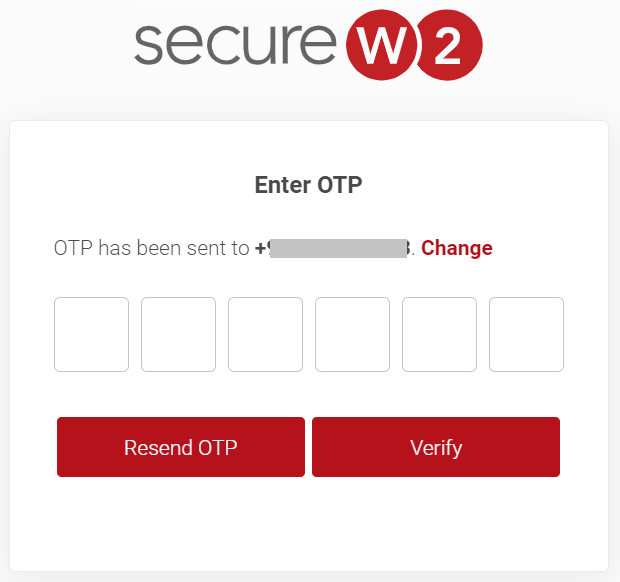
Registration via Mobile OTP

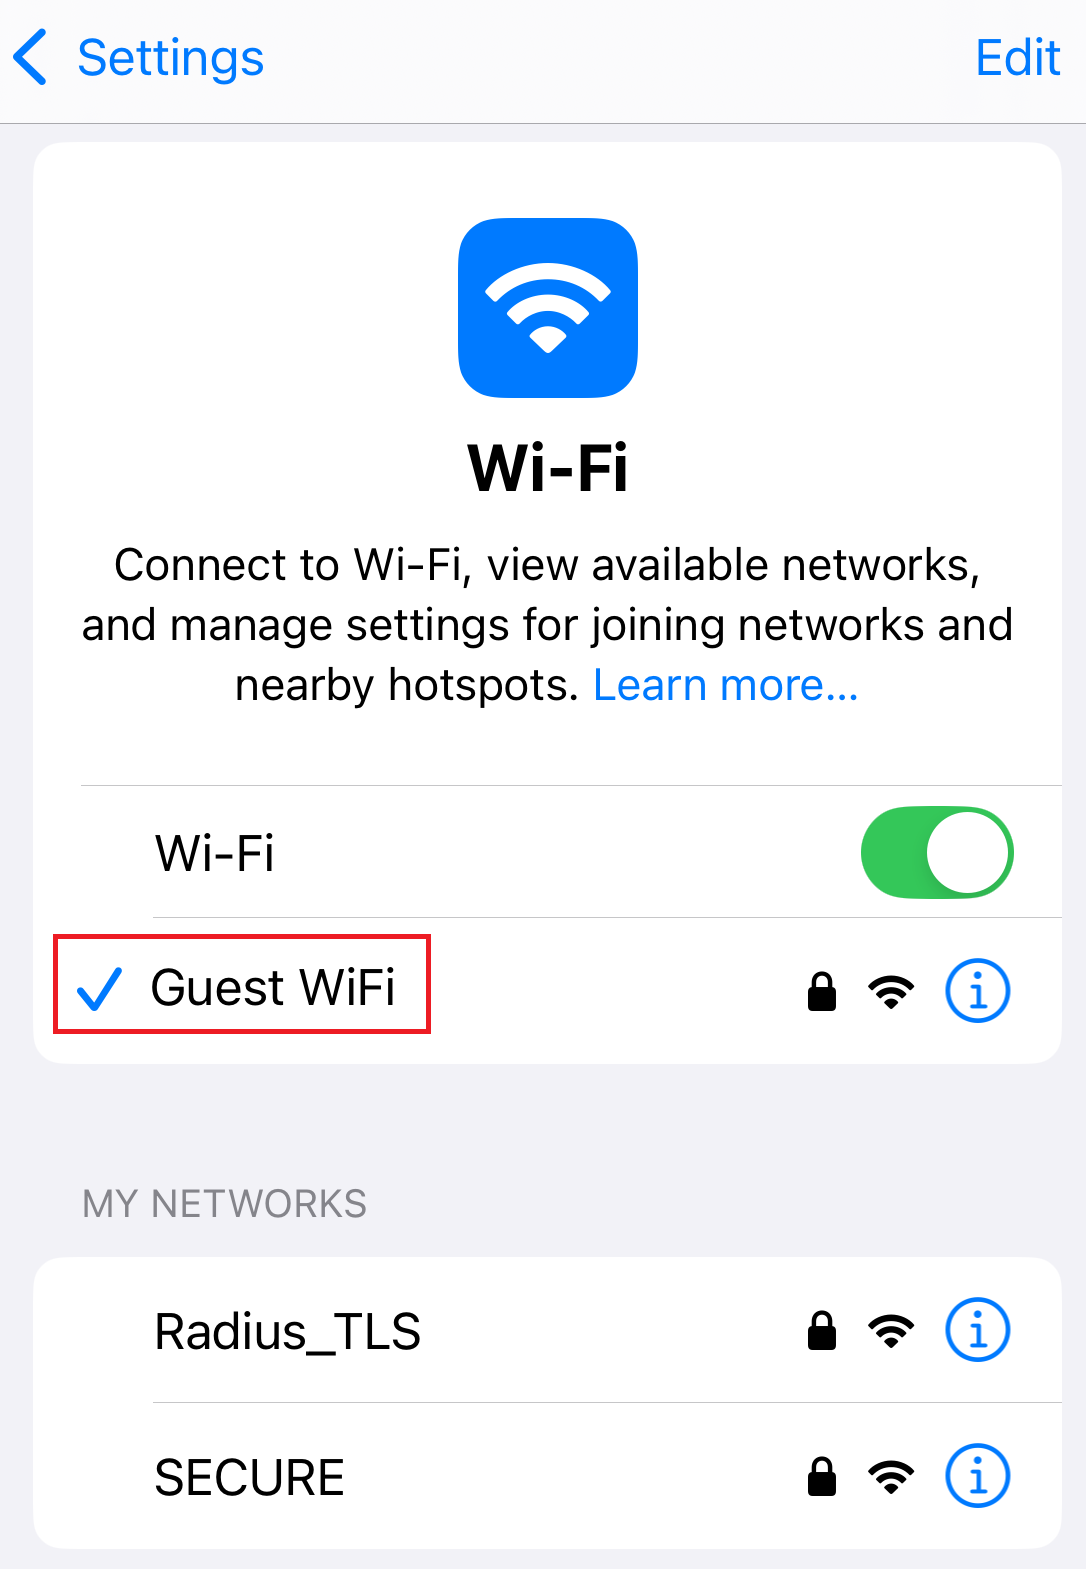
Registration via Google Identity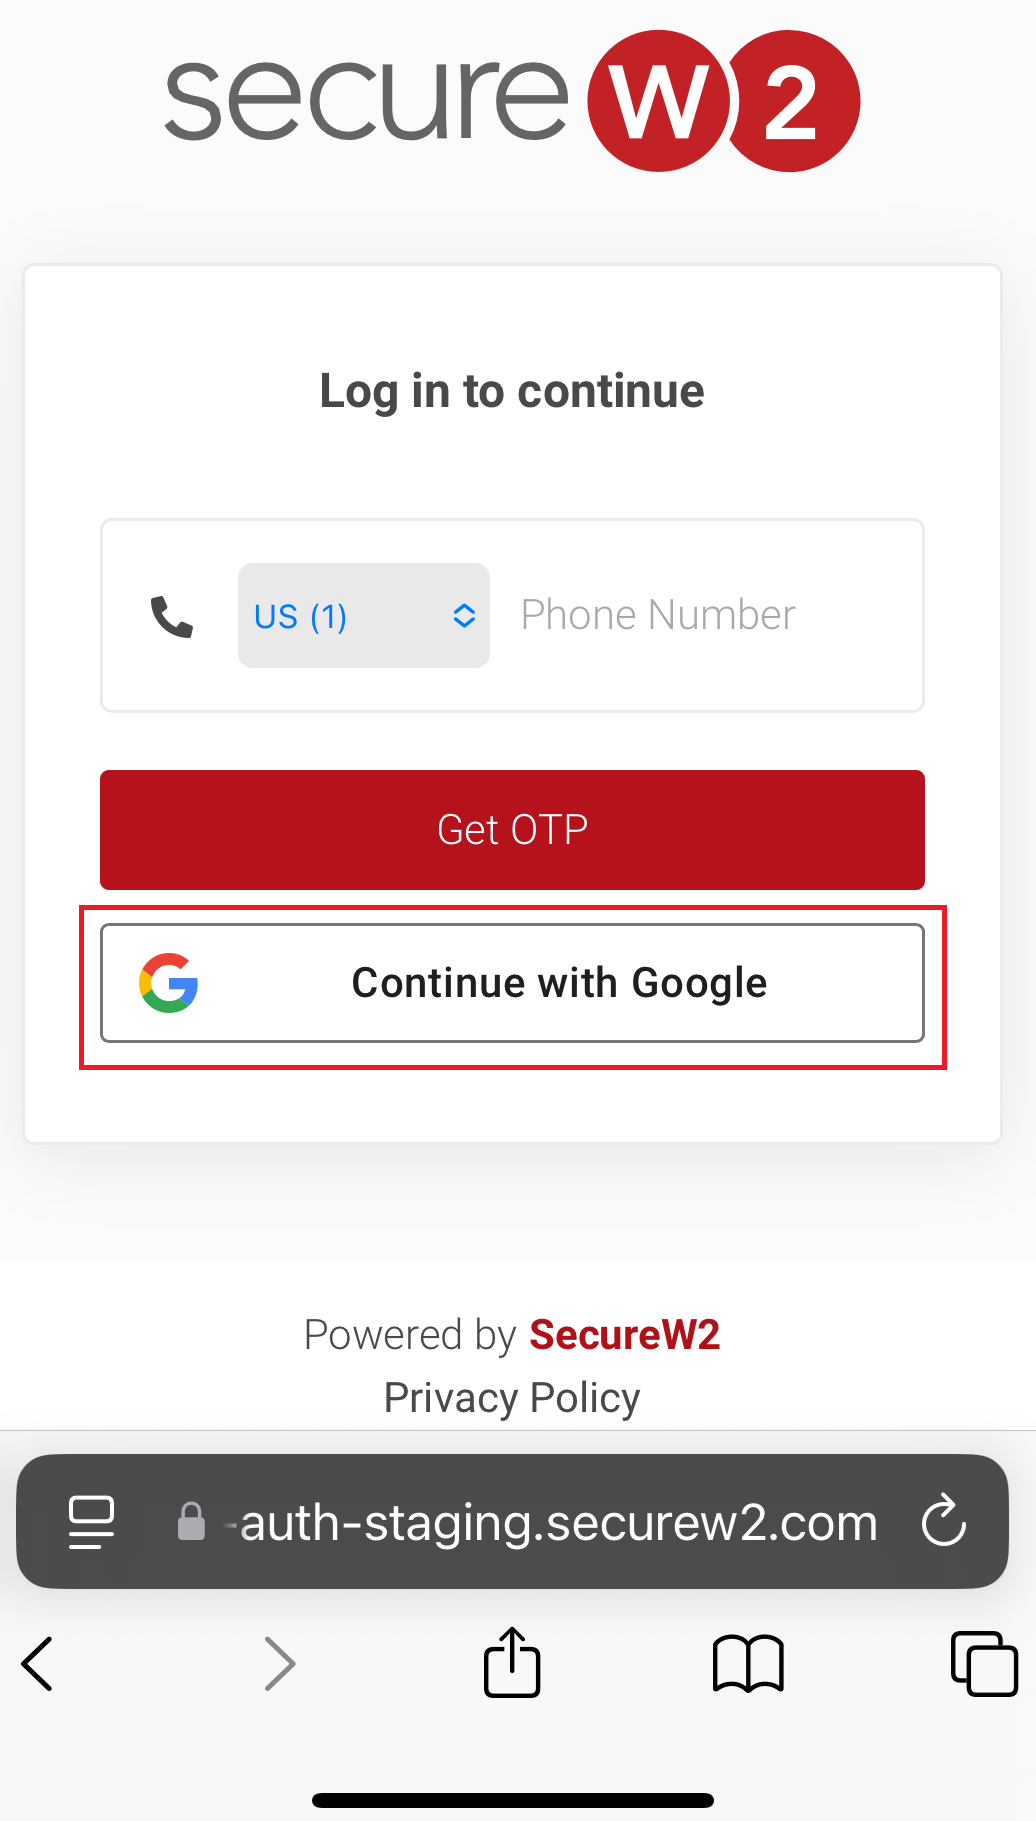
Registration via Mobile OTP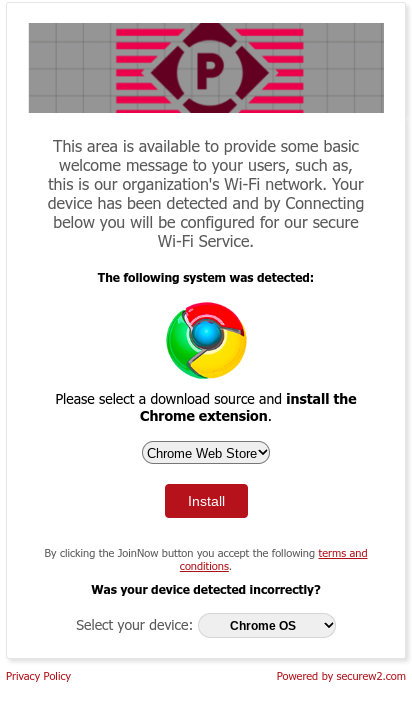

Registration via Google Identity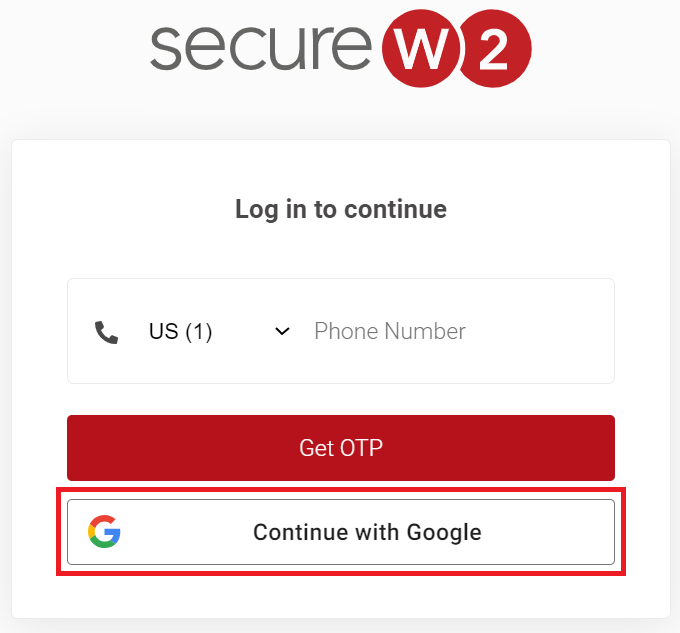
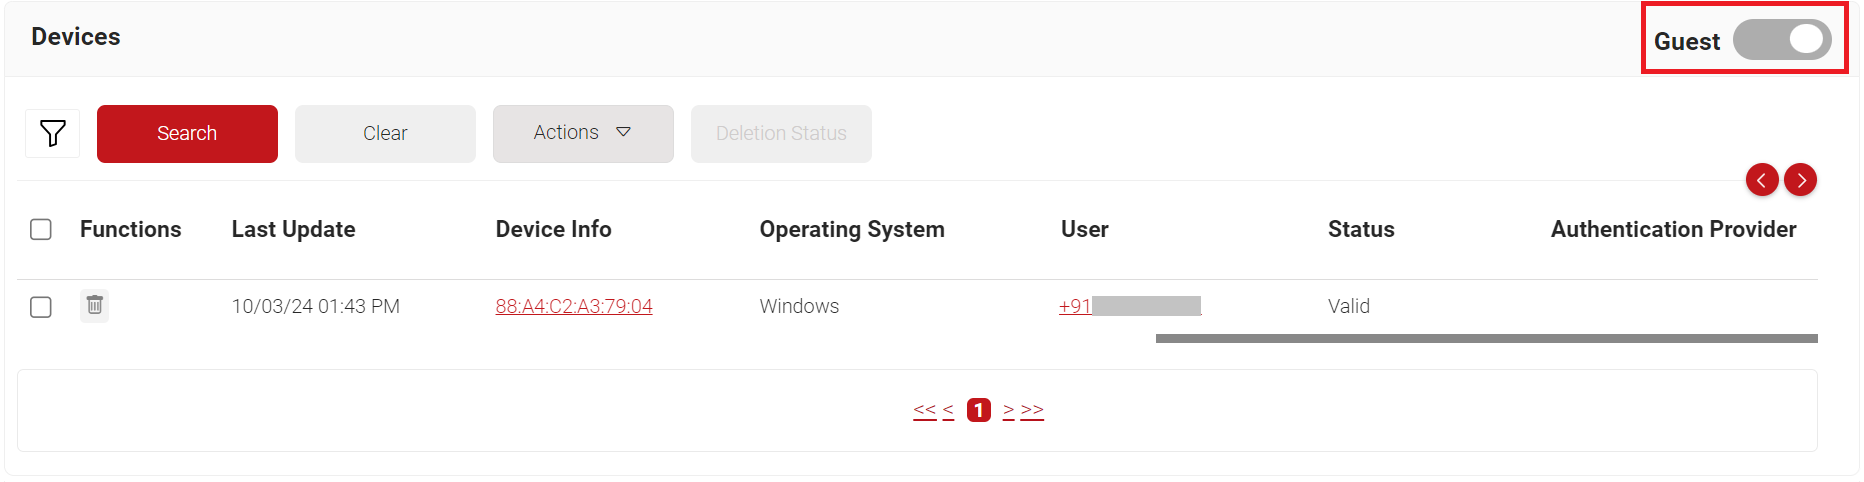
The enrolled guest devices and their details can be tracked on the Devices page in the JoinNow Management Portal. To view the Guest device details, navigate to Data and Monitoring > Devices and disable the Managed toggle button.
The values in the Onboarded Devices field under the Subscriptions section display the number of devices with valid certificates that were onboarded via Guest with the TLS feature.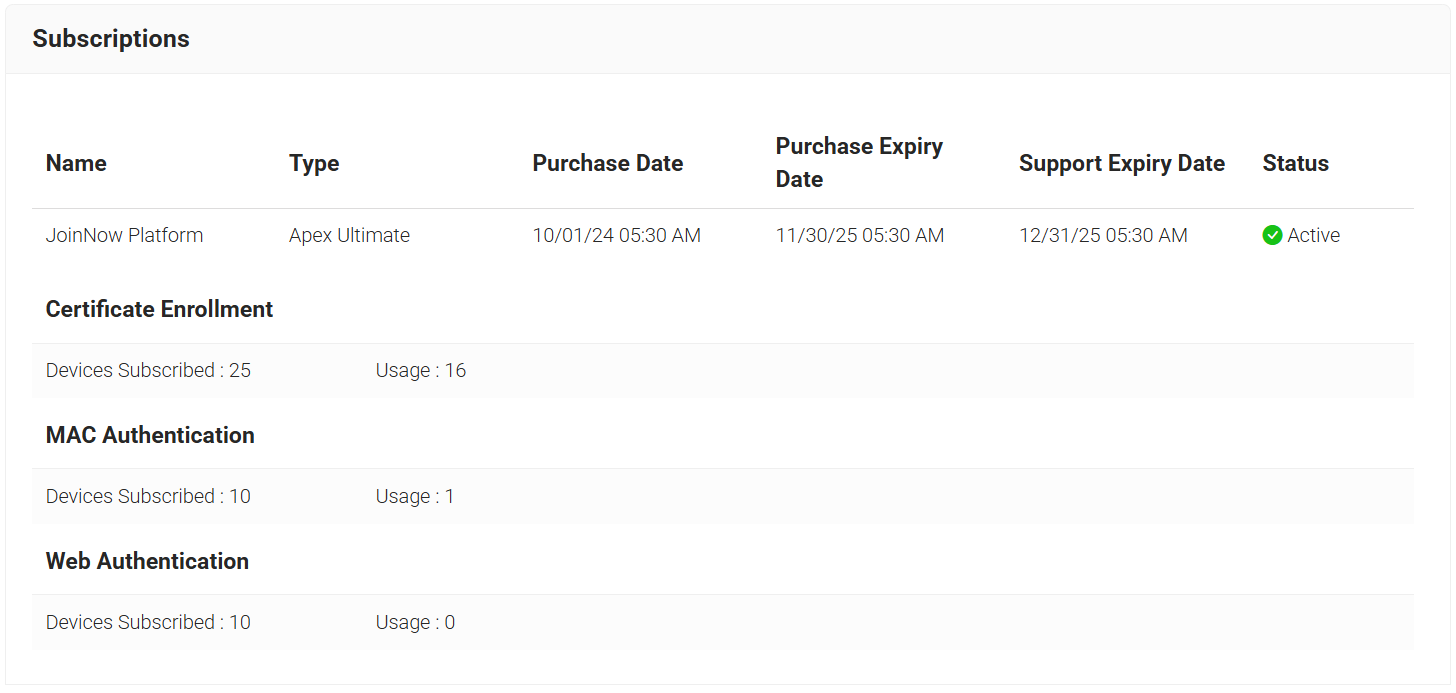
A new report type named “Total Enrolled Guest Devices” has been added to the Predefined Reports page to track enrolled guest devices. To view the Total Enrolled Guest Devices report, navigate to Data and Monitoring > Reports > Predefined Reports.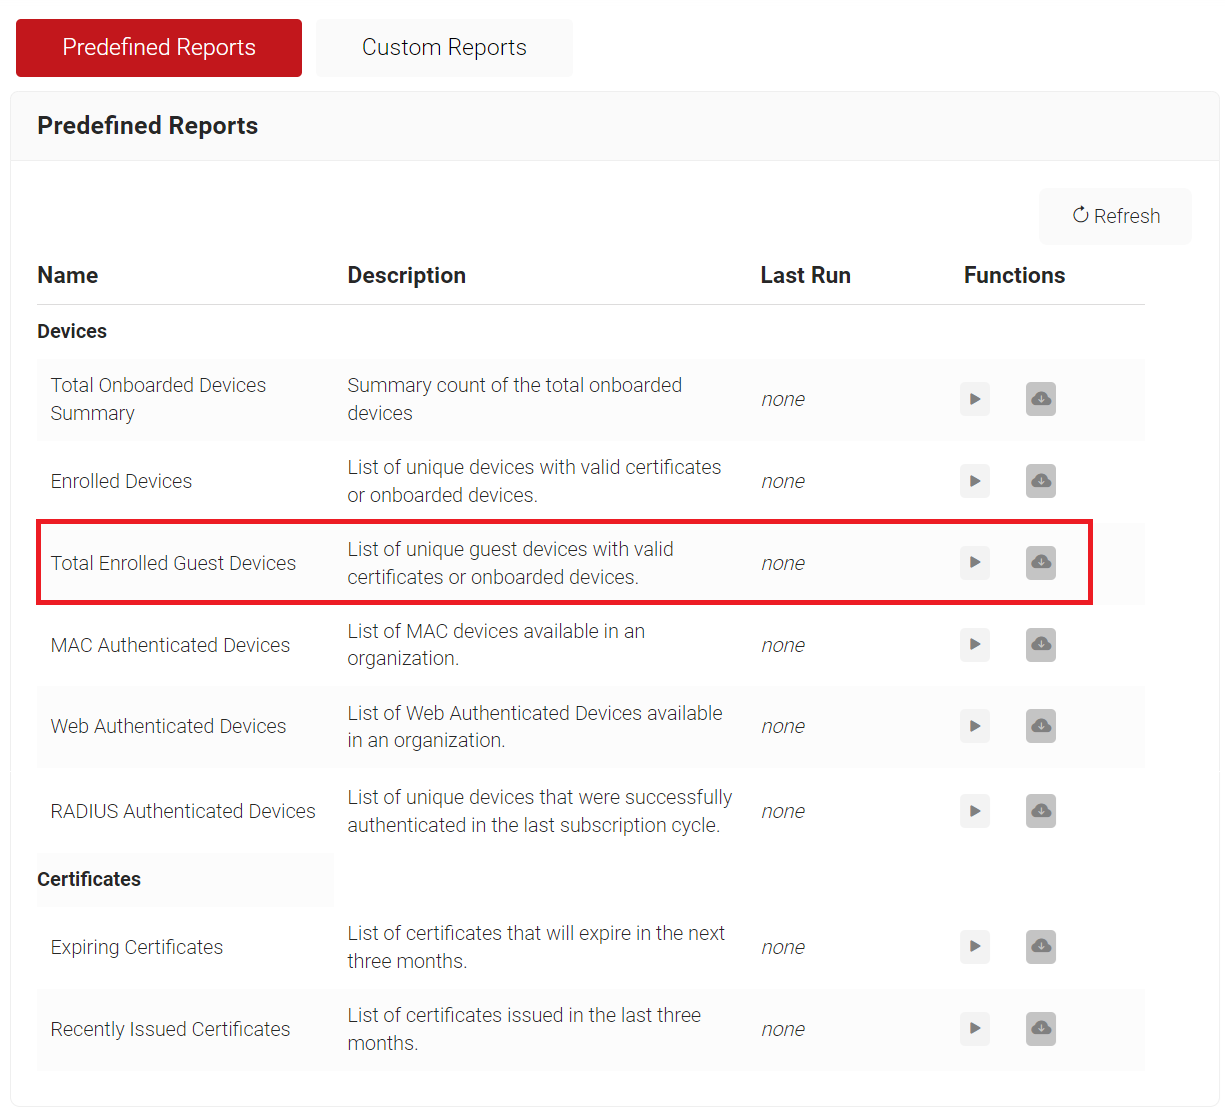
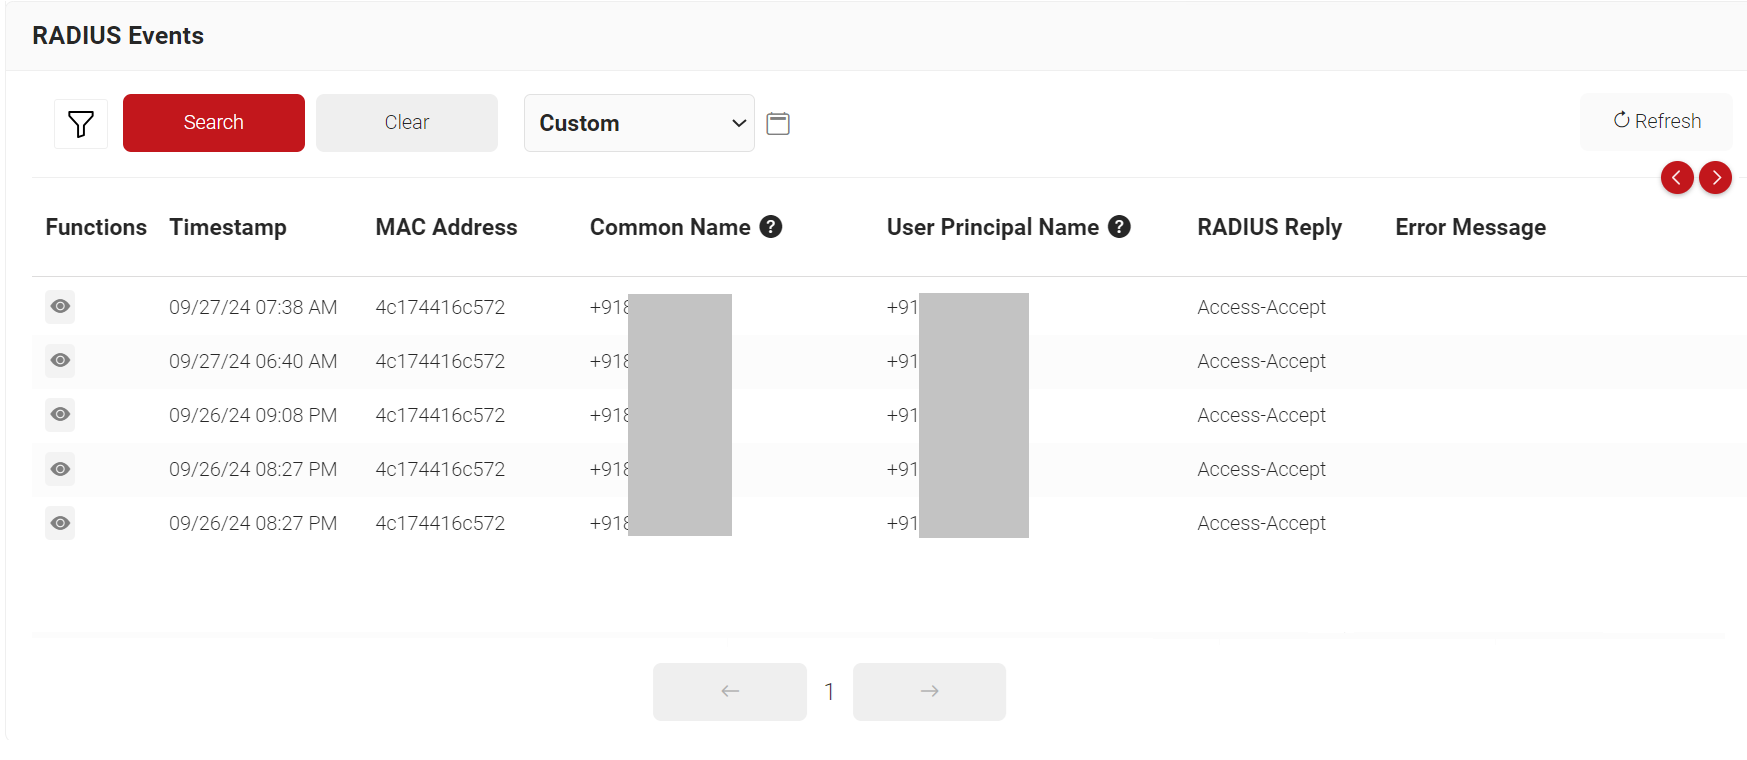
Wi-Fi Authentication events for guests are available on the RADIUS Events page. To access the RADIUS Events page, log in to the JoinNow Management Portal and navigate to Data and Monitoring > RADIUS Events.