WPA2-Enterprise Configuration & Certificate Issuance on Raspberry Pi

Introduction

Raspberry Pi devices are highly versatile and can support a wide range of applications. When deployed in enterprise environments such as businesses, schools, or large-scale IoT installations, securing network connectivity is essential.

WPA2-Enterprise provides robust 802.1X-based network authentication and is a recommended standard for protecting devices on managed networks. Deploying Raspberry Pi devices with WPA2-Enterprise helps ensure that each device uses secure authentication methods and is protected against unauthorized network access.

This guide explains how to configure Raspberry Pi devices for WPA2-Enterprise connectivity and how to enroll and deploy certificates for certificate-based authentication.

Can Raspberry Pi Run WPA2-Enterprise or 802.1x?

Yes, Raspberry Pi supports any type of  802.1x network security, from WEP to WPA to WPA2.

The benefits of WPA2 primarily lie in the increased security and control it offers over its predecessors. Take full advantage of WPA-2 on your Raspberry Pi by using WPA2-Enterprise and certificate-based network authentication.

With SecureW2, you can replace login credentials with digital certificates for network authentication. This confers several advantages:

  1. Tie an identity to the device or user, so you know exactly who or what is accessing the network
  2. Prevent over-the-air credential theft, such as a man-in-the-middle attack
  3. Eliminate password-policy-related disconnects

Additionally, our world-class onboarding software allows you to automatically configure all of your Raspberry Pis for certificate enrollment – whether they are BYOD or managed devices. Instead of manually setting up each device, you can push out a config file and be done in minutes.

Configuring WPA2-Enterprise on Raspberry Pi

The SecureW2 Management suite is a powerful tool that allows you to generate a custom configuration file to push to your Raspberry Pis. While it is entirely possible to configure your Pi for WPA2-Enterprise without an onboarding solution, it’s fairly involved and doesn’t scale well.

The file is highly customizable so that you can tailor the solution to your exact needs. You could:

  1. Enroll your Raspberry Pis for certificates for WPA2-Enterprise network authentication directly
  2. Configure the Pis to access, move to, or forget a specific SSID
  3. Segment your Pis to a separate VLAN

And more! Between the JoinNow application and certificates-based security, your Raspberry Pi will be more versatile and more secure than ever.
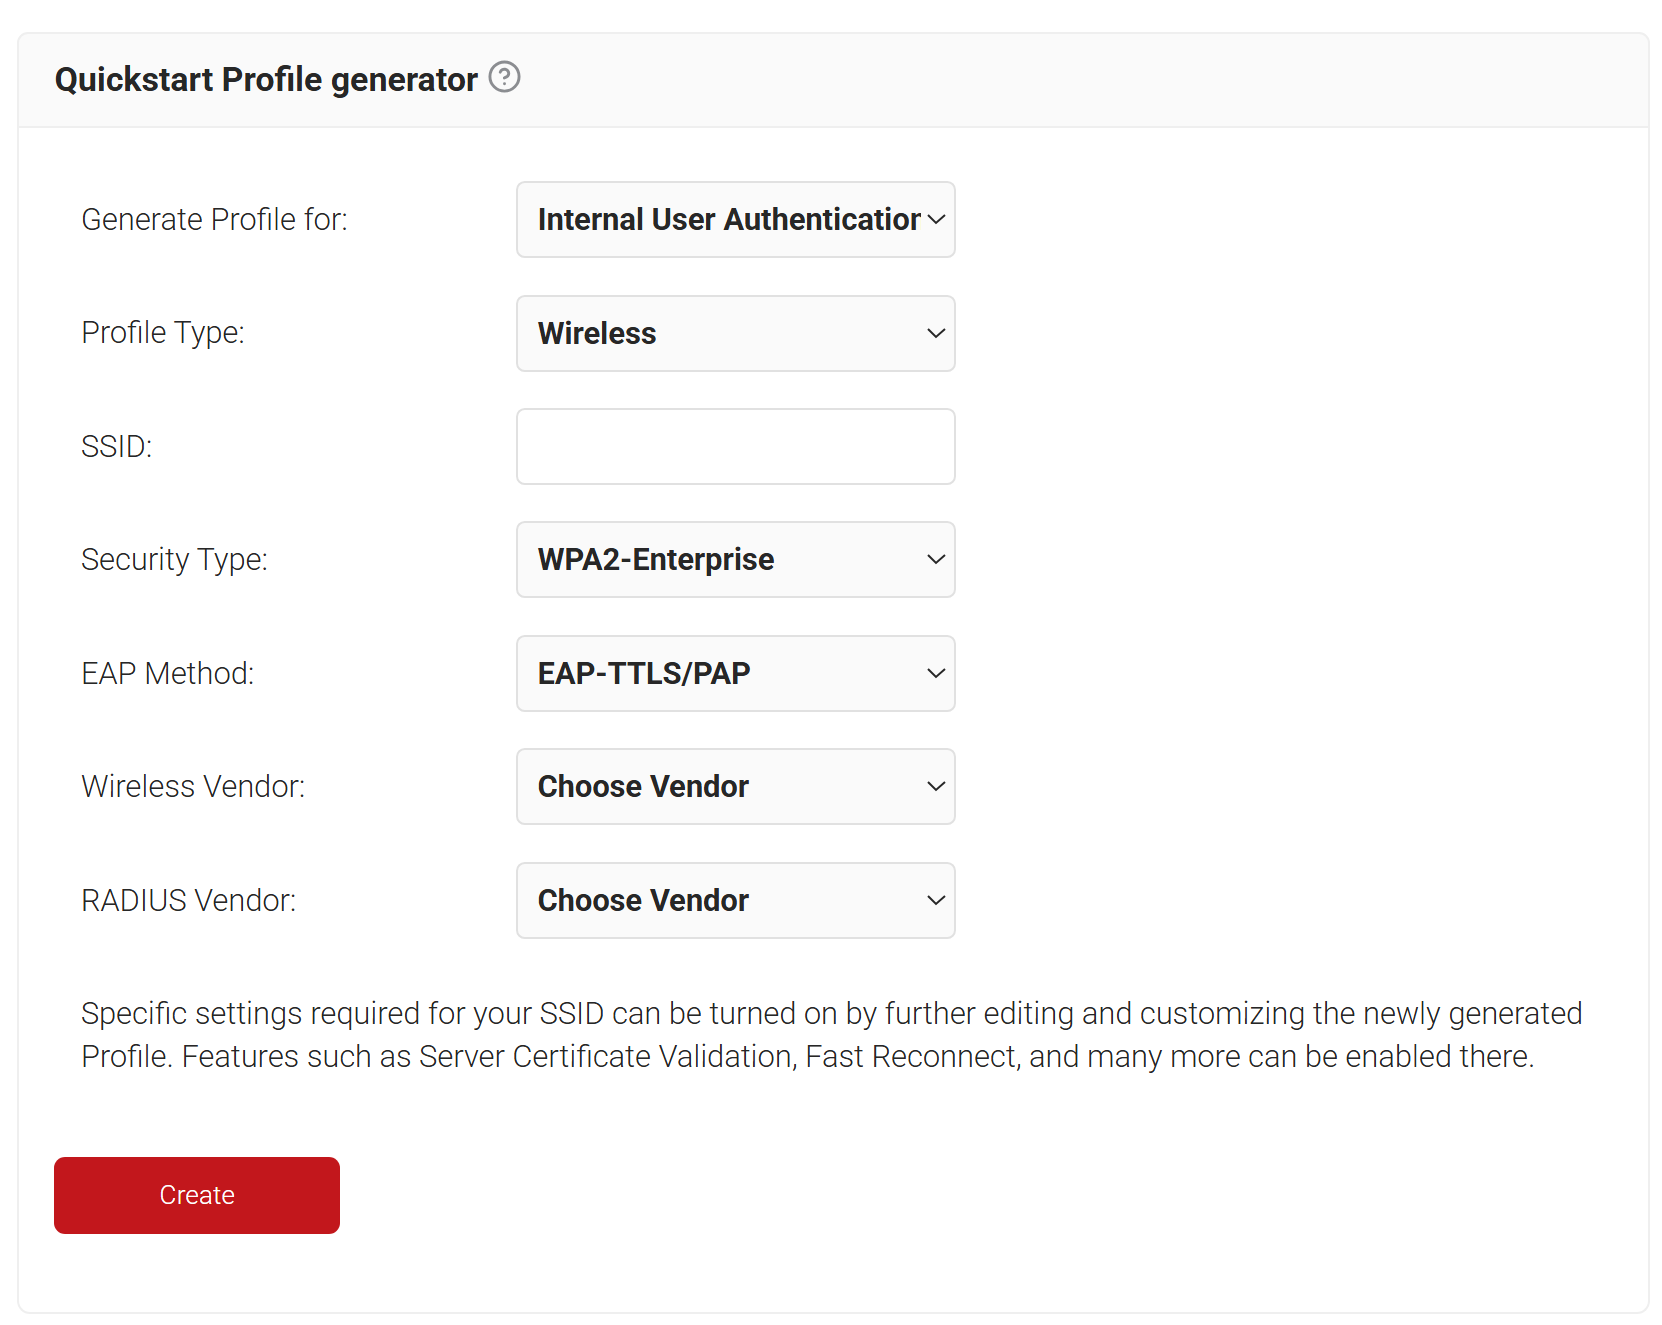
SecureW2 can be used to configure any 802.1x Wi-Fi infrastructure, to use any WPA2-Enterprise protocol, on any device. Using our Getting Started Wizard, we first need to configure the network settings we will use on our WPA2-Enterprise network. Then the Wizard will create a landing page that will distribute the scripts we need to configure our Raspberry Pi.

Next, configure the Identity Provider you want to use, so your users can get authenticated using the SecureW2 App. Click here to learn more about how SecureW2 integrates with IDPs to configure WPA2-Enterprise.

How to Install Client Certificates on a Raspberry Pi

Manually Installing Client Certificates on a Raspberry Pi / Linux Device

At a very high level, manually installing certificates on a Raspberry Pi takes 4 steps:

  1. Obtain a unique client certificate and it’s issuing CA certificate and convert them to PEM format
    1. This isn’t too difficult for one user, but ensuring it’s done correctly on an organizational level is a nightmare.
  2. Make a new Certificate directory
    1. sudo mkdir /usr/local/share/certificates/
  3. Upload your certificates to your Raspberry Pi
    1. You can do this through a USB
      1. sudo cp /media/pi/USB_STICK/my_certificate.pem /usr/local/share/certificates
    2. Or by issuing the Certificate directly on to your Pi. We recommend this option, as it ensures the Private Key only exists on the device.
      1. cd /usr/local/share/ca-certificates/local wget https://sample-certificate-website.com/certificate.pem
  4. Update the main certificate trust store to reflect the new certificates
    1. sudo update-ca-certificates

Installing Client Certificates with SecureW2

Using SecureW2 PKI services, end users can easily self-enroll any device for certificates. You can generate your own public-private key pair, or you can upload your own CA and issue certificates. Contact us to learn more about setting up our PKI to work with your Raspberry Pis.

Once you’ve configured that, the SecureW2 landing page can create scripts that will issue out unique client certificates to your Raspberry Pi.

  1. Download and launch the JoinNow application. It should identify your Pi as a Linux device – if it doesn’t select Linux from the dropdown list of ‘devices’.
  2. Click the JoinNow It will download a custom shell script to your device.
  3. Run the command sh SecureW2_JoinNow.run. The Pi will run the script and finish downloading the SecureW2 JoinNow client.certificate raspberry pi

Once JoinNow is downloaded and installed, your Pi will be configured to the specifications outlined during the configuration step.

Manual Configuration of Raspberry Pi for WPA2-Enterprise

If you just need to set up a single Pi, this might help. These are the files that helped Reddit user /u/BitingChaos configure his Pi for university Wi-Fi using the WPA2-Enterprise PEAP MSCHAPv2 protocol.


/etc/network/interfaces

				
					auto lo
iface lo inet loopback
allow-hotplug wlan0
iface wlan0 inet manual
wpa-roam /etc/wpa_supplicant/wpa_supplicant.conf
iface default inet dhcp


/etc/wpa_supplicant/wpa_supplicant.conf

				
					ctrl_interface=DIR=/var/run/wpa_supplicant GROUP=netdev
update_config=1

network={
# network name / ssid
ssid="school"
# authentication method
key_mgmt=WPA-EAP
eap=PEAP
phase2="auth=MSCHAPV2"
# username and password
identity="insert username"
password="insert password"
}