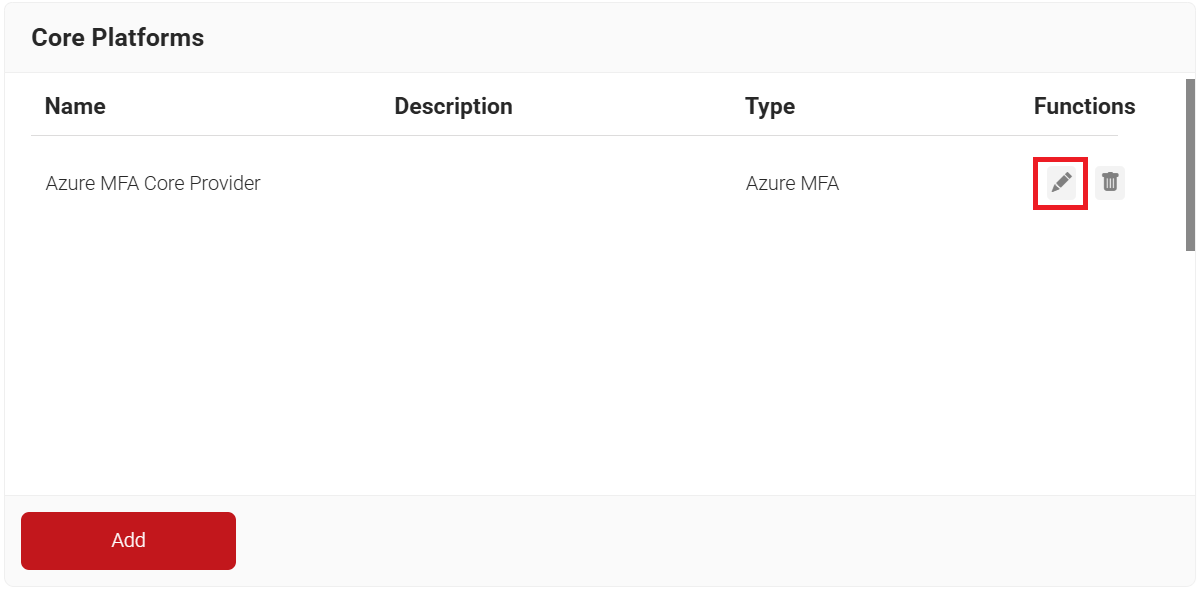
To create an Azure MFA Core Provider:
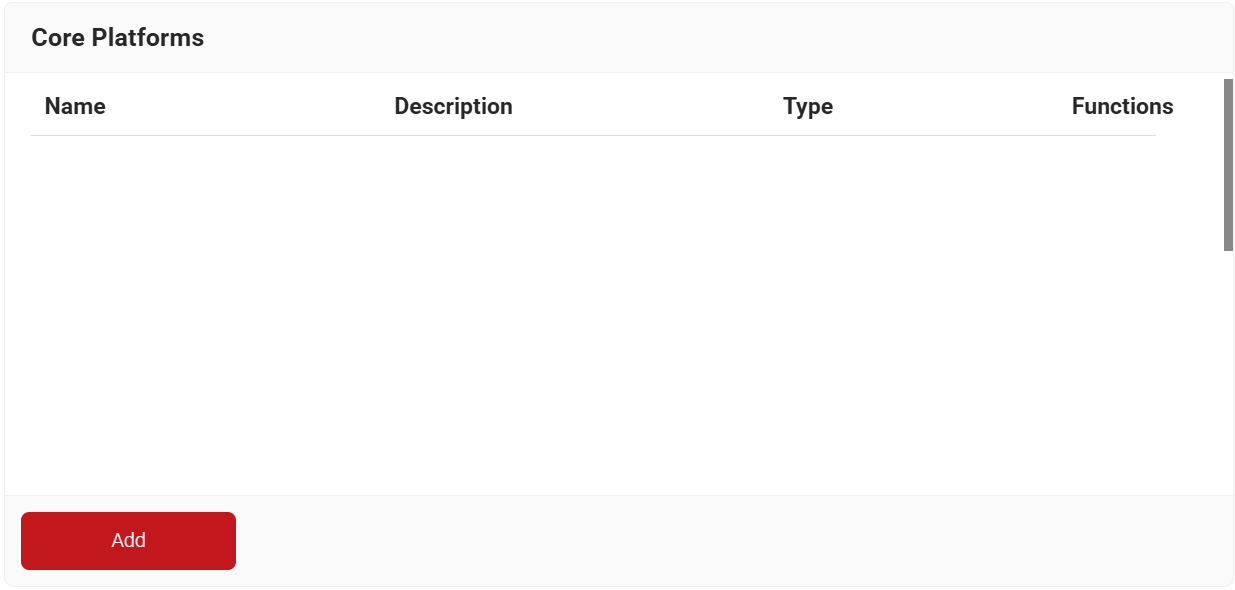
- Navigate to Integration Hub > Core Platforms.
- Click Add.
- In the Name and Description fields, enter an appropriate name and description for the Core Provider.
- From the Type drop-down list, select Azure MFA.
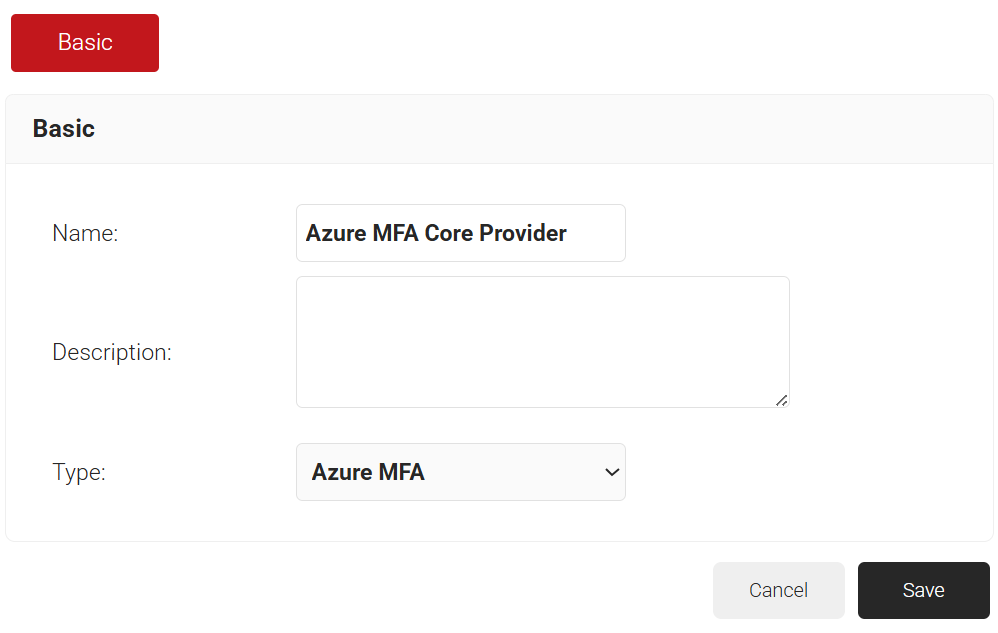
- Click Save.
- Click the Configuration tab.
- In the Tenant ID field, enter the Directory (tenant) ID obtained from the Microsoft Azure portal. For more information on how to obtain the Tenant ID, refer to the Configuring Dynamic RADIUS with Azure to Support WPA2-Enterprise page.
- From the Identity drop-down list, select the certificate-based attribute.
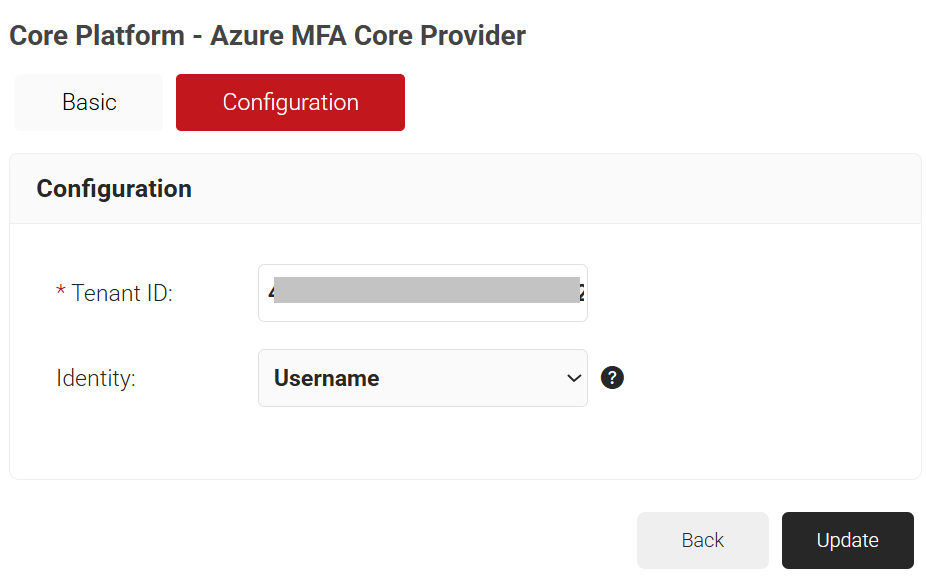
- Click Update.
- For the newly added Core Provider, click the Edit icon.
- Navigate to the Configuration tab.
a. Click the Download button to save the setup script file.
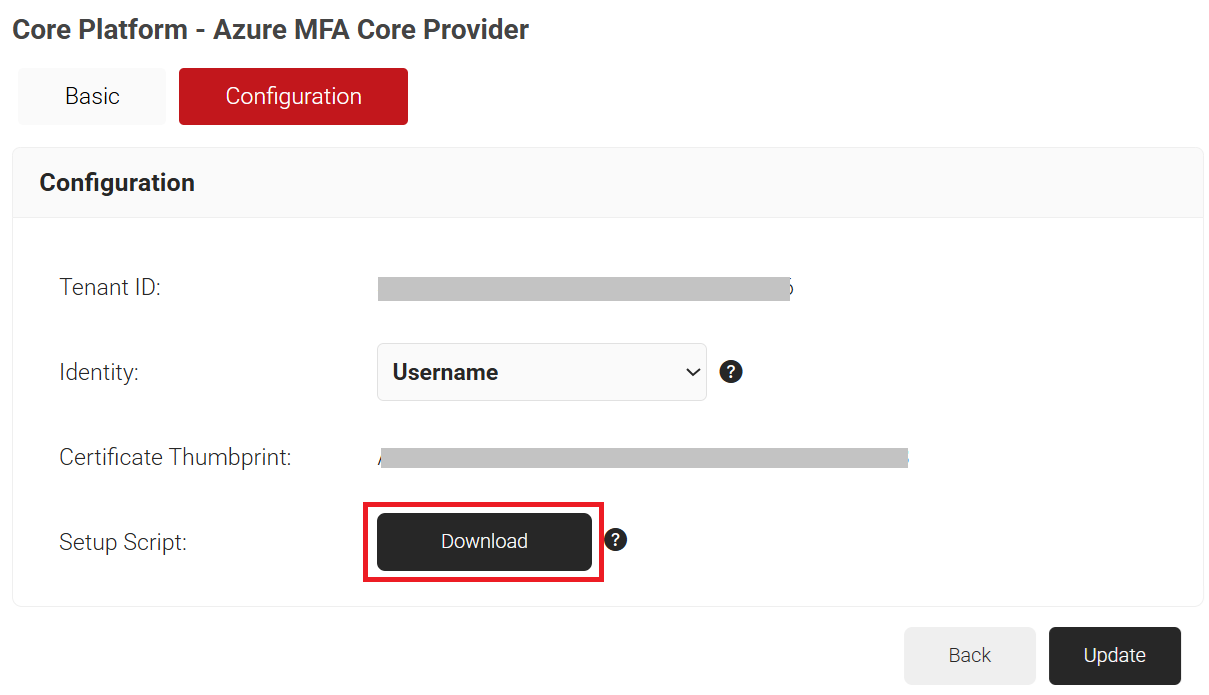
NOTE: You need to run the Powerscript file to complete the setup. The PowerScript file is supported only in Windows.
- On your Windows machine, click Start, type PowerShell, and select Run as administrator.
- On the command line, go to the location of the PowerScript file and run the following command: powershell -ExecutionPolicy Bypass -File “Azure MFA Authorization Script.ps1”
- You need to install certain packages, and you will be prompted with the following messages:
- The MSOnline module is not installed on the system. Automatically install it? – Type “Y”
- NuGet provider is required to continue. PowerShellGet requires NuGet provider version ‘2.8.5.201’ or newer to interact with NuGet-based repositories. The NuGet provider must be available in ‘C:\Program-Files\PackageManagement\ProviderAssemblies’ or ‘C:\Users\user\AppData\Local\PackageManagement \ProviderAssemblies’. You can also install the NuGet provider by running the Install-PackageProvider-Name NuGet -MinimumVersion 2.8.5.201 – Force the command. Do you want PowerShellGet to install and import the NuGet provider now? – Type “Y”
- This script will enable SecureW2 to access your Azure Strong Authentication Service in order to verify users in your Azure organization with Tenant ID < >. In order to do so, you will have to log in to Azure using an organization admin account. Continue? – Type “Y”
- The Azure sign-in window is displayed. Enter the organization admin account credentials and click Sign in.
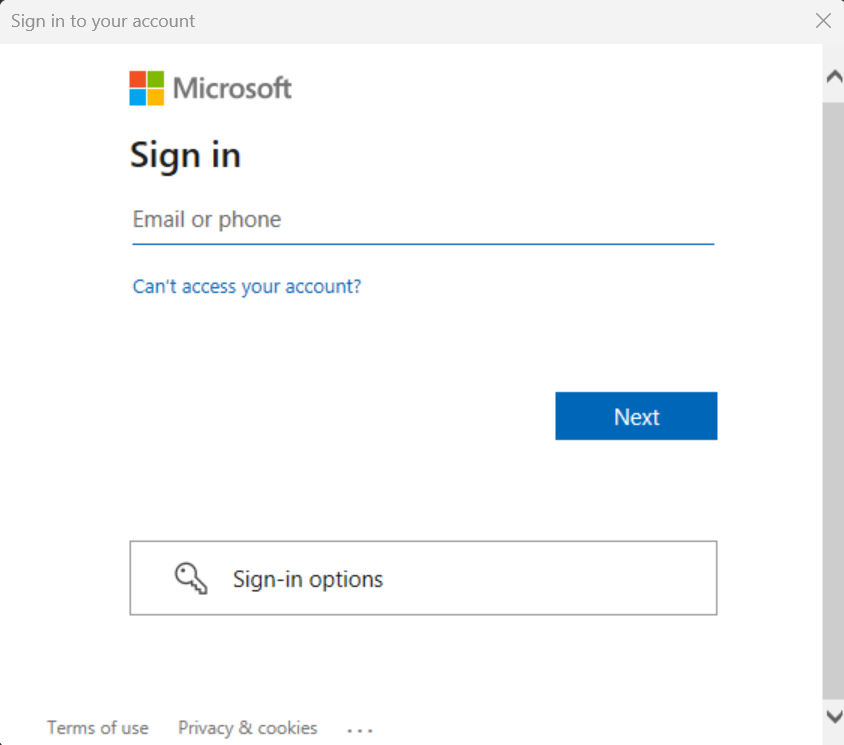 NOTE: You need to use the latest version of Firefox or Chrome as your default browser.
On successful authorization, the following message is displayed at the prompt: “Azure Strong Authentication Service OAuth credential registered successfully.”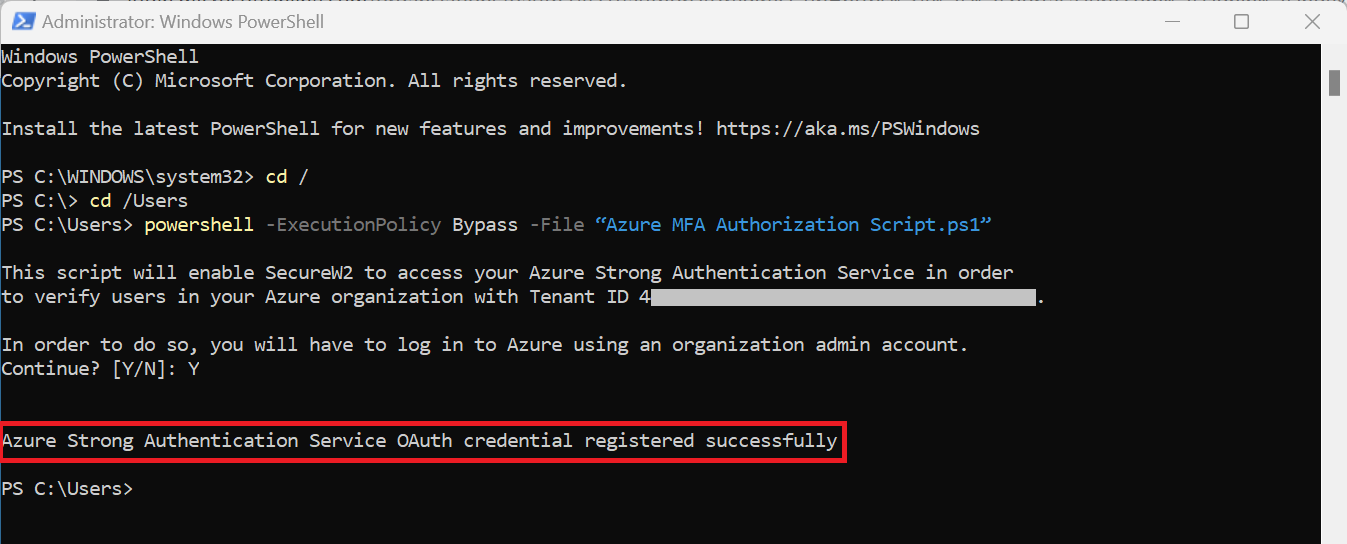
- Navigate to Device Onboarding > Getting Started.
- On the Quickstart Network Profile generator page, from the Generate Profile for drop-down list, select Internal User Authentication.
- From the Profile Type drop-down list, select Virtual Private Network.
- In the Profile Name field, enter a suitable name for the VPN profile.
- From the VPN Vendor drop-down list, select a vendor.
- Global Protect VPN Client – Enter only the VPN Server Address.
- Native VPN Client – Enter both the VPN Server Address and VPN Shared Secret.
- From the RADIUS Vendor drop-down list, select a vendor. If you select a vendor other than the SecureW2 RADIUS server, ensure you have the Root or Intermediate CA that issued the RADIUS server certificates.
- Click the Choose file button to upload a profile logo.
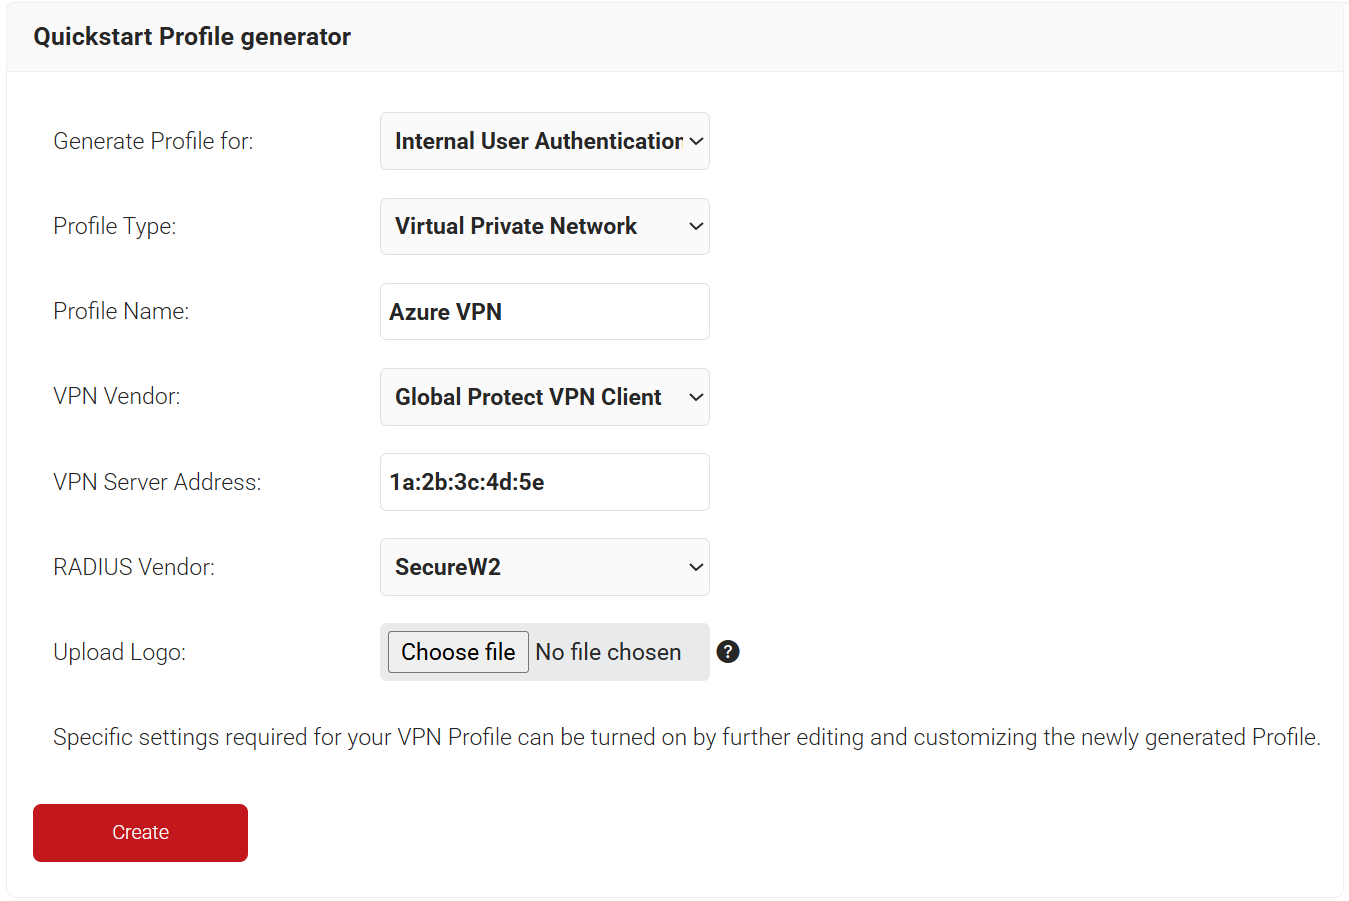
- Click Create.
To map the VPN profile to the Core Provider for authentication:
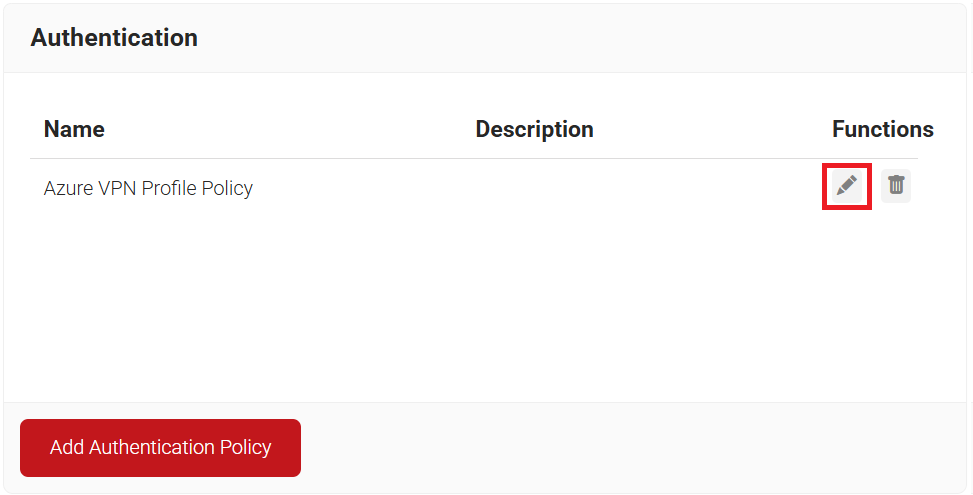
- Navigate to Policy Management > Authentication.
- Click the Edit link of the newly created VPN profile policy.
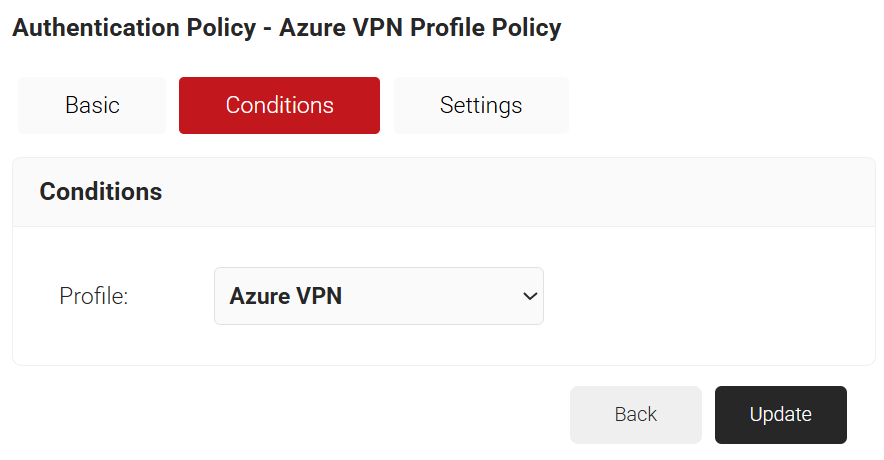
- Select the Conditions tab and make sure that your network profile is displayed in the Profile field.
- Click the Settings tab, and from the Core Provider drop-down list, select the Azure MFA core provider you created earlier for authentication (refer to the Creating an Azure MFA Core Provider section).
- Select the Enable User Self Service checkbox if required.

- Click Update.
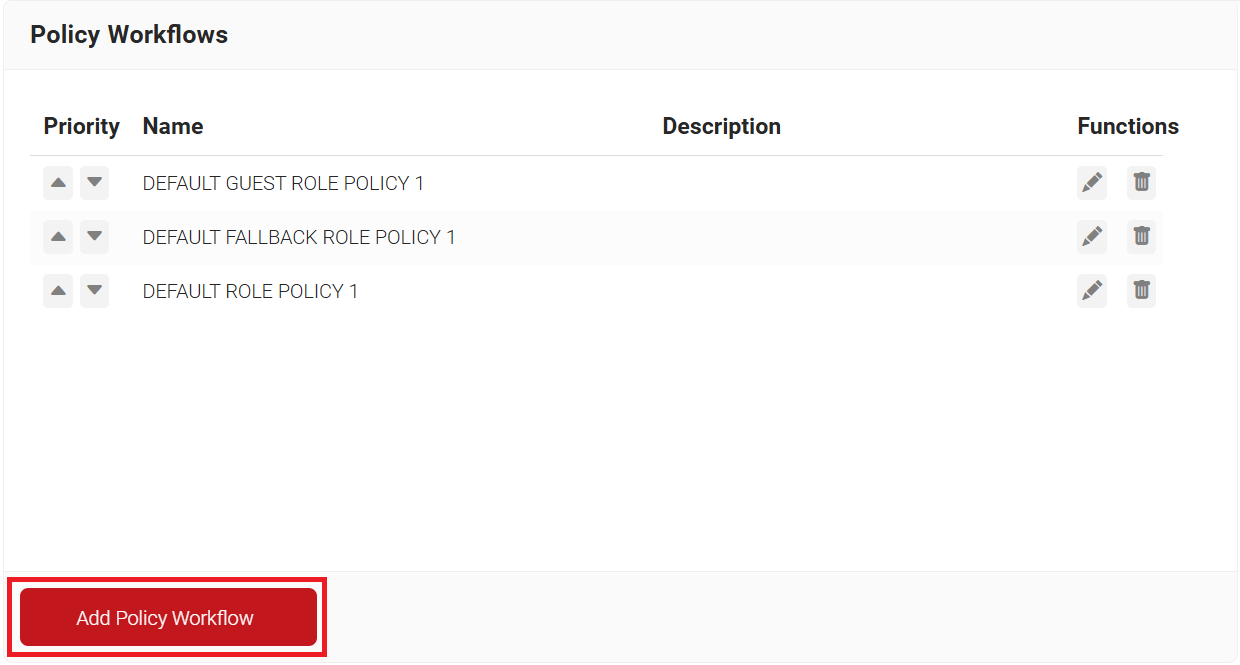
To create a Policy Workflow, perform the following steps:
- Navigate to Policy Management > Policy Workflows.
- Click Add Policy Workflow.
- In the Basic section, enter the name of the policy workflow in the Name field.
- In the Display Description field, enter a suitable description for the policy workflow.
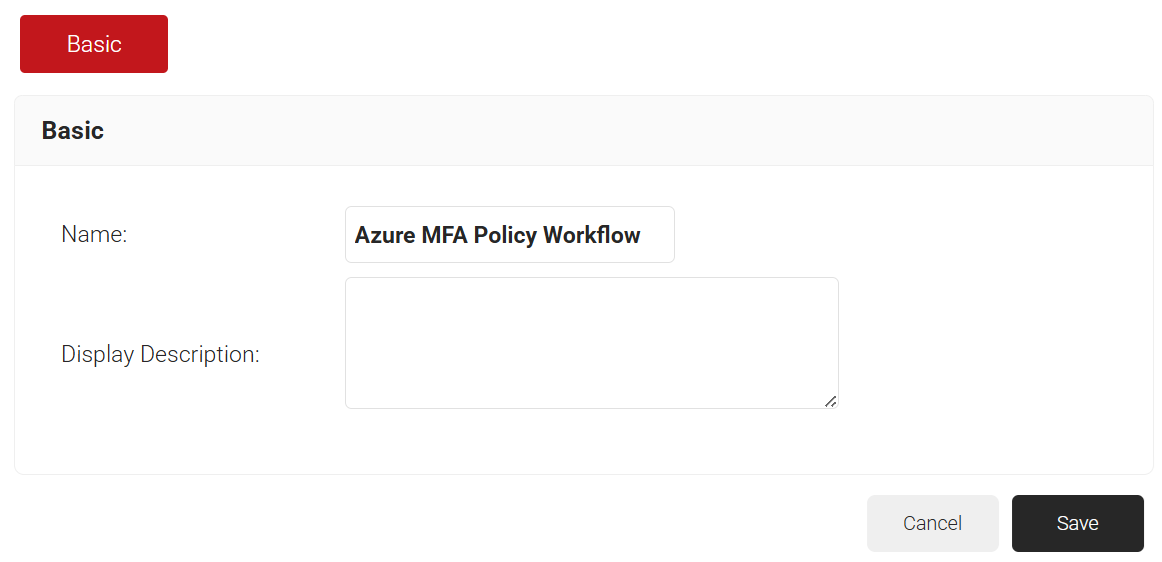
- Click Save.
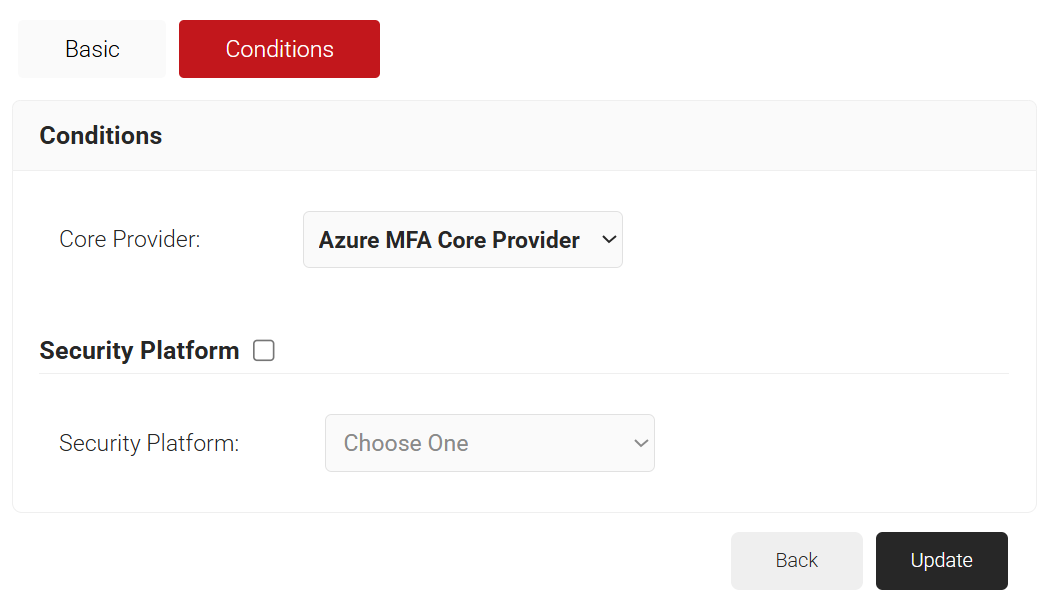
- The page refreshes, and the Conditions tab is displayed.
- Select the Conditions tab.
- From the Core Provider drop-down list, select the Azure MFA Core Provider created earlier in the Creating an Azure MFA Core Provider section.
- From the Core Provider drop-down list, select the Azure MFA Core Provider created earlier in the Creating an Azure MFA Core Provider section.
- Click Update.
To configure the VPN profile for MFA:
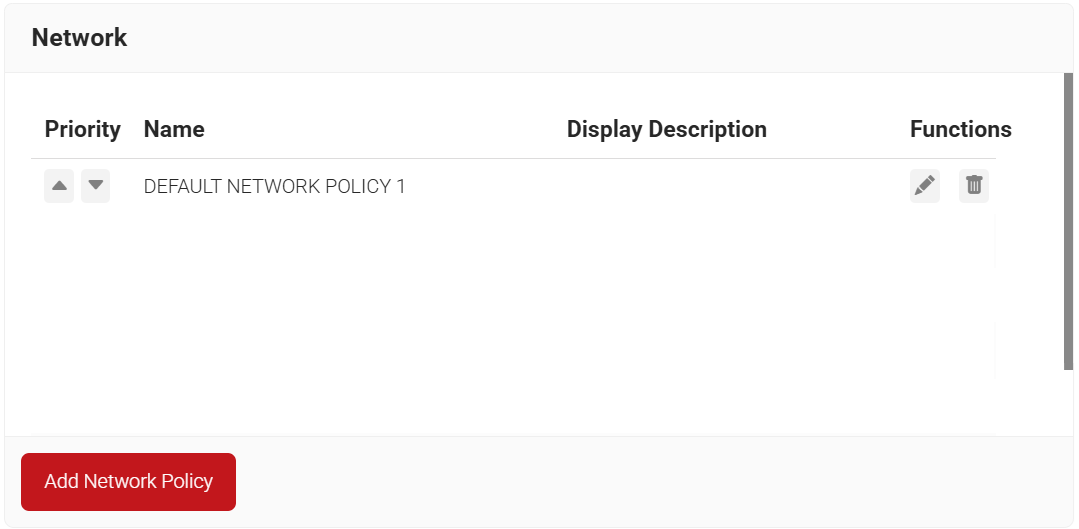
- Navigate to Policy Management > Network.
- Click Add Network Policy.
- On the displayed screen, enter a name and description for the network policy in the corresponding fields.
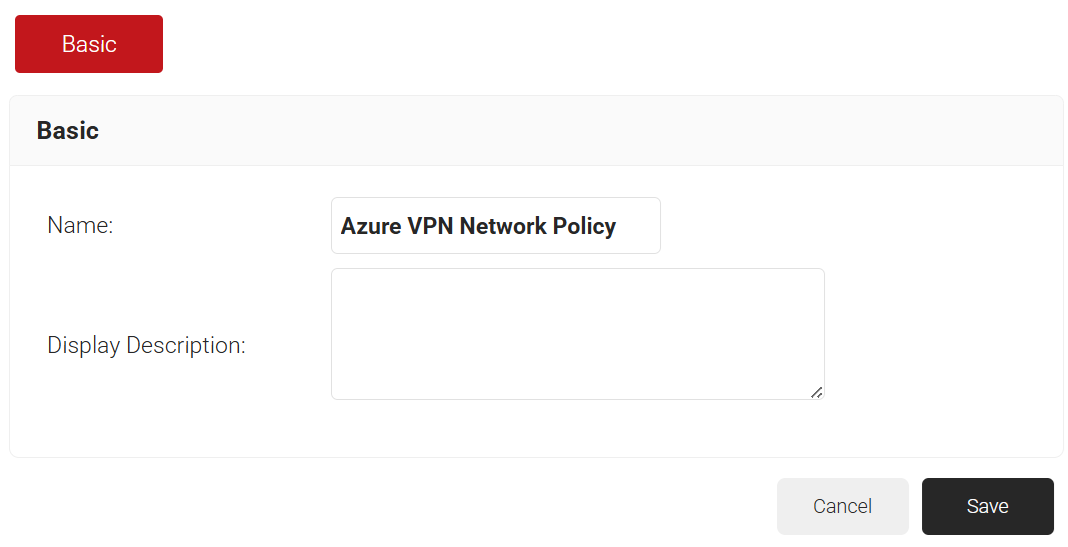
- Click Save.
- The page refreshes, and the Conditions and Settings tabs appear.
- Select the Conditions tab.
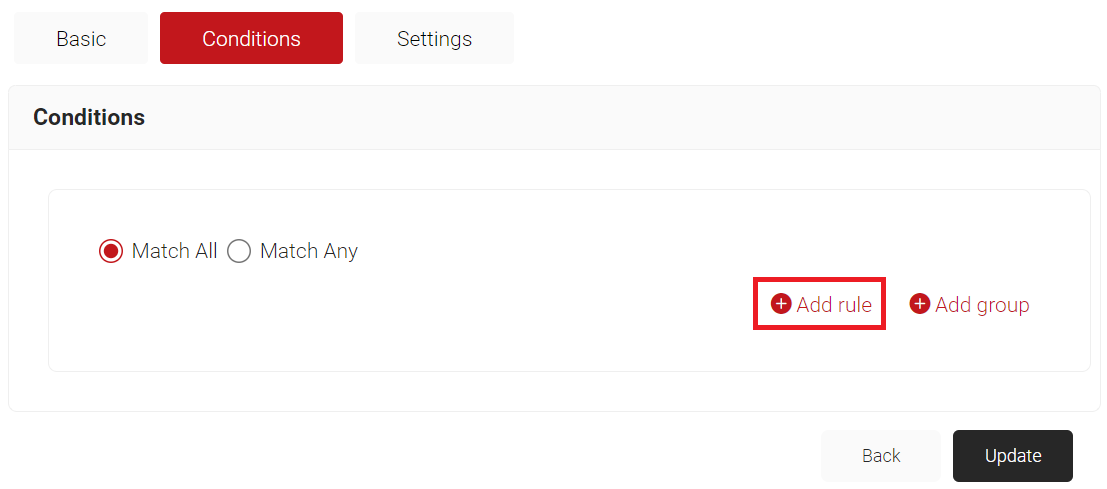
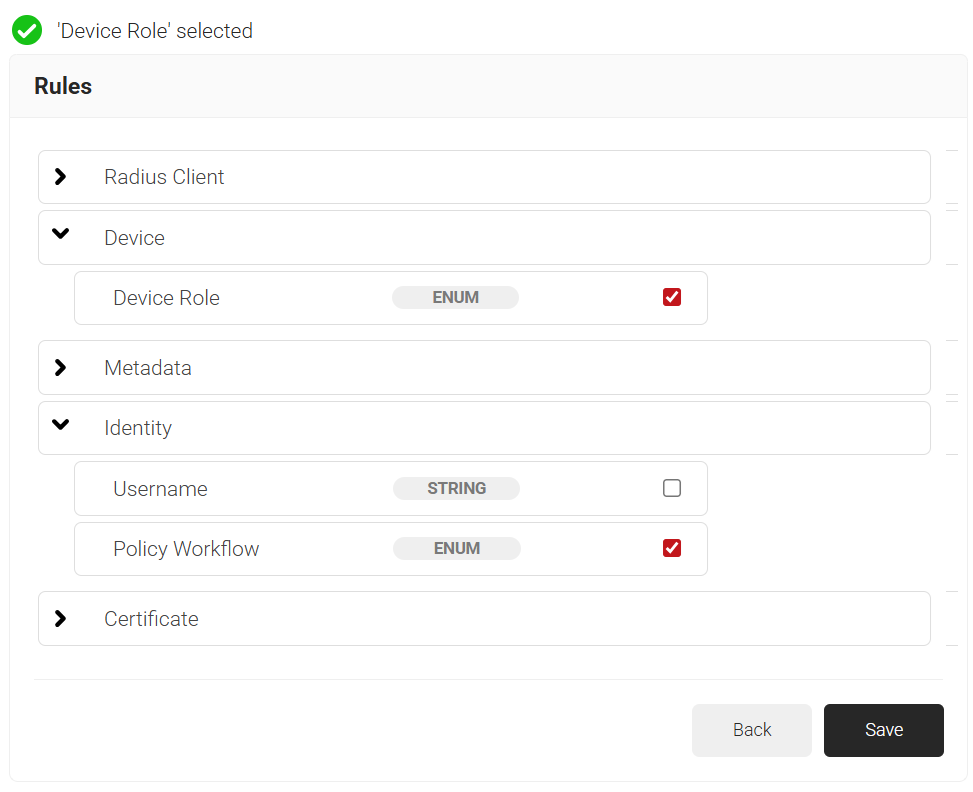
- Click the Add rule and select the role you want to assign to this network policy. It is essential to select the appropriate policy workflow, as it triggers the network policy. This menu offers various rules that you can select based on your business requirements.
NOTE: You can assign a network policy to multiple user roles.
- Click the Add rule and select the role you want to assign to this network policy. It is essential to select the appropriate policy workflow, as it triggers the network policy. This menu offers various rules that you can select based on your business requirements.
- Select the Settings tab.
- From the Access drop-down list, select any one of the options to allow or deny authentication requests. The default value is “Allow”.
- To configure MFA, select the checkbox to enable MFA.
- From the Perform MFA Using drop-down list, select a Core Provider for MFA.
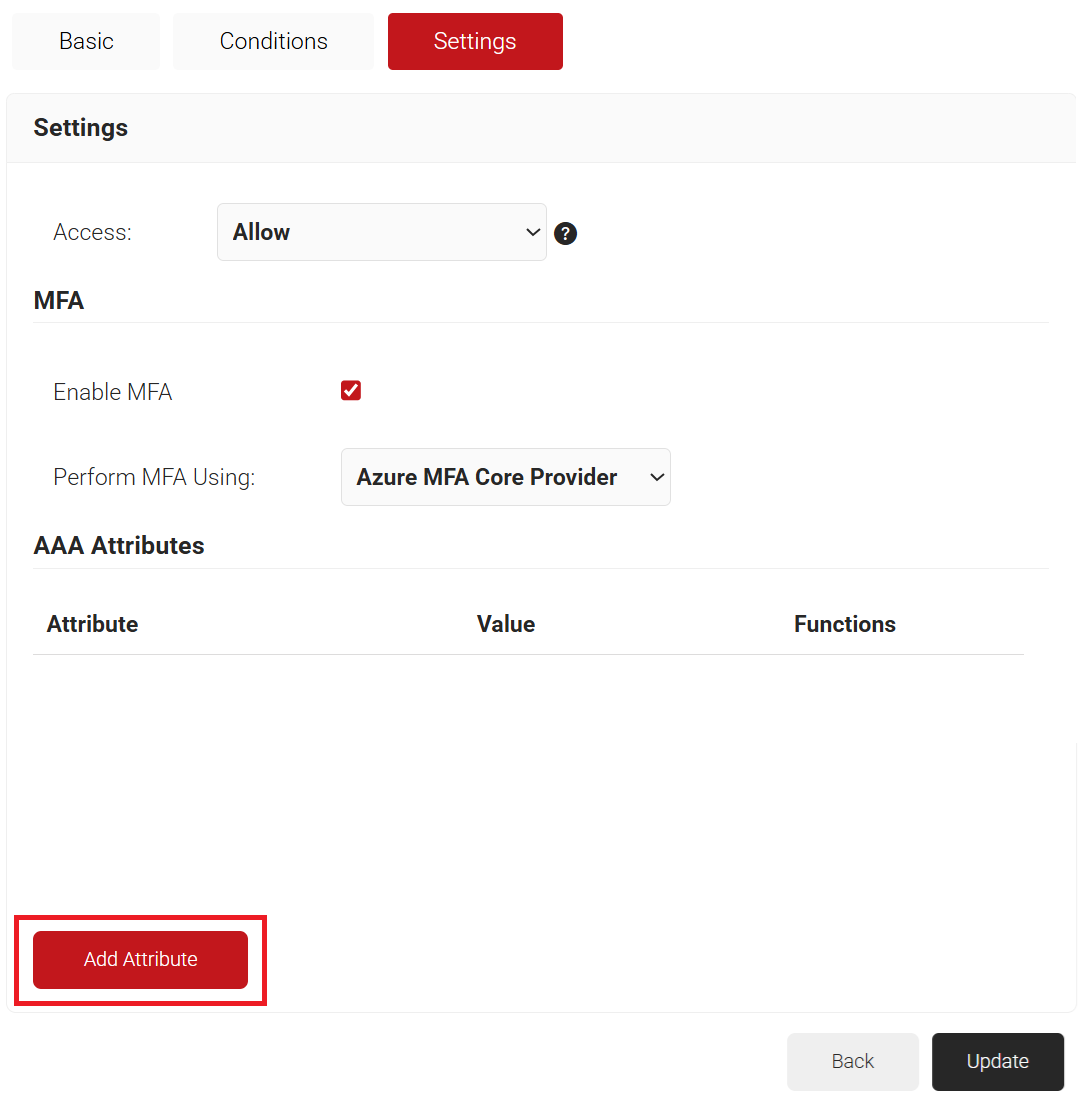
- Click Add Attribute.
- From the Dictionary drop-down list, select an option:
- Radius: IETF – This is what we will use for the following attributes, as we are using standard RADIUS attributes for VLAN assignment.
- Custom: Used for any VSAs (Vendor-Specific Attributes).
- From the Dictionary drop-down list, select an option:
- From the Attribute drop-down list, select an option.
- Framed-Protocol
- Framed-IP-Address
- Framed-IP-NetMask
- Framed-Routing
- Filter-Id
- Framed-MTU
- Framed-Compression
- Reply-Message
- Framed-Route
- Framed-IPX-Network
- State
- Class
- Session-Timeout
- Tunnel-Type
- Tunnel-Medium-Type
- Tunnel-Private-Group-ID
- Framed-Pool
- User-Name
- In the Value field, enter the appropriate value for the attribute.
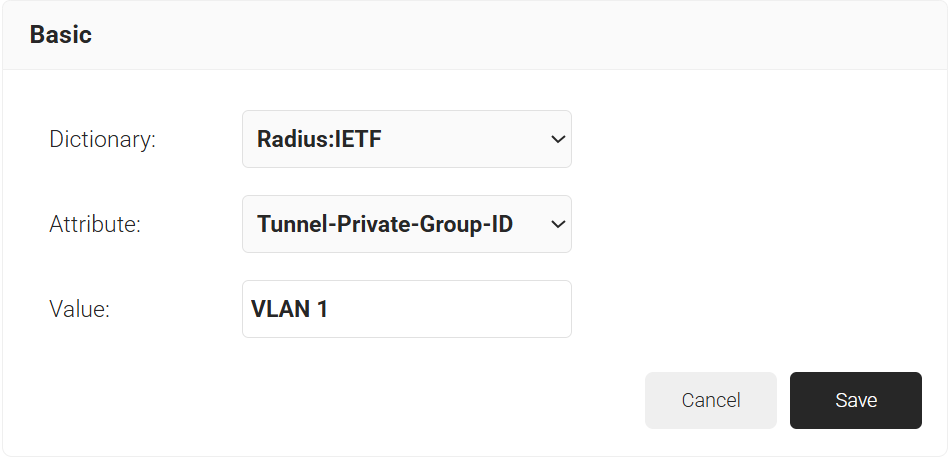
- Click Save.
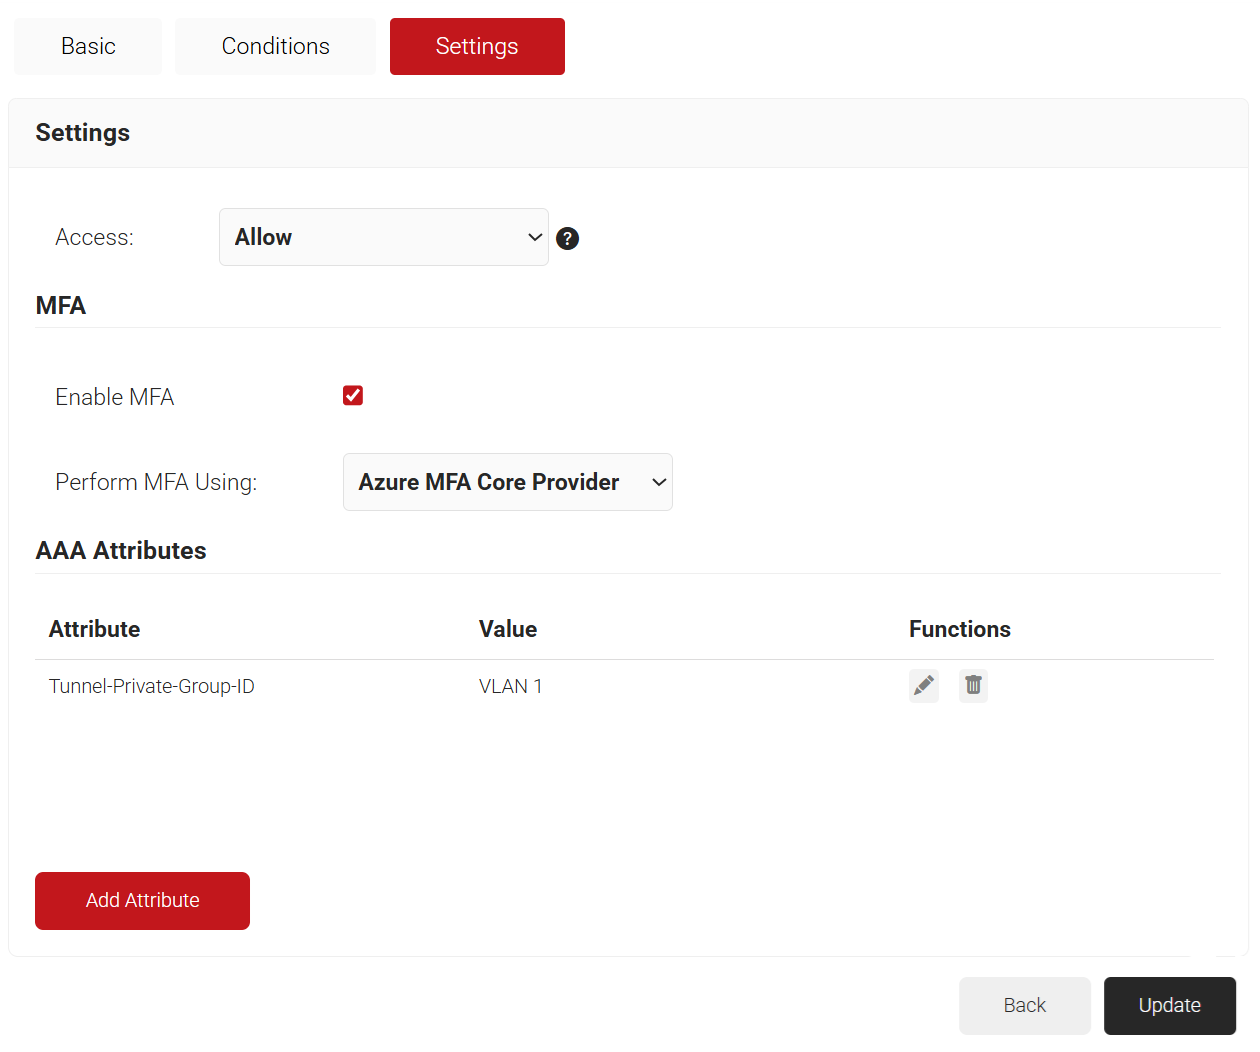
- Repeat for any other RADIUS attribute you would like to send. For reference, here is what is commonly required for VLAN Assignment:
- Tunnel-Medium-Type: IEE-802
- Tunnel-Private-Group-ID: {VLAN Name}
- Server Tunnel-Type: VLAN
- Click Update.
You can customize the Self Service Portal in any supported language so end users can easily download their credentials and configure the VPN.
To create a new language template for VPN settings:
- Navigate to Self Service > Templates.
- Click Add Template.

- In the Name field, type a name for the VPN template.
- In the Display description field, type a suitable description.
- In the Locale field, enter the required language (for example, for English type “en” and for Dutch, “nl”).
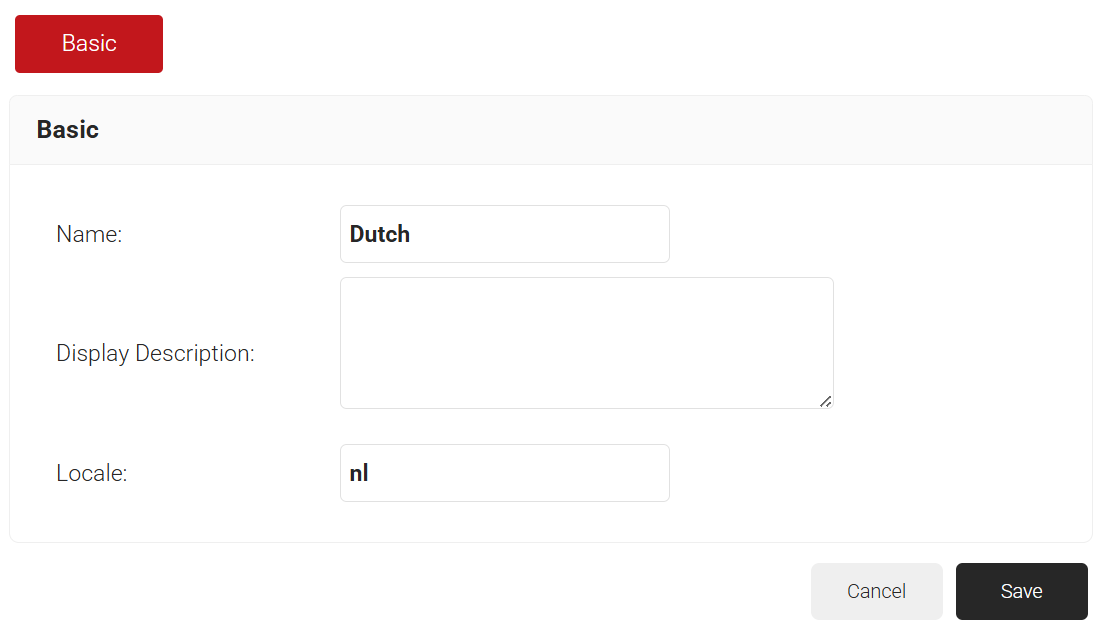
- Click Save.
- Click the VPN tab and enter appropriate values in the different fields.
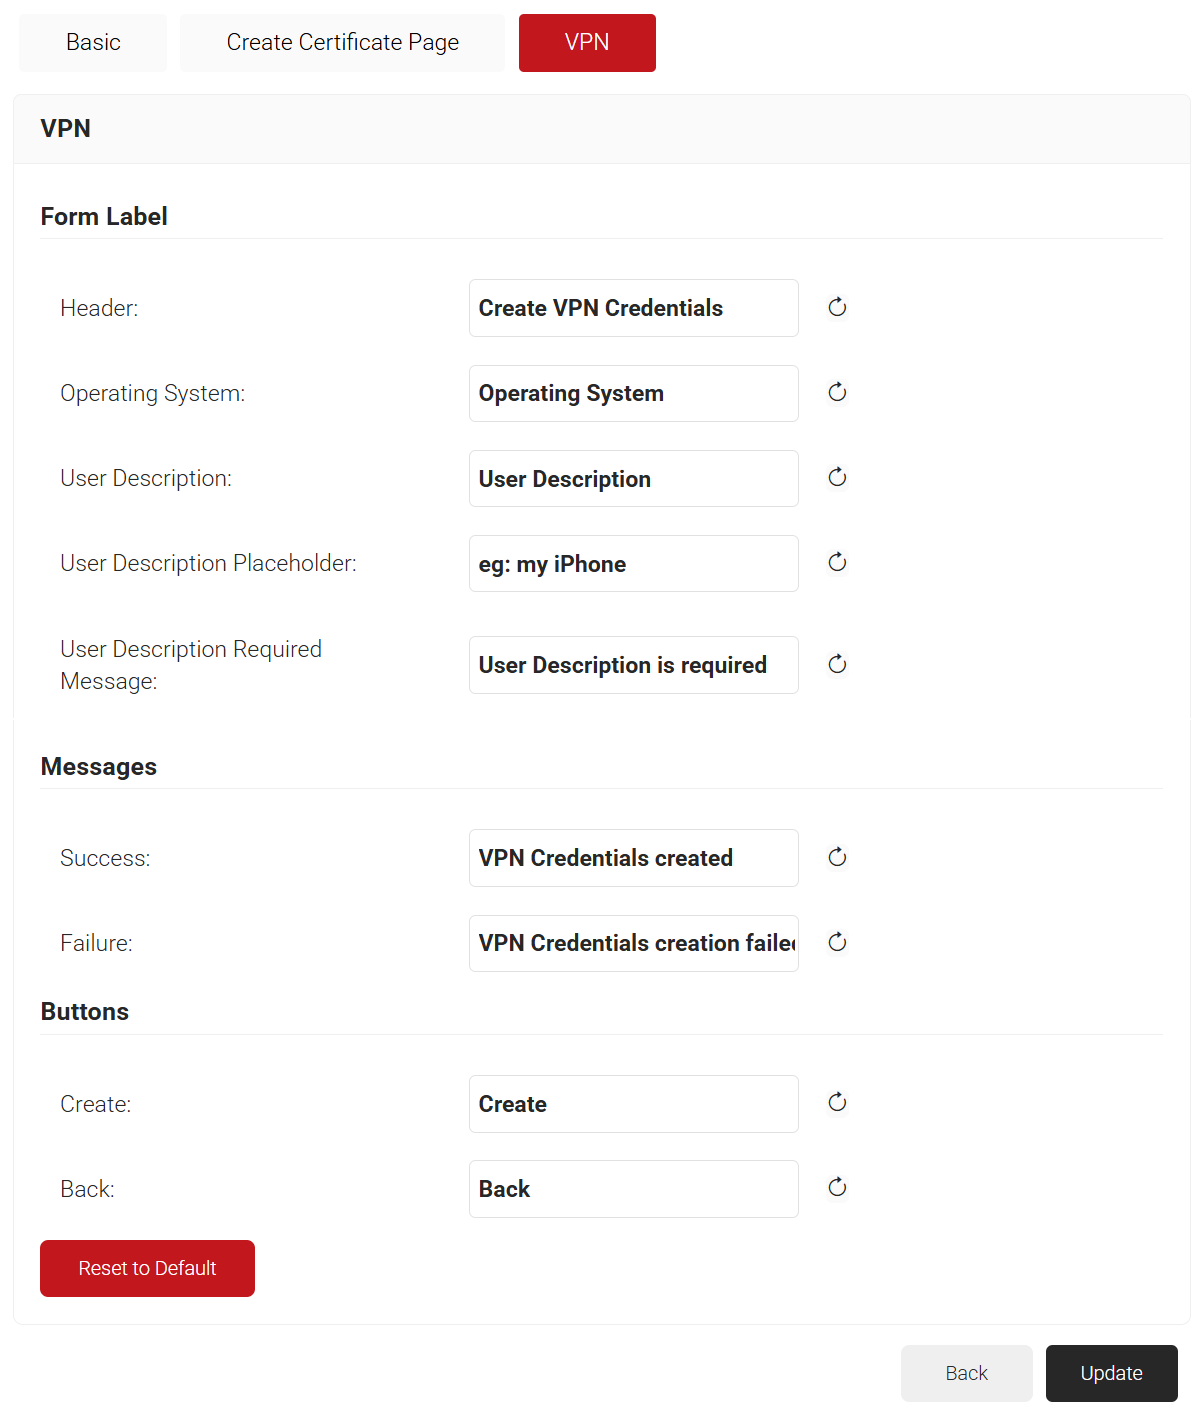
- Click Save. Now, administrators can configure VPN on the Self Service Portal in the specified language.
To customize settings for the VPN:
- Go to Self Service > Settings and click the VPN tab. The following screen is displayed.

- In the Basic section, select an option to set the Device Description input to mandatory, optional, or not to be displayed.
- Click Update. The following screen is displayed.
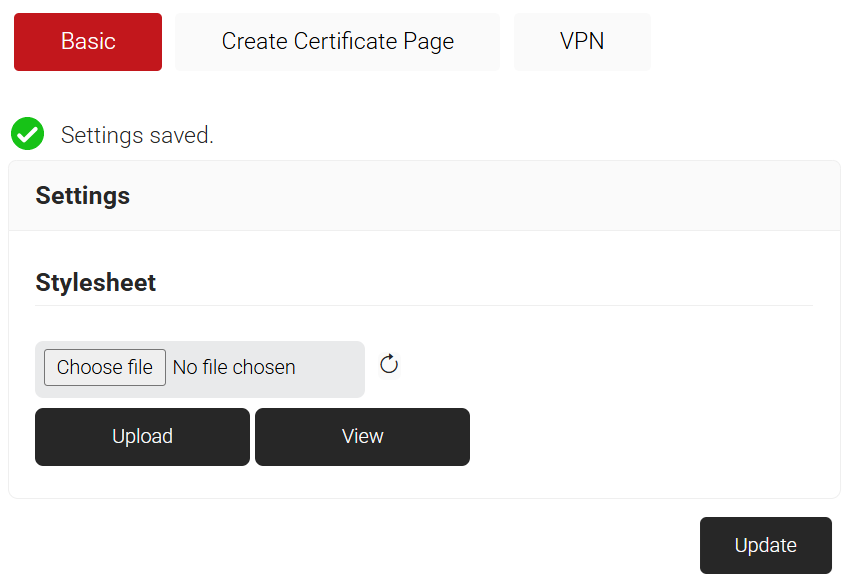
- To upload the required stylesheet, click Choose file and then click Upload.
- Click Update.
Since Cloud RADIUS supports token-based VPN authentication, RADIUS authentication events are displayed in Data and Monitoring > RADIUS Events.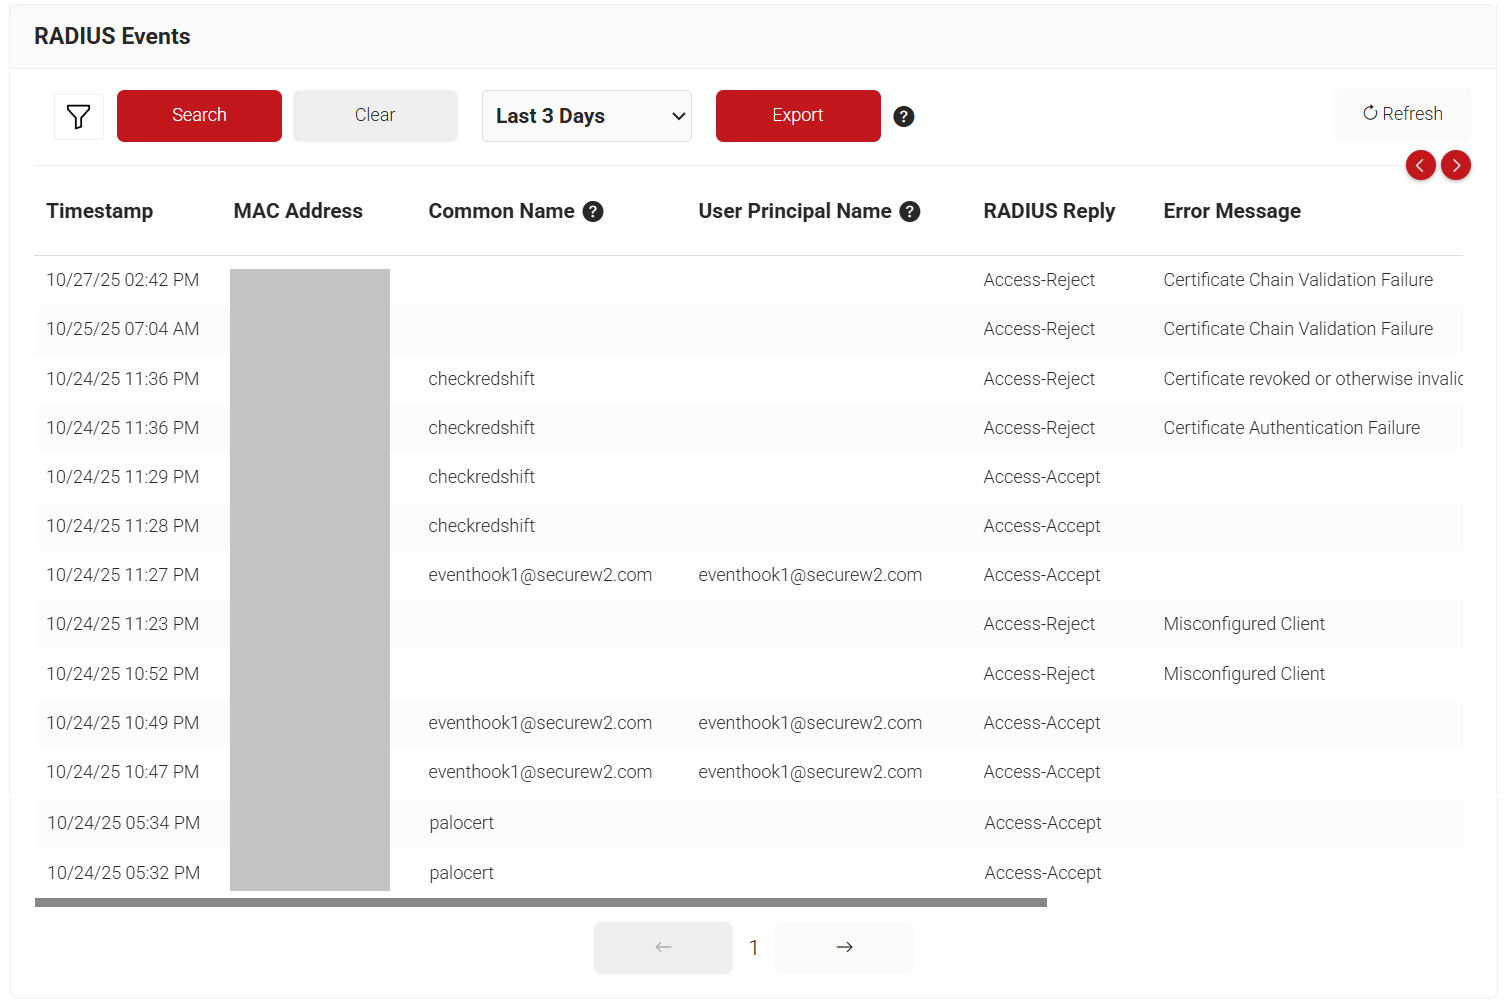
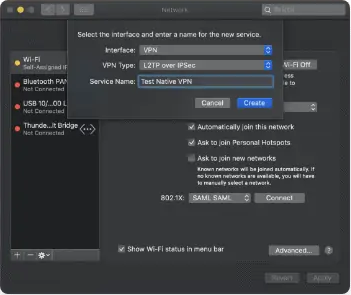
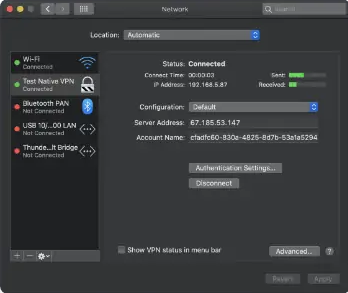
- On your Mac, click the Apple logo > System Preferences > Network.
- Click the + button at the bottom of the left pane.
- In the pop-up menu, from the Interface drop-down list, select VPN.
- From the VPN Type drop-down list, select L2TP over IPSec.
- In the Service Name field, type a name for the service and then click Create.
- On the Network window, enter the Server Address and Account Name for the VPN connection in the respective fields. These values are available in the vpn-credentials.txt file downloaded from the SecureW2 Landing page.
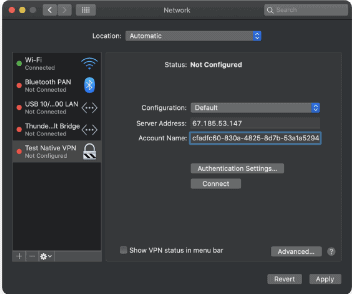
- Click Authentication Settings. In the pop-up window, enter the password and shared secret in their respective fields. These values are available in the vpn-credentials.txt file downloaded from the SecureW2 Landing page. Click OK and then click Apply.
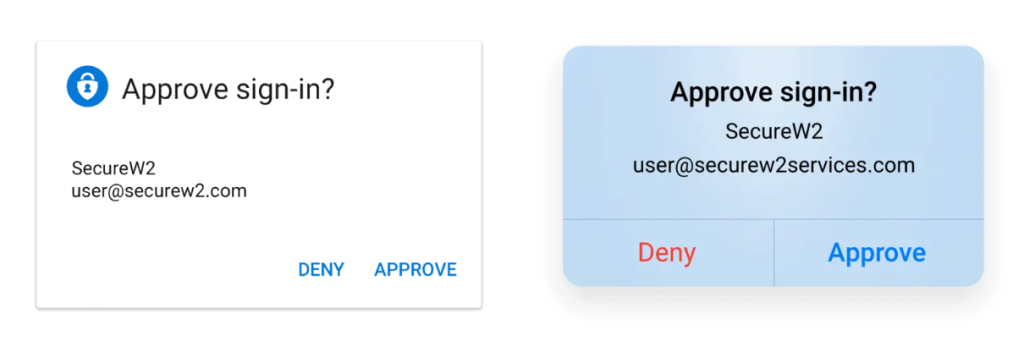
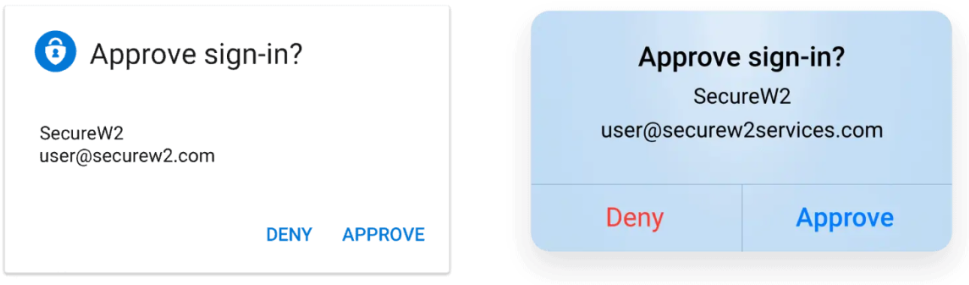
- Once the credentials are verified, you will receive an “Approve sign-in?” MFA prompt from Azure. Select Approve on the prompt on your MFA device.
- After multi-factor authentication (MFA) is approved, you will be connected to the VPN.
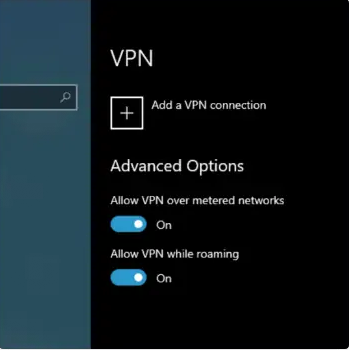
- Click Start, then go to Settings > Network & Internet > VPN.
- Click the + button to add a VPN connection.
- In the Add a VPN connection window:
- From the VPN provider drop-down list, select Windows (built-in).
- In the Connection name field, enter a VPN connection name (for example, My Personal VPN).
- In the Server name or address field, enter the VPN server’s IP address.
- From the VPN type drop-down list, choose L2TP/IPsec with pre-shared key.
- From the Type of sign-in info drop-down list, choose Username and password.
- In the Username (optional) and Password (optional) fields, enter the username and password and then click Save.
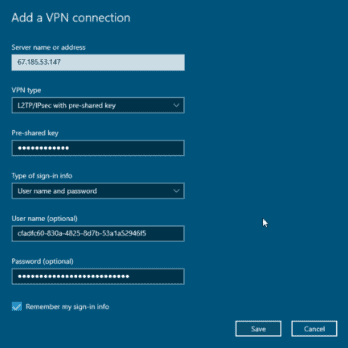 Note: The Server IP, Username, Password, and Pre-shared key values are available in the VPN-credentials.txt file downloaded from the SecureW2 Landing page.
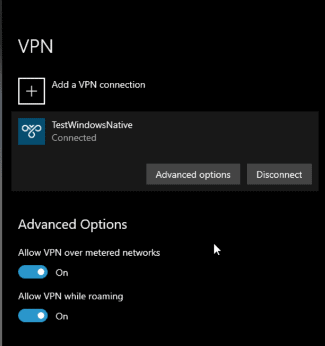
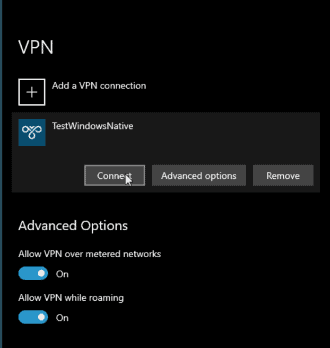
- On the VPN window, select the VPN connection you just created and click Connect.
- Once the credentials are verified, you will receive an “Approve sign-in?” MFA prompt from Azure. Select Approve on the prompt on your MFA device.
- After successful multi-factor authentication (MFA), you will be connected to the VPN.