Creating an Application in Azure for Account Lookup
To register a new application in Azure, perform the following steps:
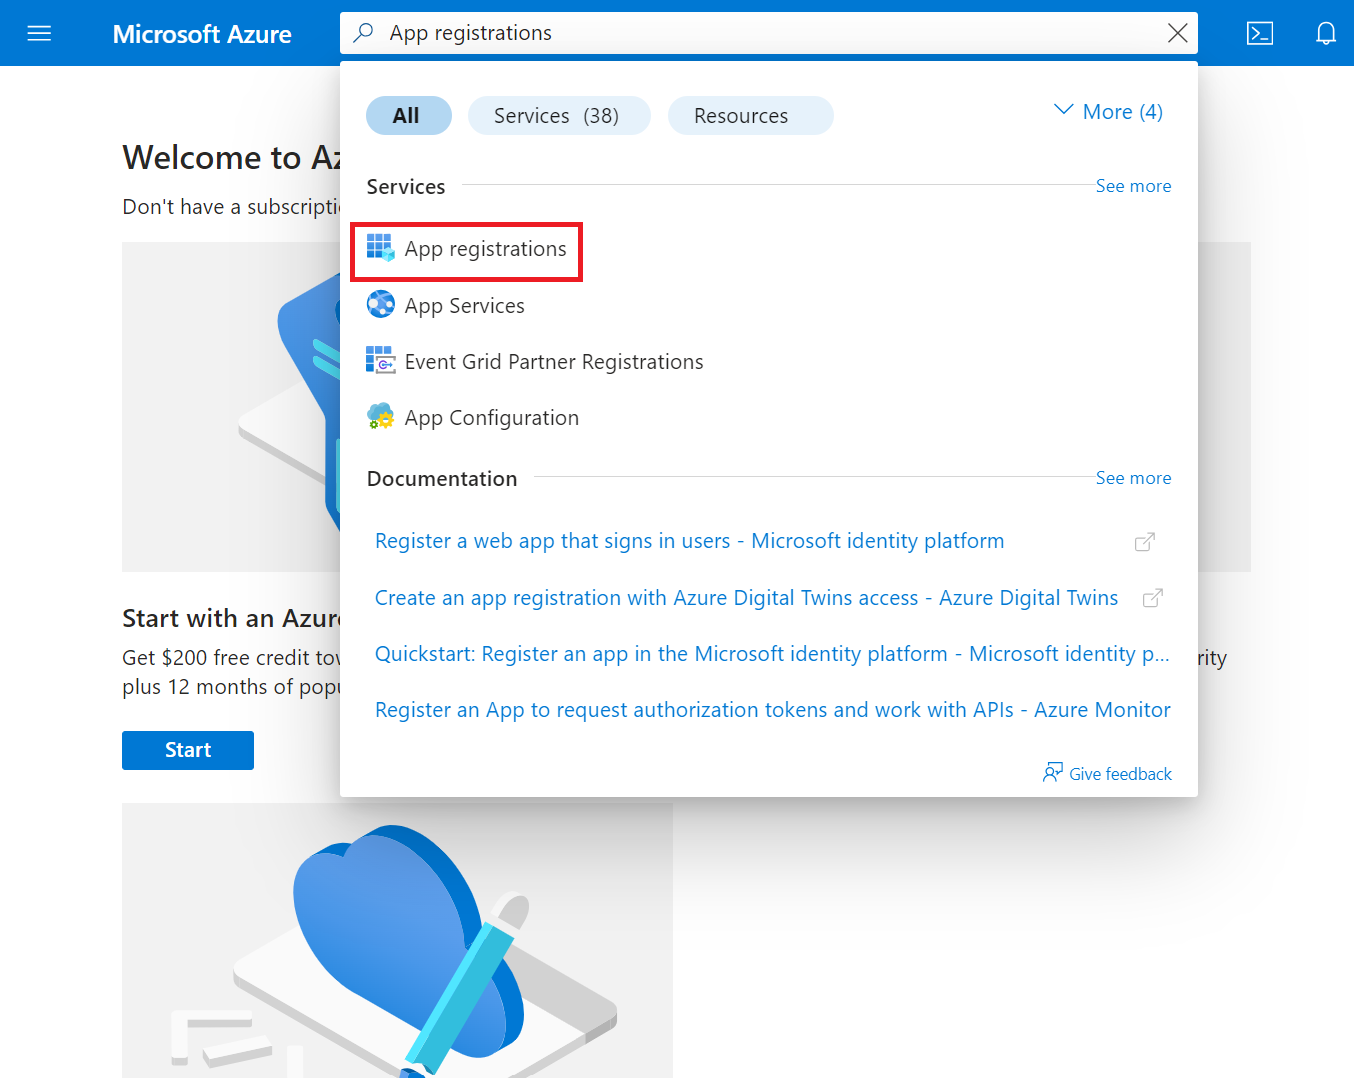
- Log in to the Microsoft Azure portal.
- Type App registrations in the search box and click App registrations.
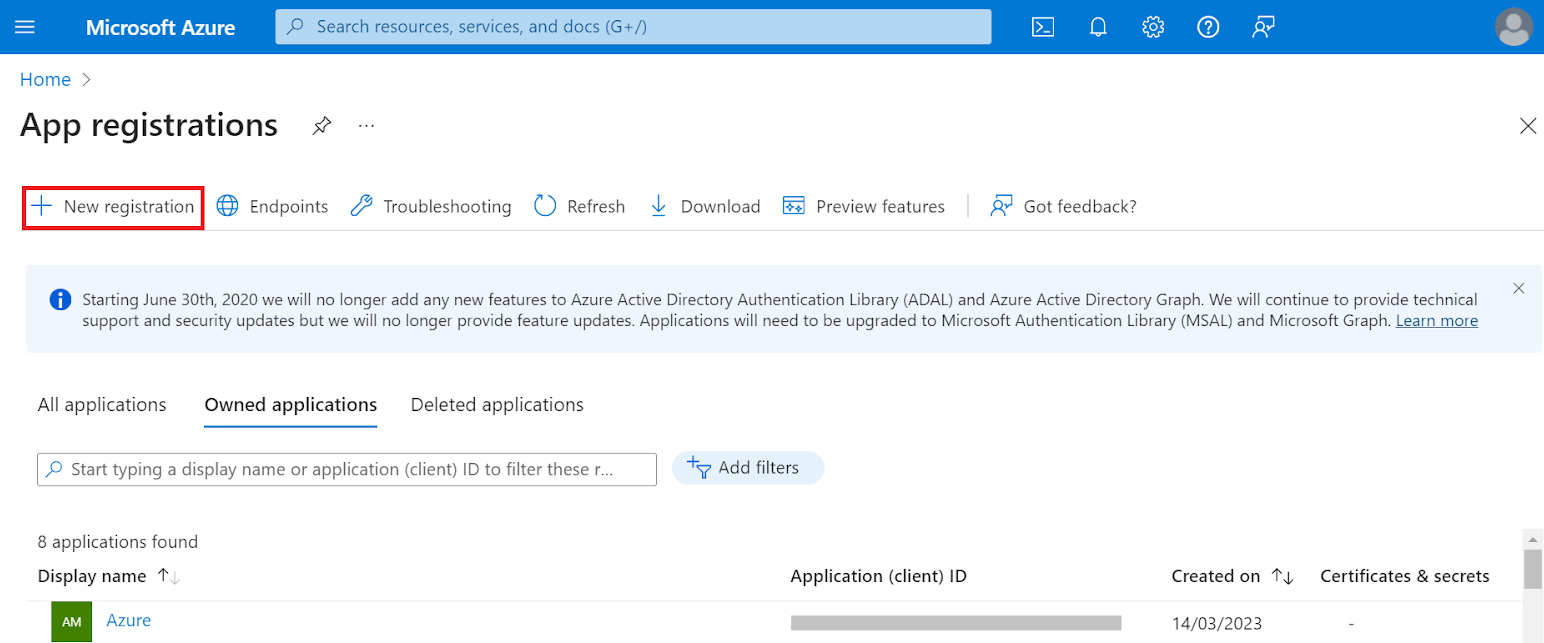
- On the App registrations page, click New registration.
- On the Register an application page, enter the name of the application in the Name field.
- In the Supported account types section, specify who can use the application by selecting any one of the following options:
- Accounts in this organizational directory only (MSFT only – Single tenant)
- Accounts in any organizational directory (Any Microsoft Entra ID tenant– Multitenant)
- Accounts in any organizational directory (Any Microsoft Entra ID tenant– Multitenant) and personal Microsoft accounts (e.g., Skype, Xbox)
- Personal Microsoft accounts only
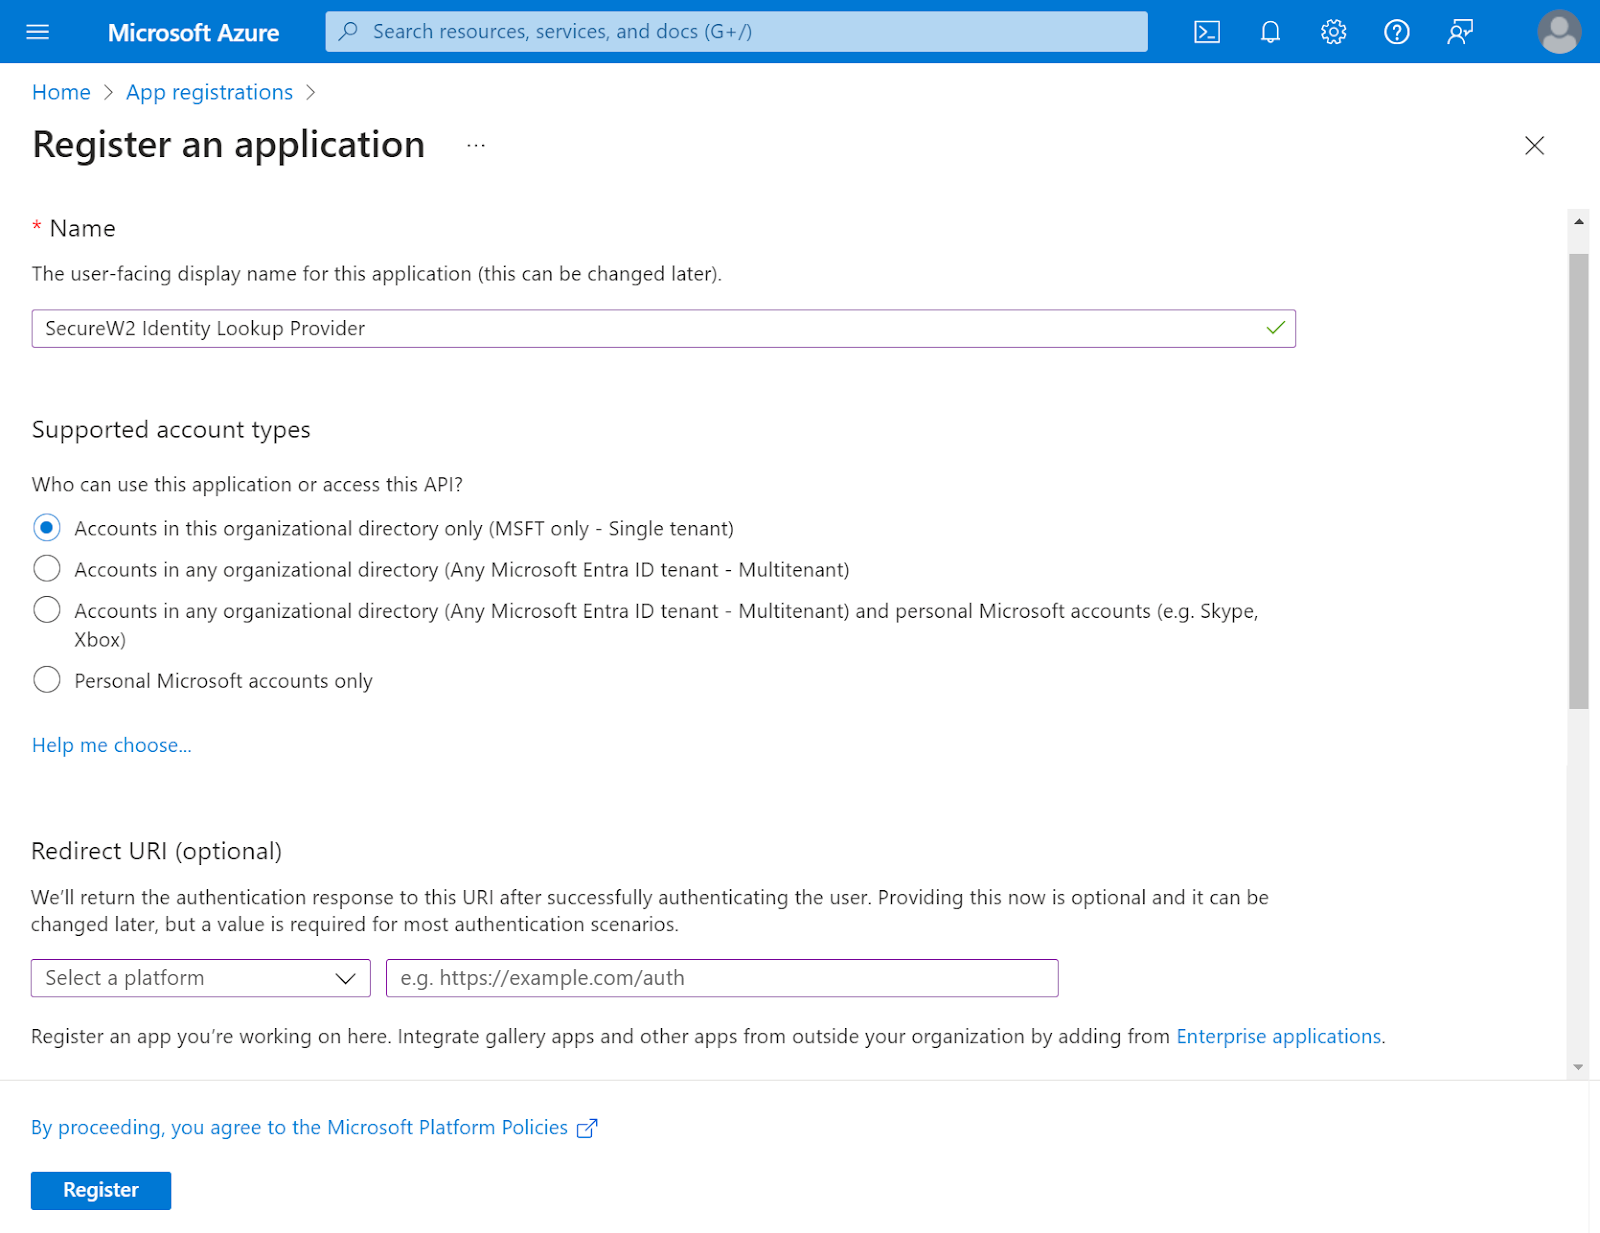
- Click Register. The following screen is displayed.
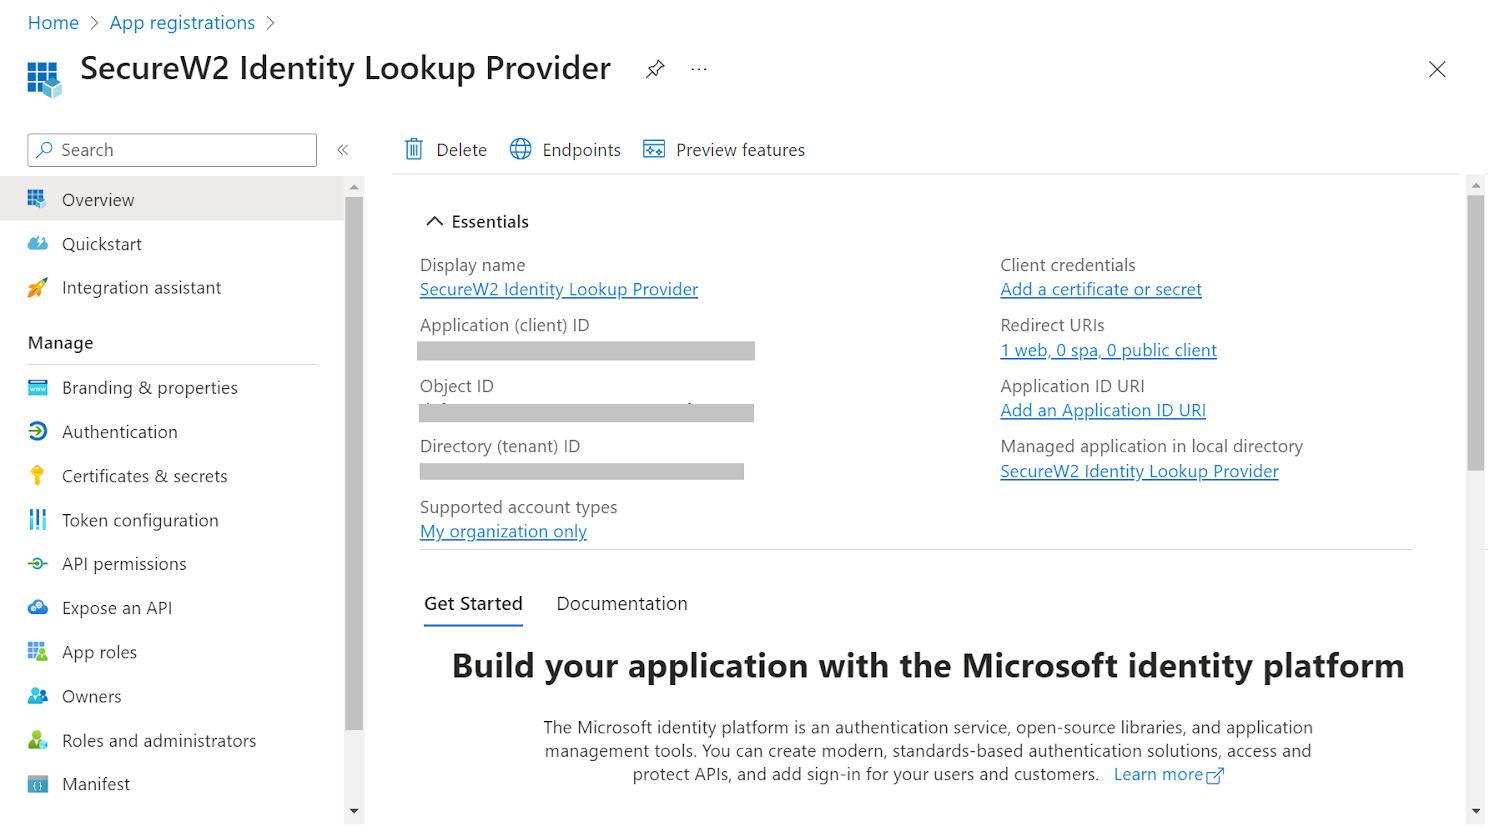
- Copy the Application (client) ID, Object ID, and Directory (tenant) ID values to your console.
Creating a Client Secret
To create a client secret, perform the following steps:
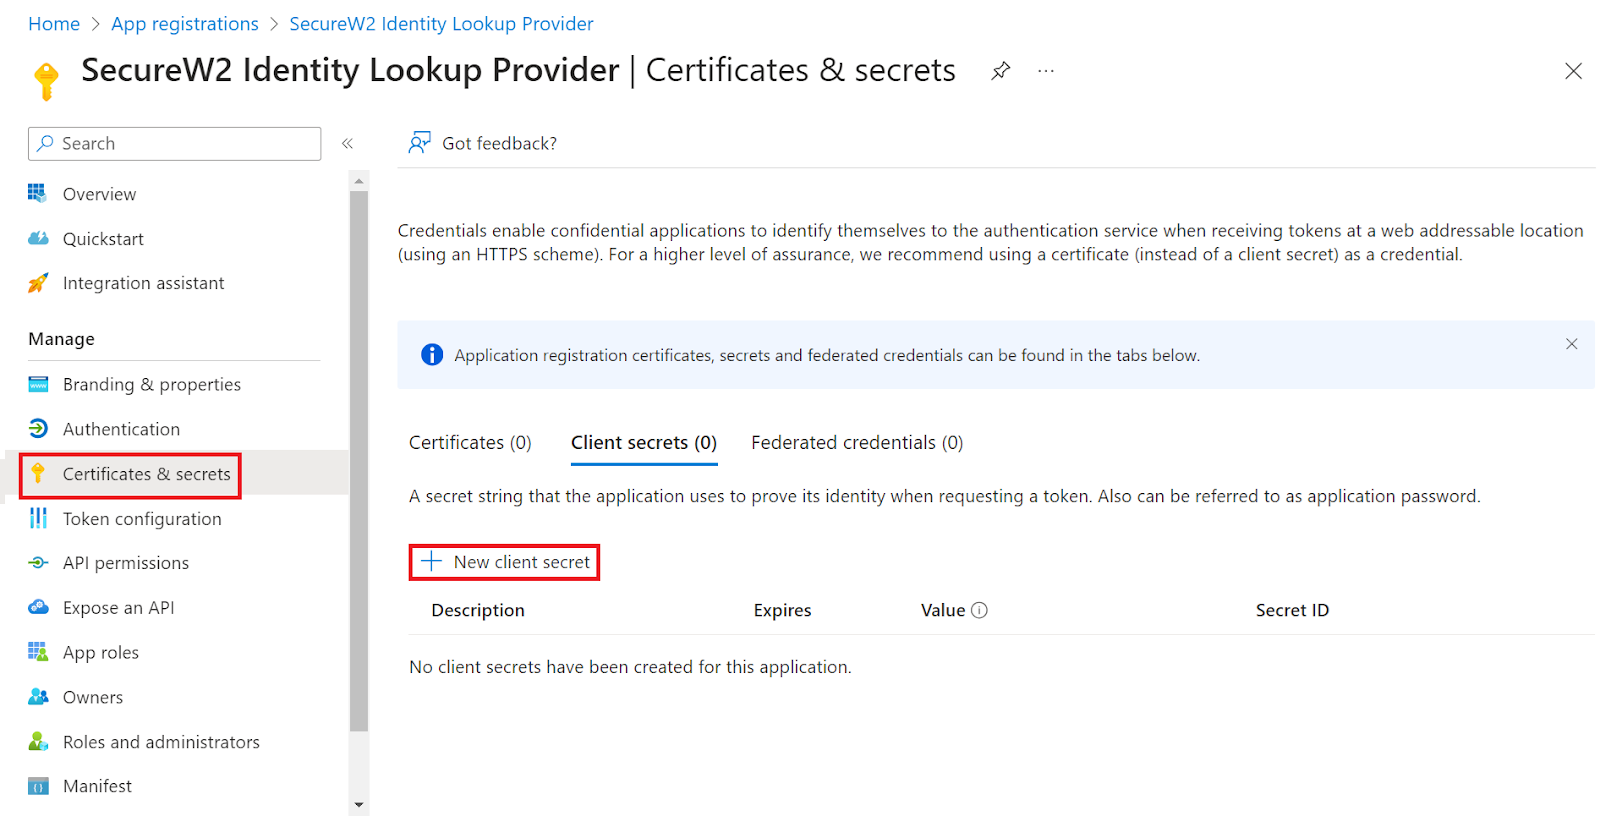
- On the left pane, go to Manage and click Certificates & secrets.
- Click New client secret.
- In the Add a client secret pop-up window, enter a description for the client secret in the Description field.
- From the Expires drop-down list, select the expiration date of the client secret.
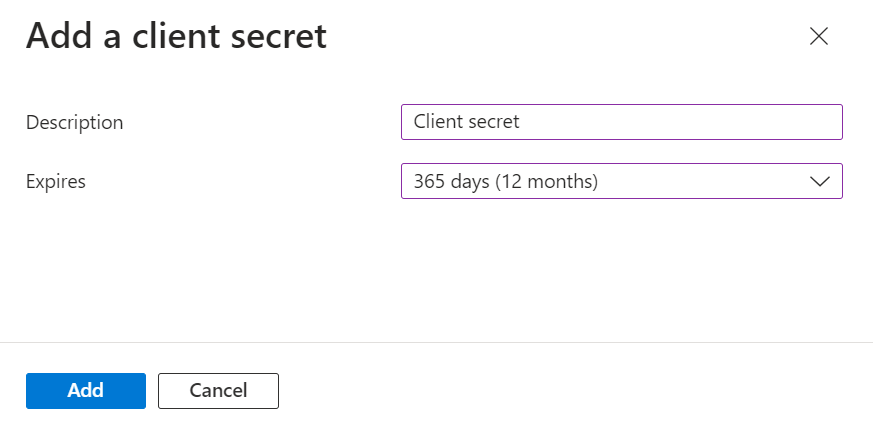
- Click Add.
- The client’s secret is displayed under the Value column.
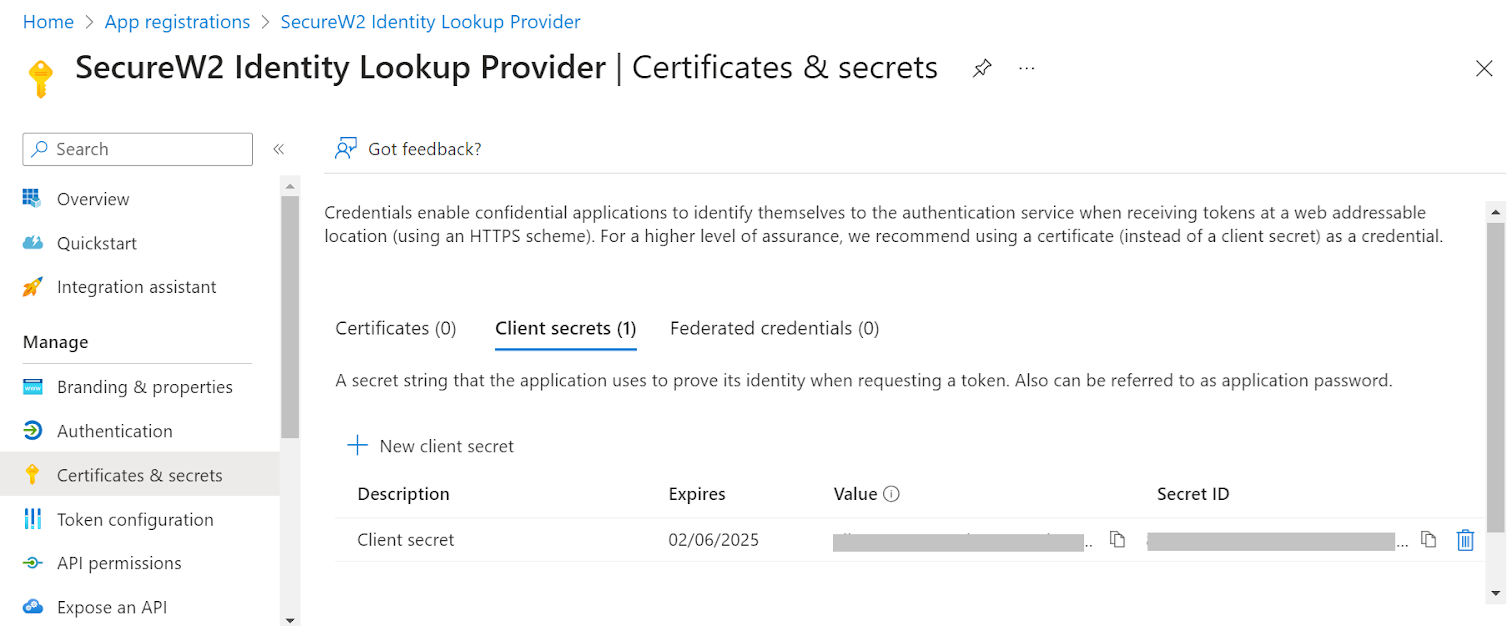
NOTE: Ensure you save the client secret on your console properly, as this secret is non-recoverable.
Creating a Provider URL and Client ID
To create a provider URL and client ID, perform the following steps:
- Navigate to the Overview section.
- Copy the Application (client) ID and Directory (tenant) ID values to your console.
- Insert it into the following URL: https://login.microsoftonline.com/{Directory (tenant) ID}. This should look like this:
https: //login.microsoftonline.com/561bc66f-1d86-4244-8bc4-5eb12cba45ac
- Save this for later.
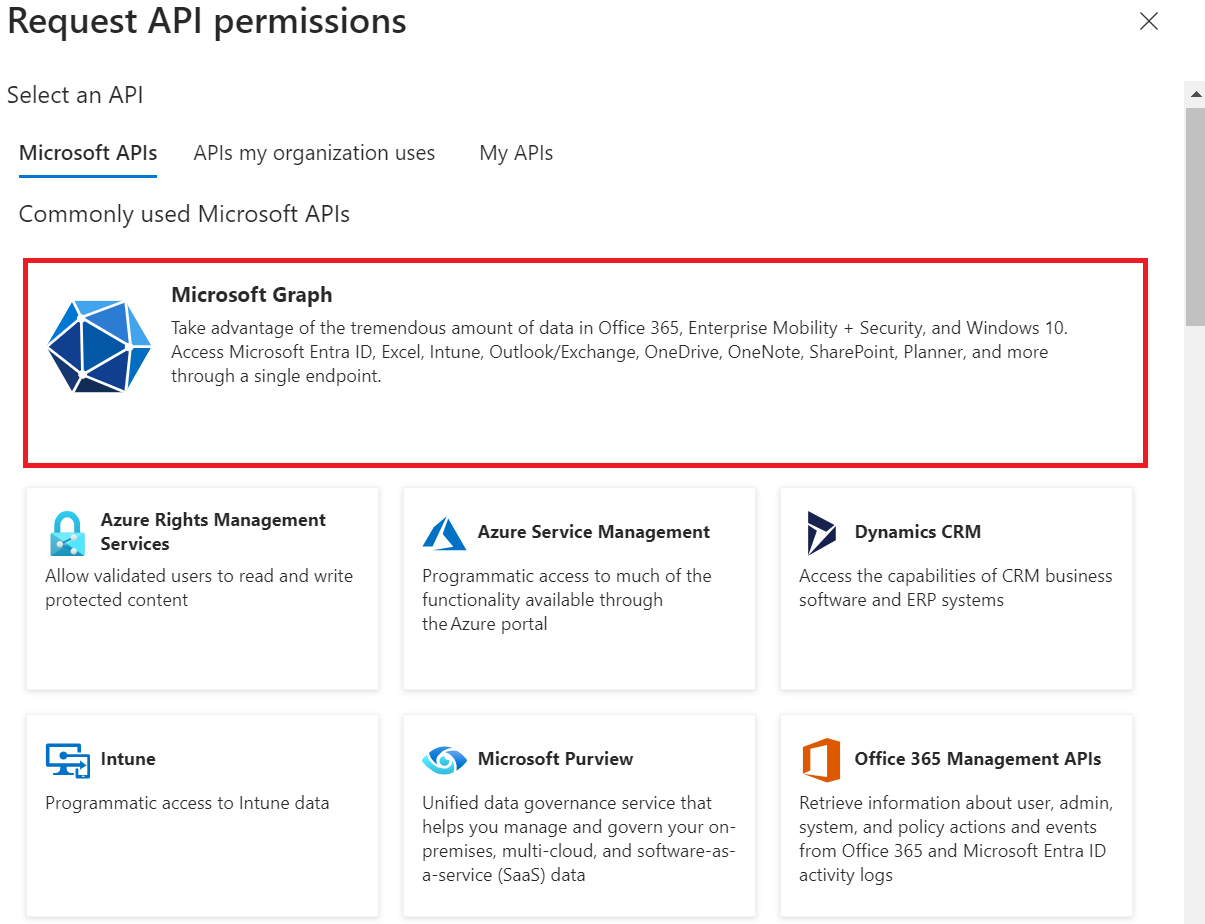
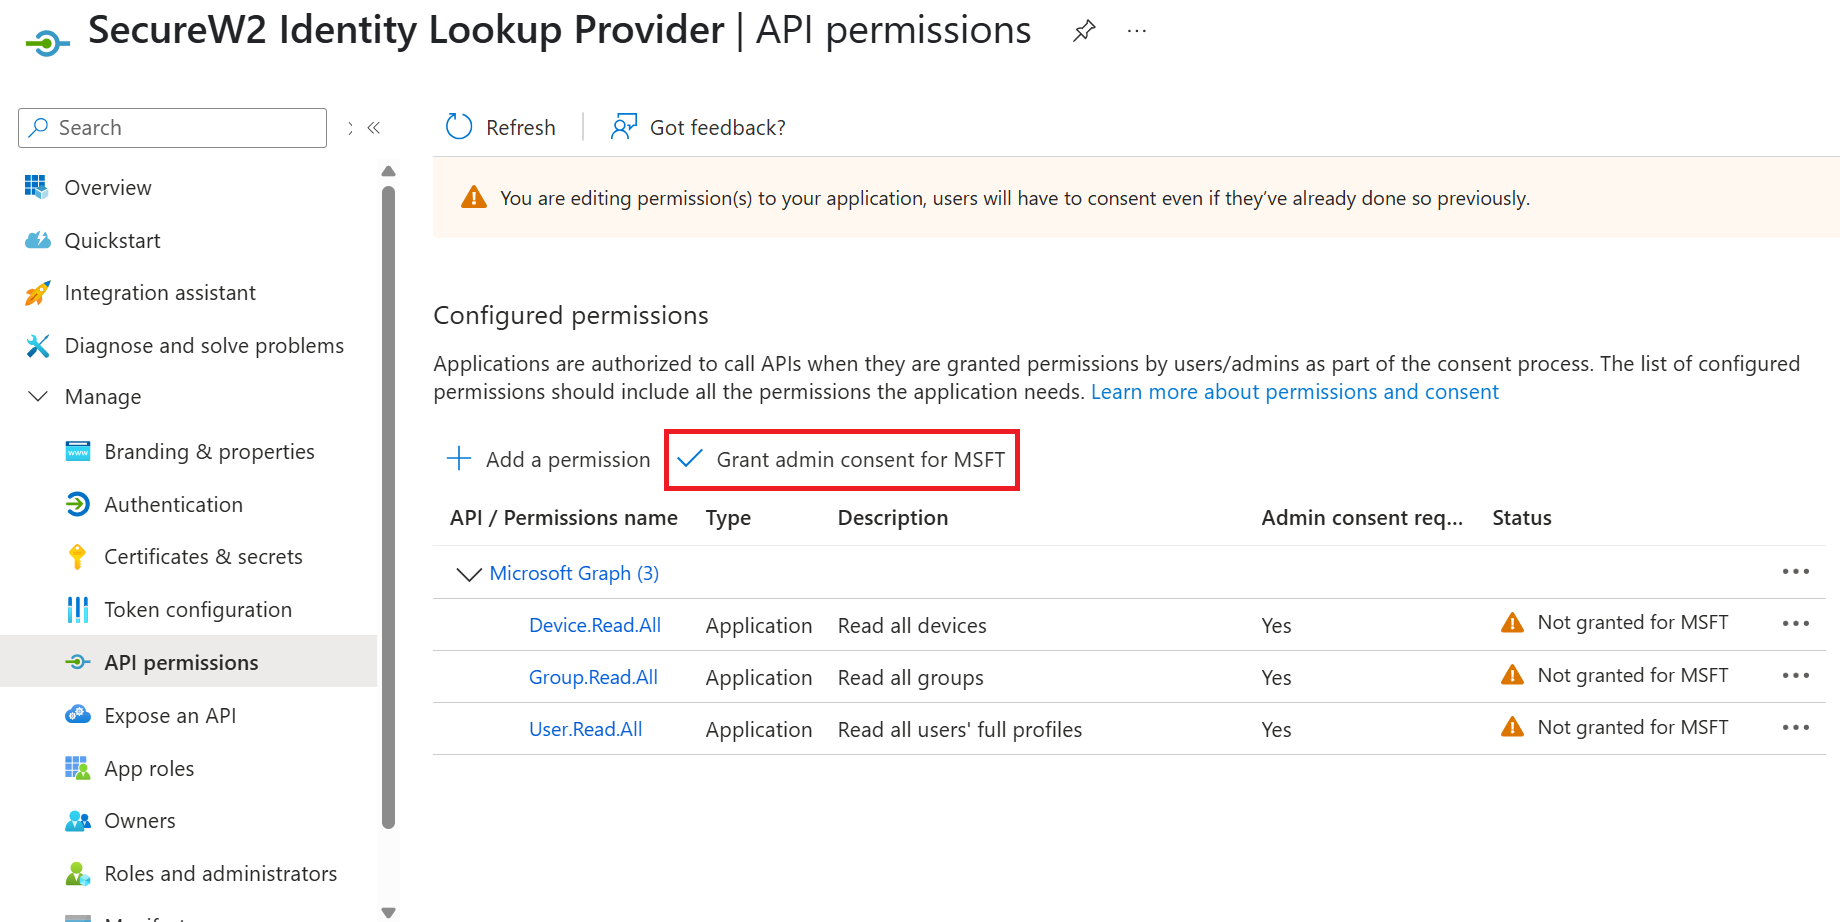
Providing API Permissions
Finally, provide this application permission to access the data in our Entra ID.
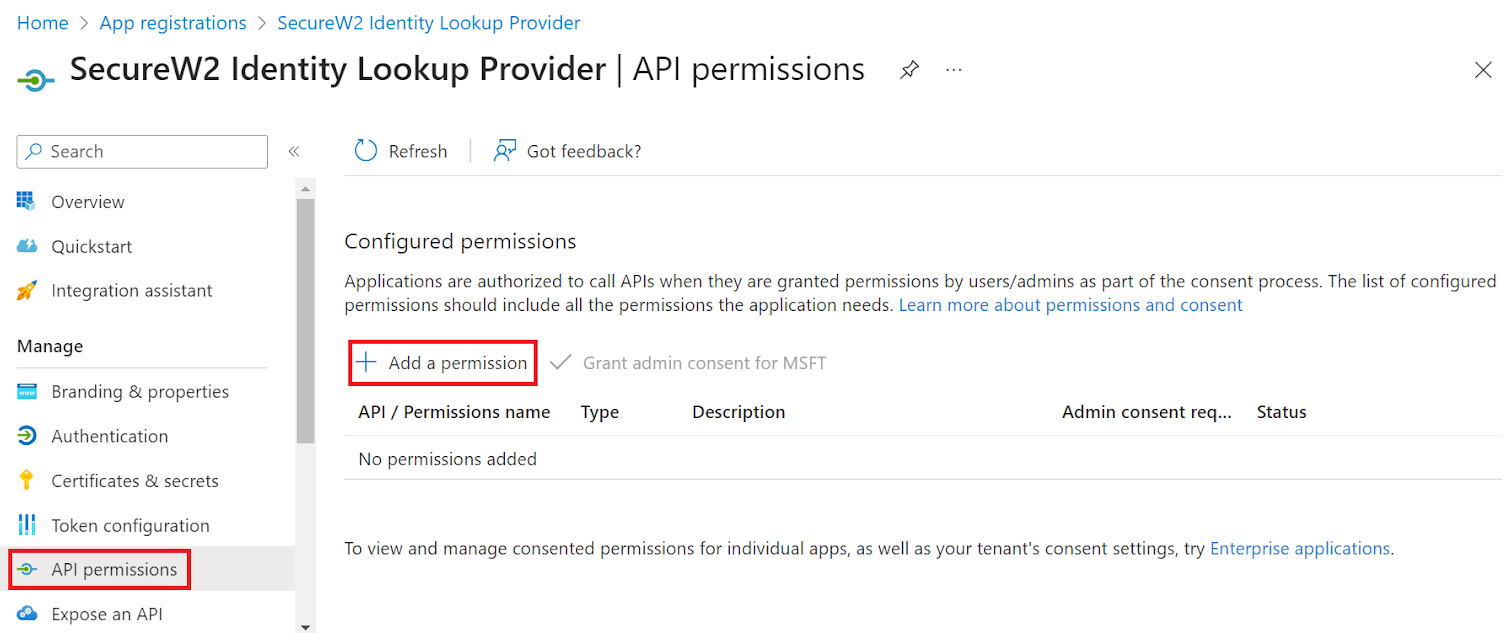
- On the left pane, go to Manage and click API permissions.
- Click Add a permission.
- Click Microsoft Graph.
- Select Application Permissions.
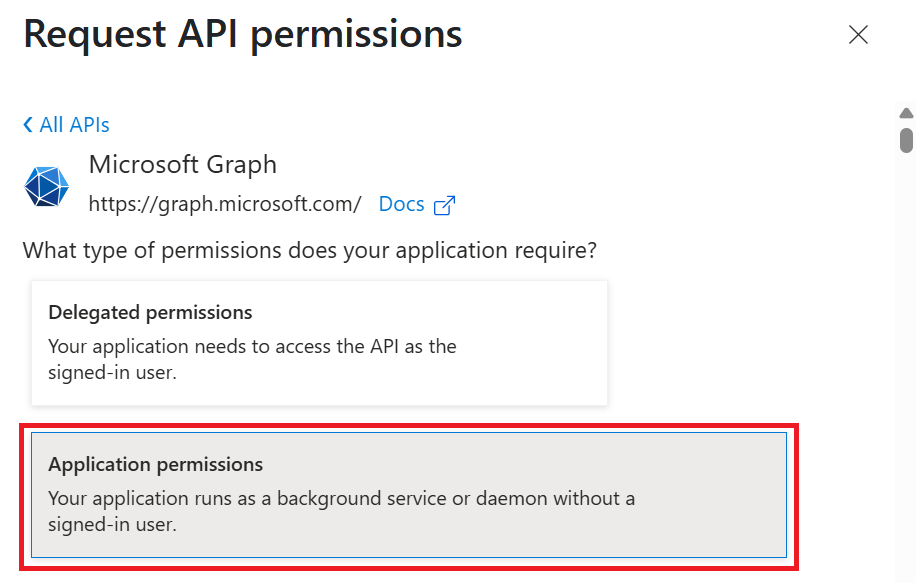
- If the Access Token Grant Flow attribute is Authorization Code, then add Device.Read and Device.Read.All in your API Permissions to configure Device Identity Lookup.
- If the Access Token Grant Flow attribute is Client Credentials, then add Device.Read.All, Group.Read.All, and User.Read.All in your API Permissions to configure Device Identity Lookup.
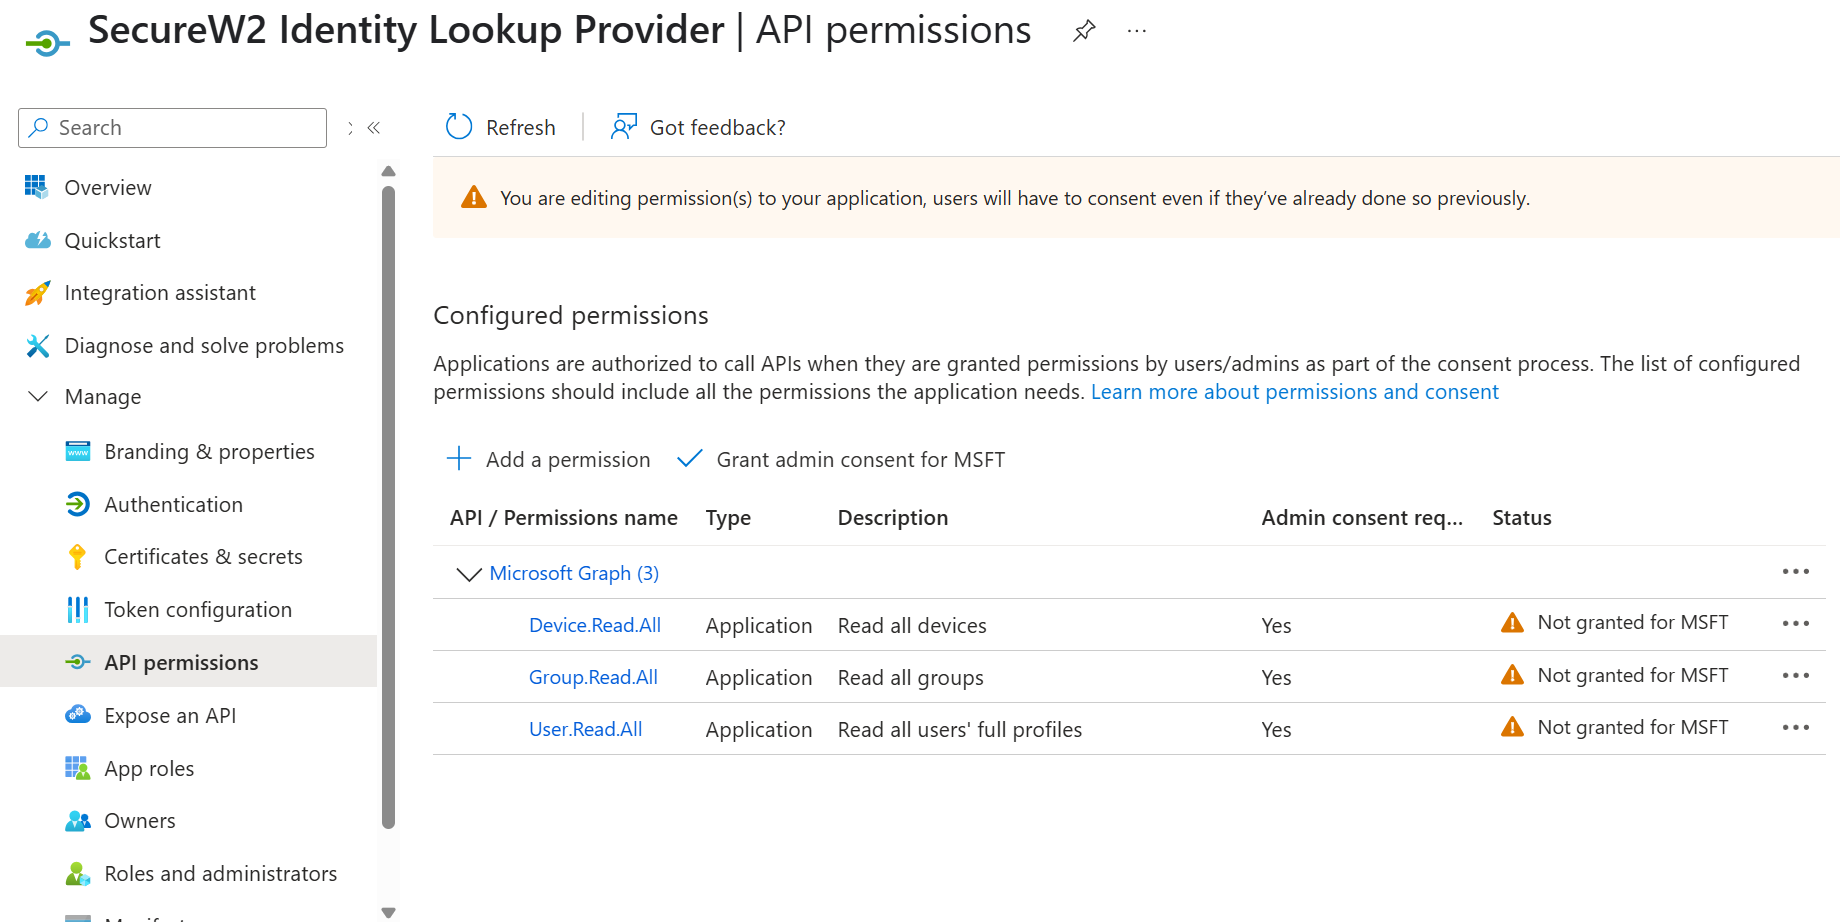
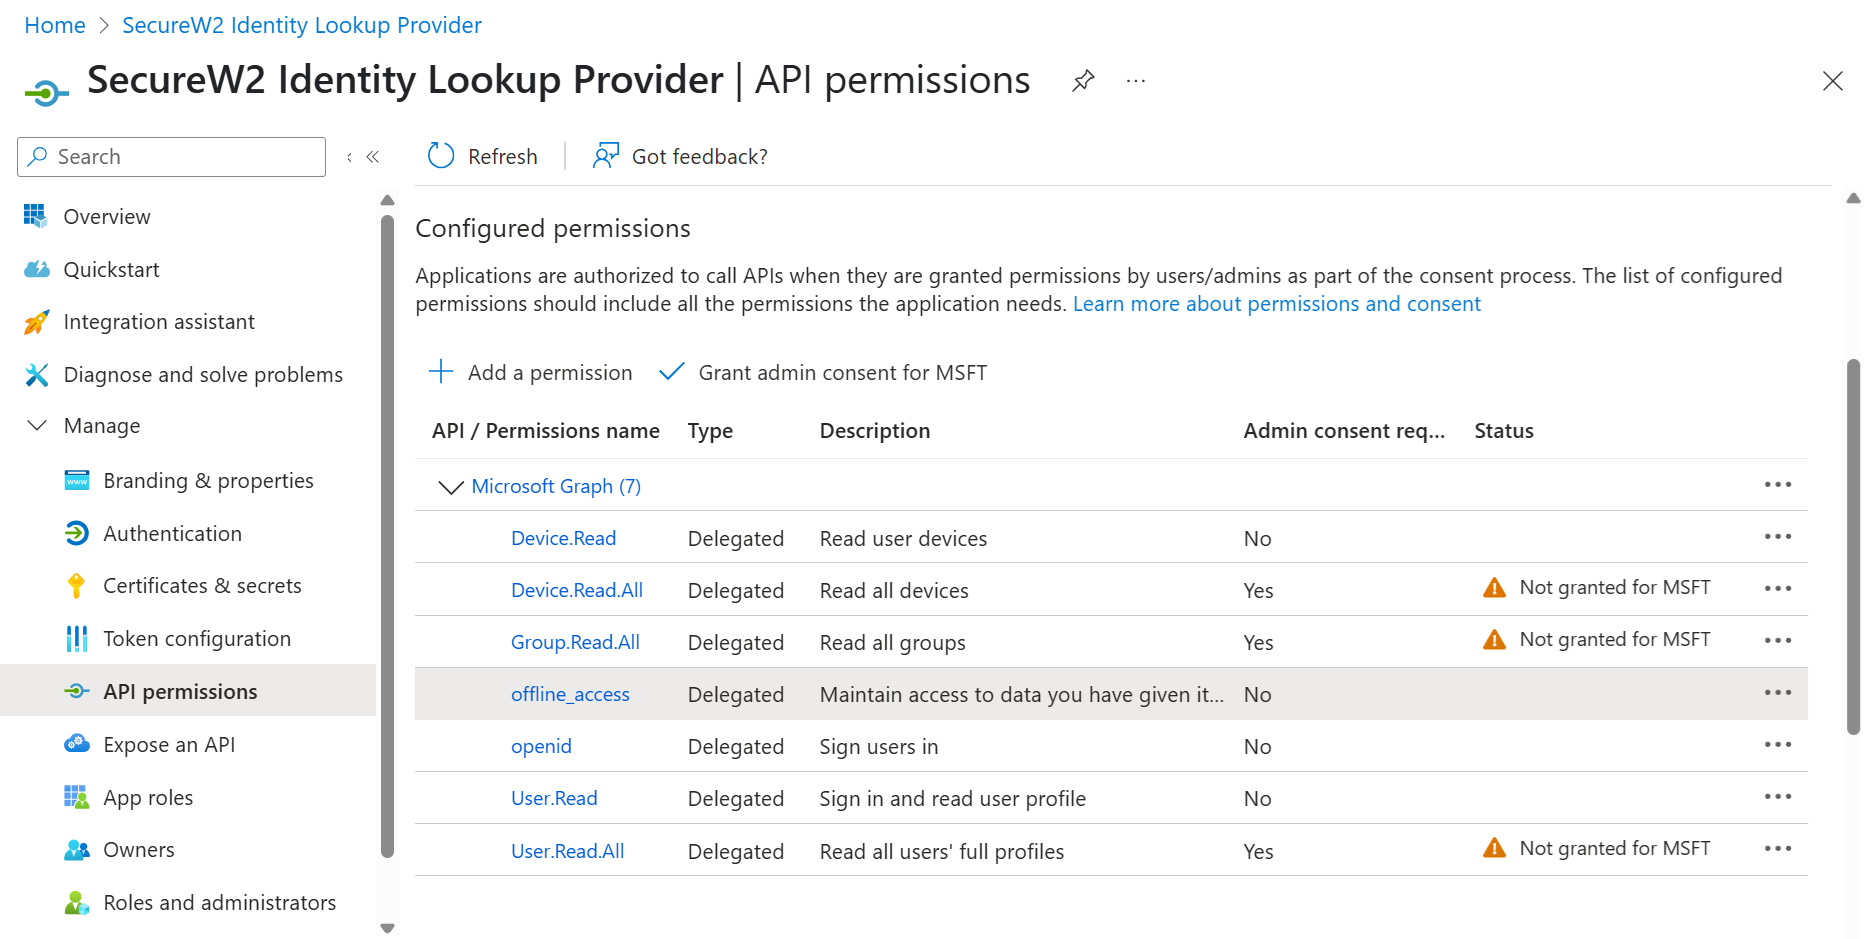
- After adding the permissions, the configured APIs are displayed under the Configured permissions section.
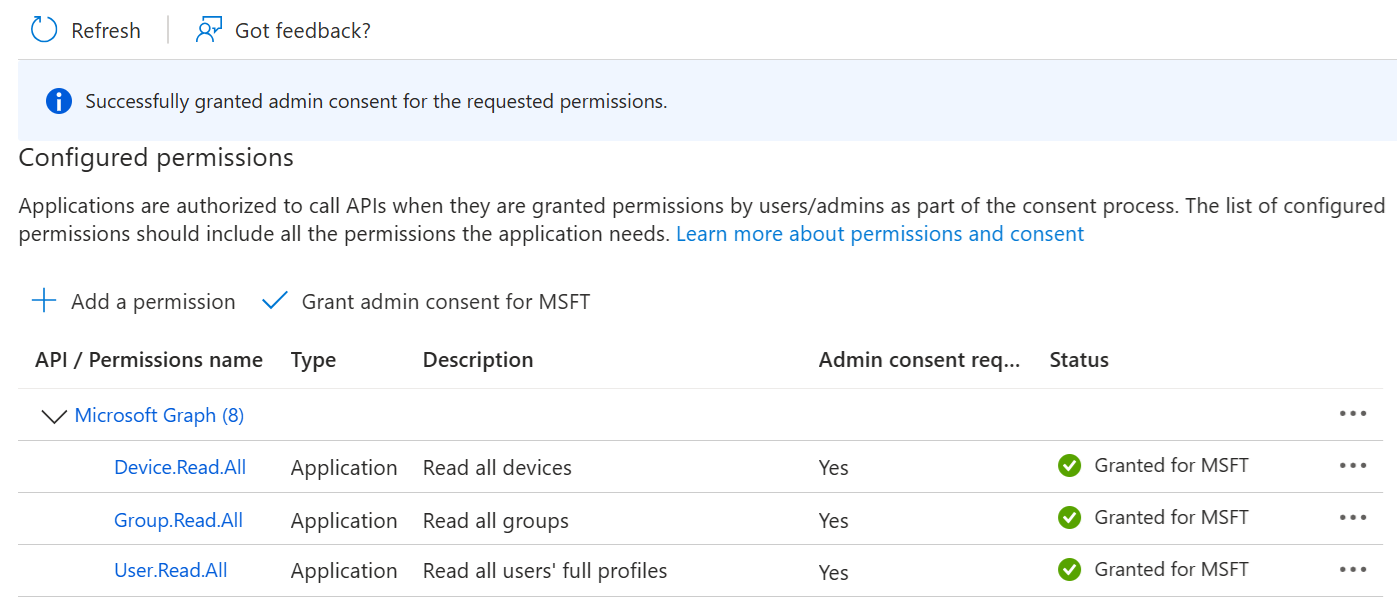
- Click Grant admin consent for {your organization} to grant consent for the requested permissions.
- In the Grant admin consent confirmation pop-up window, click Yes.

- The configured APIs are granted consent, and the following screen is displayed.
Creating a Core Platform to Integrate with Azure Event Hooks
- Navigate to Integrations Hub > Core Platforms.
- Click Add.
- For the Name field, enter the name of the identity lookup provider.
- For the Description field, enter a suitable description for the identity lookup provider.
- From the Type drop-down list, select Entra ID.

- Click Save.
- The page refreshes and displays the Configuration, Attribute Mapping, and Groups tabs.
- Click the Configuration tab.
- From the Access Token Grant Flow drop-down list, select one of the following options:
- Client Credentials – This option eliminates the need for frequent token reauthorization from the Azure portal and is the recommended method.
- Authorization Code – This option requires reauthorization of the token from the Azure portal every 90 days.
- In the Provider URL field, enter the URL you created earlier using the Directory (tenant) ID: https://login.microsoftonline.com/{Directory (tenant) ID}. This should look like this:
https://login.microsoftonline.com/561bc66f-1d86-4244-8bc4-5eb12cba45ac - In the Client Id field, enter the Application (client) ID that you retrieved from Azure Portal earlier (refer to the Creating an Application in Azure for Account Lookup section).
- In the Client Secret field, enter the Client secret you generated in the Azure Portal earlier (refer to the Creating a Client Secret section).
- Under the Lookup Configuration section, from the Device Lookup via drop-down list, select the required device lookup attribute from the options listed below:
- Entra ID Device ID – The lookup is performed using Azure ADID.
- Entra ID Device Name – The lookup is performed using the device name. For additional search filters, select the required checkboxes:
- Is Managed – checks if the device is managed.
- Is Compliant – checks if the device is compliant
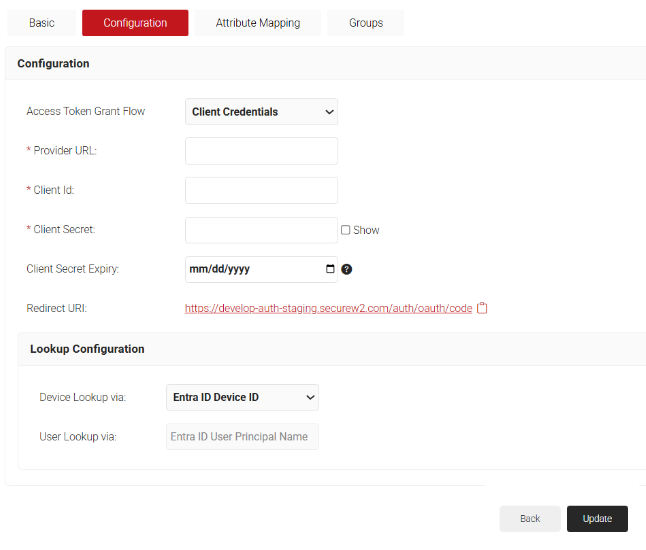
- Click Update.
- From the Access Token Grant Flow drop-down list, select one of the following options:
Configuring Groups
- Click on the Groups tab.
- Click Add.
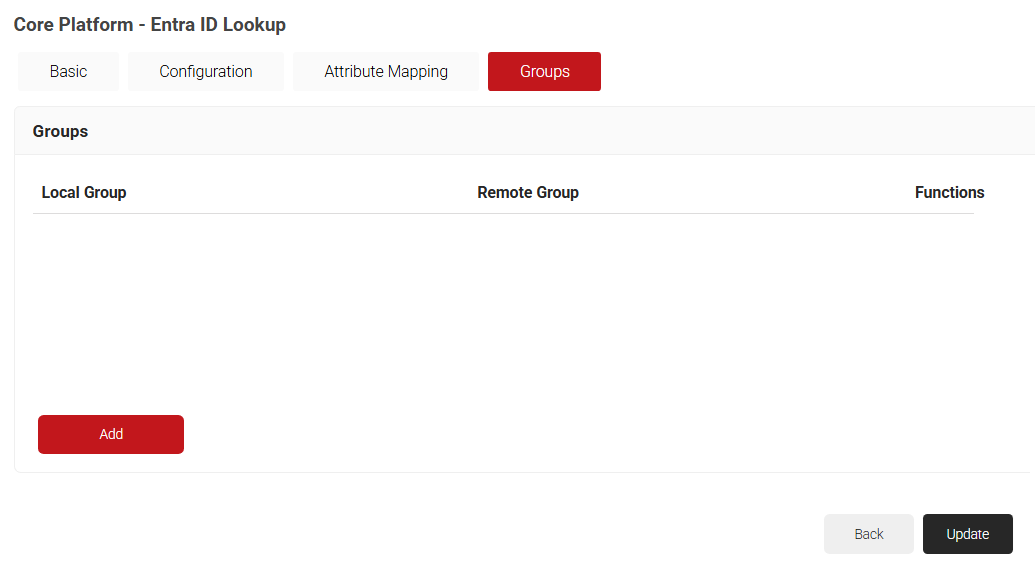
- In the Local Group field, enter a name for the group to identify it locally.
- In the Remote Group field, enter a name for the group configured in Entra ID.
- Click Create.
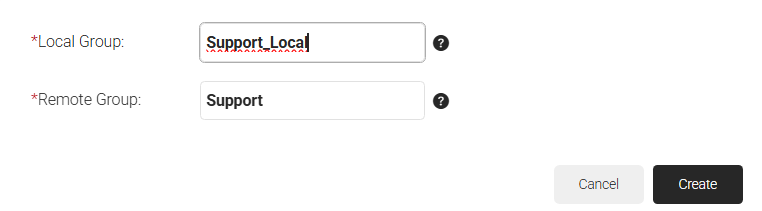
- Click Update.
Device Control Platform Integrations in JoinNow
- Navigate to Identity Management > Device Control Platforms.
- Click Add.
- In the Basic section, enter the name of the event hook in the Name field.
- In the Description field, enter a suitable description for the event hook.
- From the Provider drop-down list, select Entra ID.
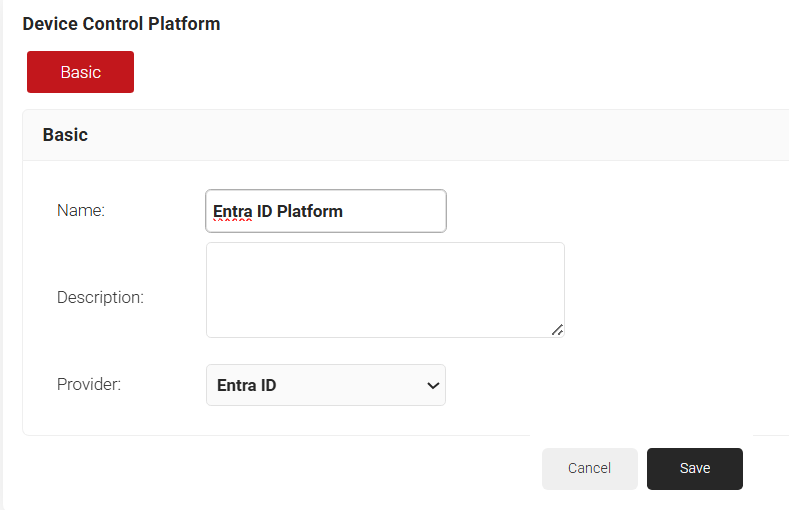
- Click Save. The page refreshes, and the Configuration tab opens.
- In the Configuration section, from the Identity Provider list, select the Identity Lookup Provider created in the Creating a Core Platform to Integrate with Azure Event Hooks section.
- Azure offers notifications for two major events – User Deactivated and User Deleted. You can choose any of the following or all of the actions to trigger for User Deactivation or for User Deletion.
- Revoke the associated certificate: Revoke the certificate(s) associated with the deleted user.
- Deregister the associated Web Auth Device: Remove the associated device from a secure network connected via Web Auth Wi-Fi with the Cloud IDP feature. Further connection attempts are allowed only after re-authentication.
- Deregister the associated VPN Token: Deregister the VPN Token associated with the user. Further VPN connections need re-enrollment.
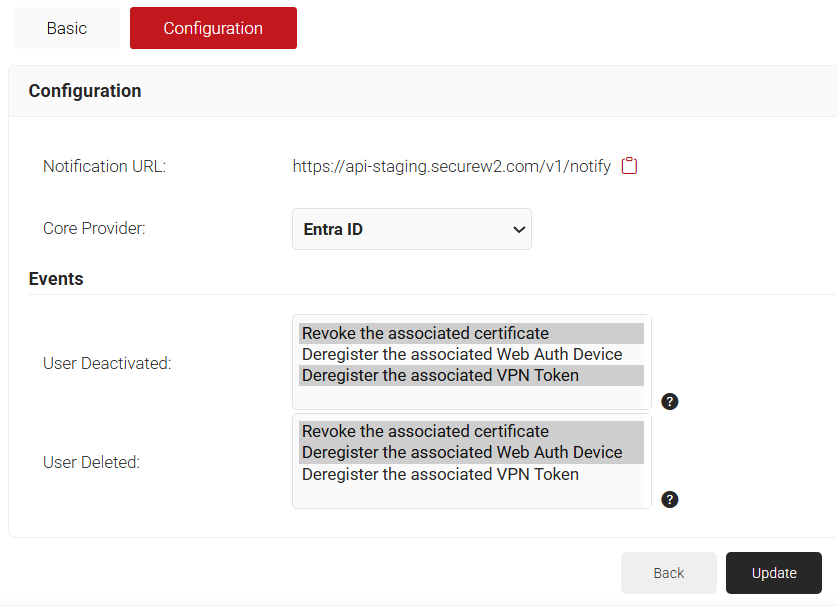
- Click Update. An Event hook will be created in the Azure portal.