To create a new intermediate CA:
- Log in to the JoinNow Management Portal.
- Navigate to Dynamic PKI > Certificate Authorities.
- Click Add Certificate Authority.
- In the Basic section, from the Generate CA For drop-down list, select the Device and User Authentication option to authenticate devices and users.
- From the Type drop-down list, select Intermediate CA.
- From the Certificate Authority drop-down list, select the default Root CA that comes with your organization.
- In the Common Name field, enter a common name for the CA certificate. SecureW2 recommends a name that includes “SCEP.”
- From the Key Size drop-down list, select 2048 for the CA certificate key pair.
- From the Signature Algorithm drop-down list, select the signature algorithm for the certificate signing request. The option available is SHA-256.
- In the Validity Period (in years) field, enter the validity period of the CA certificate.
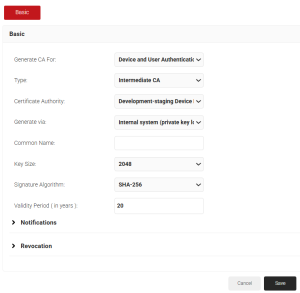
- Click Save. The new intermediate CA is generated.
- Click the Download link for the intermediate CA created. The downloaded CA will be used to configure external CA in the Okta portal.
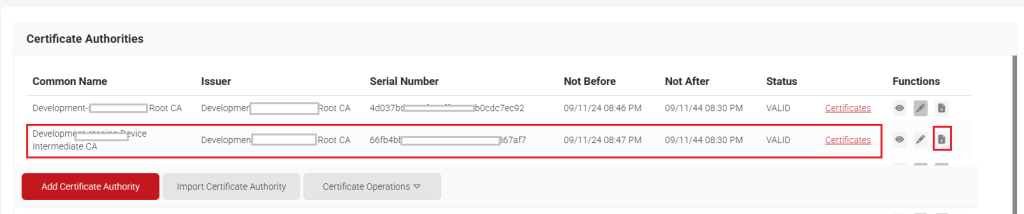
NOTE: The downloaded CA certificate should be converted to PEM format so it can be uploaded to the Okta portal. To convert a .cer file to .pem, use the OpenSSL command-line tool with the command :
openssl x509 -inform der -in your_certificate.cer -outform pem -out your_certificate.pem
- In the Okta Admin Console, navigate to Security > Device integrations.
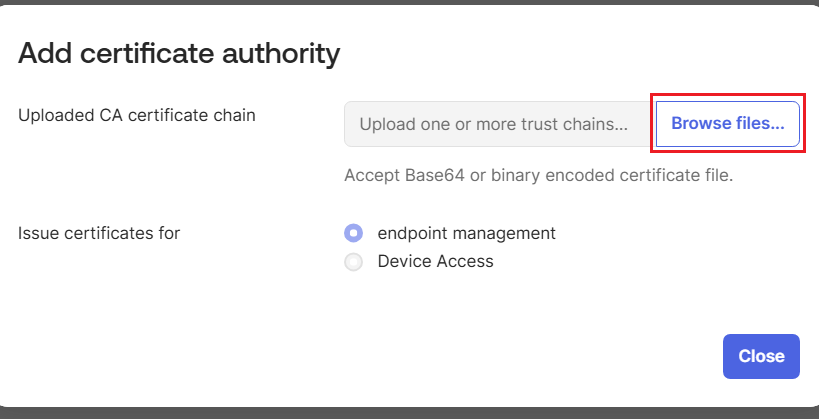
- Go to the Certificate authority tab and click Add certificate authority.
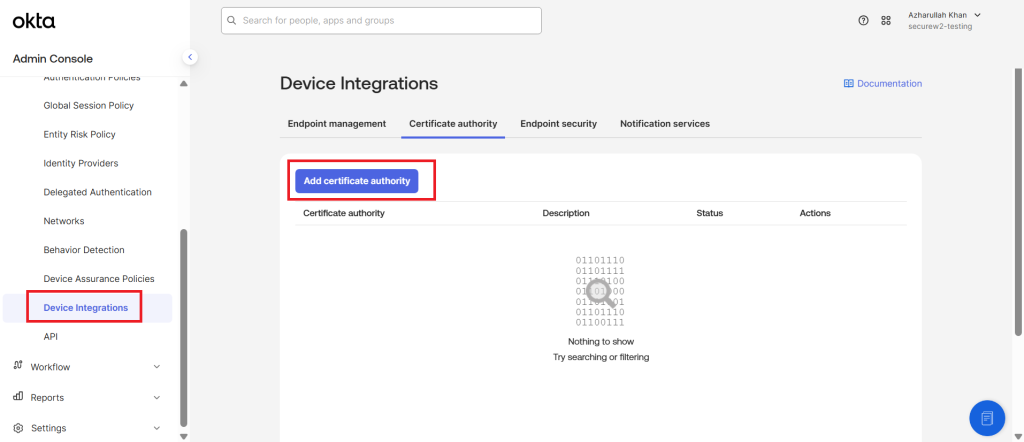
- In the Add certificate authority dialog box, click Browse files. Select the CA certificate exported from JoinNow portal in PEM format.
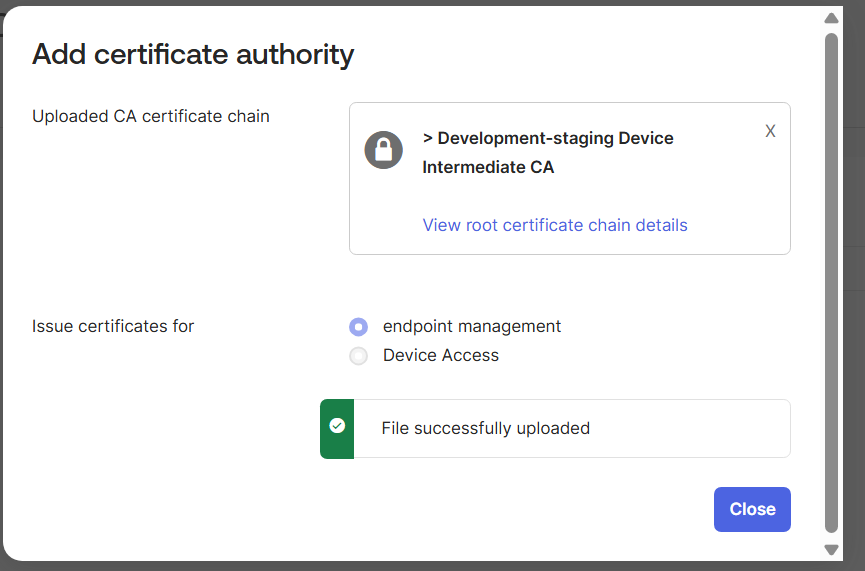
Certificates are uploaded automatically. A message appears if uploads are successful. To view details, click View root certificate chain details. - Click Close.
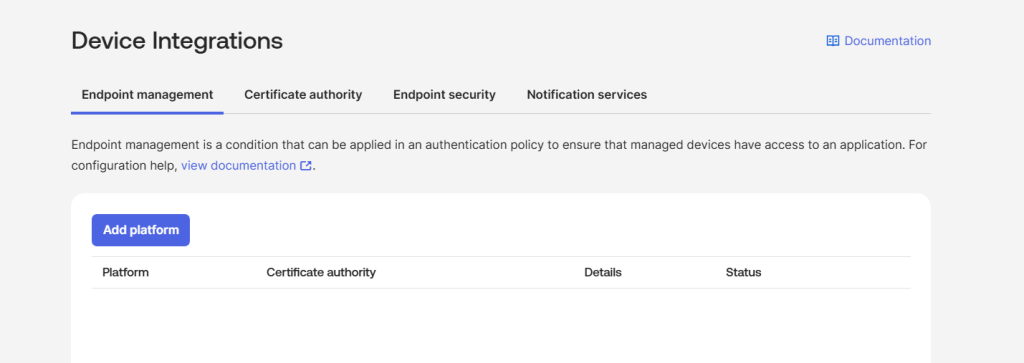
- Go to the Endpoint management tab.
- Click Add platform.
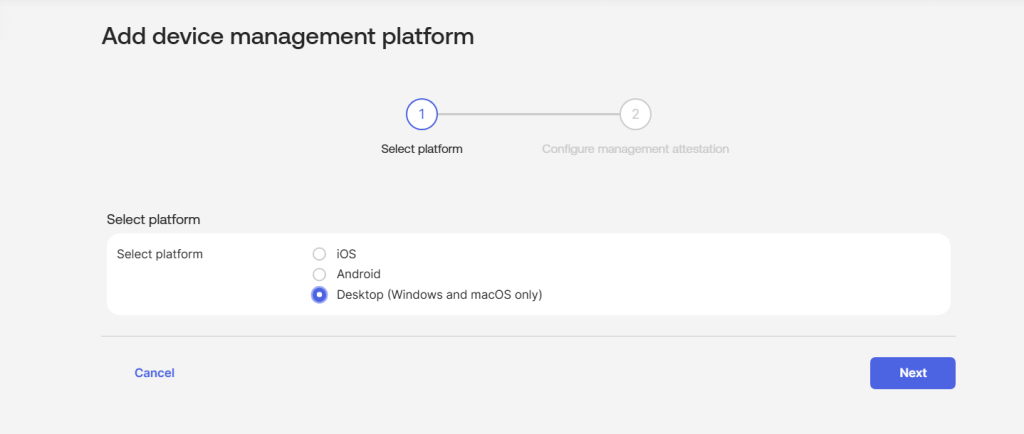
- Select Desktop (Windows and macOS only) and click Next.
- In Configure management attestation, select Use my own certificate authority for the Certificate authority.
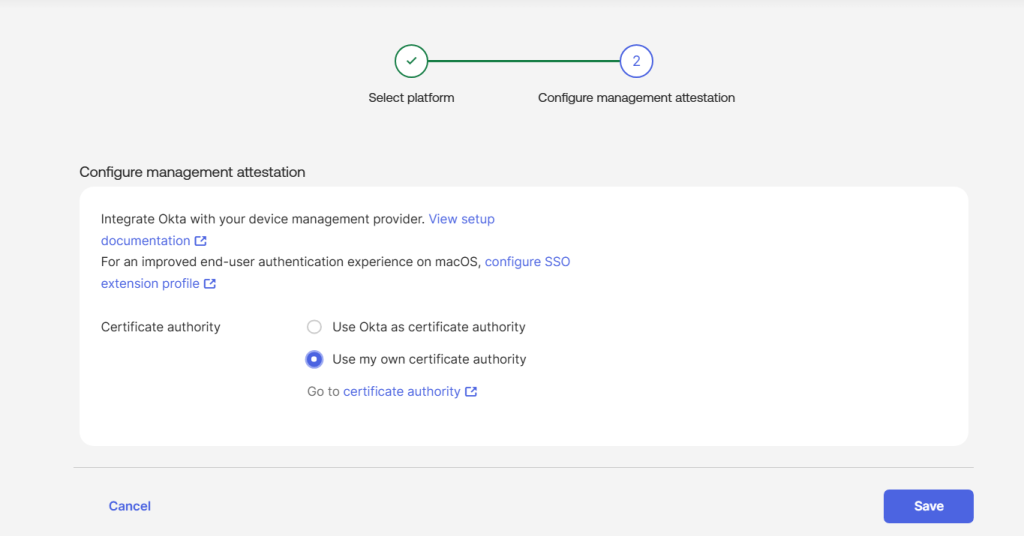
- Click Save.
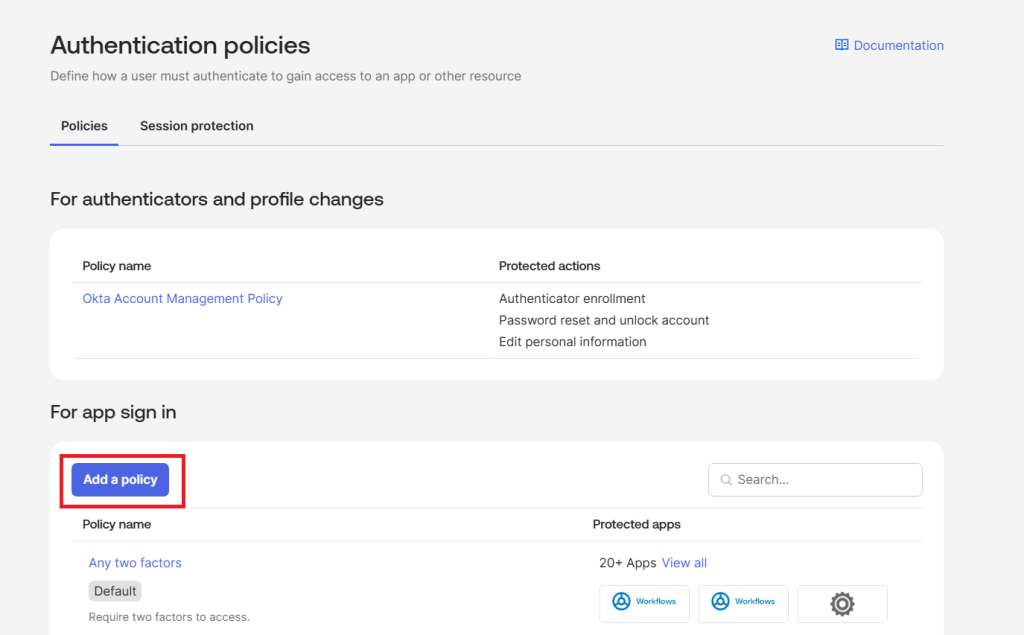
- In the Admin Console, navigate to Security > Authentication Policies.
- Under app sign-in, click Add a policy.
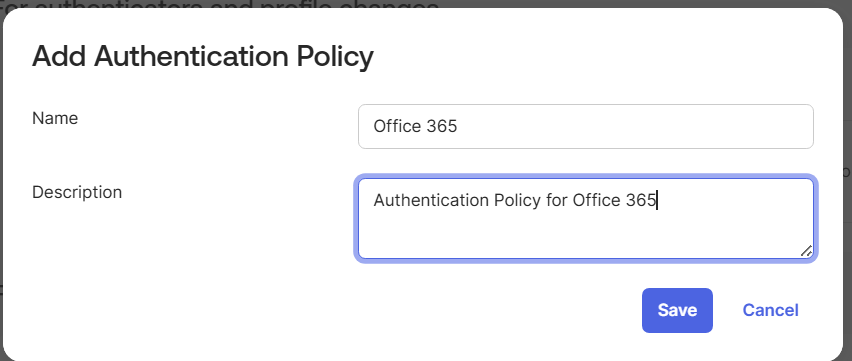
- Enter a name and description for the Authentication Policy. Click Save.
- Click on the authentication policy created. Inside the policy page, click Add role.

- In the Rule name field, type a name to describe the rule.
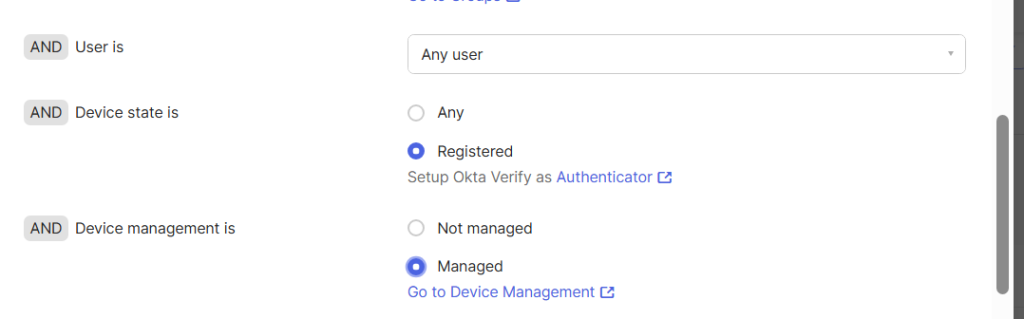
- From the AND User’s group membership includes drop-down list, select the groups with required users.
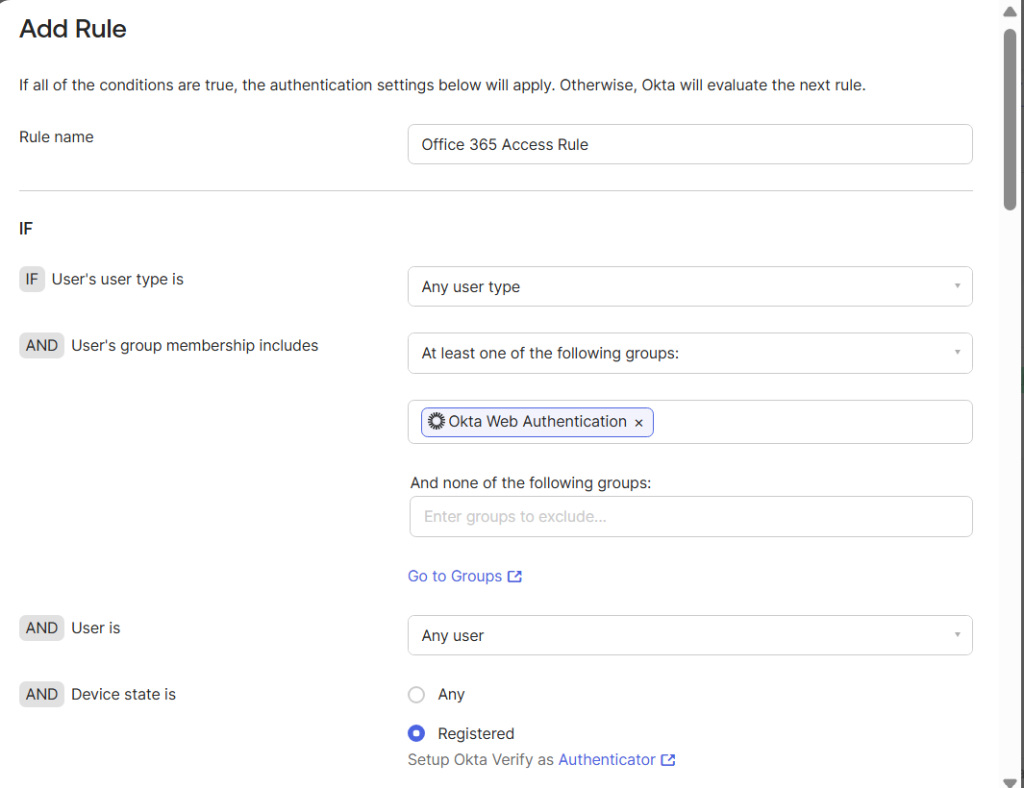
- In the And Device state is section, click on the Registered option.
- In the And Device Management is section, click on the Managed option.
- Configure the appropriate THEN conditions to specify how authentication is enforced.
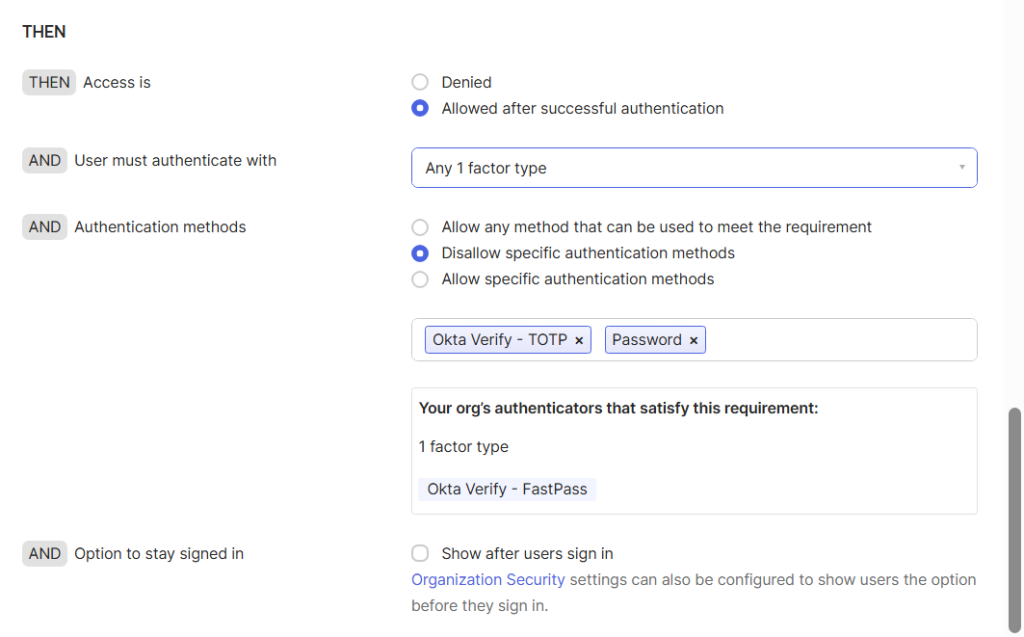
- Configure the re-authentication frequency, if needed.
- Click Save. The authentication policy will be created successfully.
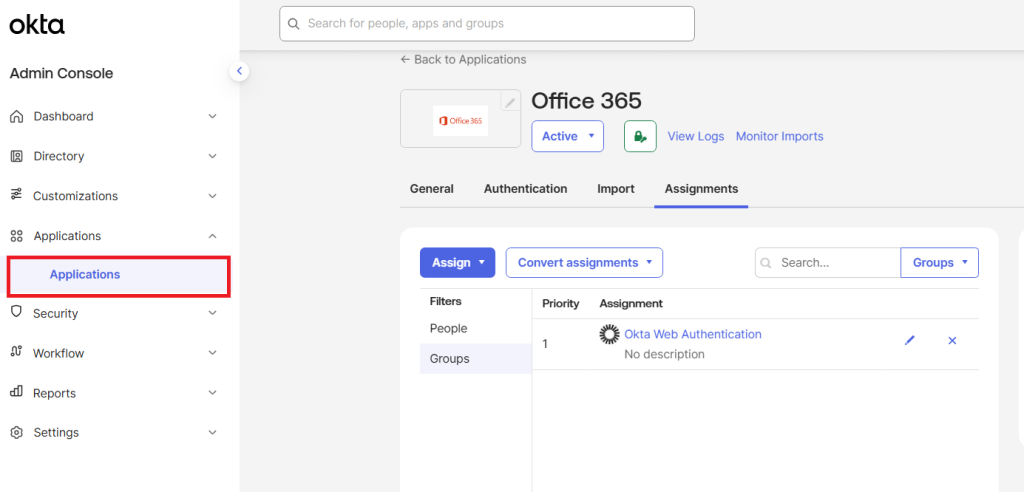
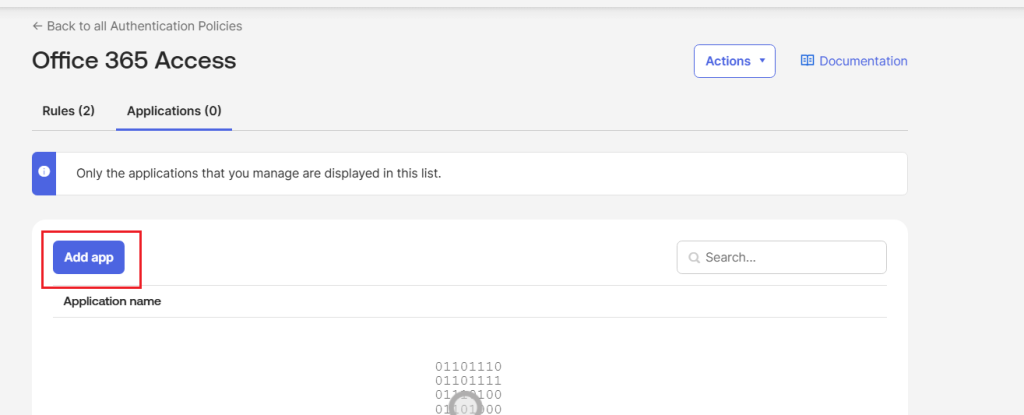
- Click on Applications.
- Click Add app.
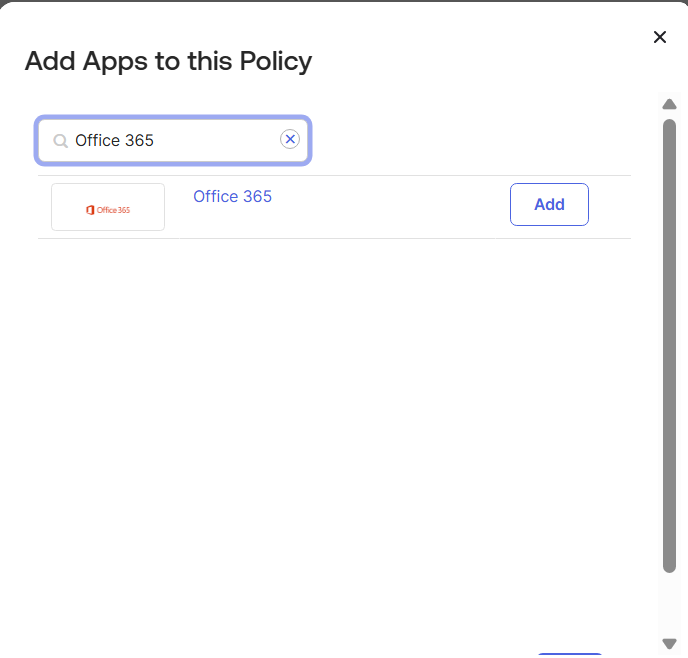
- In the search box, enter the name of the required application for which the policy must be mapped to. Click Add.
- Applications with the required users and groups can be created in the Applications tab: