Introduction
This guide describes the steps to integrate SecureW2’s third-party CA with Mosyle using SCEP to auto-enroll managed devices with X.509 certificates and 802.1X settings.
Prerequisites
To set up Mosyle for device enrollment using SCEP, you need:
- A Mosyle account subscription
- Active subscription to the JoinNow Management Portal.
Creating an Intermediate CA for Mosyle SCEP Gateway Integration
As a best practice, SecureW2 recommends creating a new intermediate CA for each SCEP Gateway API we create. Using a separate CA makes it easier to manage certificates, and enables us to create enrollment and network policies based on the issuing CA. We also recommend having a separate CA for BYOD and Managed devices, as you can configure certificate expiration notification emails in the CA settings for BYOD; but for managed devices this is not required as renewal is automatic.
To create a new intermediate CA:
- Log in to the JoinNow Management Portal.
- Navigate to Dynamic PKI > Certificate Authorities.
- Click Add Certificate Authority.

- In the Basic section, from the Generate CA For drop-down list, select the Device and User Authentication option to authenticate devices and users.
- From the Type drop-down list, select Intermediate CA.
- From the Certificate Authority drop-down list, select the default Root CA that comes with your organization.
- In the Common Name field, enter a common name for the CA certificate. SecureW2 recommends a name that includes “SCEP.”
- From the Key Size drop-down list, select 2048 for the CA certificate key pair.
- From the Signature Algorithm drop-down list, select SHA-256 as the signature algorithm for the certificate signing request.
- In the Validity Period (in years) field, enter the validity period of the CA certificate.
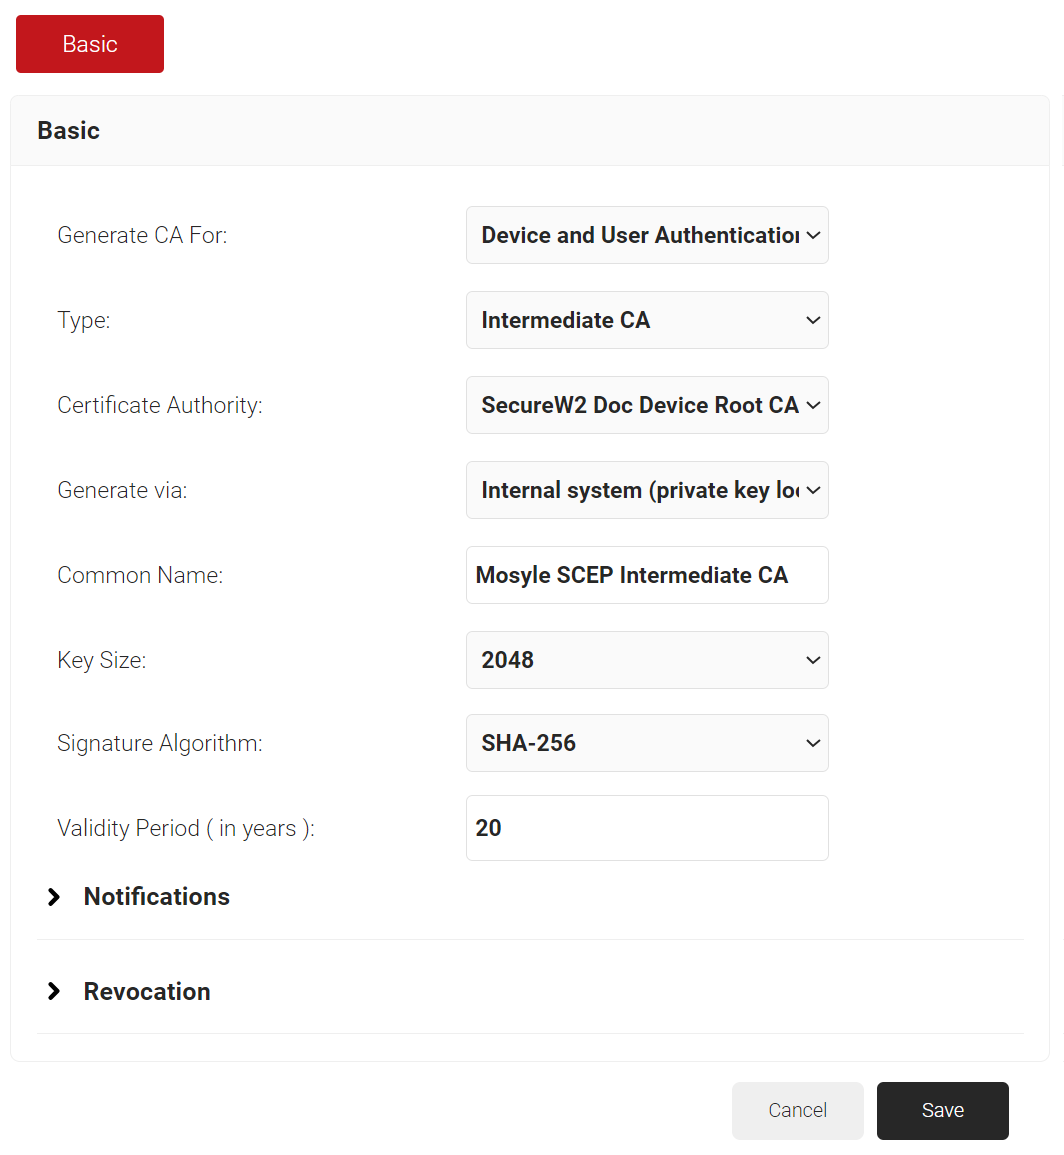
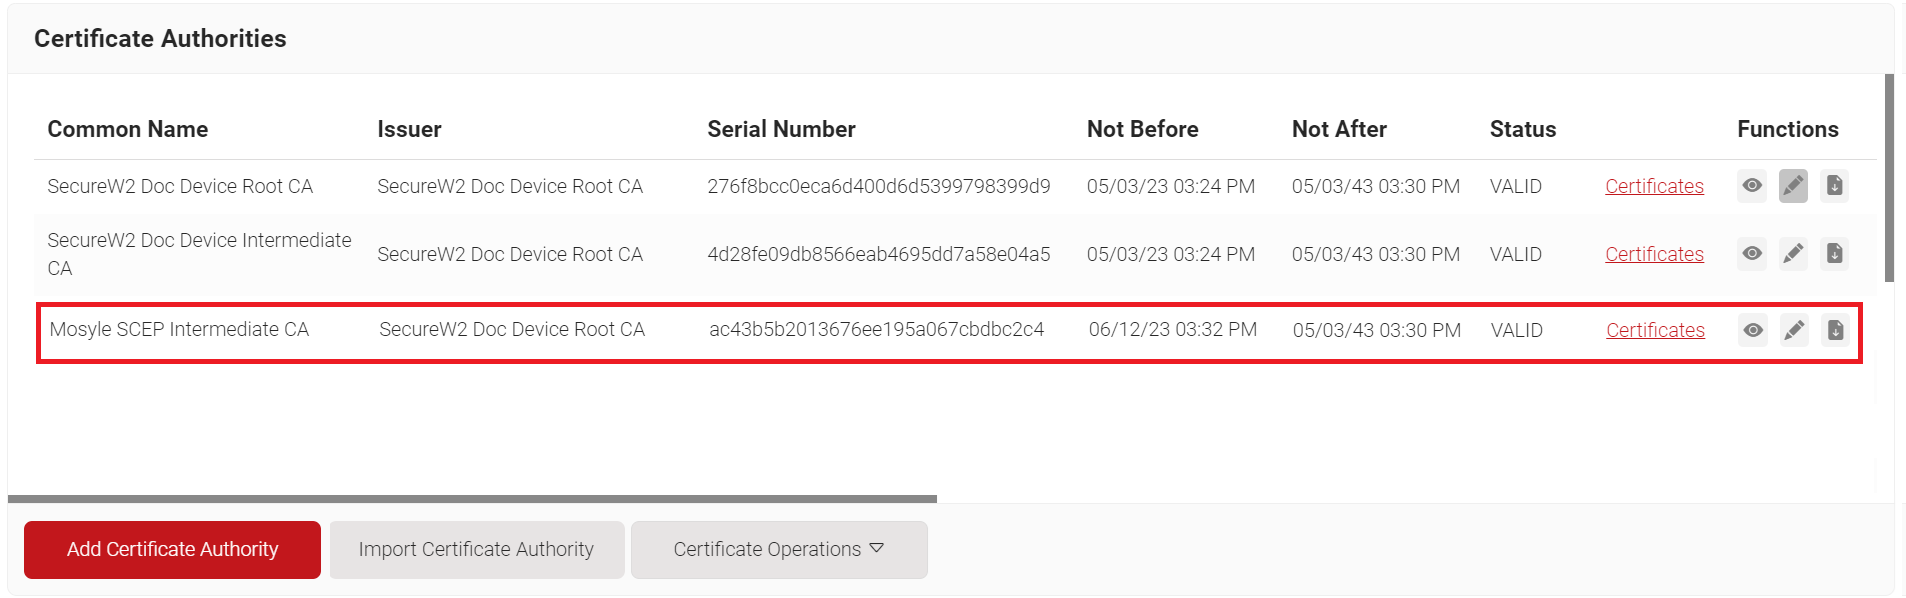
- Click Save. The new intermediate CA is generated.
Creating a Mosyle Certificate Template
A certificate template determines how information is encoded in the certificate to be issued by the Certificate Authority. It will consist of a list of certificate attributes and how the information must be encoded in the attribute values. The organization administrator provides this information using the JoinNow Management Portal.
SecureW2 recommends creating a separate template for each MDM platform for easier identification of different values being passed.
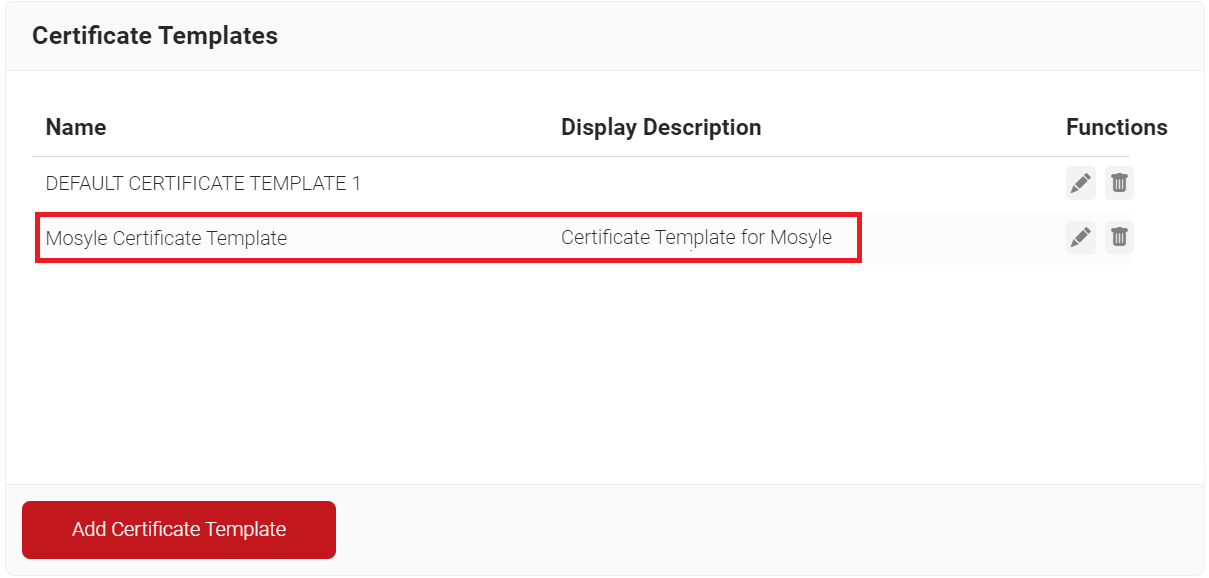
To create a Mosyle Certificate Template:
- Navigate to Dynamic PKI > Certificate Authorities.
- Scroll to the Certificate Templates section and click Add Certificate Template.

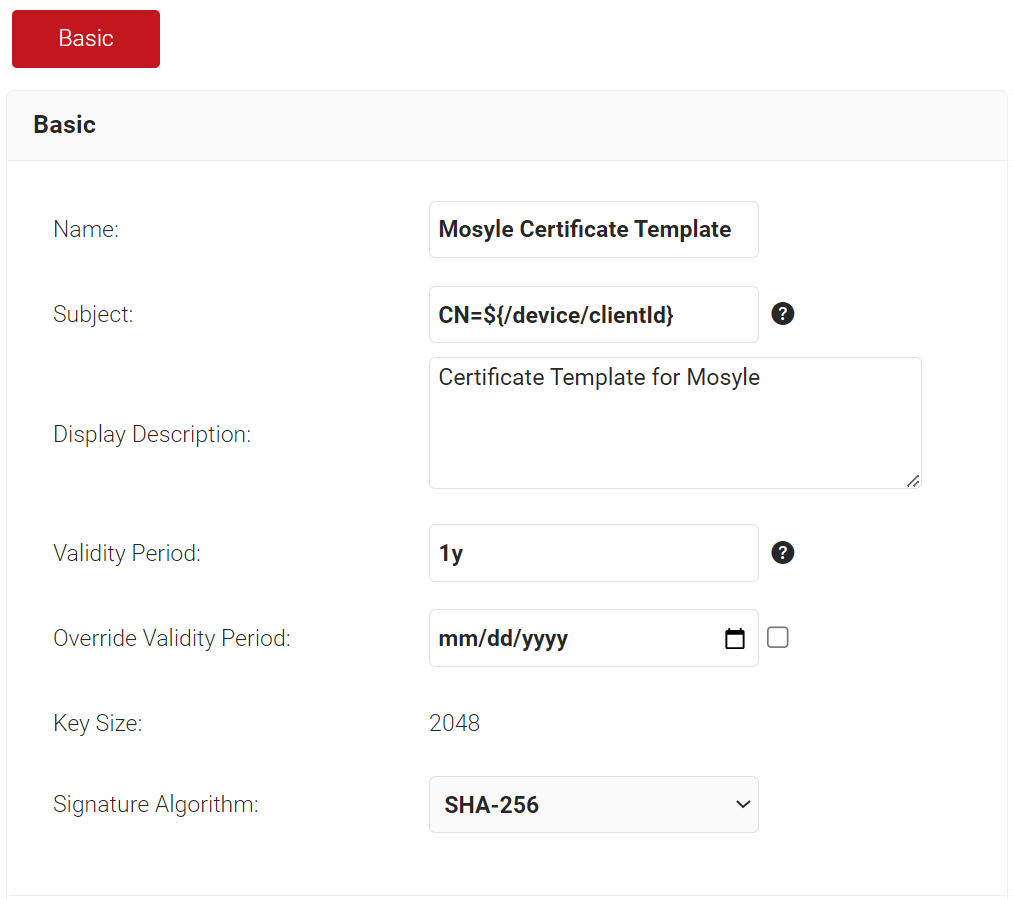
- In the Basic section, for the Name field, enter the name of the certificate template.
- In the Subject field, enter CN=${/device/clientId}.
- In the Display Description field, enter a suitable description for the certificate template.
- In the Validity Period field, type the validity period of the certificate (based on the requirement).
- From the Signature Algorithm drop-down list, select SHA-256 as the signature algorithm for the certificate signing request.
- In the SAN section:
a. In the DNS field, enter ${/device/identity}.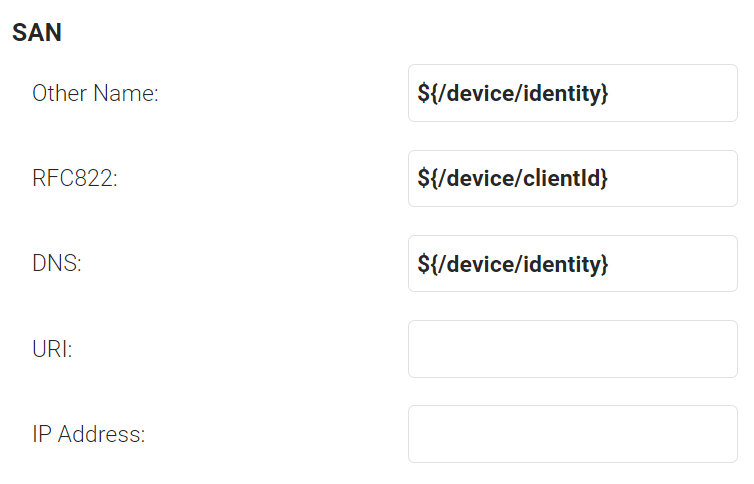
- In the Extended Key Usage section, from the Use Certificate For list, select Client Authentication.
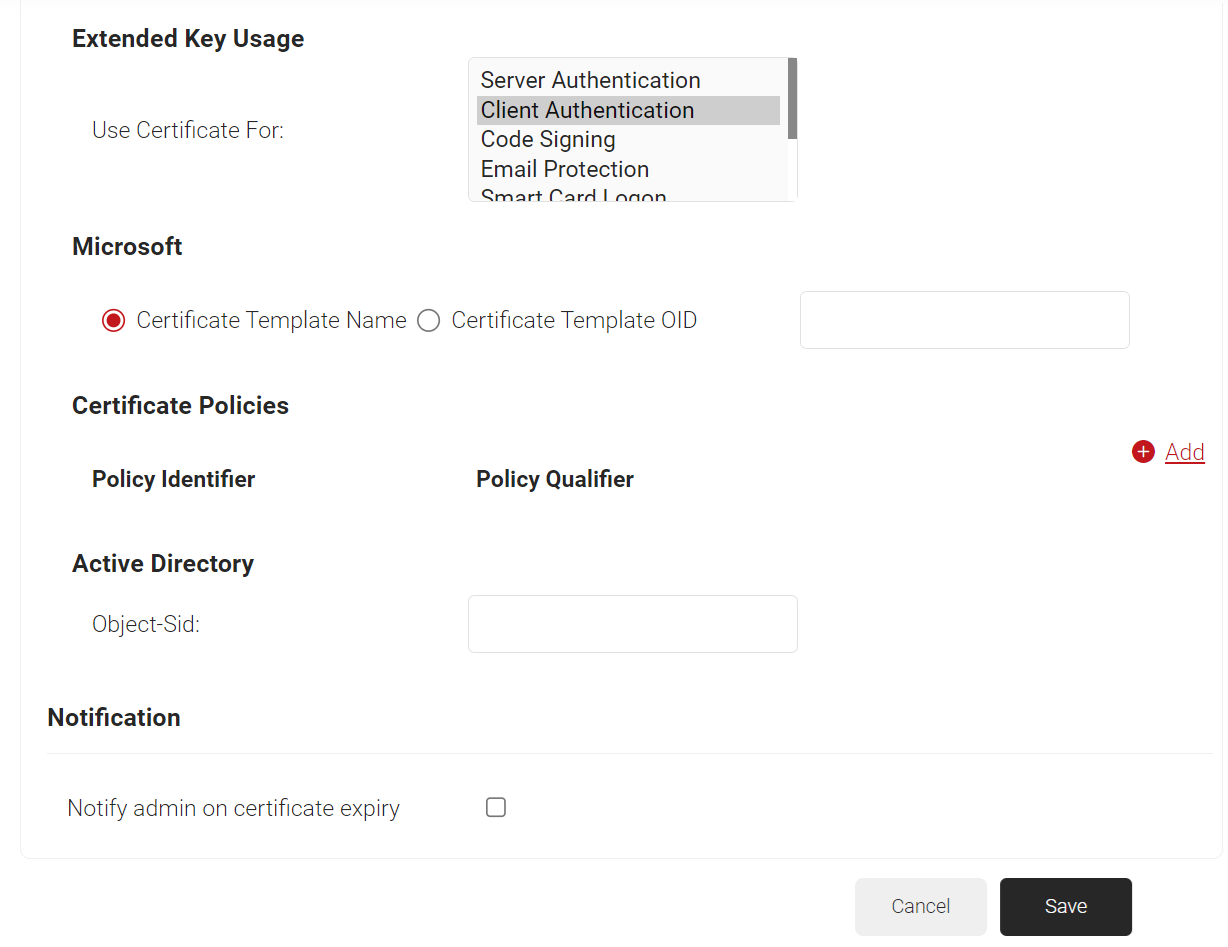
- Click Save.
Generating a SCEP URL and Secret
The SCEP URL and secret generated here will be passed to Mosyle to securely automate certificate enrollment for managed devices.
To generate a SCEP URL and Secret:
- Navigate to Integrations Hub > Device Management Platforms.
- Click Add API Gateway.
- In the Basic section, for the Name field, enter the name of the API Gateway.
- In the Description field, enter a suitable description for the API Gateway.
- From the Type drop-down list, select SCEP Enrollment Token.
- From the Vendor drop-down list, select Other.
- In the Vendor Name field, enter Mosyle.
- From the Certificate Authority drop-down list, select the CA created earlier (refer to the Creating an Intermediate CA for Mosyle SCEP Gateway Integration section). If you do not select a CA, the organization CA is chosen by default.
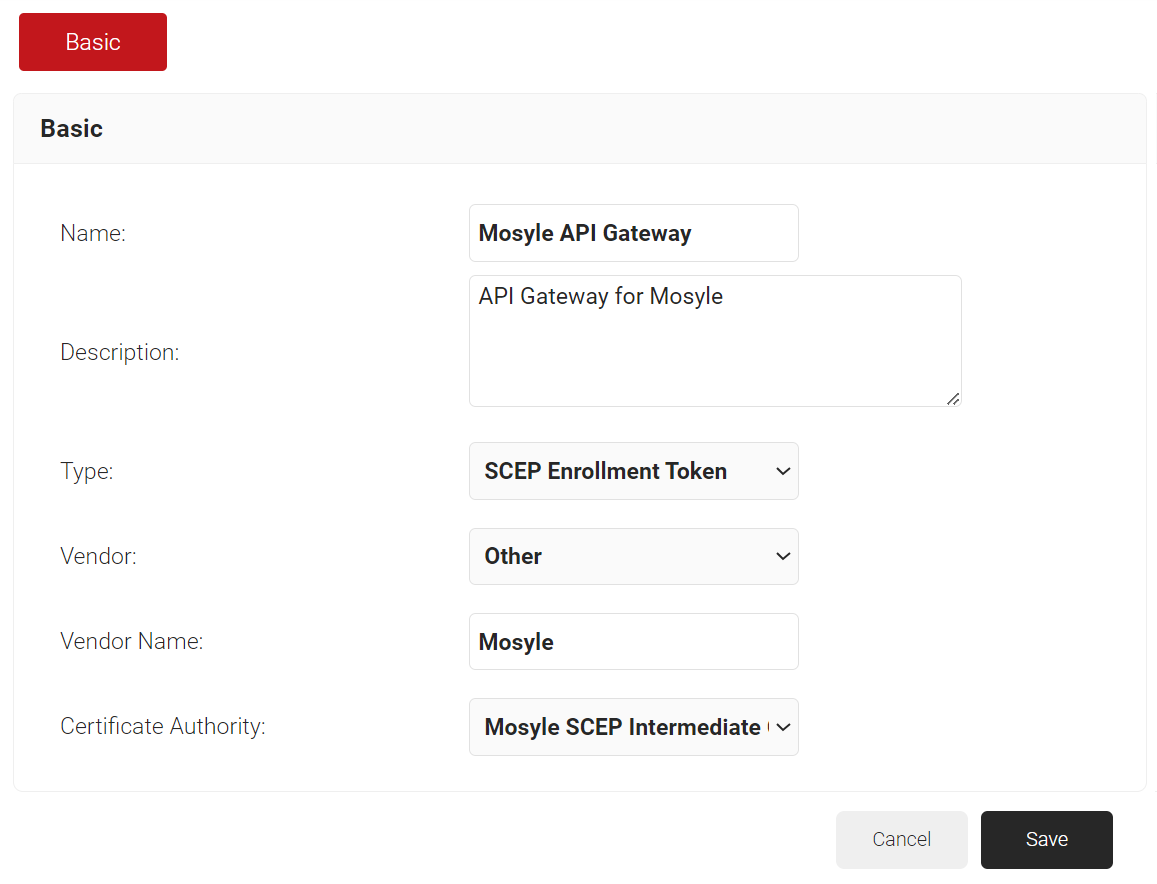
- Click Save.
- A .csv file that contains the API Secret and URL is downloaded. In addition, the Enrollment URL is displayed on the screen.
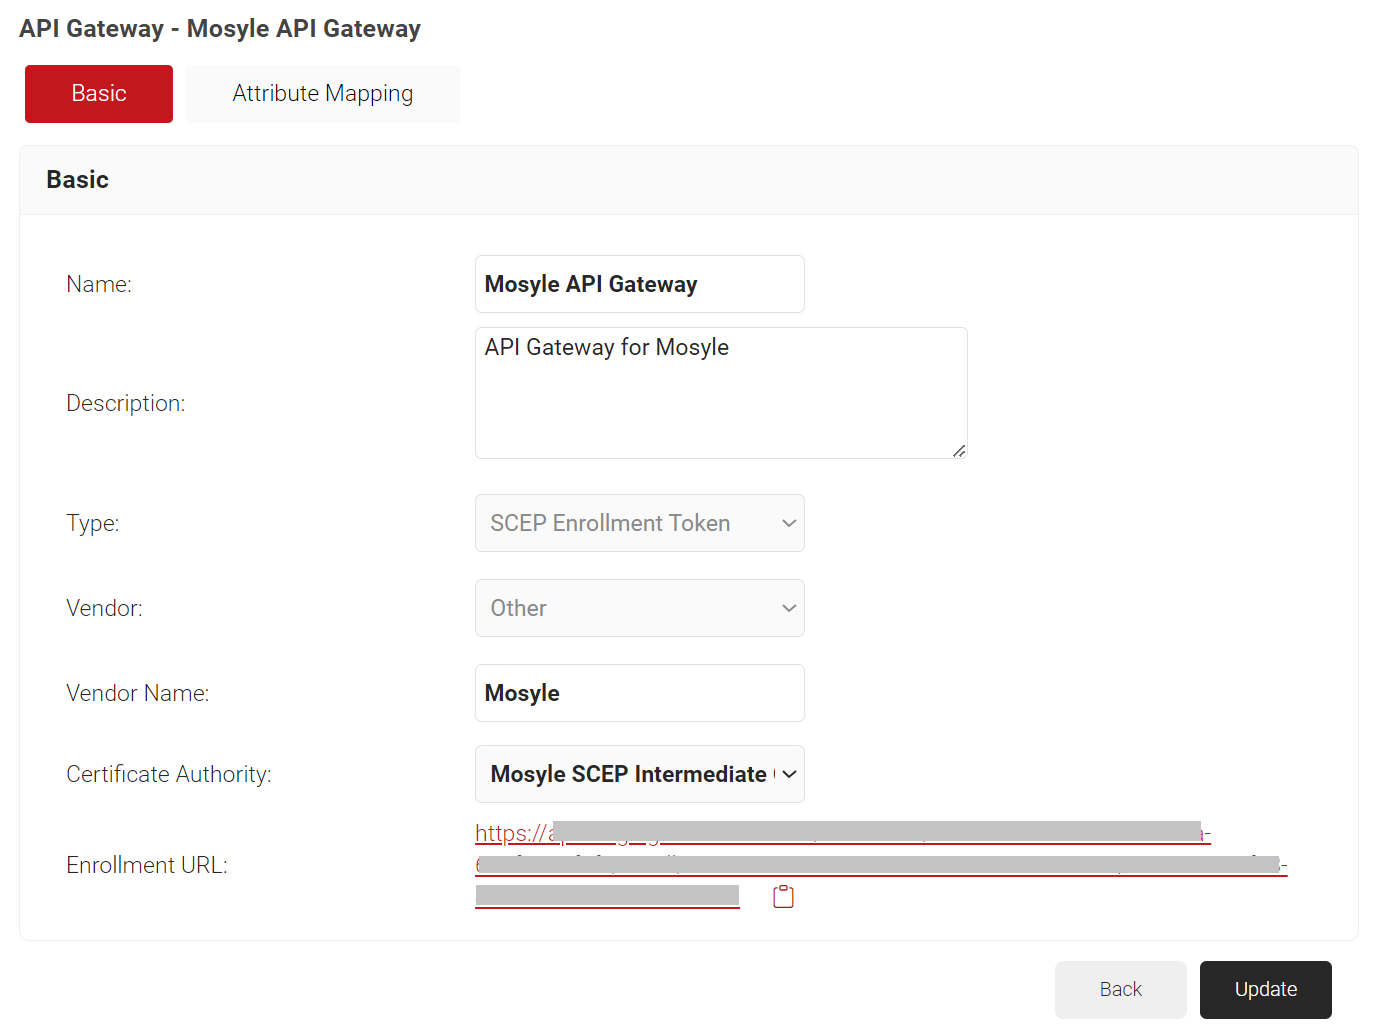
NOTE: Securely save the .csv file. This file is downloaded only once when the token is created. If you lose it, you cannot retrieve the secret.
Policy Management
Setting up MDM in Mosyle requires configuring three policies in the JoinNow Management Portal:
- Policy Workflow
- Enrollment Policy
- Network Policy
Policy Workflow allows us to create specific roles for users and groups, which can be used in the JoinNow Management Portal to create custom certificate enrollment policies and custom network access policies for use cases like network segmentation.
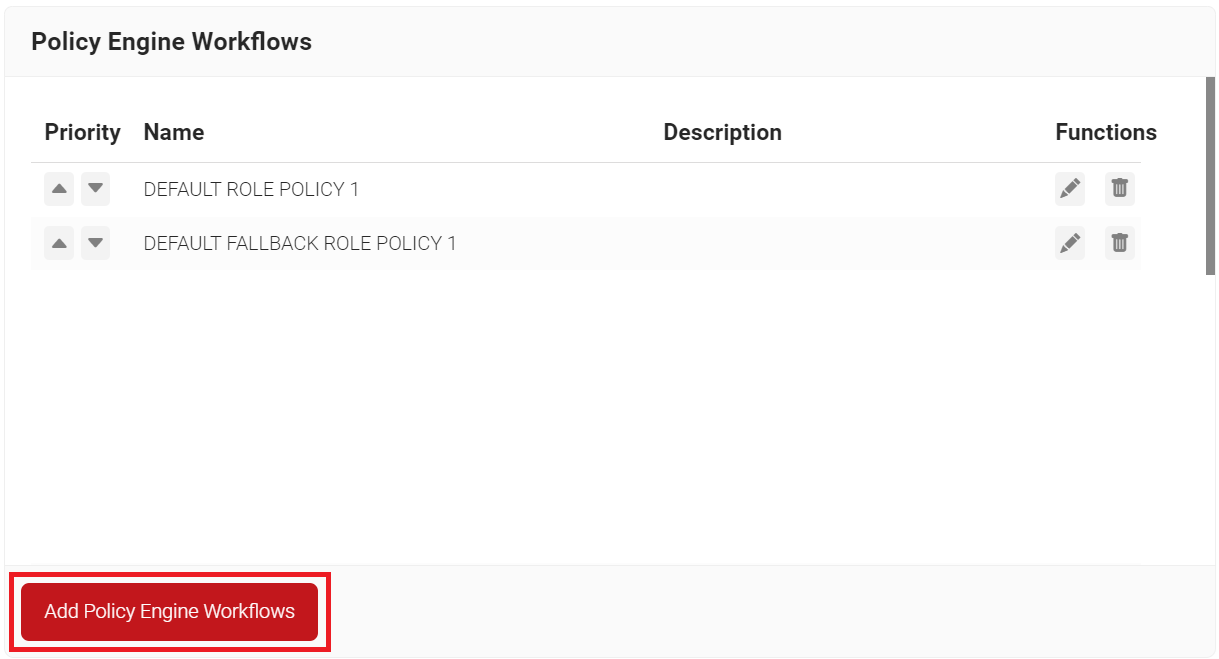
Configuring a Policy Workflows
To configure a Policy Workflows:
- Navigate to Policy Management > Policy Workflows.
- Click Add Policy Workflows.
- In the Basic section, enter the name of the Policy Workflows in the Name field.
- In the Display Description field, enter a suitable description for the Policy Workflows.
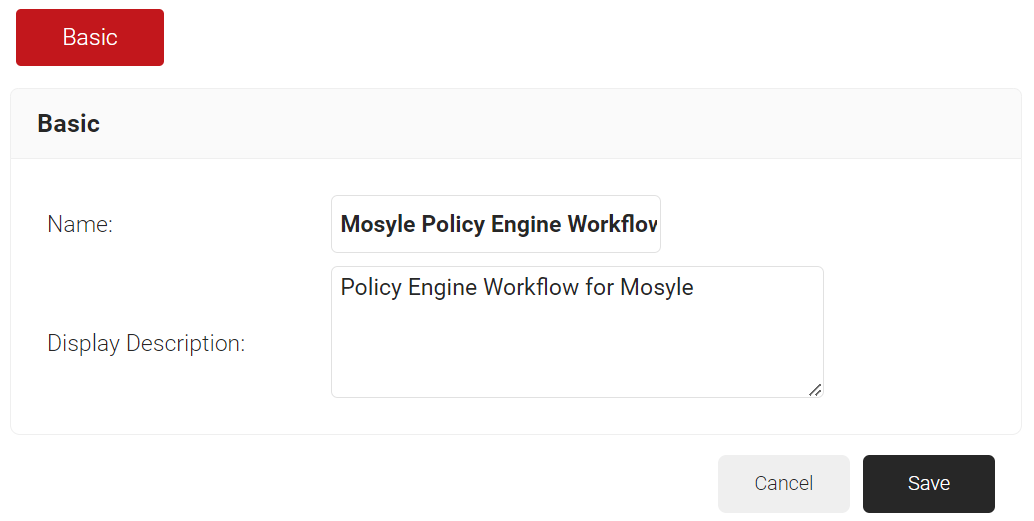
- Click Save.
- The page refreshes, and the Conditions tab is displayed.
- Select the Conditions tab.
- In the Conditions section, from the Identity Provider drop-down list, select the Mosyle API Token created earlier (see the Generating a SCEP URL and Secret section).
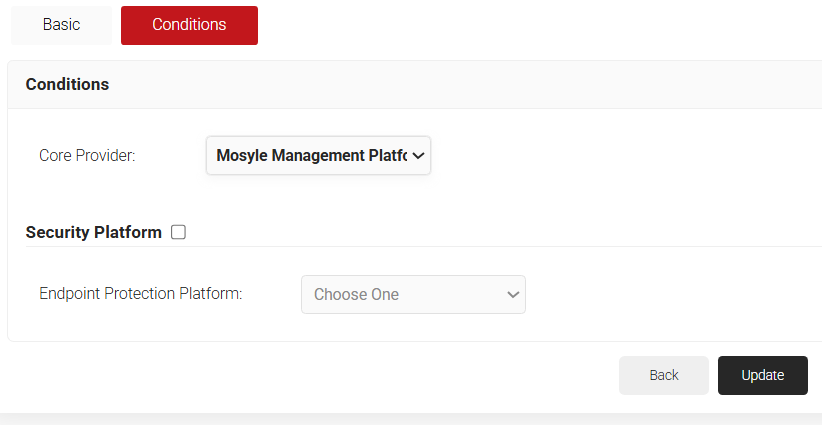
- Click Update.
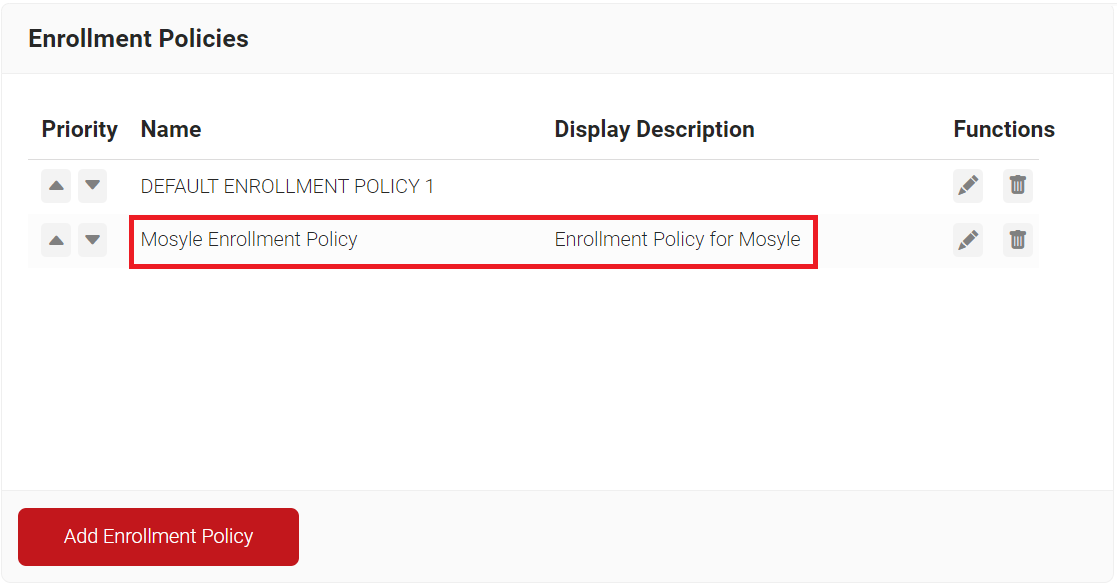
Configuring an Enrollment Policy
To configure enrollment policy:
- Navigate to Policy Management > Enrollment.
- Click Add Enrollment Policy.
- In the Basic section, enter the name of the network policy in the Name field.
- In the Display Description field, enter a suitable description for the network policy.
- Click Save.
- The page refreshes, and the Conditions and Settings tabs are displayed.
- Select the Conditions tab.
- Select Match All or Match Any based on your requirements to set authentication criteria.
- Click Add rule.
- Select the Settings tab.
- In the Settings section, from the Use Certificate Authority drop-down list, select the intermediate CA you created earlier (refer to the Creating an Intermediate CA for Mosyle SCEP Gateway Integration section).
- From the Use Certificate Template drop-down list, select the template you created earlier (refer to the Creating a Mosyle Certificate Template section).
- In the other settings, retain the default values.

- Click Update.
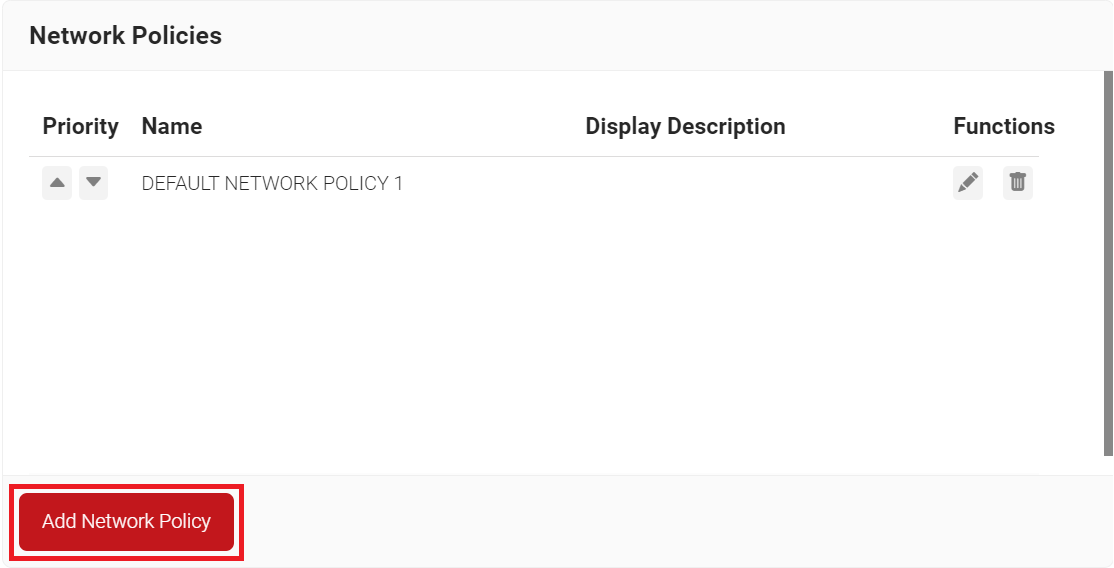
Configuring Network Policy
To configure network policy:
- Navigate to Policy Management > Network.
- Click Add Network Policy.
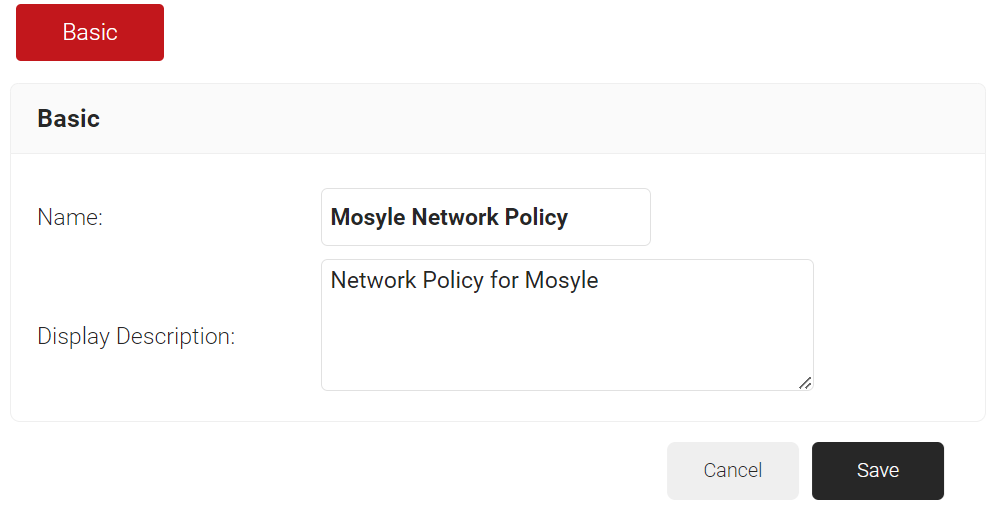
- In the Basic section, enter the name of the network policy in the Name field.
- In the Display Description field, enter a suitable description for the network policy.
- Click Save.
- The page refreshes, and the Conditions and Settings tabs are displayed.
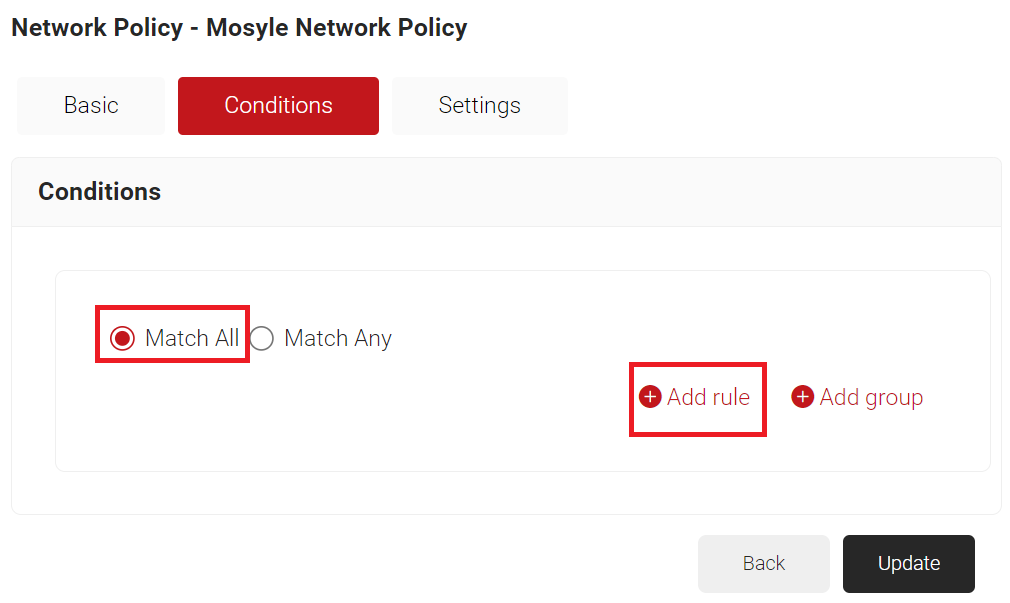
- Select the Conditions tab.
- Select Match All or Match Any based on your requirements to set authentication criteria.
- Click Add rule.
- Expand Identity and select the Role option.
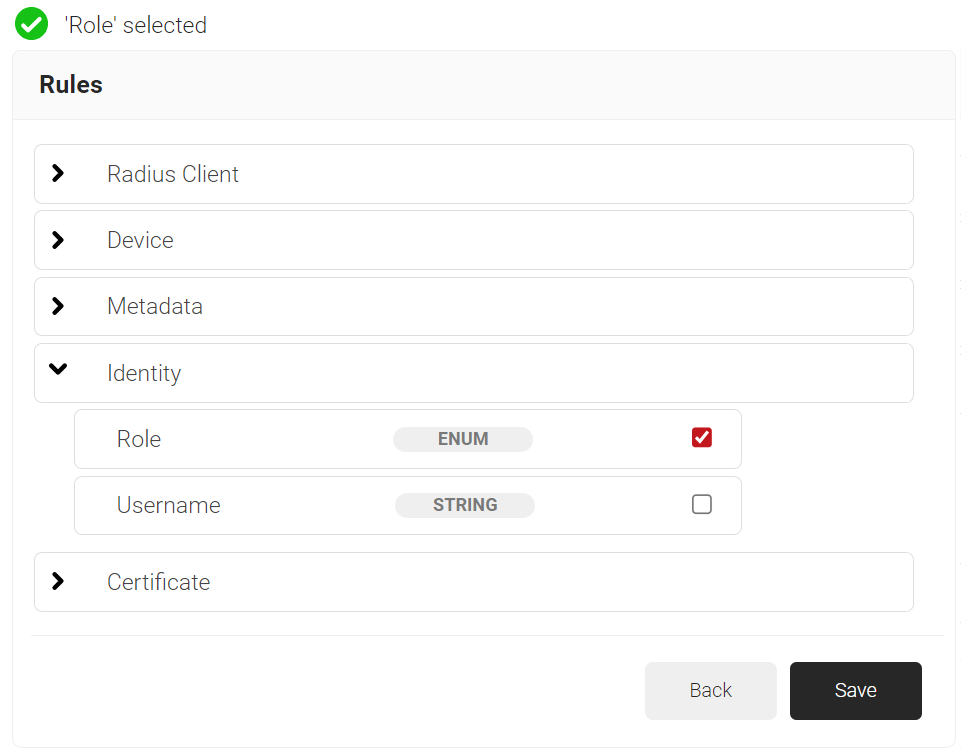
- Click Save.
- The Role option appears under the Conditions tab.
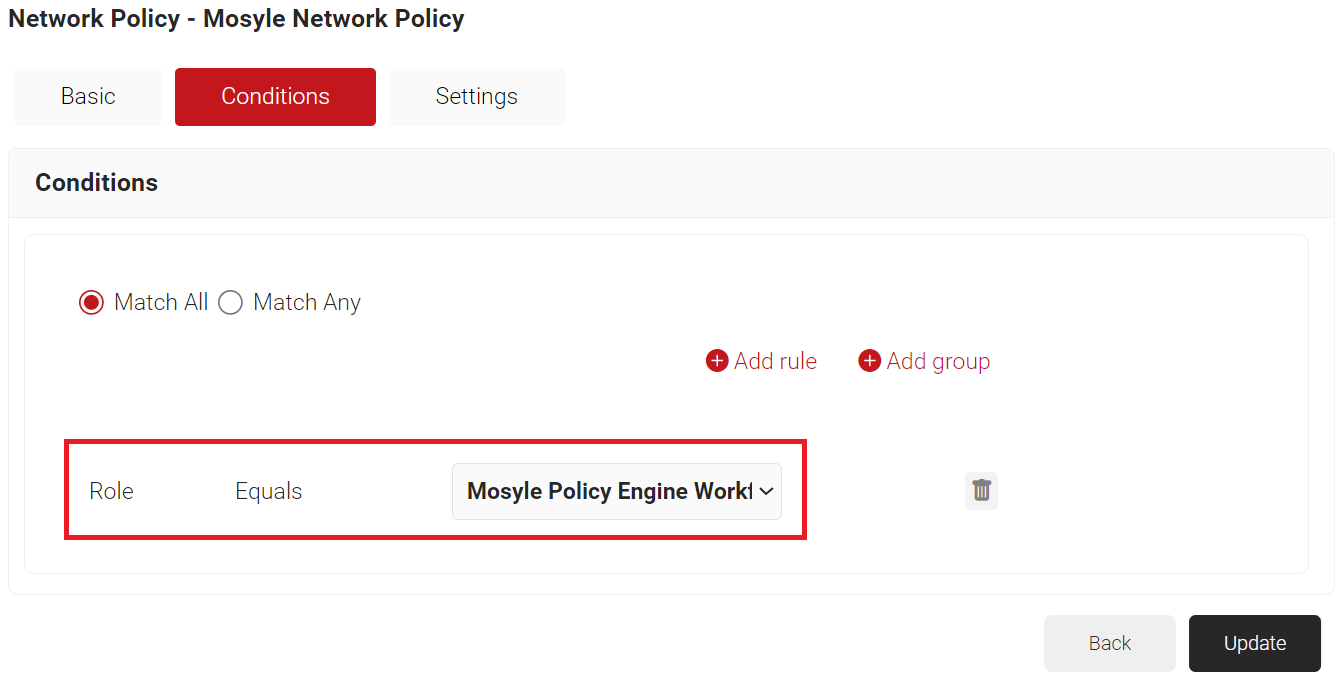
- From the Role Equals drop-down list, select the user role policy you created earlier (refer to the Configuring a Policy Workflows section). You can select multiple User Roles to assign to a Network Policy.
- Navigate to the Settings tab.
- Click Add Attribute.
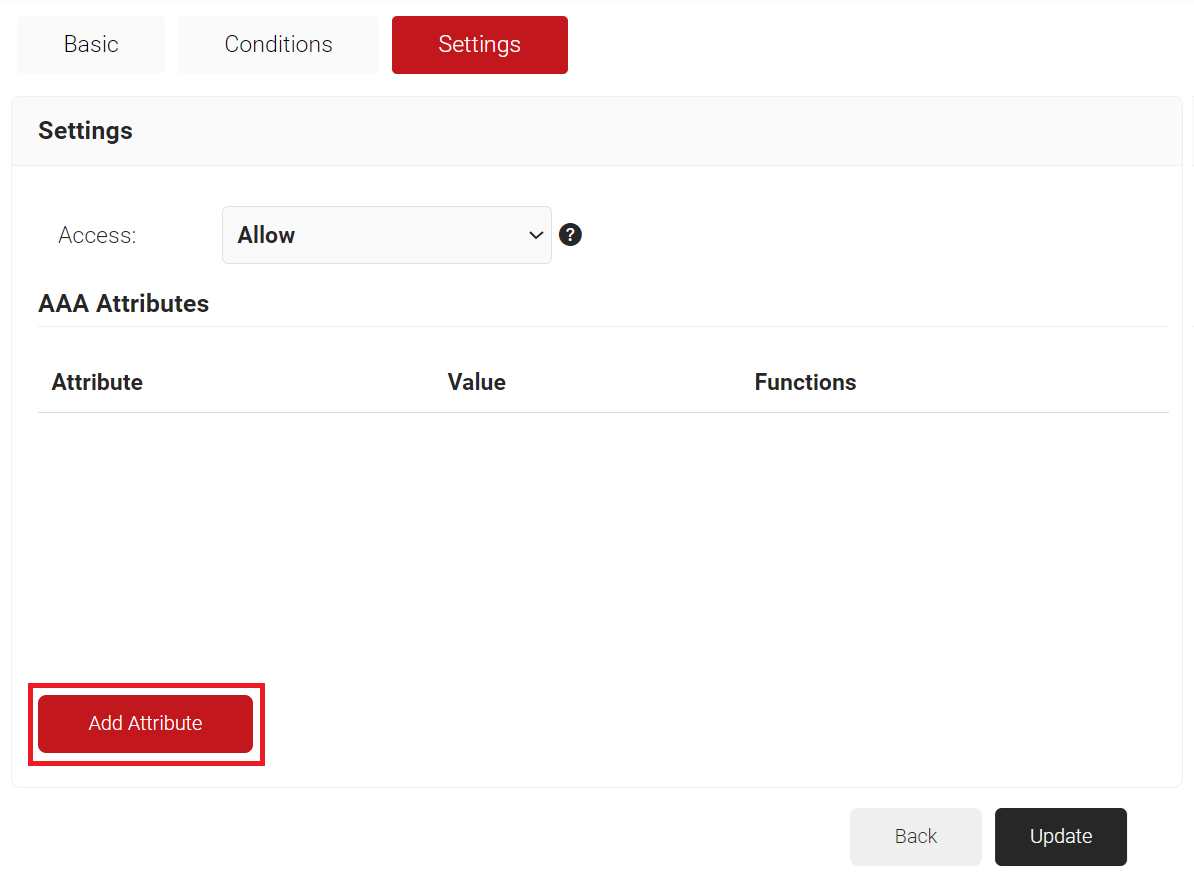
- From the Dictionary drop-down list, select RADIUS:IETF or Custom.
a. From the Attribute drop-down list, select an option.
b. In the Value text box, enter a value for the attribute.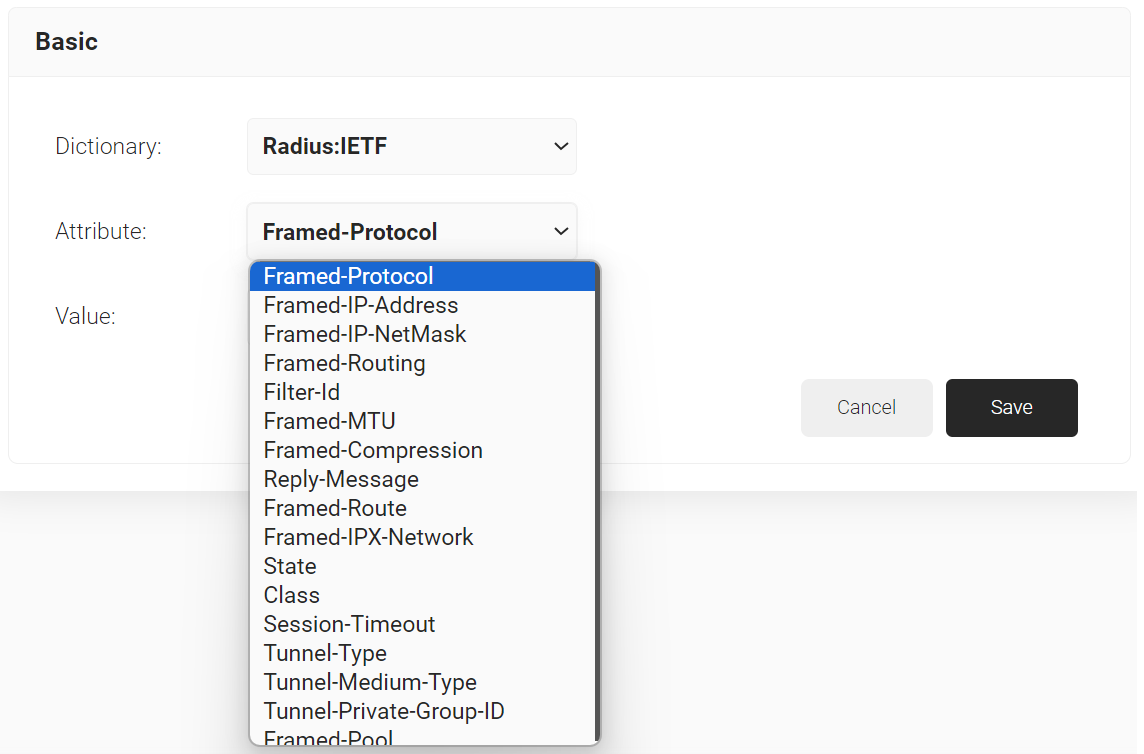
- Click Save.
Trusted Certificate Profiles
You should configure the Trusted Certificate Profile with the certificate of your RADIUS server certificate’s issuing authority. This is to make the devices trust your RADIUS server by validating the RADIUS server certificate. We achieve this server validation in the profile configuration by adding the Root and/or Intermediate Certificate Authority (CA) certificates that issued the RADIUS server certificate. When you assign this profile, the Mosyle managed devices receive the trusted certificates.
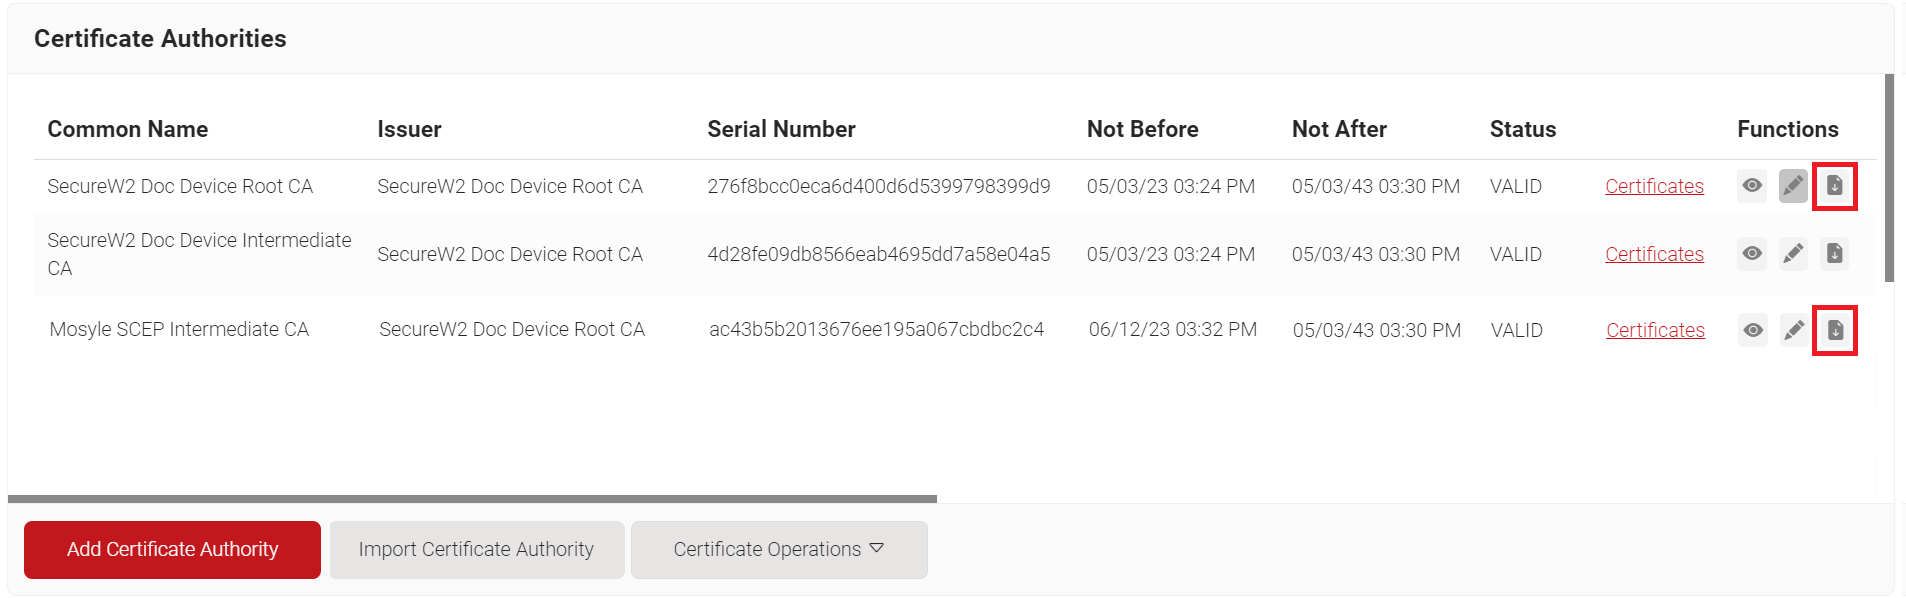
Exporting the SecureW2 Root, Intermediate, and RADIUS CA
To establish trusted profiles in Mosyle, the Root, Intermediate, and RADIUS Server CA certificates must be uploaded into their respective profiles within the platform. To download these certificates from the JoinNow Management portal, follow the below steps:
- Log in to the JoinNow Management Portal.
- Navigate to Dynamic PKI > Certificate Authorities.
- In the Certificate Authorities section, click the Download link for the Root CA and Intermediate CA issued to your organization (see the Creating an Intermediate CA for Mosyle SCEP Gateway Integration section).
Exporting RADIUS Root CA
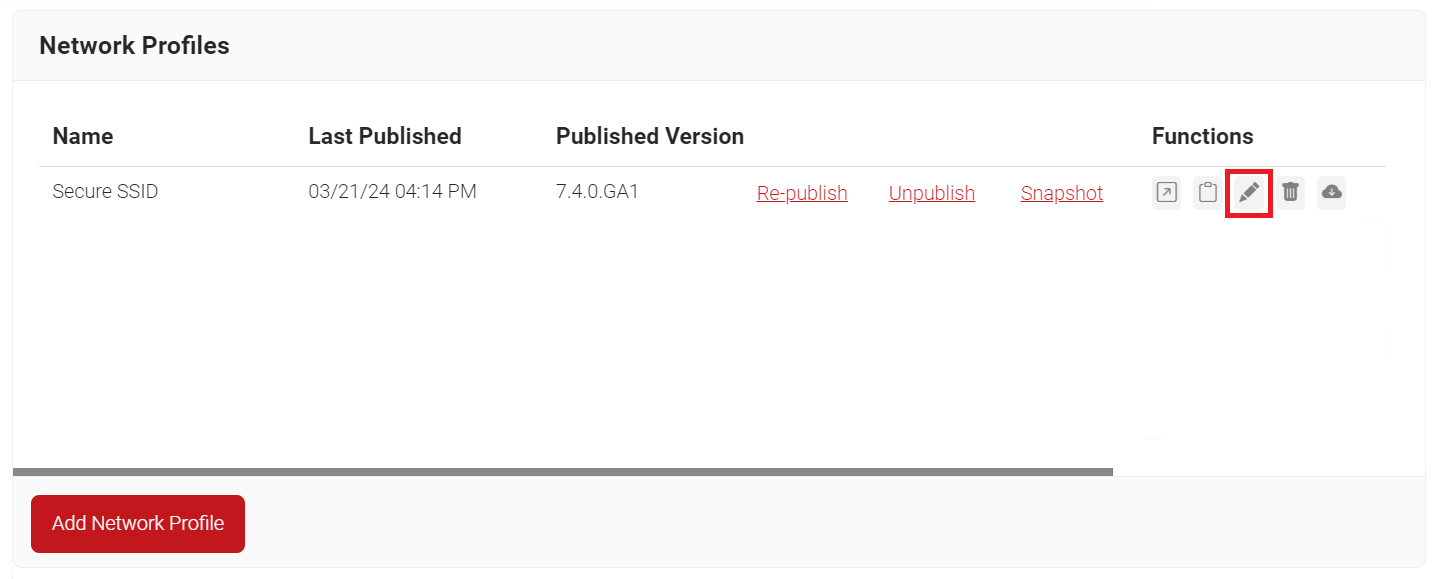
Similarly, for downloading the RADIUS Server Root CA:
- Navigate to Device Onboarding > Network Profiles.
- On the Network Profiles page, click the Edit link of the network profile configured earlier.
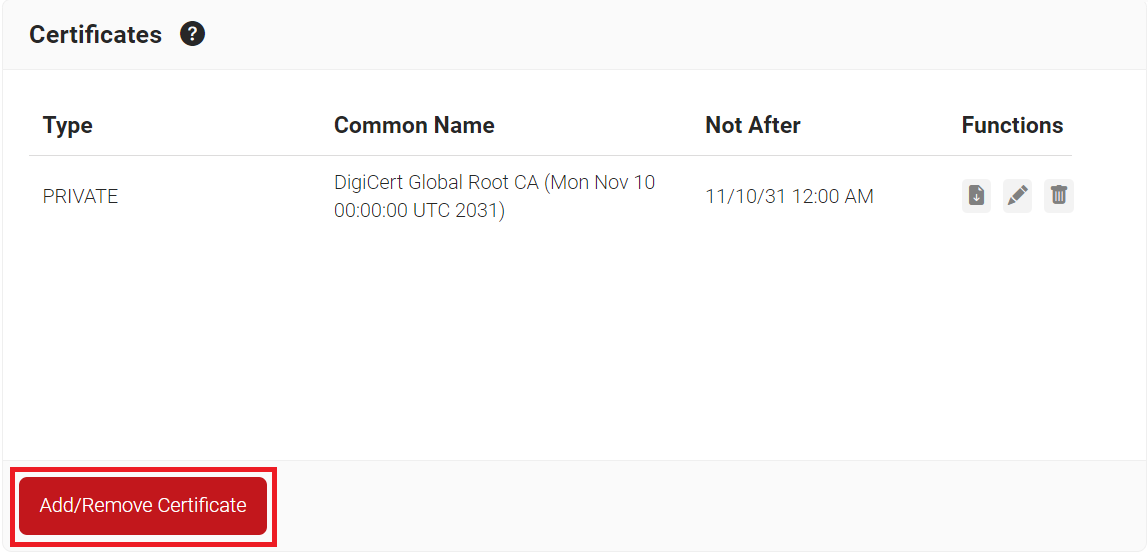
- Scroll down to the Certificates section and click Add/Remove Certificate.
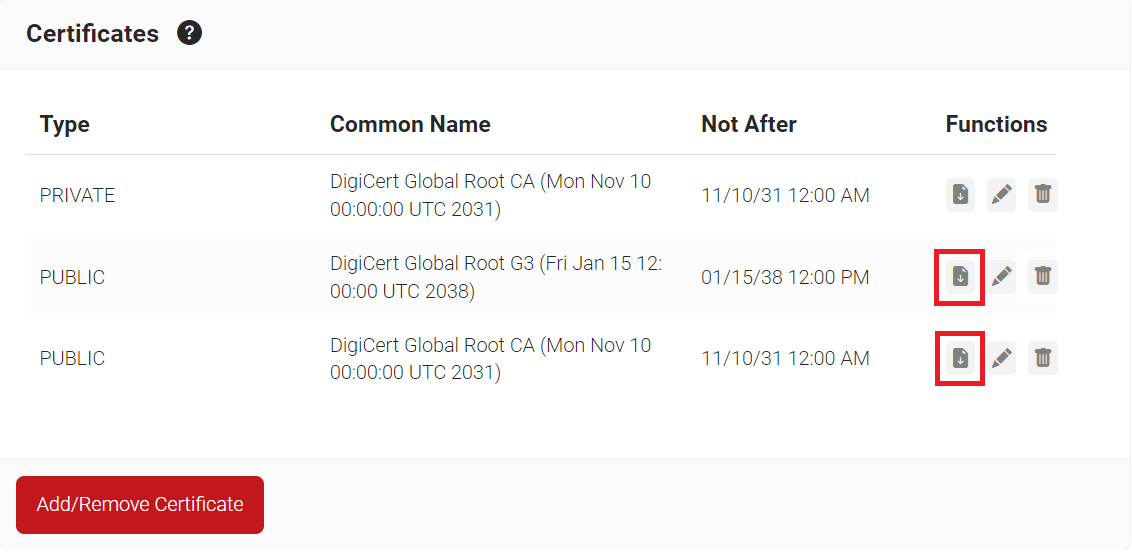
- Select the DigiCert Global Root CA (Mon Nov 10 00:00:00 UTC 2031) and DigiCert Global Root G3 (Fri Jan 15 12:00:00 UTC 2038) checkboxes as shown in the following screen.

- Click Update.
- The CA appears in the Certificates section.
- Click Download.
Configuring SCEP Enrollment in Mosyle
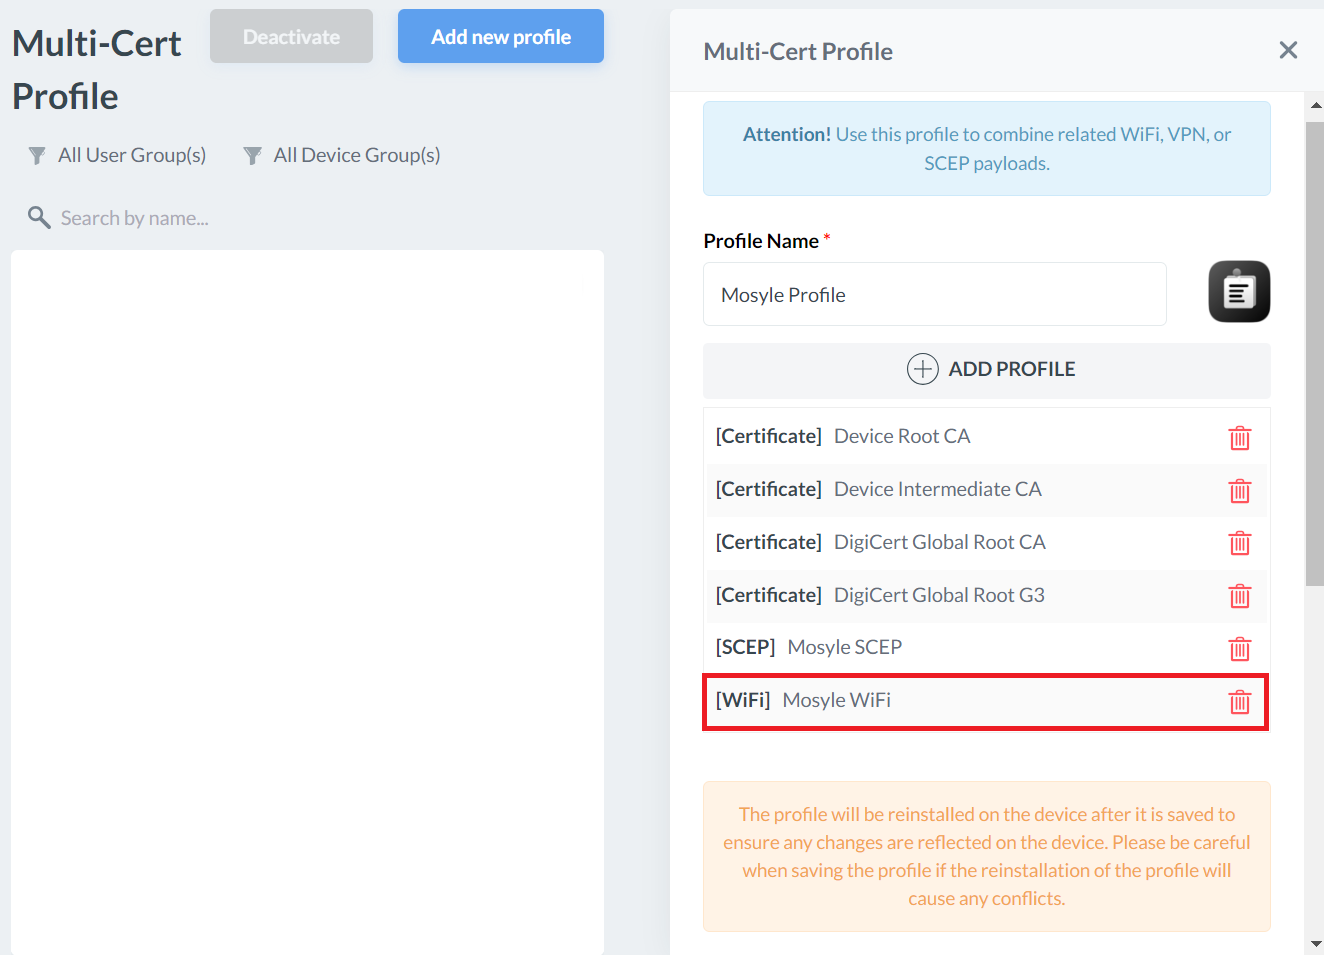
By configuring a Multi-cert profile in Mosyle, devices can be enrolled for certificates via SCEP. Five profiles must be created in Mosyle to configure SCEP.
NOTE: You require a Mosyle Premium subscription for an automated Wi-Fi connection.
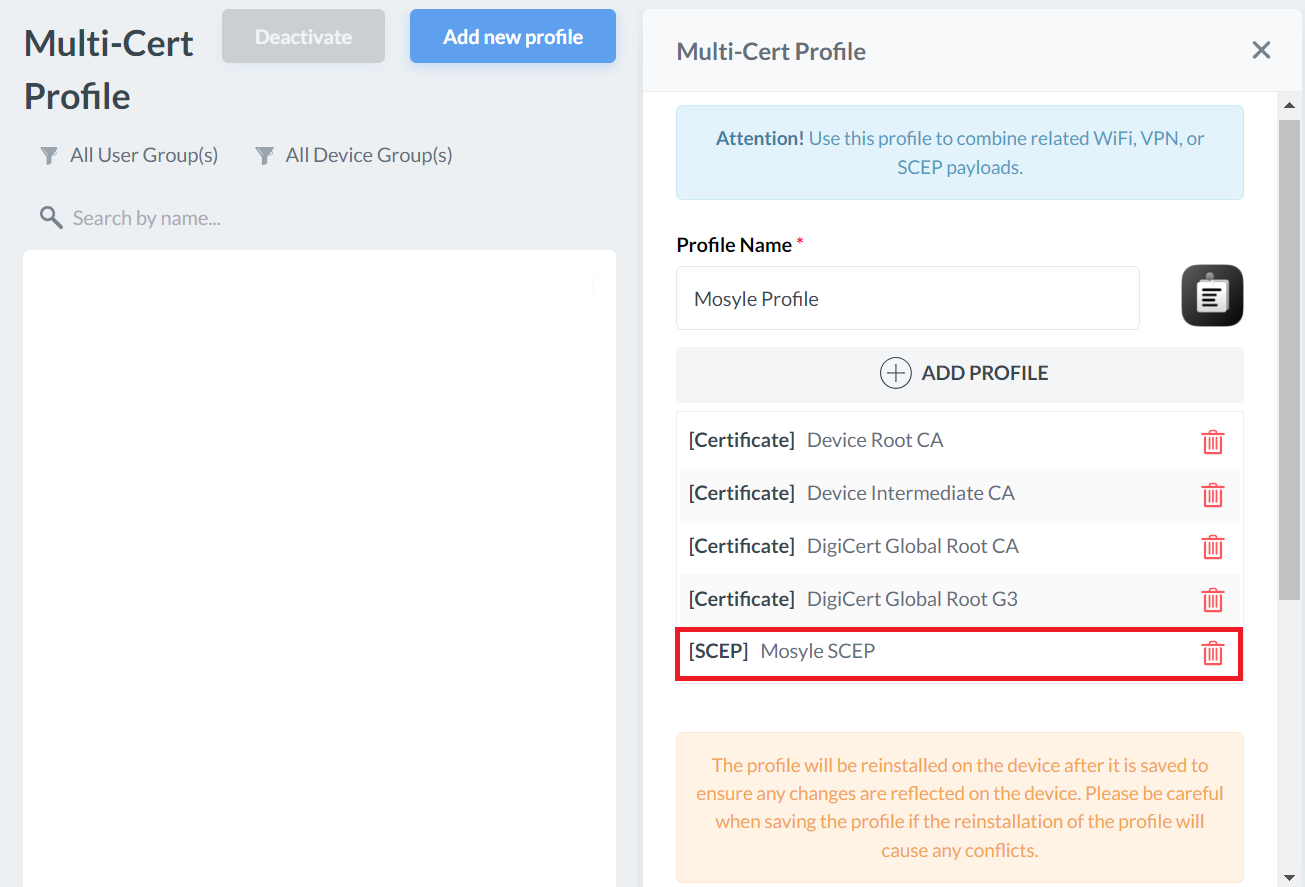
Creating a Multi-Cert Profile
The device needs to have the Issuing CA installed to complete the chain of trust, and the RADIUS CA installed so it can perform server certificate validation for a more secure connection. We will use a Multi-Cert Profile to install the CAs on the device.
- Log in to the Mosyle Portal.
- To add a new profile, navigate to Management > Management Profiles and select Multi-Cert Profile.
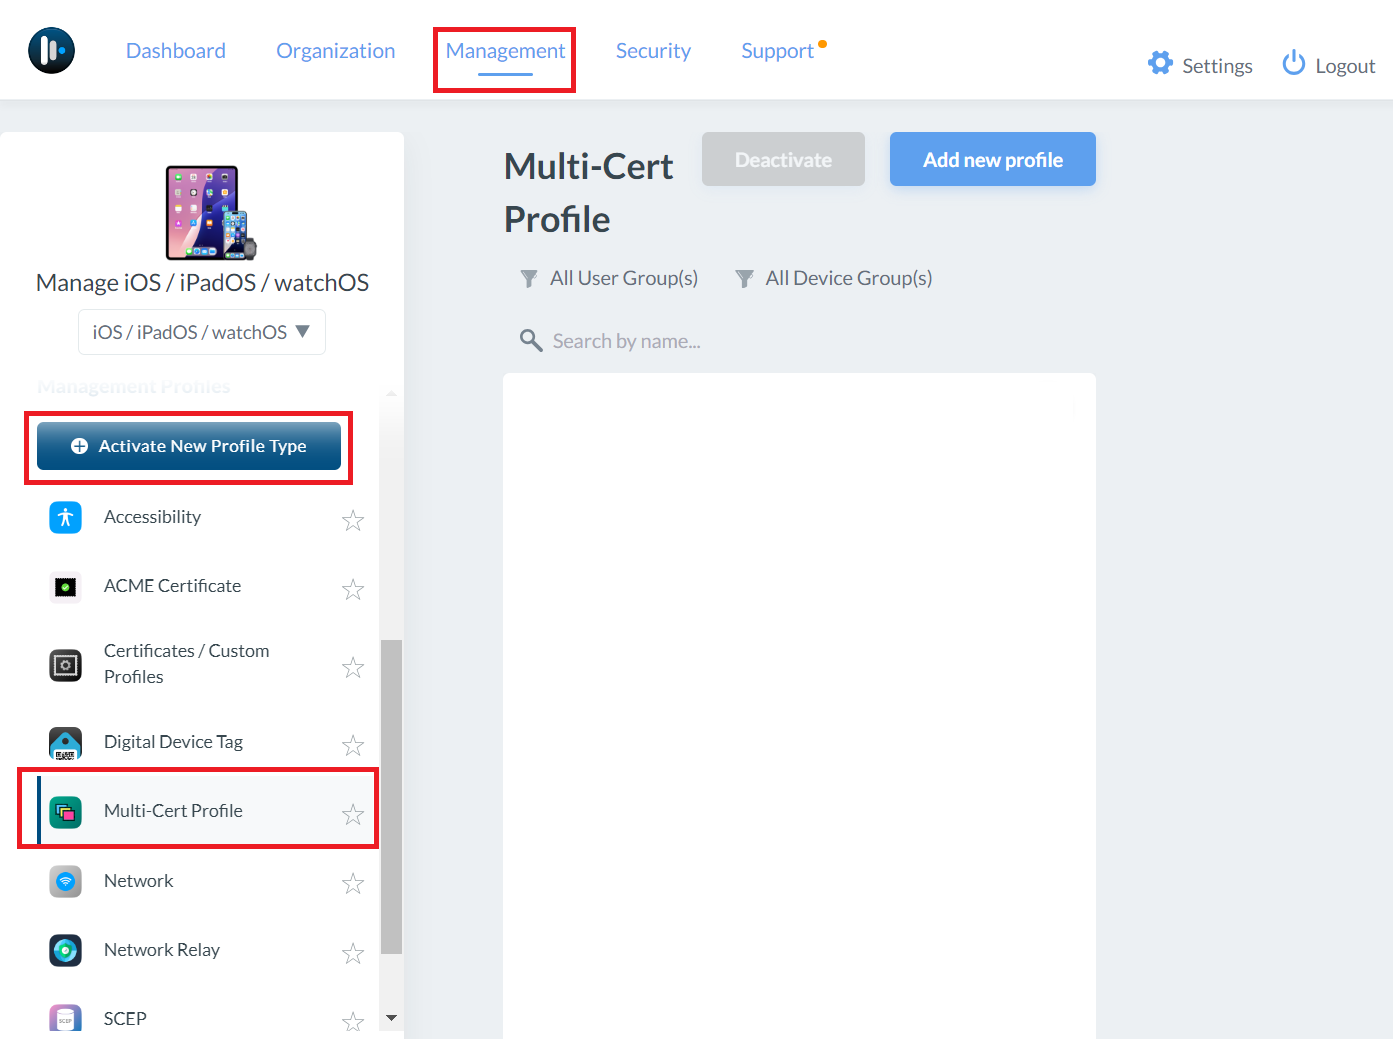
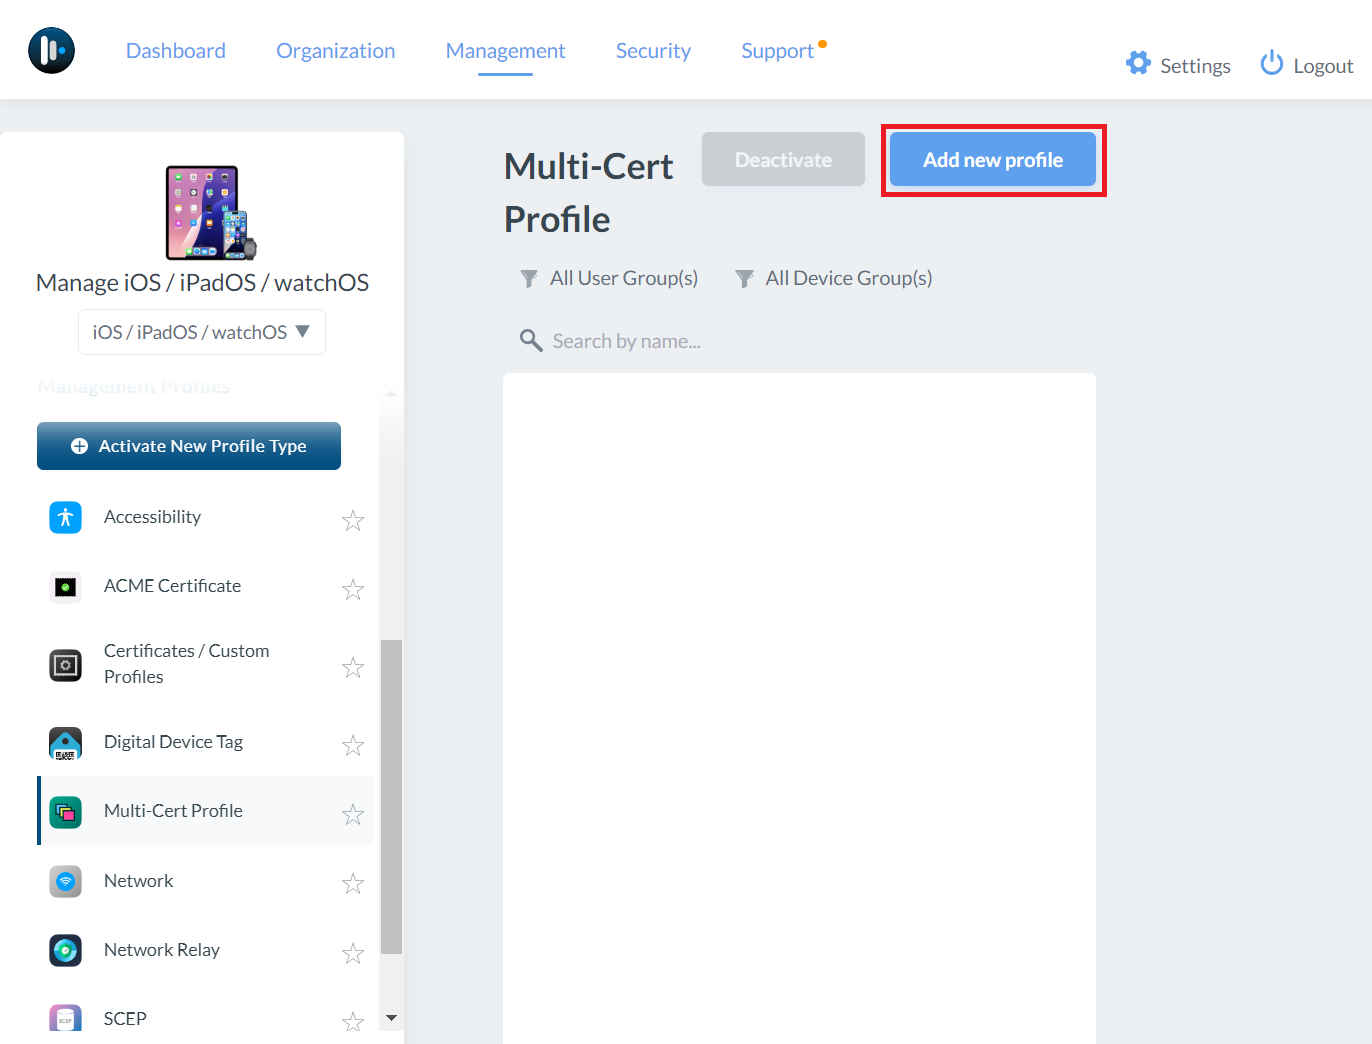
NOTE: If the Multi-Cert Profile option isn’t available, you might need to activate that profile type. - Click Add new profile.
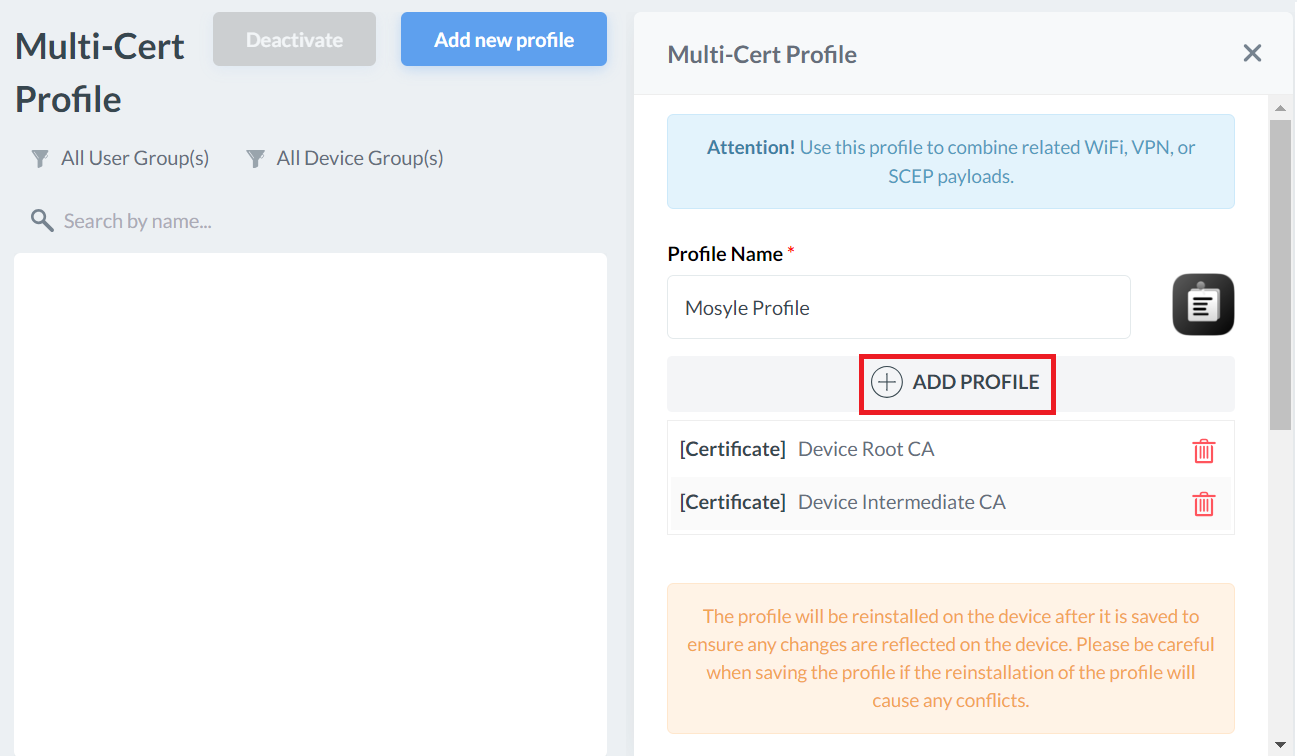
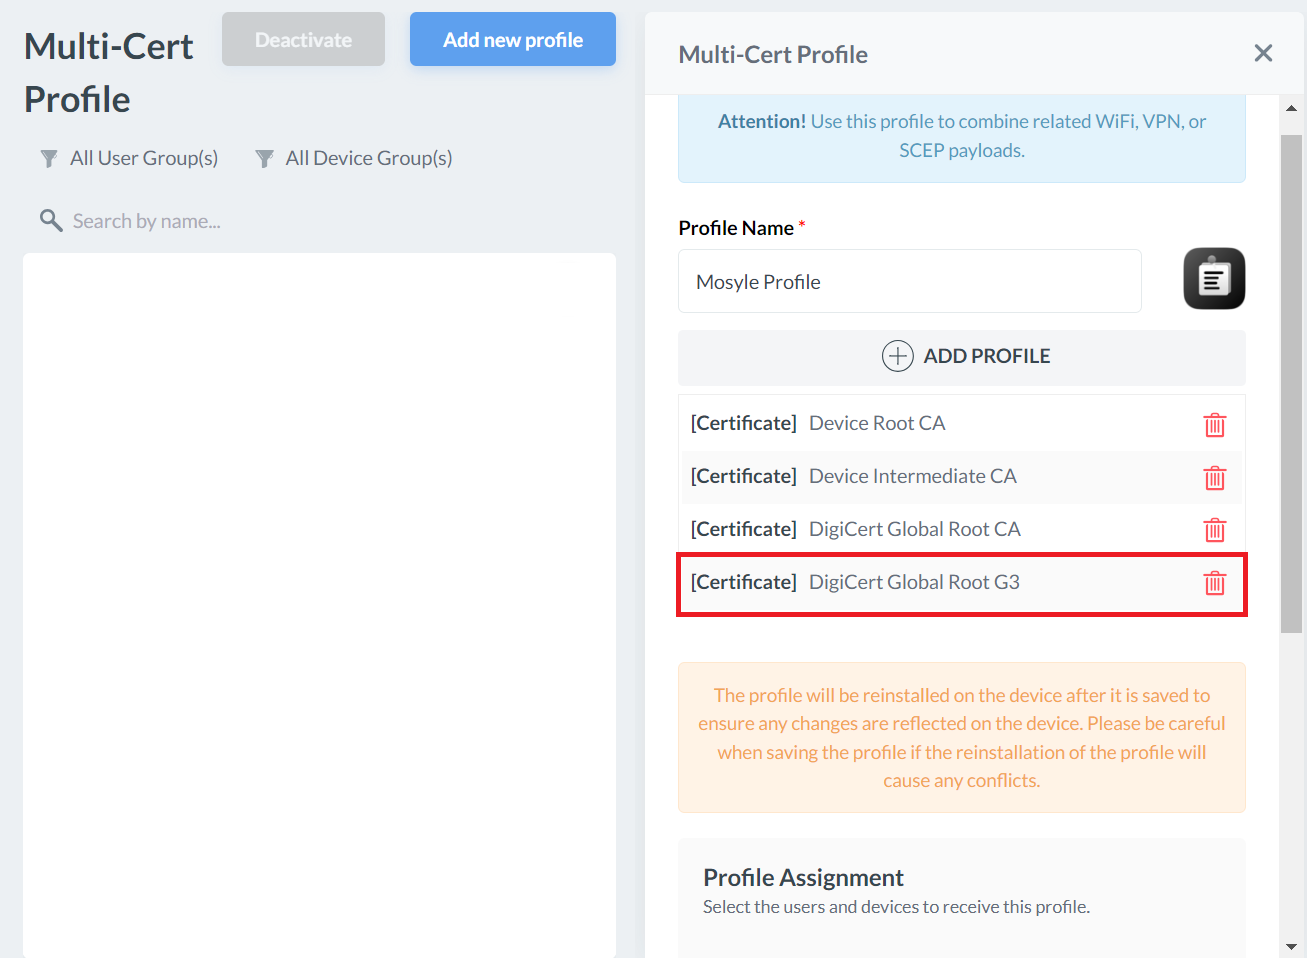
Creating a ROOT CA Profile
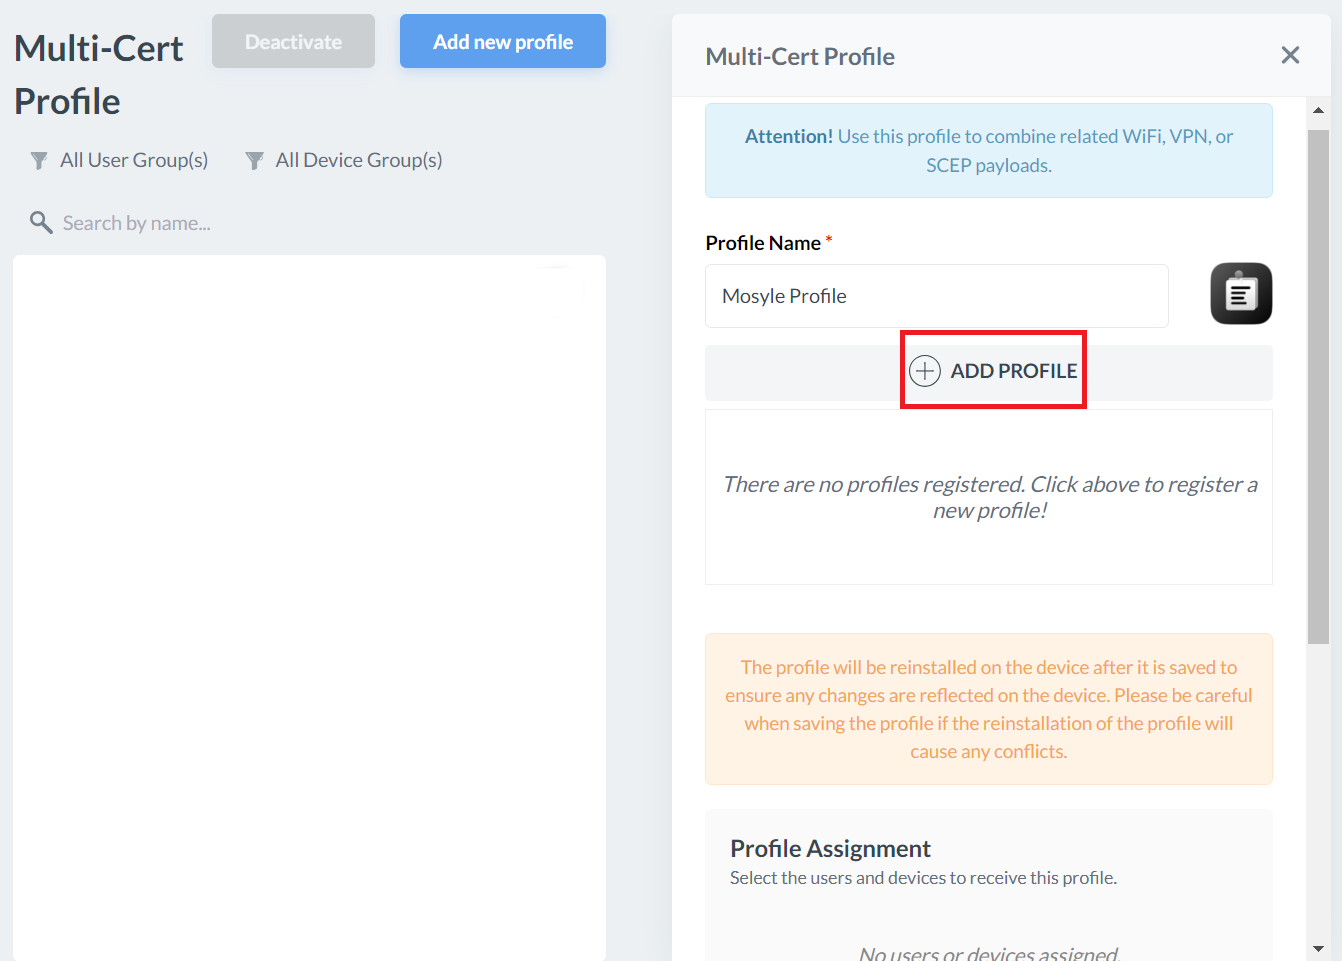
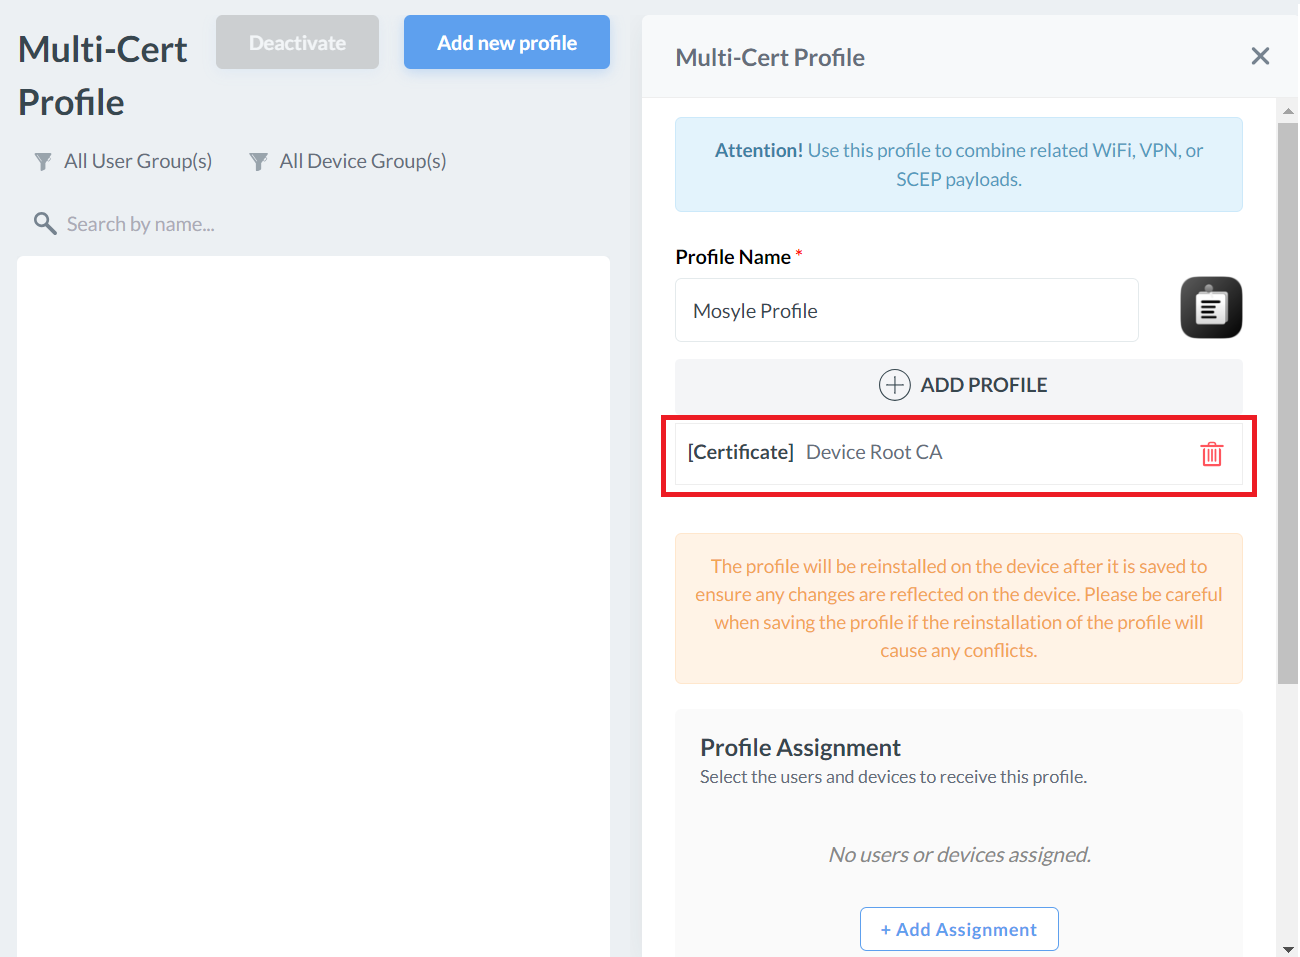
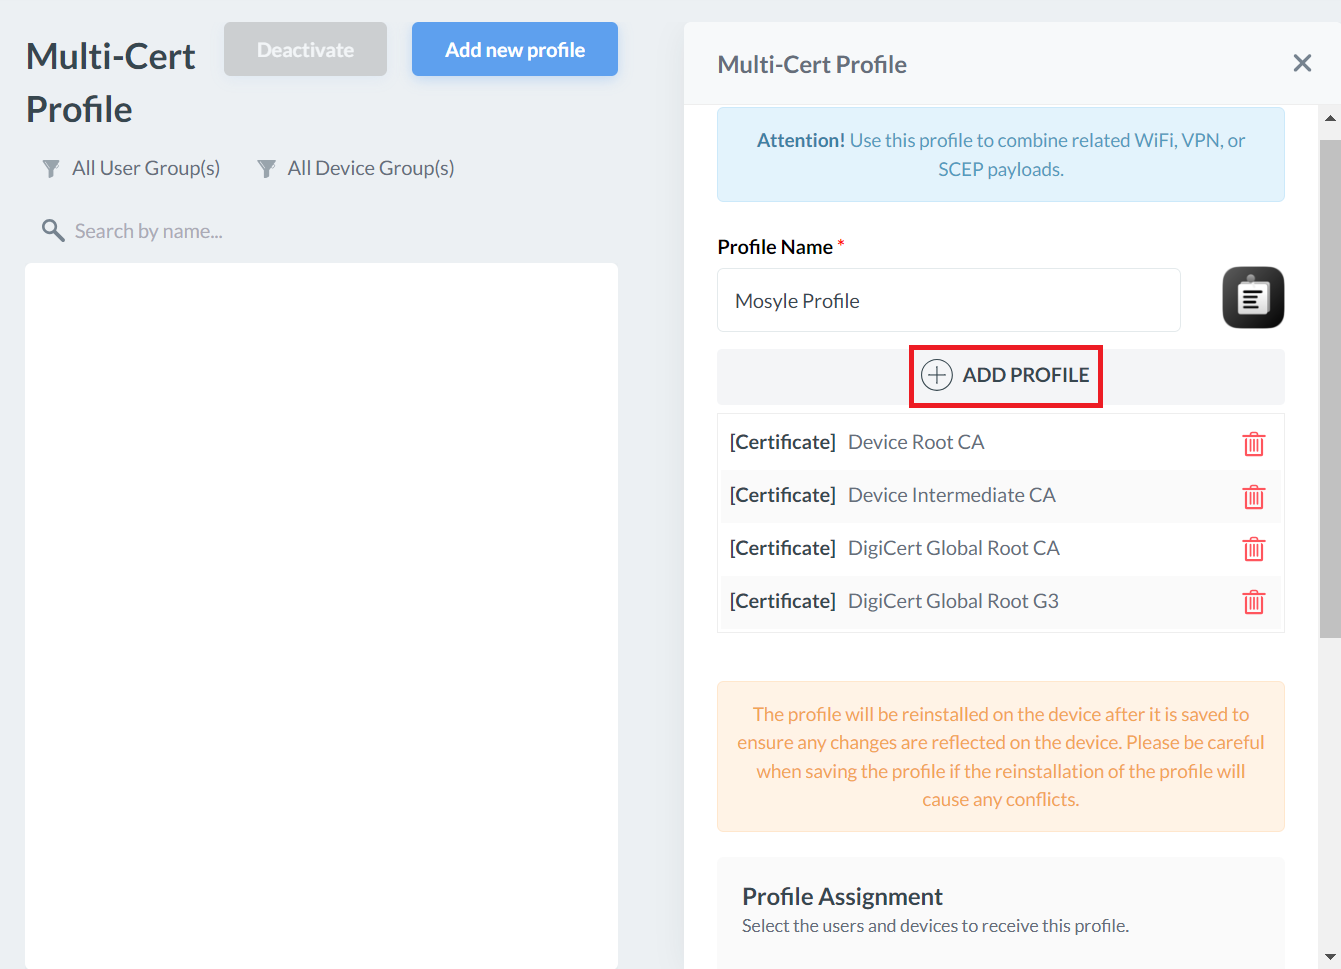
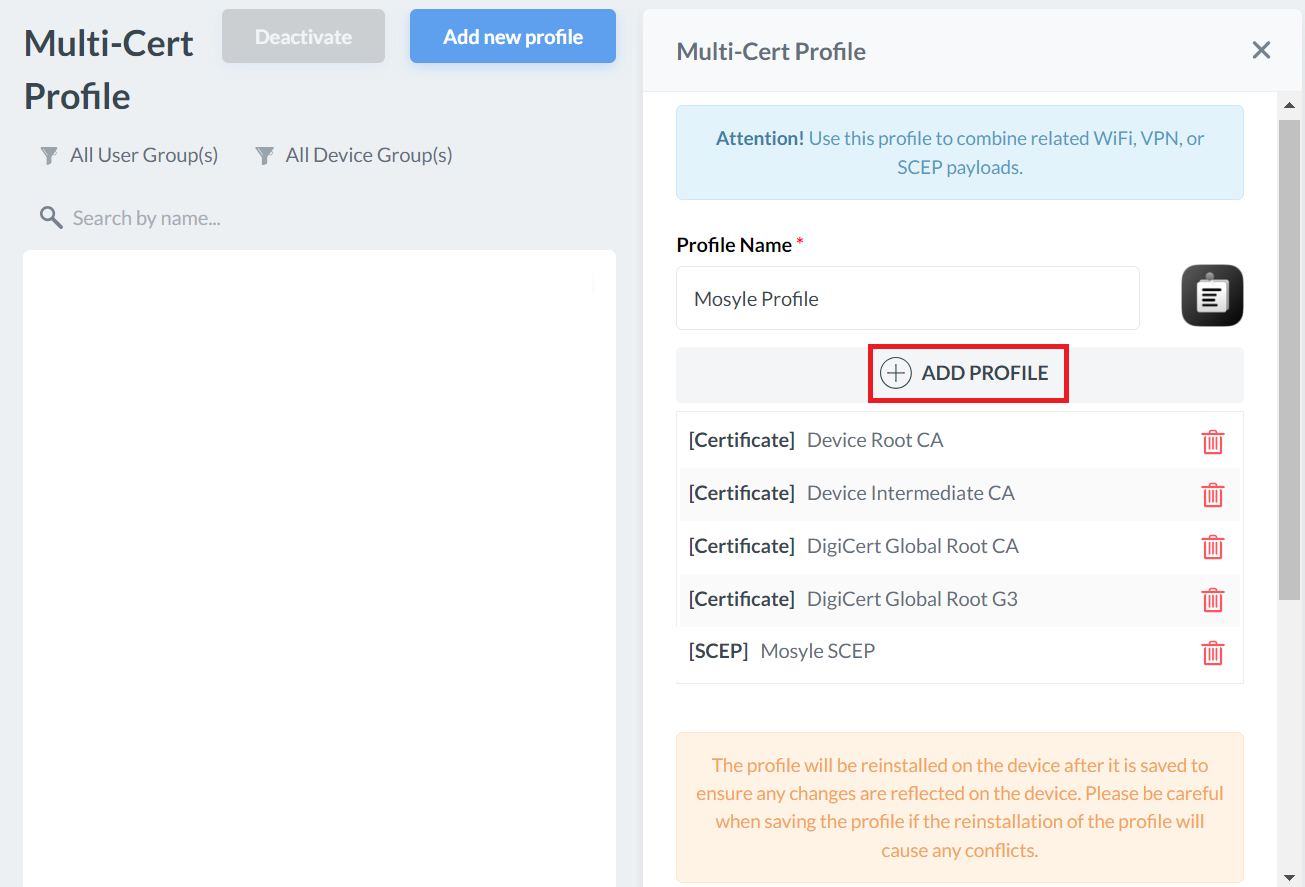
- In the Profile Name field, enter a name for your Multi-Cert Profile.
- Click + ADD PROFILE.
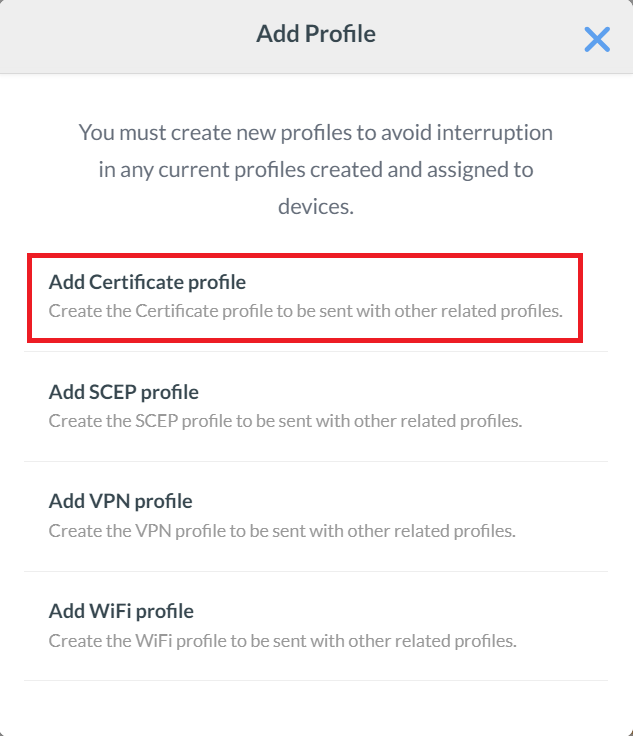
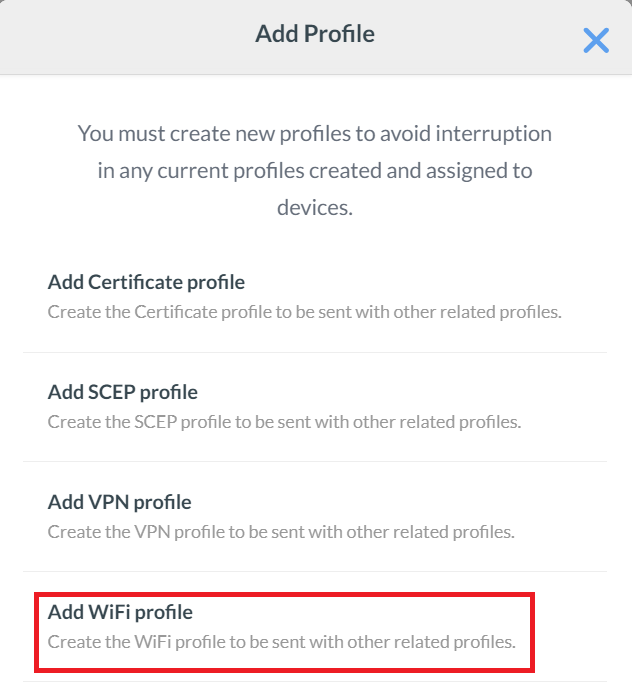
- Click Add Certificate profile.
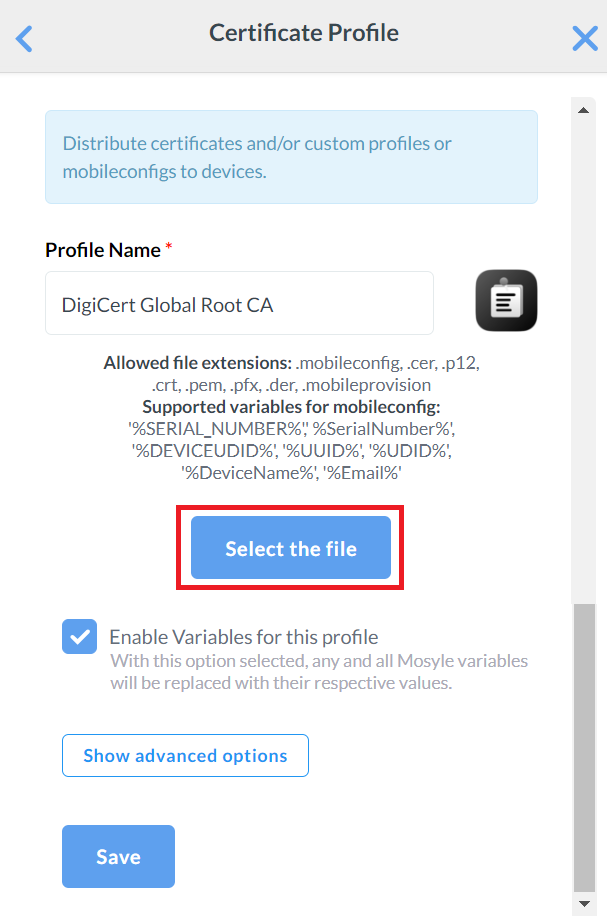
- On the Certificate Profile pop-up window, enter a name in the Profile name field for your Root CA profile.
- Click the Select the file button and upload the Root Certificate created earlier in the Exporting the SecureW2 Root, Intermediate, and RADIUS CA section.
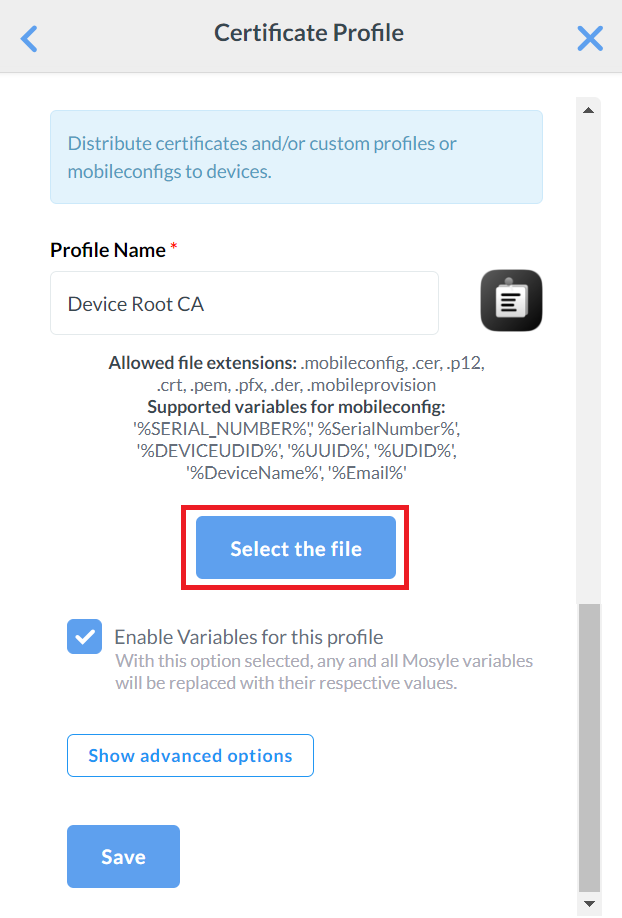
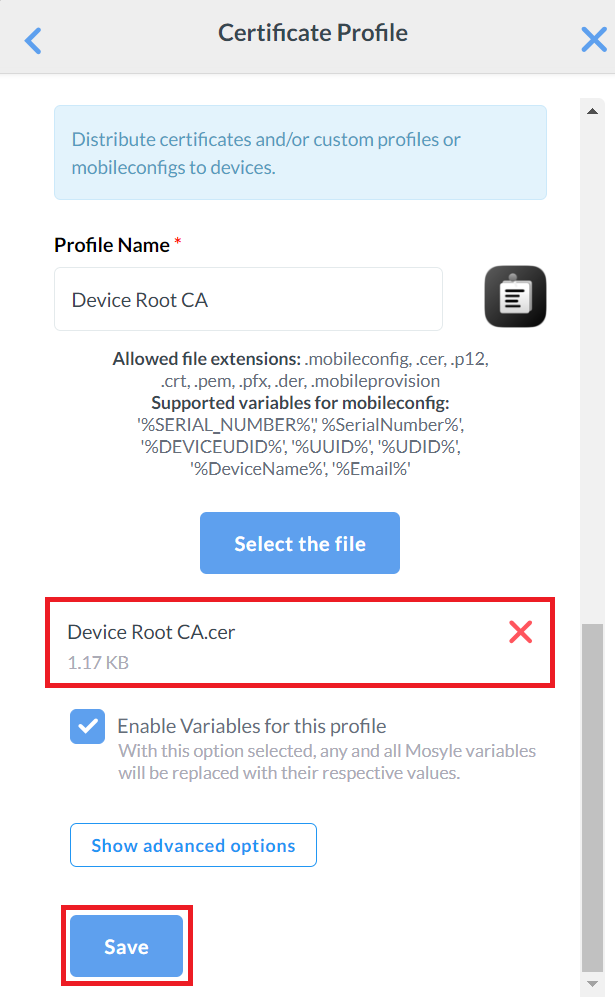
- Click Save.
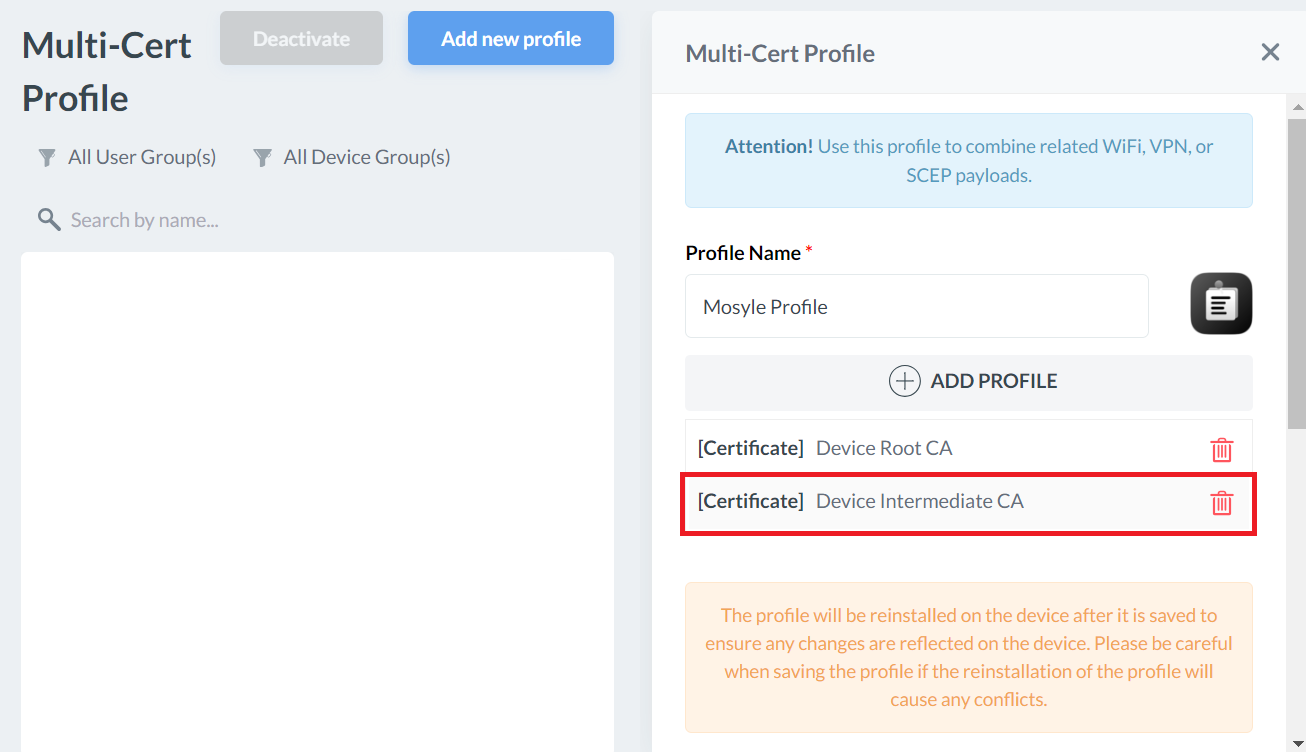
Creating an Intermediate CA Profile
This Certificate Profile is required to map the SecureW2 Issuing CA certificate to the SCEP certificate profile created at a later step. This CA certificate will be used to issue the end-user certificates.
- Click + ADD PROFILE.
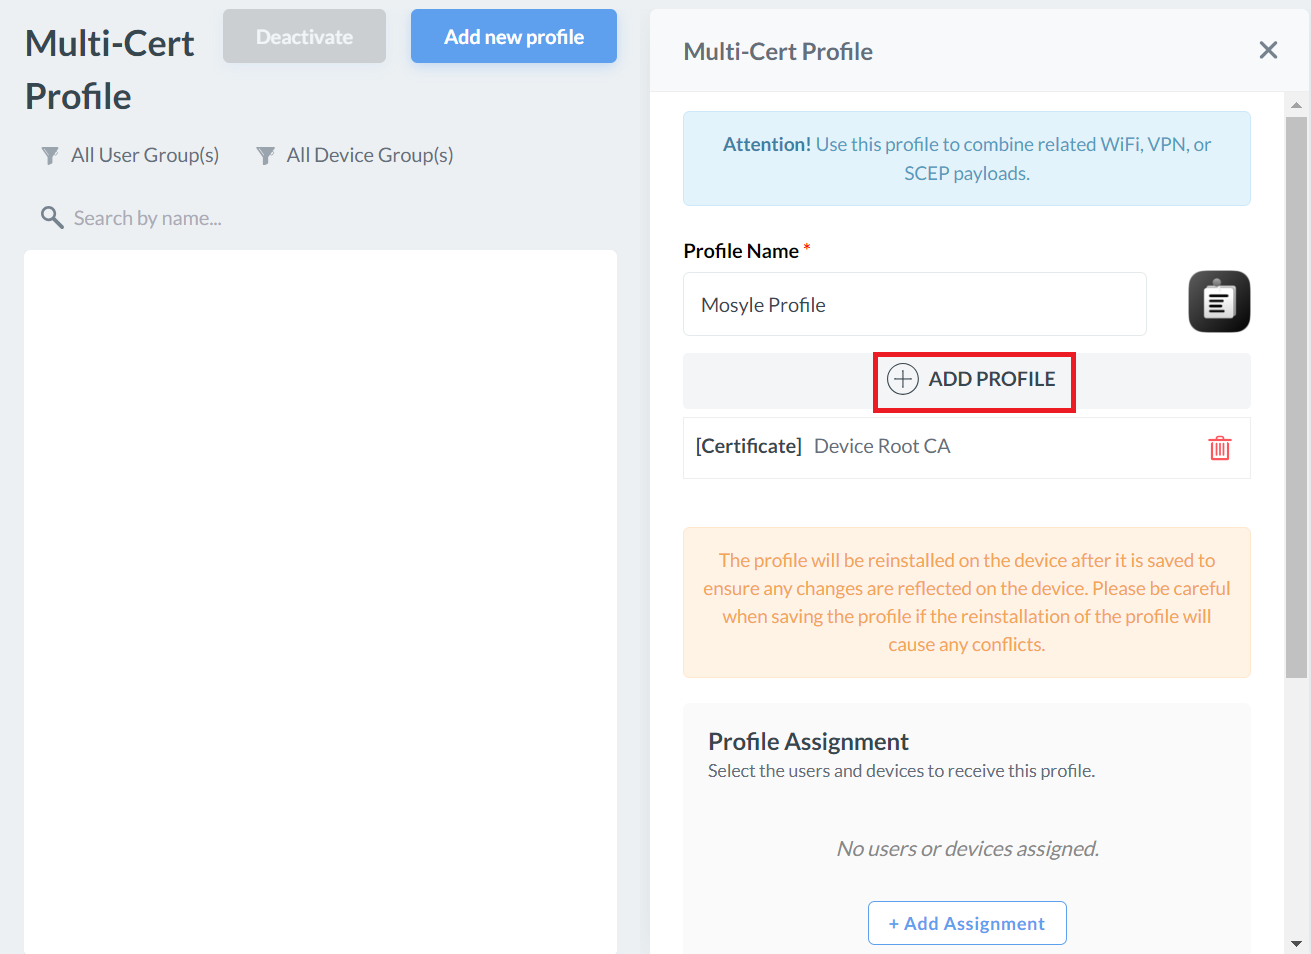
- Click Add Certificate profile.
- On the Certificate Profile page, enter a name in the Profile name field for your Intermediate CA profile.
- Click Select the file and upload the Intermediate CA Certificate created earlier in the Exporting the SecureW2 Root, Intermediate, and RADIUS CA section.


- Click Save.
Creating a Global Root CA Profile
This profile is created with the RADIUS server certificate and will be pushed into the devices so we can configure Server Certificate Validation and ensure they only attempt authentication with our RADIUS server.
- Click + ADD PROFILE.
- Click Add Certificate profile.
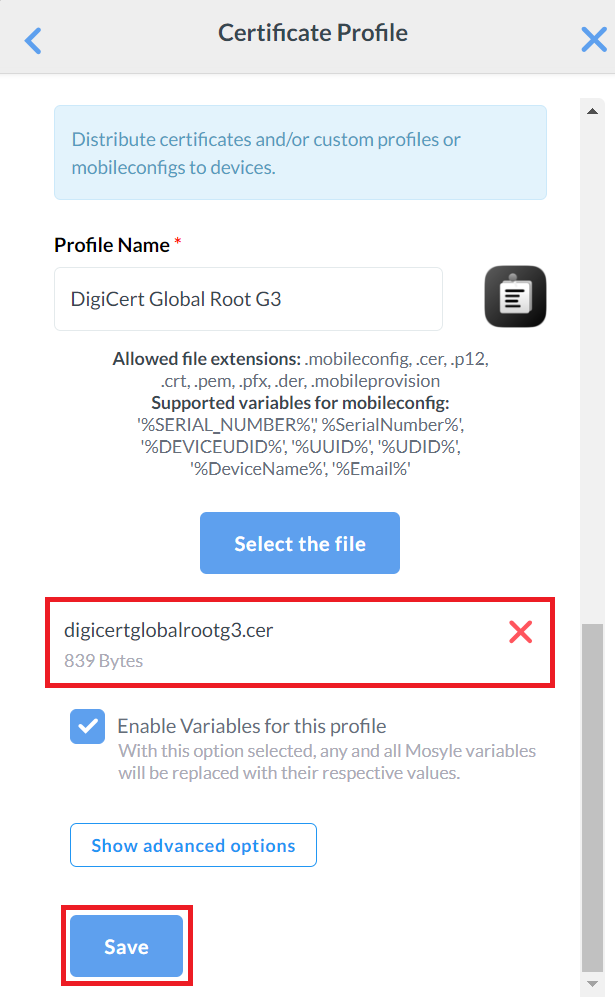
- On the Certificate Profile page, enter a name in the Profile name field for your Global Root CA profile.
- Click Select the file and upload the Global Root CA Certificate created earlier in the Exporting RADIUS Root CA section.

- Click Save.

- Repeat steps 1-5 to upload the new Global Root CA Certificate. This helps in installing the new Root CA in the device which establishes trust and connection with the CloudRADIUS Server when migrating to the new Root CA.
Creating a SCEP Profile
The SCEP Certificate Profile delivers essential details for end-user devices to connect to the JoinNow CloudConnector and obtain client certificates. It can also include secure Wi-Fi configurations, enabling devices to authenticate with the issued certificate and connect to the secure network.
To create a SCEP profile:
- Click + ADD PROFILE.
- Click Add SCEP profile.

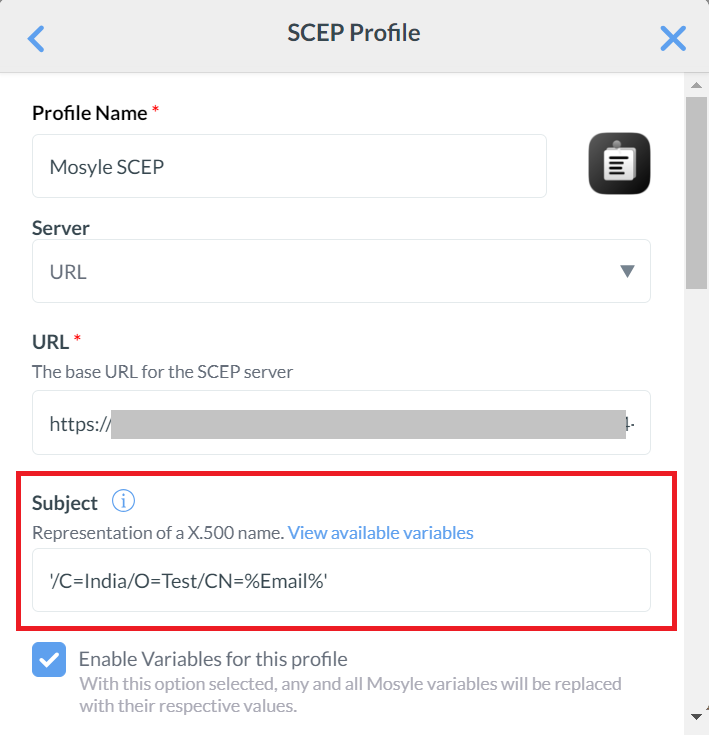
- In the Profile Name field, enter a name for your SCEP profile. SecureW2 recommends a name involving SCEP for easier identification in the future.
- From the Server drop-down list, select URL.
- Next, open the .csv file containing the API token created in the Generating a SCEP URL and Secret section. Copy the URL available and paste it into the URL field.
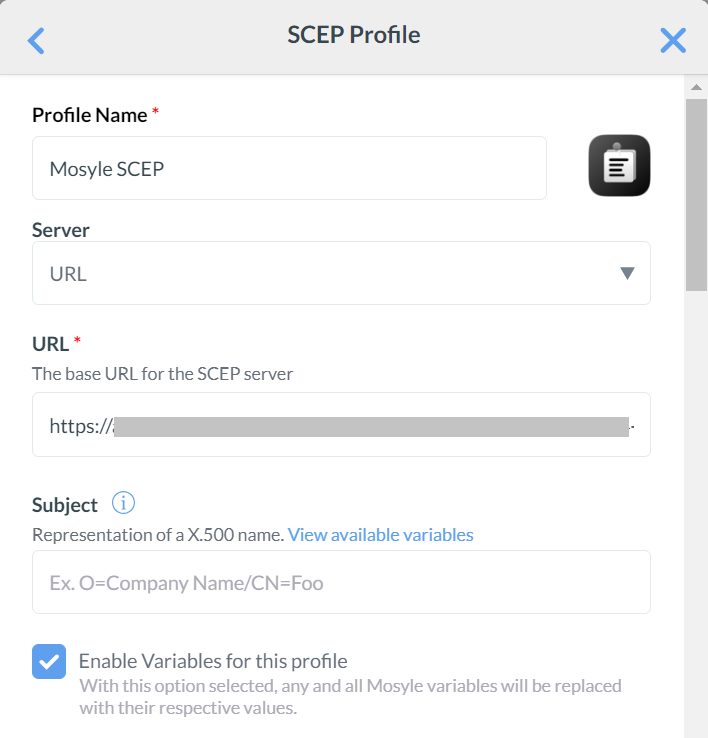
- For the Subject field, click View available variables. A list of variables to select from for the subject will be displayed.

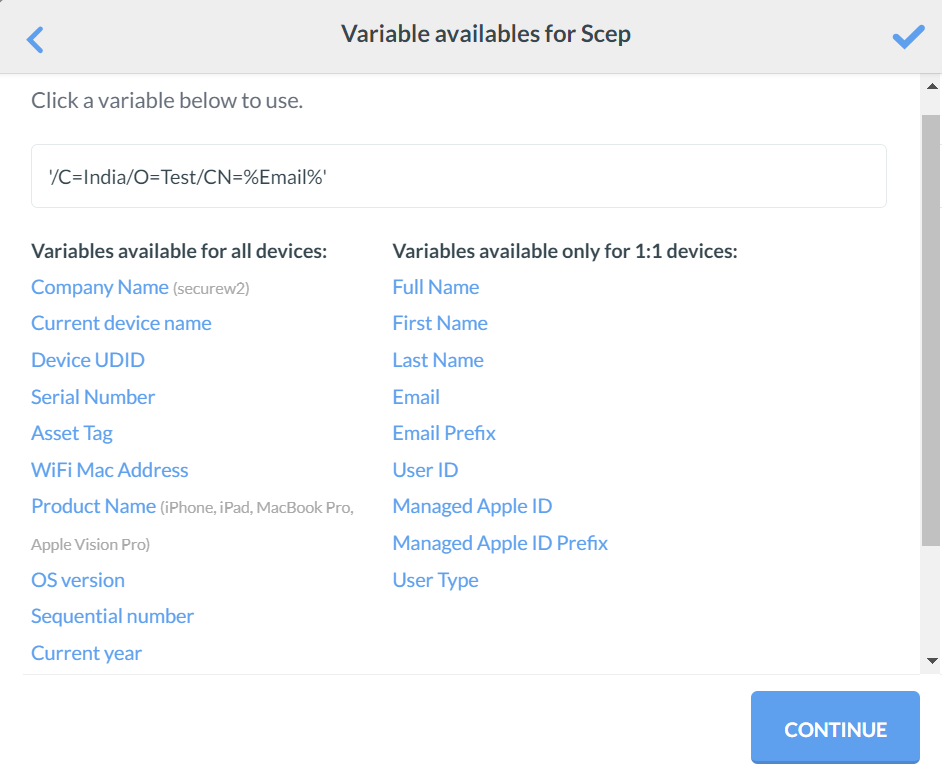
- Click CONTINUE after selecting the variable. As an example, the Email variable is selected as a Subject for demonstration purposes.
- From the Subject Alternative Name Type drop-down list, select RFC822 Name.
- For the Subject Alternative Name Value field, click View available variables. A list of variables to select from for the subject alternative name will be displayed.

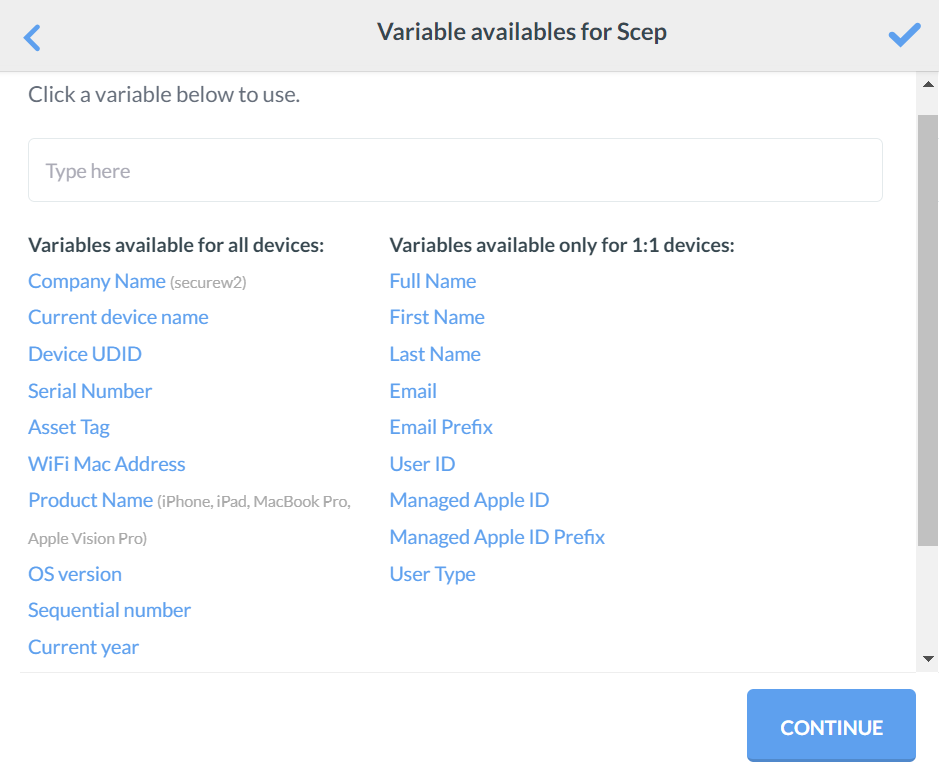
- Click CONTINUE after selecting the variable. For demonstration purposes, the WiFi Mac Address and Product Name variables are selected as Subject Alternative Name Values.

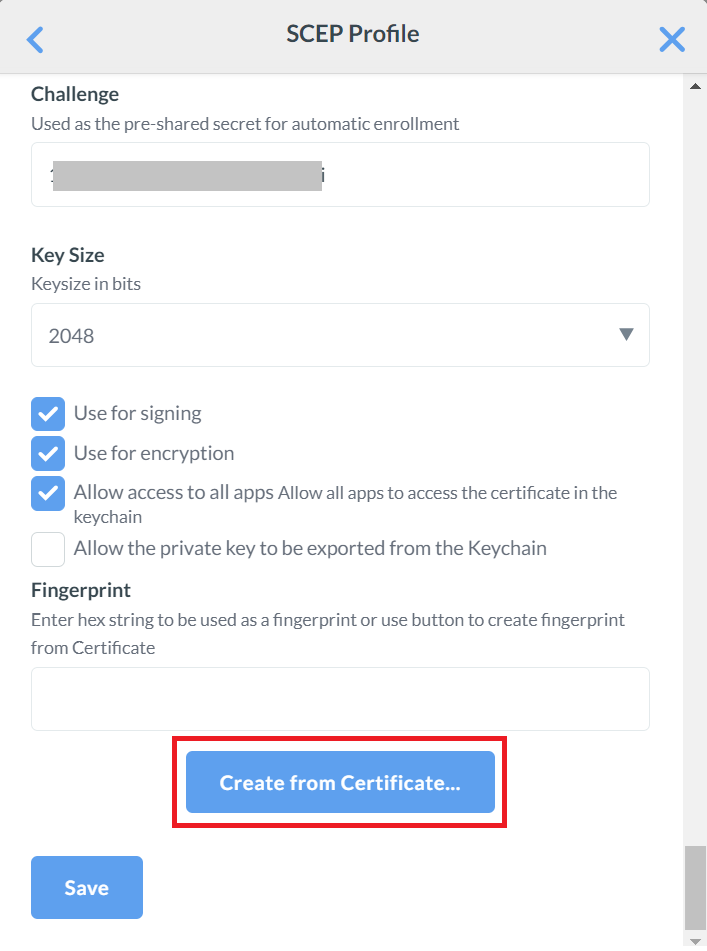
- For the Challenge field, open the .csv file and copy and paste the API Secret into the Challenge field box.
- From the Key Size drop-down list, select 2048.
- Select the Use for signing, Use for encryption, and Allow access to all apps check boxes.
- Click the Create from Certificate button and select the Intermediate CA certificate.
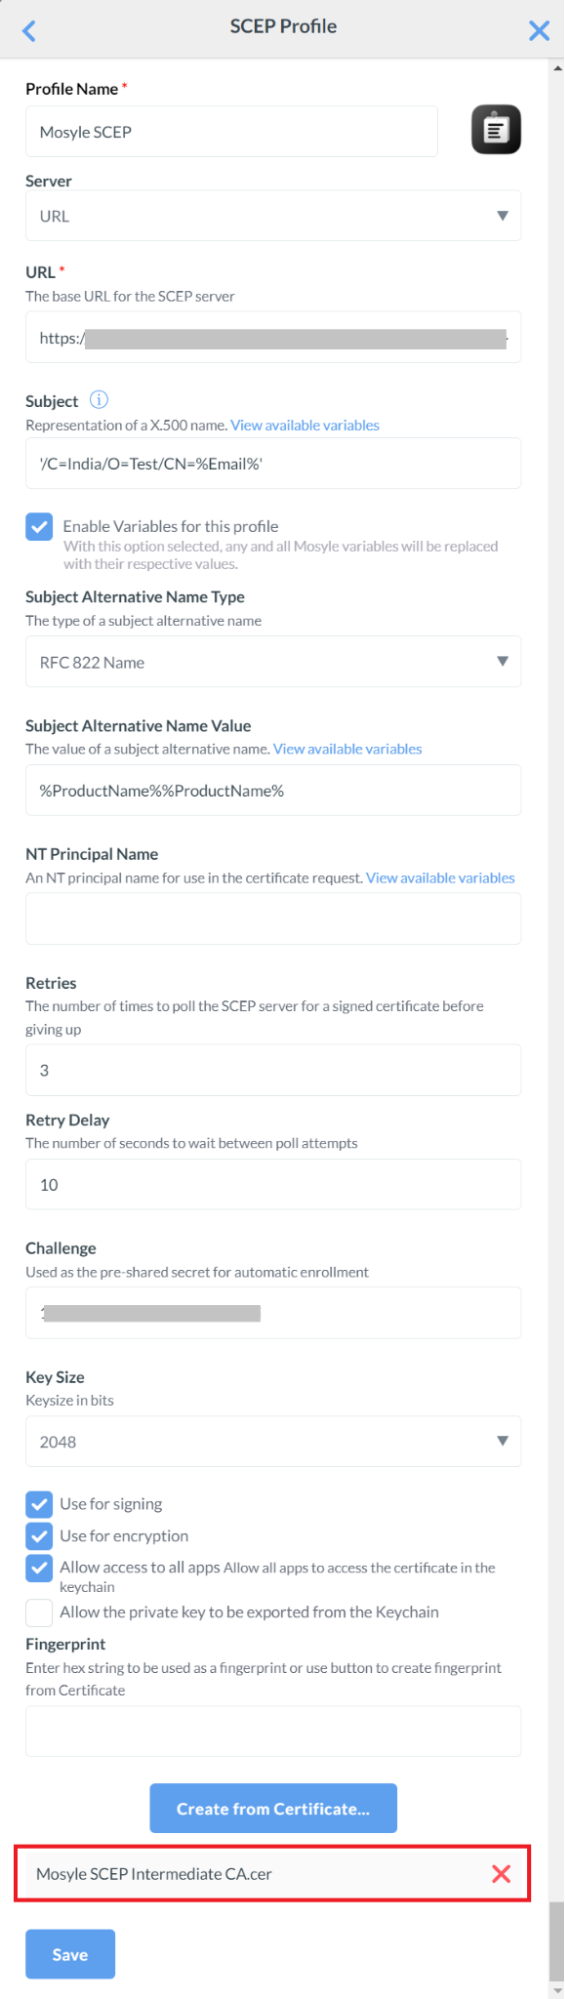
- Click Save.
Creating a Wi-Fi Profile
You can create a Wi-Fi profile in Mosyle with specific settings and assign it to users, devices, and groups.
To create a Wi-Fi profile:
- Click + ADD PROFILE.
- Click Add WiFi profile.
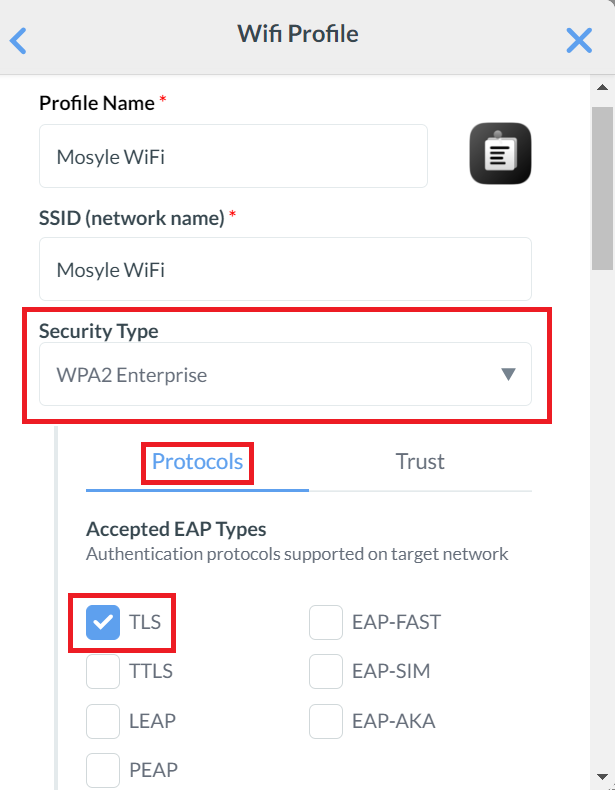
- In the Profile Name field, enter a name for your Wi-Fi profile.
- In the SSID (network name) field, enter the name of the secure network to which users will connect using their SCEP certificates.
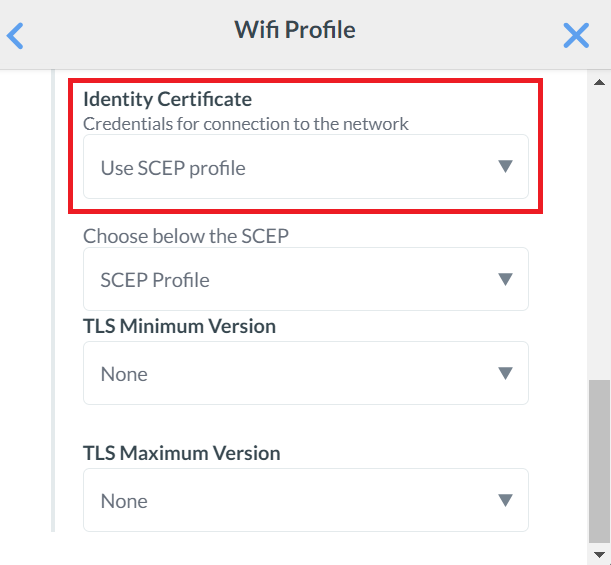
- From the Security Type drop-down list, select WPA2 Enterprise.
- Under the Protocols tab, select the TLS checkbox.
- From the Identity Certificate drop-down list, select Use SCEP profile.
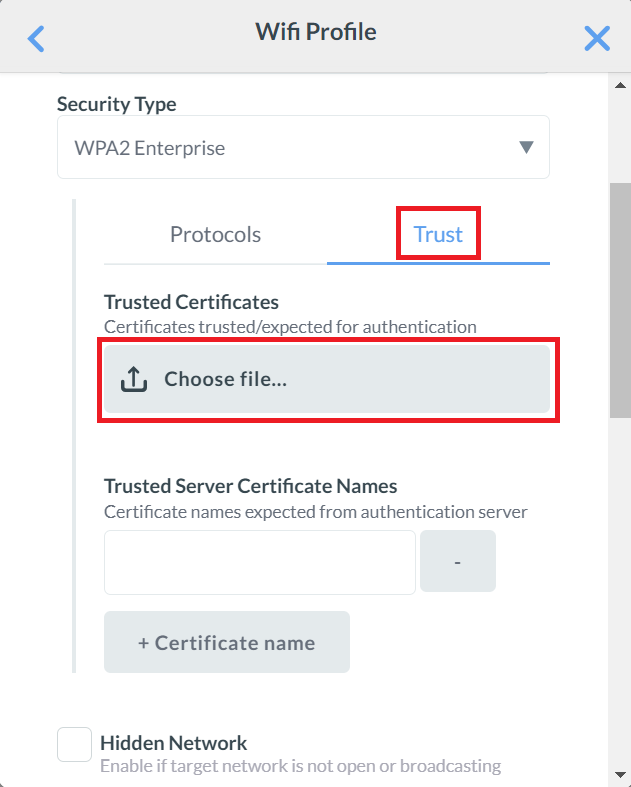
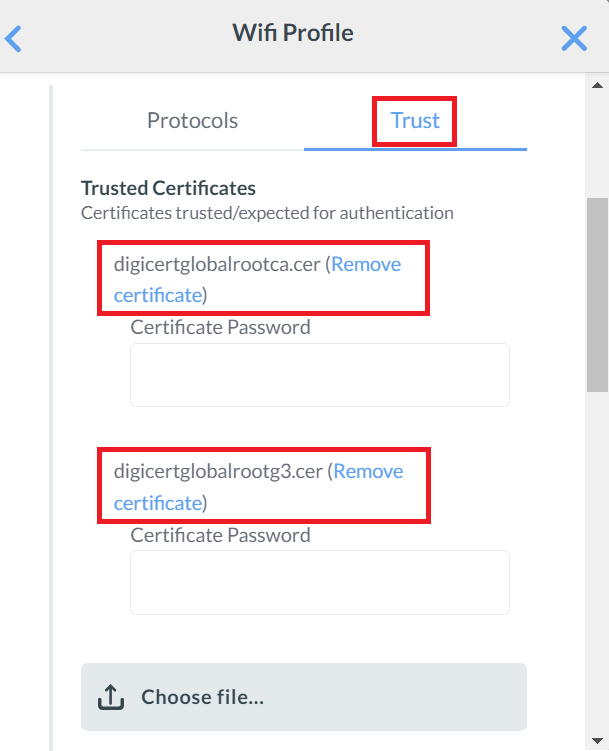
- Click the Trust tab.
- In the Trust Certificates section, click Choose file and select both the existing and new Global Root CA certificates.
- In the Trusted Server Certificate Names textbox, enter *.securew2.com.
- Check the Auto Join and Disable MAC Address Randomization boxes.
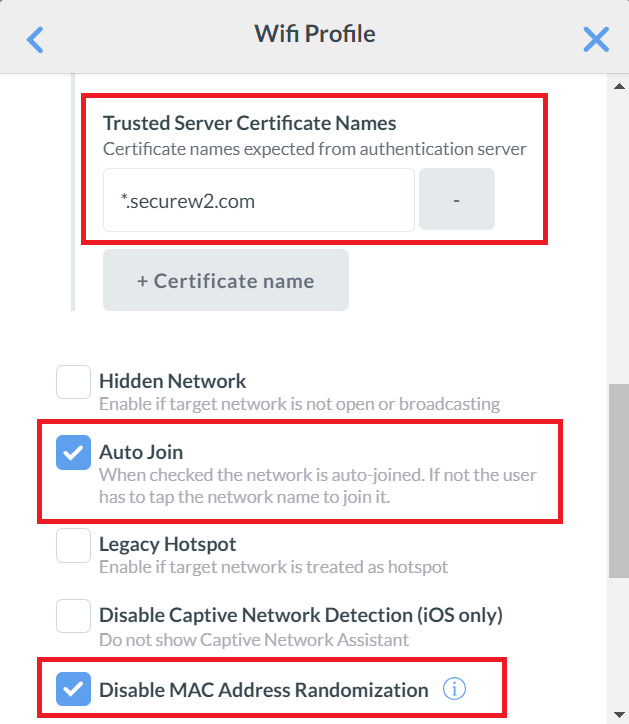

- Click Save.
Assigning a Profile
The created Multi-cert profile can then be assigned to specific users or devices that require the created certificate.
To assign the profile:
- On the Multi-Cert Profile page, scroll down to the Profile Assignment section.
- Click + Add Assignment.

- Click the Device Enrollment tab, and select All current and future Devices to assign the profile.

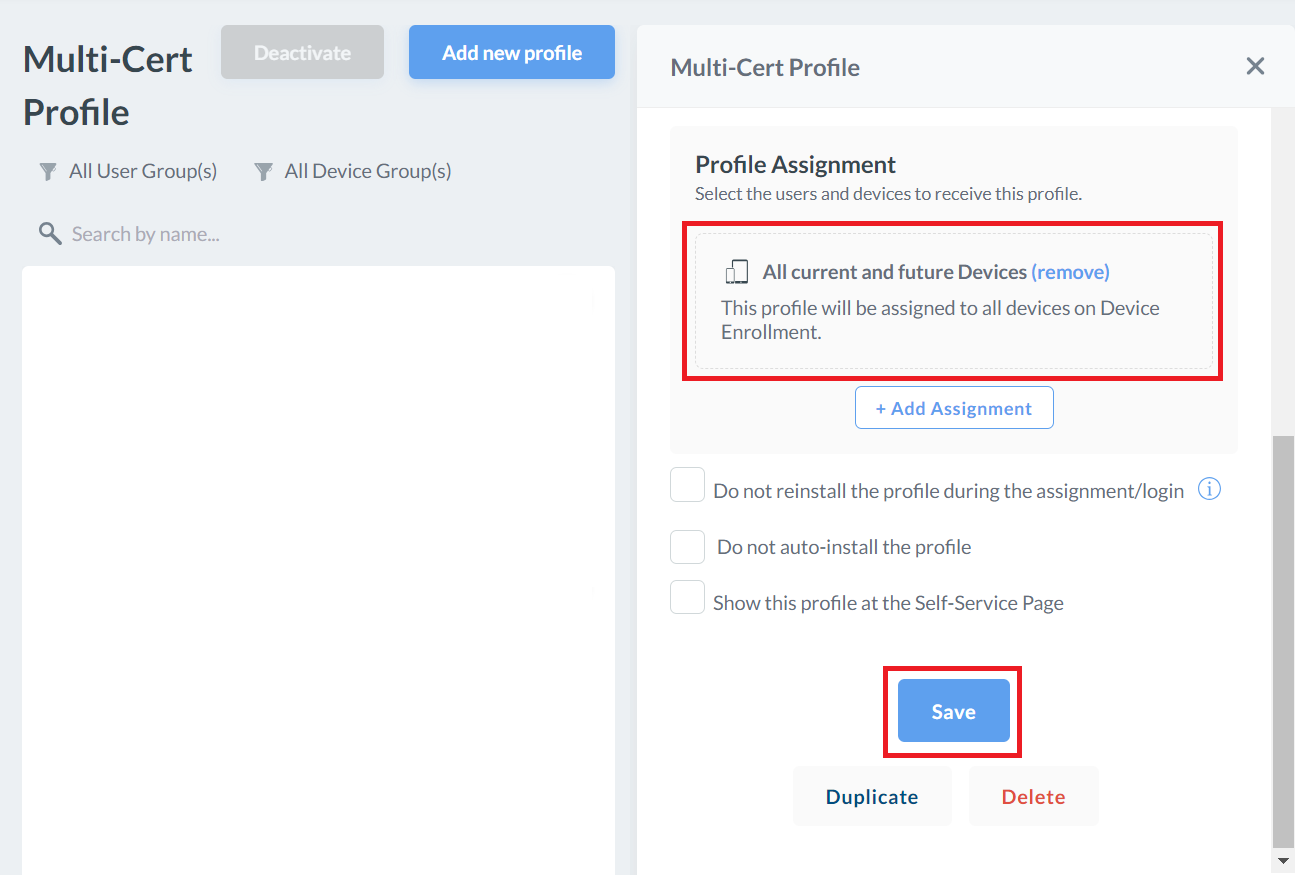
- Click Save.
Troubleshooting
This section lists the common issues and the steps to resolve them. Common issues that you may encounter after the configuration is done:
- Certificate fails to enroll.
- Connection to the secure SSID fails.
- Error messages are displayed:
a. The “Device Creation Failed” error message is displayed on the Events page (Log in to the JoinNow Management Portal, navigate to Data and Monitoring > General Events).
b. The “SCEP enrollment failed” error message is displayed in the Mosyle portal. - Users not assigned to the application in Mosyle.
To resolve them:
- Check if the attributes have values and are mapped correctly. For more information, see the Creating an Intermediate CA for Mosyle SCEP Gateway Integration section.
- Make sure that the SCEP profile (in the Mosyle Portal) is configured to send values in the SAN attribute using an Email address (RFC822). For more information, see the Creating an Intermediate CA for Mosyle SCEP Gateway Integration section.
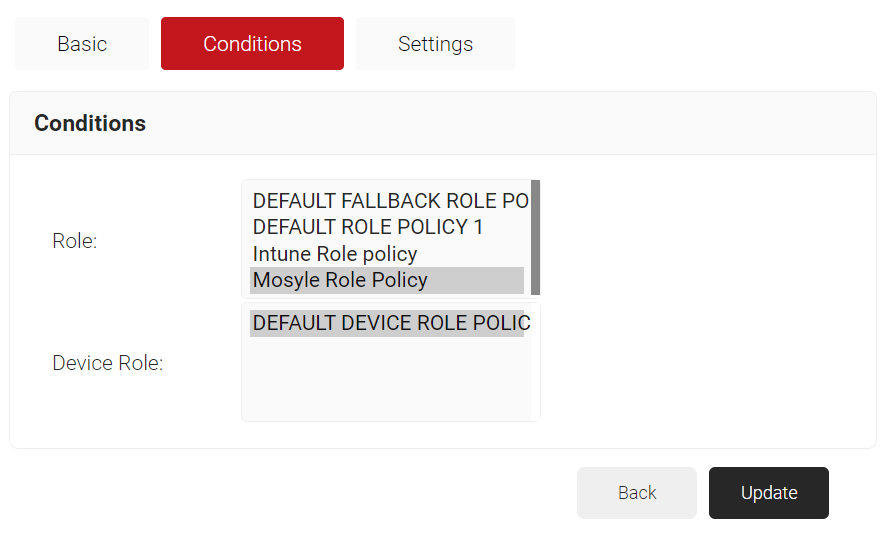
- Confirm if the Policy Workflows is mapped to the Mosyle API Token as an Identity Provider. Similarly, ensure the Enrollment Policy is mapped to the User Role and default Device Role. For more information, see the Configuring a Policy Workflows section.
- Ensure that the SCEP profile is configured accurately. For more information, see the Creating an Intermediate CA for Mosyle SCEP Gateway Integration section.
- Check if the Trusted Root CA of the RADIUS server certificate is mapped in the Wi-Fi profile. For more information, see the Creating a Wi-Fi Profile section.
- Remove the SCEP profile and push any other profile, like the Trusted Root CA profile, to confirm if the user is successful with the configuration. For more information, see the Exporting the SecureW2 Root, Intermediate, and RADIUS CA section.