Creating an Intermediate CA for Google SCEP Gateway Integration
As a best practice, SecureW2 recommends having a new intermediate CA for JoinNow SCEP Gateway integration with Google SCEP based enrollment for Chromebooks. To create a new intermediate CA:
- Log in to the JoinNow MultiOS Management Portal.
- Navigate to Dynamic PKI > Certificate Authorities.
- Click Add Certificate Authority.
- In the Basic section, from the Generate CA For drop-down list, select the Device and User Authentication option to authenticate devices and users.
- From the Type drop-down list, select Intermediate CA.
- From the Certificate Authority drop-down list, select the default Root CA that comes with your organization.
- In the Common Name field, enter a common name for the CA certificate. SecureW2 recommends a name that includes “SCEP.”
- From the Key Size drop-down list, select 2048 for the CA certificate key pair.
- From the Signature Algorithm drop-down list, select the signature algorithm for the certificate signing request. The option available is SHA-256.
- In the Validity Period (in years) field, enter the validity period of the CA certificate.
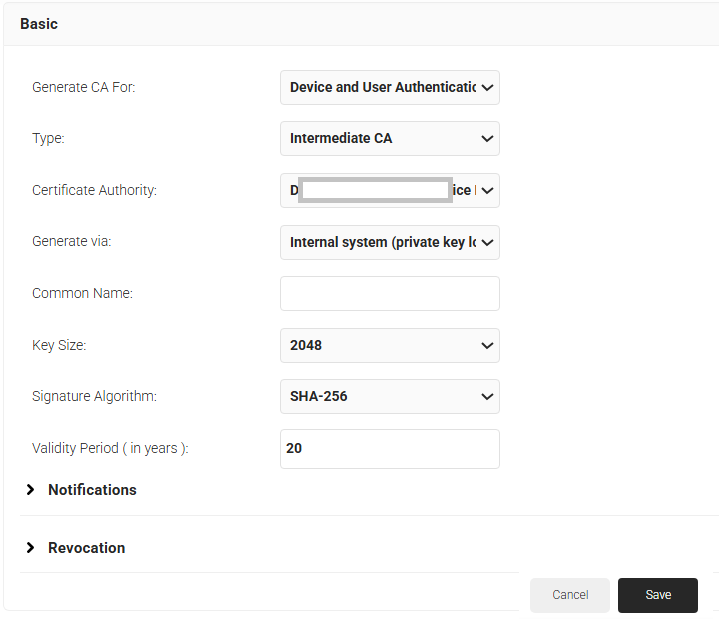
- Click Save. The new intermediate CA is generated.
Creating a Certificate Template for Google SCEP
To create a Google Certificate Template:
- Navigate to Dynamic PKI > Certificate Authorities.
- Click Add Certificate Template.
- In the Basic section, for the Name field, enter the name of the certificate template.
- In the Subject field, enter CN=${/auth/displayName:/device/identity:/csr/subject/commonname}
- In the Display Description field, enter a suitable description for the certificate template.
- In the Validity Period field, type the validity period of the certificate (based on the requirement).
- From the Signature Algorithm drop-down list, select the signature algorithm for the certificate signing request. The option available is SHA-256.

- In the SAN section:
a. In the Other Name field, enter ${/auth/upn:/device/identity:/csr/san/othername}b. In the RFC822 field, enter ${/auth/email:/device/identity:/csr/san/rfc822name}
c. In the DNS field, enter ${/device/computerIdentity:/device/buildModel:/csr/san/dnsname}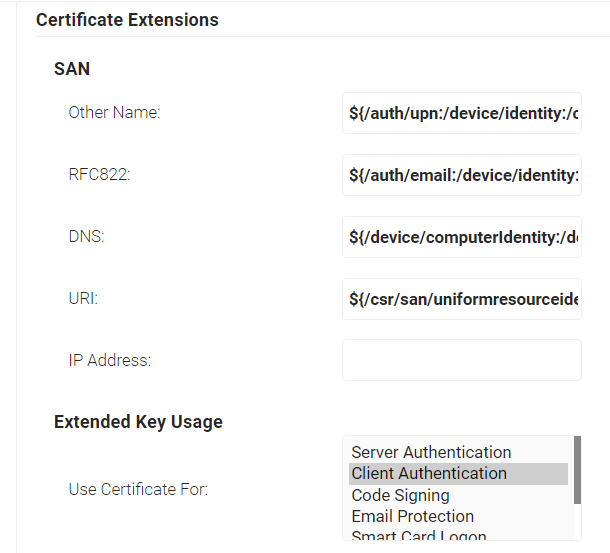
- In the Extended Key Usage section, from the Use Certificate For list, select Client Authentication.
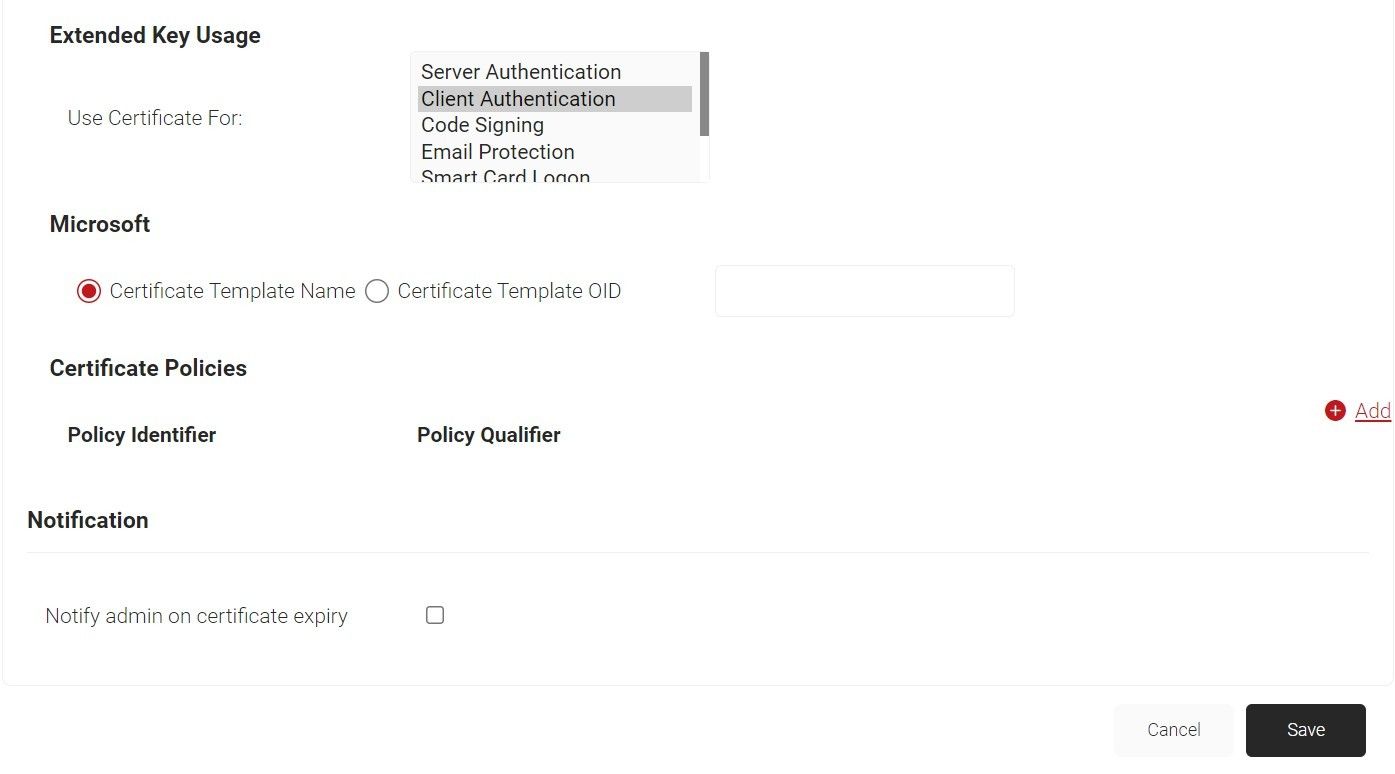
- Click Save.
Generating a SCEP URL and Secret
To generate the SCEP URL and secret:
- From your JoinNow MultiOS Management Portal, go to Integrations Hub > Device Management Platforms.
- Click Add.
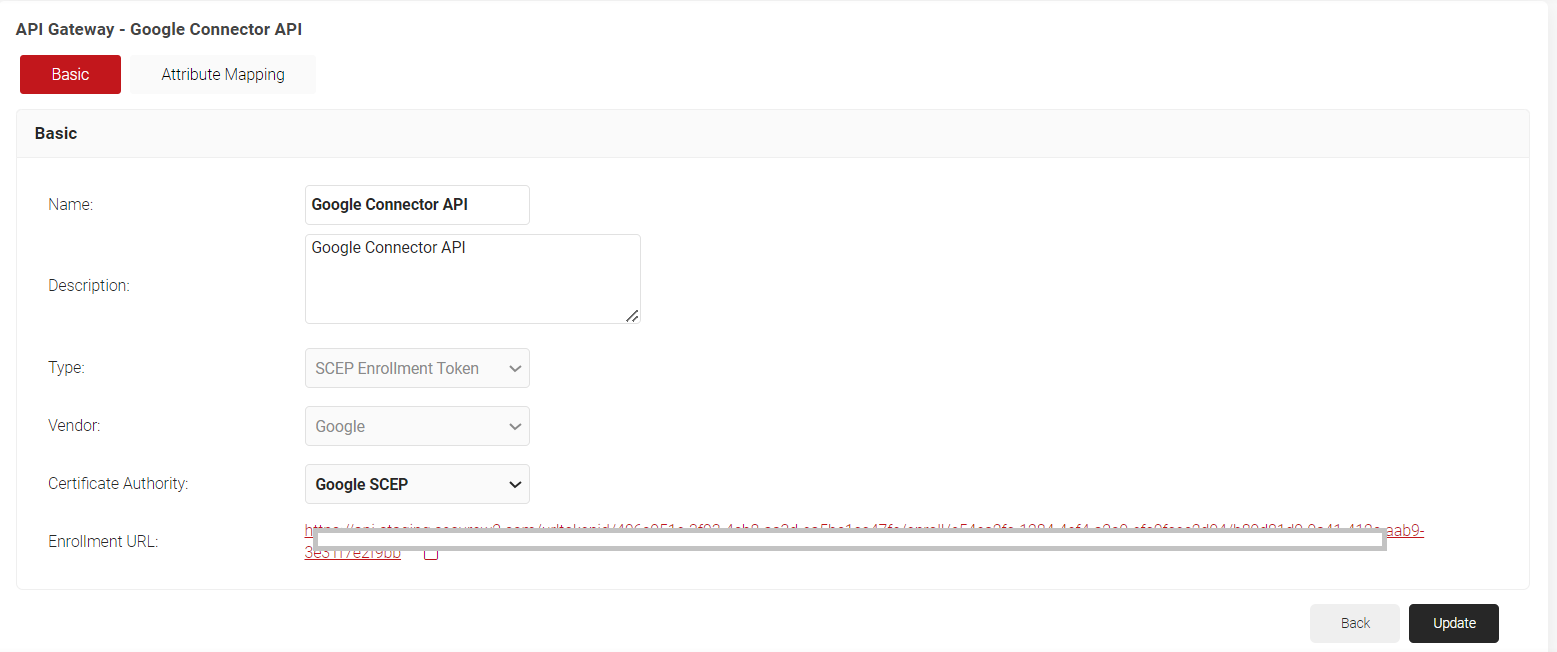
- Under the Basic section, in the Name field, enter the name of the API token.
- In the Description field, enter a suitable description for the API token.
- From the Type drop-down list, select SCEP Enrollment Token.
- From the Vendor drop-down list, select Google SCEP.
- From the Certificate Authority drop-down list, select the Intermediate CA created in Creating an Intermediate CA for Google SCEP Gateway Integration. If you do not select a CA, by default, the organization CA is chosen.
- Click Save. A .csv file containing the API Secret and URL is downloaded. In addition, the Enrollment URL is displayed on the page.
Configuring a Policy Workflow
To configure a Policy Workflow:
- Navigate to Policy Management > Policy Workflows.
- Click Add Policy Workflow.
- In the Basic section, enter the name of the role policy in the Name field.
- In the Display Description field, enter a suitable description for the role policy.
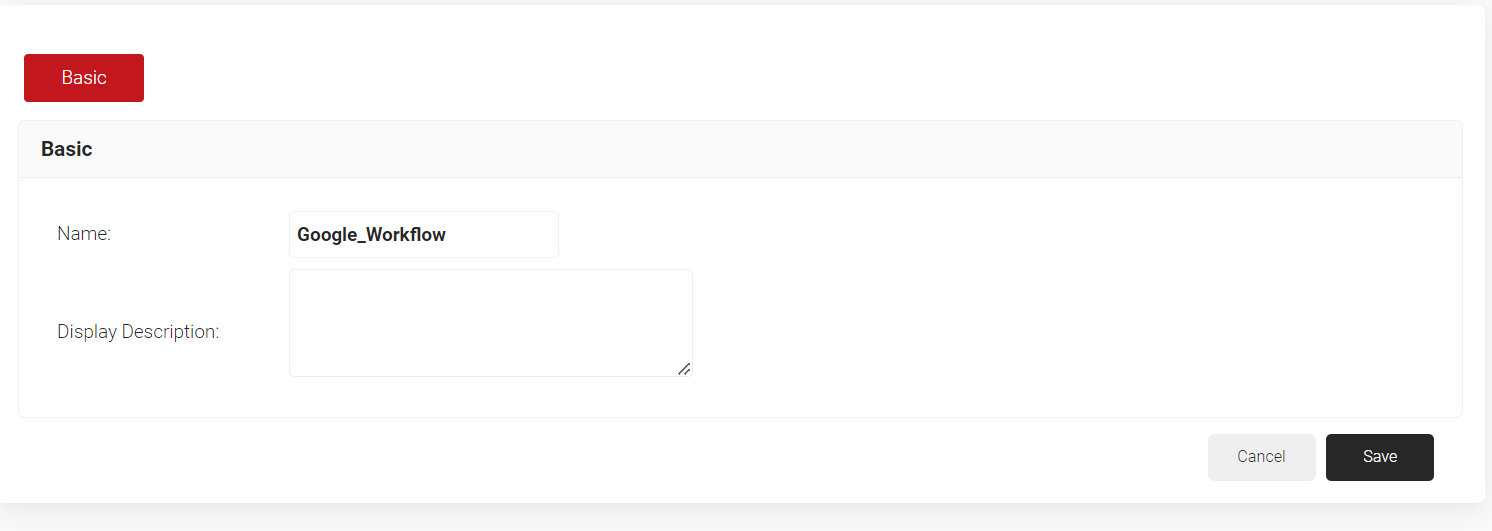
- Click Save.
- The page refreshes, and the Conditions tab is displayed. Select the Conditions tab.
- From the Core Provider drop-down list, select the API token you created earlier (see the Generating a SCEP URL and Secret section).

- Click Update.
Creating Enrollment Policy
To add an Enrollment Policy, perform the following steps:
- Navigate to Policy Management > Enrollment.
- Click Add Enrollment Policy.
- Under the Basic section, in the Name field, enter the name of the enrollment policy.
- In the Display Description field, enter a suitable description for the enrollment policy.
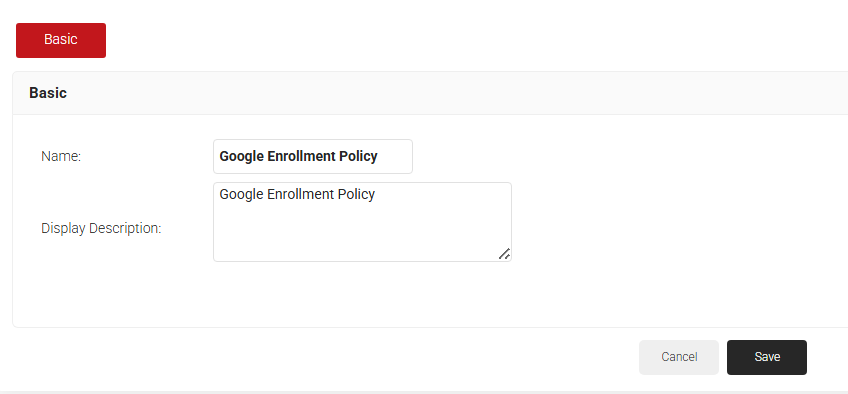
- Click Save.
- The page refreshes, and the Conditions and Settings tabs are displayed.
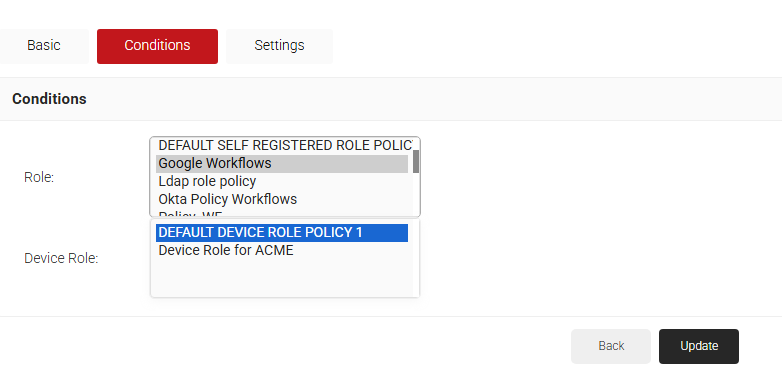
- Select the Conditions tab.
- In the Conditions section, from the Role drop-down list, select the role policy you created earlier (see the Policy Workflow section).
- From the Device Role drop-down list, select DEFAULT DEVICE ROLE POLICY.
- Select the Settings tab.
- In the Settings section, from the Use Certificate Authority drop-down list, select the intermediate CA you created earlier (see the Creating an Intermediate CA for Google SCEP Gateway Integration section).
- From the Use Certificate Template drop-down list, select the template you created earlier (see the Creating a Google Certificate Template section).
- In the other settings, retain the default values.
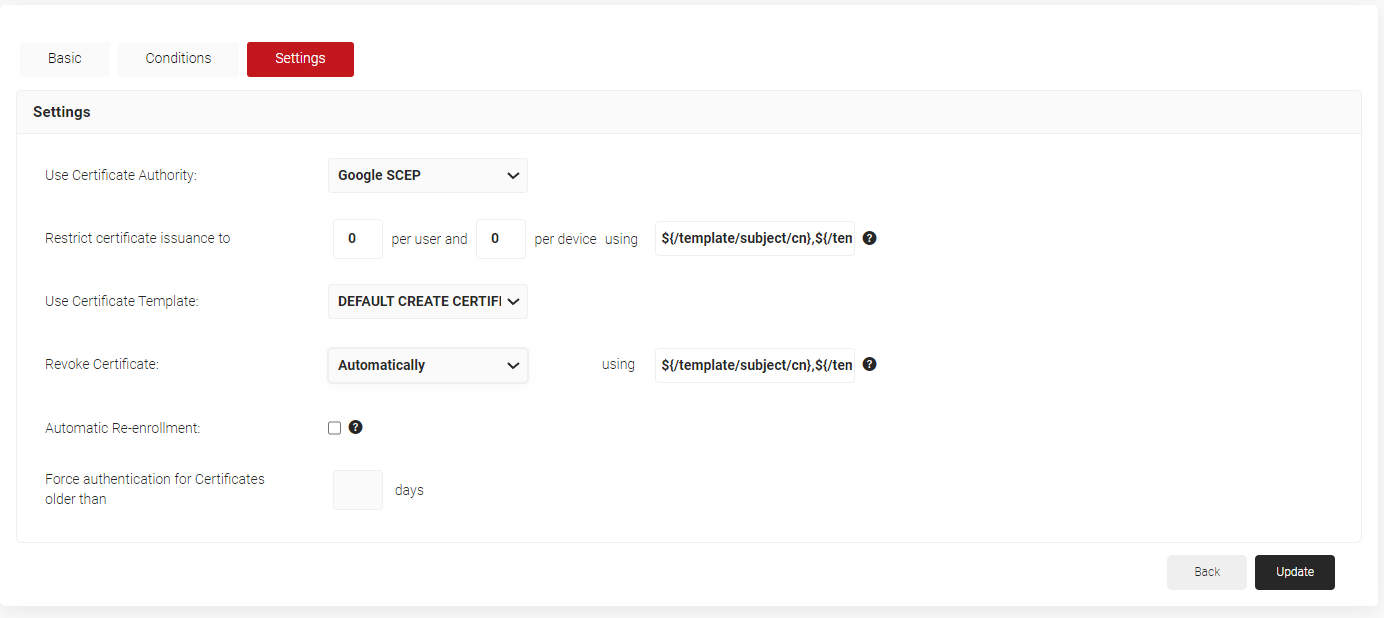
- Click Update.
Configuring Network Policy
To configure network policy:
- Go to Policy Management > Network.
- Click Add Network Policy.
- In the Basic section, enter the name of the network policy in the Name field.
- In the Display Description field, enter a suitable description for the network policy.
- Click Save.
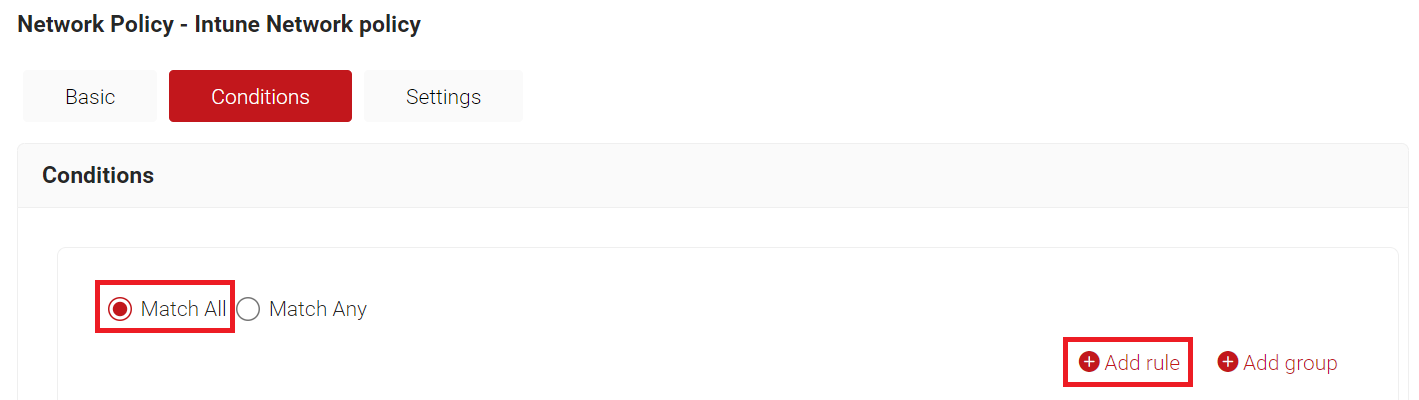
- Select the Conditions tab.
- Select Match All or Match Any based on your requirements to set authentication criteria.
- Click Add rule.
- Expand Identity and click Select adjacent to the Role option.
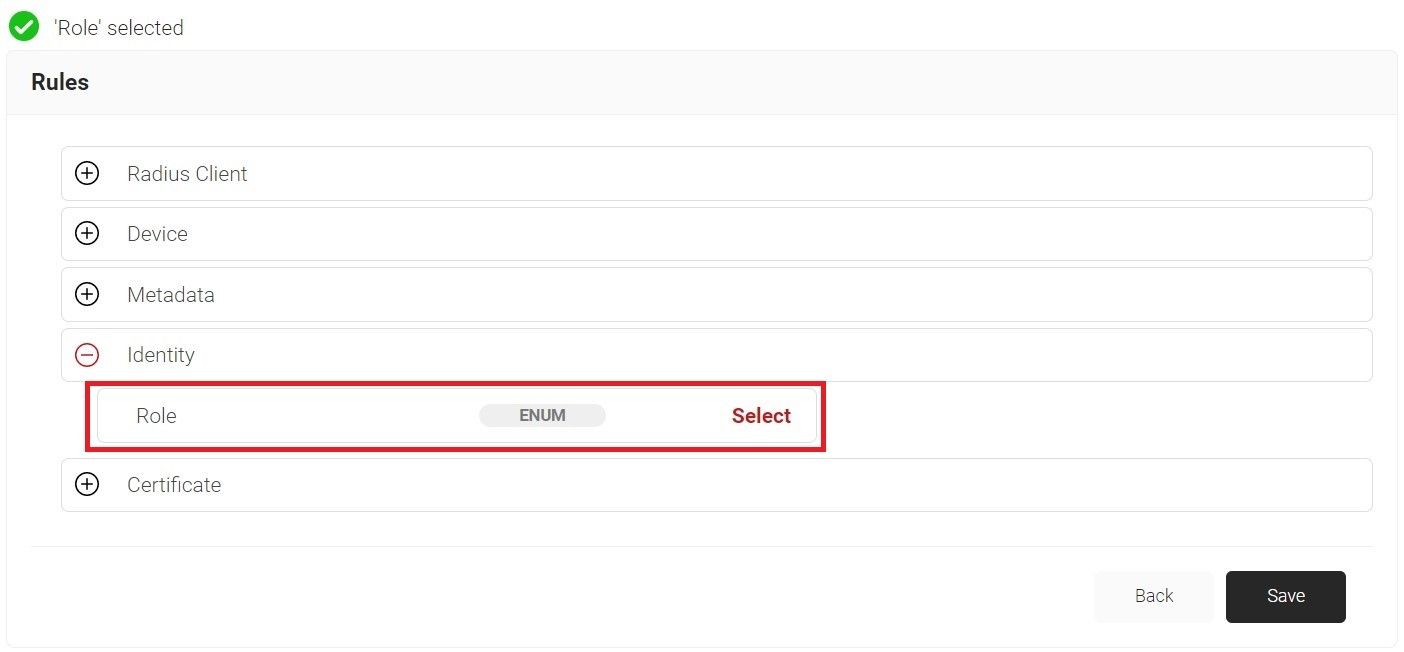
- Click Save.
- The Role option appears under the Conditions tab.
- From the Role Equals drop-down list, select the role policy you created earlier (see the Configuring a Policy Workflow section).
- Select the Settings tab.
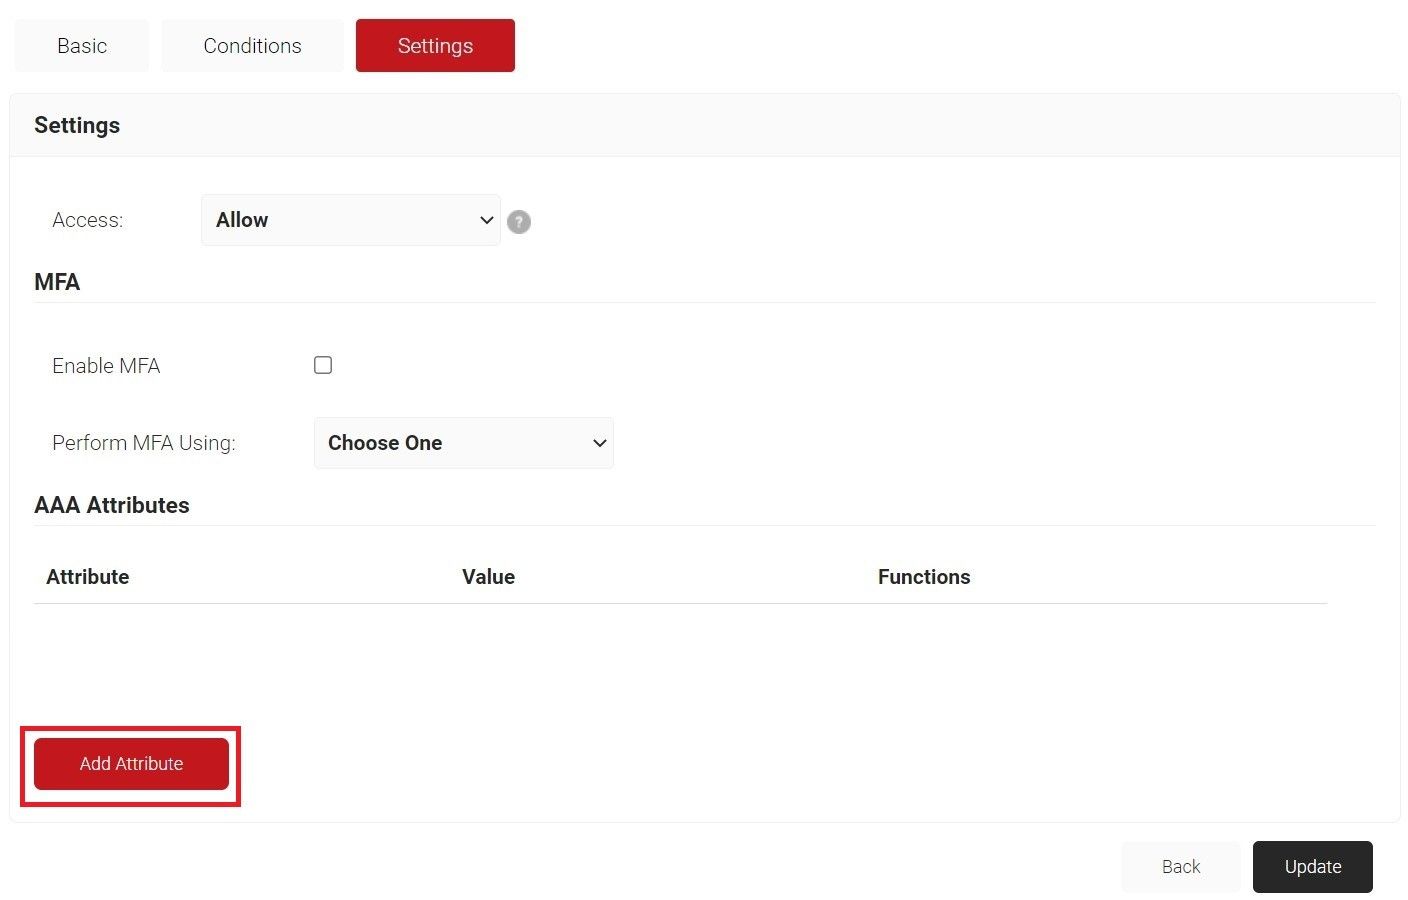
- Click Add Attribute.
a. From the Attribute drop-down list, select an option.
b. From the Dictionary drop-down list, select Radius:IETF or Custom.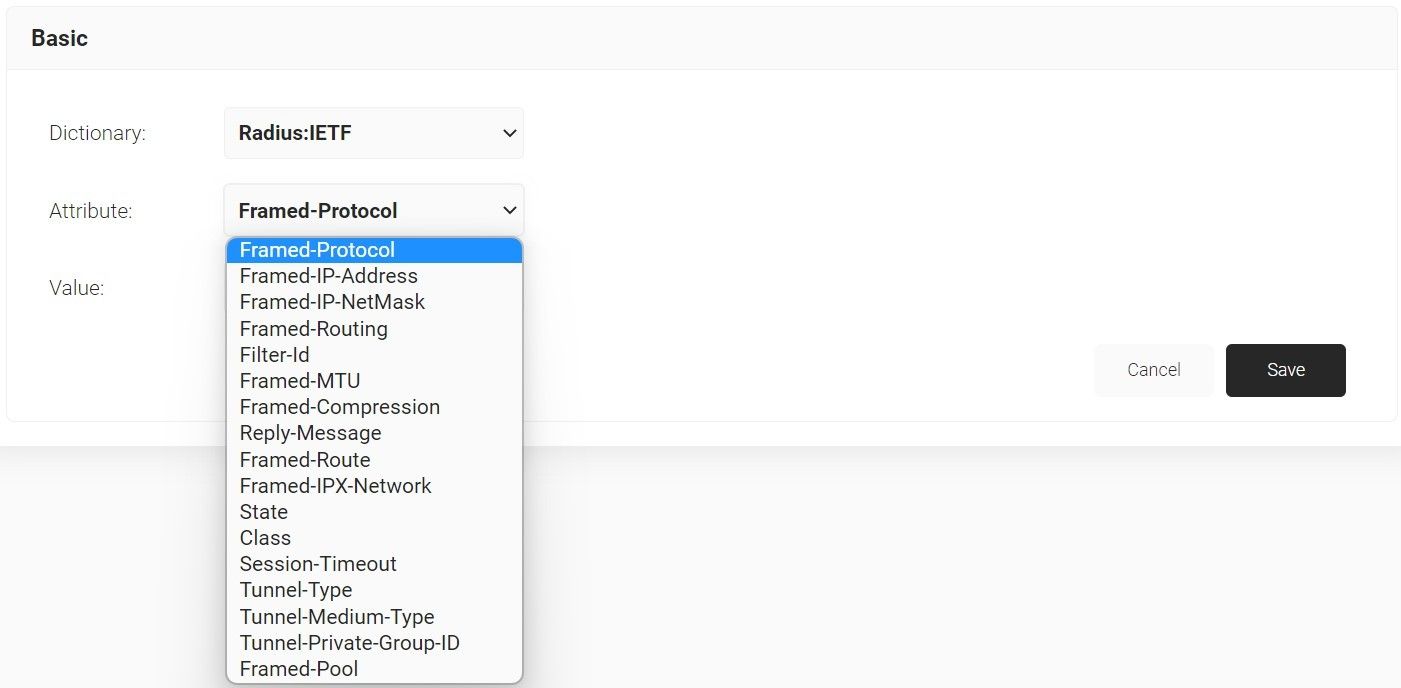
- Click Save
Configuring Google Cloud Certificate Connector
- Log in to the Google Admin console.
- Navigate to Devices> Networks > Secure SCEP.
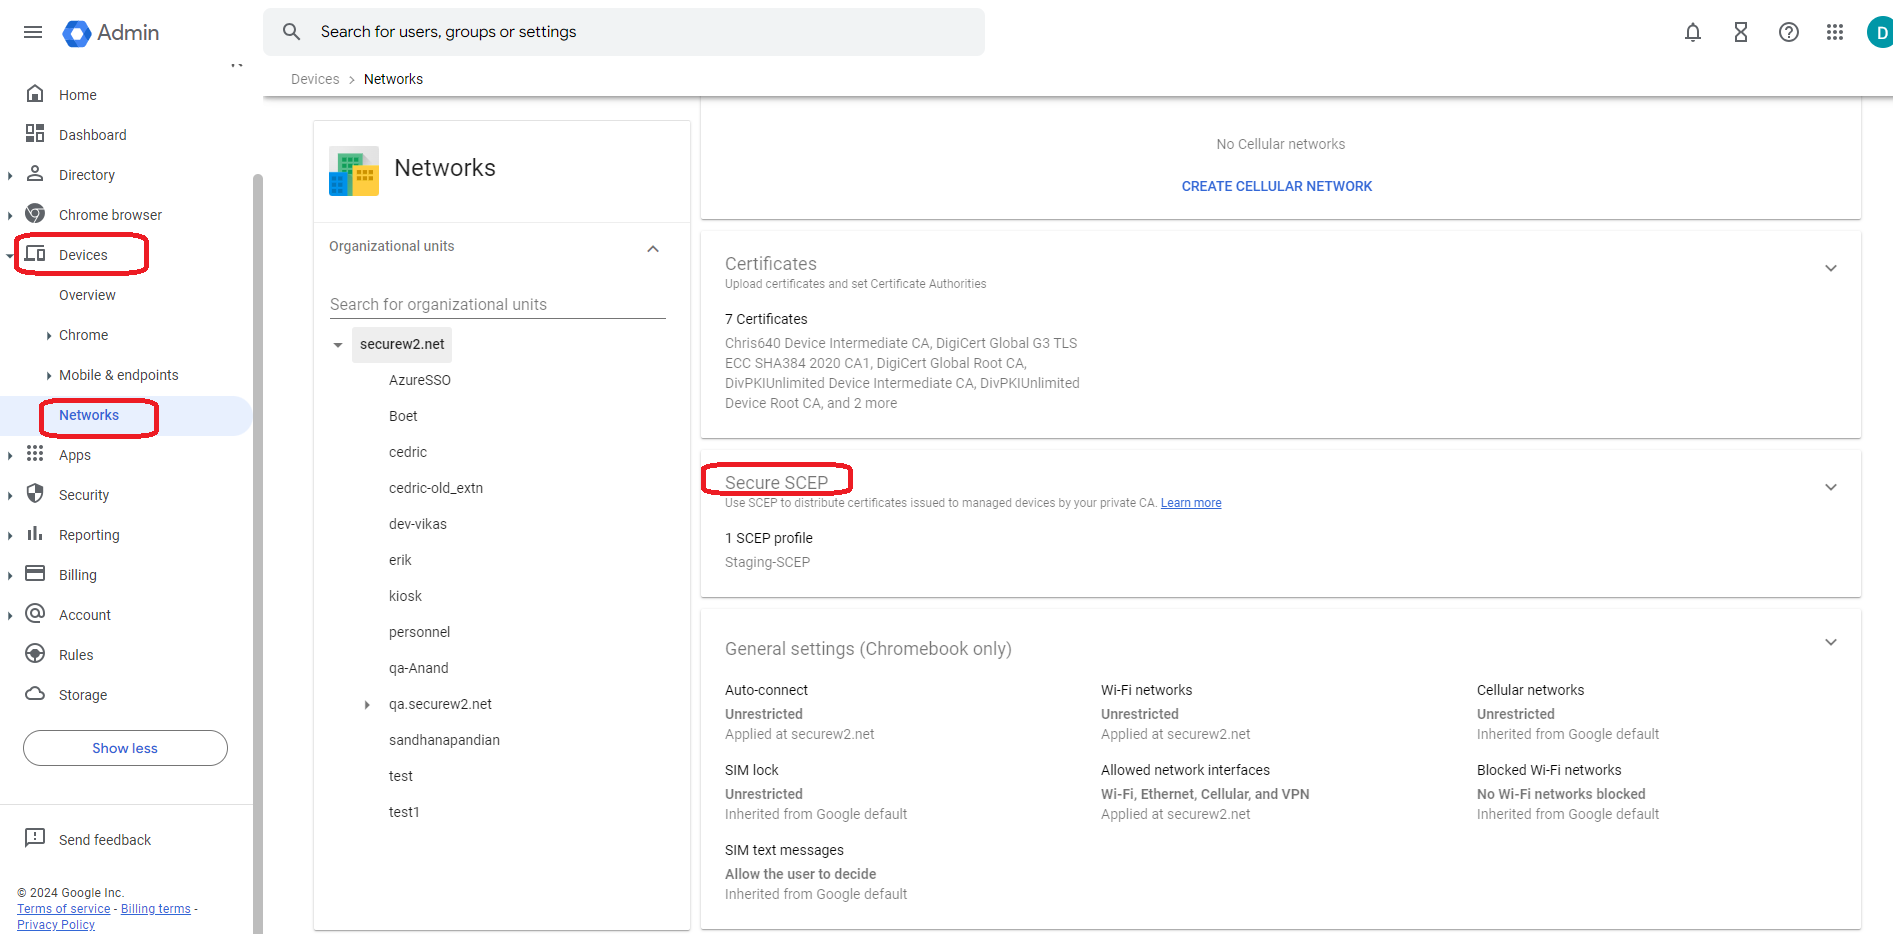
- Click on Download Connector.
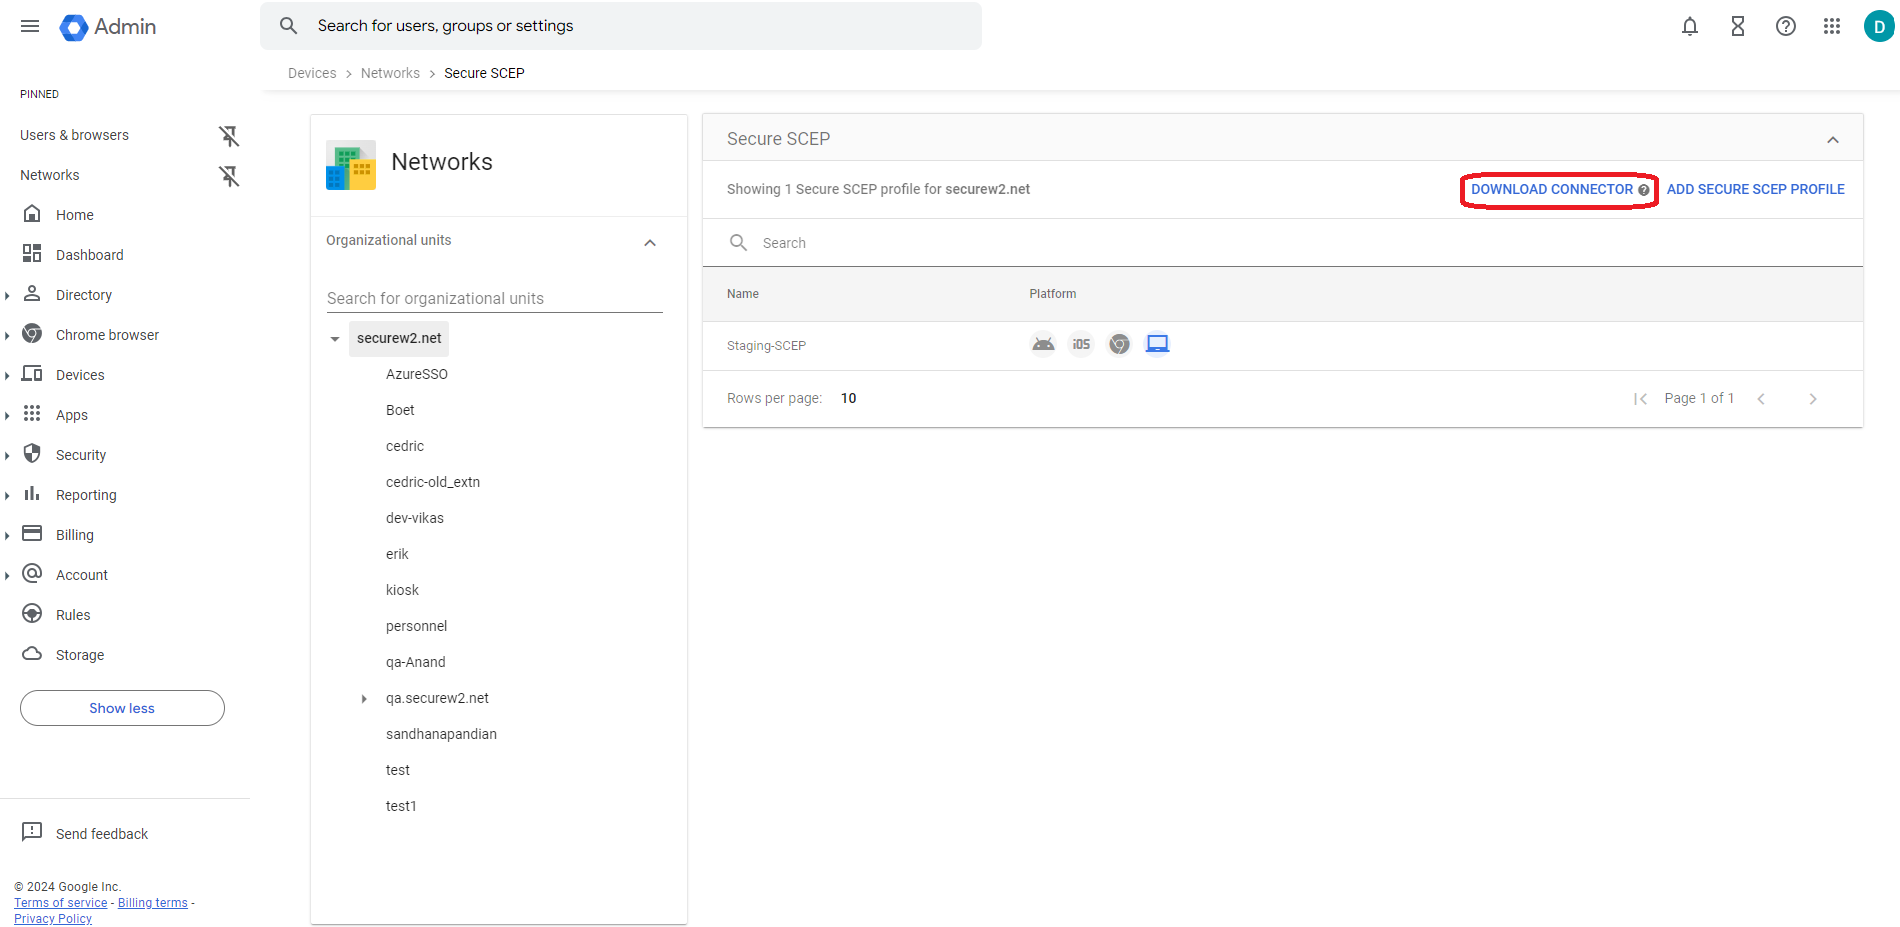
- Click Download in the Install Google Cloud certificate connector section. The .exe file downloads.
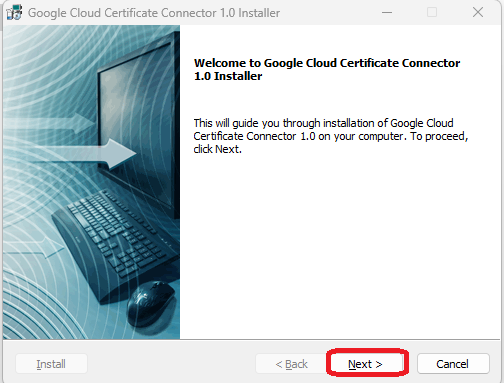
- Run the downloaded connector file (google-cloud-certificate-connector-setup.exe). The Google Cloud Certificate Connector Installer wizard will open.
Note: If the Microsoft Defender Dialog-box displays an Unknown publisher warning, click on the Run Anyway button. - In the Welcome screen of the Cloud Certificate Connector wizard, click on the Next button.
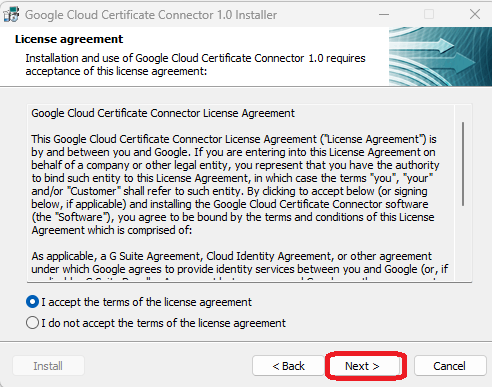
- In the License agreement screen, select the I accept the terms of the license agreement radio button and click the Next button.
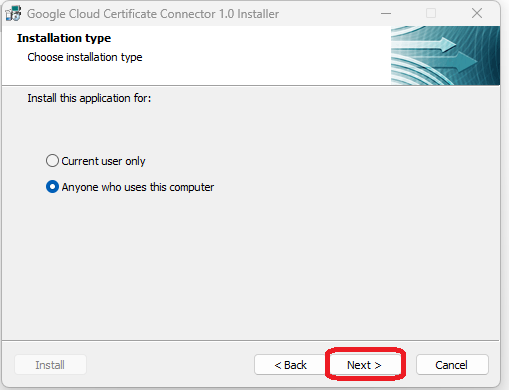
- In the Installation type screen, click the Anyone who uses this computer radio button and then click the Next button.
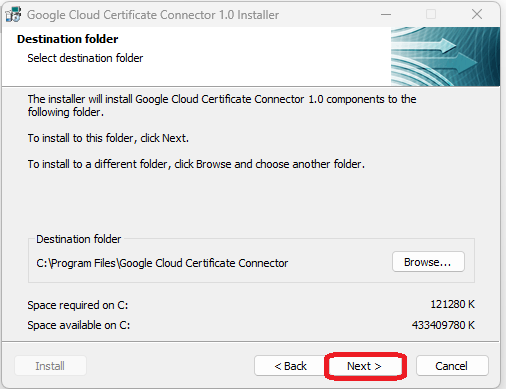
- In the Destination folder screen, retain the default destination folder under “C” drive and click Next.
- Click the Next button in the Program Folder screen.

- In the Windows services screen, enter the user credentials (username and password) to run the service. Click Next.
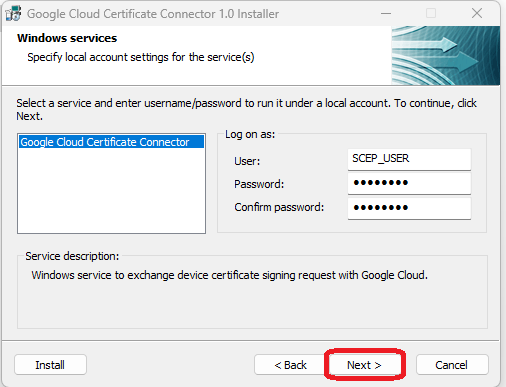
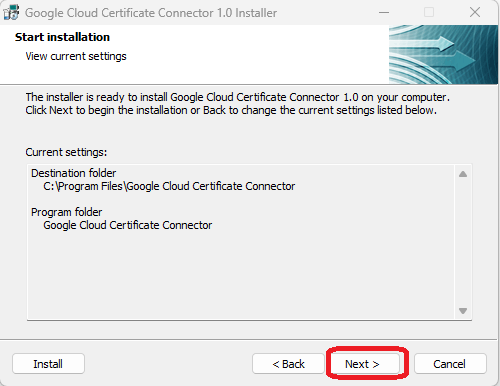
NOTE: Enter the username in the computer\user or domain\user format. - In the Start installation screen, click Next.
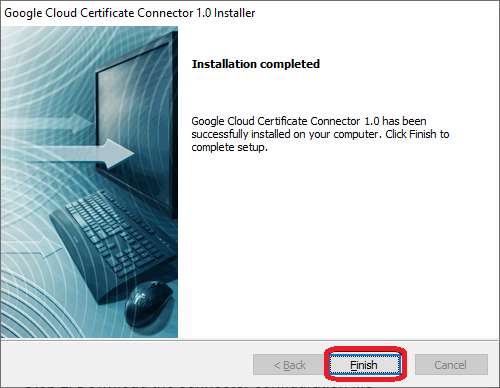
- Once the Installation is finished, the Installation Completed screen is displayed. Click Finish.
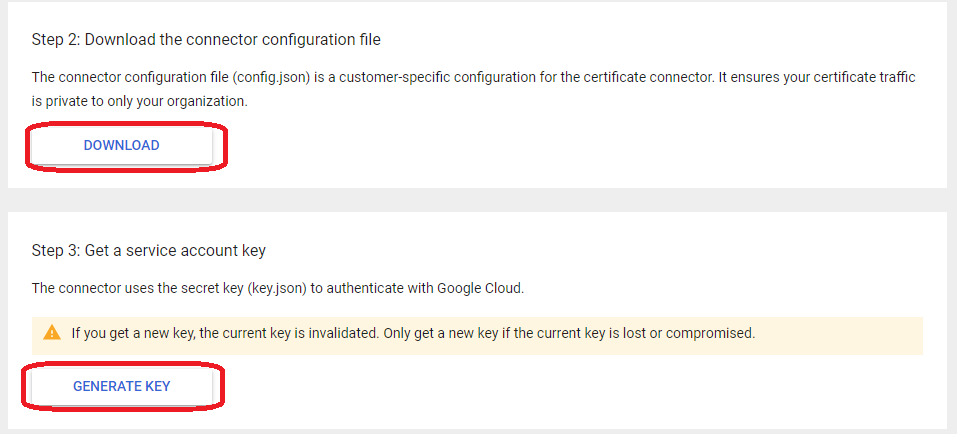
- Click DOWNLOAD in the Step 2: Download the connector configuration file section. The “config.json” file downloads.
- Navigate to the Get a Service Account key section, and click on the Generate key. The “key.json” file downloads.
NOTE: Place the key files and configuration (config.json and key.json) into the Google Cloud Certificate Connector folder, typically: C:\Program Files\Google Cloud Certificate Connector.
- Launch the Windows Services application. Right-click the Google Cloud Certificate Connector service and select the Start option.
Exporting the Trusted RADIUS Server Root CA Certificate
This section lists the steps to export the RADIUS server Root CA certificate from the JoinNow MultiOS Management Portal.
- Log in to the JoinNow MultiOS Management Portal.
- Navigate to Device Onboarding > Profiles.
- Click the Edit link of the network profile configured earlier.
- In the Certificates section, click Add/Remove Certificate.
- Check the checkbox next to DigiCert Global Root CA (Mon Nov 10 00:00:00 UTC 2031) as shown in the following screen.
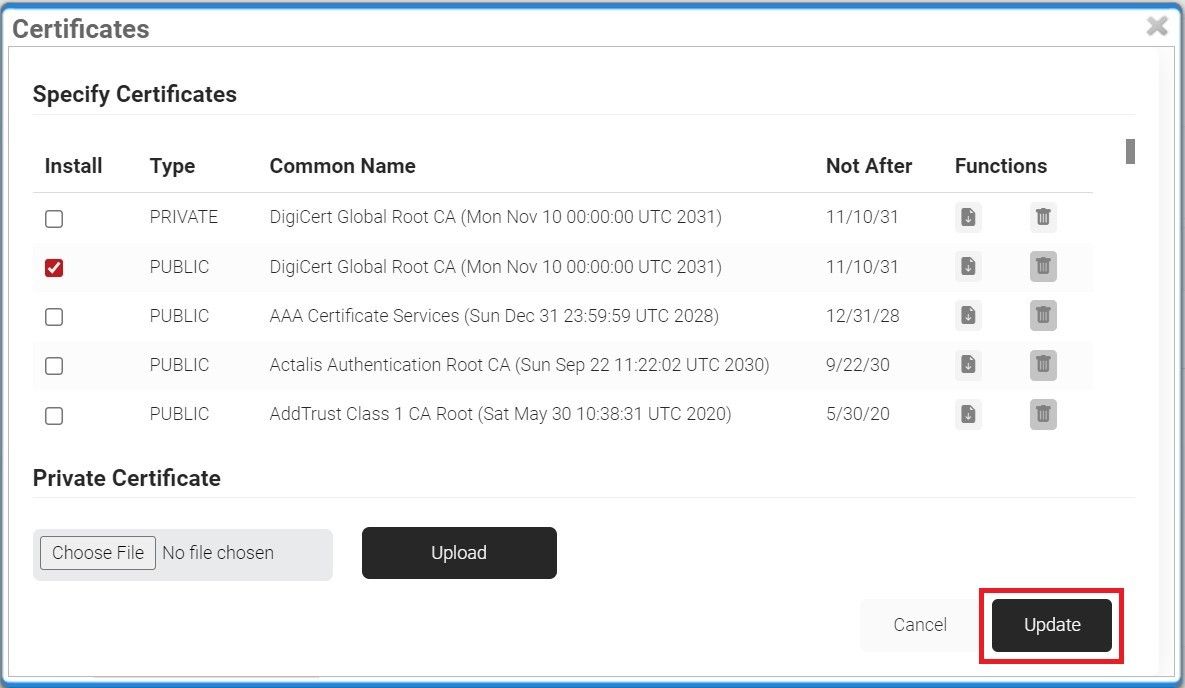
- Click Update.
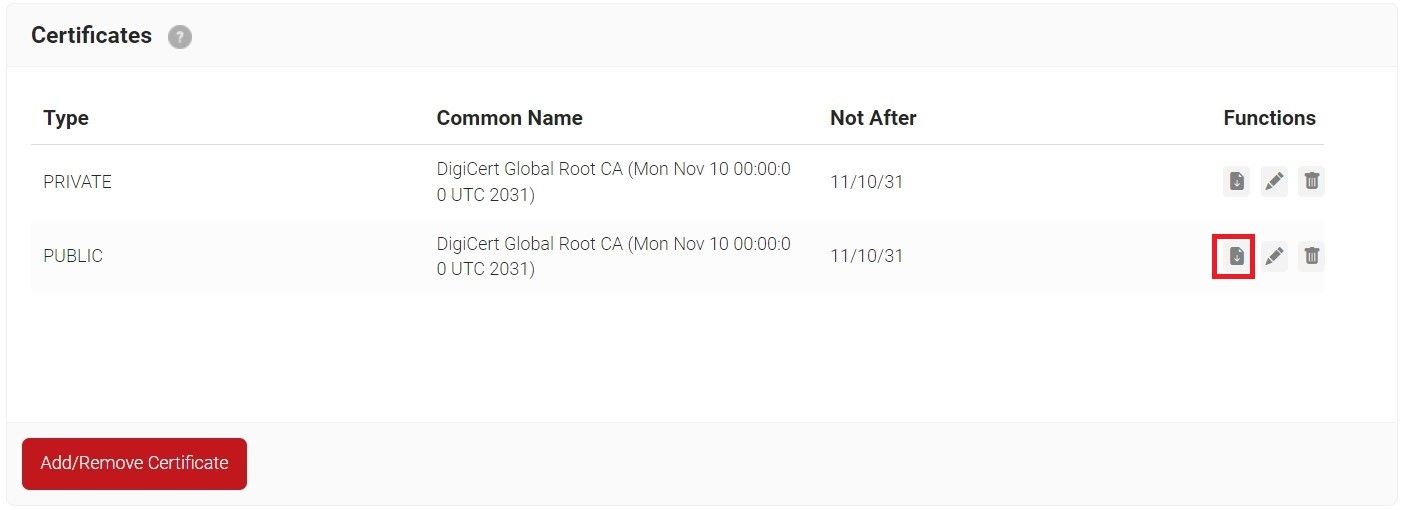
- The CA appears in the Certificates section. Click Download.
Uploading Intermediate CA and RADIUS Server CA in Google Console
- Navigate to the Certificates section in the Google Admin console.
- Click ADD CERTIFICATE.
- In the Name field, enter a name for the certificate authority.
- Click Upload. Choose the Intermediate CA certificate downloaded earlier and click Open.
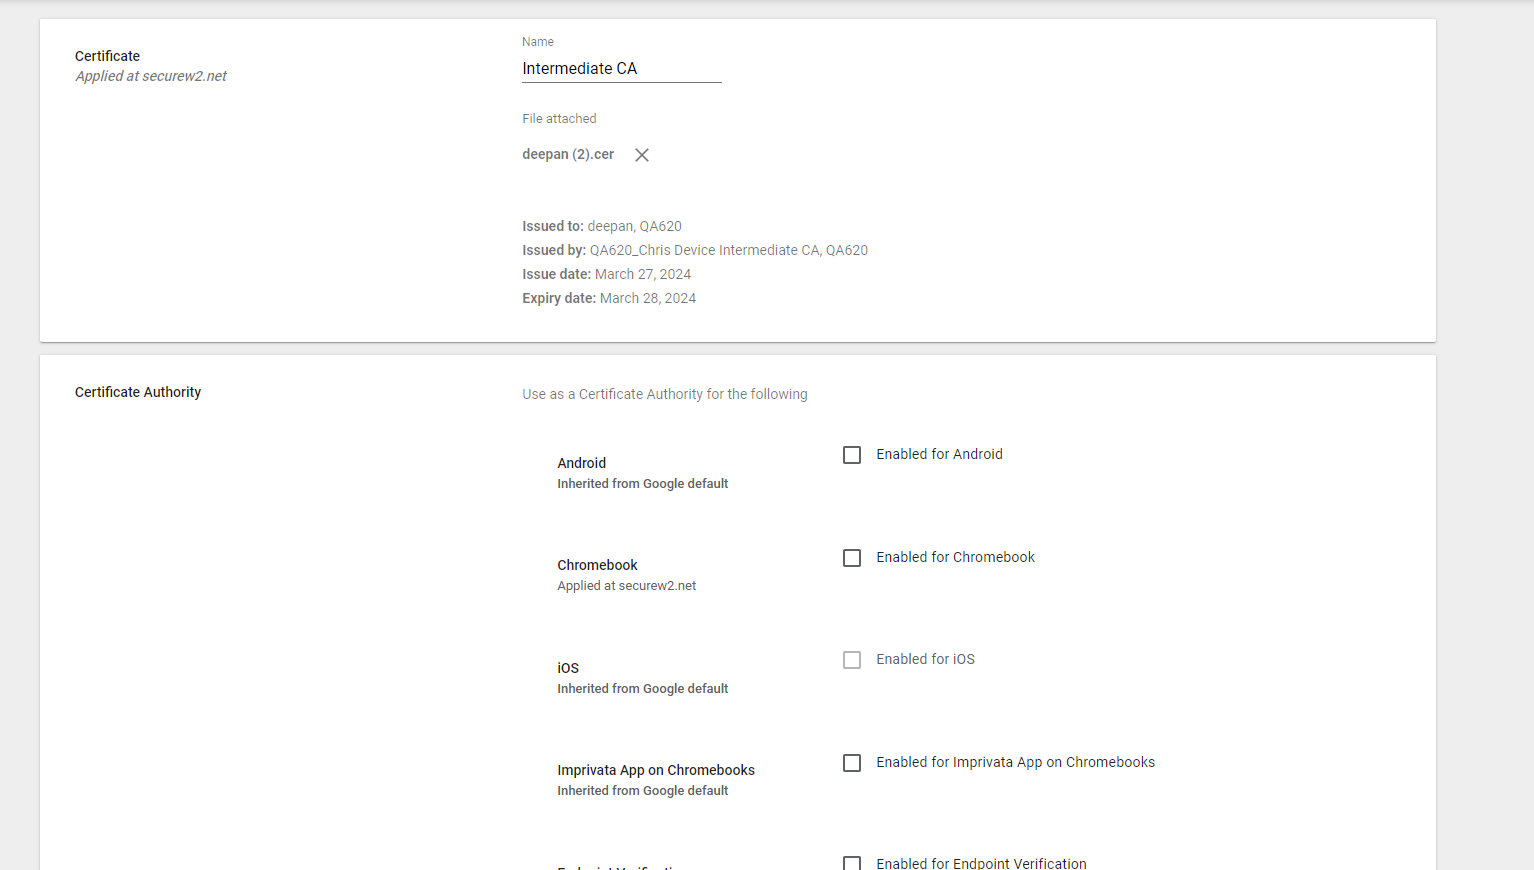
- Select the Enabled for Chromebook option.
- Click ADD.
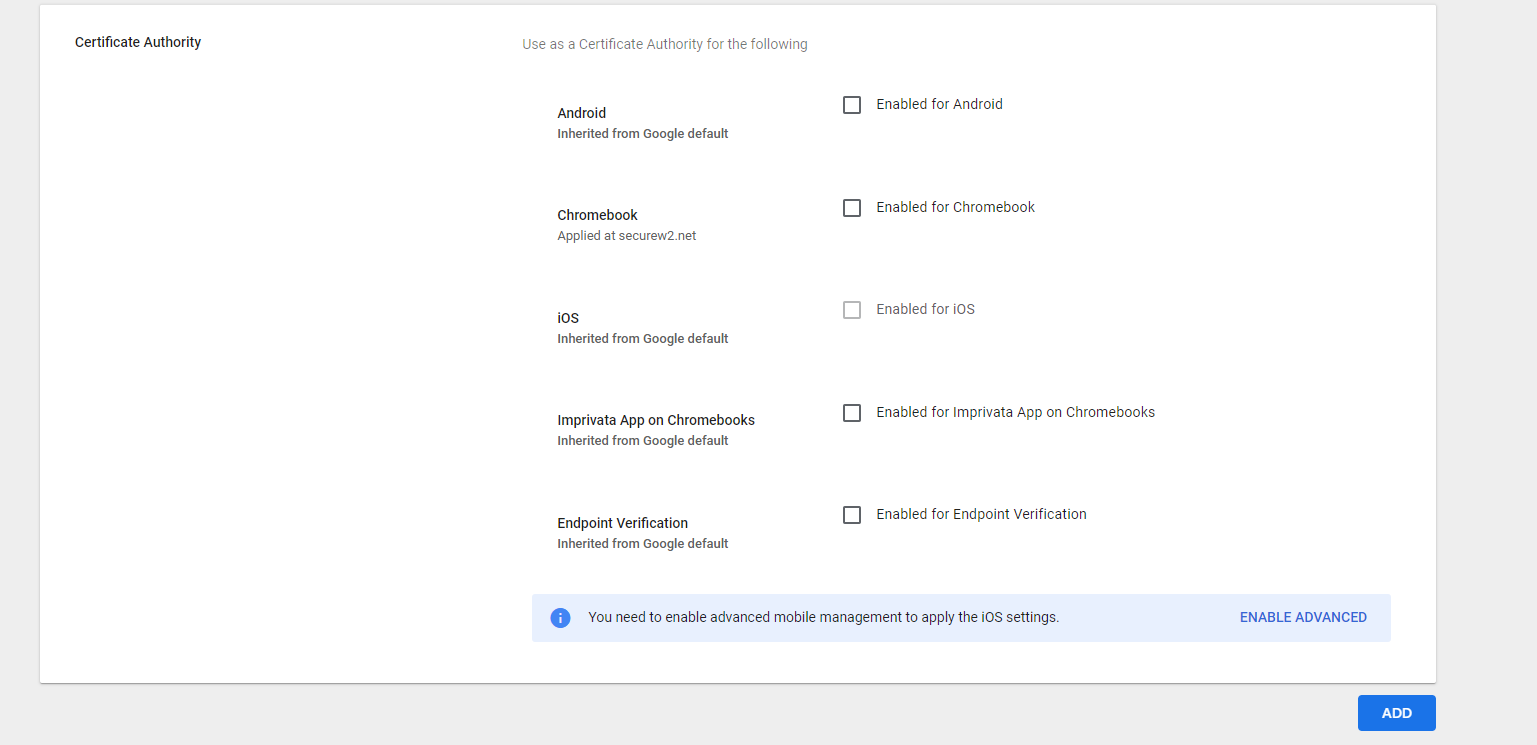
Follow the above steps in this section to upload the RADIUS server certificate downloaded in 5.3 Exporting the Trusted RADIUS Server Root CA Certificate.
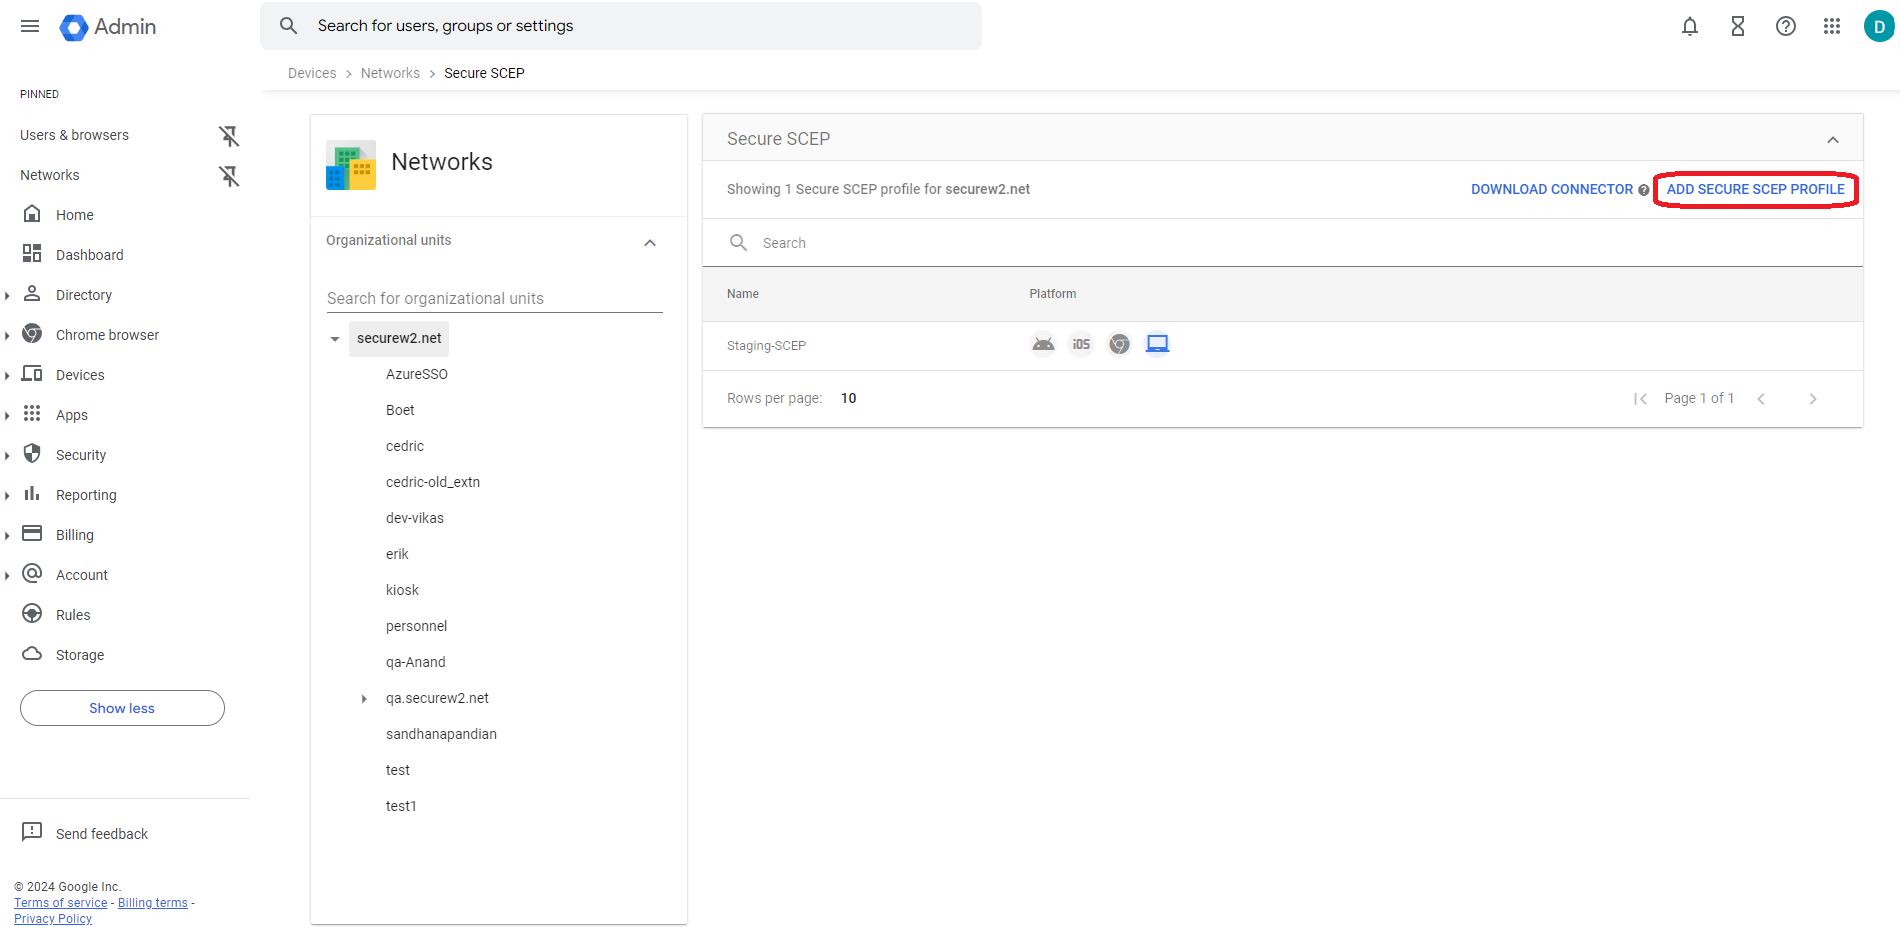
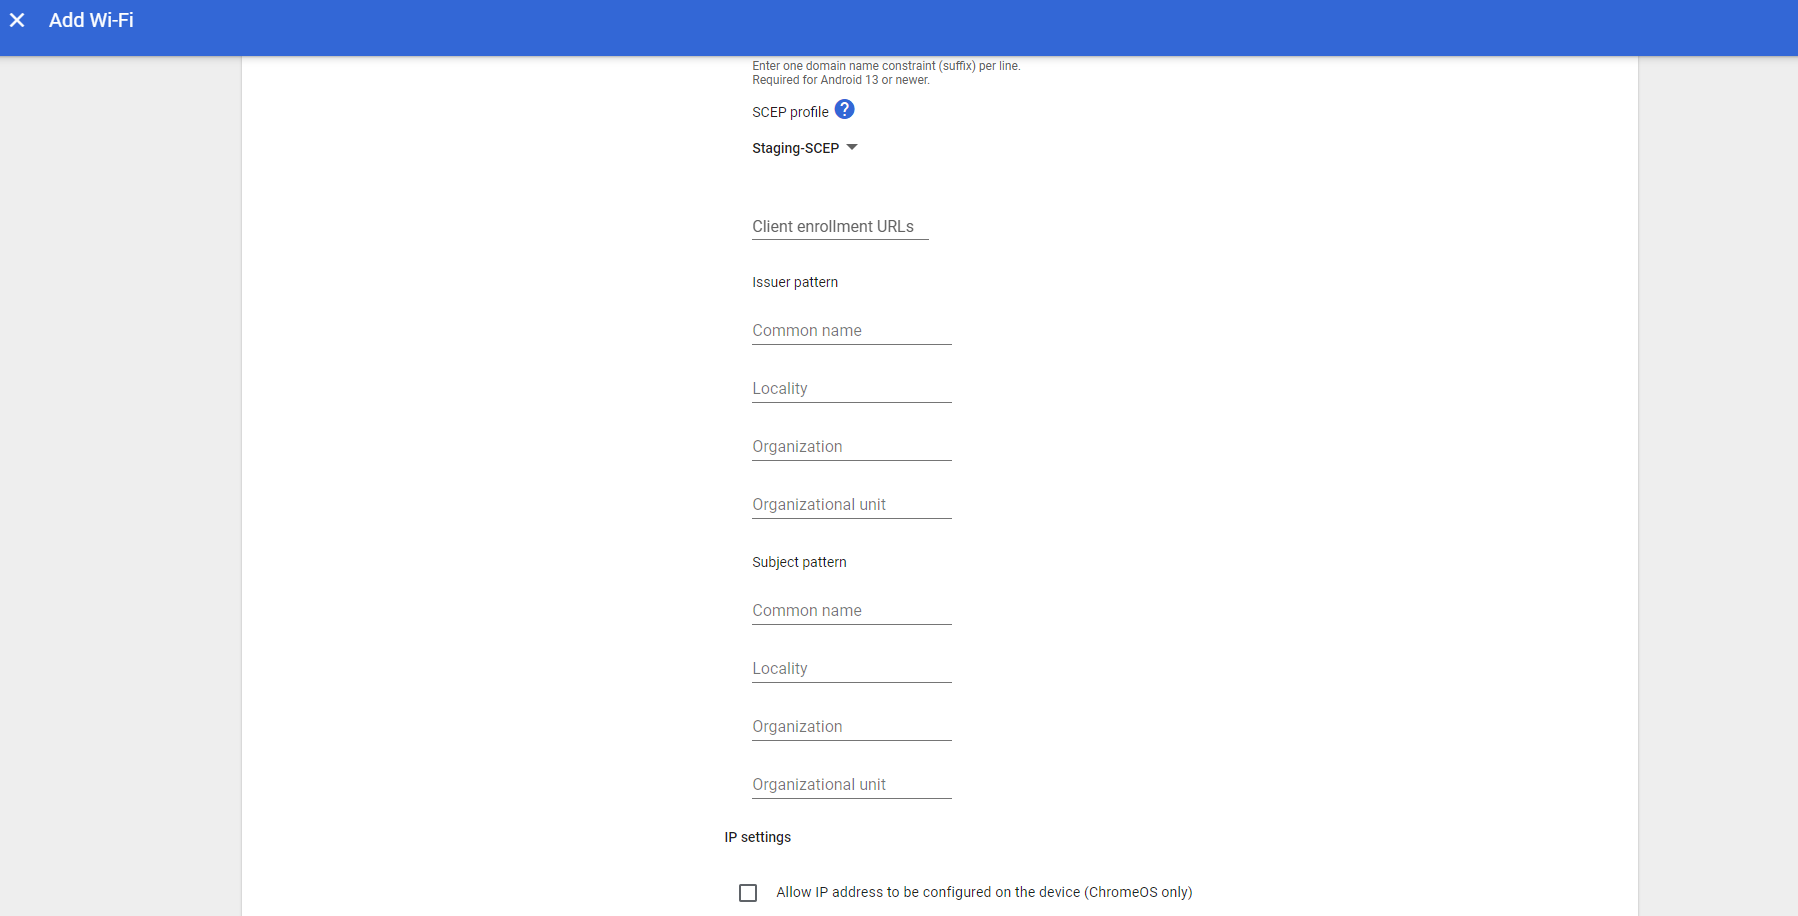
Configuring SCEP Profile in Google Console
- Log in to the Google Admin console.
- Navigate to Devices > Networks.
NOTE: Leave the top organizational unit chosen to apply the setting to everyone. Choose a child organizational unit instead. Due to a known problem, we recommend that you configure the SCEP profile for each organizational unit to which you wish the profile to apply. - Click Create SCEP Profile after selecting the organization.
- Click Add Secure SCEP Profile.
- In the Device Platforms section, select Chromebook (Device).
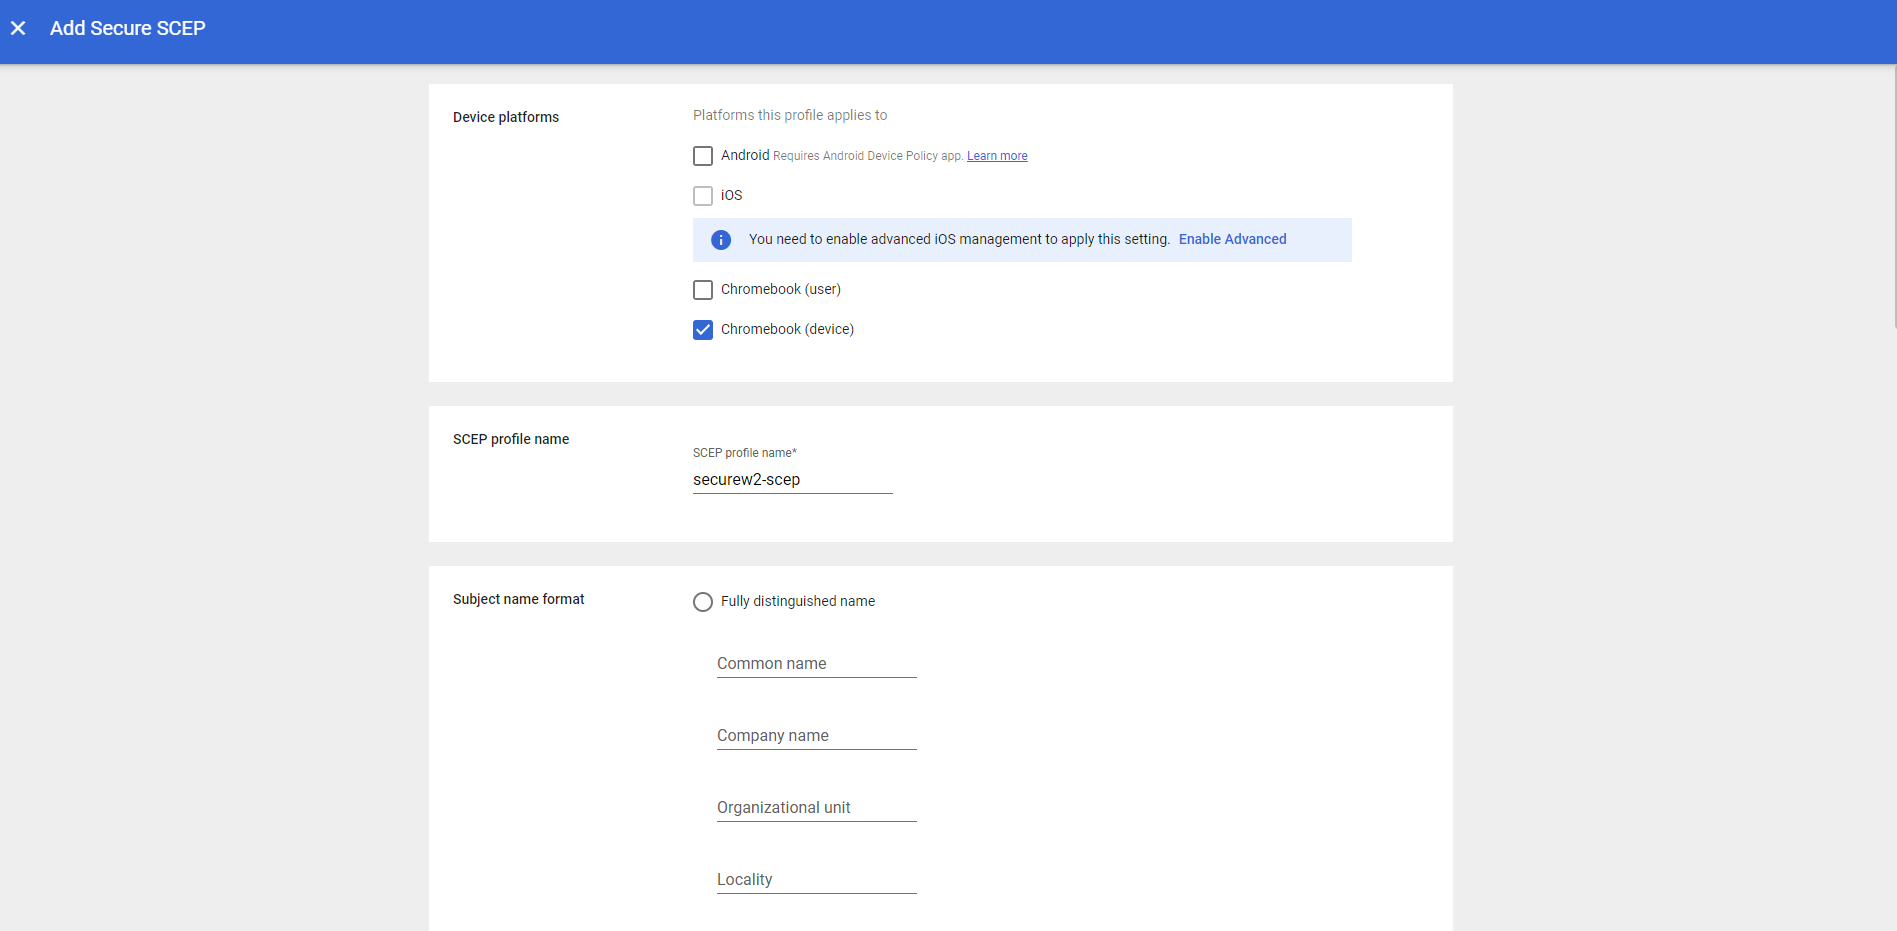
- In the Subject name format section, click on Fully distinguished name radio button.
- In the Common name field, enter ${DEVICE_SERIAL_NUMBER}
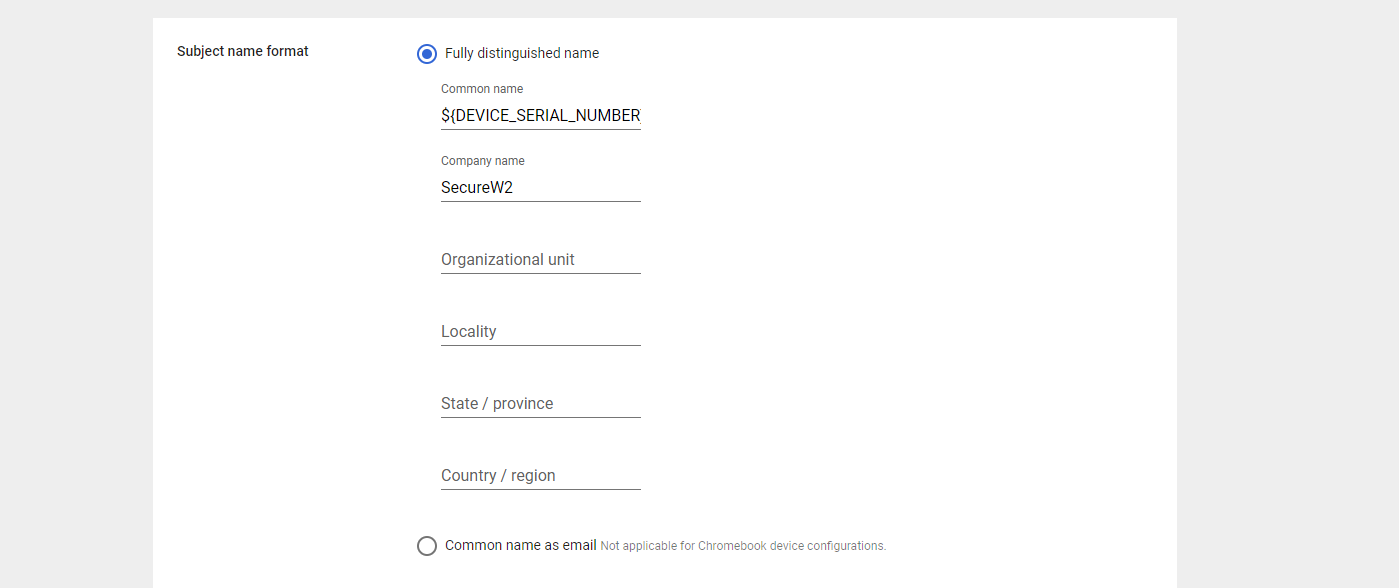
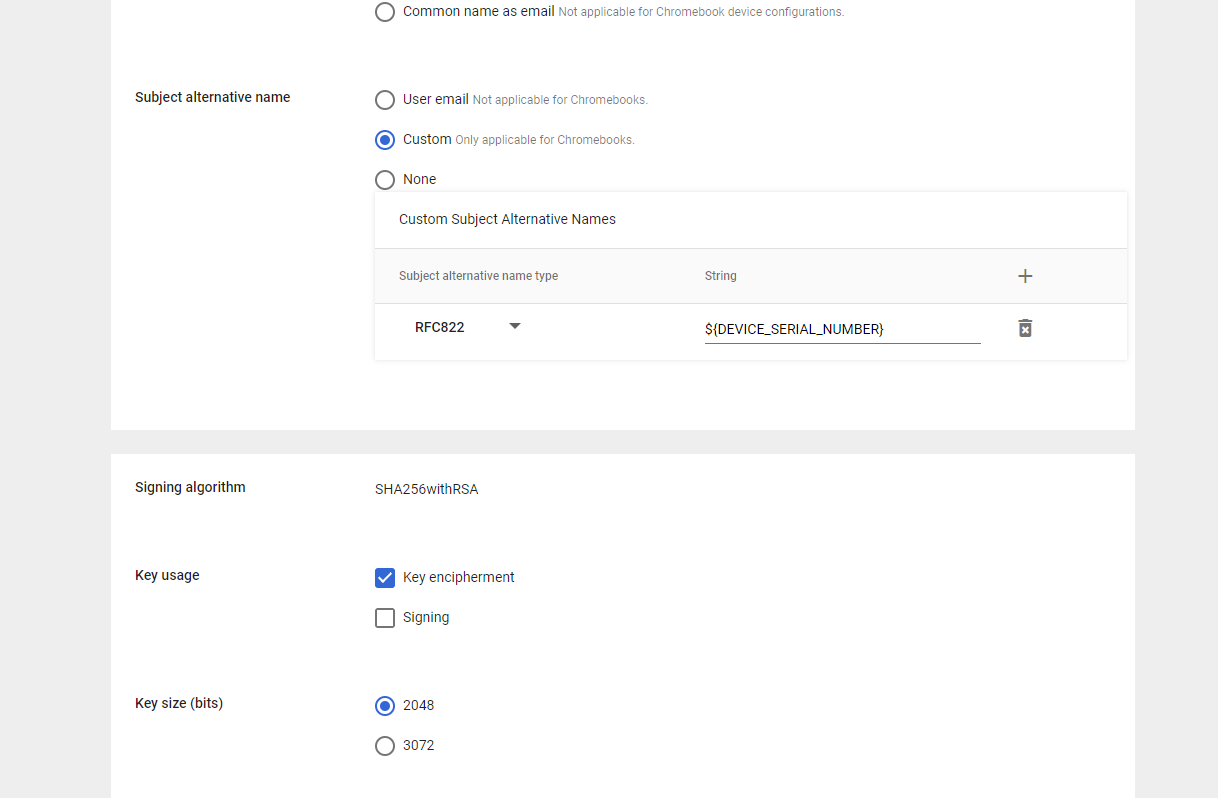
- In the Subject alternative name field, choose Custom.
- From the Subject alternative name type drop-down, select RFC822. In the adjacent field, enter ${DEVICE_SERIAL_NUMBER}.
- In the Key usage field, select Key Encipherment.
- In the Key size (bits), select 2048.
- In the Security section, select Strict.
- In the SCEP server URL field, copy paste the URL from the .csv file created in Generate a SCEP URL and Secret section.
- In the Extended key usage field, select Client authentication.
- In the Challenge type, select Static. In the field for challenge, copy and paste the API Secret from the .csv file.
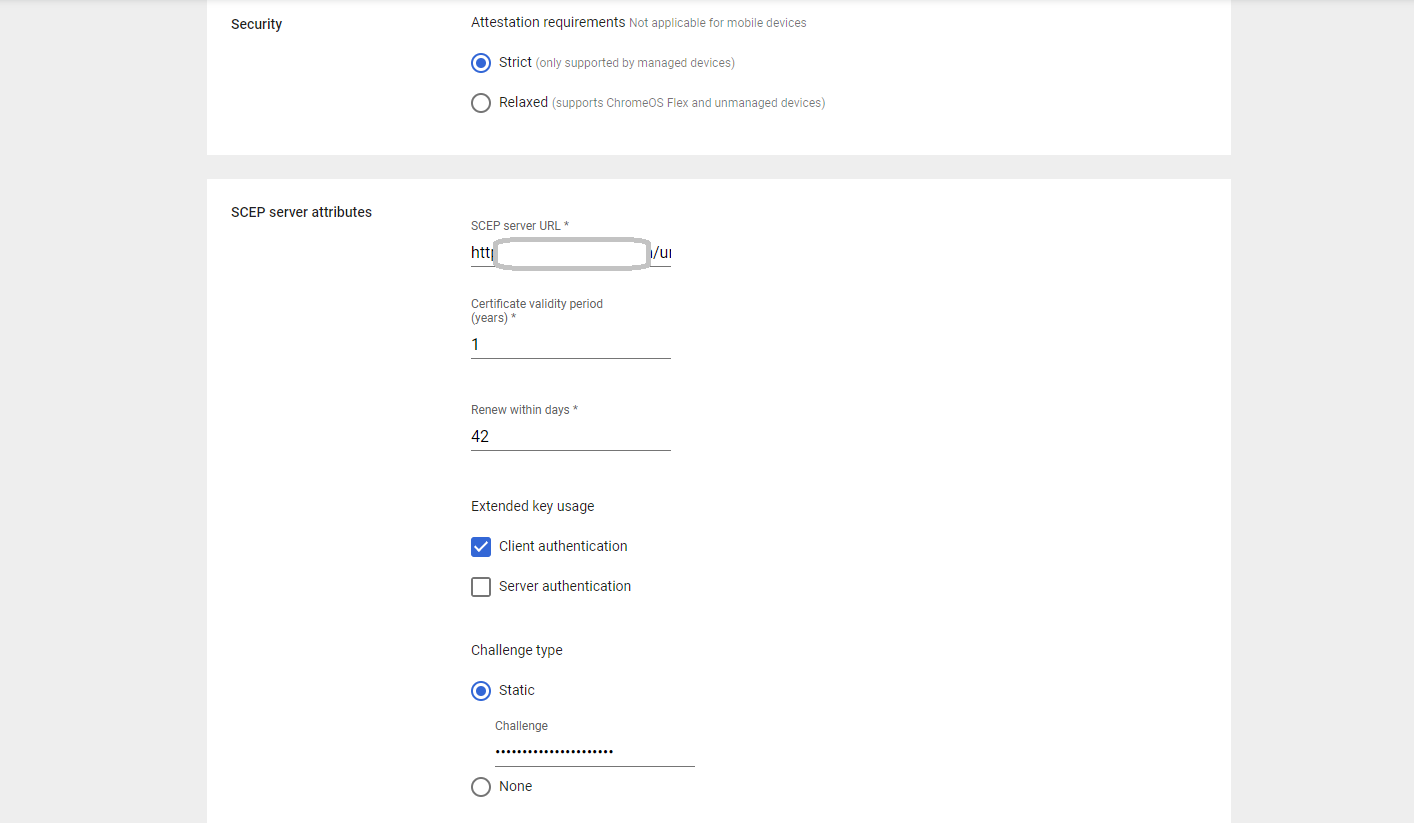
- In the Template name field, enter a name for the SCEP template.
- From the Certificate Authority drop-down, select the certificate authority created for this SCEP organization.
- Click Save.

Configure 802.1X Wi-Fi for Certificate-Based Authentication on Chromebook
The last thing we need to do is configure the network settings that will be pushed to our Chromebooks so that they will authenticate to our SSID using SecureW2 for certificate-based Wi-Fi authentication.
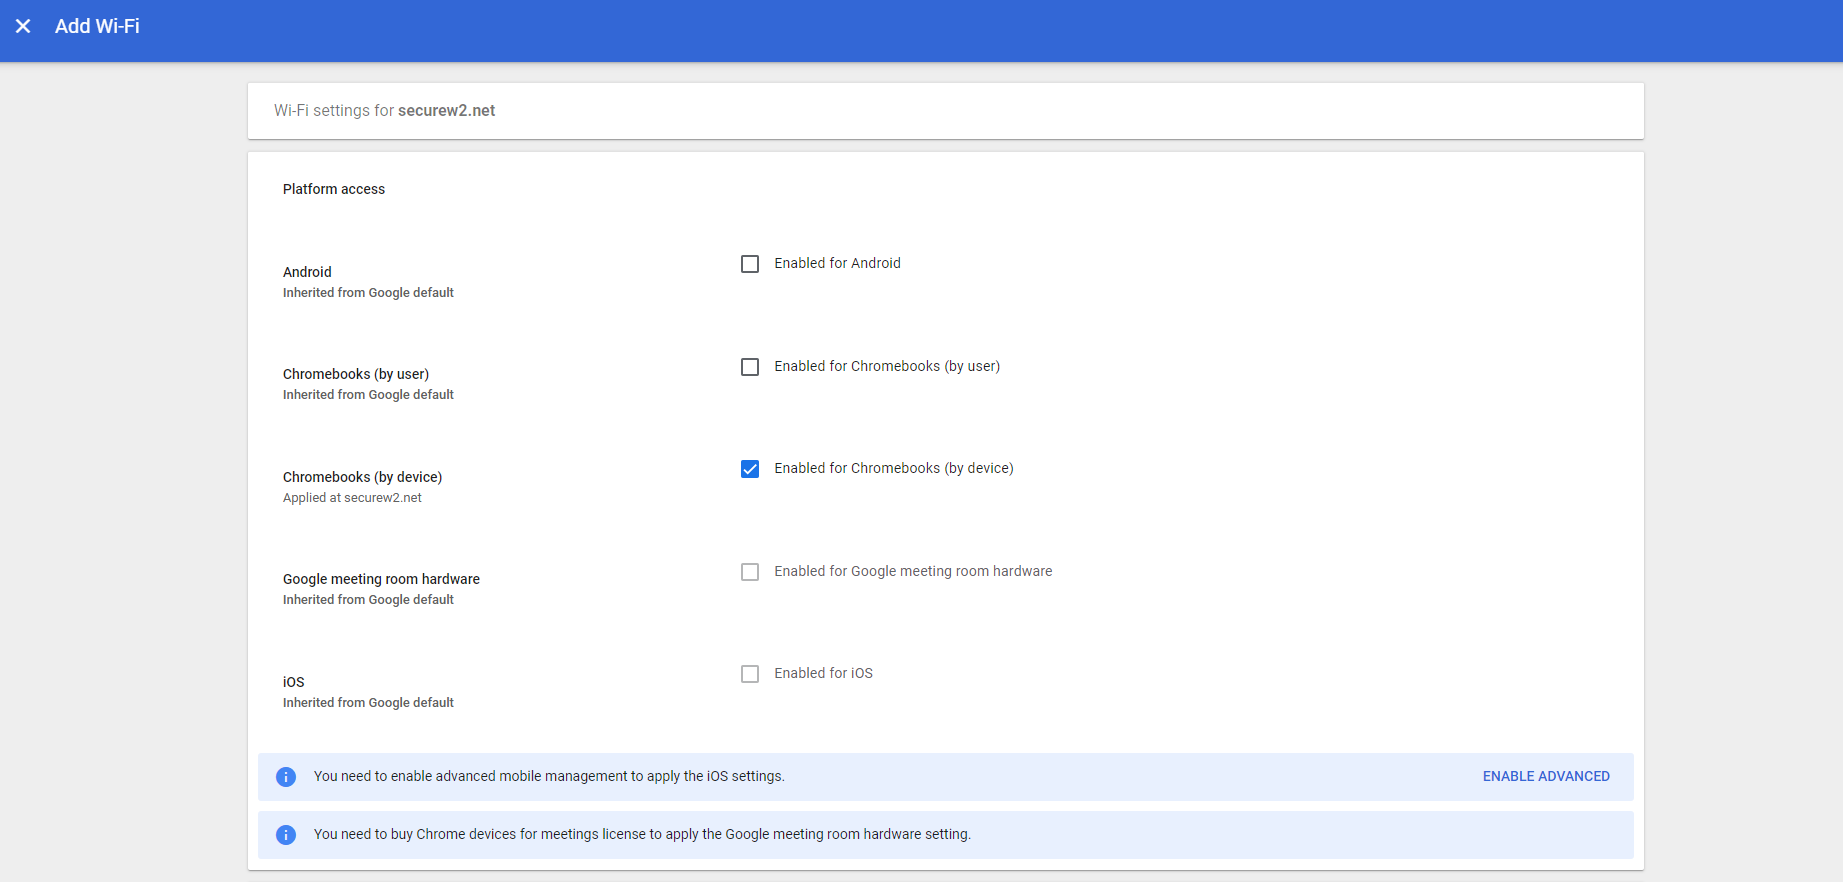
- Navigate to Devices > Networks > Wi-Fi > Add Wi-Fi
- Under Platform access, select Enabled for Chromebooks (by device) option.
- In the Name field, enter a name for your Wifi.
- In the SSID field, enter a name for your broadcasting SSID.
- Enable the Automatically connect option.
- From the Security type drop-down, select WPA/WPA2-Enterprise (802.1X).
- Set the Extensible Authentication Protocol to EAP-TLS. Select Maximum TLS Version as 1.2.
- In the Username field, enter ${CERT_SAN_EMAIL} or ${CERT_SAN_UPN}.
- From the Server Certificate Authority drop-down, select the RADIUS Server Certificate’s Issuer CA chain you uploaded earlier.
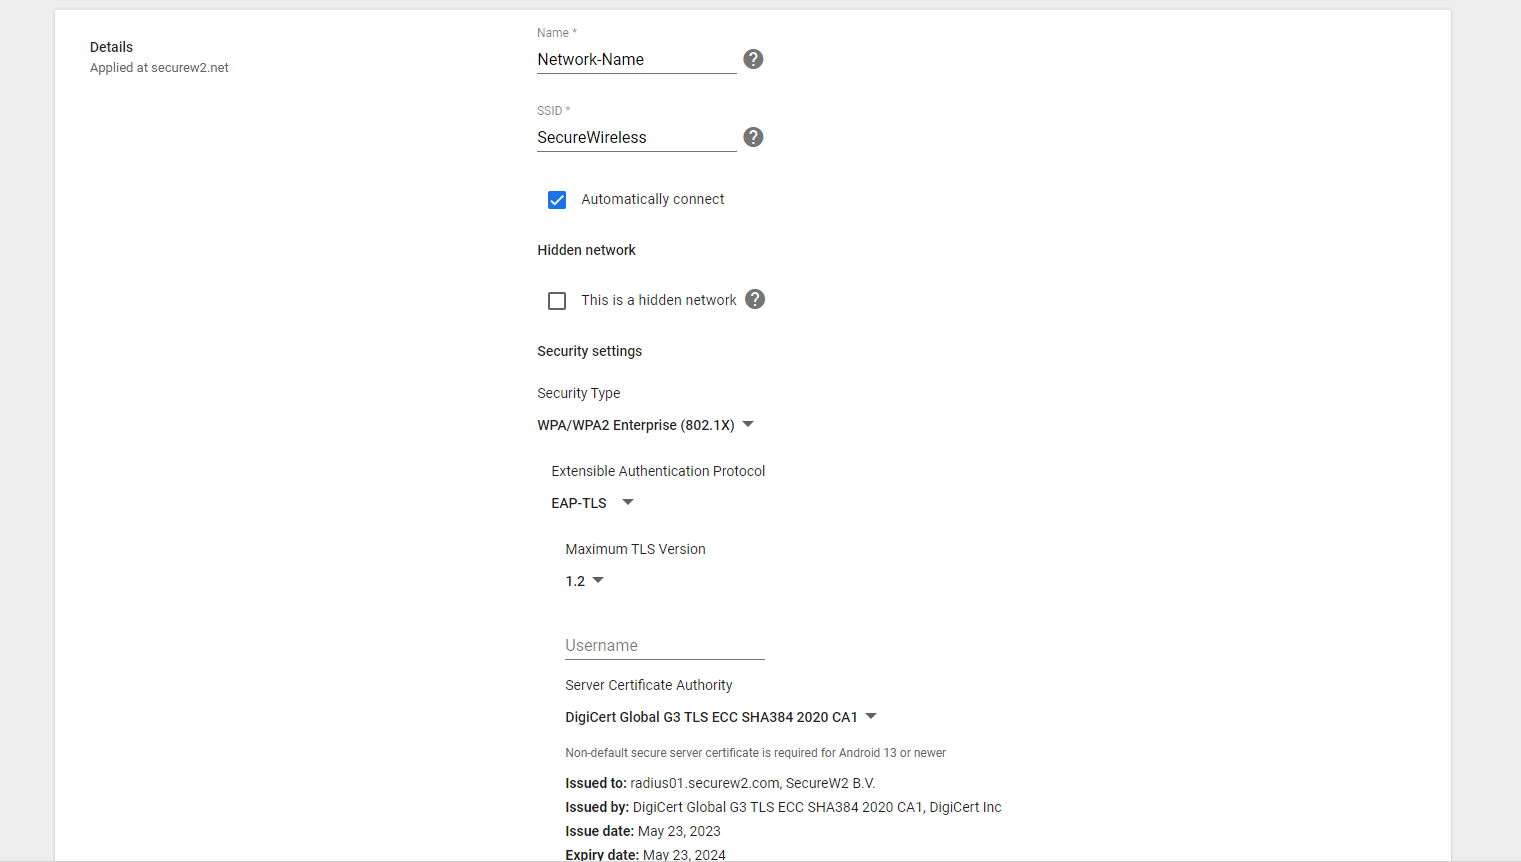
- From the SCEP profile drop-down, select the SCEP profile created in the earlier step.
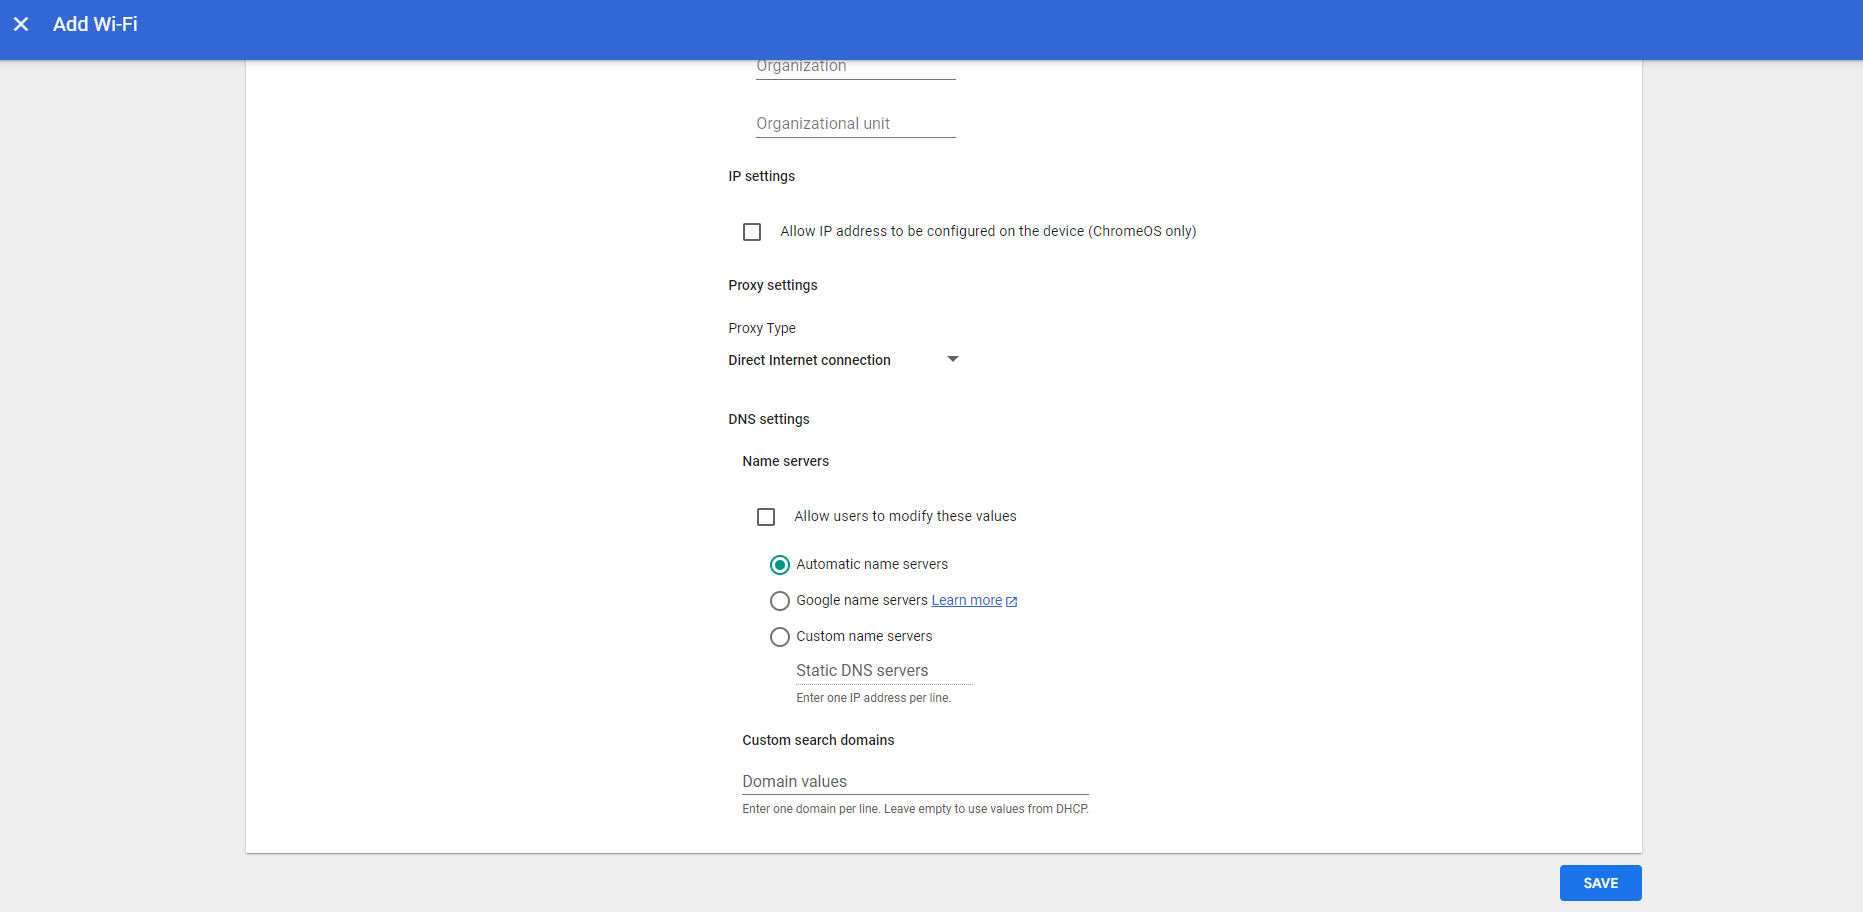
- Under the DNS settings section, select Automatic name servers.
- Click Save.
Chromebooks for your organization can now be enrolled via the SCEP protocol. You can check successful device enrollment in Google console under Devices > Chrome > Devices.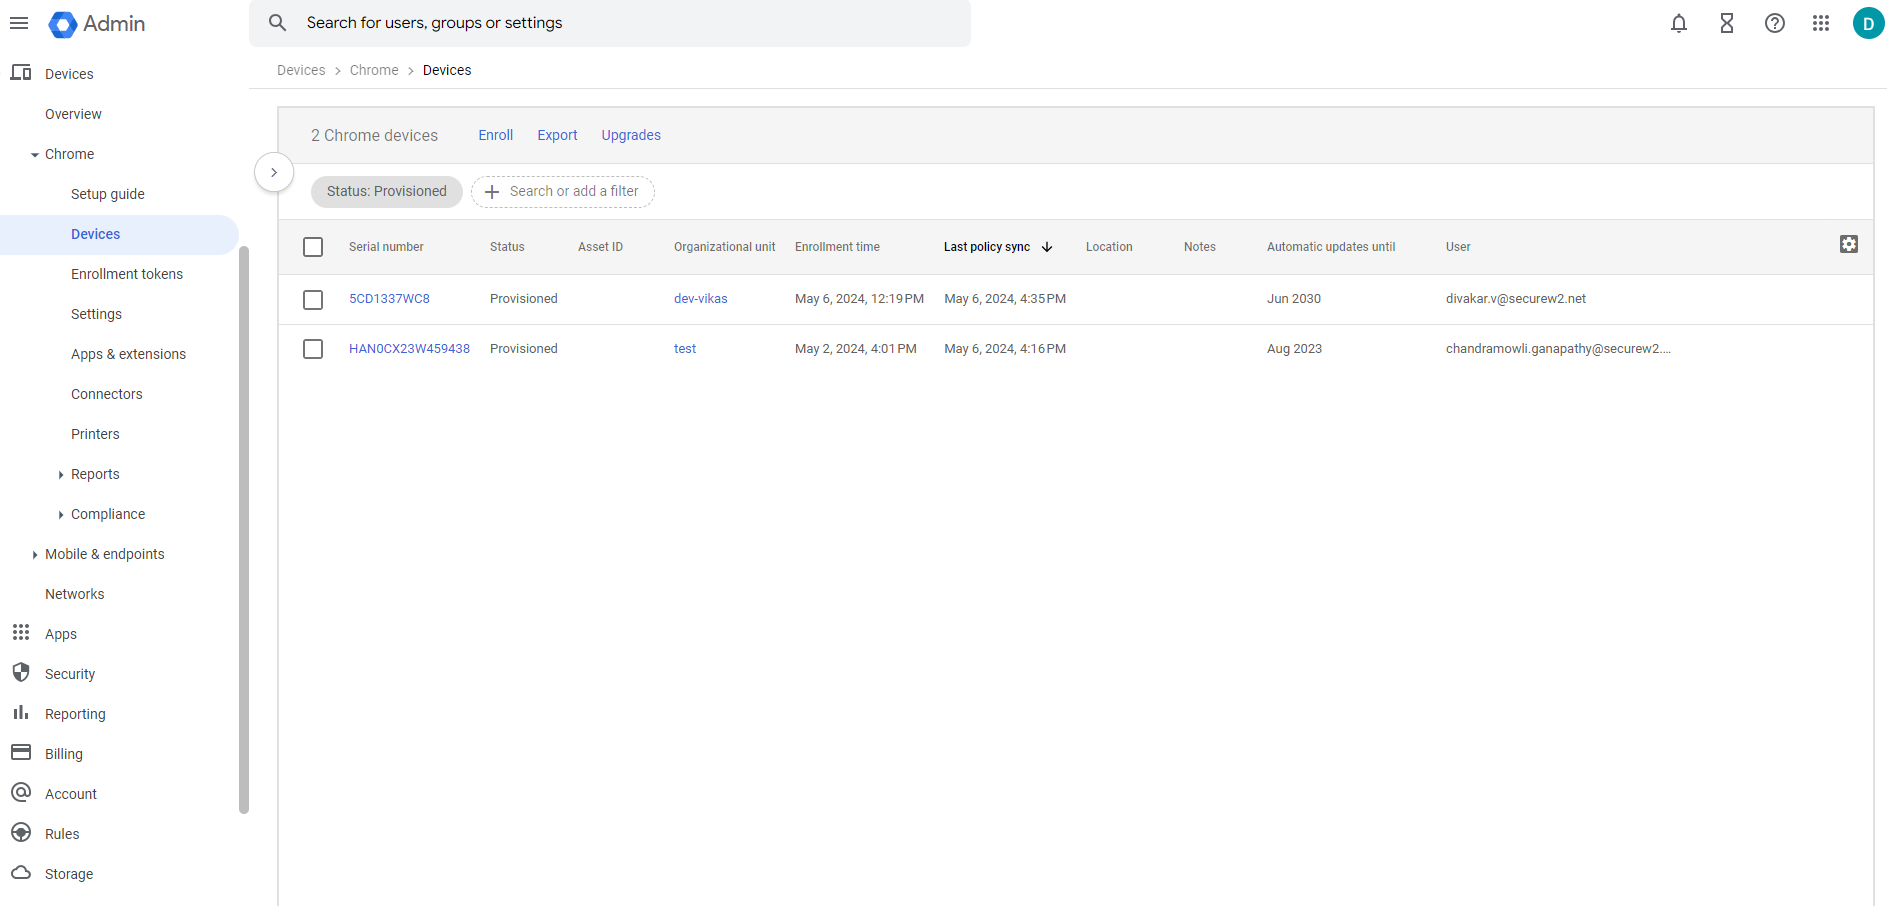
Admins can also check for successful certificate enrollment under Data and Monitoring > General Events. A Certificate Issued message would be displayed for the chrome device enrolled.