Key Points
- AD CS provides the foundation for issuing and managing certificates across Microsoft environments.
- Manual certificate issuance or misconfigured Microsoft CA setups can lead to errors, security gaps, and operational inefficiencies.
- Following best practices for Microsoft CA certificate issuance ensures seamless enrollment, strong security, and simplified enterprise PKI management.
Now that we’ve learned passwords are not a secure form of authentication, organizations are implementing digital certificates, which provide stronger security and can be leveraged for more efficient network authentication.
Many Microsoft environments use Active Directory Certificate Services (AD CS) to implement digital certificates for their environment. AD CS provides the foundation for admins to build a Public Key Infrastructure (PKI) which is required for certificates to function.
Background on AD CS
While AD CS is useful by itself, there’s a lot left to be desired. AD CS requires admins build an on-premise PKI instead of one completely in the cloud. Admins would have to further entrench themselves on-prem with outdated legacy systems. With AD CS, the only option for admins looking to configure cloud services would have to set up a hybrid system and find workarounds for implementing cloud features.
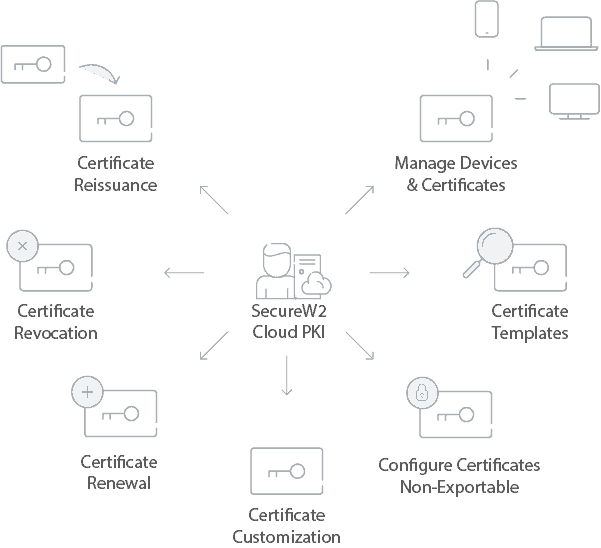
Fortunately, Microsoft environments can integrate SecureW2 software, which includes a Managed Cloud PKI and device onboarding software. With SecureW2, admins can provision every network device with a certificate and serve as identification for authentication purposes.
SecureW2’s software uses the superior 802.1X authentication protocol, EAP-TLS. As the only certificate-based authentication protocol, EAP-TLS eliminates over-the-air credential theft and ensures secure authentication for Wi-Fi, VPN, web apps, Desktop Logon, and more.
Issuing a Certificate from an Internal Microsoft CA

Microsoft admins have the option to issue certificates directly from AD or they can integrate their systems with a Managed PKI, like SecureW2’s Private PKI that comes with JoinNow onboarding software that simplifies certificate issuance and CloudRADIUS can directly reference your Identity Provider (AD or Azure AD) and perform runtime-level policy enforcement.
SecureW2 can simplify the process by integrating our automated certificate software with your internal CA. Our services include a turnkey cloud PKI with JoinNow automated onboarding software and Dynamic CloudRADIUS.
This article will not only show you how to integrate SecureW2 software with Microsoft CAs, but also how to issue certificates from those CAs. For more information on certificate management, check out our page on the best way to manage Microsoft certificates.
Integrate Microsoft CA with SecureW2
Instead of keeping on-prem legacy systems in place, Microsoft clients can import their AD CS servers in SecureW2’s software. Our Cloud Connector provides a seamless transition to the cloud and strengthens network security. Microsoft networks no longer need to be on-prem and can enjoy the perks of cloud-based services.
With SecureW2 PKI, admin can create an Intermediate CA with the Microsoft Root CA, or you can use SecureW2’s AD CS integration module (contact us to learn more) to issue certs directly from AD CS, but still take advantage or all the enrollment and management features of SecureW2’s PKI. Below we will detail the first scenario of creating an Intermediate CA with SecureW2.
Backup CA on AD CS
- Open the Certification Authority snap-in. In the console tree, right click the name of the CA. On the Action menu, point to All Tasks, and click Back up CA.
- A popup wizard will be opened (as shown in the figure below). Click Next.
- A new screen with Dialogue Box appears as below. Select Private Key and CA certificate. Select a folder in which you want to save the certificate.
- When the new screen appears, enter the password twice. Click Finish on the next screen.
Import CA in Cloud Connector
- Log in to JoinNow MultiOS Management Portal. Navigate to PKI management -> Certificate Authority and click on Import Certificate Authority.
- The basic certificate authority page is displayed. Select the p12 file in Certificate.
- Enter Password that was created when exporting the Certificate Authority.
- Once completed, ensure the certificate is created in the screen below.
Note: While importing the CA certificate, only SHA-256 or SHA1 are supported as the signature algorithm.
Configure SecureW2 to Issue Microsoft Certificates
- Log in to your SecureW2 management portal
- Click Certificate Authorities
- Go to Add Certificate Authority
- Under Local CA use the drop down menu to find Intermediate CA
- Navigate to Generate via → Certificate Signing Request
- Underneath, find Certificate Signing Request and locate your Certificate file and upload it to SecureW2
Admins can now leverage SecureW2’s certificate issuance and management features. The imported Microsoft CA signs the certificate and gives full control to SecureW2, allowing admins to provision certificates through our intuitive onboarding software.
Issuing CA-Signed Certificate to Windows Devices
Connecting your Windows device is simple and only takes a few minutes. Here’s a quick guide on configuring a certificate onto all Windows network devices.
- Connect to your WiFi.
- Open your browser to be redirected to the onboarding client → Click JoinNow.
- An application will be downloaded → Open the application.
- A pop up will appear that will bring you to your account provider website to sign-in → Click Next.
- Sign-in using your credentials.
- Your device will automatically be enrolled, issued, authenticated, and connected in just a few seconds.
Configuring Microsoft CA with Non-Windows Devices
SecureW2’s solutions allow Microsoft admins to issue certificates to every network device, BYOD (Bring Your Own Device) and MDM. BYODs are now an important part of the business landscape since almost everyone has a smart device. However, that has historically been a pain for admins to manually configure every single BYOD for network authentication. Leaving the configuration for the end user
SecureW2 has a number of ways to issue certificates to users. Bring Your Own Devices (BYODs) are becoming more widely used in the business landscape. However, it can be a chore for admins to manually set up each and every device for authentication. If left up to the end user, the device could be misconfigured and become a security risk.
Configuring Managed Devices with Microsoft CAs
MDMs can be a costly and time-consuming challenge for admins to configure for certificates. Using SecureW2’s powerful Gateway APIs, administrators can push out certificates without the need of end-user interaction and can guarantee 802.1X EAP-TLS configuration for all devices.
Our Management portal also offers a robust feature set so that administrators have everything they need to revoke, manage, and troubleshoot issues that arise with certificates. Our services come at an affordable price, contact us today!