1. Introduction
SecureW2’s ACME service can enroll Apple devices with certificates. It can cryptographically prove that a device is a genuine Apple product, and confirm its serial number using Apple Managed Device Attestation (MDA). MDA is what allows JoinNow CloudConnector to validate a device’s identity and cross-reference it with your MDM to ensure that only trusted devices can enroll for certificates.
This guide describes the steps to integrate Kandji MDM with JoinNow Cloud Connector to allow devices, such as macOS, iOS, iPadOS, and tvOS, to enroll for digital certificates via ACME.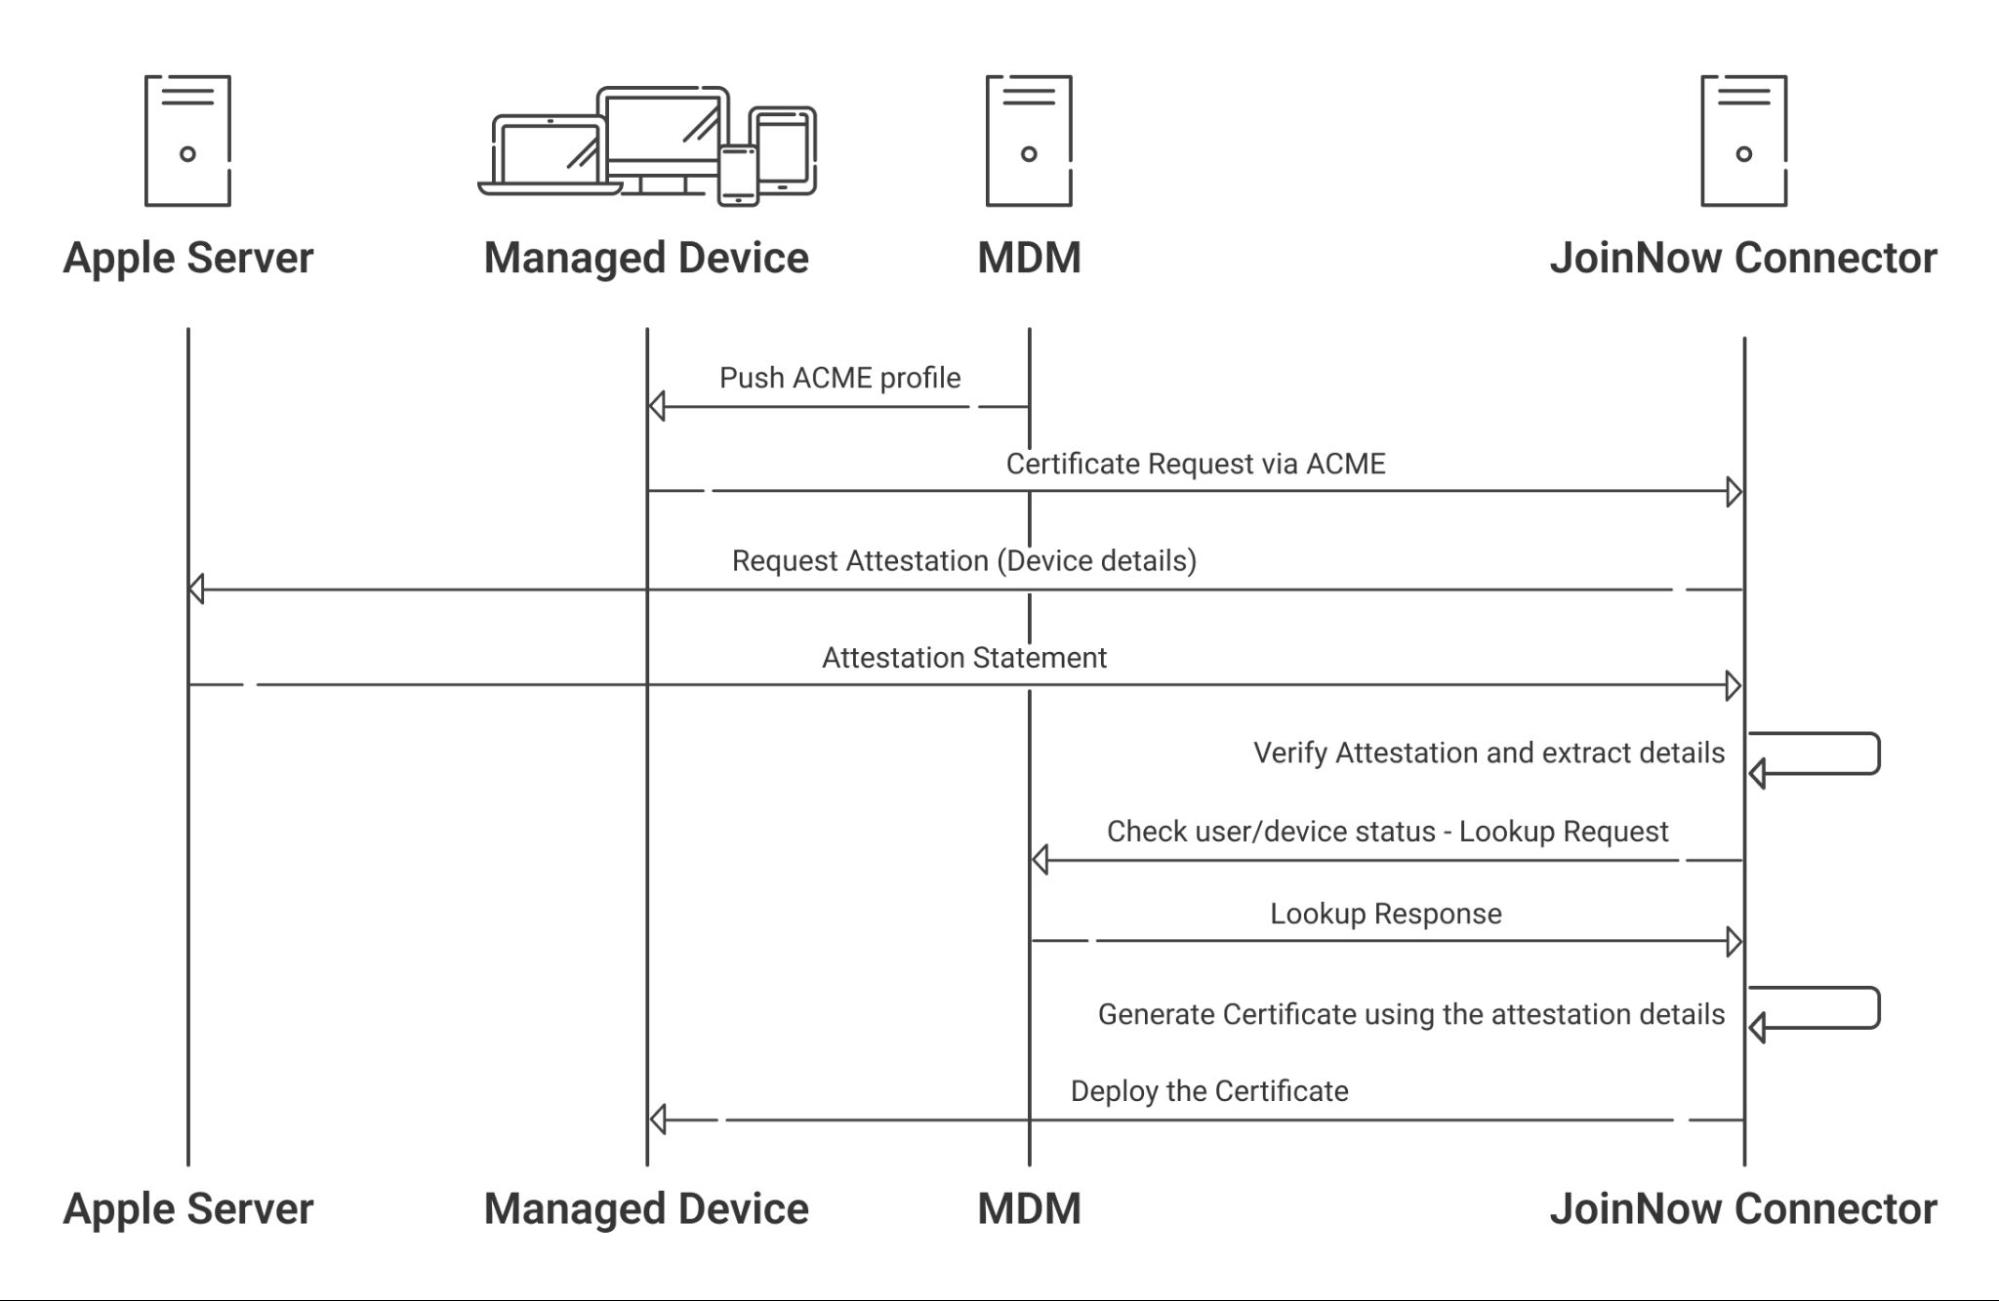
2. Prerequisites
- Active Kandji subscription
- Active JoinNow CloudConnector subscription along with the Enterprise Enrollment and Attestation (EEA) add-on
- iOS or macOS devices (that support the ACME protocol) actively managed in Kandji
3. Configuring JoinNow Management Portal
To configure ACME-based enrollment with the JoinNow portal, the following high-level steps are required:
- Create an Intermediate CA
- Create a Kandji Certificate Template
- Create an ACME API Token
- Create a Generic HTTP Identity Lookup Provider
- Create Policies
3.1 Creating an Intermediate CA for Kandji SCEP Gateway Integration
As a best practice, it is recommended to have a new intermediate CA for ACME Gateway based integrations with Kandji.
To create a new intermediate CA:
- Log in to the JoinNow Management Portal.
- Navigate to PKI > Certificate Authorities.
- Click Add Certificate Authority.
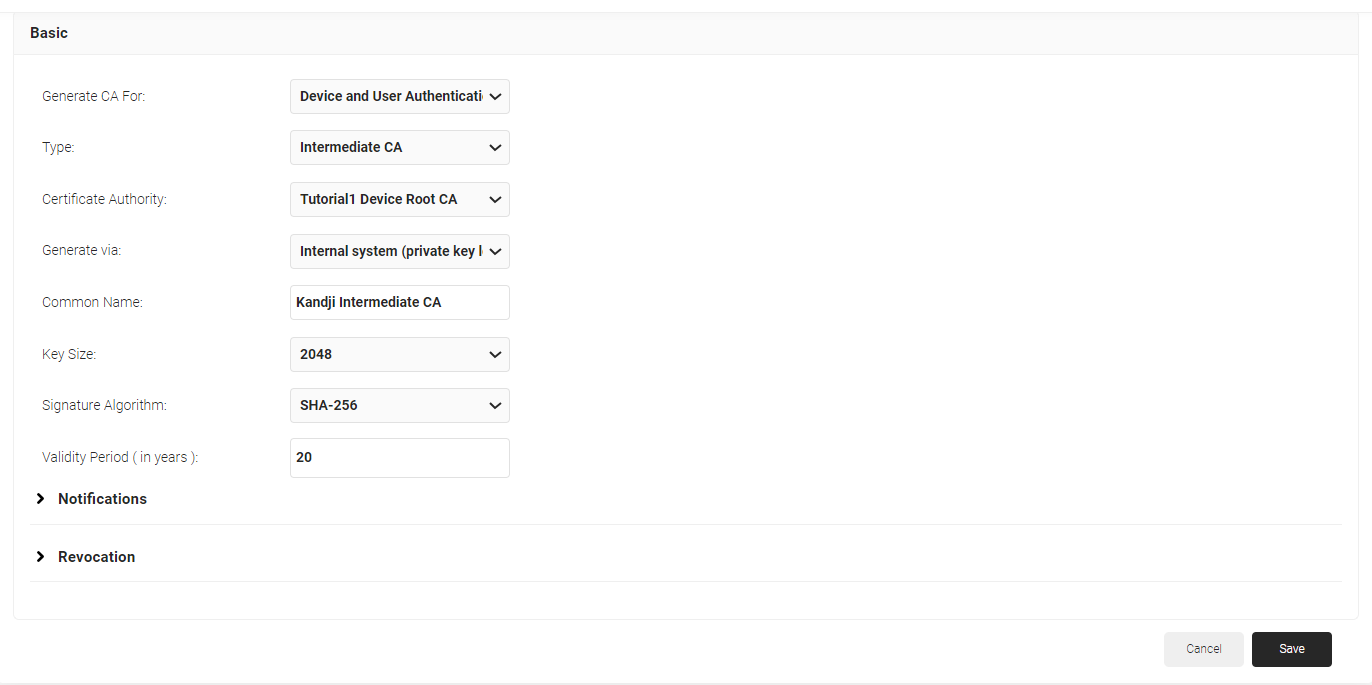
- In the Basic section, from the Generate CA For drop-down list, select the Device and User Authentication option to authenticate devices and users.
- From the Type drop-down list, select Intermediate CA.
- From the Certificate Authority drop-down list, select the default Root CA that comes with your organization.
- From the Generate via drop-down list, select Internal system.
- For the Common Name field, enter a name. It is recommended to use a name that includes ‘ACME’.
- From the Key Size drop-down list, select 2048 for the CA certificate key pair.
- From the Signature Algorithm drop-down list, select the signature algorithm for the certificate signing request. The option available is SHA-256.
- In the Validity Period (in years) field, enter the validity period of the CA certificate.
- Click Save.
The new intermediate CA is generated.
3.2 Creating a Certificate Template for Kandji
A certificate template determines how information is encoded in the certificate to be issued by the Certificate Authority. The template consists of a list of certificate attributes and how the information must be encoded in the attribute values. This information is provided by the Admin in the JoinNow Management Portal.
It is recommended to create a separate template for each MDM platform for easier identification of different values being passed. To create a Kandji certificate template:
- Navigate to PKI > Certificate Authorities.
- Click Add Certificate Template.
- Under the Basic section, in the Name field, enter the name of the certificate template.
- Subject field can be configured to source values from the Jamf.To use the attributes sent from Jamf, enter CN=${/csr/subject/commonname}
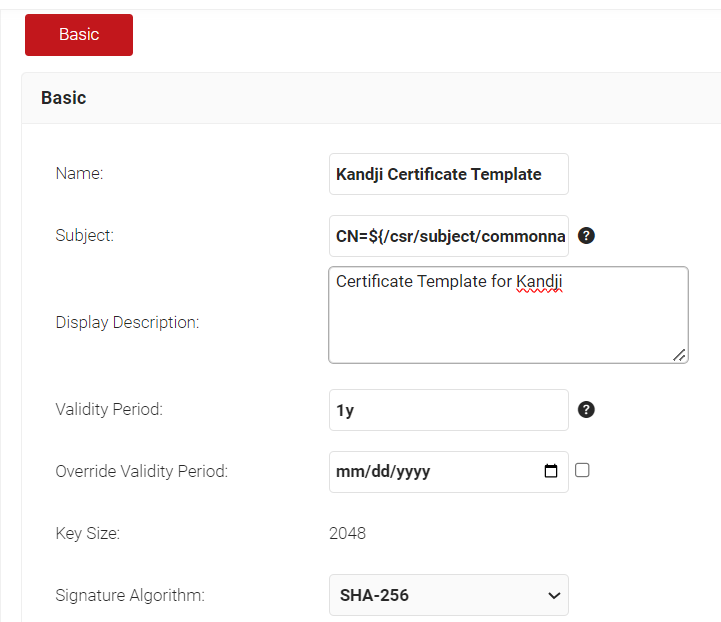
- In the Display Description field, enter a suitable description for the certificate template.
- In the Validity Period field, type the validity period of the certificate (based on the requirement).
- From the Signature Algorithm drop-down list, select the signature algorithm for the certificate signing request. The option available is SHA-256.
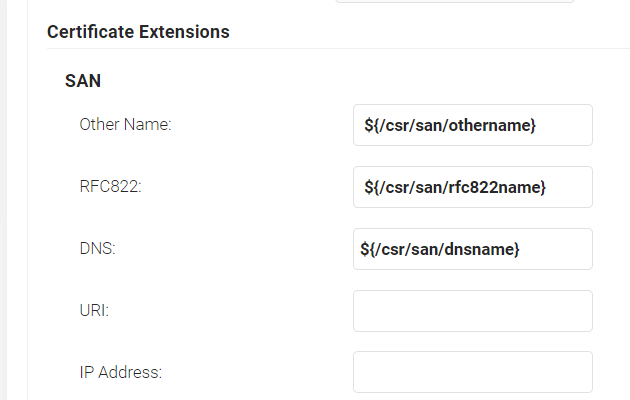
- In the SAN section:
- In the Other Name field, enter ${/csr/san/othername}
- In the RFC822 field, enter ${/csr/san/rfc822name}
- In the DNS field, enter ${/csr/san/dnsname}
- In the Extended Key Usage section, from the Use Certificate For list, select Client Authentication.

- Click Save.
3.3 Creating an ACME API Gateway
- Log in to the JoinNow Management Portal.
- Navigate to Identity Management > API Gateways.
- Click Add API Gateway.
- In the Basic section, enter the name of the API Gateway in the Name field.
- In the Description field, enter a suitable description for the API token.
- From the Type drop-down list, select ACME Client Certificate Enrollment Token.
- From the Vendor drop-down list, select Kandji.
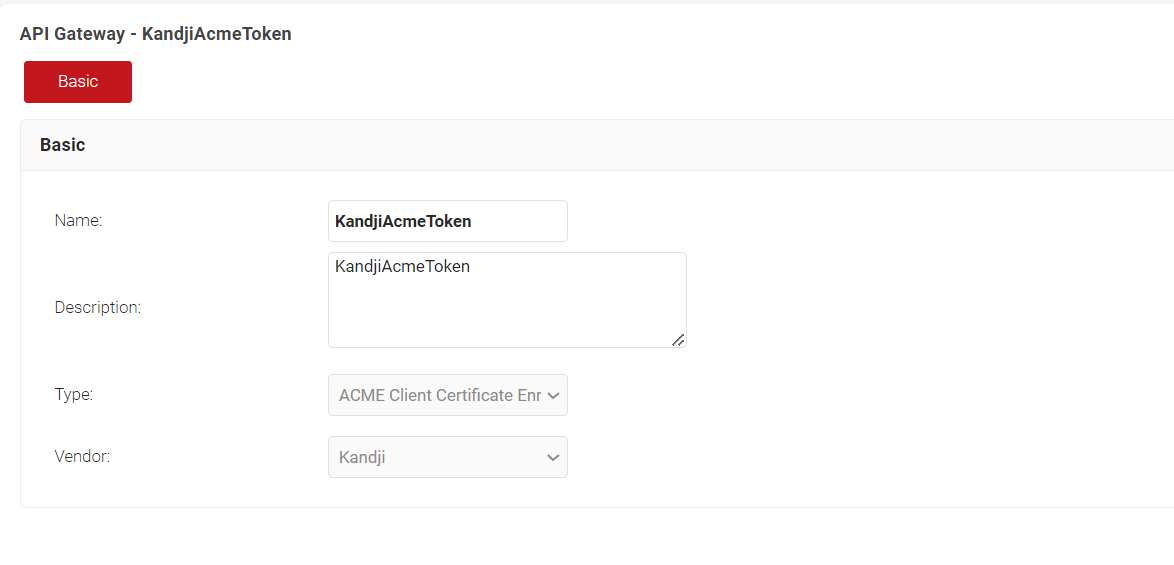
- Click Save. A .mobileconfig file is downloaded.
3.4 Creating a Generic HTTP Identity Lookup Provider
With JoinNow, you can create a Generic HTTP-based Identity lookup provider. This is necessary to configure a device lookup with Kandji during ACME certificate enrollment.
- Navigate to Identity Management > Identity Providers.
- Click Add Identity Provider.
- Enter a name and description for the Lookup IDP in the respective fields.
- From the Type drop-down list, select Generic HTTP.

- Click Save.
- On the displayed page, click the Configuration tab.
- From the Authentication Method drop-down list, select Bearer Token.
- In the Bearer Token field, enter the token value obtained from Kandji.
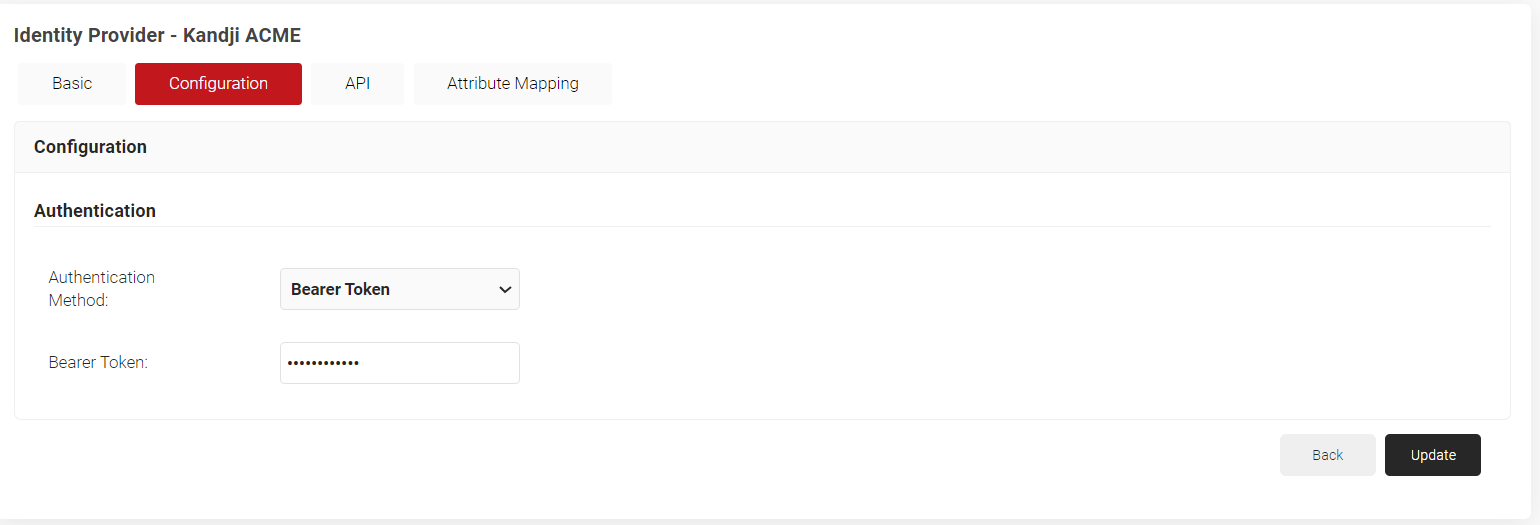
- Click the API tab.
- In the URI field, enter the organization’s API URL (obtained in step 3a in the Creating a Token in Kandji section).
- In the Response Validation section, click Add.
- In the Response Path field, enter data[0].serial_number
- From the Condition drop-down list, select Exists.
- In the Expected result field, enter a valid device serial number.
- Click Validate to check if the configuration is correct.
- Click Update.
3.5 Creating a Key Attestation Provider
A Key Attestation Provider in JoinNow helps set up device attestation services for iOS devices. To create an Key Attestation Provider:
- Log in to JoinNow Management Portal.
- Navigate to Identity Management > Key Attestation Provider.
- Click Add Key Attestation Provider.
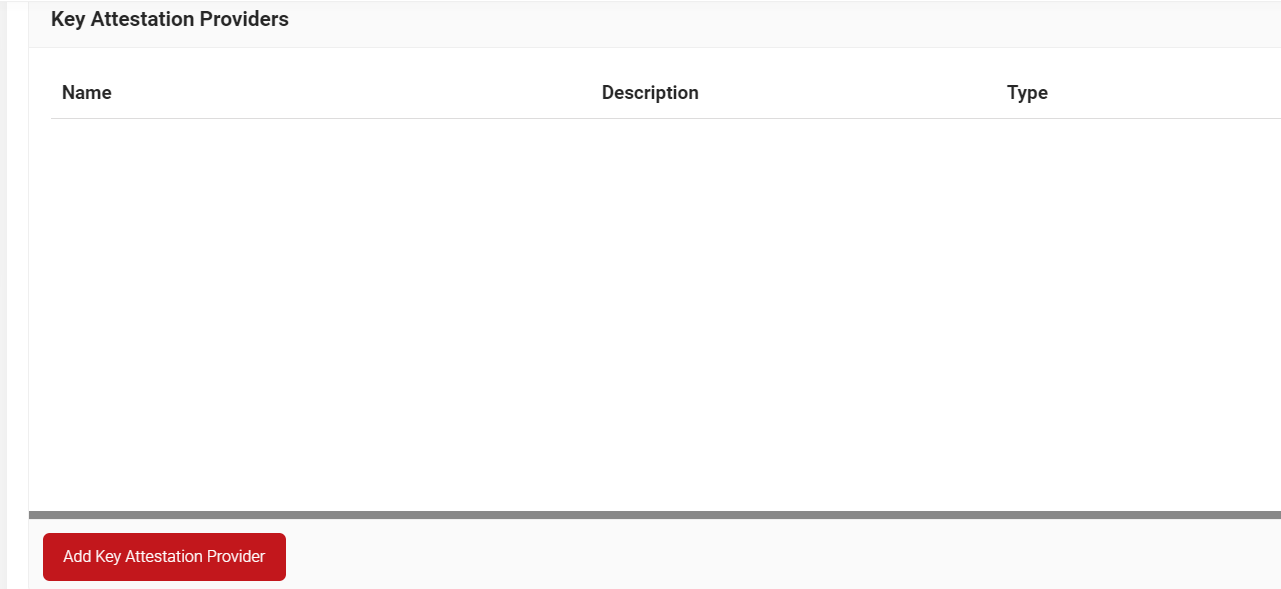
- In the Name field, enter a name for your Key Attestation Provider.
- In the Display Description field, enter a description (Optional).
- From the Type drop-down, select Apple.
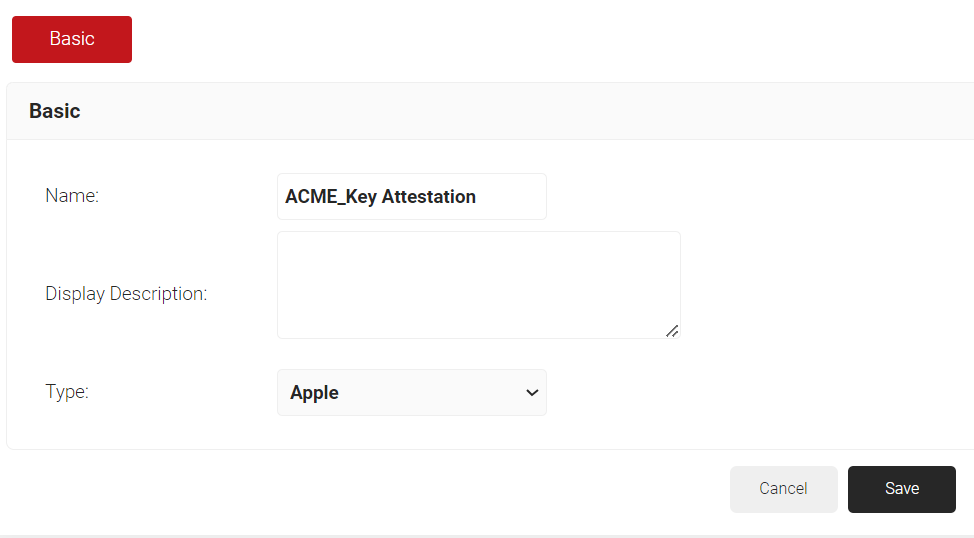
- Click Save.
3.6 Policy Management in JoinNow
Policy management helps admins define and create various policies that associate rules with identity providers. These rules are configured for user authentication via network profiles.
3.6.1 Creating an Account Lookup Policy
The Account Lookup policy can be mapped along with the Generic HTTP Identity Lookup provider created earlier for device lookup.
- Go to Policy Management > Account Lookup Policies.
- Click Add Account Lookup Policy.
- In the Basic section, enter a name and description in the respective fields.

- Click Save. On the displayed page, click the Settings tab.
- From the Identity Provider Lookup drop-down list, select the Generic HTTP Lookup IDP created earlier.
- From the Lookup Type drop-down list, select Custom.
- From the Identity drop-down list, select Computer Identity.
- Lookup Purpose – Purpose of Account Lookup
a. Certificate Issuance – To lookup user/device account during Enrollment.
b. RADIUS Authentication – To lookup user/device account during RADIUS Authentication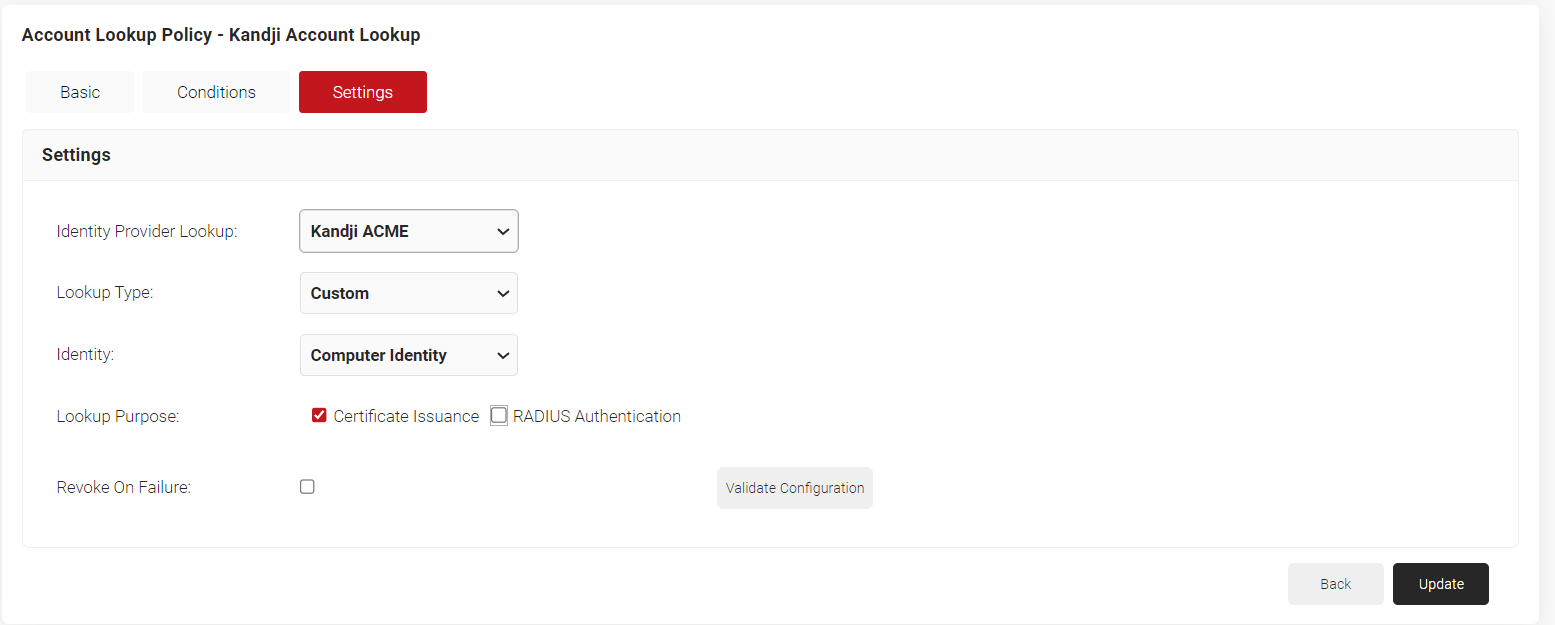
- Click Update.
3.6.2 Creating a Policy Engine Workflow
To configure a Policy Engine Workflow:
- Navigate to Policy Management > Policy Engine Workflows.
- Click Add Policy Engine Workflow.
- In the Basic section, enter the name of the role policy in the Name field.
- In the Display Description field, enter a suitable description for the policy engine workflow.

- Click Save.
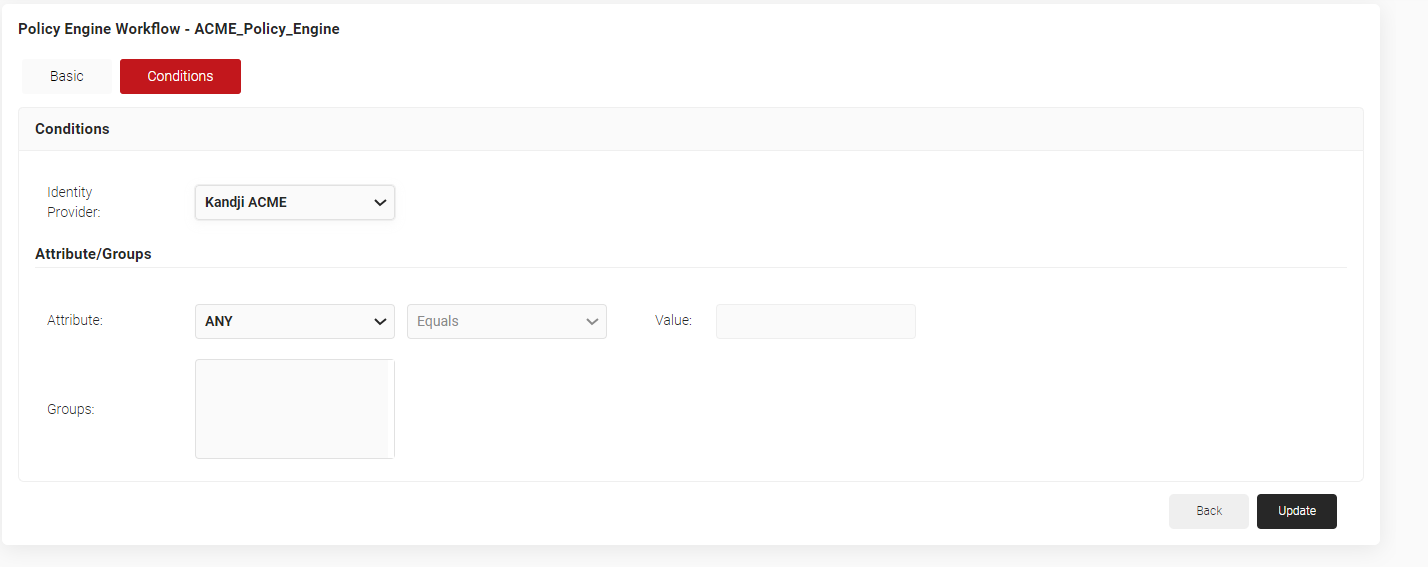
- The page refreshes, and the Conditions tab is displayed. Select the Conditions tab.
- From the Identity Provider drop-down list, select the identity provider you created earlier in section 3.4 Creating a Generic HTTP Identity Lookup Provider.
- In the Attributes/Groups section, for the Attribute field, retain ANY.
- Click Update.
3.6.3 Creating a Device Role Policy
Device Role Policy helps in mapping the attestation provider in JoinNow for device attestation.
- From the JoinNow Management Portal, go to Policy Management > Device Roles Policies.
- Click Add Device Role Policy.
- In the Basic tab, for Name, enter a name.
- For Description, enter a description.
- Click Save. The page refreshes and the Conditions tab opens.
- Click on the Conditions tab.
- From the Identity drop-down, select the Key Attestation provider created in 3.5 Creating a Key Attestation Provider.

- Click Update.
3.6.4 Creating an Enrollment Policy
- Go to Policy Management > Enrollment Policies.
- Click Add Enrollment Policy.
- In the Basic section, in the Name field, enter a name for the policy.
- In the Description field, enter a description for the policy.
- Click Save.
- On the displayed page, click the Conditions tab.
- From the Role drop-down list, select the Role policy you created earlier.
- From the Device Role drop-down list, select the Default Device Role policy.
- Click the Settings tab.
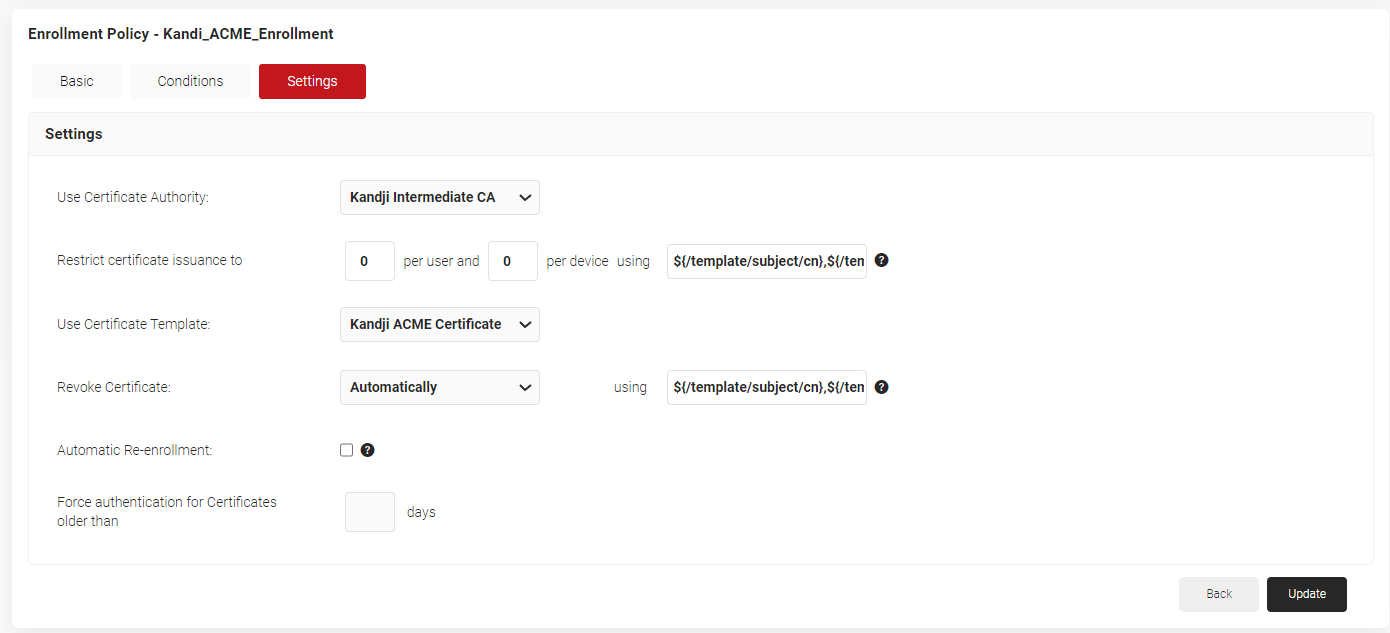
- From the Use Certificate Authority drop-down list, select the Intermediate CA created in 3.1 Creating an Intermediate CA for Kandji SCEP Gateway Integration.
- From the Use Certificate Template drop-down list, choose the certificate template you created earlier.
- Click Update.
4. Configuring Kandji
Configuring Kandji for certificate enrollment via ACME requires:
- Creating a New Blueprint
- Creating a New Library
- Enrolling the Devices to Kandji MDM
4.1 Creating a New Blueprint
- In the Kandji portal, on the left pane, click BLUEPRINTS.
- At the top-right corner, click New Blueprint. Select New Classic Blueprint.
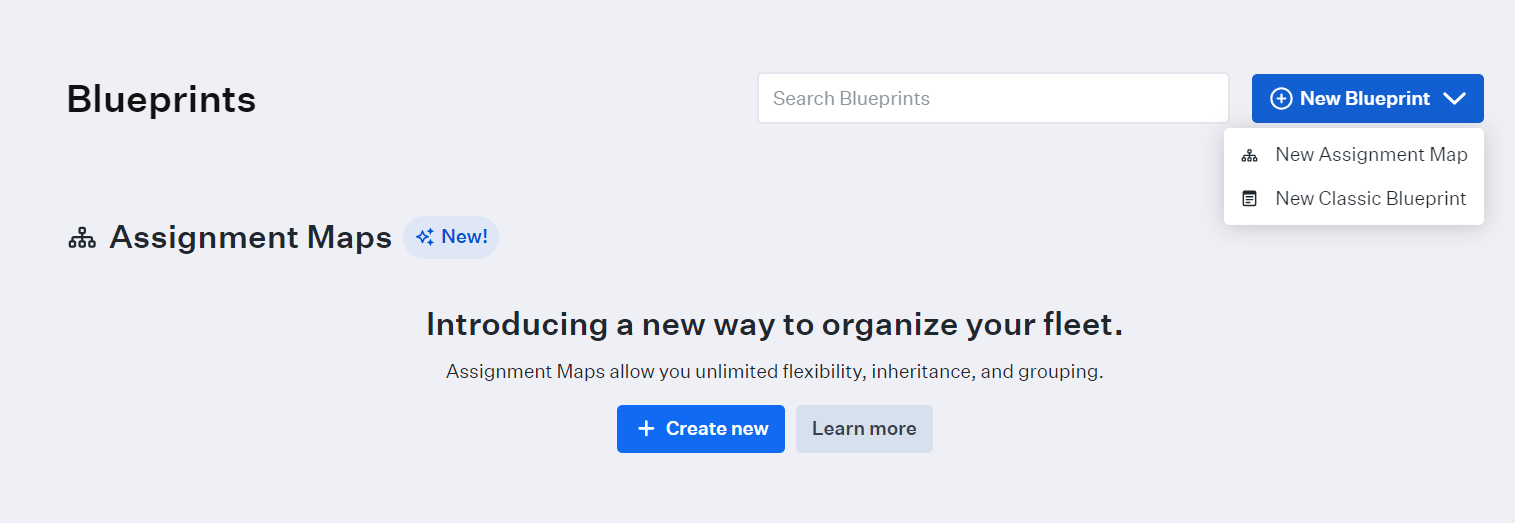
- On the displayed window, click +New Blueprint.

- Enter the Blueprint name and Blueprint description in the corresponding fields.
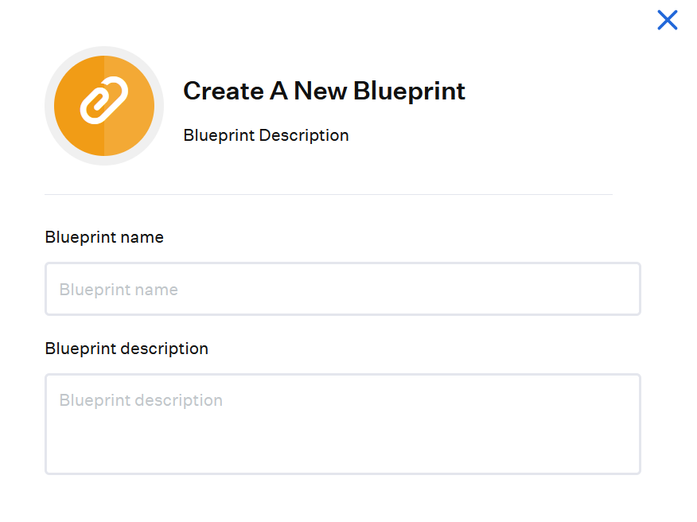
- Click Create Blueprint.
4.2 Creating A Kandji Library
- To map the Blueprint to the profile, on the left pane, click LIBRARY and then click Add new.
- On the displayed page, click Custom profile and then click the Add & Configure button.

- Near the gear symbol, enter a name for the profile.
- In the Assignment section, from the Blueprint drop-down list, select the Blueprint you created in Section 4.1 (Creating a New Blueprint)
- From the Install on drop-down list, select the devices for enrollment.
- In the Settings section, in the Profile section, upload/drag and drop the .mobileconfig file obtained from the Management Portal.
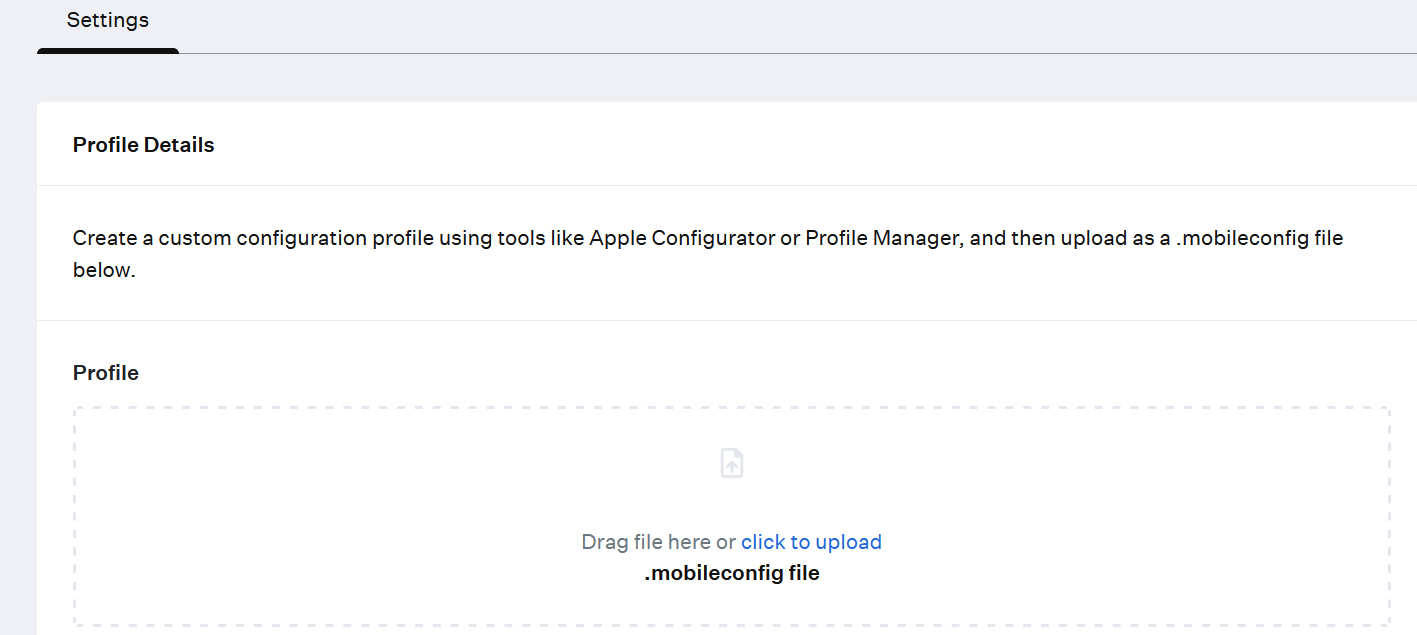
- Click Save.
4.3 Adding Devices to Kandji MDM
- To add the devices in the MDM, on the left pane, click ADD DEVICES. In the Add Devices section, from the Blueprint drop-down list, select the Blueprint and click Download.
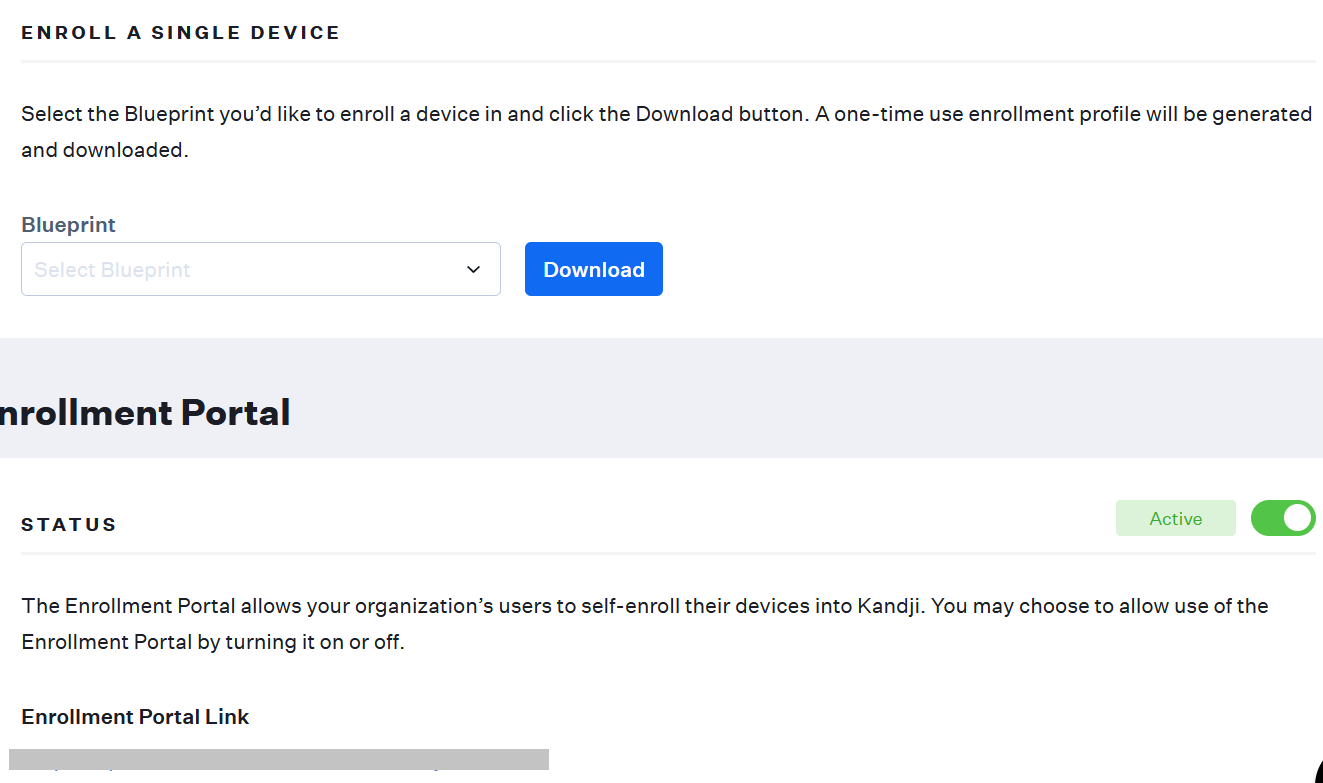
- In the Enrollment Portal section, Copy the Enrollment Portal Link which is to be sent to users to self-enroll their devices.

- Copy the Enrollment code which is used during the enrollment process to map the Blueprint used for device enrollment.

The user should access the URL and fill in the Enrollment Code specific to the required blueprint to enroll devices in Kandji. - On the left pane, click DEVICES and the devices added in the Blueprint are displayed on the page.
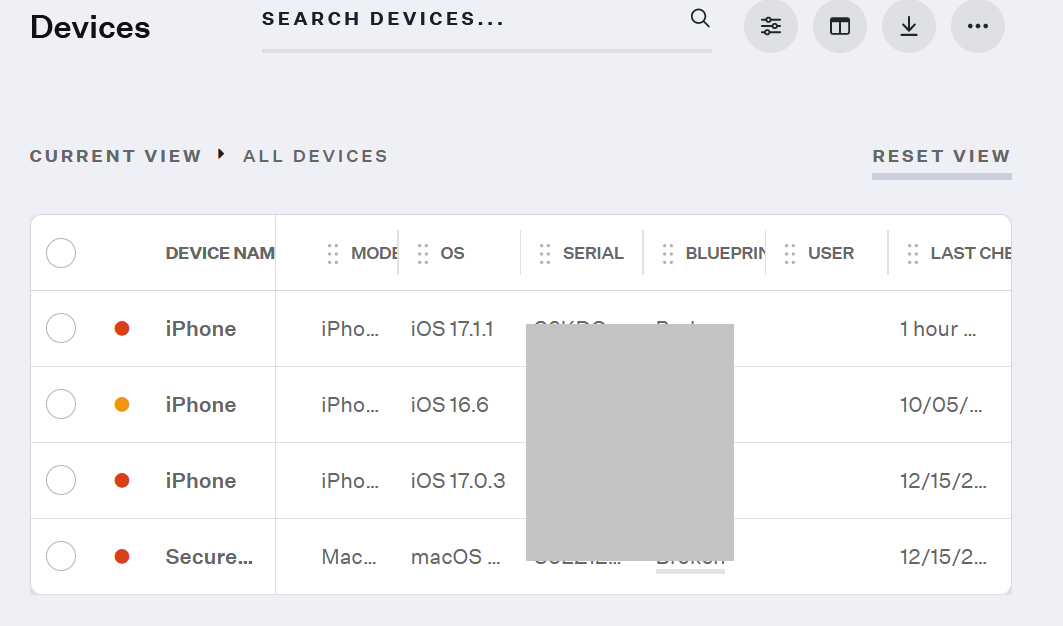
- Click the added device.
- On the displayed page, at the top-right corner, click the Ellipses icon.

- Click Edit Blueprint Assignment.
- On the displayed window, from the Assign device to the Blueprint drop-down list, select the Blueprint you added.

- Click Change. The profile is pushed to the device automatically and a success message is displayed.
5. Certificate Issuance
After completing the steps above, the profile is pushed to the device followed by certificate enrollment.
JoinNow Admins can check for successful certificate enrollment under Data and Monitoring > General Events. A Certificate Issued event should be displayed when device certificate enrollment is successful.