- Create a SAML Application in the SAML Provider’s Console:
- The SAML application serves as the medium through which end users enter their credentials, are verified by the Core Provider, and initiate the certificate enrollment process.
- Create the SAML application by creating a custom app, then download the Core Provider metadata.
- The metadata can be uploaded to the SecureW2 JoinNow management Portal, and an ACS URL and EntityID will be created and copied into the custom app.
- Configure Attribute Mapping:
- Attribute mapping allows admins to categorize end users by the level of access granted.
- These attributes can be added and adjusted on the custom app and encoded onto the certificates:
- SecureW2 can encode the attributes onto certificates in the management portal.
- Configure Policies in SecureW2:
- Two policies need to be configured:
- Authentication – how the end user is authenticated.
- Policy Workflow – the access that is granted to the end user.
- Both of these policies can be configured in the JoinNow Management Portal.

- Two policies need to be configured:

Creating a Core Provider within SecureW2 is your first step toward establishing a seamless link between our platform and your core provider’s user database. This critical stage not only verifies user credentials but also issues digital certificates, which help build trust and security in your authentication procedures.
A core provider is the system that verifies a user/device. Creating a core provider in SecureW2 tells the Cloud Connector system how to connect to your provider’s user database, verify user credentials, and issue digital certificates. To create a core provider in SecureW2:
- Log in to the JoinNow Management Portal.
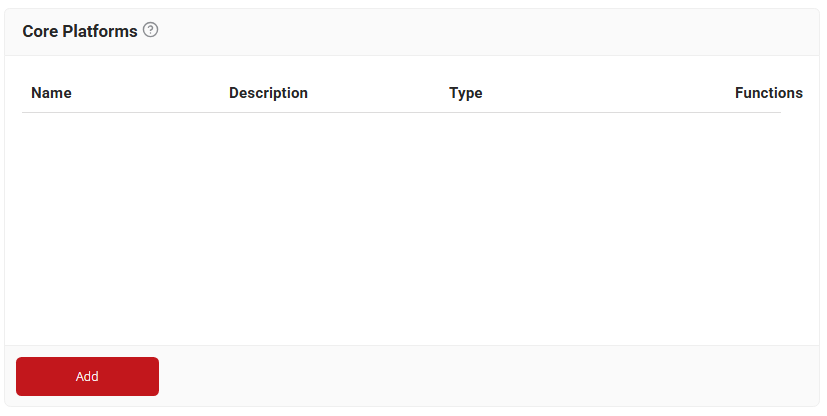
- Navigate to Integration Hub > Core Platforms.
- Click Add.

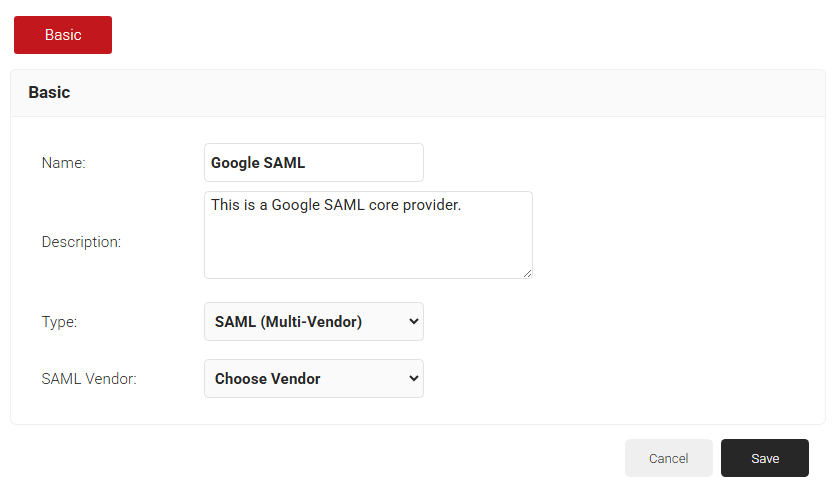
- In the Name and Description fields, enter a name and description for the core provider.
- From the Type drop-down list, select SAML(Multi-Vendor).
- From the SAML Vendor drop-down list, select a vendor.

- Click Save.
Now, SecureW2 Cloud Connector knows how to exchange information with your provider’s user database.
Your SAML application is a crucial connection between your Core Provider and SecureW2. Your SAML application lets a user enter their credentials, which your core provider then verifies. Your core provider verifies the user’s identity and then sends attributes to your SAML application, which then passes the attributes to SecureW2 for certificate issuance.
SAML plays a key role in certificate enrollment for BYODs; the user enters their credentials with your core provider before being issued a certificate, and SAML helps verify their identity in your database.
As an example, here’s how to create a SAML application in Google:
- In your Google Admin Console, click Apps, then SAML apps.
- At the bottom-right of the screen, hover over the yellow circle, then click Enable SSO for a SAML Application.
- Click SETUP MY OWN CUSTOM APP.

- Under Option 2, click DOWNLOAD for Core Provider metadata. Save the metadata file (.XML) to your computer.

- From your SecureW2 JoinNow Management Portal, go to Integration Hub > Core Platforms.
- Click Edit for the previously created core provider (GoogleSAML).
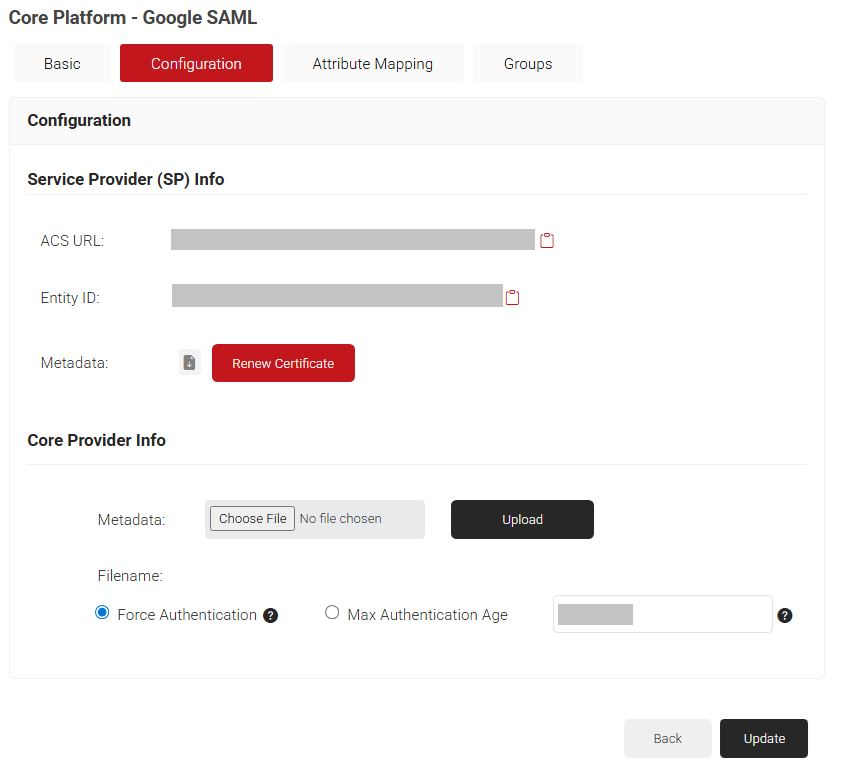
- Click the Configuration tab.
- In the Core Provider Info section, click Choose File, select the metadata file, and click Upload.

- Copy the ACS URL and Entity ID values and paste them into a text editor.
- Click Update.
- Return to your Google SAML App setup.
- On the Basic information for your Custom App page, enter the Application Name and Description.

- Click Next.
- On the Service Provider Details page, paste the ACS URL and the Entity ID.
- Check the Signed Response box, then click Next.

- On the Attribute Mapping page, click Finish.




To map attributes in your SAML provider (we’ll use Google as an example):
- From your Google Admin Console, scroll to Attribute Mapping and click ADD NEW MAPPING. This allows you to configure the attributes that will be encoded onto the certificate.
- For Enter the application attribute, enter ‘name’.
- Click the Select category dropdown and select Basic Information.
- Click the Select user field dropdown and select First Name.
- Click Save.
- Click ADD NEW MAPPING.
- For Enter the application attribute, enter ‘email’.
- Click the Select category dropdown and select Basic Information.
- Click the Select user field dropdown and select Primary Email.

- Click SAVE.

Now, set SecureW2 to receive attributes from your Core Provider and securely encode them into certificates for policy usage. This configuration allows you to create user or device certificates with customized features suited to your needs for 802.1X network authentication and more. Follow these steps to map the attributes SecureW2 receives from your core provider and to update the certificate template to use them.
Now you need to configure SecureW2 to receive the attributes sent by your core provider so they can be encoded on the certificate and used for policies. These steps show you how to map the attributes SecureW2 receives from your core provider and how to edit the certificate template to use them.
- Log in to the JoinNow Management Portal.
- Navigate to Integration Hub > Core Platforms.
- Click Edit for the previously created core provider (Google SAML).
- Select the Attribute Mapping tab.
- Click Add.
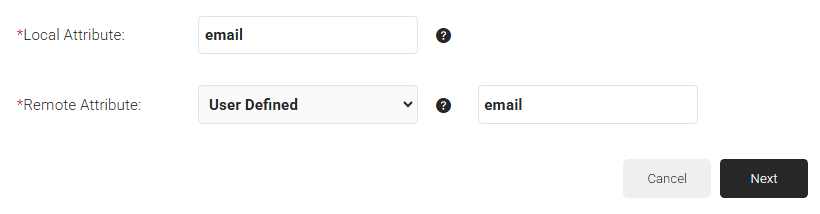
- For Local Attribute, enter email as the name of the variable.
- From the Remote Attribute drop-down list, select User Defined. Enter email in the field that appears, and then click Next.

- Click Add.
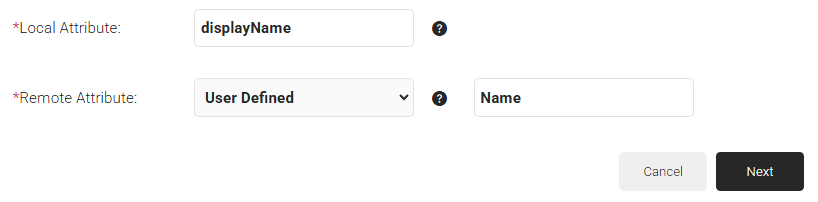
- For Local Attribute, enter displayName as the name of the variable.
- From the Remote Attribute drop-down list, select User Defined. Enter Name in the field that appears, and then click Next.

- Click Update.

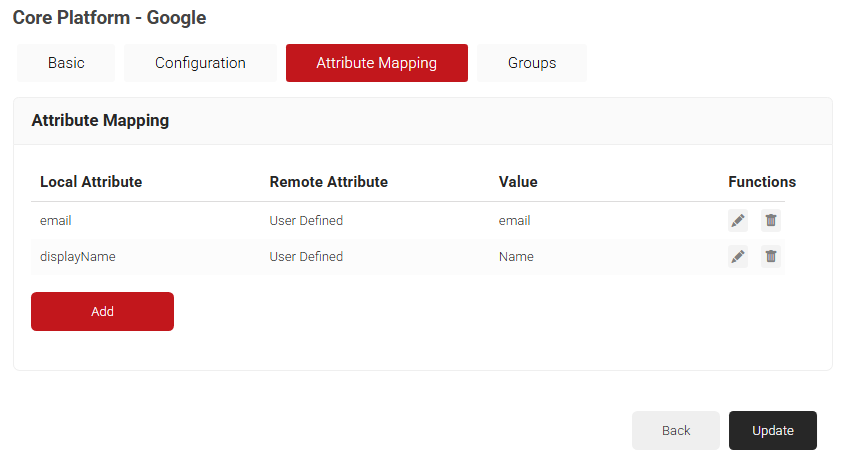
Now that you’ve configured SecureW2 to receive the attributes, you need to ensure the attributes are encoded on the certificates issued to users. Here’s how:
- From your JoinNow Management Portal, go to Dynamic PKI > Certificate Authorities.

- Scroll down to the Certificate Template.
- In Certificate Template, click Edit for DEFAULT CERTIFICATE TEMPLATE 1.
- Retain the default values and then click Update.

- Click Update.
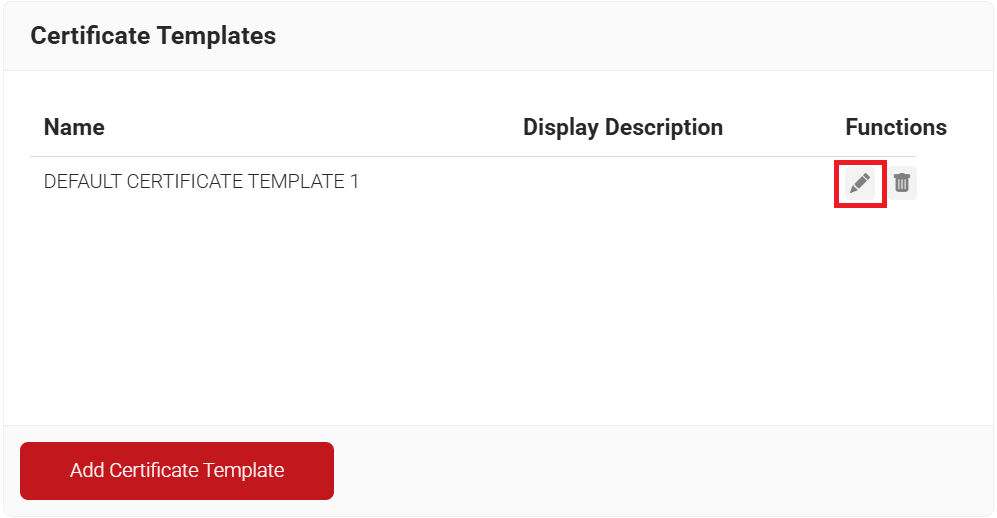
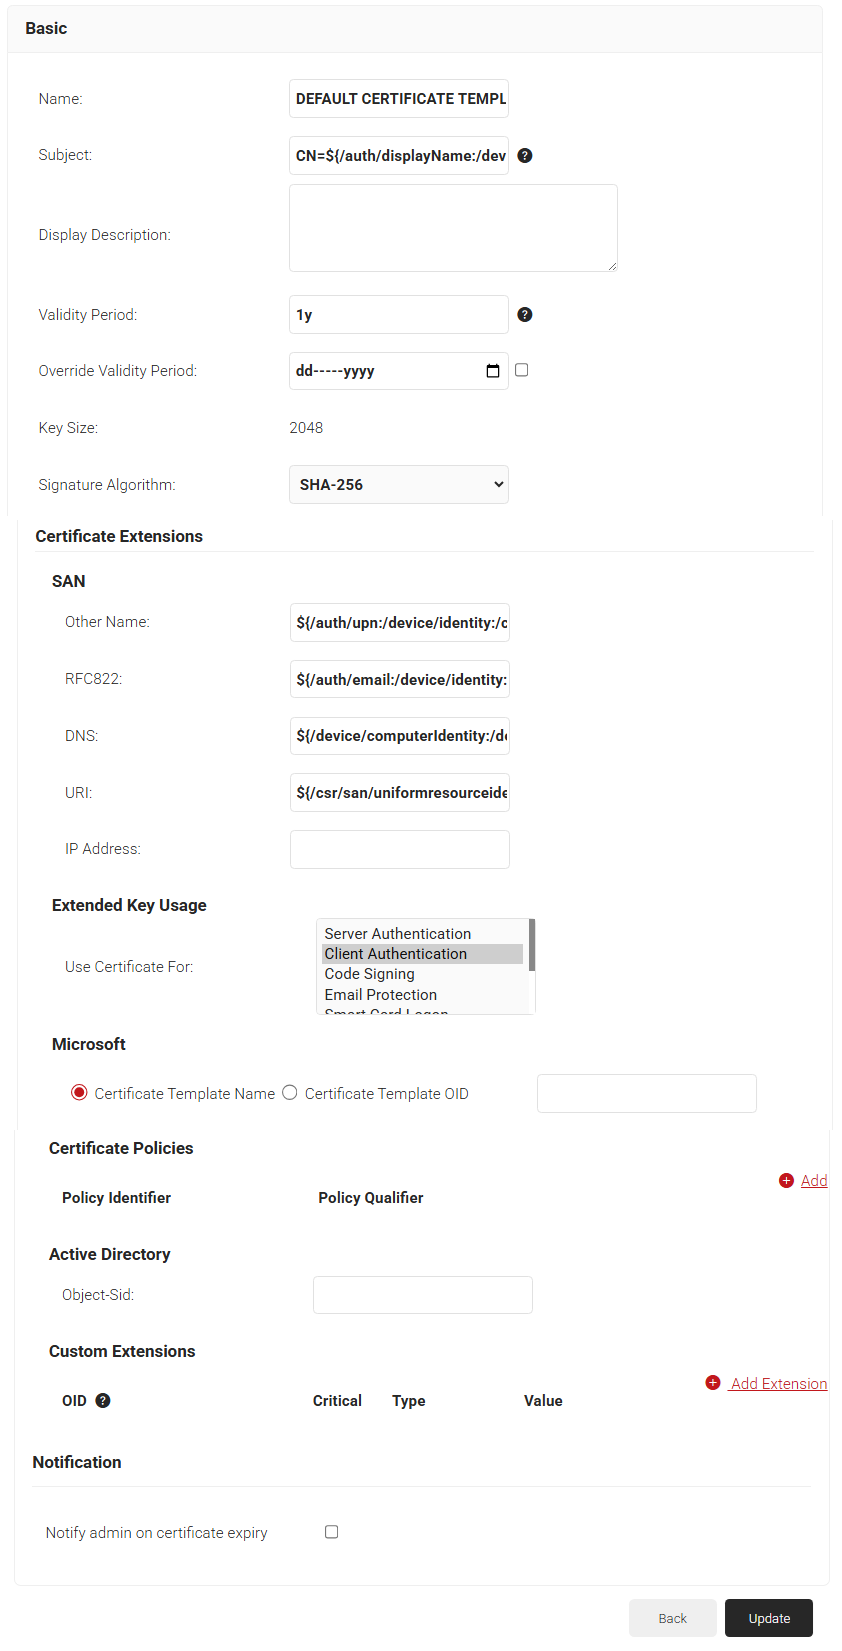
The certificate template now includes the attributes, and they will be used when certificates are issued.
SecureW2 issues digital certificates based on the policy configuration you set up in the JoinNow Management Portal. You need to configure two policies: the Authentication and the Policy Workflows.
To configure policies in SecureW2:
- From your JoinNow Management Portal, go to Device Onboarding > Getting Started.
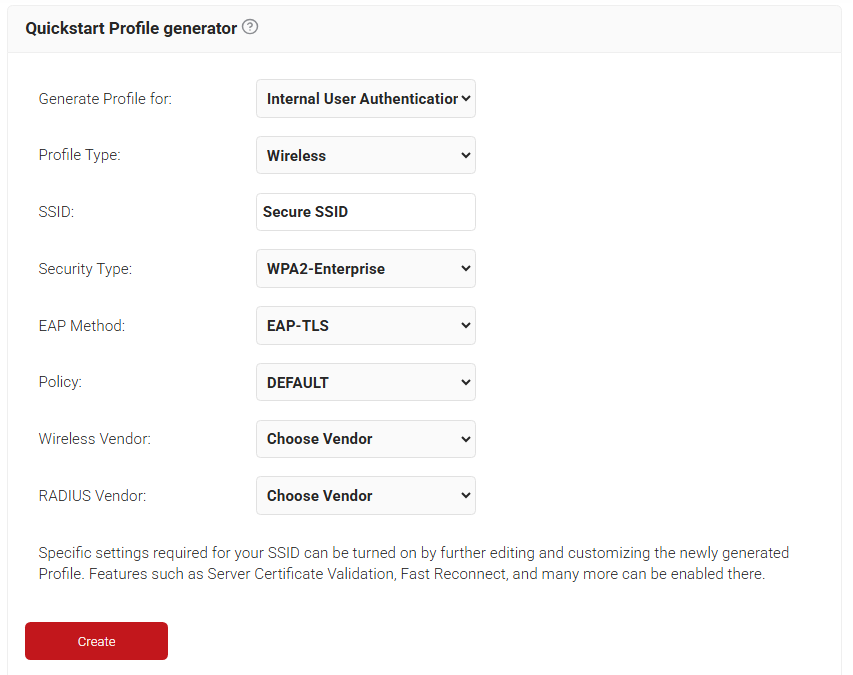
- On the Quickstart Profile generator page, from the Generate Profile for drop-down list, select Internal User Authentication.
- Click the Profile Type dropdown and select Wireless.
- For the SSID field, define the SSID name.
- Click the Security Type dropdown and select WPA2-Enterprise.
- Click the EAP Method dropdown and select EAP-TLS.
- From the Policy drop-down list, retain DEFAULT.
- From the Wireless Vendor drop-down list, choose a vendor.
- From the RADIUS Vendor drop-down list, choose a vendor.
- Click Create. It takes 60-90 seconds to complete the process.

- Navigate to Policy Management > Authentication.
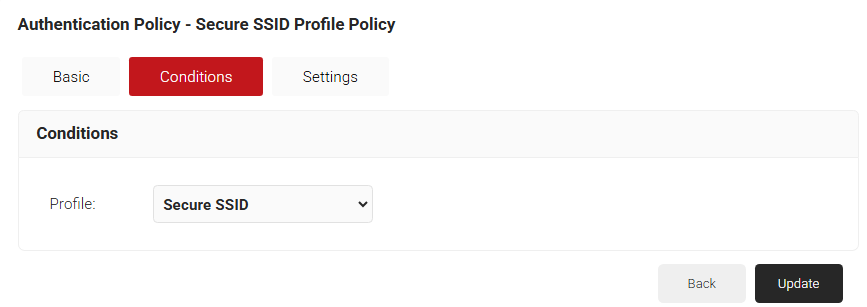
- Click Edit for the authentication policy created during network profile creation.
- Select the Conditions tab, then ensure the previously created network profile is selected.

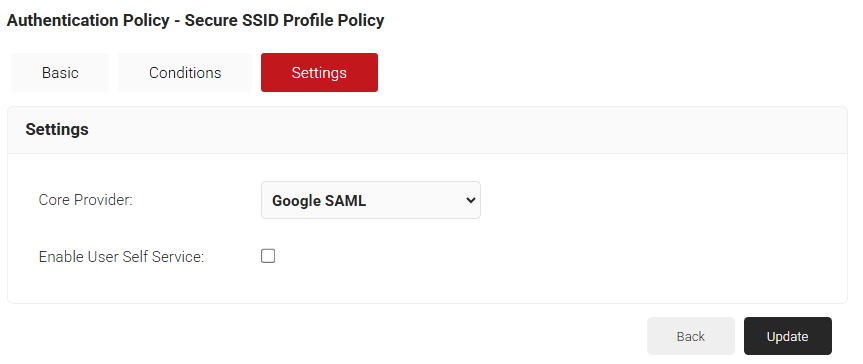
- Click the Settings tab.
- From the Core Provider drop-down list, select the previously created core provider (Google SAML).

- Click Update.
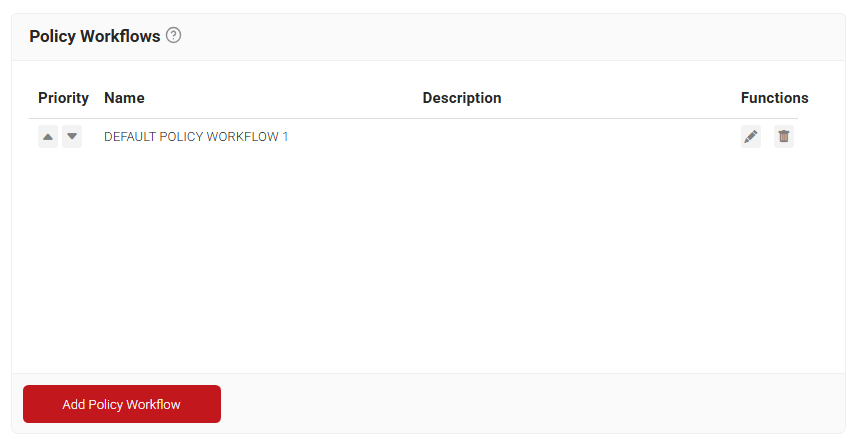
- Navigate to Policy Management > Policy Workflows.

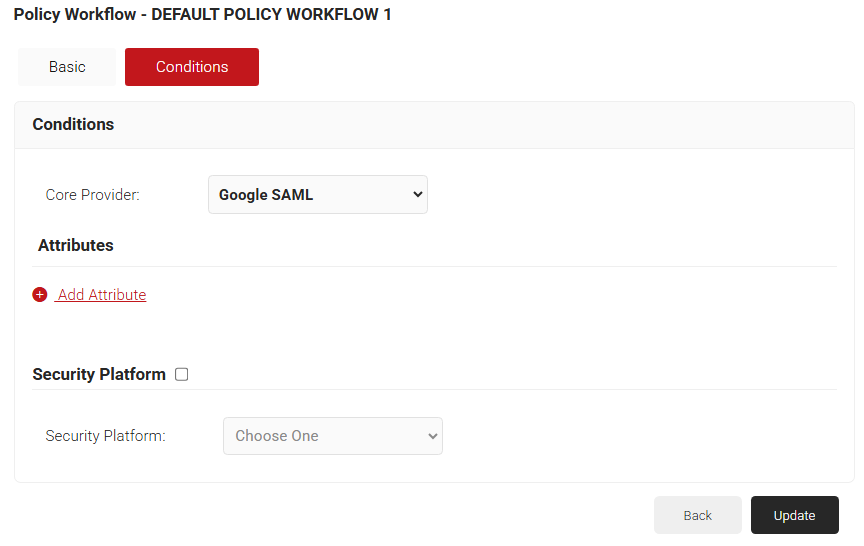
- Click Edit on the DEFAULT POLICY WORKFLOW 1.
- Select the Conditions tab.
- From the Core Provider drop-down list, select the Core Provider you created earlier (Google SAML).

- Click Update.