Want to learn the best practice for configuring Chromebooks with 802.1X authentication?

Sign up for a Webinar!

Configuring DPI SSL on SonicWall with SecureW2

SSL is a requirement for browsing today’s internet and, while it offers powerful protection, it’s not foolproof. It prevents unwanted parties from being able to eavesdrop on the packets being sent back and forth, but that can exploited by bad actors.

SSL also prevents legitimate parties, such as network admins and firewalls, from being able to inspect the traffic that passes through their network. Hackers can exploit this “blind spot” to smuggle harmful code to devices – which can compromise the whole network.

Fortunately, SonicWall has the capacity for Deep Packet Inspection (DPI), a proprietary version of SSL Inspection. Enabling DPI confers some critical benefits:

  • It allows the firewall to inspect all traffic and function properly
  • It allows you to confirm that users are complying with privacy and security standards
  • It ensures administrators have full information on network usage

SecureW2’s PKI services include the ability to install SSL Inspection certificates on devices, in addition to the myriad other security benefits digital certificates provide. Our world-class onboarding service will guide you through creating a config that preps devices for automatic enrollment of certificates, removing the hassle of manual setup.

Ready to take back control of your network and enable DPI on SonicWall? Below is a quick overview of the process, and after that is a step-by-step guide.

Tech Overview

  1. Configure SecureW2 for DPI on SonicWall
    • Generate a .p12 file to upload later to the Firewall for SSL Inspection (DPI). Be sure to save it somewhere safe since you only get one.
    • Set up the onboarding device profile that will be pushed to all devices so they can easily self-enroll themselves for Wi-Fi certificates.
    • Create and download the Root CAs for the devices.
  2. Enroll devices for certificates through SecureW2.
    • We generate a custom landing page which you direct users to. A quick download and setup wizard enrolls their devices without any hassle.
    • To keep track of your issued certificates, SecureW2’s dashboard allows you to create a custom report. We’ll walk you through the steps of downloading a report that contains the information of all your devices with issued certificates.

Prerequisite

  • You have access to SonicWall University
  • You have access to your Antivirus Software
  • You have an active subscription to SecureW2’s CloudConnector SSL Inspection License

Configuring SecureW2 for SonicWall

Navigate to Device Onboarding on the left hand side of your screen and underneath that section, select Getting Started.

Here you will see our Getting Started wizard, which will configure everything you need to start your deployment of DPI SSL/SSL Inspection. Configure the settings for the wizard as shown in the screenshot below.

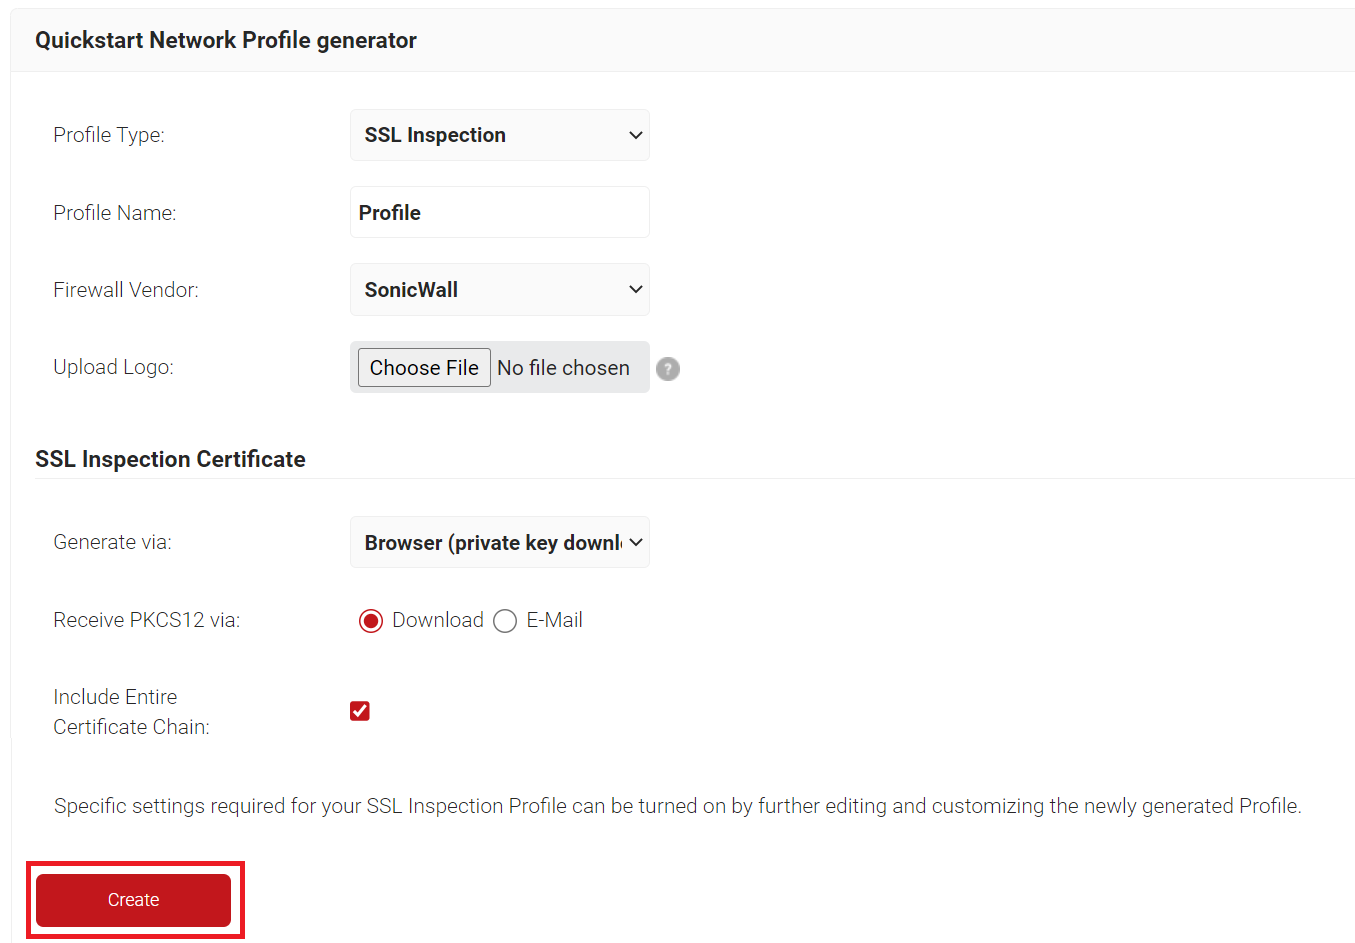
After clicking create, two things will happen.

  1. A .p12 file will be generated
    • Before it is generated, you will be prompted to create a password, which will be used to password lock the .p12 file
    • This .p12 file is what will be uploaded to your Sonicwall Firewall for DPI SSL/SSL Inspection configuration
    • This .p12 file is only generated once. Make sure it’s saved in a safe place.
  2. A landing page will be generated
    • This landing page can be used to install DPI SSL/SSL Inspection certificates on end user devices
    • This landing page automatically detect the operating system of the device, and deploy the appropriate client to install the certificate

Distributing the Landing Page to End Users

The most common way we see this done is by getting the URL of the landing page that is generated for SSL Inspection and sending it to end users through email. The SecureW2 landing page only takes a few clicks for end users, and has instructions on there for the end users, so all MSP/Admin needs to do is send them the URL.

To get the URL:

  1. Navigate to Device Onboarding and then Network Profiles
  2. Click View on the Network Profile we just created using the getting started wizard and it will take you to the landing page
  3. Take this URL and email it to your users

Tracking Devices and their Certificates

Here we will configure a report of all the devices that have installed DPI SSL/SSL Inspection certificates. It will be configured to run automatically on intervals with the updated report sent via email, creating a set and forget mechanism to monitor how many devices have installed a certificate.

To start tracking devices and their certificates, perform the following steps:

  1. Navigate to Data and Monitoring > Reports > Custom Report
  2. Basic Tab
    • Click Add Report
    • Enter in a Name and Description

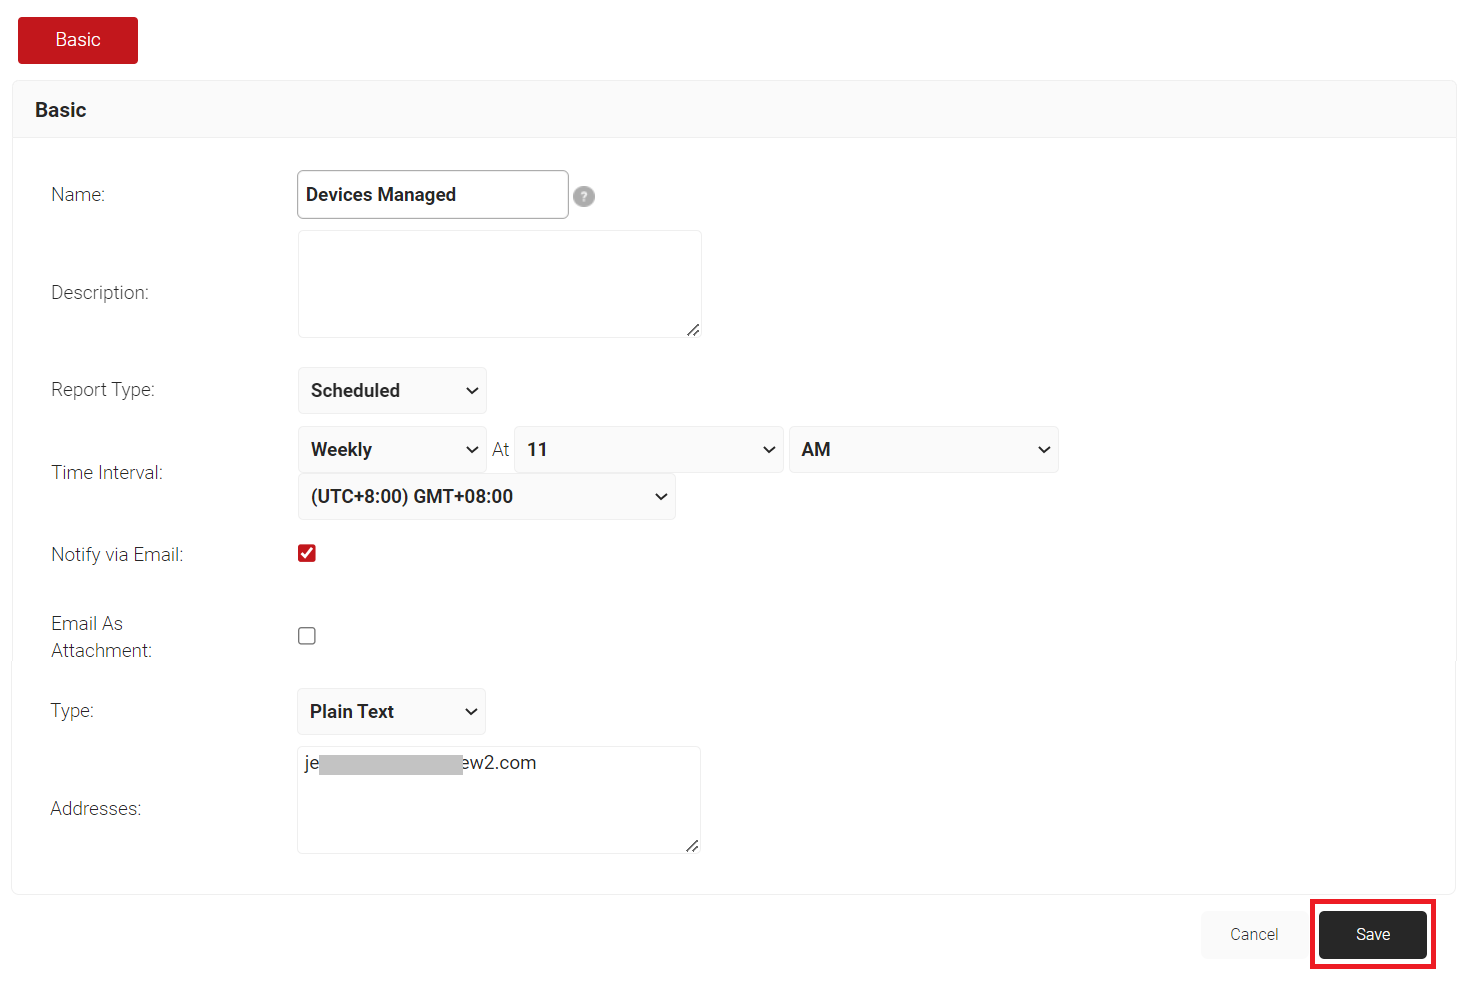
    • Select Scheduled under Report Type
      • This is to configure the report to run at automated intervals
    • Configure the Time Interval to the intervals you’d like the report to run and be sent via Email
    • Check Notify via Email and enter in the Email addresses you’d like to have the reports sent to
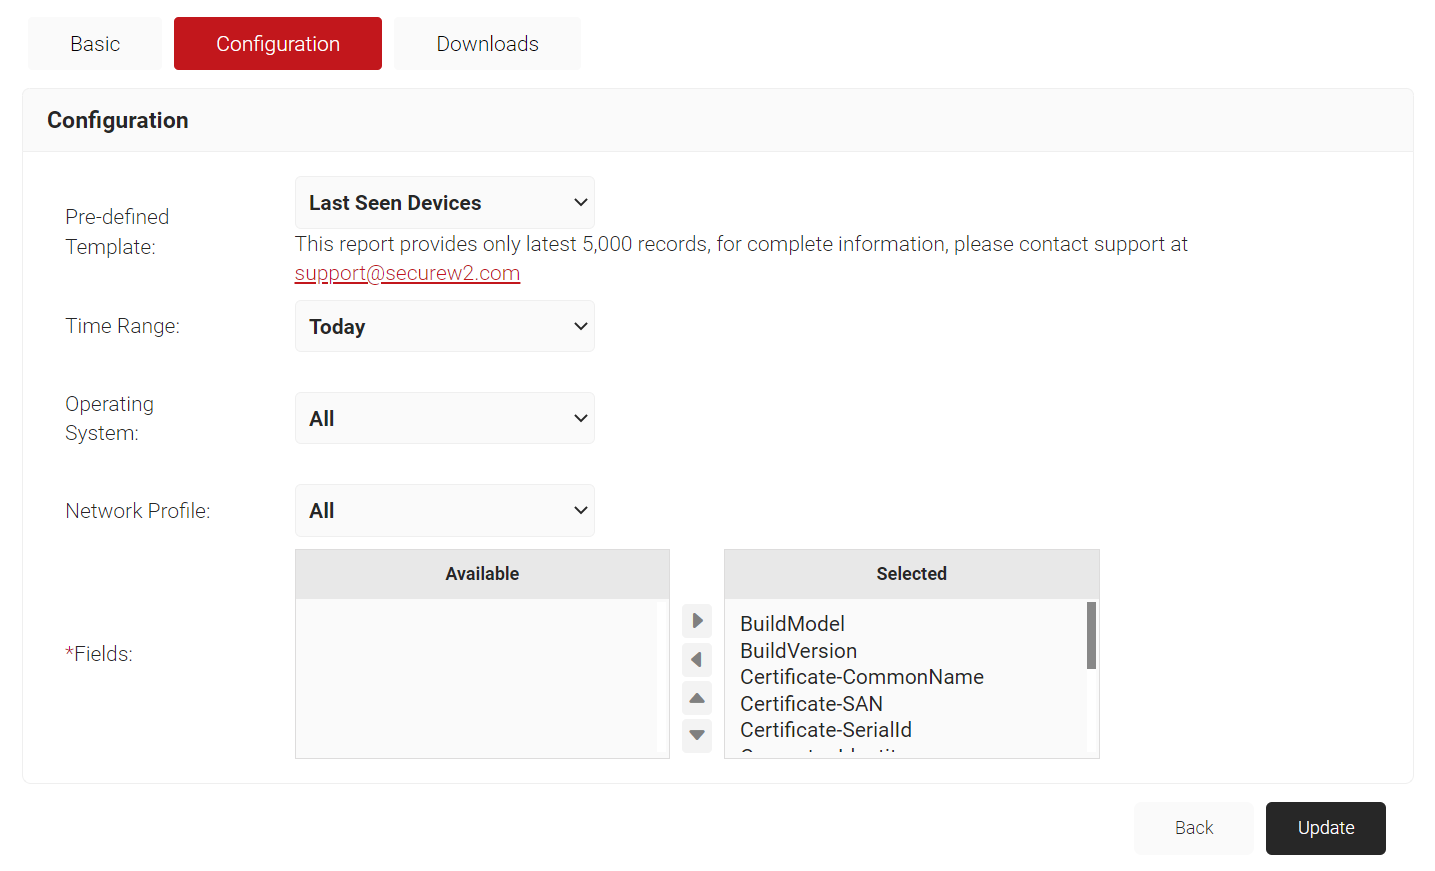
  3. Configuration
    • Select Pre-defined Template as Total Devices
    • OS as All
    • Select the Network Profile that was generated using the Getting Started Wizard
    • Click Update.

  4. Running the Report, Downloads
    • After clicking update you will be taken back to the reports screen.
    • Click Run the Report
      • After it’s run successfully, you will see a note saying “Started running report ‘Devices Managed’. Please check ‘Downloads’ tab in the report for details.”
    • Click the Report you’ve just created
    • Navigate to the Downloads tab
    • Here you can download a .csv or .xlsx file containing your report.

SecureW2 offers a cost-effective solution to streamline device onboarding and strengthen network security. Head over to our pricing page to learn more.