


Shibboleth is the most commonly used Identity Management system in the world. It is a web server tool that helps Single Sign-On (SSO) integrate between two applications. It has three components: Shibboleth Identity Provider(IDP), Shibboleth Service Provider, and Discovery Service. The reason to install Shibboleth is to allow people to sign in to various devices using a single user identity.
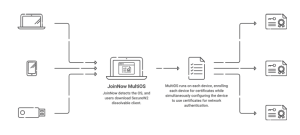
Shibboleth can work for Single Sign-On using SAML protocol, which JoinNow MultiOS rapidly configures. JoinNow MultiOS plays a vital role in enabling self-service certificate-based authentication (EAP-TLS) for any user, allowing organizations to support passwordless security through our Public Key Infrastructure (PKI) by providing digital certificates efficiently. The method can be provided after validating the identity of the users within the IDP.
JoinNow MultiOS can integrate with any modern cloud-based SAML IDP to issue and configure their SSL certificate to the devices for EAP-TLS network authentication. In this document, we will show you how to configure Shibboleth IDP to authenticate the SAML for WPA2- Enterprise.
The Importance of EAP-TLS Authentication:
The Extensible Authentication Protocol-Transport Layer Security is commonly called EAP-TLS, which is highly secure and often used as an authentication mechanism. The TLS Protocol is used to develop a communication channel securely between the user’s device and the Authenticated server. It passes the EAP message over to the server and client, which has PKI Certificates and keys needed for the authentication.
The most significant feature of EAP-TLS, is it does not rely on Password-Based Authentication like EAP-PEAP, EAP-Pre-shared Key, and EAP-TTLS, where your device gets affected by security attacks and Man-In-Middle-Attacks(MITM). It uses Asymmetric Cryptography, using a digital certificate and private key to significantly improve authentication security to levels of phishing resistance.
Below we’ve summarized the integration process into 3 high level steps:
- Create a SAML application in Shibboleth and share Metadata between the two
- Exchange metadata to inform the IDP of approved network users and to imprint certificates with user identity.
- Configure the attributes Shibboleth sends to SecureW2
- Define the fields that will determine different user groups. Based on a user’s certificate attributes, they will be segmented into network groups that can be assigned differing network policies.
- Configure the authentication and user role policies
- Configure these policies to segment users into groups and apply different policies to different user groups. Based on a user’s attributes, you can customize the network to limit access to websites, applications, files, etc, based on the user’s organizational role.
Ready to set it up? Here’s what you need to get started:
- An active SecureW2 account
- An active Cloud Connector subscription
- Used the SecureW2 Getting Started Wizard to configure for EAP-TLS certificate-based Wi-Fi authentication
Create an Identity Provider in SecureW2
An identity provider is the system that proves the identity of a user/device. Creating an IDP in SecureW2 enables Shibboleth to be used with the SecureW2 system by using SAML to connect to your Shibboleth IDP by user database, verify user credentials, and issue PKI certificates that help to configure with EAP-TLS Authentication by using the combination of public and private key.
To create an IDP in SecureW2:
- Log in to the JoinNow MultiOS Management Portal.
- Navigate to Identity Management > Identity Providers.
- Click Add Identity Provider.
- On the displayed screen, enter the name and description of the IDP.
- From the Type drop-down list and select SAML.
- From the SAML Vendor drop-down list and select Shibboleth.
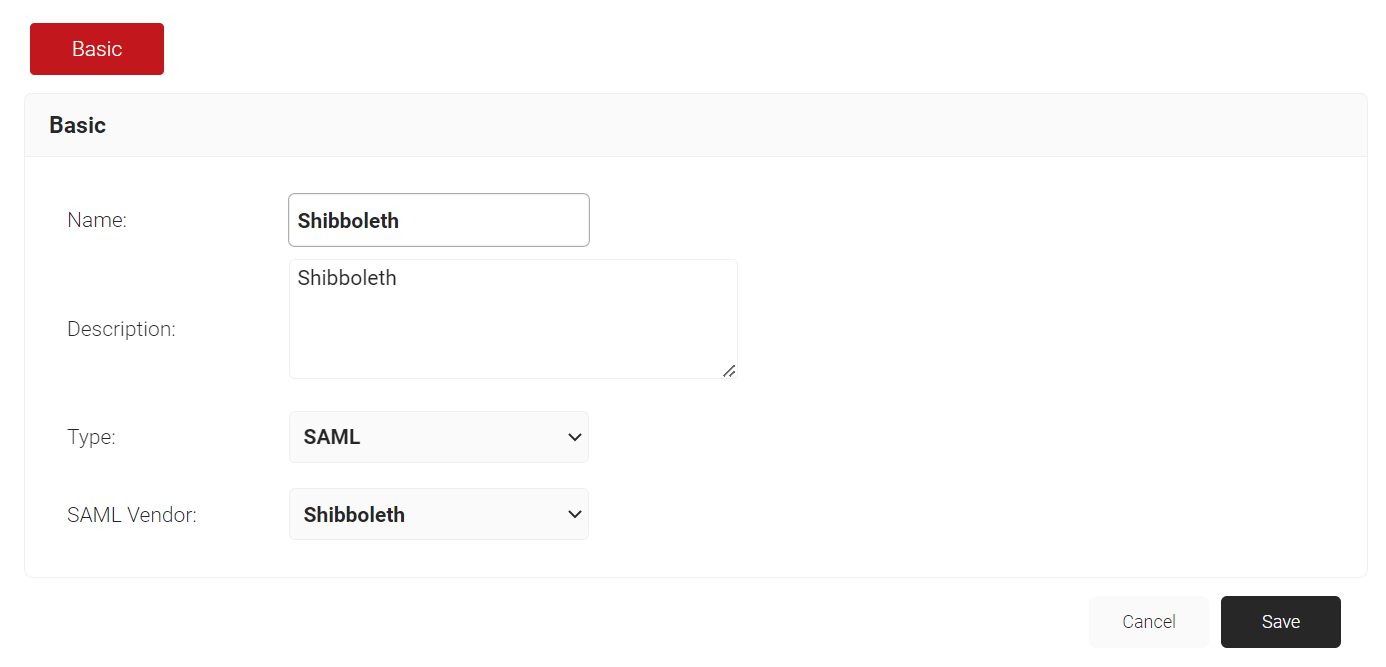
- Click Save to finish creating the IDP.
Now, SecureW2 Cloud Connector knows how to exchange information with your Shibboleth user database.
Create a SAML Application in Shibboleth
Next, we need to create a SAML Application in Shibboleth so it can trust SecureW2. This will allow SecureW2 to send your credentials to your Shibboleth IDP, which verifies your identity and sends attributes. When SecureW2 receives the SAML Token, it proceeds with configuring your device for secure WPA2-Enterprise network authentication (EAP-TLS) and enrolling certificates for you.
To create a SAML application to use with SecureW2:
- From your Shibboleth Admin Console, create a SAML application and download the IDP metadata. Save the metadata file (.xml) to your computer.
- In the JoinNow MultiOS Management Portal, go to Identity Management > Identity Providers.
- Click Edit for the IDP you created (Shibboleth).
- Select the Configuration tab.
- In the Service Provider (SP) Info section, copy the ACS URL and Entity ID values to your clipboard.
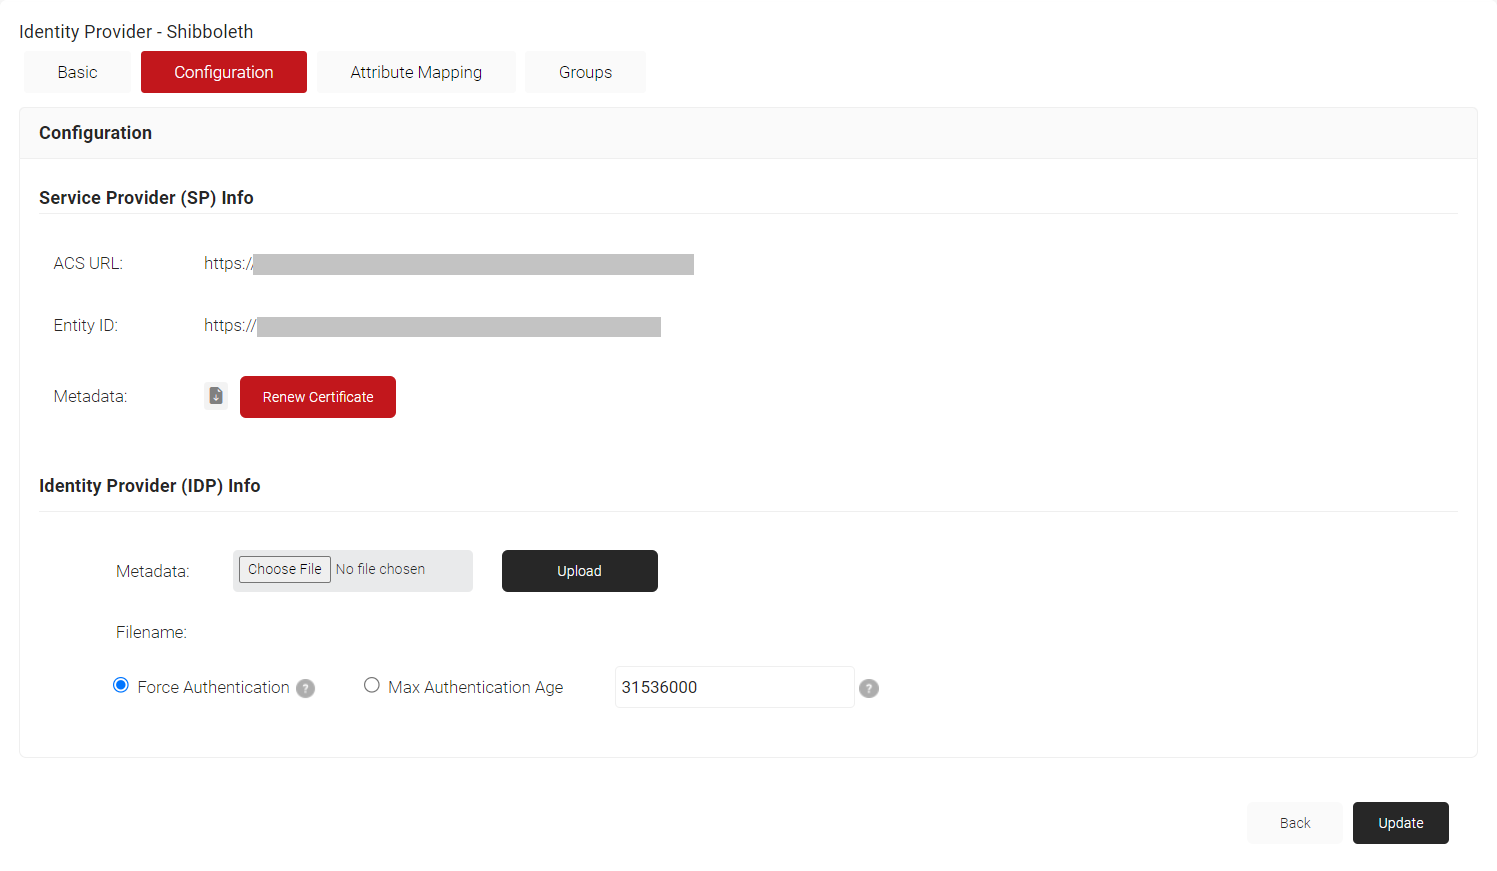
- In the Identity Provider (IDP) Info section, for the Metadata field, click Choose File and select the metadata (.xml) file that you downloaded earlier from Shibboleth.
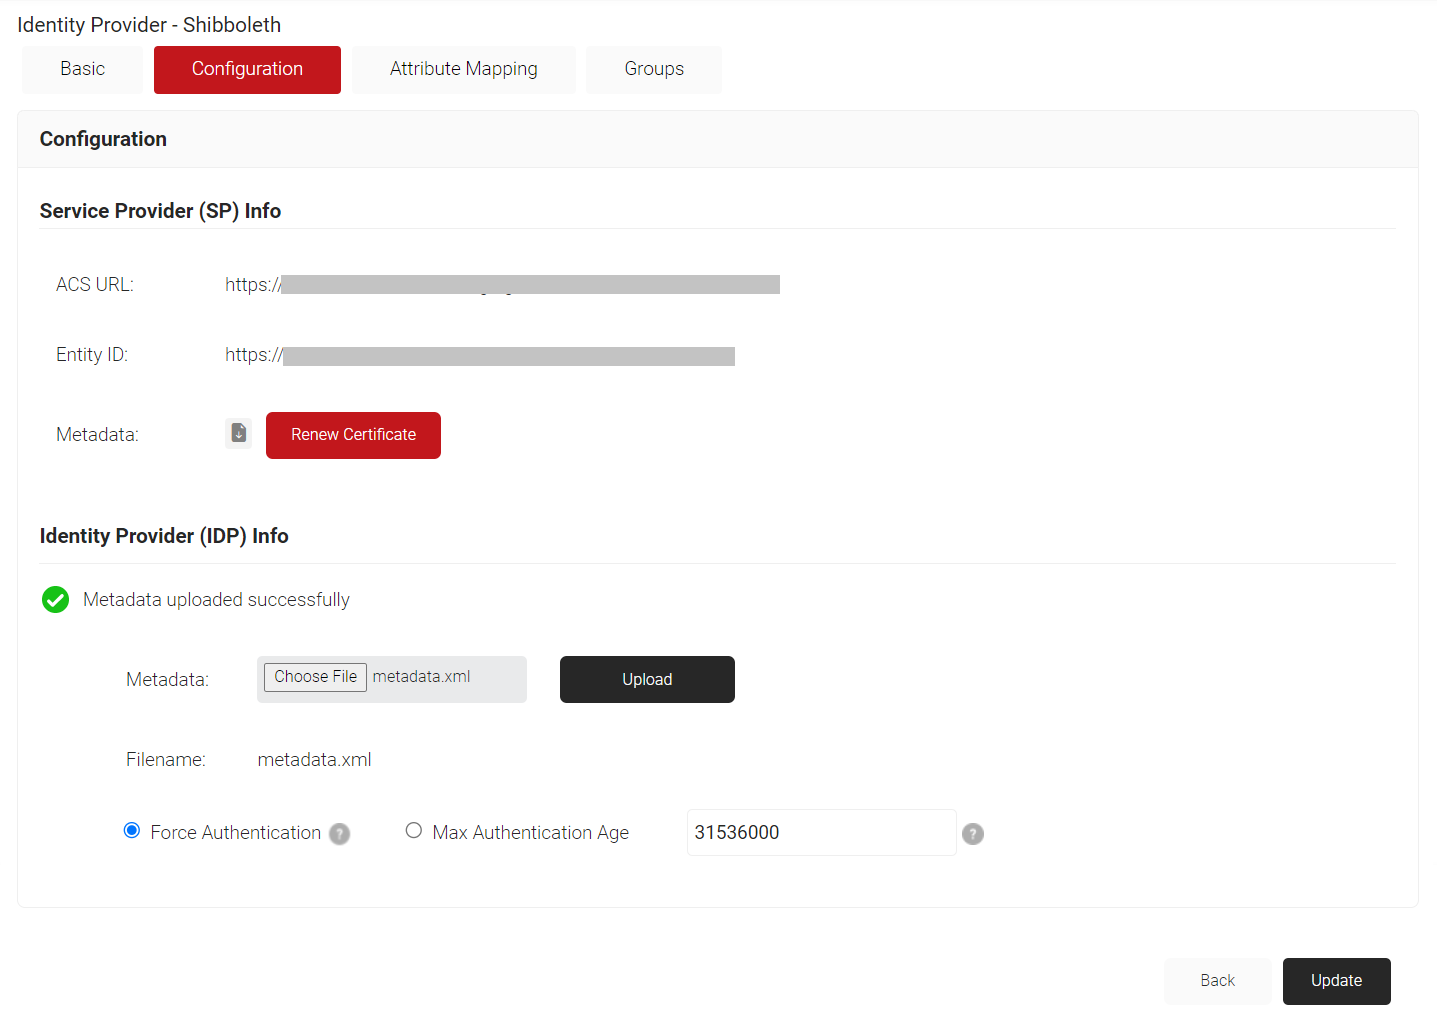
- Click Upload and then click Update.
- Return to your Shibboleth SAML App setup. For the service provider details, paste the ACS URL and Entity Id.
- Select Enable Signed Response.
Configure Attribute Mapping
Attribute mapping is a process that determines the attributes that your IDP sends to your SAML application and gets authenticated with SecureW2. These attributes are used to grant user access and encode them on the digital certificate issued by SecureW2 PKI.
To enable SAML authentication, you must configure attribute mapping in your Shibboleth admin console and in the SecureW2 Management Portal.
Configure Attribute Mapping in Shibboleth Identity Provider Software:
For the Shibboleth IDP Software configuration, you need to send attributes to SecureW2. After configuring attribute mapping in SecureW2, It will populate these attributes to issue the digital certificates.
To map attributes in Shibboleth:
- From your Shibboleth Admin Console, add attribute mapping. This will allow you to configure the attributes that will be encoded onto the certificate.
- Create an application attribute called ‘name’.
- Create another application attribute called ’email’.
Configure Attribute Mapping in SecureW2
Now you need to configure SecureW2 to receive the attributes sent from your Shibboleth IDP, so they can be encoded onto the certificate and used for policies.
These steps will show you how to map the attributes SecureW2 receives from Shibboleth, and how to edit the certificate template to use these attributes.
- From your JoinNow MultiOS Management Portal, go to Identity Management > Identity Providers.
- For the IDP you created (Shibboleth), click Edit.
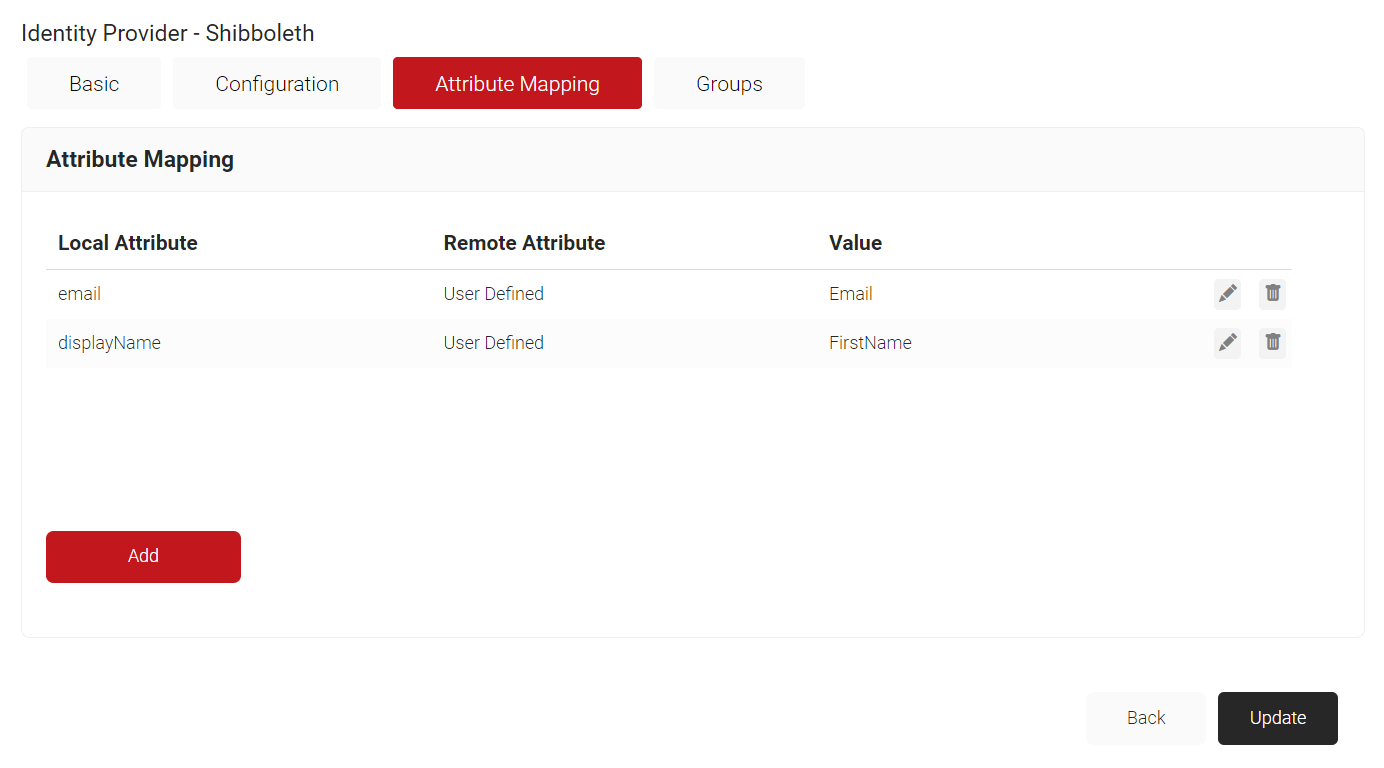
- Select the Attribute Mapping tab.
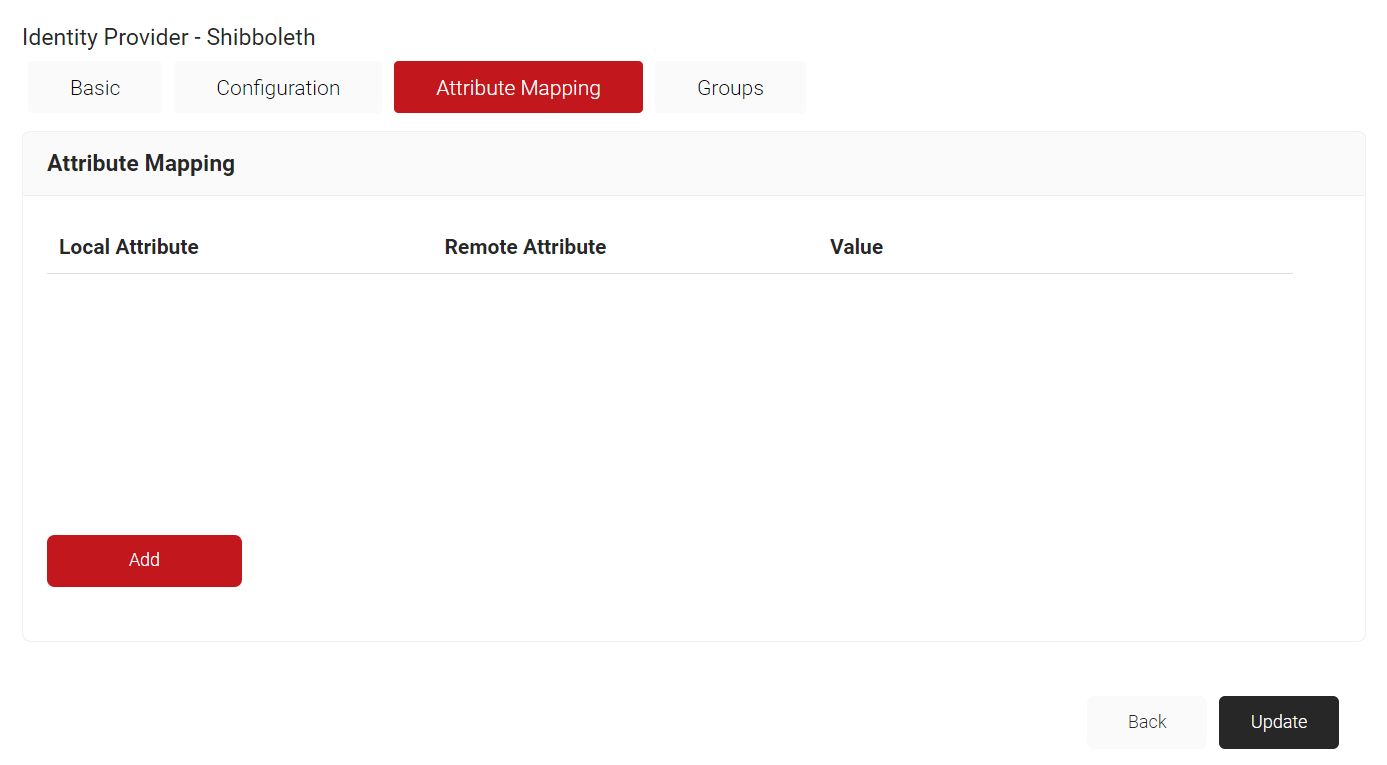
- Click Add.
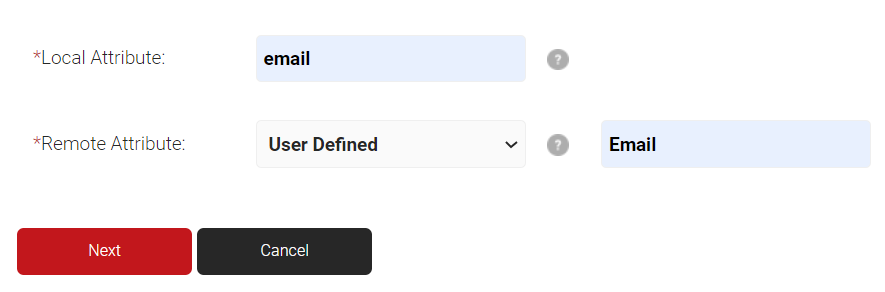
- For Local Attribute, enter ’email’ as the name of the variable.
- Click the Remote Attribute drop-down list and select User Defined. In the field that appears, enter ‘Email’ and then click Next.
- Click Add.
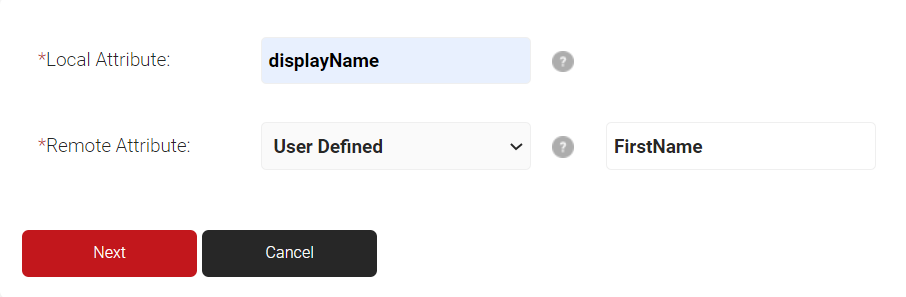
- For Local Attribute, enter ‘displayName’ as the name of the variable.
- Click the Remote Attribute drop-down list and select User Defined. In the field that appears, enter ‘FirstName’ and then click Next.
- Click Update.
Now that you’ve configured SecureW2 to receive the attributes, you need to make sure the attributes are encoded onto the certificates that are issued to users. Here’s how:
-
- Log in to the JoinNow MultiOS Management Portal.
- Navigate to PKI > Certificate Authorities.
- In the Basic section, for the Subject field, type CN=${/auth/displayName:/device/identity}.
NOTE: Enter a value that will help the administrators identify the device. If you wish, you can make this a static value. - In the SAN section:
- DNS: ${/device/computerIdentity:/device/buildModel}
- RFC822:${/auth/email:/device/userDescription}
- Other Name:${/auth/upn:/device/clientId}
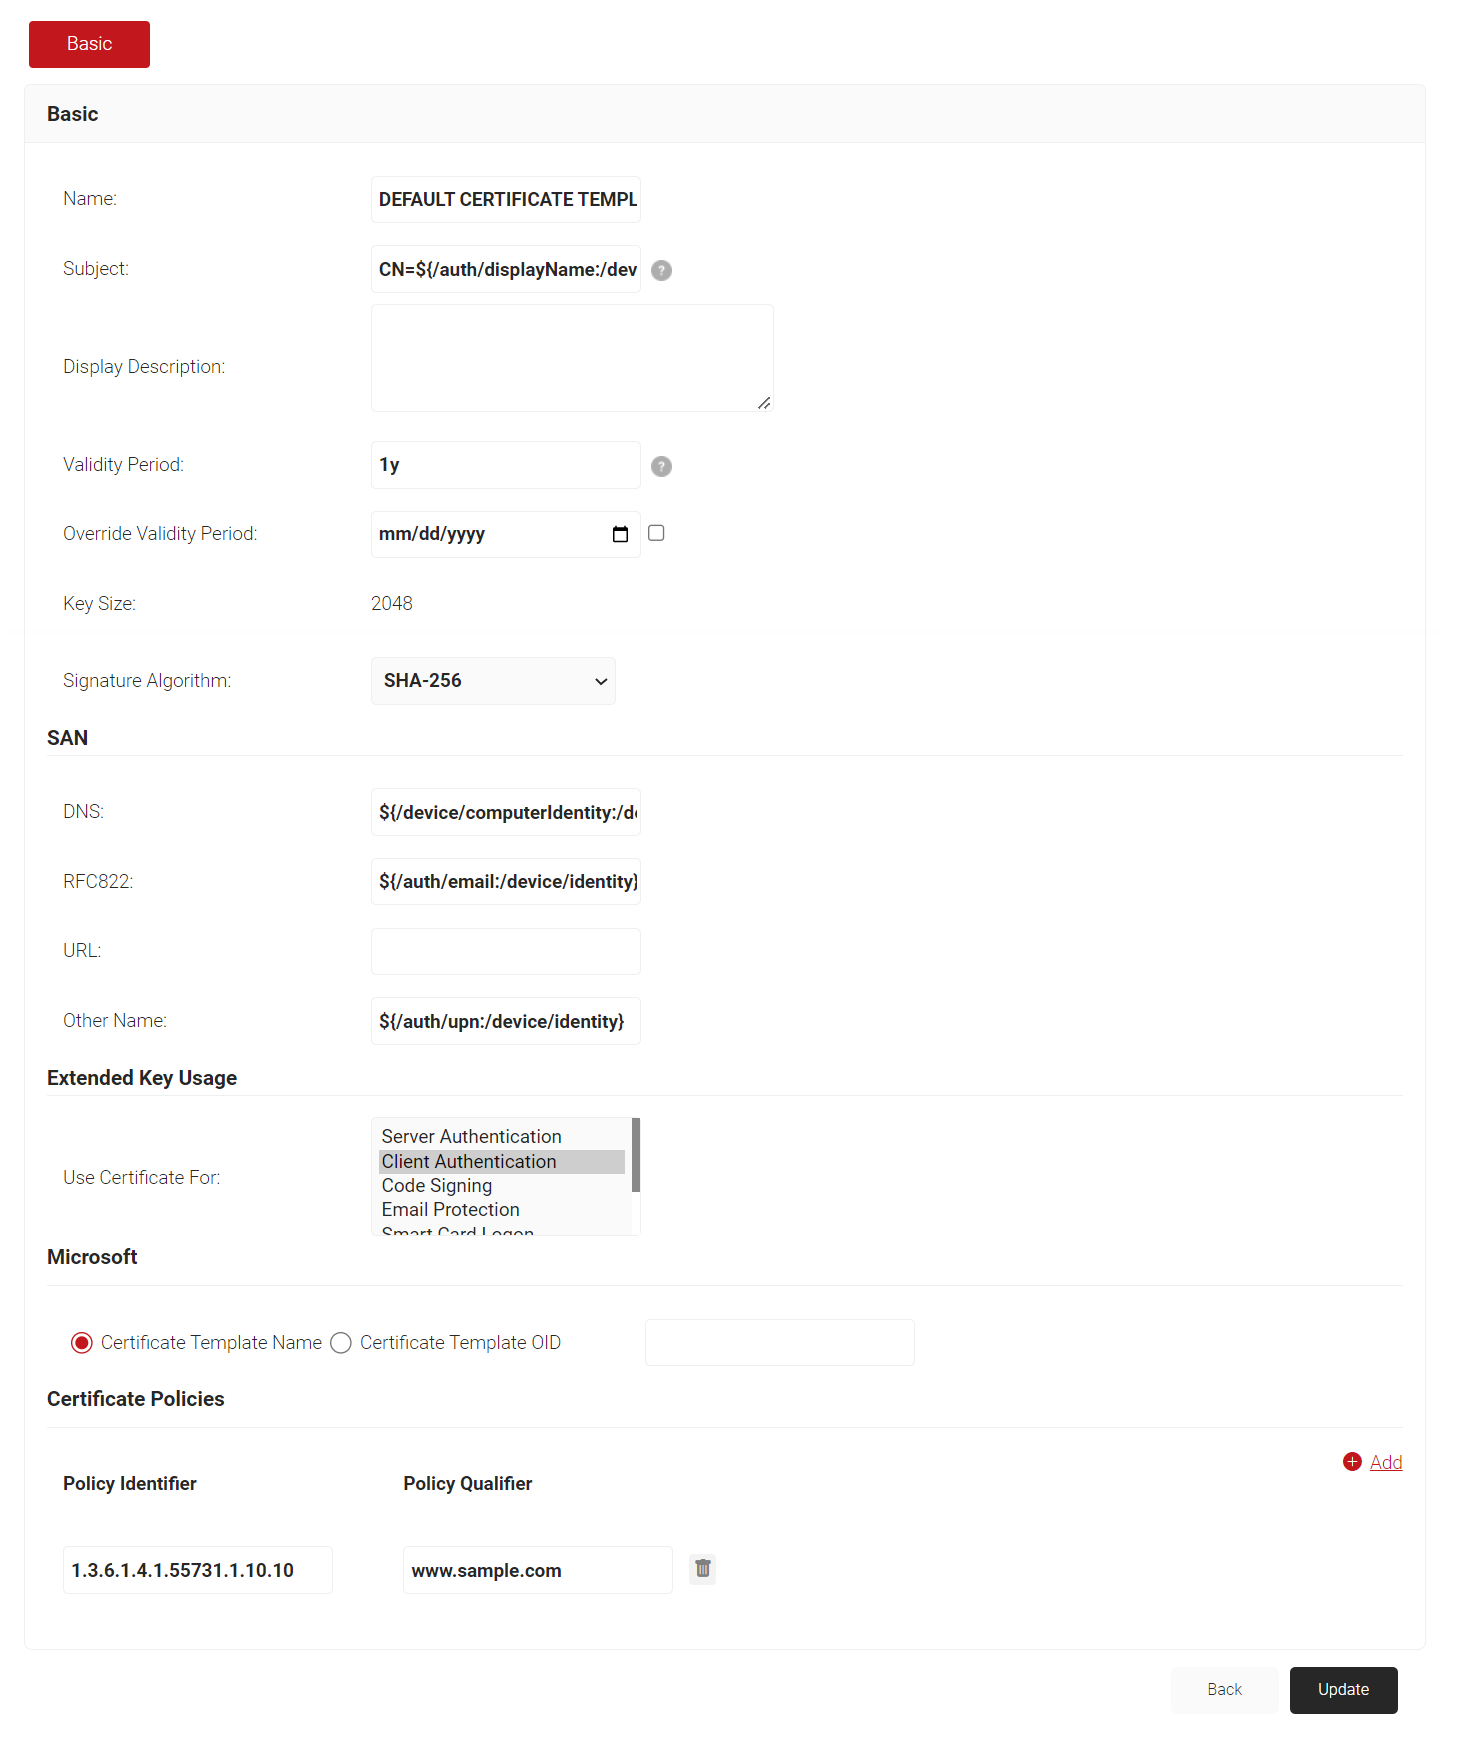
- Click Update.
The certificate template now includes the attributes and will use these attributes when certificates are issued.
Configure Policies in SecureW2
SecureW2 PKI can support configuring the WPA2-Enterprise with Shibboleth software by using SAML to enroll and issue certificates based on the policy configuration you set up in the SecureW2 Management Portal. You need to configure two policies: the Authentication policy and the User Role policy.
The Authentication Policy is needed so we can tie our Shibboleth IDP to our SecureW2 Network Profile. The Role Policy is where you can specify your Identity Provider, which in this case is Workspace One, and attributes (like groups) that you want tied to a specific role. Then, this role can be used to trigger a Certificate Enrollment policy, or a Network Policy.
To configure the policies:
- Navigate to Policy Management > Authentication Policies.
- For your network profile’s authentication policy, click Edit.
- Click the Conditions tab and make sure your network profile is selected.
- Select the Settings tab and make sure the selected IDP is the one you created (Shibboleth).
- Select the Enable User Self Service checkbox.
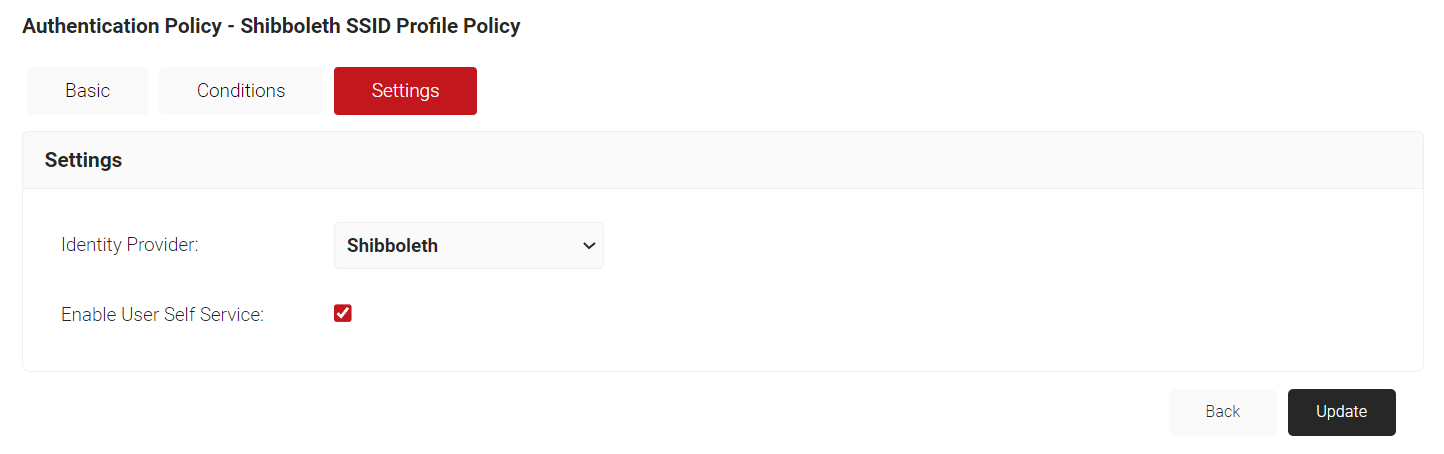
- Click Update.
- Navigate to Policy Management > Role Policies.
- For DEFAULT ROLE POLICY 1, click Edit.
- Select the Conditions tab. Click the Identity Provider drop-down list and select the IDP you created (Shibboleth).
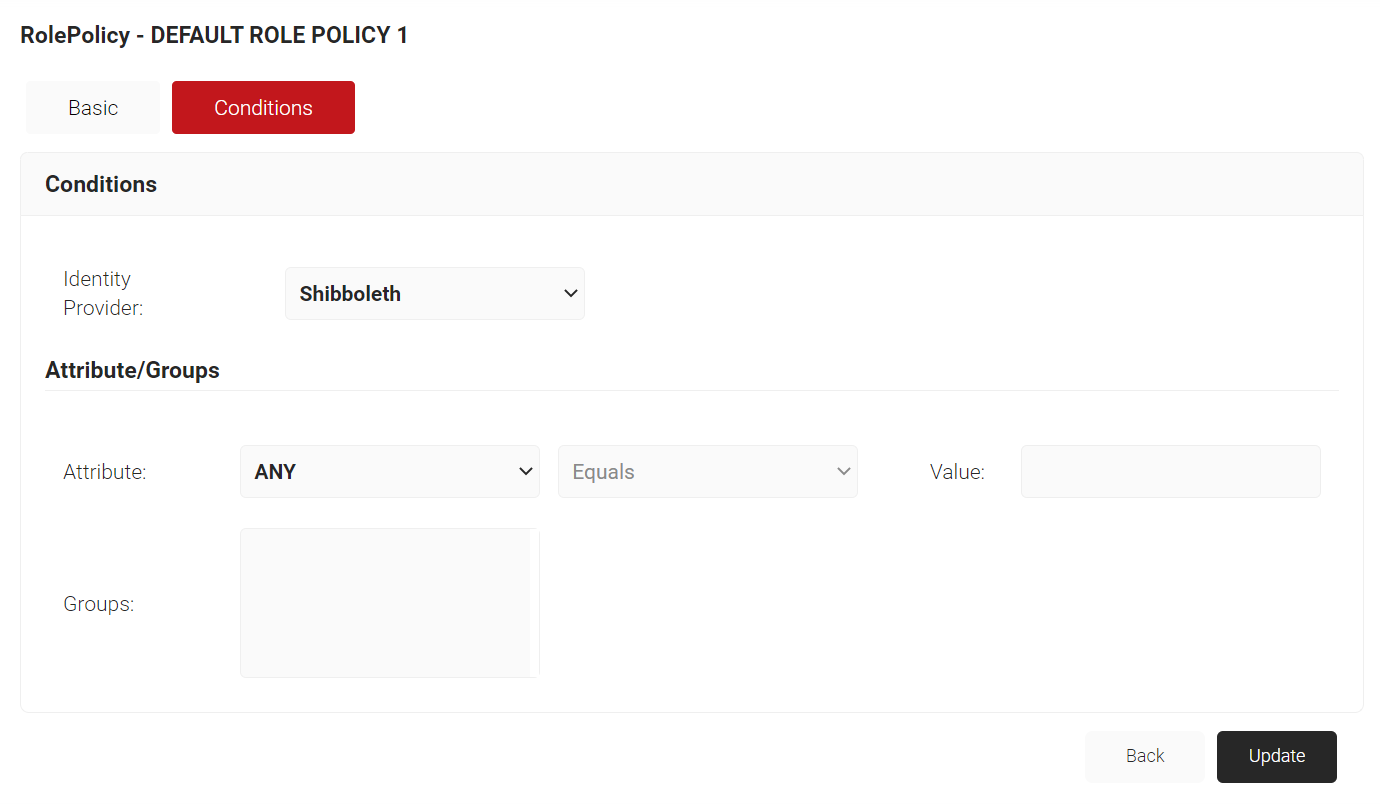
- Click Update.
Configure Shibboleth PKI with SecureW2 SAML Authentication via EAP-TLS :
For Shibboleth, SecureW2 provides simple solutions to pass WPA2- Enterprise and deploy the certificate to the user devices by using both the public key and private key of the network access. The RADIUS Server and PKI help the configuration process with all the IDPs, including the IDP for the Shibboleth configuration. Just by entering the IDP credentials, the end users of Shibboleth can self-configure their devices for Extensible Authentication Protocol (EAP-TLS authentication) in a few minutes.
The Self-Configuration process happens by accessing the onboarding and entering the IDP Credentials. Also, our SecureW2 can determine the certificate distribution process faster and simpler. For more information, click here to see our pricing details.